• Home
  • Eat
    • Breakfast
    • Appetizers
    • Main Dishes
      • Chicken
      • Beef
      • Seafood
      • Healthy Dishes
      • Paleo Dishes
      • Salads
    • Desserts
      • Decorated Cookies
      • Cookies
      • Bars and Brownies
      • Cakes and Cupcakes
  • Shop
    • Cookie Decorating Supplies
    • Bakeware
    • Cookware
    • Kitchen Gadgets
    • House
  • About
    • Contact
    • Bucket List
  • Cookie Decorating 101

Follow the Ruels

Ladurée Macaron Recipe (and VIDEO!)

July 15, 2016

Ladurée Macaron Recipe

I am one of those people who get something in their head and will stop at nothing to figure it out. Example, these macarons. I have made many French macarons in the past, but about every other time I would make them, something would go wrong. They would either crack, be too bumpy, or would just fall apart. 

Then I stumbled across the Laudrée macaron recipe and I felt like my prayers had been answered! Of course this recipe would produce perfect macarons every time, right? Well, not quite. The secret is that you have to follow the recipe exactly. Who knew?

Ladurée Macaron Recipe

The first time I made the recipe they tasted great, but were just too bumpy. They are certainly not smooth and glossy like LadurĂ©e’s. Turns out that I missed a key step in the process: adding in extra egg white after the batter has been mixed.

The next time, I made sure to get all my measurements just right and follow the steps exactly….and they turned out perfectly! To make sure that it wasn’t a fluke, I tried it again. Once again, perfect macarons! 

Beautiful French Macarons

I could walk you through the whole process of making the LadurĂ©e macaron recipe, but honestly, it’s kind of complicated. I thought it would just be better to show you! So I made a video that shows you, start to finish, how I made them. After the video, I will share with you some of the key steps that I have learned over a couple years of making macarons. 


Tips for perfect macarons:

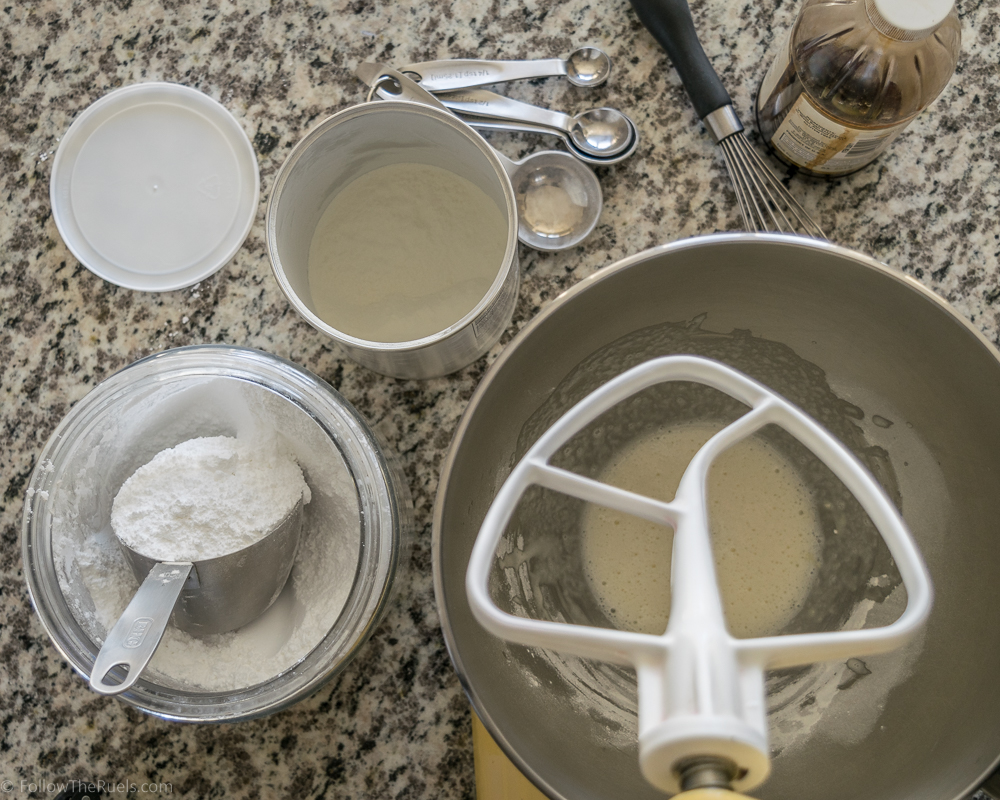
  1. Weigh your ingredients. Weighing them ensures that your recipe is exactly the same every time.
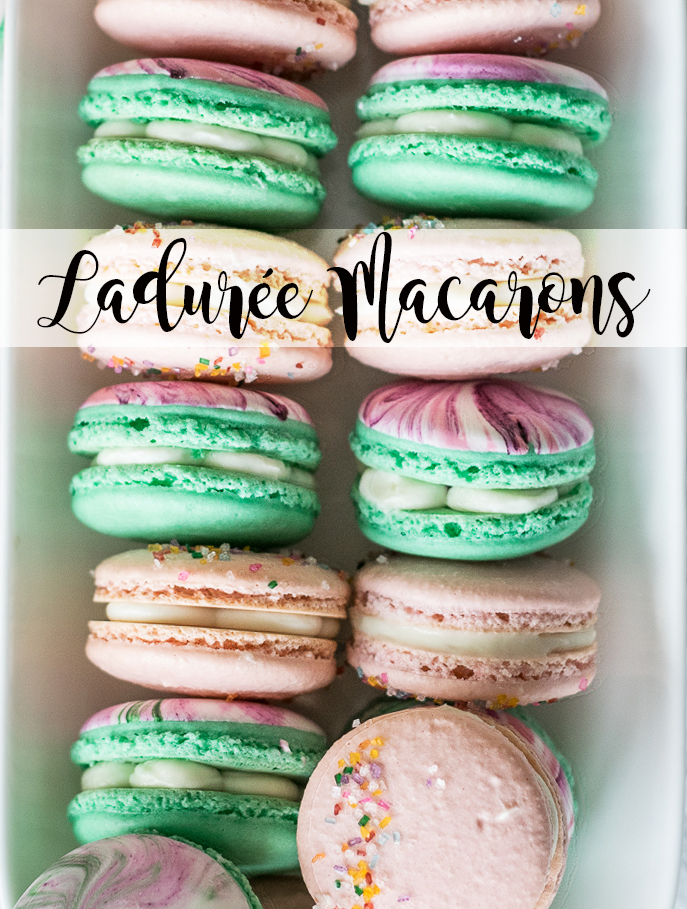
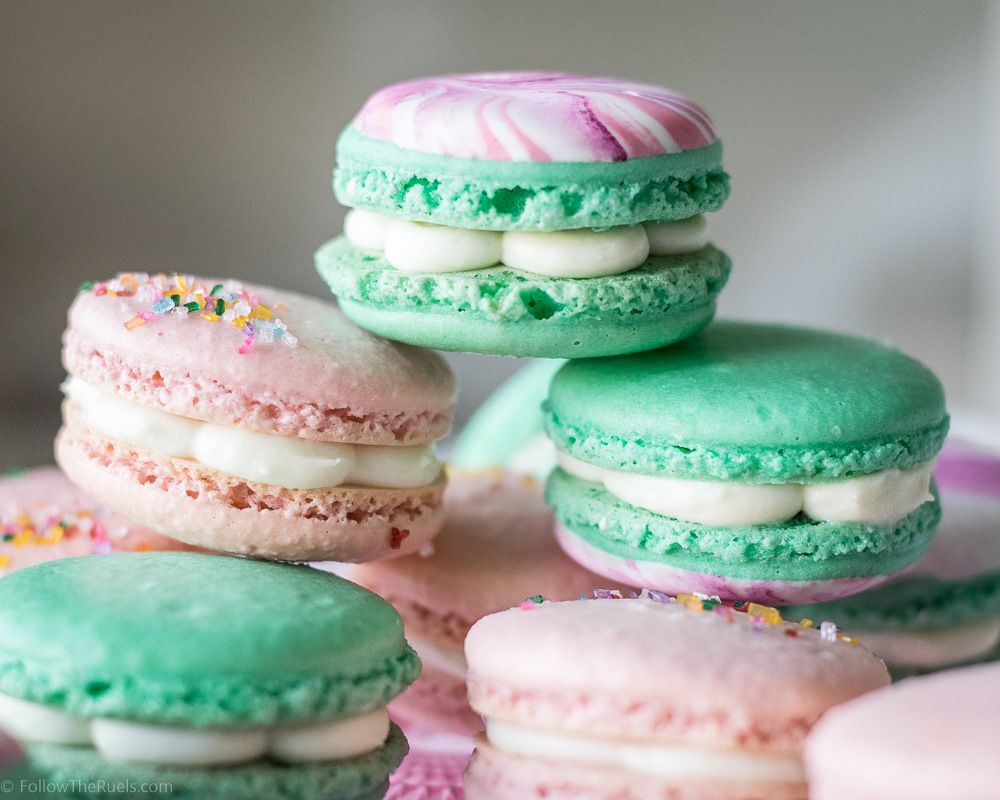
  2. Sift, sift, sift. You will notice that I sifted about 4 different times in this video. By doing that, I know that I will have the smoothest possible macaron. It also helps to process the almond flour and powdered sugar together, too. (Notice a difference in the texture of the green vs. the pink macarons? The pink ones were not processed.)
  3. Use “aged” eggs. I let my eggs sit out over night. Not only is it easier to separate room temperature eggs, but they make a better meringue.
  4. Wipe down your mixing bowl with vinegar. The vinegar removes any fate deposits from the bowl which could prevent you from getting that perfect meringue.
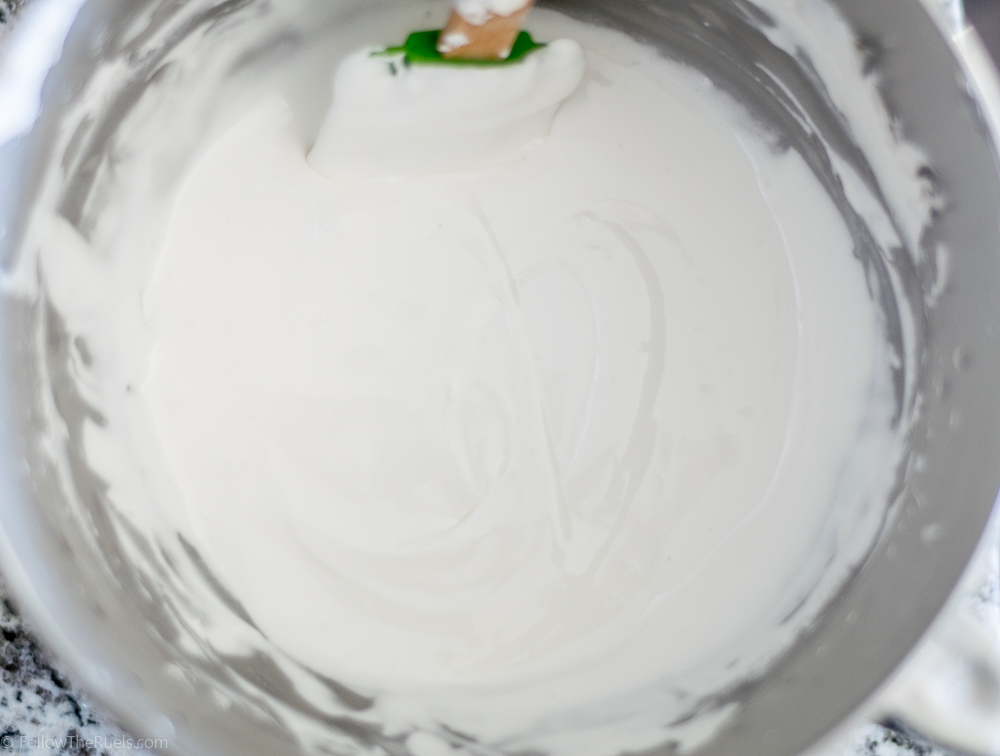
  5. Add sugar in stages. When whipping up the meringue, it’s best to add the sugar in stages to make a more stable meringue. 
  6. Don’t over whip the eggs. My issue with previous recipes was that I beat my eggs until they were too stiff which caused them to crack. This recipe tells you to just whip the eggs for one minute between each addition of sugar. 
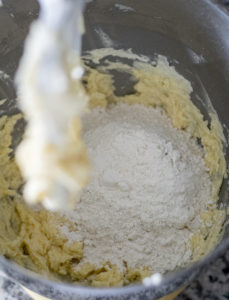
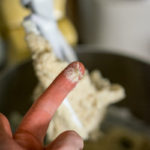
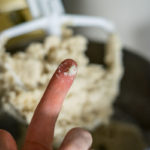
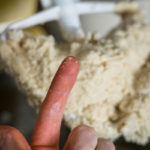
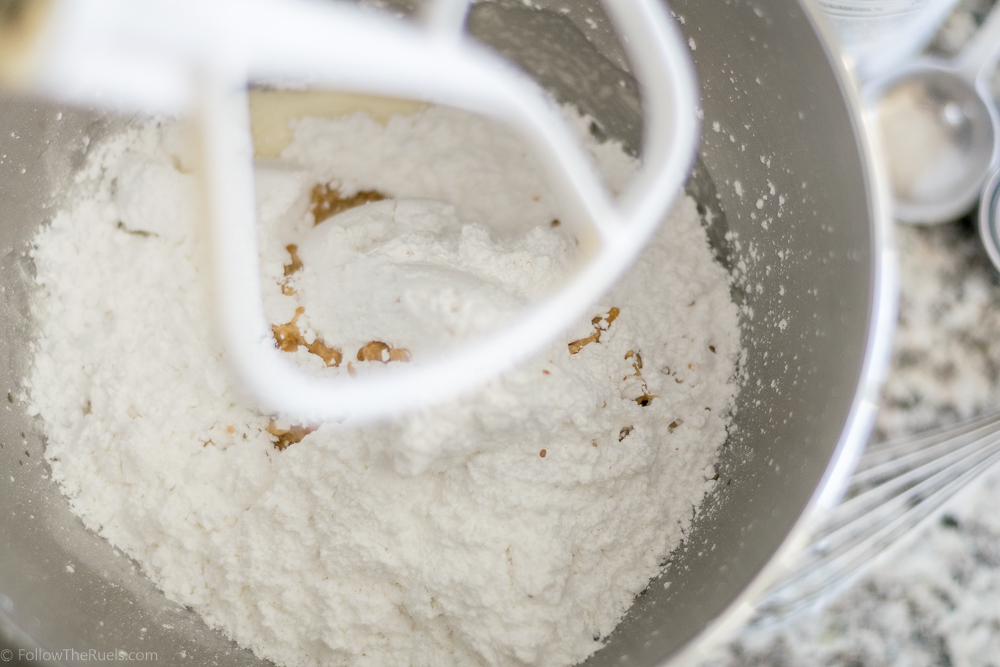
  7. Don’t under mix the batter. Another issue I had was that I didn’t want to over-mix the batter, so I ended up under-mixing it. That made the macarons too grainy and chewy.

That’s it! I promise that if you follow this recipe exactly, you will have perfect macarons every time. 

Beautiful French Macarons

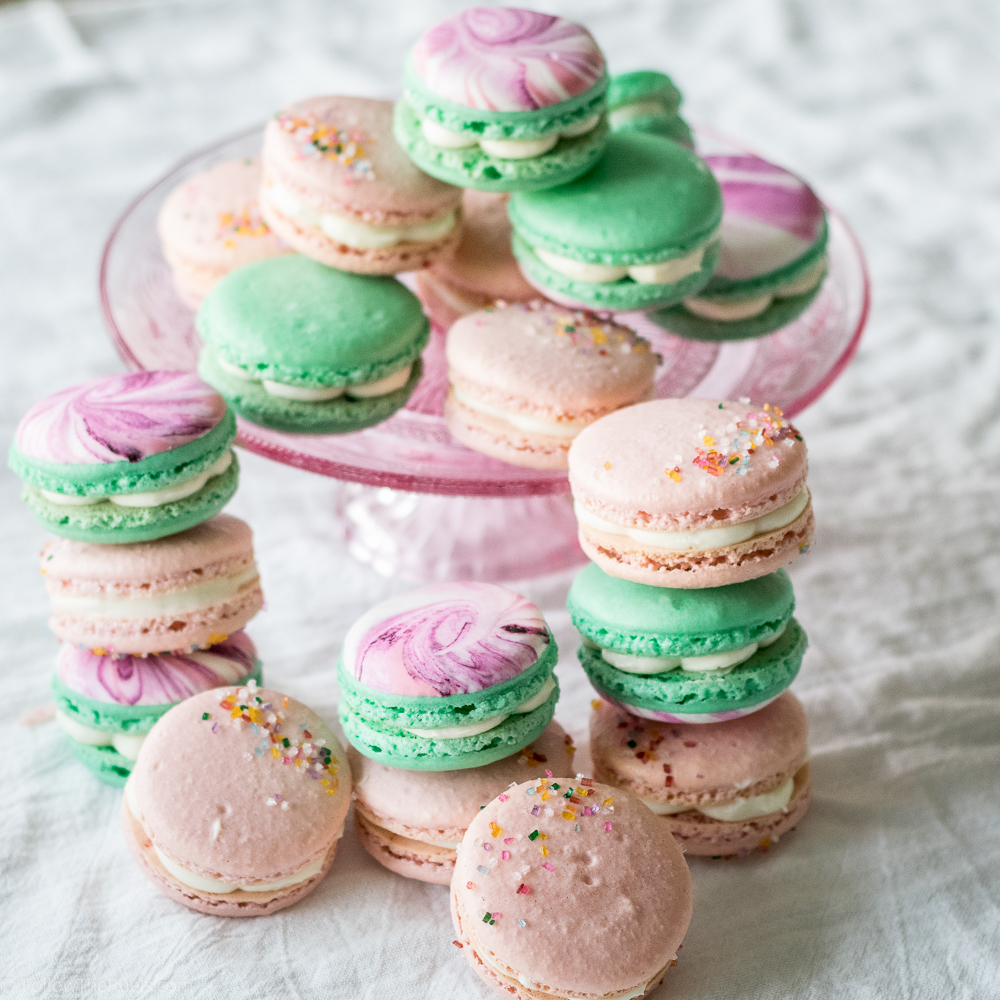
I will also add that I only made a third of the recipe (well, roughly a third….I measured around only using 2 eggs), which yields about 12 macarons. The full recipe calls for half a dozen eggs, and I didn’t want to waste all those eggs on trial and error. I will share the full recipe in the recipe box below, but also give you my measurements if you only want to 12 macarons instead of 36. 

Ingredient measurements for 12 Macarons:

  • 90 grams of almond meal
  • 80 grams of confectioners sugar
  • 70 grams of granulated sugar
  • 66 grams egg whites (about 2), reserve 1 tsp to fold in later
  • 1 pinch cream of tartar (optional)
  • 1/2 tsp vanilla extract (optional)

Of course, to me, the best part of a macaron is the filling! I filled mine with white chocolate ganache and raspberry jam. But you could also fill it with buttercream, lemon curd, Nutella, or any number of your favorite spreads, jams, or frostings. The world is your oyster-shaped macaron! 

Ladurée Macaron Recipe

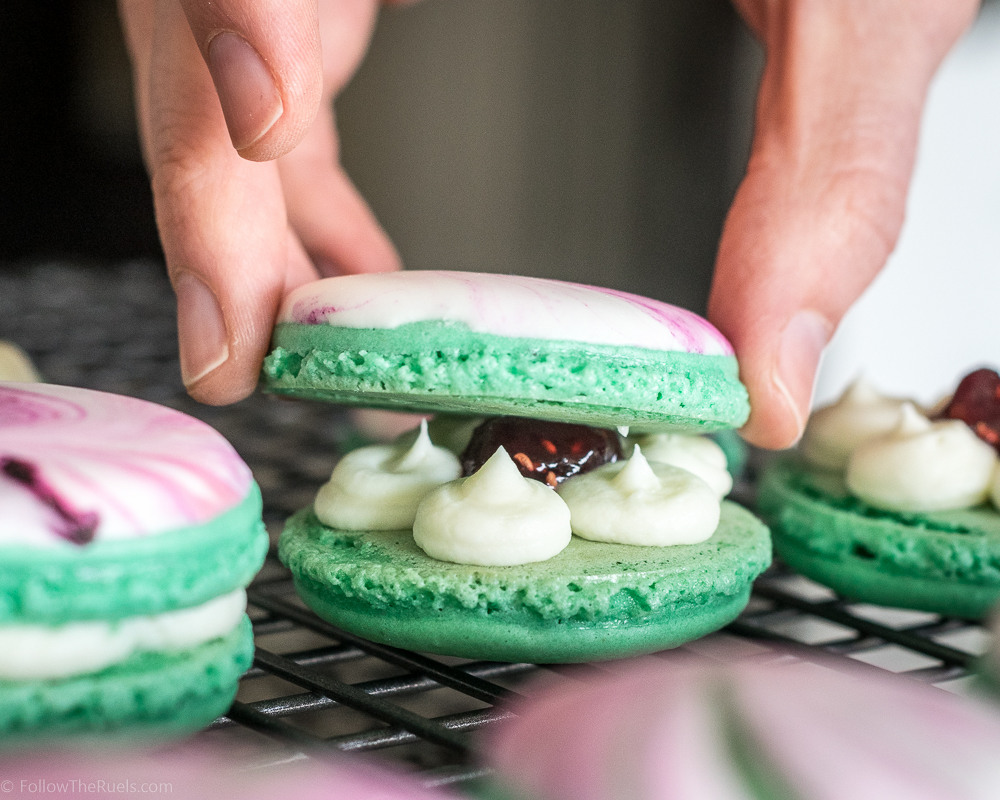
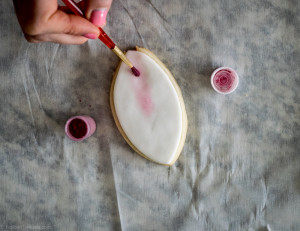
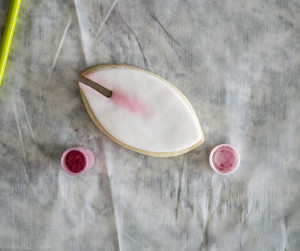
And if you are curious how I got the marbled tops, visit this post where I show you exactly how to make marbled cookies (and macarons)!

[amd-yrecipe-recipe:54]

[show_shopthepost_widget id=”2696427″]

/ Filed In: Cookies New, Desserts, Eat
Tagged: cookies, desserts, French, macaron, sweets

4th of July Cookies

June 27, 2016

America Cookies-12

By now you guys probably know that decorating cookies is one of my favorite hobbies. It was just last 4th of July that I shared one of my first decorated cookies here on the blog. While the stars and stripes cookies were very festive, I knew I could step my game up this year to make some even better 4th of July cookies. 

America Cookies-1

To make these cookies, I used a United States shaped cookie cutter that I picked up from Sur La Table. At the time I figured I would only use it for 4th of July, but now I have come up with lots of other ideas for USA shaped cookies.  Like for the Olympics or to celebrate moving across the country (which I may be making soon for a friend who is moving to North Carolina from Kansas). 


To create the flag design on the cookie, I marked out 13 evenly spaced lines from top to bottom. I then marked off where I wanted the blue square to start and stop. Of course, if you don’t want to pipe so many stripes (it was a pain in the butt), you could do fewer. Once I was happy with the lines, I piped out the field of blue with flood consistency royal icing. I then dotted several lines of 5 or 6 dots across for the stars.


Next, I piped the stripes, starting with red, then white, then red, and so on with flood consistency icing. I used a scribe tool (you can use a toothpick), to move the icing as close to the stripe above so that there were no gaps between the red and white. If you just can’t picture how that works, I would recommend watching the video I made for the stars and stripes cookie to see it in action. If that seems too difficult, you can also fill the whole striped portion of the flag with white icing, and then pipe, paint, or draw on the red strips. If you look at the “Freedom” flag in the picture at the top, that’s what I did. I piped the whole thing in white, then piped over it with red stripes. I just couldn’t fit as many stripes in that way.


I let the cookies dry overnight so that the icing was completely hardened. The next day, I used piping consistency icing to pipe on some fun patriotic words and phrases like, “born in the USA” or “‘Merica”. The latter was my husband’s suggestion. Actually, he wanted me to spell it “Murica”. We compromised. Once that icing had dried, I brushed over it with some edible gold paint. 

4th of July Cookies


I will definitely be saving these in the freezer and bringing them to our 4th of July festivities. One of my husbands friends just moved to town, so we are excited to show him and his fiance how Charlotte celebrates the 4th! I hope you all have a wonderful holiday weekend and let me know if you attempt these cookies! I would love to see how they turn out!

I used this sugar cookie recipe and this royal icing recipe. 

/ Filed In: Cookies New, Decorated Cookies, Eat
Tagged: 4th of July, cookies, decorated cookies, Summer

Chocolate Chip Cookies

June 15, 2016

Classic Chocolate Chip Cookie Recipe

There are a whole lot of chocolate chip cookie recipe out there. I mean, I have a whole Pinterest board dedicated to chocolate chip cookies. Despite the vast quantity of recipes, they are pretty much all the same, maybe just a few tweaks in the amount of ingredients or the quality of the chocolate.

I have been on a quest to find the best chocolate chip cookies for a while. Actually, don’t be surprised if you see a whole challenge in the future where I pit one recipe against the other for total chocolate chip cookie supremacy (hence the chocolate chip cookie Pinterest board). But I recently whipped up a batch of cookies using a very familiar and classic chocolate chip cookie recipe as my guide. Of course, I made a few tweaks to it, because that’s what I do, and the cookies turned out incredible.

I didn’t use any fancy chocolate or extremely expensive or exotic ingredients. My special ingredients are two things you might already have in your pantry: sea salt and coffee extract. Other than that, my fancy shmancy chocolate chips cookies are basically the Nestle Tollhouse cookie recipe.

[Side Note: does this not remind you of the Friends episode where Monica is desperate to get Pheobe’s “grandmother’s” famous chocolate chip cookie recipe?]

Chocolate Chip Cookies

While I am known to change things up a bit and make a recipe my own, I did follow strict instructions to freeze my dough. I let the dough chill for an hour before I scooped it onto the baking sheet, then I chilled it again for another 15 to 30 minutes. Not only did this improve the shape of the cookies (they didn’t spread as much) but the flavor was better, too.

Chocolate Chip Cookies

The resulting cookie was crispy around the edges and soft in the middle, just how I like them. If you like really soft slightly gooey cookies, then I would recommend baking then just a few minutes less so that the center are just a tad under baked but the edges still have some structure to them.

Classic Chocolate Chip Cookie with Sea Salt

I couldn’t stop eating these cookies. They tasted like a better version of the chocolate chip cookies I would eat as a kid. They were sweet and rich. The chocolate flavor was accentuated by the coffee extract. But the sea salt is what really put these cookies over the top. I will never again make a chocolate chip cookie without a sprinkle of sea salt. It just takes them to a whole new level.

Classic Chocolate Chip Cookie Recipe

Since I couldn’t stop eating them, I got the out of my house and brought them into my office where my coworkers gobbled them up as well. Even though at that point they were a couple days old, everyone raved about them.

I wanted to tell them they were this very complicated recipe using expensive gourmet chocolate, because they would have totally believed it. Instead I told them the truth: it’s pretty much just a Nestle Tollhouse chocolate chip cookie. Can’t beat a classic!

[amd-yrecipe-recipe:44]

/ Filed In: Cookies, Cookies New, Desserts, Eat
Tagged: chocolate, chocolate chip, cookies

The Best Sugar Cookie Recipe

May 2, 2016

[UPDATED ON NOVEMBER 24, 2016]

I have been fiddling with my sugar cookie dough recipe for the past couple months trying to find the best dough for decorating cookies. Trust me, there was nothing wrong with my old recipe. It is still a great sugar cookie dough, but I wanted to make a dough that kept its shape when baked but wasn’t as hard as a rock (you know what I’m talking about!). All it took was a couple tweaks to my basic sugar cookie recipe to make an even better cookie dough!

The best sugar cookie dough

So what’s different? Well, there is no baking powder. I hate it when my sugar cookies grow in the oven, completely losing their shape. Even though the old recipe had very little of the leavening agent, they puffed up too much for me. So out it went!

The other change is the addition of powdered sugar. The powdered sugar makes the cookies lighter and smoother. Since I eliminated the leavening agent, I didn’t want the cookies to be so dense. While testing of the recipe, I tried making this dough with ALL powdered sugar, but I missed the texture from the granulated sugar. It was almost too smooth and way too sweet. The resulting recipe is a combination of both granulated and powdered sugars that still has a nice texture and is still relatively soft. 


Now that I have all the changes out of the way we can get to making some cookies! I like to mix my butter and sugar together until it’s nice and fluffy. This takes about a minute on a medium high speed in my Kitchen Aid. Then I gently mix in the egg and extracts (my favorite combination is vanilla and almond).  Next is the flour, which I mix in one cup at a time, again until it’s barely combined. The less mixing the better. 

The tricky part about this recipe is that sometimes I add more or less flour. While 2 1/2 cups is what I used most often, there are times when I only add 2 1/4, or sometimes 2 3/4. Bakers will understand that sometimes you just know how a dough or batter should look or feel. I know what this dough should feel like when it’s perfect. For some of you, that is the worst thing you could hear! But don’t worry, I have an easy way to check the dough! I poke it! 


In the first photo, I have only mixed in 1 1/2 cups of flour. See how the dough just sticks right to my finger? Not ready! So I add 1/2 cup more, still sticking to my finger when I gently press it into the dough. I add my last 1/2 cup and try again. It’s perfect! Hardly anything sticks to my finger, but the dough still feels a bit tacky. THAT is what I am going for. If anything were to stick to my finger, I would only add 1/4 cup at a time until I got it right!

Once the dough is formed, I turn it out onto some plastic wrap to wrap it up and put it in the fridge. Its good to let the dough rest and all the flavors to meld, but sometimes I don’t have that kind of time. Because this dough is pretty stiff, it can be rolled out immediately and does not need to be chilled first. 


Speaking of rolling out the dough, I like to use rolling pin bands (or I found this cool rolling pin that does the same thing!) to make sure that my cookies are all evenly thick. I like my cookies to be as thick as possible, so I use the thickest band, about 1/4 inch. 


One other thing that I didn’t actually demonstrate in the picture above, but I would highly recommend is to roll out your dough on some parchment paper using as little flour as possible. Because the dough is already pretty dry, adding more flour will make the cookies crack in the oven. I just sprinkle down enough flour to keep the rolling pin from sticking. This will ensure that your cookies are perfectly smooth and ready to ice!


After a quick bake, these cookies are ready to be enjoyed or to be decorated with royal icing. Not only are they the perfect canvas for some sugar art, they taste delicious. I personally love the taste of the almond extract, but of course, you can add whatever flavorings you like and make these cookies your own!

[amd-yrecipe-recipe:26]

PRODUCTS USED IN THIS POST:

 
[show_shopthepost_widget id=”2423763″]

/ Filed In: Cookie Decorating 101, Cookies, Cookies New, Desserts, Eat
Tagged: cookie decorating, cookies, icing, sugar cookie

Bunny Ears for your Coffee Cup

March 25, 2016

Bunny Ear Cookies-9

Happy Good Friday, everyone! Unless you don’t celebrate Easter, then just Happy Friday! 

Since Easter is just around the corner, I wanted to squeeze final Easter post just in time for Sunday’s festivities. My last, but quite possibly my favorite Easter post of the year are these are bunny ear cookies. What makes these extra cute is that they are meant to sit right on top of your coffee mug to transform your average cup of joe into a festive Easter bunny! Aren’t they adorable? Once again, I can’t take full credit (y’all should know by now I have almost no original ideas). I saw Dominique Ansel (of cronut fame…this isn’t the first time I’ve copied him) post a picture on Instagram of his latest confection creation – a ice cream cup that had very similar cookie bunny ears. Since I won’t be attempting to recreate the cronut anytime soon, I thought I would give these bunny ears a shot!

I used the same technique as I did with these Easter cookies – covering the cookie in fondant, then tinting the centers with pink luster dust.


To get the cookies the right shape, I found a cookie cutter that claimed to be a football. But as you can see its a little flat and uneven. It may make a terrible football, but it was the perfect shape for bunny ears! Once the cookies were rolled out, I cut a small slit in the bottom of the cookie wide enough for to fit around the lip of my coffee mugs. I made the opening even wider because the cookies expand in in the oven, so I wanted to make sure there was enough space left after baking. 

I then rolled out the fondant and cut it in the same shape. I “glued” the fondant onto the cookie with just a little bit of water, then brushed on some pink luster dust down the center of the cookie. From the back of the cookie (the cookie side, not the fondant side), I cut out the fondant, following the cut in the cookie. Once that fondant was removed, I smoothed all the edges and my ears were done!

All that was left to do was to find a cup of coffee to stick these on!

Bunny Ear Cookies-8

I’m kind of obsessed with these even though my husband thinks I am a little crazy. I guess he just doesn’t get it. Where is his sense of whimsy!?

I think these will be my new Easter tradition, especially if we have people over for brunch or there are kids around. Who wouldn’t want some cookie ears with their coffee? 

But these ears don’t just have to go on a cup of coffee, it can be a glass of milk or a mug of hot cocoa. I mean, how cute would these be with a generous swirl of whipped cream on top?

I do think that adding a little face to the mug or cup is necessary, though. I used food black food coloring and a toothpick for the eyes and pink food coloring and a paint brush for the nose. You could also use stickers or markers depending on how much you are about your dishes.  

Bunny Ear Cookies-12

Wouldn’t your kids love these cookies? They can even help you make them!

Also, high five to my friend Michelle who helped me come up with the name for this post. I was totally lost on what to call this one, but her idea was perfect!

Bunny Ear Cookies-11

[amd-yrecipe-recipe:11]

/ Filed In: Cookies New, Decorated Cookies, Desserts, Eat
Tagged: coffee, cookies, Easter

Easy Easter Bunny Cookies

March 14, 2016

Easter-Bunny-Cookies-title-1b

Is it just me, or do you think Easter is a little underrated (commercially, not religiously). I mean, for kids, it’s great! Easter egg hunts, Easter baskets, and lots and lots of candy. There is none of that stuff for adults! Seriously, I would still love to do an Easter egg hunt every year. I keep telling my husband this, but he isn’t getting the hint. Can you tell I am in the Easter spirit? 

To kick off my Easter baking extravaganza, I made these adorable Easter Bunny cookies. Aren’t they cute? (I can’t really take credit for their cuteness. I got these idea from Sweet Bake Shop’s Instagram feed, which you must follow if you love looking at beautiful baked goods.) And the best thing about these cookies is how easy they are!

Can you use a cookie cutter? You can make these cookies!

Easter Bunny Cookies-1

You know I love to decorate cookies, but making the icing and then decorating them can be so time consuming. So to take a bit of a short cut, I used fondant! If you have never used fondant before, it’s basically the same consistency as Play-doh. It’s soft and pliable and can be rolled out and cut into any shape. 

Easter Bunny Cookies-2

To cover these bunny cookies, I rolled the fondant out to about 1/16th inch and cut it with the same cookie cutter as the cookie. The cookie will be slightly bigger since it expands in the oven, but it should fit perfectly. If not, the fondant does have some stretch, so you can pull it a little to fit the cookie, if necessary. 

Easter Bunny Cookies-3

To stick the fondant to the cookie, I brushed some water on to the back of the fondant. Since its basically made of sugar, when it’s wet it becomes really tacky and sticks easily to the cookie. Once the fondant is on the cookie, I run my finger around the edge to soften it a bit and make sure that its completely pressed down. 

Easter Bunny Cookies-4

The other great thing about fondant, it doesn’t require any drying time! You can pretty much immediately start decorating them. The next step with these cookies is to draw on the eye with an edible food marker. Like @sweetbakeshop, I drew the closed eye which makes them look so sweet and feminine. If you don’t like that you could just make a small dot or draw an open eye. 

Easter Bunny Cookies-5

To create the pink nose and cheeks, I used a little bit of pink luster dust that I picked up from Michaels. Luster dust is basically edible powdered pigment. You don’t need a lot of it to make an impact. What I do is tap a little bit into the lid, then dab my brush into the lid and tap off the excess. For the nose, I just brush a bit on. For the cheeks, I move my brush in circular motions right under the eye, first starting in a small circle, then working my way out. 

That’s it. That’s the whole process. I told you it was easy!

Easter Bunny Cookies-10

Come on! Don’t tell me you don’t want to make these cookies right this second! Anyone can make these cookies. Even if you don’t bake regularly or have never decorated cookies.

Easter Bunny Cookies-7

What would also be fun to do with these cookies is to create some water colors with watered down food coloring (gel food coloring + vanilla extract) and let the kids paint the bunnies with the water colors. The world is your oyster!

Enjoy!

[amd-yrecipe-recipe:6]


/ Filed In: Cookies New, Decorated Cookies, Desserts, Eat
Tagged: cookies, Easter, fondant

The Best Royal Icing for Decorating Cookies

February 12, 2016

The Best Royal Icing for Decorating Cookies

I’ve shared my favorite sugar cookie and now have some great new sugar cookie recipes for Summer. I have also shared a few fun ways to decorate the sugar cookies. What I haven’t yet shared is my favorite recipe for royal icing! 

Well friends, today is the day! I am finally sharing my favorite royal icing recipe that I use for all my decorated cookies. After trying a few recipes over the past year, this one is my hands down favorite. It is easy to pipe and creates the perfect crust on the cookies for that perfect finish.


The recipe is pretty much like any icing you would have made when decorating cookies – water, powdered sugar, vanilla – but the key ingredient, and what makes it crust up so perfectly is meringue powder. 

The Best Royal Icing Recipe

Meringue powder, as you may have guessed, is processed egg whites (so they are safe to consume without heating up) that help give the icing it’s consistency and also it’s signature “crust”. With the help of meringue powder, this icing will dry perfectly so that you can stack and package these cookies without fear of ruining all your hard work!

To start off, I whisk the meringue powder and water until it forms a foam. I like to whisk this up with a plain old while, not the whisk attachment of my stand mixer. I find that the whisk attachment doesn’t really do much.

The Best Royal Icing Recipe

Then I dump in the powdered sugar and vanilla into the mixer and let the thing go to work. This is when a stand mixer really comes in handy because you need to let this mix for about 2 minutes. If you find that the icing is too thick and isn’t mixing very well, add a bit more water – about 1 tbsp at a time. 


Update: Because I now make such large batches of icing for my cookie decorating classes, I have started using a hand mixer. I actually like using the hand mixer a lot, even though it is a little bit more work. But hey! I’m also getting an arm workout in, too! I just mention this because I know not everyone has a stand mixer, so I want you to know that a hand mixer will work just fine!

The Best Royal Icing Recipe

I just whip it up until the icing becomes light and airy. You will know it’s ready because the color will change from a cream color to almost white. Don’t get me wrong, though, at this point it is VERY thick. This is the kind of icing that you would use to construct a gingerbread house. I’ve learned that you always want to start with thick icing, then thin it down because 1) it keeps longer in the fridge or freezer if you want to make it ahead of time and 2) it’s easier to thin down than to thicken. 

The Best Royal Icing Recipe

Speaking of thinning down, the photo above is the end result of thinning the icing down to flood consistency. I know it’s flood consistency because when I run a spoon or knife over the surface, the icing goes back to how it was in about 10-15 seconds. 

My trick to thinning my icing is to separate out the icing into separate bowls for each color I will need. I mix in the color, then slowly add in water using a spray bottle. That way, if I want to have piping AND flood consistency icing that’s the same color, I can just spoon some out once it gets to piping consistency. 

So how do I know when it gets to piping consistency? I know the icing is good for piping when I can lift up a spoon or knife from the surface and the icing drops down in a relatively steady stream and then forms a soft peak. 

Speaking of coloring my icing, I prefer to use gel food coloring versus the liquid stuff you buy at the grocery store. My favorite brand is AmeriColor, which you can find in singles or packs on Amazon. But I also like Wilton brand, which you can find at Michael’s or your local craft store. 

So now that you know how to whip up a batch of royal icing, here’s an easy Valentine’s Day cookie you can make this weekend. 

Royal Icing

Start with heart-shaped sugar cookies. Then outline the heart in flood consistency royal icing. While the outline is still wet, fill it in with a generous amount of flood consistency icing (NOTE: you can always add more icing if it’s not enough, but you can’t take it away), then spread out the icing with a toothpick or scribe tool (the yellow thing in the bottom right corner). 

You can see the I am using a generic zip-top bag for my piping, which I totally prefer because not only are they cheap and readily available, they do the job just as well. If I am doing something a bit more details or precise, then I would use a piping bag (like these) and some of my piping tips (I highly recommend this kit, but I use this one and this one most often)

If your edges aren’t perfect, that’s okay! Use the toothpick to even out the outline by swirling in small circles in the icing. Once you are happy with it, tap the cookie on the table to get rid of any air bubbles. 

Conversation Heart Cookies-11

Then to finish them off, use a red food coloring marker (found at any craft store) to write your favorite love word or phrase. 

Conversation Heart Cookies-10

Happy Valentine’s Day everyone! And have fun decorating your cookies!


[yumprint-recipe id=’102′]

TOOLS USED IN THIS POST:

 
[show_shopthepost_widget id=”2423708″]


/ Filed In: Blog, Cookie Decorating 101, Cookies New, Decorated Cookies, Desserts, Eat
Tagged: cookie decorating, cookies, royal icing

Carolina Panthers Cookies

February 3, 2016

Panthers-Cookies-B-1hp

I will be the first to admit that I am a bit of a bandwagon Carolina Panthers fan. You see, I grew up in San Diego and have been an avid Charger fan my entire life. It’s been a little hard for me to give up my allegiance. But now after being in Charlotte for three years, after some pretty outstanding Panthers seasons, it’s kind of hard NOT to be a Panthers fan. 

Now that they are going to the Super Bowl…well, make room folks, I am jumping on that bandwagon with both feet! So it only seems natural that I would resort to making some Carolina Panthers cookies for our watch party celebrations, right?

Panthers-Cookies-A-2hp

A few weeks ago I had every intention of making two different designs of football cookies, one for each of the Super Bowl bound teams. But once the Panther’s made it in (and also because Denver is an AFC rival of San Diego), I put all my effort making blue, black, and silver cookies just for them. Panthers Cookies B-5

I had made Super Bowl cookies last year that turned out rather well, so I used the lessons I learned on that project to make these helmet and jersey cookies. To get the logo just right, I traced it on parchment paper with the icing, then let the icing dry overnight. The next day, I flooded the helmets with grey icing, and placed the logo on the wet icing right where I wanted it. Panthers Cookies B-6

The jerseys were much easier since there was no logo on these guys. I started by flooding the jersey in either black, white, or blue. I added the contrasting stripes on the sleeves, then let it dry for a few hours (about 4). Once it was dry, I etched the number and the name on the cookie with my scribe tool so I could easily trace over it with the icing. 

See my whole process here:


Also, if you plan on making any football cookies at some point, a word of advice. Make sure you bake your helmets so that they are facing the right way. I made about a dozen helmet cookies. How many could I actually use? FOUR! The other eight were all facing the other direction and I didn’t have a logo that faced the other way either. Oh well, you live and you learn. 

Panthers-Cookies-B-2hp

These wouldn’t only be cute for the Super Bowl, but come college football season, you could make these for your favorite college team, too! Remember, you can bake the cookies ahead of time and freeze them for a couple weeks. Just make sure they are securely sealed in a zip-top bag. 

Hope you all have a great Super Bowl Sunday (if you even care about the Super Bowl). And GO PANTHERS!!!

[yumprint-recipe id=’98’][yumprint-recipe id=’99’]

/ Filed In: Cookies New, Decorated Cookies, Eat
Tagged: Carolina Panthers, cookies, football, Super Bowl

The Best Decorated Christmas Cookies

December 21, 2015

Best Christmas Cookies

As you may have figured out by now, cookie decorating was one of the “hobbies” I took up this year. I watched A TON of Youtube videos to teach myself how to decorate cookies. I have to say, I have made a lot of progress and am pretty pleased with how far I have come. 

(If you want to know all my tips and trick for decorating Christmas Cookies, read this post!)

Christmas is one of the best times to make and decorate cookies, so I wanted to share with you some of my favorite decorated cookies from some very talented bloggers and bakers. 

Vintage Pastel Christmas Cookies by Glorious Treats

White Chocolate Dipped Ginger Cookies by Cooking Classy

Gingerbread Snowflakes by the Baker Lady

Christmas Mouse Cookies by Yankee Girl Yummies

Mini Gingerbread Houses by Cake Time Blog

Gingerbread Centerpiece Cookies by Haniela’s

Reindeer Cookies by Sweet Ambs (#goals)

Gingerbread Men Cookies-10

Gingerbread Men Sugar Cookies by Follow the Ruels

Christmas Macarons by Katelig

I hope you all have a wonderful holiday and time with your family. I will be taking the rest of the week off as I spend time with my husband and in-laws. 

Merry Christmas!

/ Filed In: Decorated Cookies, Desserts, Eat
Tagged: Christmas, cookies, roundup

3-D Christmas Tree Sugar Cookies

December 9, 2015

3-D-Christmas-Tree-Cookies

I am not totally sure what sparked this little baking project, but just before Thanksgiving I thought to myself that it would be fun to try to make a 3-D cookie. I have seen some cookie cutters that make 3-D animal cookies, like lions that stand on 4 legs – you get the idea. But I wanted to do something more Christmas-y. 

Of course, you can’t just turn any cookie shape into a 3-D cookie, it has to be something that has a wide base and can easily stand on it’s own. Which makes the Christmas tree the perfect cookie shape for this project! 

Christmas Tree Cookies A-1

I started by dying my dough green. The very first attempt (there were 3, total), involved using a plain sugar cooking and icing the cookie. Guess, what, that didn’t work. So instead, I just dyed the cookie green, making the icing much easier!

Christmas Tree Cookies A-2

I then rolled out the cookies to about 1/3″ thickness (I use these rolling pin bands), and cut them into Christmas tree shapes. I moved the cut out dough to a baking sheet then cut out the slots so that I could fit two cookies together. I also cut off the stump of the tree so that the cookie could stand a lot easier. 

Christmas Tree Cookies A-3

To get the slots right, you want to find the center of the cookie, both vertically and horizontally. Use a knife or toothpick to mark the spot. You then want to mark off how wide you want the slot to be, which should be slightly wider than the cookie’s thickness. If the cookie is 1/3″, then the slot should be about 1/2″, or maybe a tad smaller. Use the knife to cut the slot from the center point. For half the cookies, you will cut from the center, down. The other half, from the center, up. 

Christmas Tree Cookies A-4

You can remove the cut piece of dough if you want, but the cookie will expand slightly and you will have to cut it again after it’s baked. I learned after attempt 2 that it was better to just cut out the slot, but leave the dough there and bake the cookie whole. Immediately after the cookies have baked, go back in with a sharp knife and recut the slot and remove the piece of cookie. Make sense? If you look at the picture above, it what I did with the two cookies on the far left. 

Once they have baked, fit the cookies together by placing one cookie perpendicular to the other and sliding together. If some don’t fit, you can use a sharp knife to shave down the edges. 

The just decorate them however you want! I decorated mine two different ways. One was more of a snow covered tree. I painted white royal icing over the tops of the trees and on the tips of each limb. I think sprinkled sugar all over the wet icing to make it look like snow. 

Christmas Tree Cookies B-1

Christmas Tree Cookies B-3

The other was more of a decorated tree. I used royal icing to ice on ornaments, garland, and lights! It was pretty simple, and nothing special. I am sure all of you could make these look super cute! My only advice is do not decorate the center of the cookie that crosses with the other cookie. If you try to put your cookies together once the icing is dry, they won’t fit anymore. 

Christmas Tree Cookies C-1


For these cookies, I used my basic sugar cookie dough with a few drops of green, a touch of blue, and a bit of black, to get that dark evergreen tree green. For the icing, I used this recipe. 

I hope you give these a try this holiday season! I think these would be so fun to make with kids! And they just display themselves! 

/ Filed In: Desserts, Eat
Tagged: Christmas, cookies

Cranberry Pistachio Oatmeal Cookie

November 30, 2015

Cranberry Pistachio Oatmeal Cookies

One of my favorite things about the holiday season is all of the treats, cookies, and candies that are around all the time. If you hadn’t figured it out already I love just about any cookie, candy, brownie, truffle, etc, so this is probably no surprise. 

To kick off the Christmas cookie making season I wanted to start with something a little different. Oatmeal cookies aren’t always associated with the holidays, but when you add in some green pistachios and red dried cranberries, they take on a much more festive look. 

Oatmeal Cranberry Cookies-10

But they don’t just look festive. They taste delicious. The cranberries are tart and chewy. The pistachios are salty and crunchy. And the white chocolate balances them both out with their sweetness. 

Oatmeal Cranberry Cookies-3

The recipe is pretty simple. Other than the extras, it starts with your basic oatmeal cookie recipe. If you have a favorite oatmeal cookie recipe, you can start with that as the base then add in the chocolate, cranberries, and pistachios. If you don’t have a favorite oatmeal cookie, I highly recommend the one I used below. It makes a delicious, crumbly, soft, with crunchy edges oatmeal cookie. 

Oatmeal Cranberry Cookies-9

So if you are looking for a fun alternative for a cookie swap or holiday party, I recommend these cookies! I promise you won’t be disappointed!

[yumprint-recipe id=’85’]

/ Filed In: Cookies, Cookies New, Desserts, Eat
Tagged: Christmas, cookies, cranberry, oatmeal, pistachio

Iced Pumpkin Sugar Cookies

November 23, 2015

Iced Pumpkin Sugar Cookie

I made these cute pastel orange and pink pumpkin sugar cookies for a friends baby shower last month. And since Thanksgiving is this week, thus ending “pumpkin” season, I thought it was about time I posted how I decorated these cute cookies! 

I should also mention that these aren’t just any decorated sugar cookie. When I made the cookie dough, I tossed in a couple teaspoons of pumpkin pie spice. I didn’t tell my friend about the added spice, but she was pleasantly surprised! She loved the flavor and it tied in with the decoration beautifully. 

Even if you don’t want to decorate these cookies like pumpkins, I highly recommend adding pumpkin pie spice to cookie dough. Obviously there is no “pumpkin” flavor, but the spice combination is just so warm and cozy! It just taste like Fall and everything that is wonderful about Fall. 

Pumpkin Cookies

I started the decoration process by marking off the sections of the pumpkin with an edible ink marker. Then I piped 15-second consistency royal icing to form every other section, as you can see in the top section. 

After the first sections crusted, which took about 30-45 minutes, I piped the sections in between. By allowing the sections to dry first, it ensure that the icing doesn’t run together and keeps each section slight separated.

To give the pumpkin some additional dimension, I brushed some brown edible petal dust in the creases once the cookie was completely dry (I allowed it to dry overnight). This not only helped with dimension, but also gave the pumpkin a little bit more texture, which made it look a bit more realistic.

 Then I piped on a stem with thicker, piping consistency brown royal icing using a star piping tip. I wanted the icing thick enough so that the groves from the star tip stayed in tact. 

With green piping consistency royal icing, I piped on some vines and leaves. I used a leaf piping tip for the leaves, which are much easier than they look. With the points of the tip on the top and bottom, apply enough pressure on the piping bag to pipe a thick ribbon of icing, then release the pressure and pull the tip away quickly to create the point of the leaf. I hope that makes sense! Every time I make leaves, I do a couple practice tries before I pipe on the cookie. 

Pumpkin Sugar Cookies-1

These are great cookies to make if you are still getting comfortable decorating cookies with royal icing (like me!). It doesn’t require a lot of intricate piping. You can just pipe out some icing in the general shape and use a toothpick or scribe tool to help you form the exact shape you need. 

Pumpkin Sugar Cookies-7

I will definitely be making pumpkin cookies again next year for Halloween, Thanksgiving, or for any Fall get-together! People seemed to really love them, not just because they look like pumpkins but also because of the pumpkin pie spice flavor. 

I used my Basic Sugar Cookie recipe and added 2 teaspoon of pumpkin pie spice in with the flour mixture. 

See my other cookie decoration posts here and here. 

Happy baking! 

[yumprint-recipe id=’83’]

/ Filed In: Decorated Cookies, Desserts, Eat
Tagged: cookies, Fall, pumpkin

Ultimate Cookie & Goodies Virtual Party & Giveaway

November 5, 2015

Welcome to the second year for the Ultimate Cookies & Goodies Virtual Party and Giveaway!

We can’t wait to see what cookies and goodies you are preparing for this holiday season! We know you’ve been busy cooking, decorating and snapping adorable photos of the treats you plan to serve your family and guests throughout the holiday season! Show them all off with us now! I’m sharing my Salted Caramel Thumbprints and Milk and Cookie Shots.

You can also visit the 2014 Ultimate Cookie & Goodies Party by visiting here for even more sweet goodness.

Please share the party with our hashtag! #ultimatecookieparty

What to link up ~

Link up your very best cookies, candies, cupcakes, cakes, goodies and even free printables posts. Old or new posts related to the winter holidays, especially Thanksgiving and Christmas!

Enter to win $210 in Paypal Cash! Giveaway is open worldwide. Must be 18 to enter.

2015 Ultimate Cookies & Goodies Virtual Party & Giveaway 727x1124

Follow our Ultimate Cookies & Goodies Party Board on Pinterest for hundreds of new ideas and recipes! We’ll be pinning your post throughout the party! Please stop by and repin your favorites!

Follow intelligent domestications’s board Ultimate Cookie & Goodies Party on Pinterest.

Meet all 23 of our hosts for 2015

Hosts graphic 2015 Ultimate Cookies & Goodies Virtual Party & Giveaway

Although it isn’t required, we’d love for you to follow us on social media and get an entry into our $210 Paypal Cash Giveaway!

ENTER TO WIN $210 Paypal Cash!!Paypal Cash Giveaway graphic. 2015 Ultimate Cookies & Goodies Virtual Party & Giveawaya Rafflecopter giveaway

  • Intelligent Domestications. Facebook/Pinterest/Twitter
  • My Pinterventures. Facebook/Pinterest/Twitter
  • Made in a Day. Facebook/ Pinterest/Twitter
  • Marilyn’s Treats. Facebook/Pinterest/Twitter
  • The Evolution of Mom. Facebook/Pinterest/Twitter
  • Meatloaf and Melodrama. Facebook/Pinterest/Twitter
  • Love Create Celebrate. Facebook/Pinterest/Twitter
  • Second Chances Girl. Facebook/Pinterest/Twitter
  • Kupon Girl. Facebook/Pinterest/Twitter
  • A Life in Balance. Facebook/Pinterest/Twitter
  • Life With Lorelai. Facebook/Pinterest/Twitter
  • Sizzling Toward Sixty. Facebook/Pinterest/Twitter
  • The Kolb Corner. Facebook/Pinterest/Twitter
  • Olives–n-Okra. Facebook/Pinterest/Twitter
  • Follow the Ruels.Pinterest/Twitter
  • 4 Sons ‘R’ Us. Facebook/Pinterest/Twitter
  • That Recipe. Facebook/Pinterest/Twitter
  • Recipe for a Sweet Life. Pinterest
  • A Bountiful Love. Facebook/Pinterest/Twitter
  • The Quiet Grove. Facebook/Pinterest/Twitter
  • Eclectric Red Barn. Facebook/Pinterest/Twitter
  • Inside the Fox Den. Facebook/Pinterest/Twitter
  • Jillian Does Food. Pinterest/Twitter

Party Rules

  • Link up cookies, candy, cake, sweets and Free Printables from the winter holidays especially Thanksgiving and Christmas. No crafts.
  • Share the party on social media using #ultimatecookieparty
  • Link no more than 3 posts per day over the course of the party
  • No Roundups
  • Link to your post and not your page
  • By linking to this party, you agree that we may use your post and one image in a future promotion or seasonal round-up

[tweetthis url=”http://wp.me/p4QbPx-Fn” twitter_handles=”@followtheruels”]Link up your Cookie, Candy & Sweets recipes at the #ultimatecookieparty[/tweetthis]

Let’s Party!

An InLinkz Link-up


/ Filed In: Eat
Tagged: cookies, holiday, linkup, sweets

Salted Caramel Thumbprint Cookies

November 4, 2015

Thumbprints2

Remember when I made the salted caramel sauce a few weeks ago? I wanted to find as many ways to use it as possible so I turned to one of my favorite cookies, the thumbprint cookie.

When I was a kid, I loved chocolate thumbprint cookies! My mom would put a package of them in my lunch box every day. It has been years since I had one, and I had actually never made a thumbprint cookie until now. 

Did you know they are actually really easy to make? Since I had never made them, I expected that they would be much more complicated. In reality, the dough it is just four ingredients and all you have to do is roll it into a ball and bake. Once they come out of the oven, you press your thumb (or a tablespoon – they are hot!) into the center to create a well for whatever goodness you want pour in there, whether its chocolate or salted caramel. 

Caramel Thumbprints 1

Since I had the left over salted caramel sauce, that is what I used to fill in the thumbprint. You could also melt some soft caramel candies and spoon that into the center. But I highly recommend waiting to do this step until the cookies are completely cool. The caramel will run right off the cookie if it is too warm.

Salted Caramel Thumbprints-5

The finishing touch is to add a touch more sea salt to really bring out the flavor. These cookies are very sweet, so the salty balance is a nice touch!

Salted Caramel Thumbprints-7


I highly recommend these cookies for any of your upcoming holiday parties. They are a crowd pleaser! Just ask my coworkers!

[yumprint-recipe id=’80’]

/ Filed In: Cookies, Cookies New, Desserts, Eat, Jaimie
Tagged: cookies, holiday, salted caramel

Pumpkin Spice Macarons

October 5, 2015

Pumpkin Spice Macarons-10

I’m going to be honest…I don’t LOVE pumpkin flavored foods. Pumpkin spice lattes are not my thing and I avoid pumpkin pie like the plague. But everyone else seems to love pumpkin so much, and it is the ultimate Fall flavor, so every Fall I try some new pumpkin recipes thinking that maybe THIS will be the year I finally get what all the hype is about. 

Well these macarons are helping me get there. The macaron itself is just vanilla flavored, but the filling is this subtle cream cheese based filling with a bit of pumpkin puree and a generous about of pumpkin pie spice. The resulting macaron has just a hint of the pumpkin flavor that is complimented by the cream cheese and spice flavors and the vanilla cookies. 

Pumpkin Spice Macarons 1

As I have mentioned before in other macaron posts (chocolate hazelnut, cake batter), macrons are tricky! Which is why I don’t try to do too much with the cookie part and save the all flavor for the filling. But if you want even more pumpkin spice flavor, feel free to mix in some pumpkin pie spice to the batter before you pipe them. 

Pumpkin Spice Macarons-6

If you have never made macarons, do not be intimidated! There are lots of youtube videos and instructional blog posts that will help you master the art! 

[yumprint-recipe id=’65’]

/ Filed In: Desserts, Eat
Tagged: cookies, Fall, macarons, pumpkin

Teddy Bear Cookies

September 9, 2015

Teddy Bear Cookies-8

I’m at that stage in life where it seems like all my friends, co-workers, and Facebook acquaintances are having babies. Which also means I am at that stage in life where those aforementioned people are asking ME when I plan on having one of my own. So to distract them from their question (hey, look over here!), I just make them really cute cookies for their baby shower. 

These teddy bear cookies were made for the most friend to have a baby shower. My friend doesn’t know the gender of the baby and since she also went to Baylor, like me, I thought green and yellow cookies with teddy bears would be perfect! But I also through in some pink and blue cookies to break up the Baylor theme. 

Teddy Bear Cookies-10

Before I get too much further, I want to apologize. I only filmed the bear portion of the cookie design, since it was the most complicated (and I didn’t think about filming until I had done the first layer of icing). But for all the cookies, either did stripes or dots, which are both really easy. 

First I iced the whole cookie with flood/15 second consistency icing in a solid color, like white. Then while the cookie was still wet, I either piped little dots or stripes (see my post here for some tips on piping). I let them dry completely overnight before putting the bear on top.

Teddy Bear Cookies-5

For the bears, I actually found a picture of a teddy bear I liked on Google and traced it onto parchment paper (I had the picture pulled up on my clean iPad and placed the parchment on top of my iPad to trace). I cut out the design and then traced the template onto the cookie with a food coloring pen. I then filled in the different parts of the bear in brown flood consistency icing. 

The other part of the bear design that I didn’t capture in the video was the “fur”. Once the bears were done, they just looked too flat to me. So I stippled thickened brown icing onto the bears with a little craft brush. Once it dried, it looked like the bear had a fuzzy layer of fur.

I finished the cookies by piping dots in stiff consistency icing around the outside to create a border and let them dry over night. You could definitely leave the borders off, but I find them helpful to hide my mistakes. The circular cookies are especially hard to form an even and perfect circle, so the dots help cover that up.

I used my Basic Sugar Cookie recipe with almond extract and this royal icing recipe. 


I have a while until my next baby shower…so what cookies should I make next?

/ Filed In: Decorated Cookies, Desserts, Eat
Tagged: baby shower, cookies, dessert, teddy bear

  • Newer Entries
  • 1
  • …
  • 3
  • 4
  • 5
  • 6
  • Previous Entries

Follow

Hey There!

Hey there, I'm Lindsey. I'm a number cruncher by day and a home cook and baker by night. While I love to eat healthy and find fresh and healthy alternatives for my favorite foods, I will never turn down dessert! Life is all about moderation, right?

Recipes

  • All Recipes
  • Breakfast
  • Appetizers
  • Salads
  • Main Dishes
  • Side Dishes
  • Desserts
  • Drinks

Favorite Finds

[show_lookbook_widget id=”388783″]

Theme by 17th Avenue · Powered by WordPress & Genesis