• Home
  • Eat
    • Breakfast
    • Appetizers
    • Main Dishes
      • Chicken
      • Beef
      • Seafood
      • Healthy Dishes
      • Paleo Dishes
      • Salads
    • Desserts
      • Decorated Cookies
      • Cookies
      • Bars and Brownies
      • Cakes and Cupcakes
  • Shop
    • Cookie Decorating Supplies
    • Bakeware
    • Cookware
    • Kitchen Gadgets
    • House
  • About
    • Contact
    • Bucket List
  • Cookie Decorating 101

Follow the Ruels

Baylor Homecoming Cookies

October 19, 2017

This weekend, Billy and I are off to Waco for Baylor University’s Homecoming, where Billy and I both went to school. While I have been back to Waco quite a bit over the years, even since moving to Charlotte, this is the first Homecoming we have been back to in years. So it will be a lot of fun to see old friends and sorority sisters who I may not have seen in the last 10 years. 

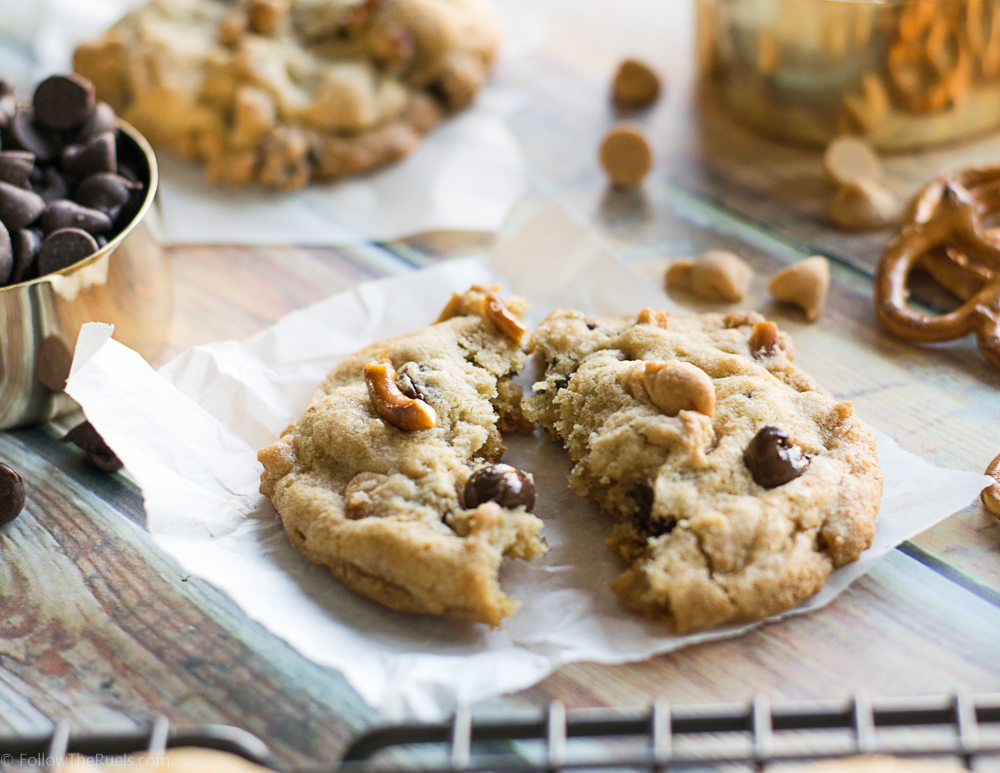
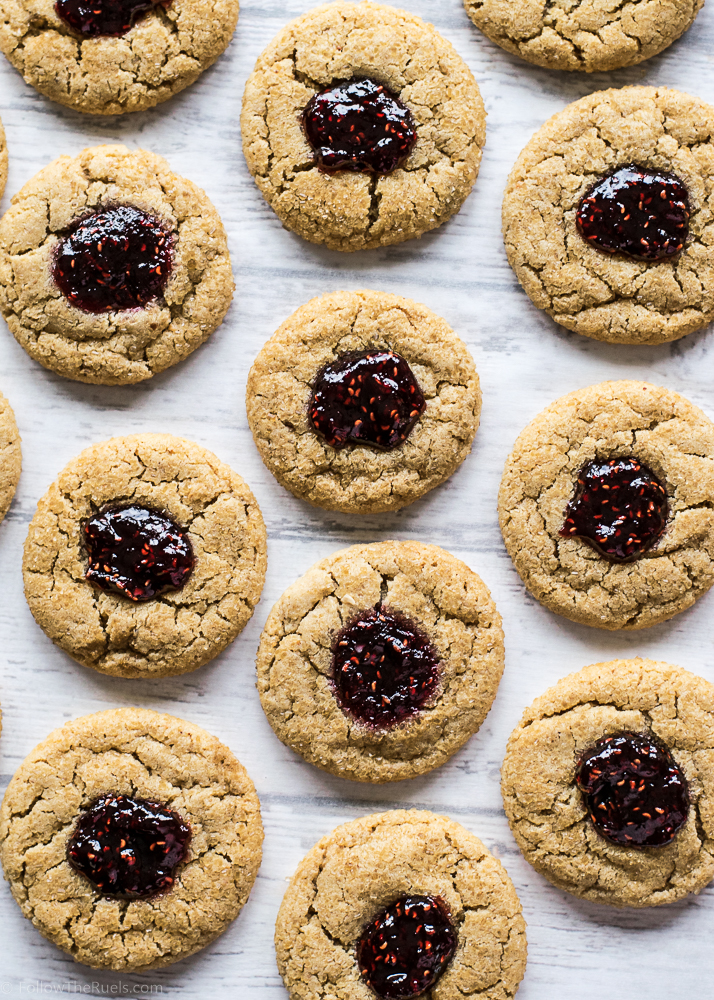
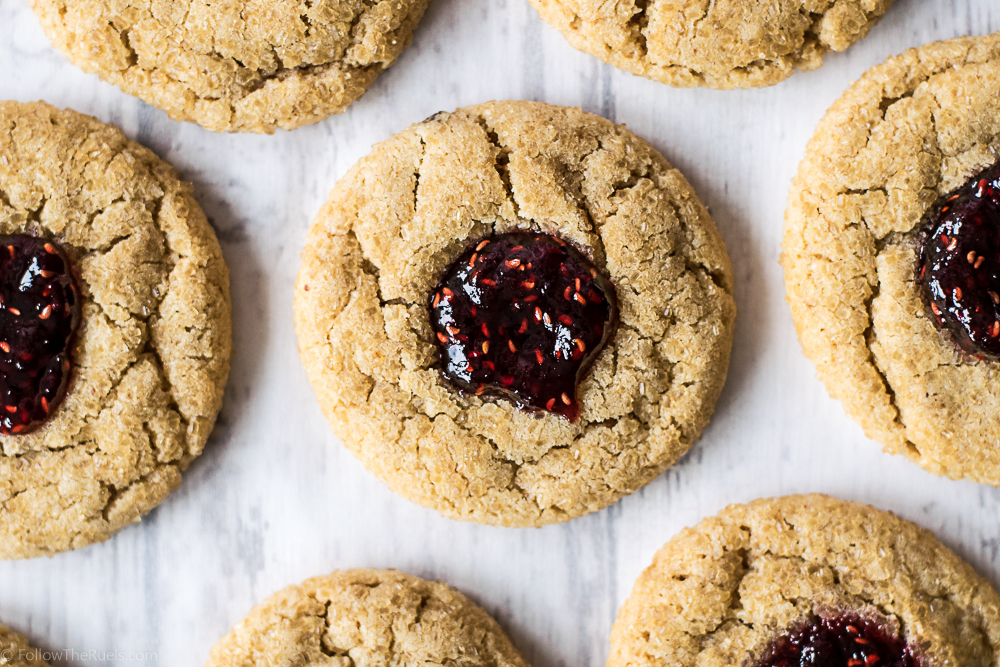
But it wouldn’t be an event if there I didn’t make cookies, right? Billy jokes that it didn’t happen if I didn’t put it on Instagram. Well, I think it doesn’t happen if I don’t make cookies!

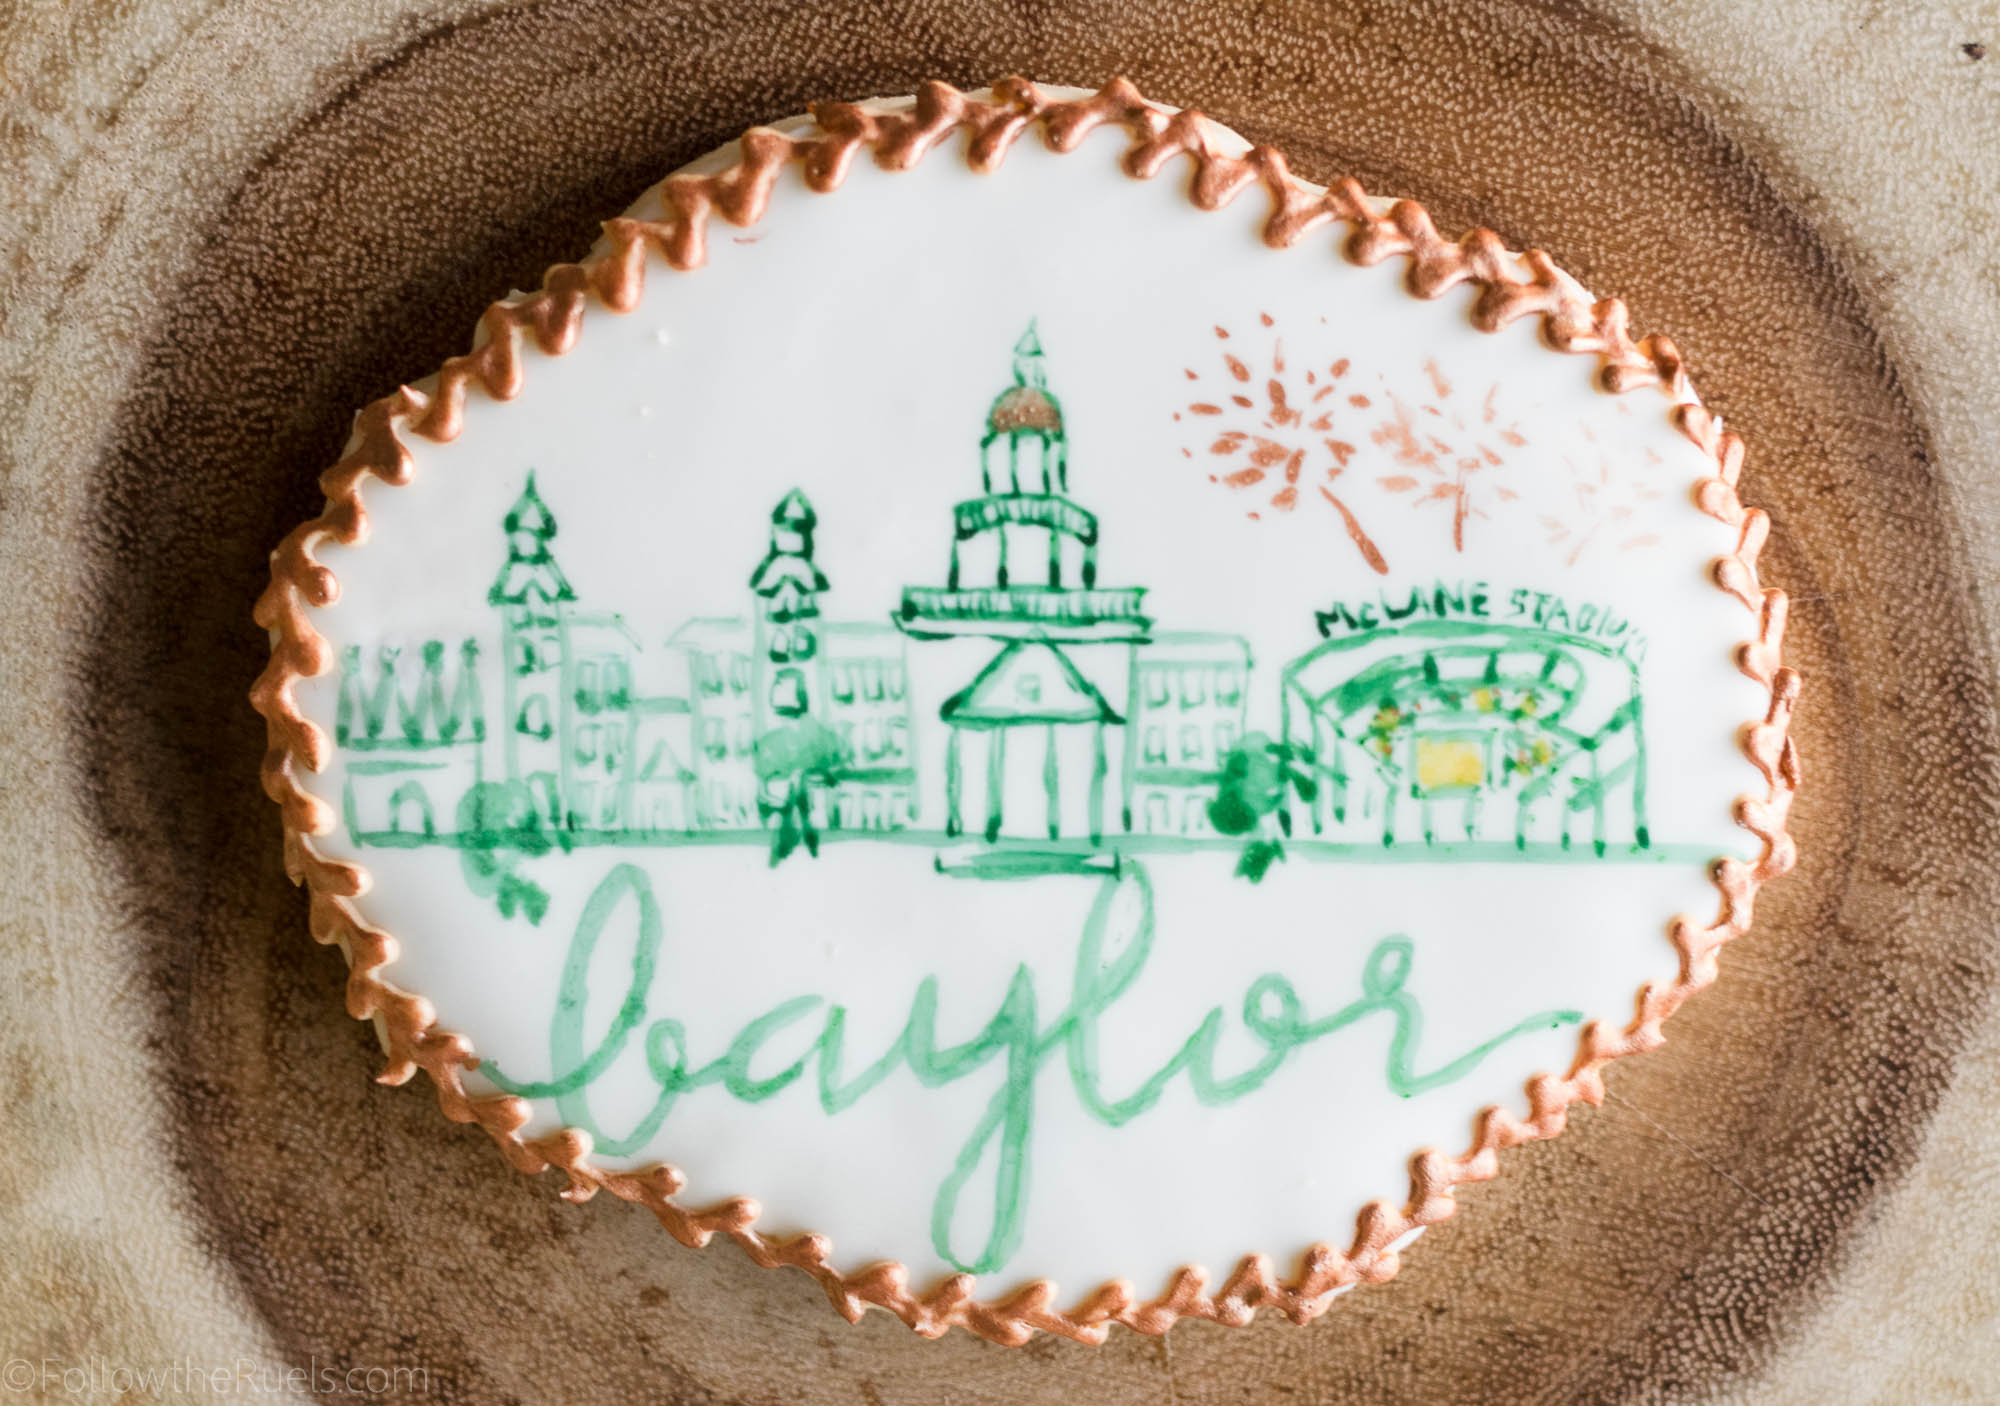
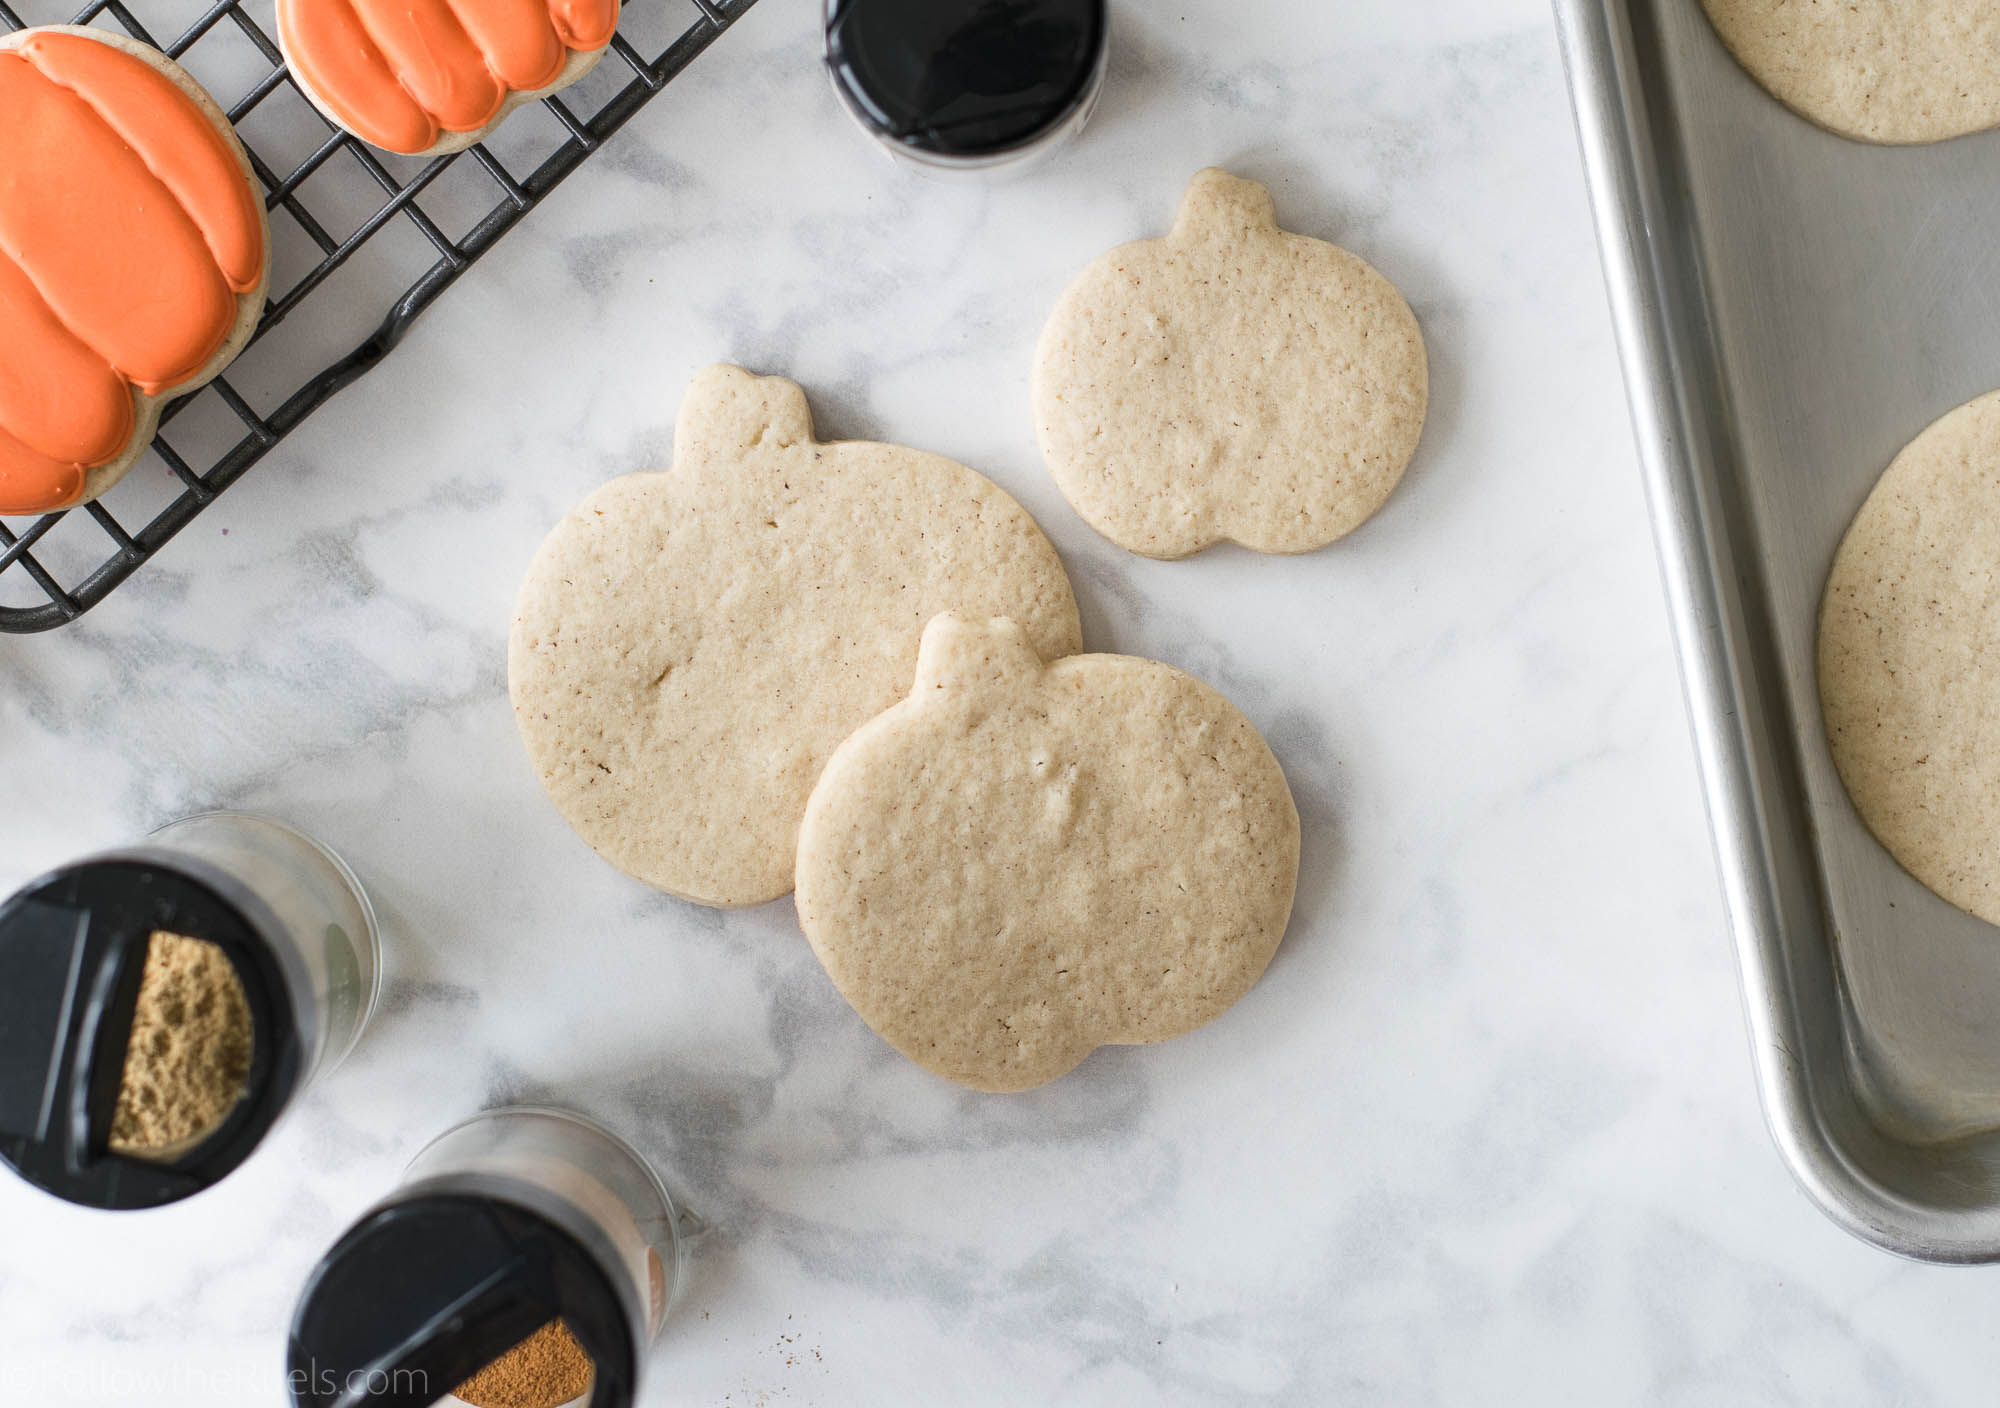
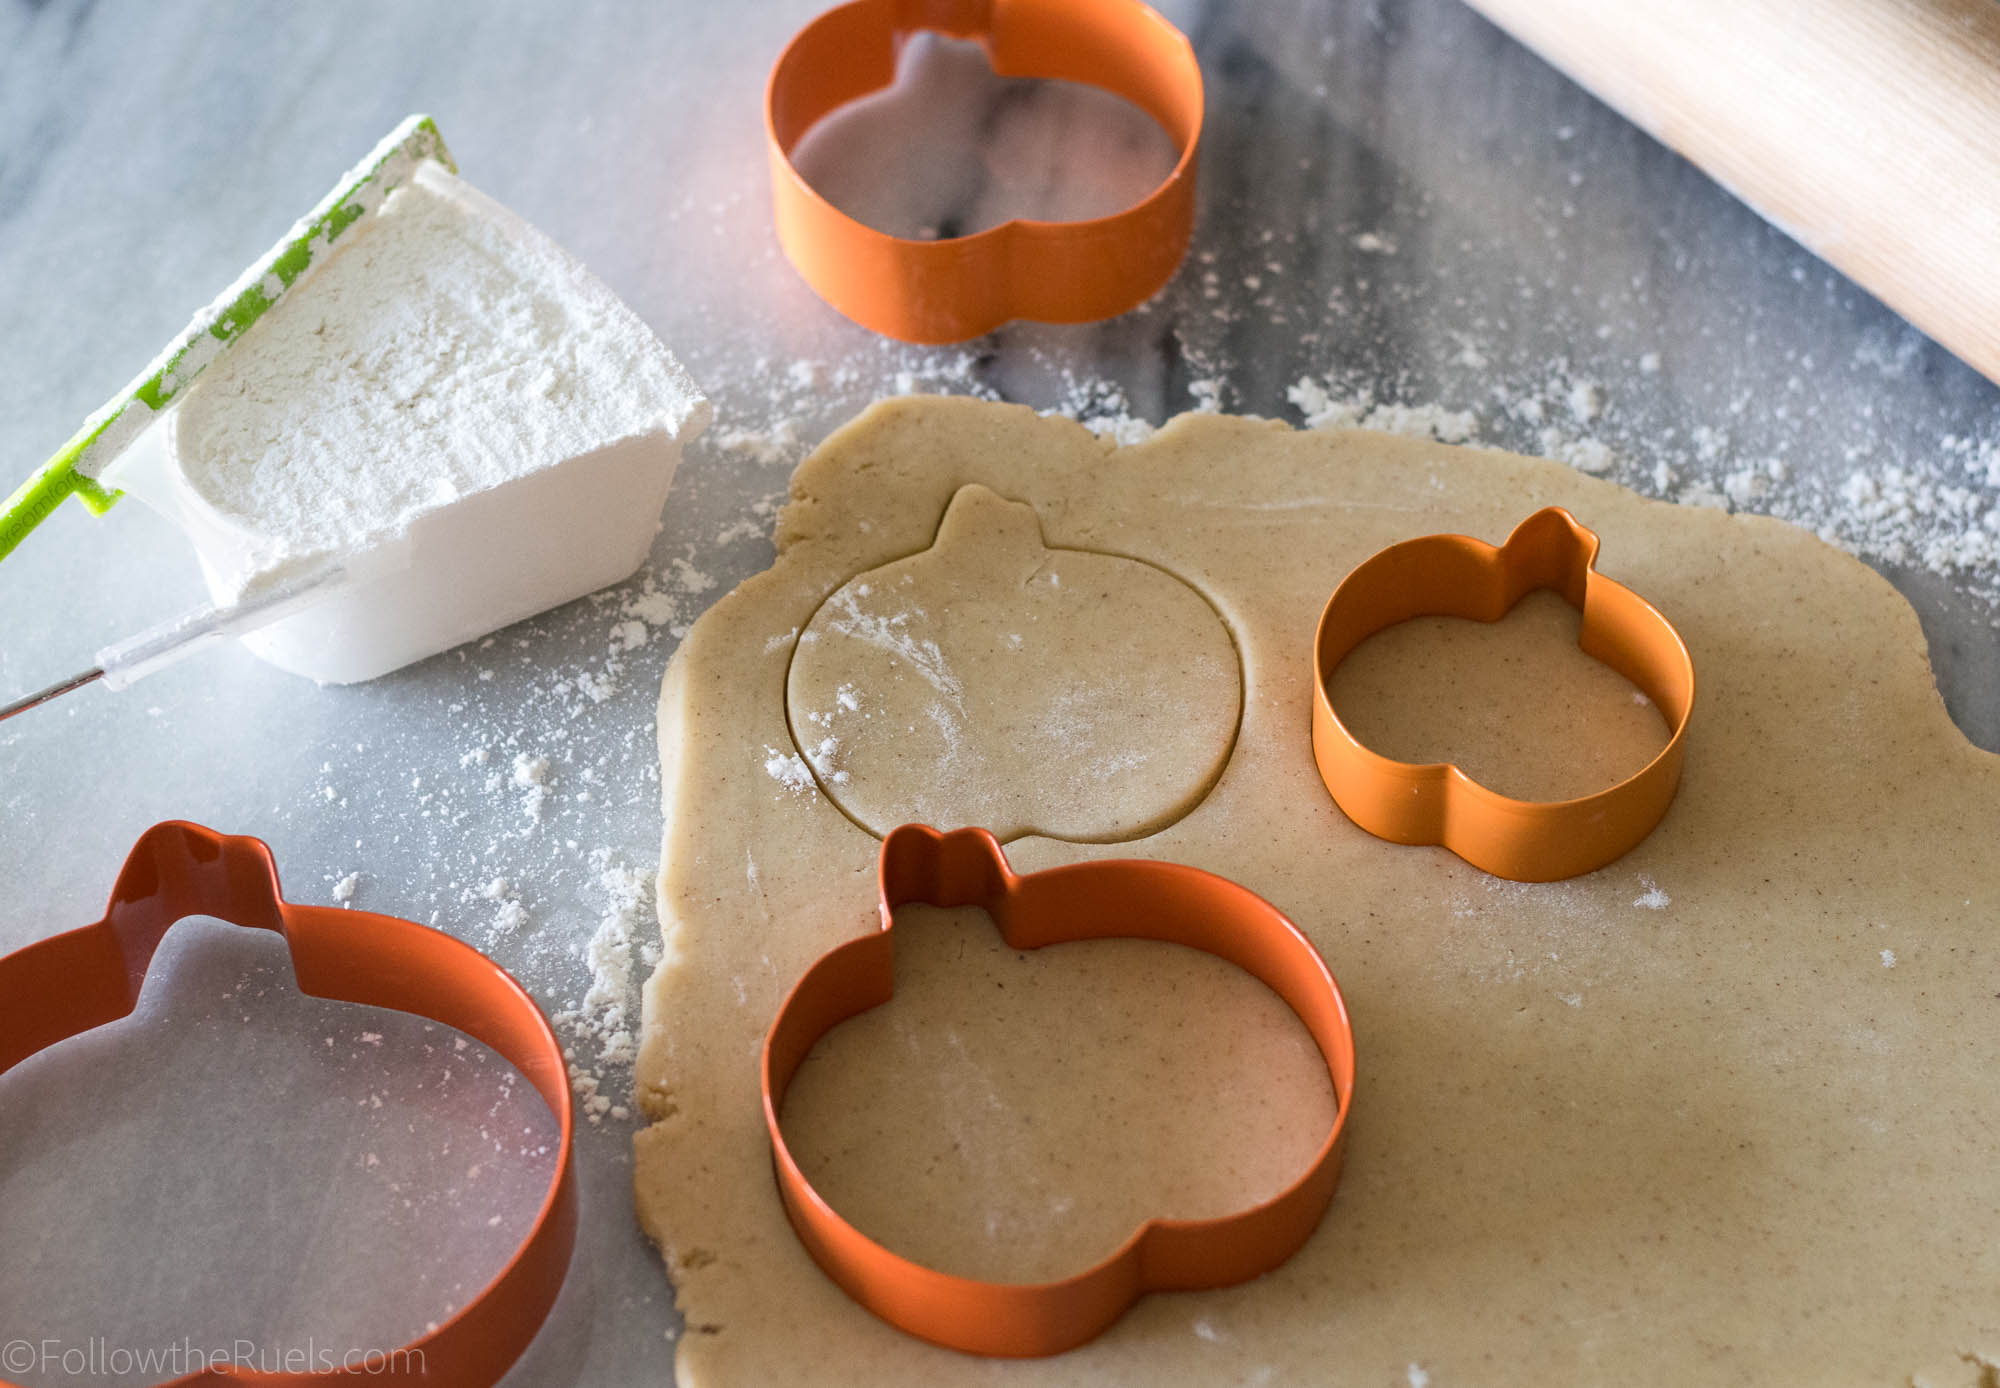
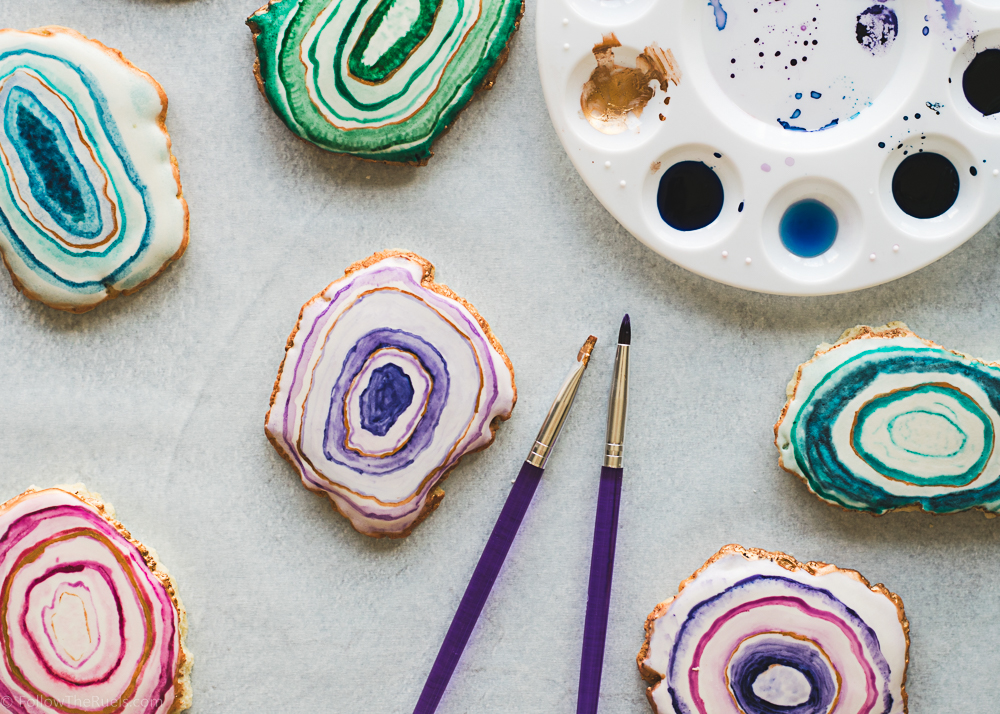
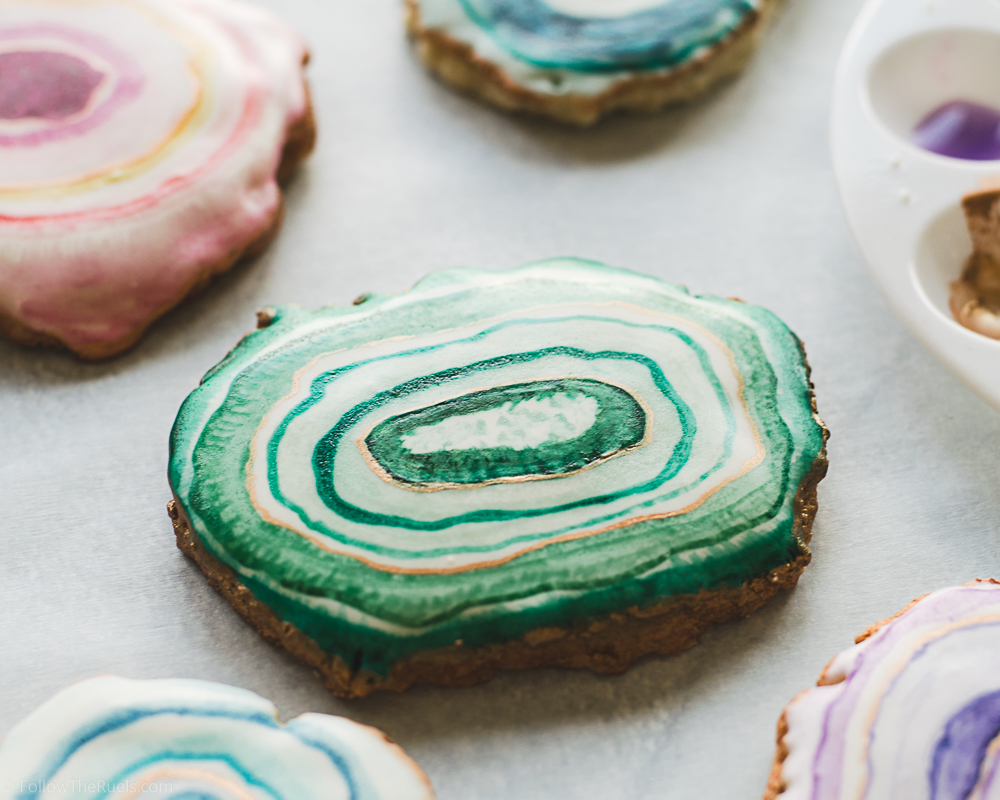
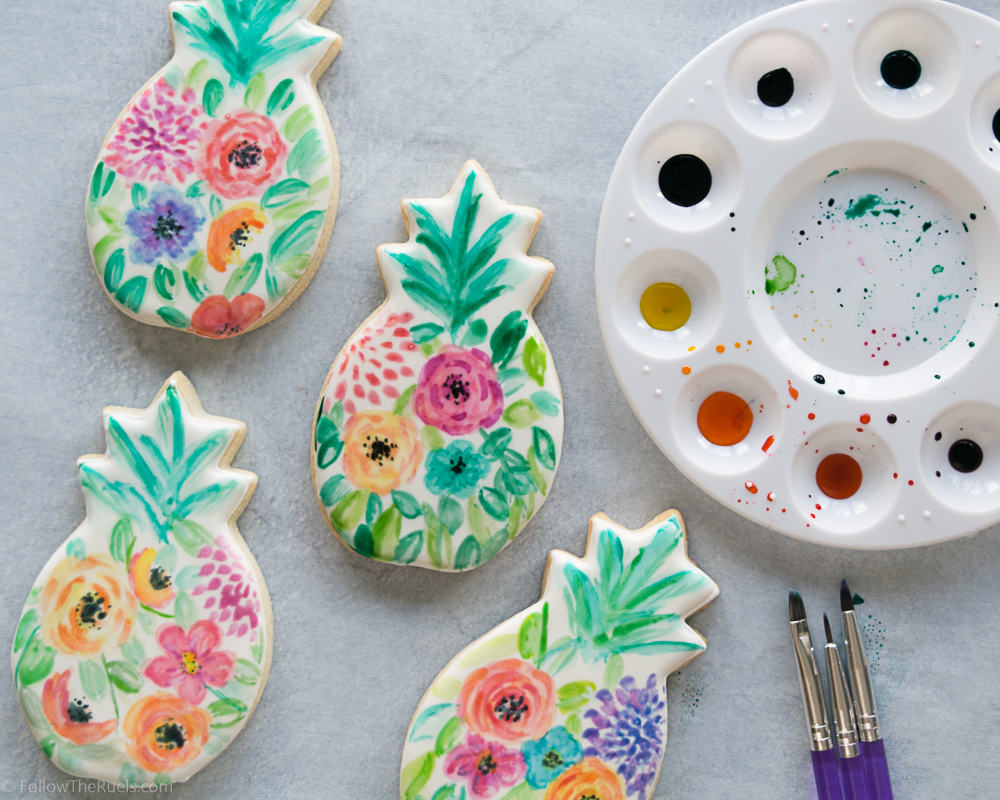
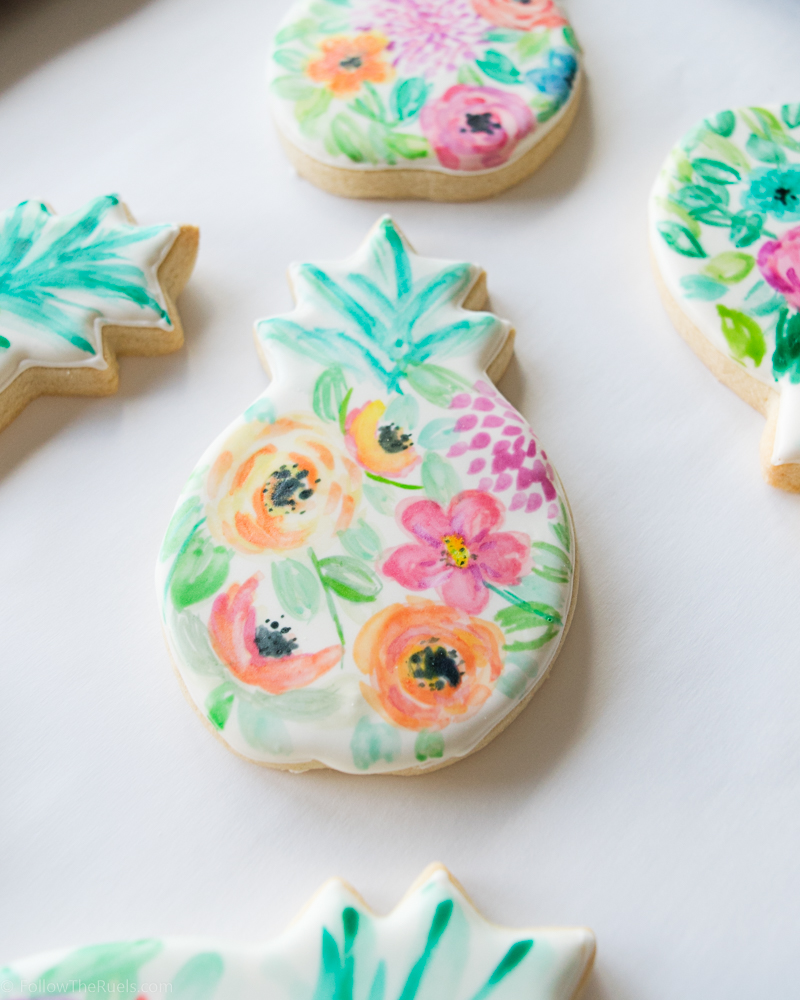
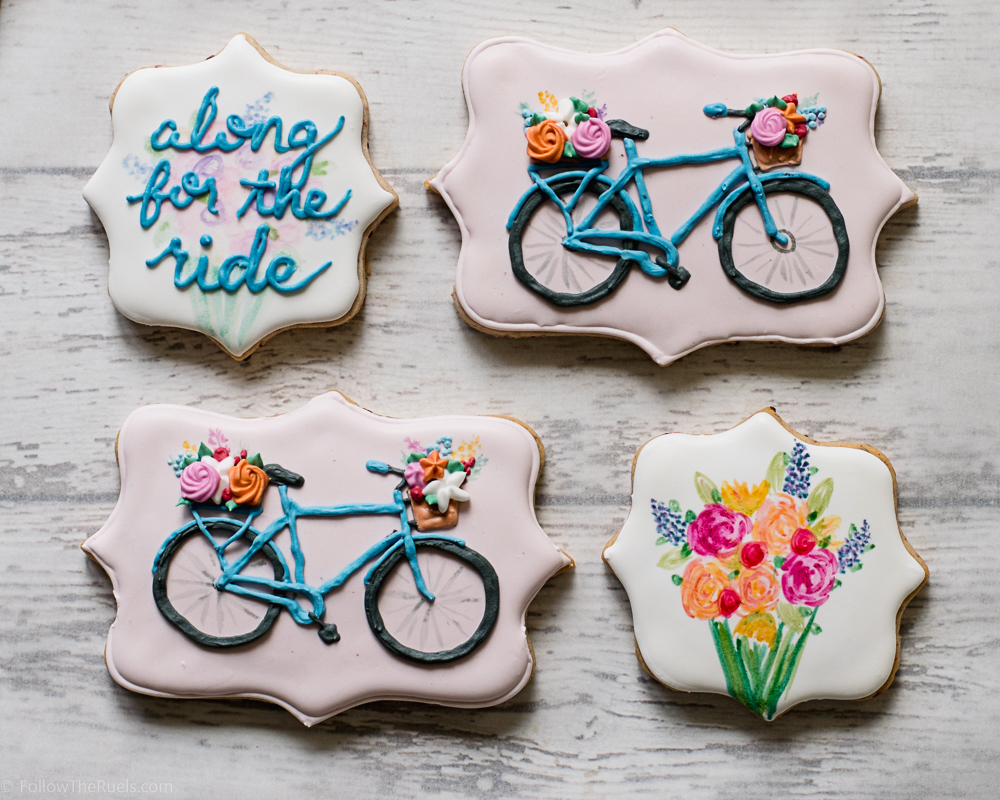
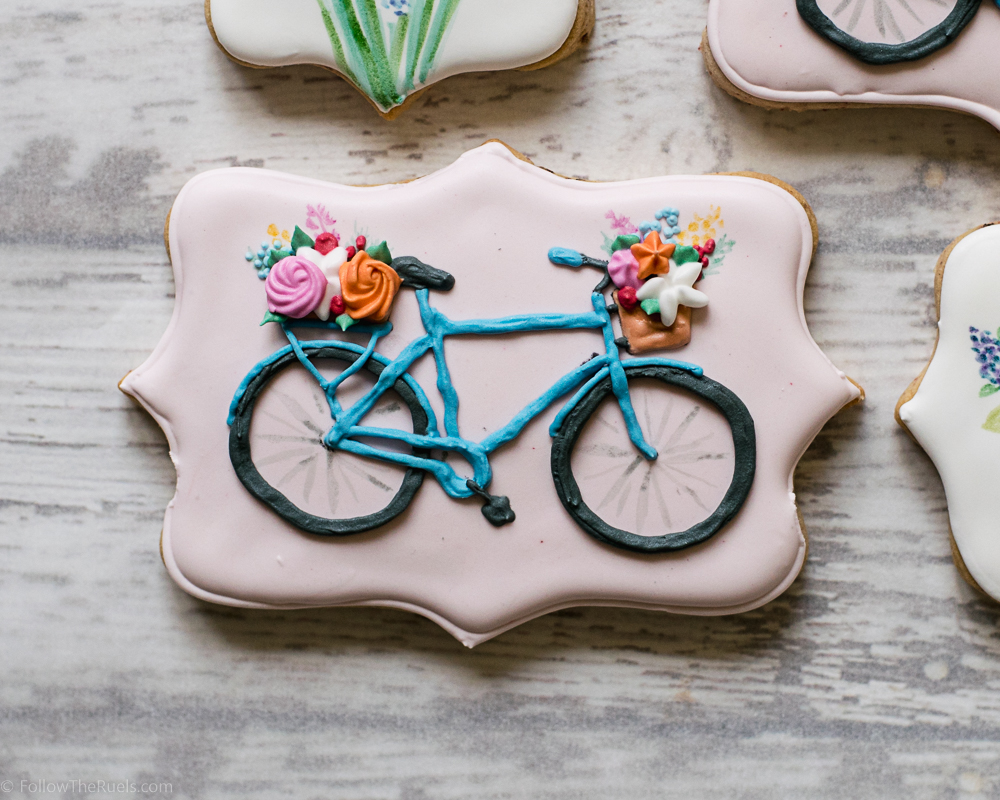
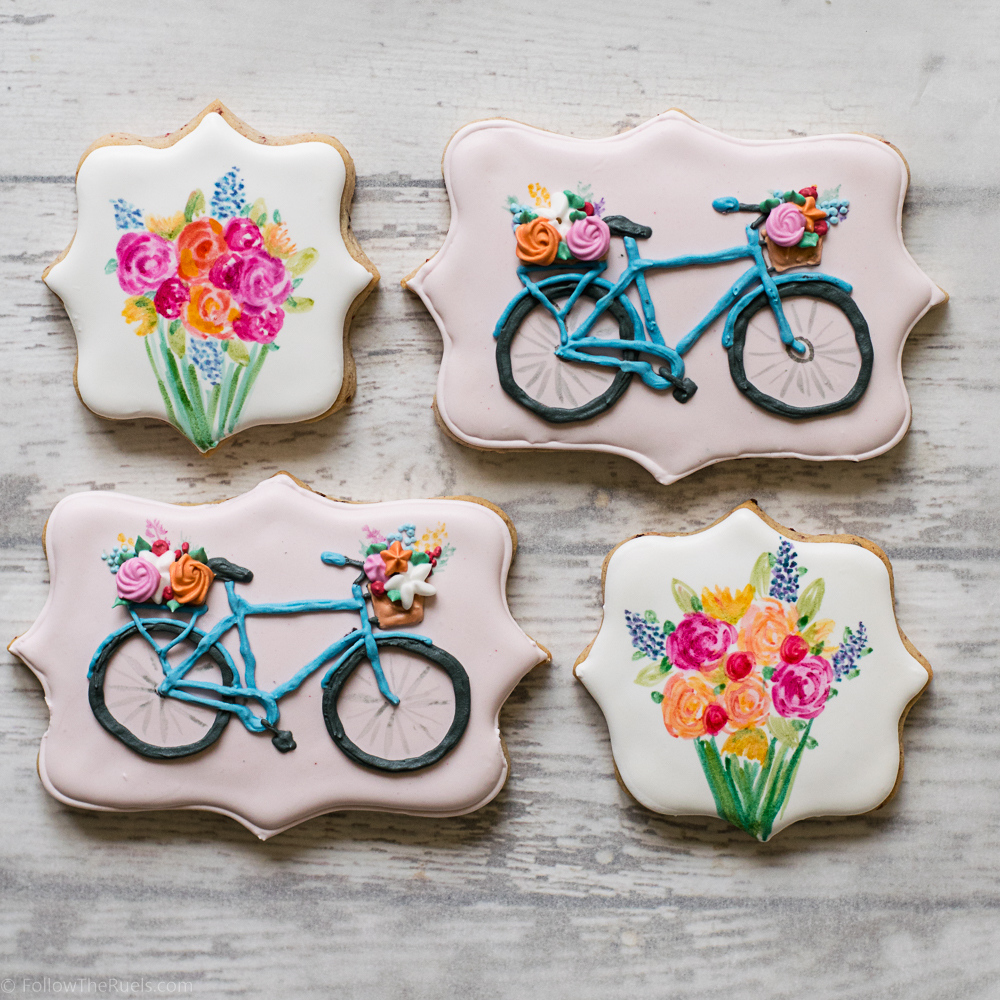
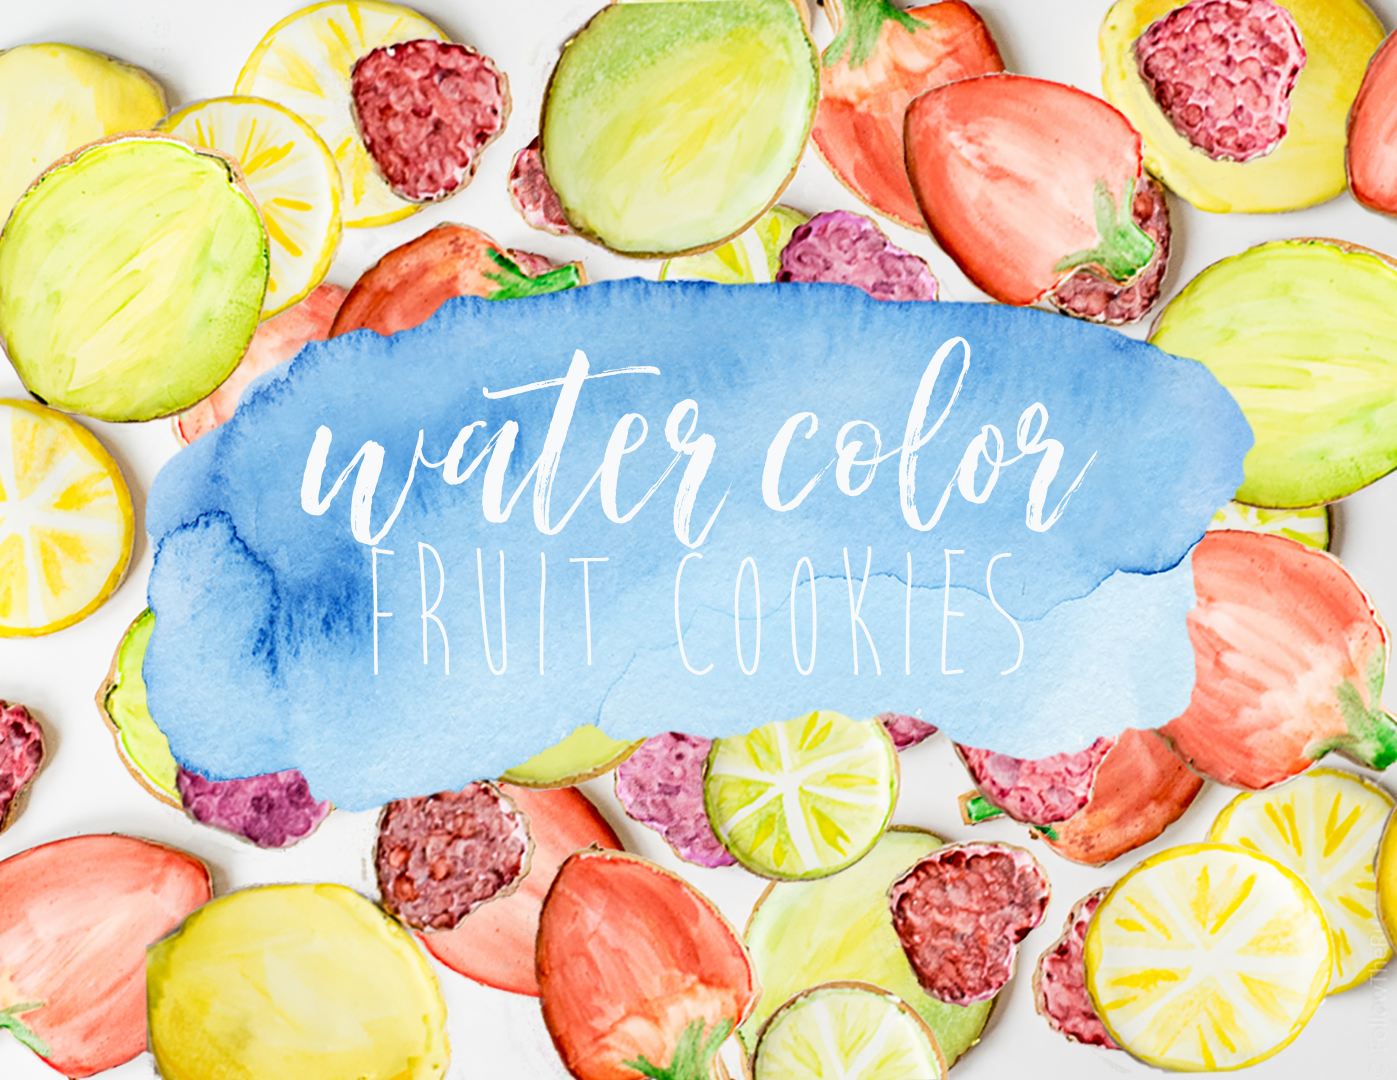
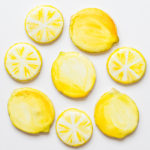
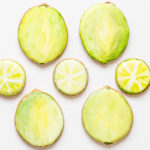
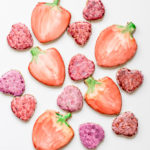
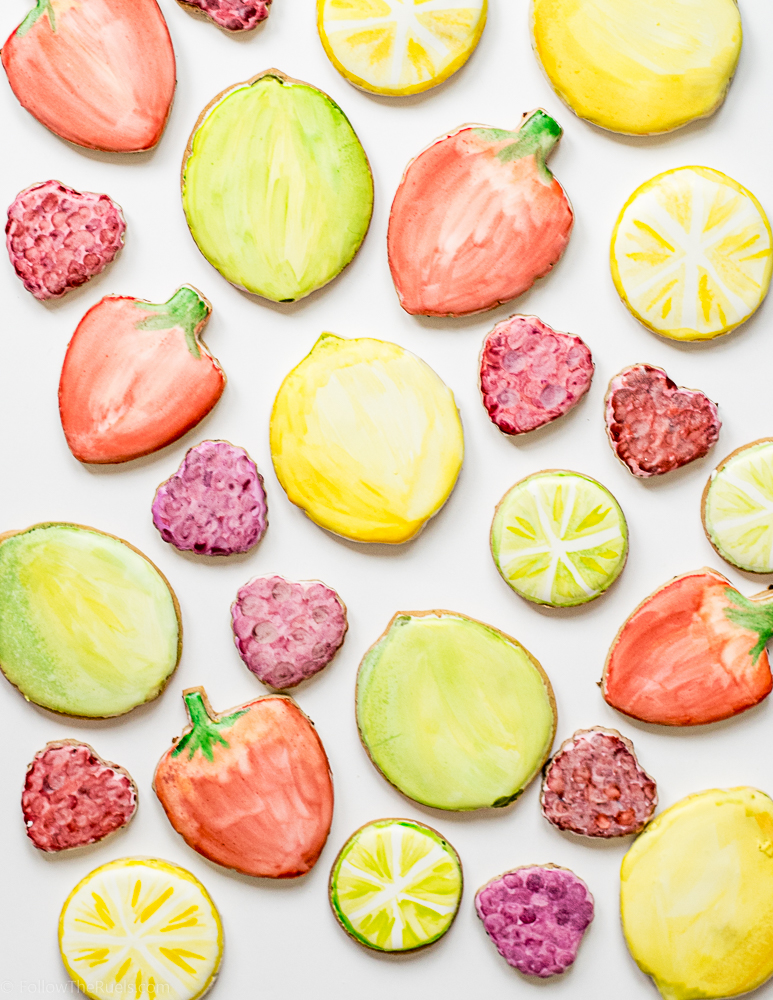
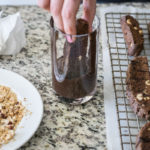
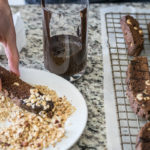
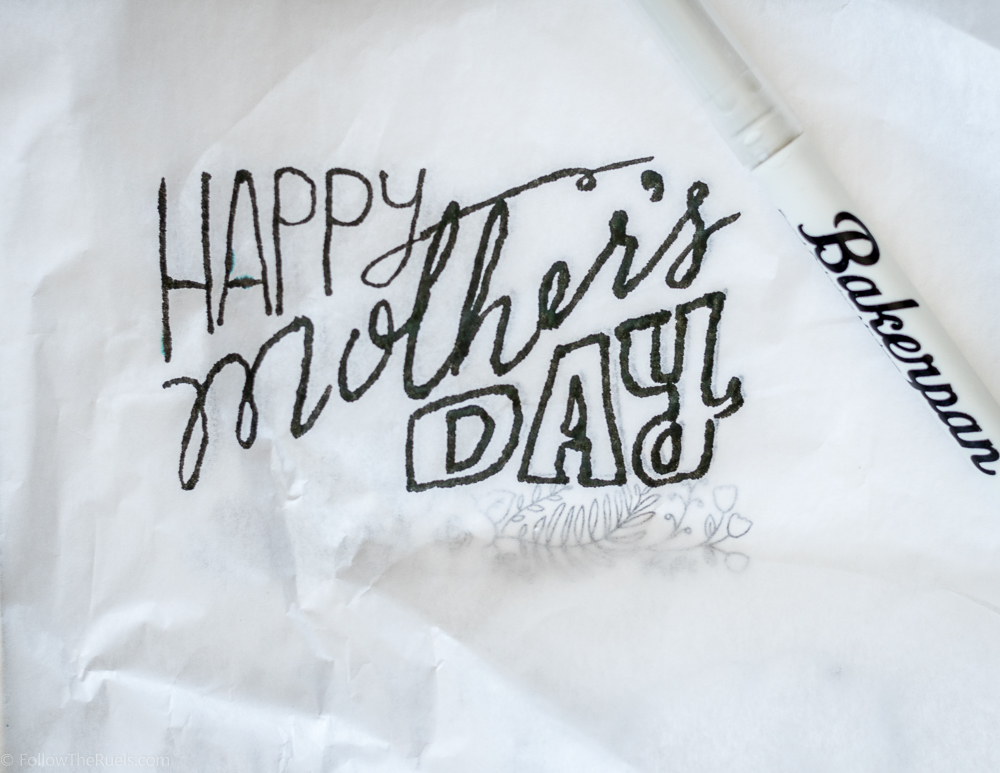
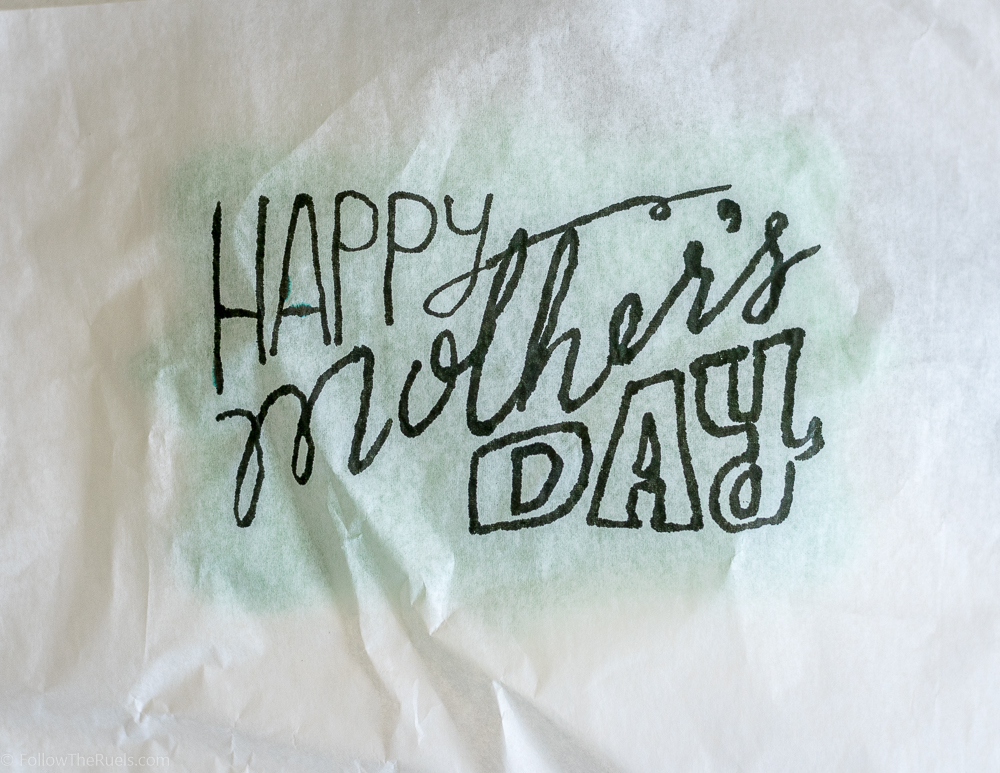
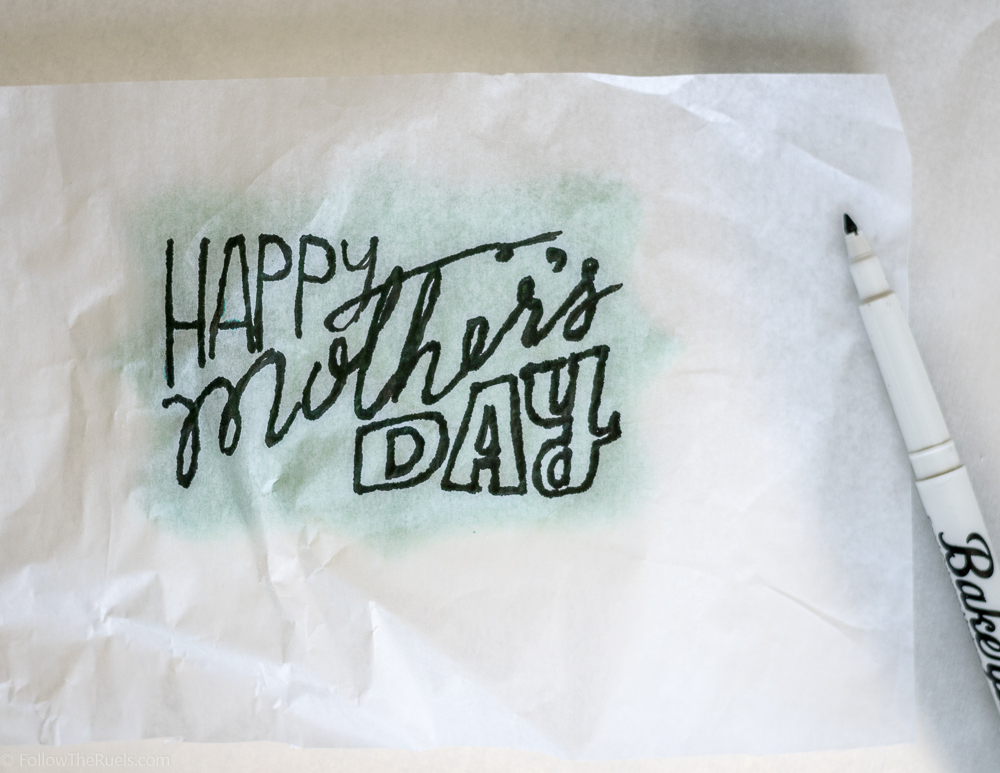
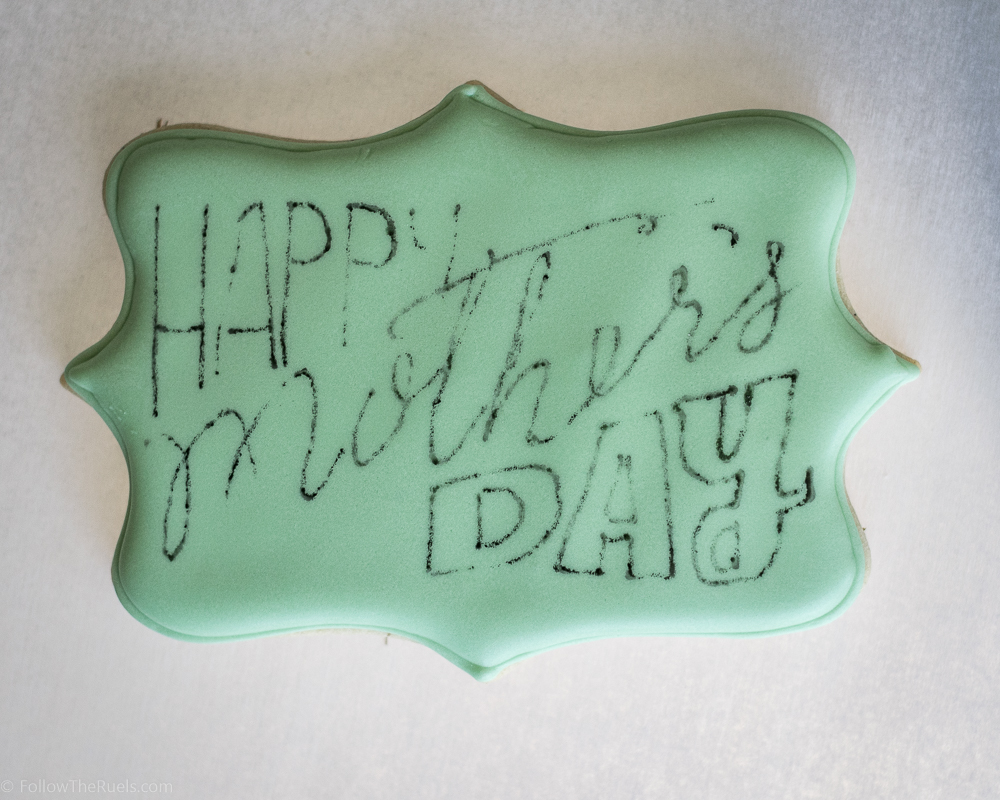
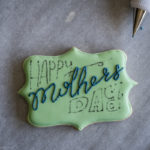
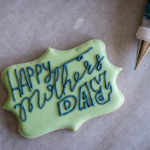
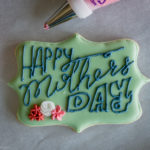
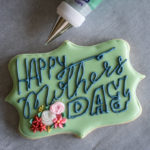
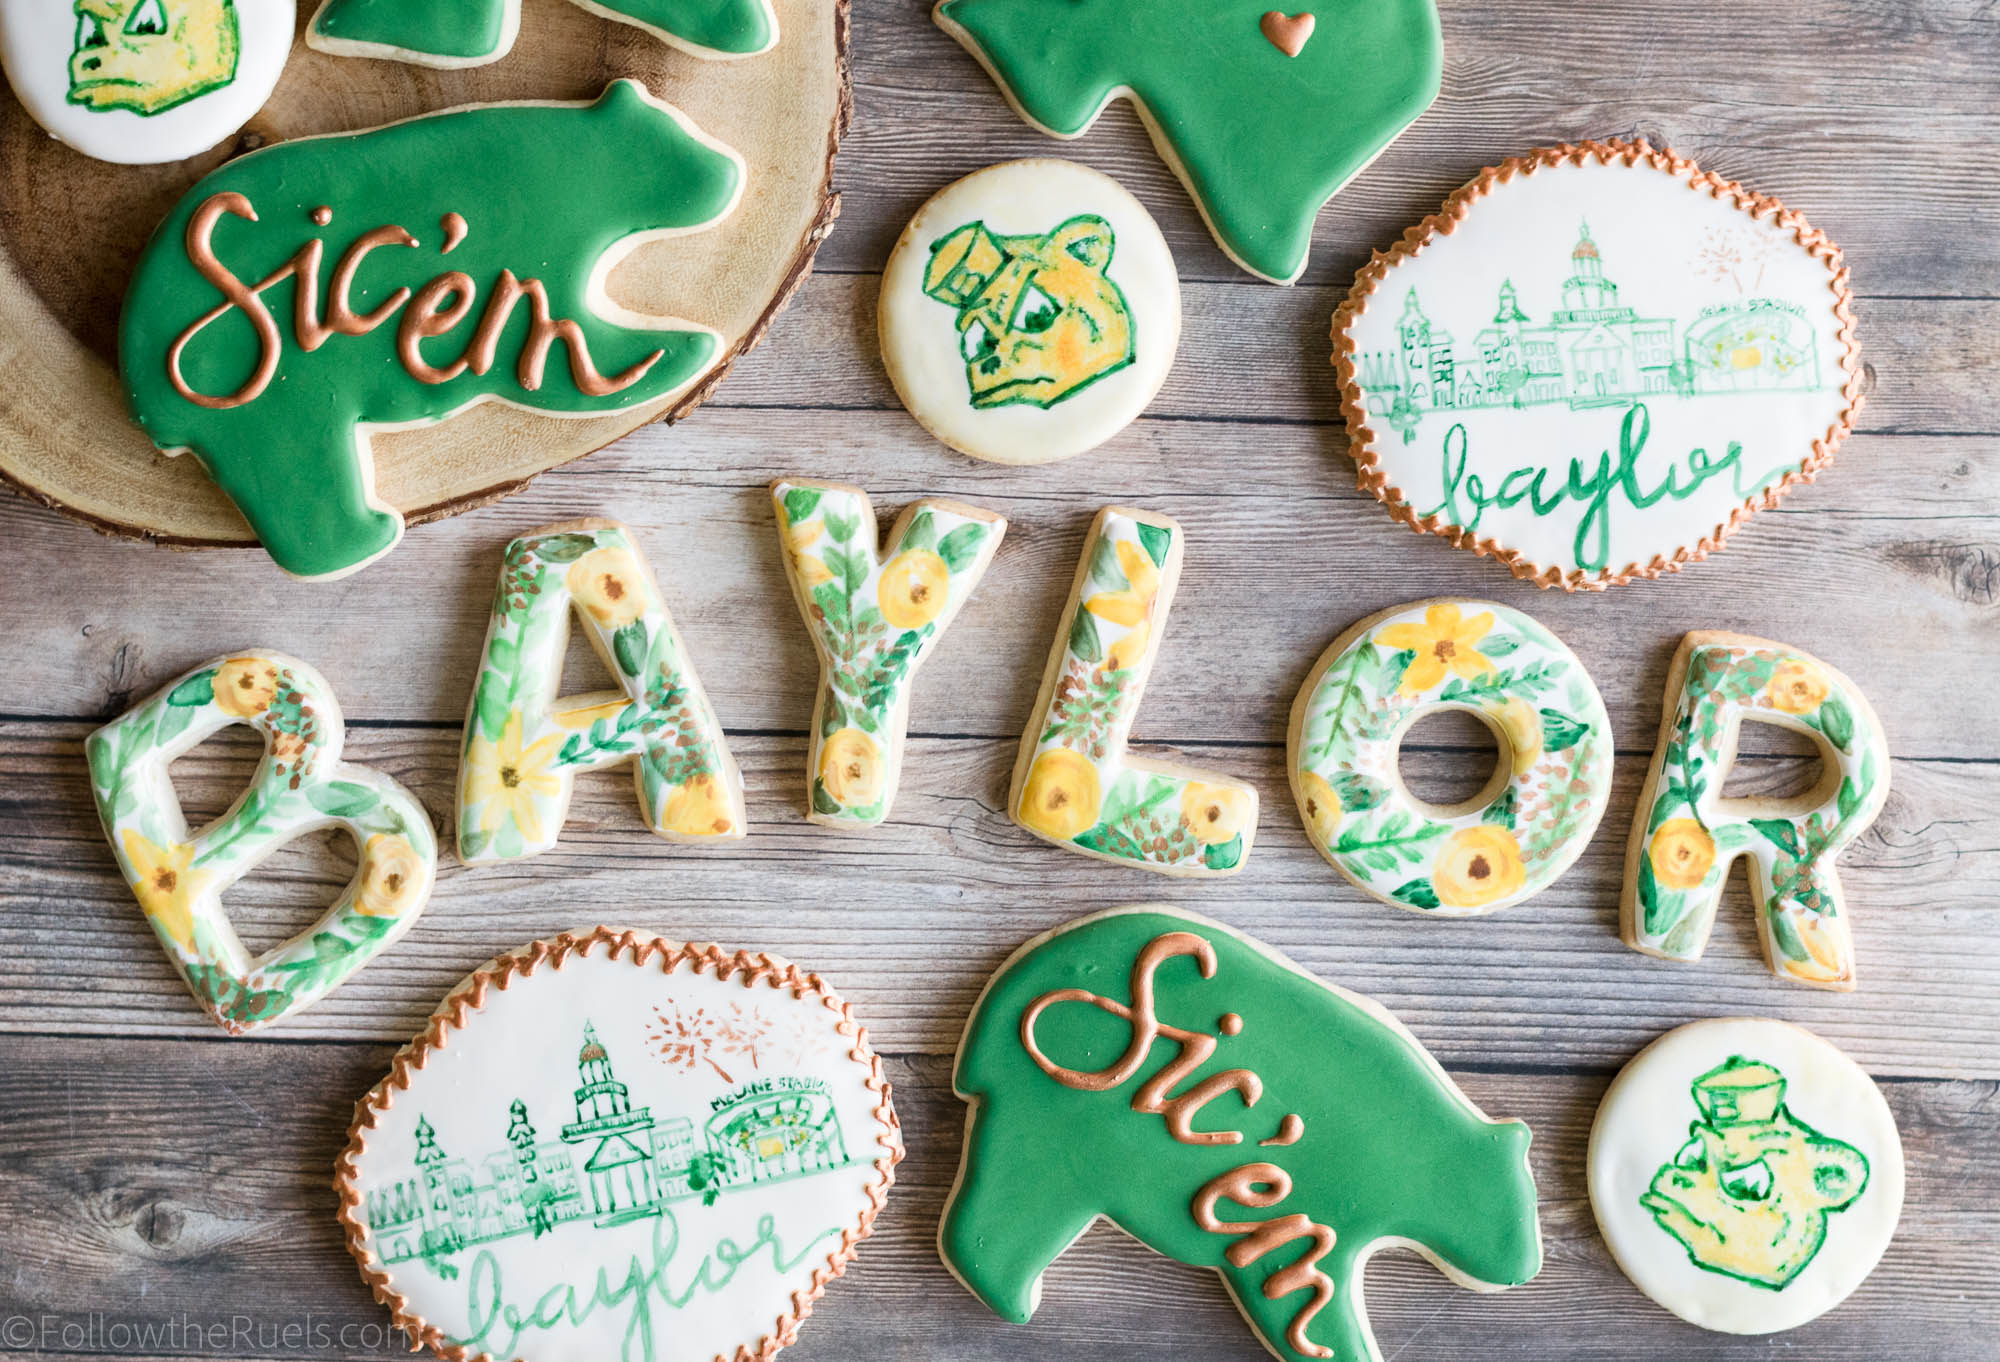
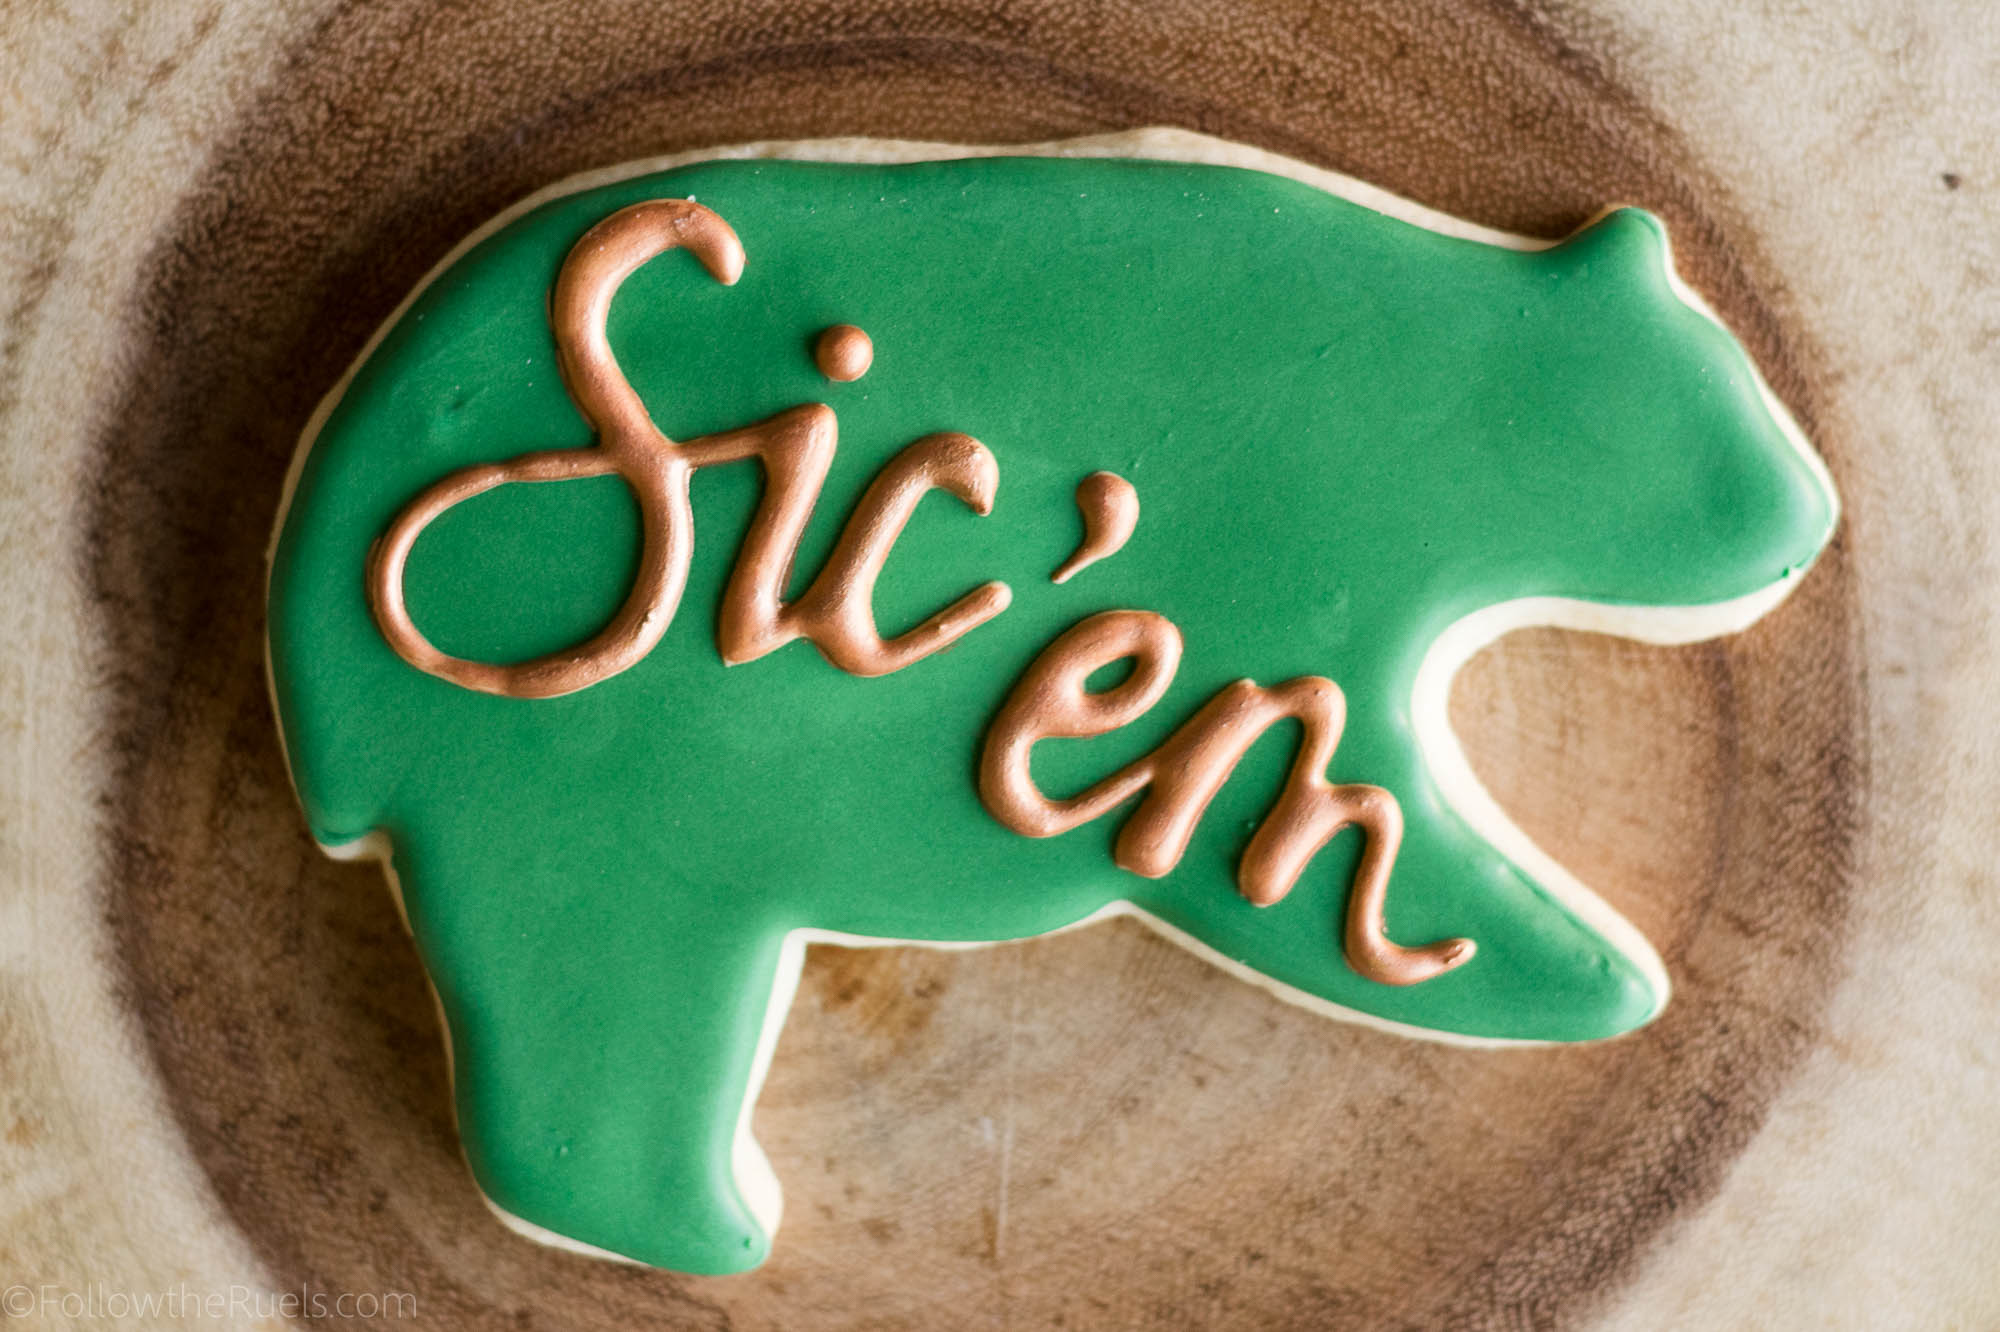
The cookies were inspired by this print that I found on Etsy. I loved it so much I wanted to make it into a cookie! Since I am not artistic enough to hand draw it onto the cookie, I used the tracing method that I demonstrated here. 

I used the same method to make the Sailor Bear cookies to keep with the watercolor theme. But I do think I like these royal icing Sailor Bears I made for the Cotton Bowl better. I made those using the royal icing transfer method, where I just trace over the image with royal icing. 

To see how I made the Sailor Bear cookies, skip to minute 4:00 in the video. To see how I made the skyline cookies, skip to minute 5:27.

I’m giving away all my tricks, here. Now you know that I am actually not all that talented, I am just really good at tracing things with royal icing or a paint brush. 

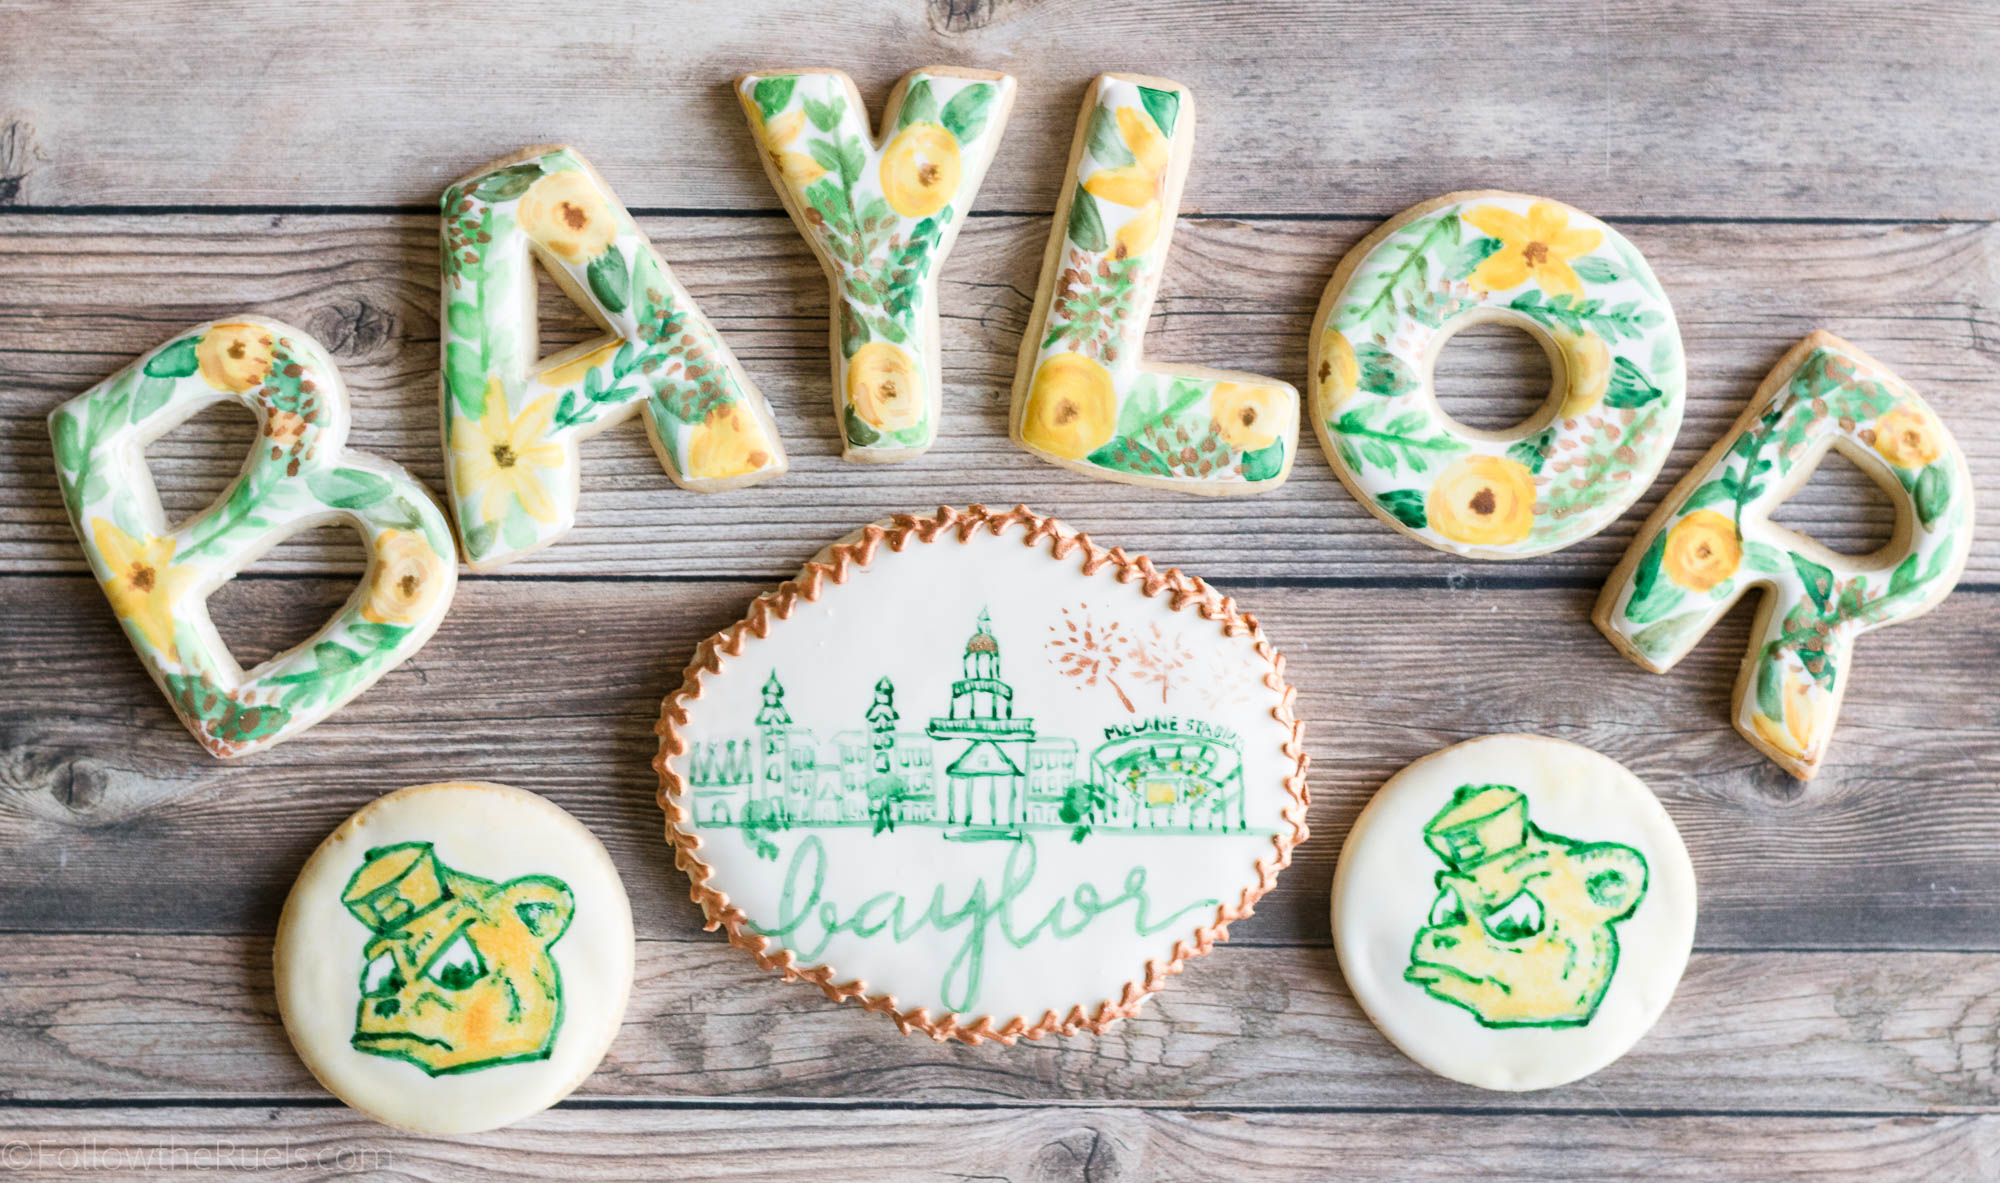
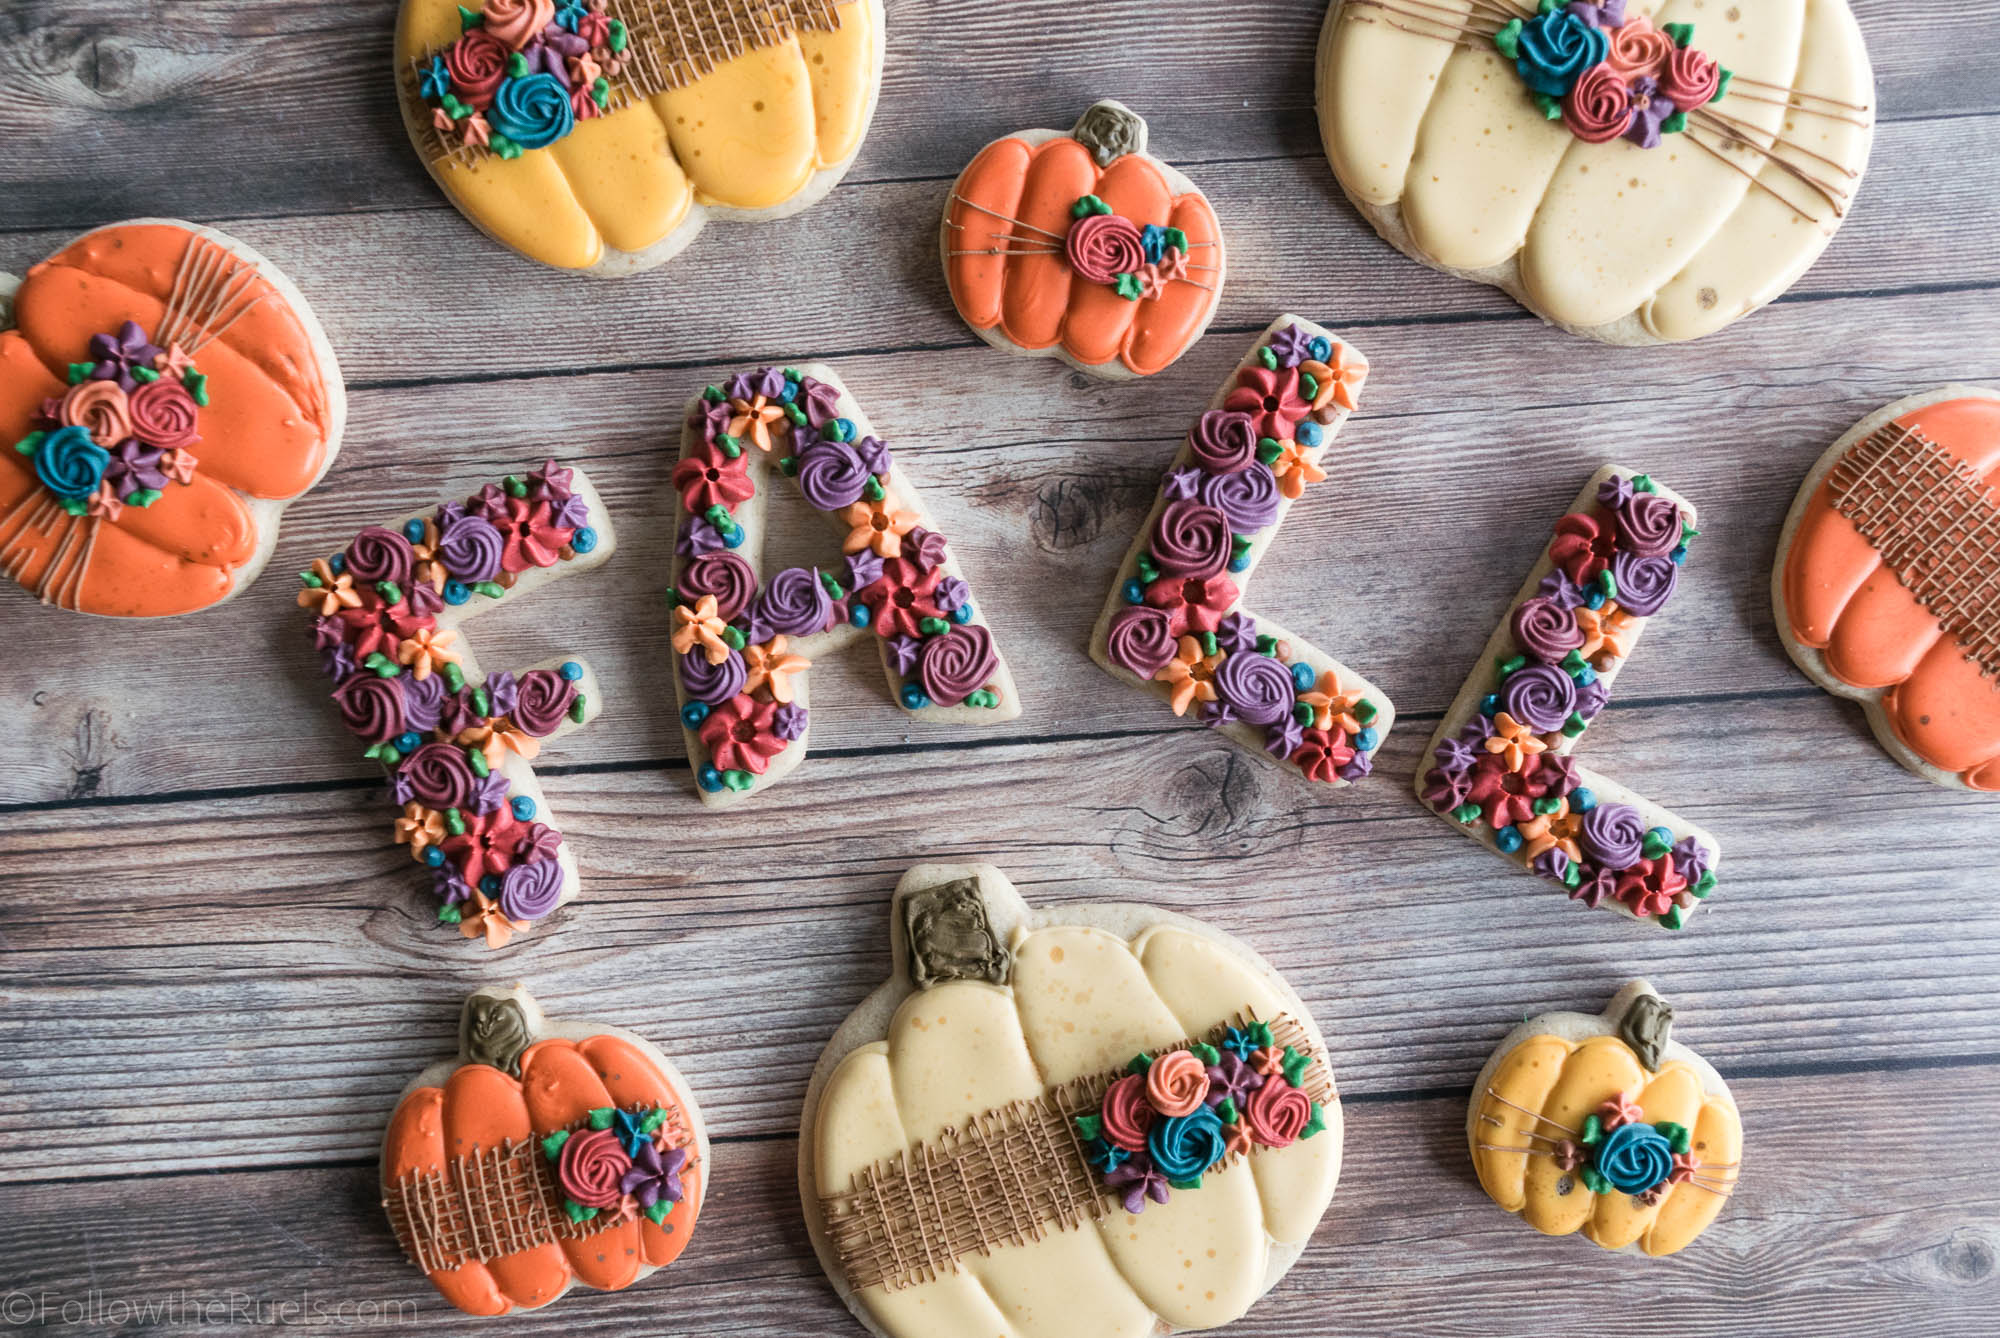
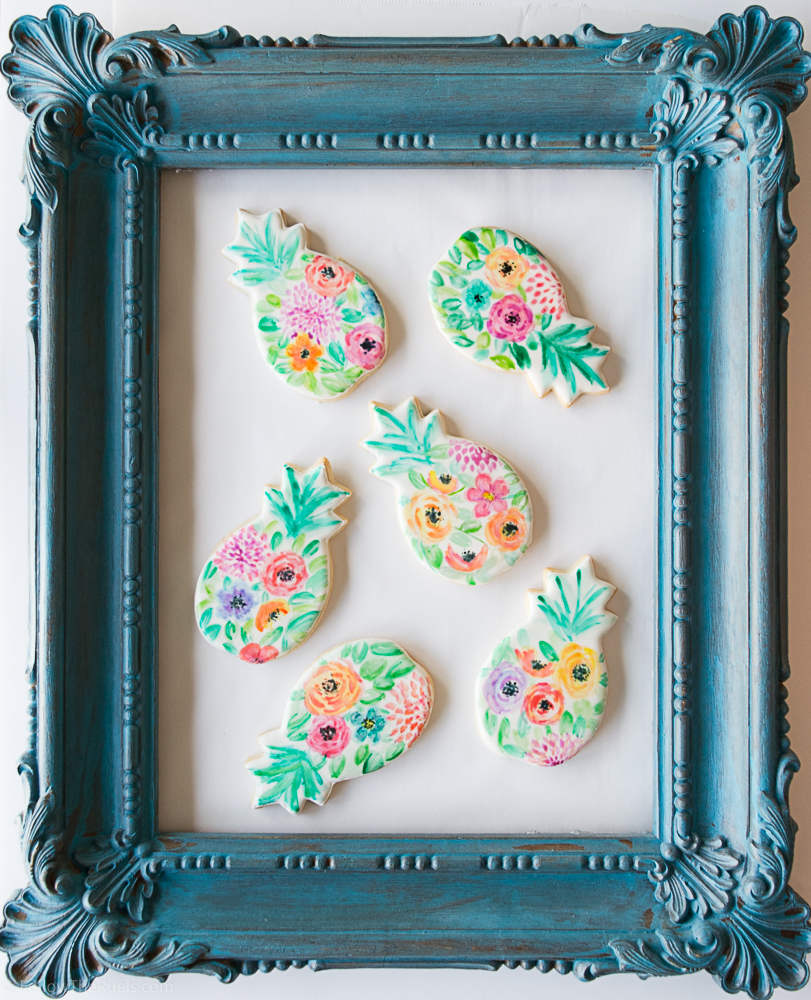
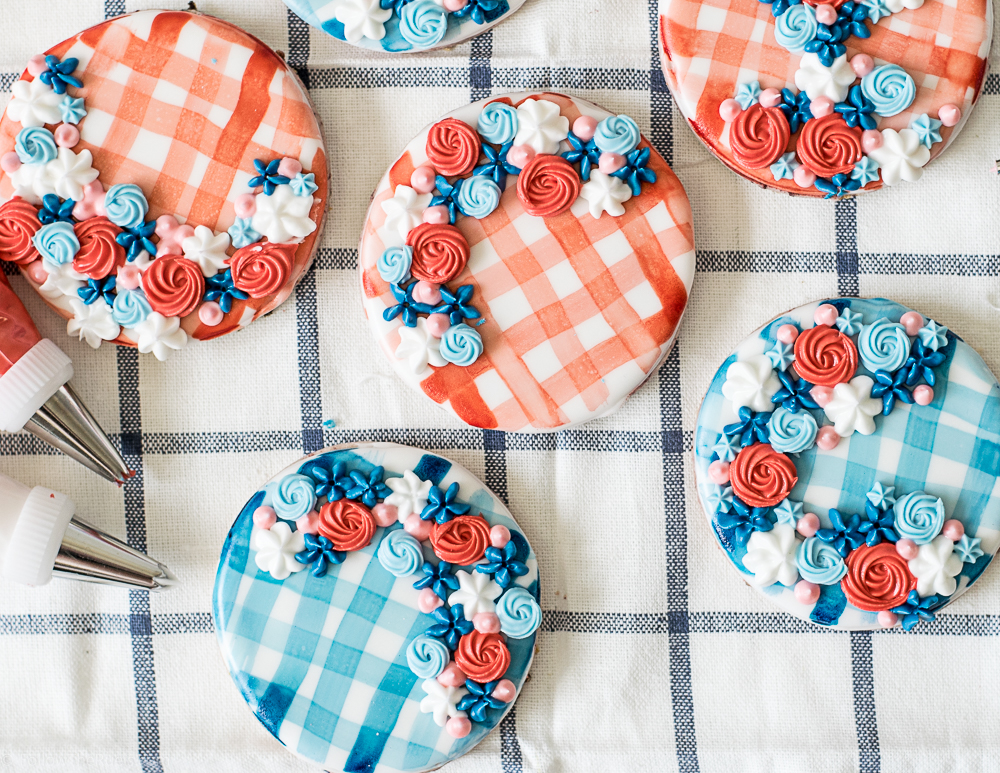
My favorite cookies of the entire collection are the B-A-Y-L-O-R letter cookies. Of course, I didn’t film these cookies because they were the last ones I made. After spending a few hours making the other cookies I was at a loss of what to do for the letter cookies. Should I just ice them in green and gold icing? Should I paint them? Should I try some fun new design? No, I decided to rely on an old favorite and paint a floral pattern very similar to what I did with these Pineapple cookies. Instead of using several various colors, I just used a couple shades of green and gold. 

Now I just have to pray that they make it to Texas in one piece! 
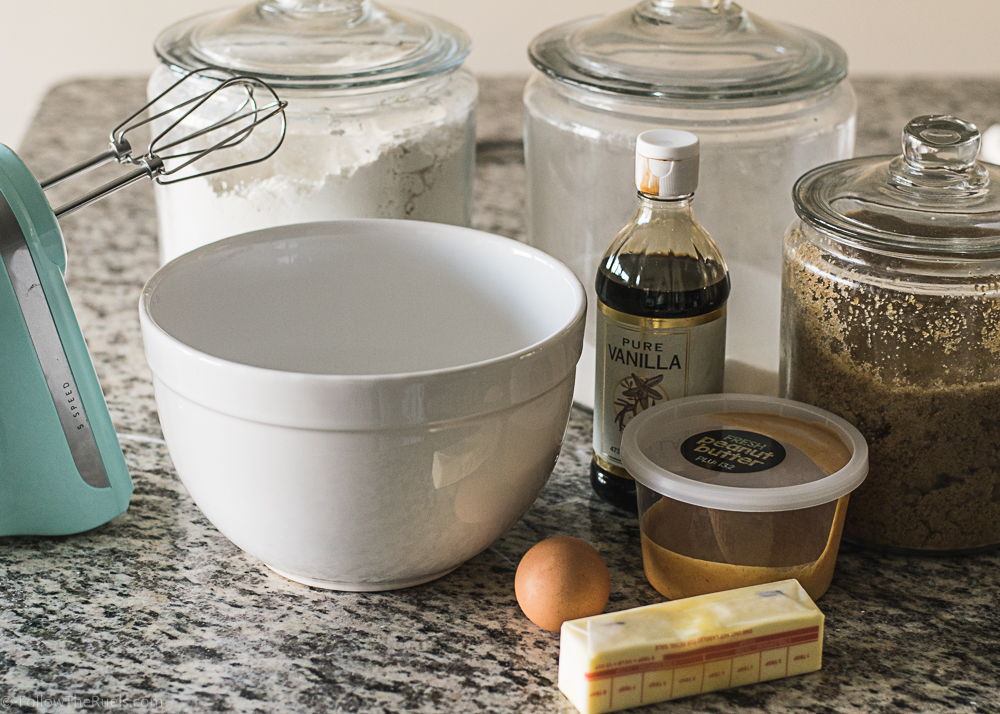
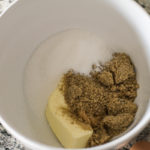
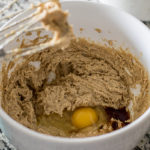
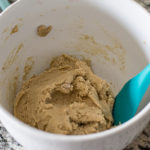
Recipes used:

  • Sugar cookie
  • Royal icing 

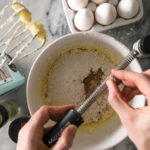
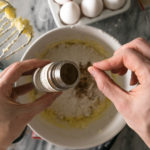
Cookie cutters used:
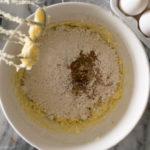
  • Texas
  • Grizzly Bear
  • Plaque
  • Letters

Supplies used:

  • Piping bags 
  • Meringue powder 
  • Gold edible paint 
  • Gel Food Coloring 
  • Clear extract or alcohol 
  • Paint brushes 
  • Pallet Tray 

 
[show_shopthepost_widget id=”2862351″]

/ Filed In: Cookies New, Decorated Cookies, Eat, Uncategorized
Tagged: Baylor, cookies, decorated cookies, floral, gold, green, royal icing, sugar cookies, watercolor

Fall Pumpkin Cookies

October 5, 2017

While Fall is one of my favorite seasons (who doesn’t love reprieve from the hot, humid Summer?), I still end September dragging my feet to get into the “Fall spirit”. But come October, and I am in the full Fall mode! In the last week alone, I have made four pumpkin spice recipes. This has got to be a new personal record. 

These cookies are actually one of those recipes. On Tuesday I shared my pumpkin spice sugar cookies which are freaking delicious. They only deserve the best Fall decoration!

I mean, you can’t make pumpkin spice sugar cookies and not make them into adorably decorated pumpkin cookies, right? 

You should know by now that I love throwing royal icing flowers on just about every cookie I make. They are fun way to really dress up a cookie. Plus people are generally pretty impressed with flowers on cookies (little do they know, it’s incredibly easy!). 

I also drew inspiration from my own Mother’s Day cookies and made some floral Fall letters, which I love. Again, they look so intricate and detailed, but really the piping tips do all the work. 

Speaking of which, these are the piping tips I used for the flowers and leaves (all are Wilton brand, most are included in this set):

  • #14 (Rosette)
  • #16 (Rosette)
  • #24 (Rosette)
  • #225 (Drop Flower)
  • #107 (Drop Flower)
  • #349 (Small Leaf)
  • #67 (Big Leaf)

I also used couplers along with my piping bags so that I could switch out my piping tips. For instance, on the pumpkins, I piped red rosettes, but on the letters, I switched to a drop flower tip. Couplers just make it easy to switch out colors and piping tips so you don’t have to have a million different tips. 

Wouldn’t these be so great for Thanksgiving!? I also made a bunch of letters to spell out “Thankful”, which would be a really pretty display on a Thanksgiving dessert table. 


Recipes:

  • Pumpkin Spice Sugar Cookies 
  • Classic Sugar Cookies
  • Royal Icing

Supplies Used:
[show_shopthepost_widget id=”2843280″]
 

/ Filed In: Cookies New, Decorated Cookies, Desserts, Eat
Tagged: cookie decorating, cookies, decorated cookies, Fall, pumpkin spice, royal icing

Pumpkin Spice Sugar Cookies

October 3, 2017

You just can’t escape it. Everywhere you look, something is flavored pumpkin spice. Coffee, candles, even peanut butter. 

Well, friends, if you are looking for some respite from the pumpkin spice overload, this is not the place. Today I am sharing my pumpkin spice sugar cookie recipe that is every bit as good as it sounds! (So good, my mother and law has already requested that her Christmas cookies are pumpkin spice flavored.) It’s my same favorite sugar cookie recipe spiced up with just the right amount of pumpkin spice. 

If you have made my sugar cookie recipe (or any cookie recipe for that matter), you know that it starts with butter and sugar. 

I like to cream the butter and sugar until it’s light and fluffy. Then I mix in the eggs and vanilla until the eggs are completely incorporated (and emulsified) into the butter.

To the butter, sugar, eggs, and vanilla I add in the flour and spices. Of course, most recipes will tell you to mix the flour and other dry ingredients together in a separate bowl. But I like to live life on the edge and just add them straight into the bowl with the other wet ingredients. 


For the spices, I used a mixture of cinnamon, nutmeg, cloves, ginger, and a bit of allspice. Then I mix everything together until it’s just combined! Once the dough is ready, I form it into a disc then wrap it in plastic wrap and place it in the fridge until I am ready to roll out the dough.

I find that rolling out the dough is so much easier when the dough is a bit stiff. The cookies hold their shape much better and are less likely to stick to counter. 

To make sure all my cookies are exactly the same thickness, I use these rolling pin bands. I also love this rolling pin! 

While the cookies bake, they will fill your kitchen with the most wonderful smell. Think about how great your kitchen smells with you make normal sugar cookies. Then add pumpkin spice!

You don’t even have to decorate them, and I guarantee they will be a hit! But if you would like to decorate them, I will show you how I did it later this week! You can make them simple pumpkins or add some more fun details like burlap, flowers, and leaves. They are the perfect cookies for Fall!

 
[show_shopthepost_widget id=”2840452″]

[yumprint-recipe id=’136′]

/ Filed In: Cookies, Cookies New, Desserts, Eat
Tagged: cinnamon, clove, cookies, Fall, ginger, nutmeg, pumpkin spice, sugar cookies

Agate Slice Cookies

September 14, 2017

Agates and geodes are just about everywhere these days. I see them as bookends, coasters (these particular cookies were inspired by agate coasters at West Elm), jewelry, and cakes. They are all so distinct and beautiful I knew I wanted to make them into cookies. 

The good news is that these agate slice cookies are actually pretty easy to make! The cookie shape doesn’t have to be perfect (actually, the less perfect the better), no piping is necessary, and your lines don’t have to be straight! 

Of course, I used my favorite sugar cookie recipe to make these cookies. I started with a circle cookie then tore off the edges to make that rough jagged edge.

Then instead of piping the royal icing on top, I actually dipped the cookies into the icing. Not only is it easier and quicker, I actually prefer it for this these cookies because the icing goes all the way to the edge and gets into all the little nooks and crannies along the edge. 

Once the icing dried, I painted the cookies with food coloring gel diluted with a bit of alcohol (I used vodka, but you can also use almond extract) in various shades of the same color. So you can see I have a purple agate slice cookie with different shades of purple and pink, a blue in various shades of blue and turquoise, green in various shades of green and teal….you get the gist. 

I finished off the cookies with a gold edge and a little bit of gold painted around the layers of the cookie. I think the gold really helps make the cookies look even more like an actual agate slice. What do you think!?

They are almost as pretty as those coasters, but better because you can eat it!

 
[show_shopthepost_widget id=”2816954″]

/ Filed In: Cookies New, Decorated Cookies, Desserts, Eat
Tagged: agate slice, cookies, decorated cookies, painted cookies, watercolor

50 Ways to Donate to Hurricane Harvey Victims

September 6, 2017

A little bit of my heart is in Houston. It was the first city I lived in all on my own with my own big girl apartment and my own big girl job. I moved to Houston after college to be close to friends. Not because I had a job offer; I found that later. I literally moved there because that’s where my best friends were going after graduation. It may not have been the most thoughtful or wise decision, but I don’t regret it for a single second. 

I have so many fond memories of Houston. It is where I had my first date with my husband. Our second was at a Houston Astro’s game. It is where I lived with two of my bestest friends. Where one of those friends met her husband, and where the other one lives to this day. 

Actually, the very first place I lived in Houston was in my friend’s parent’s spare room. Without asking any questions, or telling me how long I could stay, they put me up until I found my own apartment. 

Houston may get a bad rap thanks to the weather, but its a beautiful city filled with beautiful people. 

It’s also a BIG city. And I mean BIG. It’s not only the 4th largest city in the country in terms of population, it just downright takes up a ton of space. The entire metro area is over 8,000 square miles big! 

When you hear about how much money it is going to cost to rebuild the city after hurricane Harvey (it’s billions with a B), that’s half of the equation. There is just so much to rebuild. 

One of my not so fond memories of Houston was hunkering down during Ike, a hurricane that went right over the city. While there was a lot of wind damage, the flooding and total damage wasn’t nearly as bad as hurricane Harvey. Even then, I remember windows in the sky rises along highway 59 were boarded up for months afterwards. It took a friend of mine 2 weeks to get a tree removed from his living room and even longer to get his wall fixed. And Harvey is supposed to be at least 10 times worse. 

I recently heard that the FEMA can’t even afford to make these people whole again. Some of them have lost their entire homes, their lives. And between FEMA and their insurance, they probably won’t receive enough to start over. 

Which is why we need to help. If you don’t know where to start, here is an exhaustive list of 50 charities, organizations, foundations, etc. you can donate to. I promise, no matter how big or small, your donation will make a difference.

  • AARP Foundation
  • Airbnb
  • American Red Cross
  • All Hands Volunteers 
  • Americares
  • ASPCA
  • Best Friends Animal Society
  • Catholic Charities of the Archdiocese of Galveston-Houston
  • Child Foundation
  • Children’s Hunger Fund
  • Coalition for the Homeless
  • Convoy of Hope
  • Delivering Good
  • Direct Relief
  • DonorsChoose.org
  • Episcopal Relief & Development
  • Feeding America
  • First Book
  • GlobalGiving
  • Go Fund Me 
  • Habitat for Horses
  • Habitat for Humanity
  • Heart to Heart International
  • Houston Food Bank
  • Hurricane Harvey Relief Fund
  • International Orthodox Christian Charities
  • International Relief Teams
  • Islamic Relief USA
  • Jewish United Fund of Metropolitan Chicago
  • MAP International
  • Matthew 25: Ministries
  • Medical Teams International
  • MedShare
  • Operation Blessing International
  • Operation USA
  • Portlight Inclusive Disaster Relief
  • Samaritan’s Purse
  • Save the Children
  • SBP
  • ShelterBox USA
  • Small Steps Nurturing Center
  • Star of Hope Mission
  • Southeast Texas Food Bank
  • Texas Diaper Bank
  • The ALS Association, National Office
  • The Center for Disaster Philanthropy
  • The Zakat Foundation of America
  • UJA-Federation of New York
  • United Way of Greater Houston
  • World Vision
  • YMCA of Greater Houston

I know Houston will rebuild. It has done it before and it will do it again. It could just use a little help along the way. 


/ Filed In: Decorated Cookies
Tagged: cookies, fondant, Houston, painted, Texas

Watercolor Flower Pineapple Cookies

August 31, 2017

One of my favorite cookie decorating techniques lately has been watercolor on cookies. I really love the look of them, but I mostly rlove not having to make so much royal icing!

So with a good friends birthday around the corner, I knew I wanted to make some watercolor cookies for her. In looking for creative inspiration for her cookies, I came across a couple images that I absolutely adored! This sweet pineapple card and this beautiful pineapple print.

From there I was inspired to make these watercolor flower pineapple cookies!

To paint on cookies, you do need a few supplies you may not normally use during cookie decorating…mainly a big bottle of vodka (really any clear extract or alcohol will work, but I prefer vodka). It’s always amusing to my husband to see me painting cookies with a bottle of vodka next to me on the counter. 

Supplies you will need:

  • Sugar Cookies in pineapple form
  • Plain white royal icing
  • Gel food coloring
  • Clear extract or alcohol
  • Food safe paint brushes
  • Pallet tray

I absolutely love how these cookies turned out. I probably say this about every cookie, but these may be my favorite yet. 

I guess it’s like children, you can’t really pick your favorite. But in this case (at least for now) these are definitely my favorite!

And, you don’t have to be an artist to make these. I am by no means an artist (as you may or may not be able to tell). So painting cookies can really be fun for anyone, even the kids!

/ Filed In: Cookies New, Decorated Cookies, Eat
Tagged: cookie decorating, cookies, decorated cookies, painting, pineapple, royal icing, watercolor

Peanut Butter Pretzel Chocolate Chip Cookies

August 24, 2017

Peanut butter and pretzels. Chocolate and pretzels. Peanut butter and chocolate. All wonderful combinations on their own. So what could be bad about a cookie that combines all of them!?

I’ll tell you. Not a darn thing. 

I told my husband that these cookies were specially created for him. He’s not a big cookie eater (it’s the only thing we ever bicker about), but he does love peanut butter pretzels. So I thought that maybe I could trick him into liking cookies if I also included peanut butter and pretzels in them!

Fortunately for both of us, my evil plan worked. He thoroughly enjoyed these cookies thanks to those delicious peanut butter chips and salty pretzels.

These cookies start out as a normal chocolate chip cookie, with a few minor tweaks. 


The obvious tweaks are the addition of the peanut butter chips and pretzels, which I mixed into the dough at the very end. However, there are also some not so obvious tweaks I made to this recipe. I added some extra brown sugar and an egg yolk to help make these cookies extra rich and soft. While I love a good crispy cookie, I wanted these cookies to be extra soft so that the crunchy pretzels really stood out. 


I like to refrigerate my dough before I form them into balls and bake. It not only helps all the flavors meld together, but it helps the cookies stay nice and thick instead of flattening out into one flat disc. 

If you like your cookies on the chewier side, remove the cookies just at the point the cookies are golden brown around the edges but still a bit soft in the center. They will continue to cook a bit after you take them out of the oven.

The resulting cookies are a little crunchy on the outside and soft and chewy in the center. As far as I am concerned, its the perfect cookie.

But seriously, this is a darn good cookie. How can you not like peanut butter, chocolate, and salty pretzels are packed into one little convenient cookie package? You can’t. I dare you.

[yumprint-recipe id=’128′]

/ Filed In: Cookies, Cookies New, Eat
Tagged: chocolate chip, chocolate chip cookies, cookies, peanut butter, pretzel

Homemade Graham Crackers

August 15, 2017

Nothing like posting over 24 hours late (again). Game of Thrones has my Sunday priorities all messed up, guys. I may have spent all day making the ingredients for homemade s’mores so that I could post the recipes this week. But come 9:00 pm on Sunday night and my attention 100% belongs to HBO.  But better, late than never, right?

Now I love graham crackers, but homemade graham crackers make the store bought version taste like cardboard. These homemade versions are so much richer and more flavorful and not quite as overly sweet like processed cookies tend to be. 

Plus, you can make them in your food processor, which I love!

The hardest part of this whole recipe was finding graham flour. And by that I mean I didn’t find any graham flour. So instead I made my own by processing some wheat germ. Which also wasn’t easy to find. Quick tip, look for it near the oatmeal in your grocery store. 


Mix together your freshly processed graham flour with whole wheat flour, all purpose flour, brown sugar, baking soda, and baking powder. Then cut in chilled butter until it forms a coarse corn meal like consistency. 


Then mix in milk, molasses, and honey until it forms a ball of dough. 


After chilling in the fridge for about an hour, the dough is ready to be rolled out. Graham crackers should be pretty thin, so I used the thinnest rolling pin bands to roll out my dough about 1/8th of an inch thick. I also uses a ravioli cutter to cut out my crackers into small scalloped squares. You could also use a pizza cutter to cut the dough into squares, or any shaped cutter to cut them into whatever shape you like.

On top of each cracker, poke a few holes so that they don’t puff up too much. Then sprinkle them with a bit of sugar. 

Finally, bake them off in the oven until they are nice and crispy. Ideally, you won’t over bake them like I did. A few of them got a little charred. Fortunately for me, I like things that are on the burnt side. 

Other than the ones that got a little extra toasty, these were some of the best graham crackers I have ever had. Like I said, there is just something about homemade graham cracker that is just so much better than the store bought kind (probably the freshness, lack of preservatives, ingredients you can pronounce). You can actually taste the subtle hints of molasses and honey. 

Also, I love that they are a bit sturdier than the average graham cracker, making them ideal for some s’mores! Don’t you hate it when you are trying to assemble your s’more and your graham cracker breaks? Me too! I will be sharing more oh how I turned these grahams into s’mores this week! Stay tuned! 


[yumprint-recipe id=’124′]

/ Filed In: Cookies, Cookies New, Eat
Tagged: cookies, crackers, graham crackers, molasses, s'mores

Pretty Bicycle Cookies

August 7, 2017

This past Sunday I spent a couple hours making cookies for a friend of ours who is moving to start her next adventure in life. I wanted to send her off with some cookies and these pretty bicycles with baskets of flowers somehow popped into my mind. Do they have anything to do with her move or where she is going? Nope. I just thought they were pretty. 

How can anyone turn down these pretty bicycles in cookie form? It makes me what to immediately go buy a blue bicycle even though the last time I rode a bike I nearly broke my leg. Clearly the person who coined the phrase “it’s just like riding a bike” had never met me. 

I digress…

You may be thinking that piping an entire bicycle with royal icing is extremely hard. While not the easiest thing to pipe, it’s actually just about as easy as tracing!

As I demonstrated in this post, you can easily trace just about any image onto dried royal icing with tissue paper and an edible ink pen. They trace over your image with royal icing. Easy peasy lemon squeezy!

For the flowers in the bike’s baskets, I painted some background leaves and flowers with gel food coloring that I diluted with some clear extract, like almond extract (sometimes I use vodka). Then I piped over them with some other flowers using my favorite piping tips. 

Here are all the recipes and supplies I used to make the cookies:

  • Royal Icing Recipe (I made 1 batch for about a dozen cookies)
  • Raspberry Lemonade Sugar Cookie recipe from my Summer Cookie Pack (or you can use my Sugar Cookie recipe)

Piping Tips:

  • #2 (small circle) tip for the wheels and body of the bike
  • #1 (small circle) for the pedal and handles of the bike
  • #14 flower tip for the pink rose
  • #24 flower tip for the peach rose
  • #225 flower tip for the white flower
  • #349 leaf tip for the leaves

Other Supplies:

  • Edible ink pen
  • Piping bags
  • Food safe brushes
  • Food coloring
  • Plaque Cookie Cutters

I hope you enjoy these cookies and maybe you will even make them for yourself or a friend! 

 
[show_shopthepost_widget id=”2775305″]

/ Filed In: Cookies New, Decorated Cookies
Tagged: bicycles, cookies, decorated cookies, flowers, royal icing, Spring, Summer

Peanut Butter and Jelly Thumbprint Cookies

August 4, 2017

Apparently, I blinked and July passed by in a flash and now it is August. How did that happen? Summer is almost over and there are back-to-school supplies everywhere. I am not a child under 18, nor do I have any children under 18, but somehow I still get caught up in the back-to-school “season”. I take full advantage and stock up on pens, highlighters, notebooks. (binders, pencil pouches…don’t judge.) It’s also a great time to get nostalgic about my favorite school lunch: the peanut butter and jelly sandwich.

I love peanut butter and jelly. Love. There are very few foods I truly love (who am I kidding, there are lots), but this one is at the top of the list. Last year around this time I made peanut butter and jelly cupcakes, and oh my were they delicious! So when all those school supplies popped up in Target a few weeks ago, I got a hankering to make another pb&j treat, this time in the form of these peanut butter and jelly thumbprint cookies. 

Like any good pb&j, it starts with the peanut butter. In this case, a peanut butter cookie. If you have a favorite recipe, you could probably sub that in, instead. But this recipe is perfect for making thumbprint cookies since they spread out just enough and are soft, not crumbly.


Start by mixing the butter, sugar, and peanut butter together until they are light and fluffy. Then mix in the egg and vanilla. Lastly, incorporate the flour, baking soda, and salt.

When I mix up cookie dough, I tend to do a lot of mixing up until the point I add the flour. Once the flour is added, you run the risk of developing a really tough cookie (something about the gluten in the flour). But before the flour is added, mix away to your heart’s content! 


After a quick rest in the fridge, form the dough into small ping-pong ball or smaller sized balls (I like to use my handy dandy cookie dough scoop for that). Then roll them around in sugar. I used turbinado sugar, which is more coarse, but regular granulated sugar would work just fine.


Bake these cookies for about 15 minutes. Then as soon as you take the out of the oven use the back of a teaspoon to form the little indentation for the jam. You can also use the end of a wooden spoon, handle of a rolling pin, or your thumb. But I find the teaspoon works perfectly.

A good pb&j is only as good as the j. In my opinion, raspberry jelly is the only jam/jelly/preserve that should be in a peanut butter and jelly sandwich. Strawberry is too sweet, and grape is too artificial. Raspberry is the perfect amount of sweet and tart to balance out the creamy peanut butter. But you can pick whatever jam/jelly/preserve you like to spoon into the centers of these cookies (just know that if you pick anything other than raspberry, you chose poorly…just kidding…sort of…not really).

Can you tell I feel strongly about my jelly?

I am just passionate about my pb&j. And equally as passionate about these cookies, because they combine two of my favorite things: peanut butter and jelly and cookies!

[yumprint-recipe id=’122′]

/ Filed In: Cookies, Cookies New, Eat
Tagged: cookies, jelly, pb&j, peanut butter, raspberry, thumbprint cookies

Water Color Fruit Cookies (+ NEW Sugar Cookie Recipes!)

June 23, 2017

I am really excited about this post for a couple of reasons. First of all, I love these cookies. They are some of my favorites to date! I have been loving this painting on cookies technique that I picked up over the past couple of months. It’s actually somewhat therapeutic to sit and paint. Plus, with watercolor, you don’t have to be so precise and exact, which I certainly appreciate! 


The second reason I love this post is that each one of the watercolor fruit cookies represents the flavor of the cookie! I have been playing around with different flavors for a couple months and settled on four that will be my (actually, you have already seen them in the rotation) my go-to cookie flavors for Summer (and probably beyond). 

But I will get to the flavors in a second. First let me show you how I painted the cookies! (P.S. It’s super easy!)

So the trick is to “water down” your food coloring with a bit of a clear alcohol or extract, like almond extract. You don’t want the color to be TOO pigmented, or else it won’t look like water color. Then I just mixed my colors until I found a shade I liked and painted directly on the dried icing. There is no science to it at all! I did have pictures of water color fruit up in front of me while I did this so I had something to work off of. But after a while, I just did what I thought looked good. 

Now back to these cookie flavors. 

I know I share a lot of sugar cookie recipes. So instead of posting all the recipes here, or sharing them one by one over the course of the Summer, I decided to put together a little mini recipe e-book with all four recipes which you can get here. Each recipe is not only delicious, but I spent a lot of time in Photoshop making them pretty, too! That way you can print them out and save them for the next time you want to make some wonderful cookies. 

The lemon cookie is lemon-mint flavored and is absolutely refreshing and delicious! The raspberry cookie is a raspberry lemonade flavor, which reminds me of my all time favorite summer drink. The strawberry is strawberry and honey flavor which is subtle and sweet. And finally the lime cookie is lime and sea salt flavored which almost tastes like a margarita! (As I was decorating, I couldn’t help but think of the Willy Wonka line “the snozeberries tastes like snozeberries!”)

Also, I should mention that these recipes are not my normal sugar cookie recipe with a couple extracts thrown in. I re-developed my sugar cookie recipe just for Summer! It’s lighter and softer than normal. Plus the flavors are all natural! They are not engineered for a flavor extract, which makes the cookies that much more wonderful and delicious! 

If you do end up downloading the e-book and trying out the recipes, I would love to know what you think. Also, if you like this idea, I already have some thoughts on another e-book for the Holidays!

 
[show_shopthepost_widget id=”2717110″]

/ Filed In: Cookie Decorating 101, Cookies New, Decorated Cookies, Eat
Tagged: cookie decorating, cookies, lemon, lime, raspberry, strawberry, sugar cookies, Summer, water color

Red White and Blue Fringe Cookies

June 16, 2017

These cookies are a little bit different than what I normally make. For starters, there are no royal icing flowers anywhere! Actually, there was little to no piping done on these cookies at all (who am I?). What makes these cookies so different is the fondant! Those fringes you see are actually made with colored strips of fondant that have been expertly and delicately haphazardly cut into a fringe. 

I forget how much I like working with fondant! It’s a lot like working with that molding clay or play-doh as a kid. If you mess up, you can just roll it back into a ball and start over again!

I do have a couple tips for working with fondant, however. 

  1. Keep unused fondant wrapped in plastic wrap and in a zip top bag. It will dry out quickly. As you will see in the video below, I also kept the balls of fondant that were waiting to be rolled out under a damp cloth.
  2. Buy white fondant and color it whatever color you want. Sure they sell lots of colors of fondant, but sometimes you want a particular shade of blue or pink. Which leads me to…
  3. When coloring fondant, it’s best to use food-safe gloves. Something I clearly didn’t take to heart as evidenced by the food coloring stains on my hands. 

See how easy fondant is? When I just don’t feel like making royal icing or piping tons of cookies, I turn to fondant. I didn’t even pipe the bottom layer of white royal icing you see on the cookie. Nope! I dipped the cookie into the icing. All of those cookies you see in the pictures above were dipped. Yeah, I was feeling extra lazy that day! But they still turned out really cute!

Recipes and items used:

  • Royal Icing Recipe
  • Sugar Cookie Recipe
  • Fondant dyed with red and blue food coloring
  • Fondant roller
  • Brushes
  • Cookie cutters

 
[show_shopthepost_widget id=”2709655″]
 

/ Filed In: Cookies New, Decorated Cookies, Eat
Tagged: 4th of July, cookie decorating, cookies, fondant

Red White and Blue Water Color Gingham Cookies

June 9, 2017

If you have stopped by my Instagram feed (@followtheruels) lately and seen any of the cookies that I have posted in the past couple months, you know that there are two things I am obsessed with: water color and royal icing flowers. Adding a little floral touch to cookies is such an easy way to make a plain ol’ cookie look super fancy.

It’s the same for the water color effect. Painting cookies is also a very easy thing you can do to decorate cookies, especially if you don’t like piping. 

So that’s what I did, I combined my love of gingham (I wear a lot of gingham) with my two current favorite cookie decorating techniques to make these water color gingham cookies that are PERFECT for 4th of July!


Here are all the recipes and tools that I used:

  • Royal Icing Recipe
  • Sugar Cookie Recipe (I actually used a special flavor of sugar cookie that I will be sharing very soon!)
  • Food Coloring 
  • Almond Extract
  • Paint Brushes
  • Paint Tray
  • White Drop Flowers – #107 tip
  • Red Rosettes – #18 tip
  • Blue Drop Flowers – #225 tip
  • Light Blue Rosettes – #16 tip
  • Pink Dots – #5 tip

So festive and patriotic, aren’t they? I love them even with all of their flaws and wonky lines. It makes them look a bit more homemade and rustic. 

You could of course use some guides to make sure your lines are straight. But sometimes the character is in the imperfection, am I right?

 
[show_shopthepost_widget id=”2702796″]

/ Filed In: Cookies New, Decorated Cookies, Eat
Tagged: 4th of July, cookies, decorated cookies, flowers, gingham, royal icing, Summer, watercolor

Chocolate Hazelnut Espresso Biscotti 

May 15, 2017

Today is my mom’s birthday. So everyone say “Happy Birthday” to my mom!

This year I am actually home for my mom’s birthday (and Mother’s Day). Normally I would just send her a card and maybe mail her a gift, but this year since I will be there (which I think is a gift in and of itself) I thought would kick it old school and hand make her something like I did when I was a kid. Maybe a card made out of construction paper and a macaroni picture frame. 

No. If I know my mom, there are two things she would like more than a handmade card and a macaroni picture frame (there are a lot more than two, but let’s just pretend): a nice big cup of coffee and something chocolate. Fortunately, I have the perfect recipe to make that will check both boxes! Chocolate Hazelnut Espresso Biscotti!

Biscotti is the absolute perfect treat to make for anyone in your life who is a coffee drinker. But these chocolate-hazelnut variety amp up the flavor even more. Chocolate and coffee are made for each other. 

Since this was my first time making biscotti, I referenced a few difference recipes, but this one looked the best so my recipe is largely based on it. The only difference is that my dough is flavored with both good quality cocoa powder and ground espresso. I like using the same espresso grounds that I would use to make my morning latte. They are already so finely ground and taste delicious. 

I used Gourmesso’s Colombia Arabica espresso, which was perfect because it was strong and flavorful, but not overpowering. Gourmesso, for those of you who are not familiar, makes Nespresso compatible capsules that are way cheaper than your typical capsules. For references, the Gourmesso capsules I used were 49 cents per capsule. A similar Nespresso capsule costs 74 cents. Not too shabby! Plus they have a ton of flavors and varieties.


Making biscotti dough is exactly like making cookie dough. First cream together the butter and sugar. Add in the eggs and vanilla, then mix in all your dry ingredients. 


What you will end up with is a pretty wet dough. It’s not going to be the consistency of your classic chocolate chip cookie, it will be very very sticky!

Split the dough in half and form them into two logs. Definitely wet your fingers down when you do this so that the dough doesn’t stick to your hands. 

Bake them until they have expended and cracked a bit. They will have a crispy crust, but be a little spongy when you press down on the top.

Once your biscotti logs have cooled to room temperature, you can cut them into slices. Use a serrated knife to get nice even cuts. Then lay the slices on the baking sheet, cut side down and bake again until they are nice and crunchy!


Now, these biscotti are good plain. They do not need any help. But a little extra chocolate never hurt anybody. Especially espresso-spiked chocolate. 

I mixed in a bit more espresso grounds into some melted chocolate to get this rich chocolate flavor. You may be wary about this step if you don’t want a strong espresso flavor. But really espresso just brings out the chocolate flavor more than actually imparting it’s own flavor. Like I said, they are a match made in heaven.


There are a couple techniques to top these with some chocolate. You could just take a spoon and drizzle chocolate on top. Or you can dip them in chocolate. 

To dip them, pour the melted chocolate into a tall skinny glass. Then dip the biscotti in and immediately press into some chopped hazelnuts. 

Um, yum right? Coffee and chocolate are a great combination. But hazelnuts and chocolate are just as good (if not better!). 

I dare you to have just one biscotti with your coffee or espresso. I had about five with my Vanilla Gourmesso Coffee. The crunchy cookies just soaked up the delicious coffee and it made it impossible to stop at one. 

Sounds like the perfect homemade birthday gift for mom! 

[amd-yrecipe-recipe:159] 

/ Filed In: Cookies, Cookies New, Eat
Tagged: biscotti, chocolate, coffee, cookies, espresso, hazelnuts, Latte

How to Trace onto Cookies (Mother’s Day Cookies)

May 12, 2017

This is part two of my Mother’s Day cookie post. There was just too much to fit all in one post! Floral monogram cookies AND lean how to trace on to a cookie?! I think we would have all been overwhelmed. Plus, I think this technique deserves it’s very own post since it can be used for so many different things: fonts, images, designs, patterns, etc. Anything you don’t feel comfortable drawing freehand with icing, you can do using this technique to trace onto cookies!

But before you can decorate, you need some cookies! For these Mother’s Day cookies I flavored my favorite sugar cookie recipe with a touch of lavender and a whole lot of vanilla bean.


The resulting cookie was this subtly floral vanilla cookie that was so good. I was so afraid of going overboard with the lavender, that I just added a touch to the sugar before I mixed the sugar into the butter. I blended the sugar and lavender together so that each bite would have a very subtle hint of it. 

I didn’t feel the need to hold back on the vanilla, however. I went all out! You can see all the lovely vanilla beans sprinkled throughout the dough. If you look closely, you can sort of make out pieces of lavender, too!

Okay, so now let’s get to the reason you are here: learning to trace onto cookies!

It’s simple and requires only a couple special tools that you may already have around your house or kitchen: tissue paper and a edible food marker. 

First find an image or text that you like and print it out onto normal paper. (I found this one on Google Images and thought it would fit perfectly on my plaque cookies.) 

Top your printed image with a sheet of clean tissue paper. Then trace the image with an edible food marker.

Take the sheet of tissue paper with your image or font traced on it and place it onto of the cookie, making sure that it’s perfectly situated. 

Trace over it again with the edible food marker. Don’t press too hard because you will risk tearing the tissue paper. You should be able to trace two to three times with the same tissue paper. 

Viola! The text or image has now transferred onto the cookie! From here you can just trace over the ink with your icing. 

I say that like it’s no big deal. Tracing the image with the icing is probably the hardest part. I still have yet to master writing cursive letters with icing. 


Since the original image had some flowers on the bottom, I added some flowers to my cookies. 


Now they go perfectly with the other floral monogram cookies I shared on Wednesday. 

Wouldn’t you mom love these cookies? Well, even if you are reading this far from Mother’s Day I hope you have learned how to trace text or an image onto your cookies. I promise, this trick will come in really handy!

[amd-yrecipe-recipe:160]

/ Filed In: Cookie Decorating 101, Cookies, Cookies New, Decorated Cookies
Tagged: cookie decorating, cookies, lavender, Mother's Day, royal icing, tracing, vanilla

Mexican Wedding Cookies

May 4, 2017

These little sugar coated Mexican Wedding cookies may be more closely associated with Christmas, but cookies are pretty much good year-round in my book! Especially these cookies. They are like little pecan packed shortbread cookies dusted in powdered sugar. Yum, right?!

I’m not sure what took me so long to make Mexican Wedding Cookies. They are so much easier to make than I originally thought. Like I said above, they are almost identical to a shortbread recipe – butter, sugar, and flour – with just the added ingredient if pecans.


First cream together butter, sugar, and vanilla. Then mix in the flour until you have a pretty dry dough. Something that looks kinda dry, but when pressed together forms a ball.

Next add in the nuts. You can use either walnuts or pecans. I actually used a mix of both because I was just short of pecans.

I ground up my nuts into a course meal, where some of the nuts were finely ground, and some were still in chunk form. I also measured my nuts after they were ground. So I had one and a half cups of ground nuts, not one and a half cups of whole nuts.


Next, because this dough is fairly dry, I recommend that you let it chill for at least 30 minutes so that all the moisture from the butter gets soaked into the flour and all the flavors meld together.

It will also be a bit easier to roll into balls once its chilled. I used my little cookie scooper to get evenly sized cookies.


Finally, its time to roll them in some sugar! This part is fun! Also, very messy. Your kitchen will look a little questionable when all is said and done. 

I dropped let my cookies cool off a bit before I dropped them into the powdered sugar. The hot cookies will form a gummy sugary coating. I wanted a light powdery coating,  so I let them cool until they were warm, but not to hot to handle.

And if thats not enough sugar for you, you can sprinkle even more on top. As you can see, that’s what I did. I love me some sugar.

But don’t worry about these being overly sweet. They are perfectly sweet. The cookies themselves actually have very little sugar in them. You bite in and have the initial taste of sugar, but the interior cookie is nutty and buttery!

Plus they are just so pretty! It’s like they are the perfect cookie for a wedding. Who knew? 

[amd-yrecipe-recipe:157]

ITEMS USED 

[show_shopthepost_widget id=”2665447″]

/ Filed In: Cookies, Cookies New, Eat
Tagged: christmas cookies, cookies, Mexican, pecans, powdered sugar

  • Newer Entries
  • 1
  • 2
  • 3
  • 4
  • 5
  • 6
  • Previous Entries

Follow

Hey There!

Hey there, I'm Lindsey. I'm a number cruncher by day and a home cook and baker by night. While I love to eat healthy and find fresh and healthy alternatives for my favorite foods, I will never turn down dessert! Life is all about moderation, right?

Recipes

  • All Recipes
  • Breakfast
  • Appetizers
  • Salads
  • Main Dishes
  • Side Dishes
  • Desserts
  • Drinks

Favorite Finds

[show_lookbook_widget id=”388783″]

Theme by 17th Avenue · Powered by WordPress & Genesis