• Home
  • Eat
    • Breakfast
    • Appetizers
    • Main Dishes
      • Chicken
      • Beef
      • Seafood
      • Healthy Dishes
      • Paleo Dishes
      • Salads
    • Desserts
      • Decorated Cookies
      • Cookies
      • Bars and Brownies
      • Cakes and Cupcakes
  • Shop
    • Cookie Decorating Supplies
    • Bakeware
    • Cookware
    • Kitchen Gadgets
    • House
  • About
    • Contact
    • Bucket List
  • Cookie Decorating 101

Follow the Ruels

Easy Mulled Wine Recipe

December 24, 2017

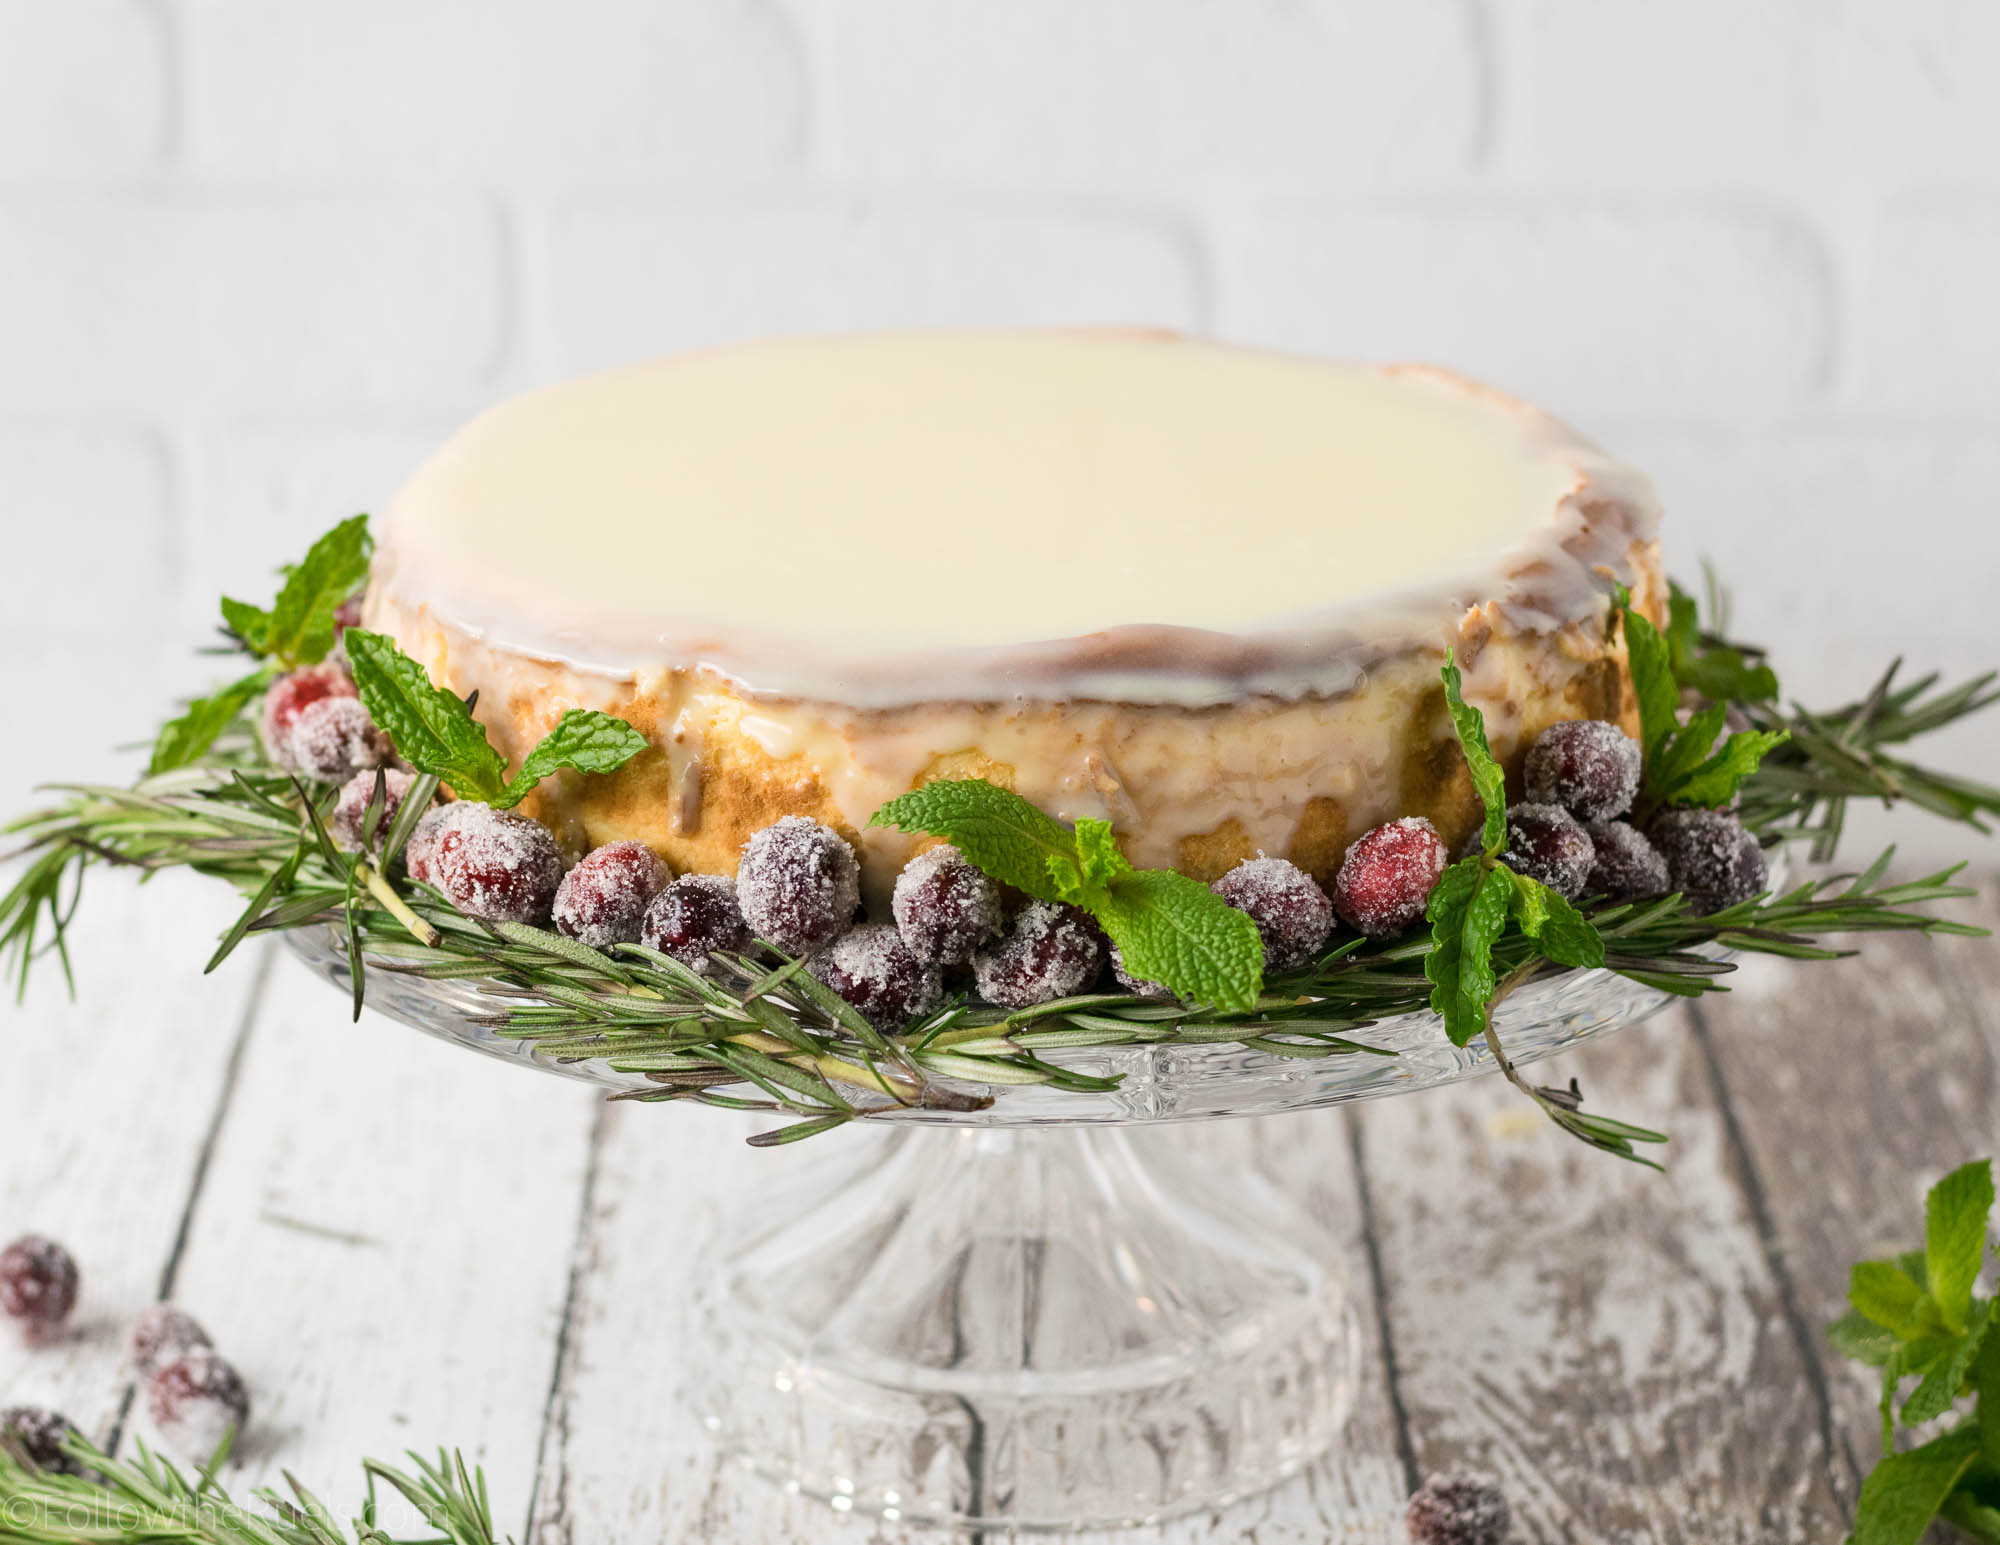
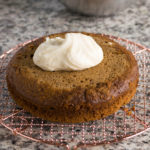
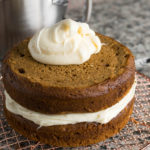
Christmas is just a few short hours away, which means that hopefully, you have done all of your holiday shopping, you have your holiday outfit picked out, and you are already enjoying time with your family.

If you answered no to the first two, I am not sure how much I can help with that. But if its spending time with your family you are worried about, I have just the trick: mulled wine!

Mulled wine is the perfect holiday drink for those who are not into eggnog. First of all, it’s wine. Who doesn’t need a little wine when hanging out with the fam? Also, it’s a warm drink which is great for these cold winter days. Lastly, it’s actually really easy to make! Of course, that is key when you are running around the day before Christmas trying to tie up any loose ends. 


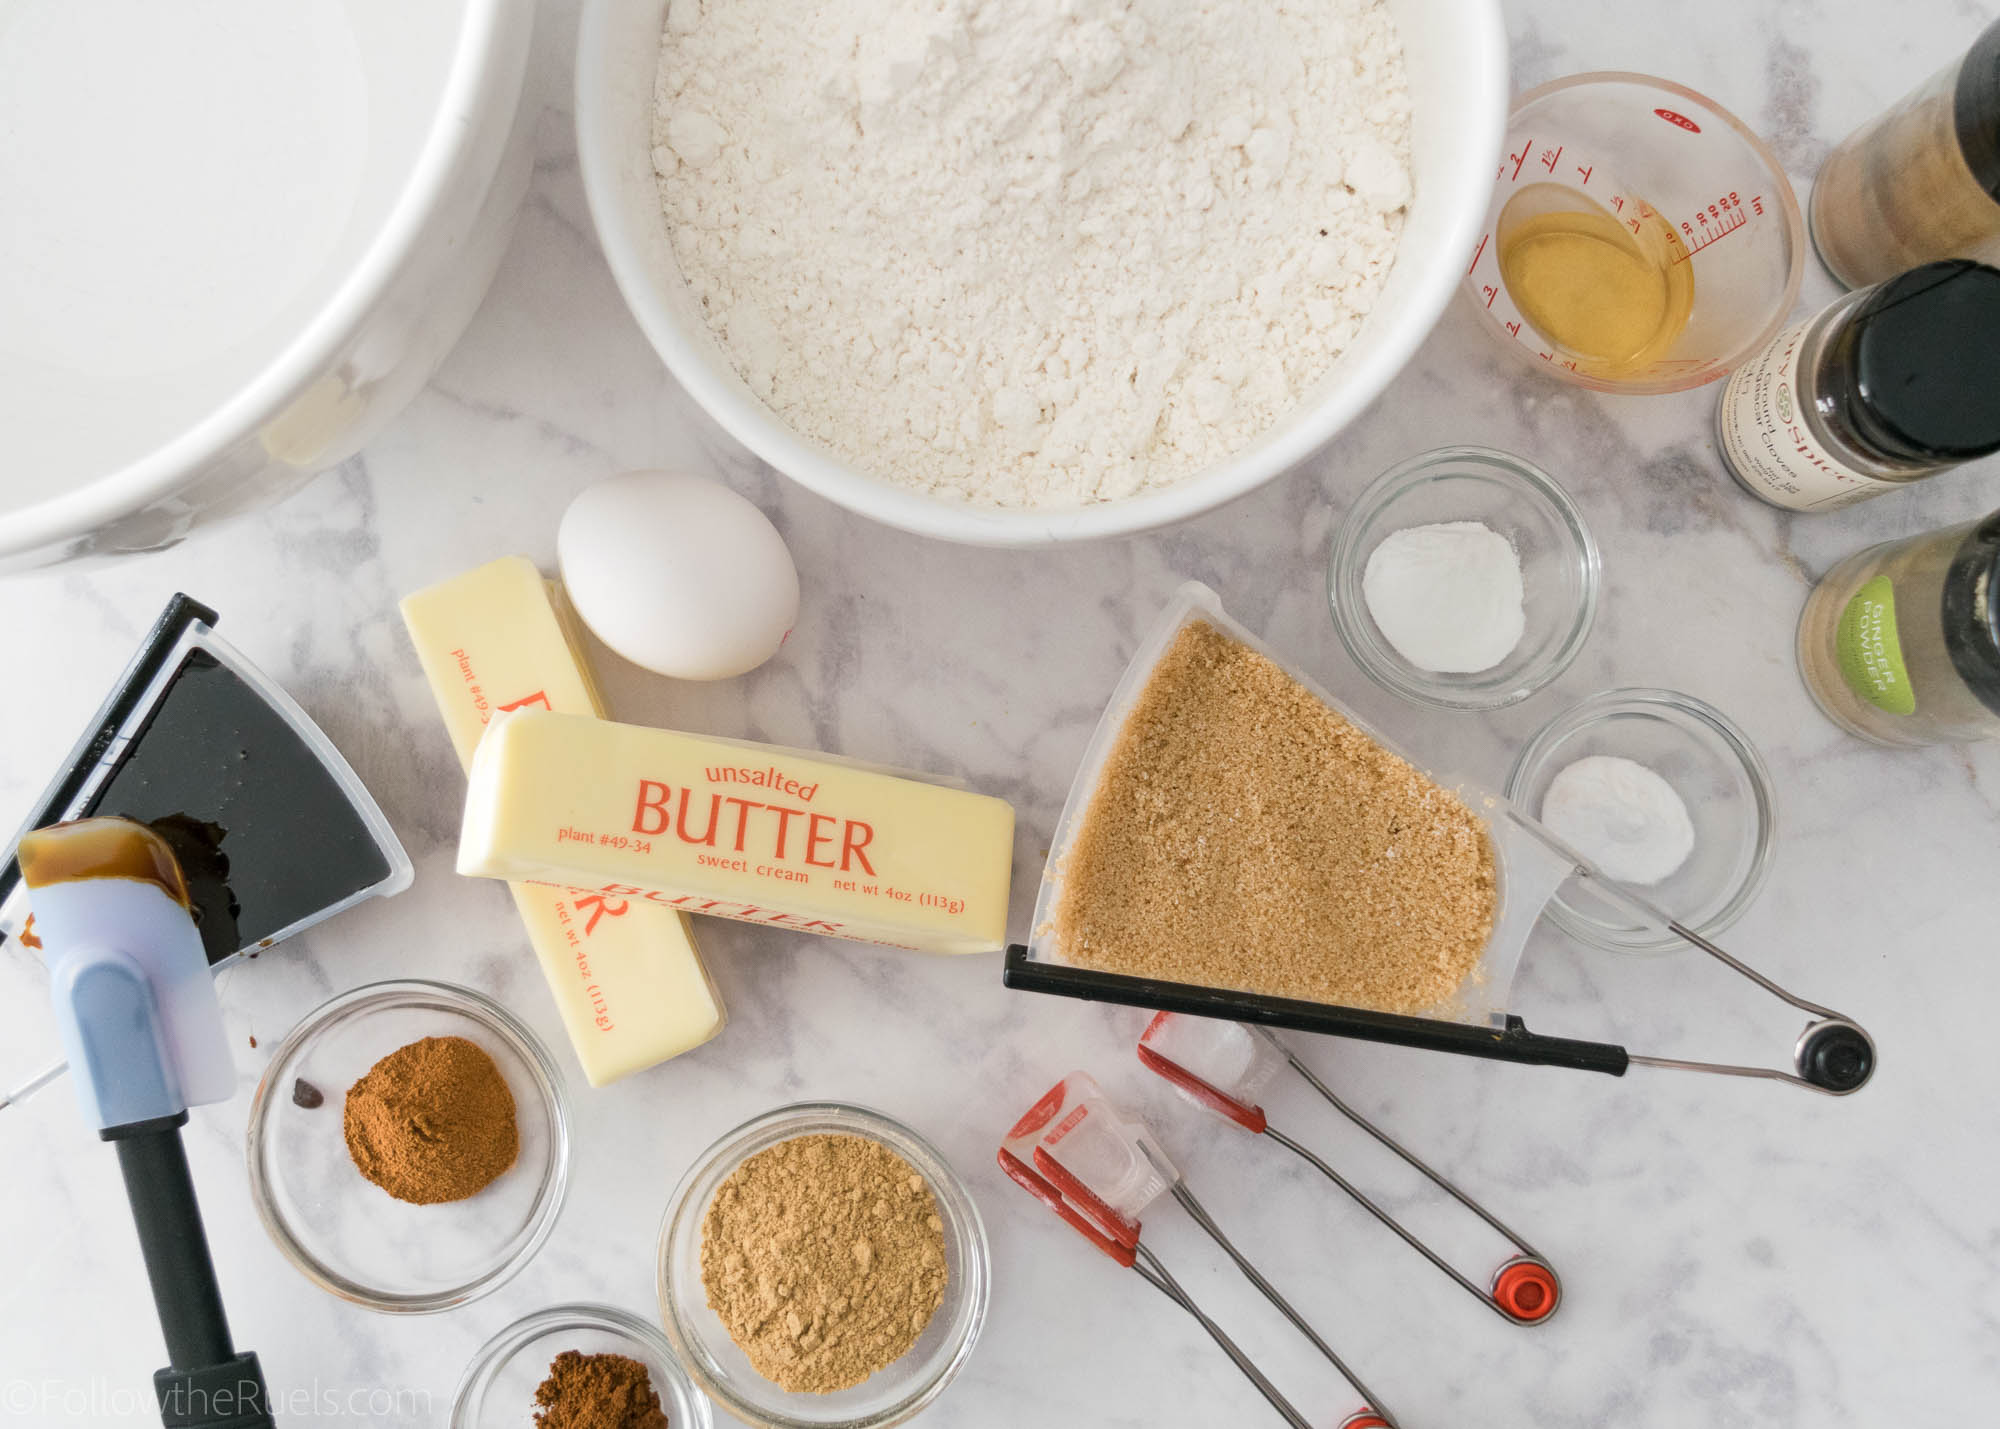
Mulled wine gets its flavor from oranges and some classic Christmas spices. Mainly, clove, cinnamon, and cardamom. 

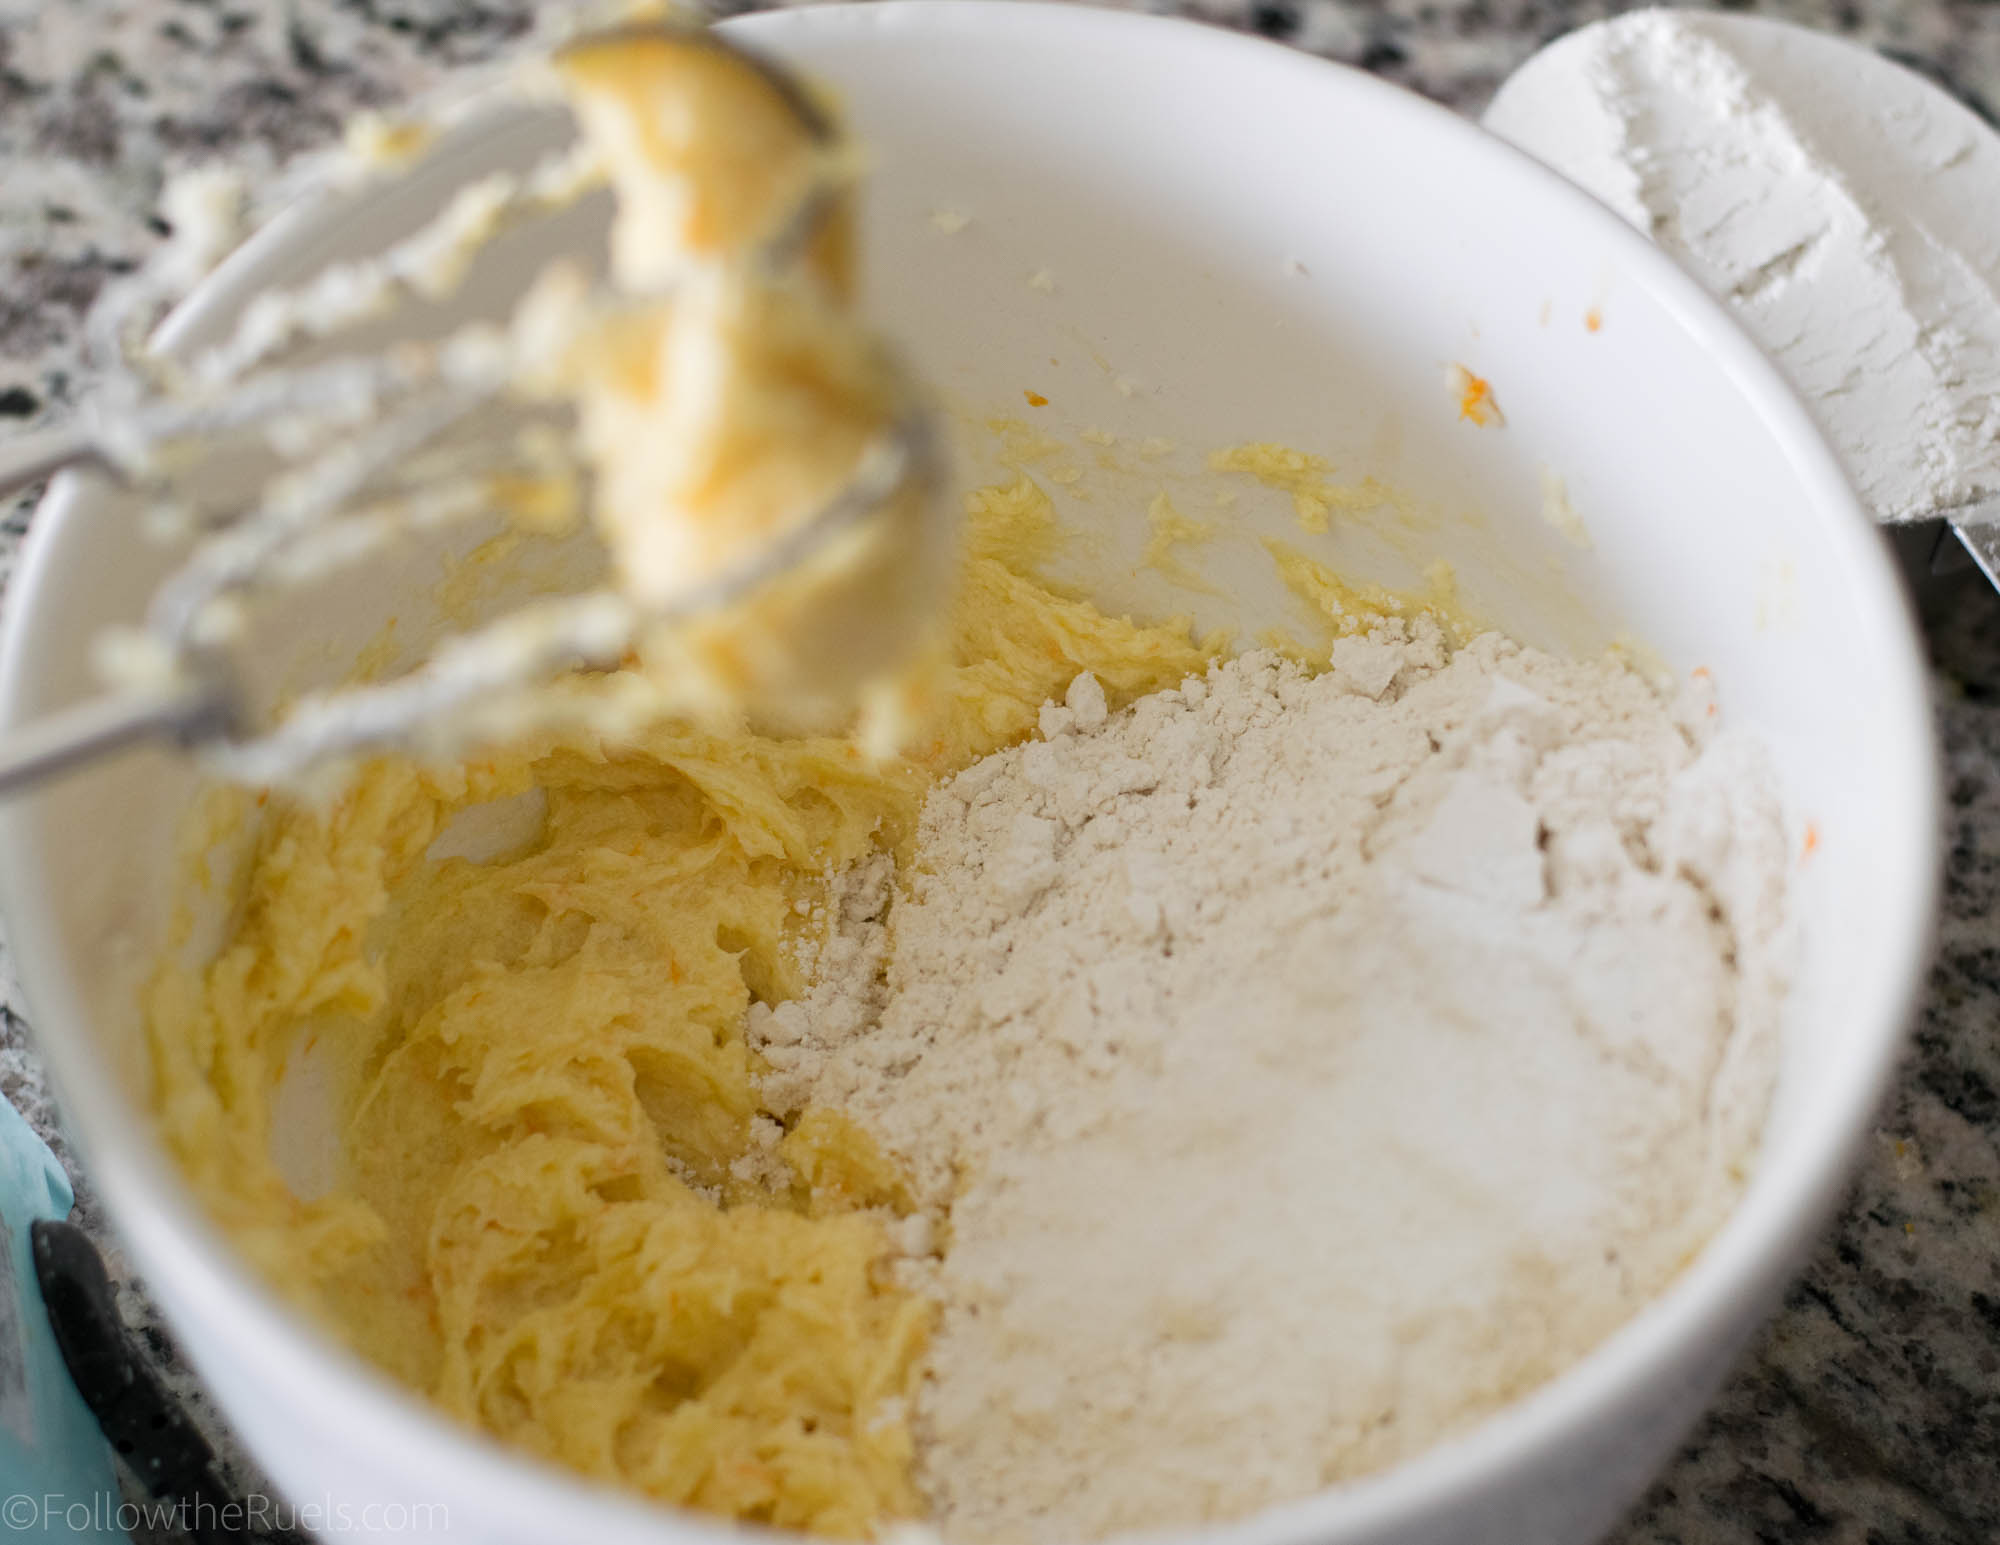
First, bring water, sugar, and the orange peel to a boil to get all those flavors out of the orange zest. Then add the spices. Hopefully, you already have some whole spices on hand (if not, you may need to make a quick trip to the store). Let the spices get all cozy with the orange zest, then turn down the heat before adding in the wine. 

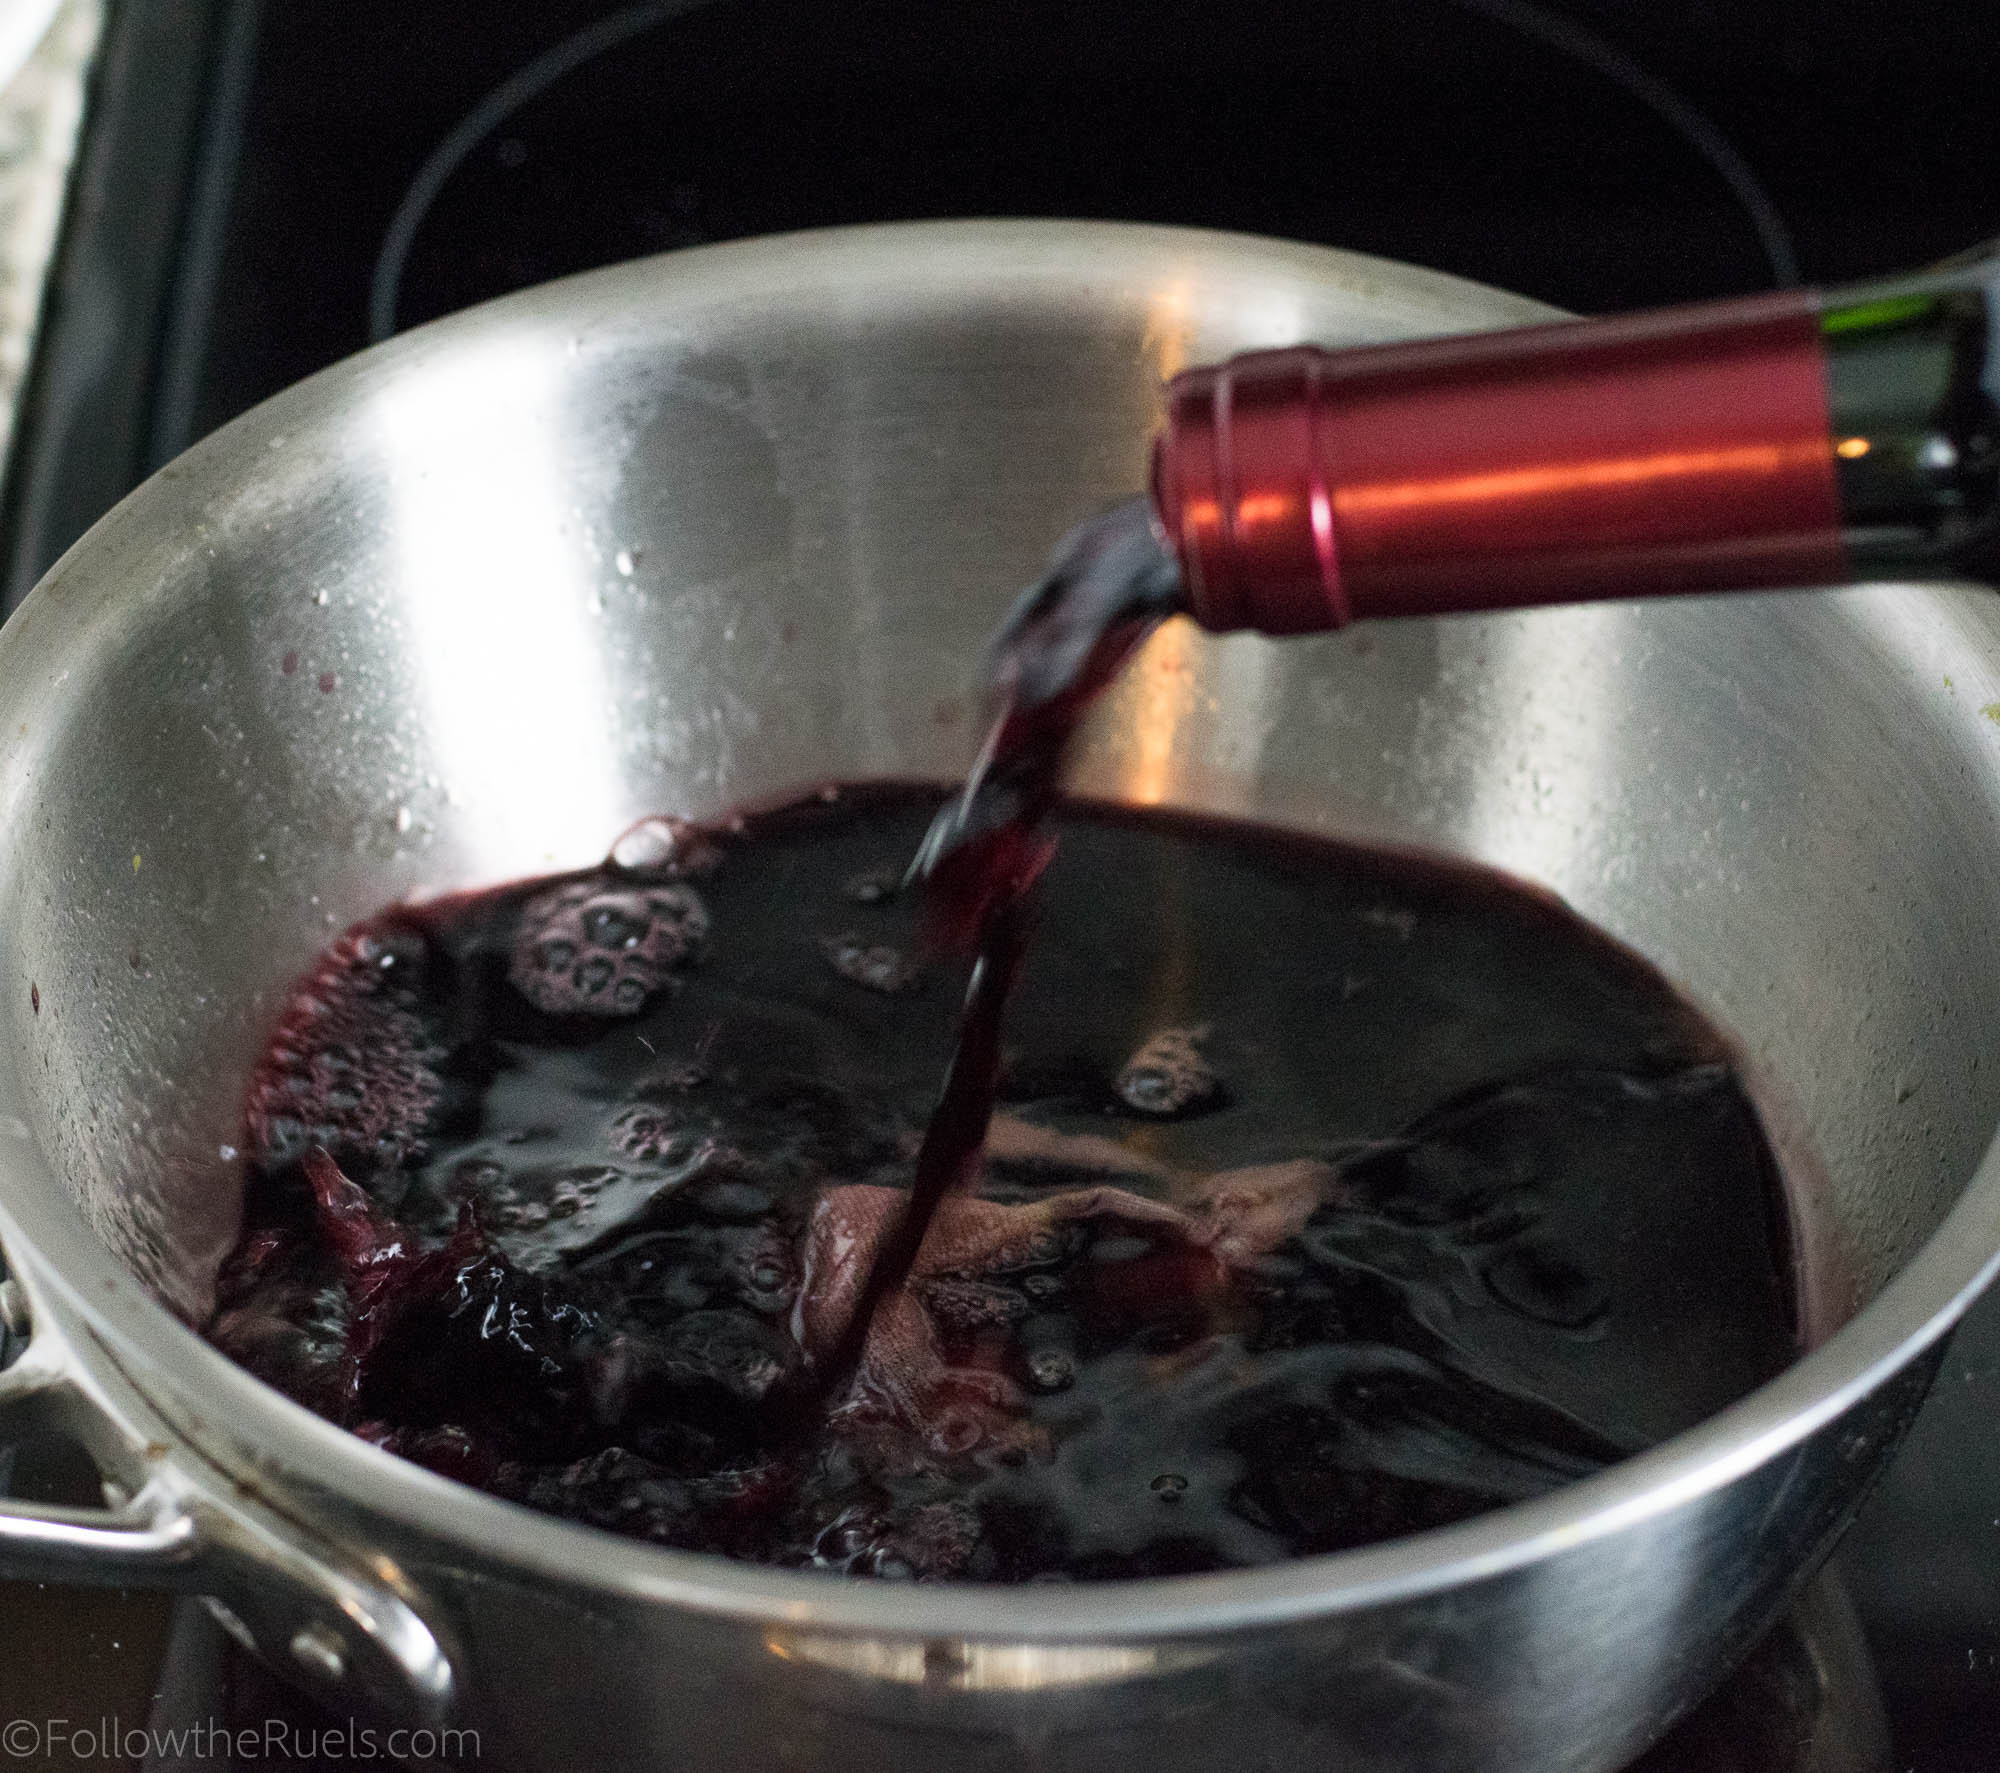
It is very important that you don’t boil the wine.

I repeat, DON’T BOIL THE WINE!

If you boil the wine, all of the alcohol will cook out of the wine, which is the opposite of what you want to happen. 

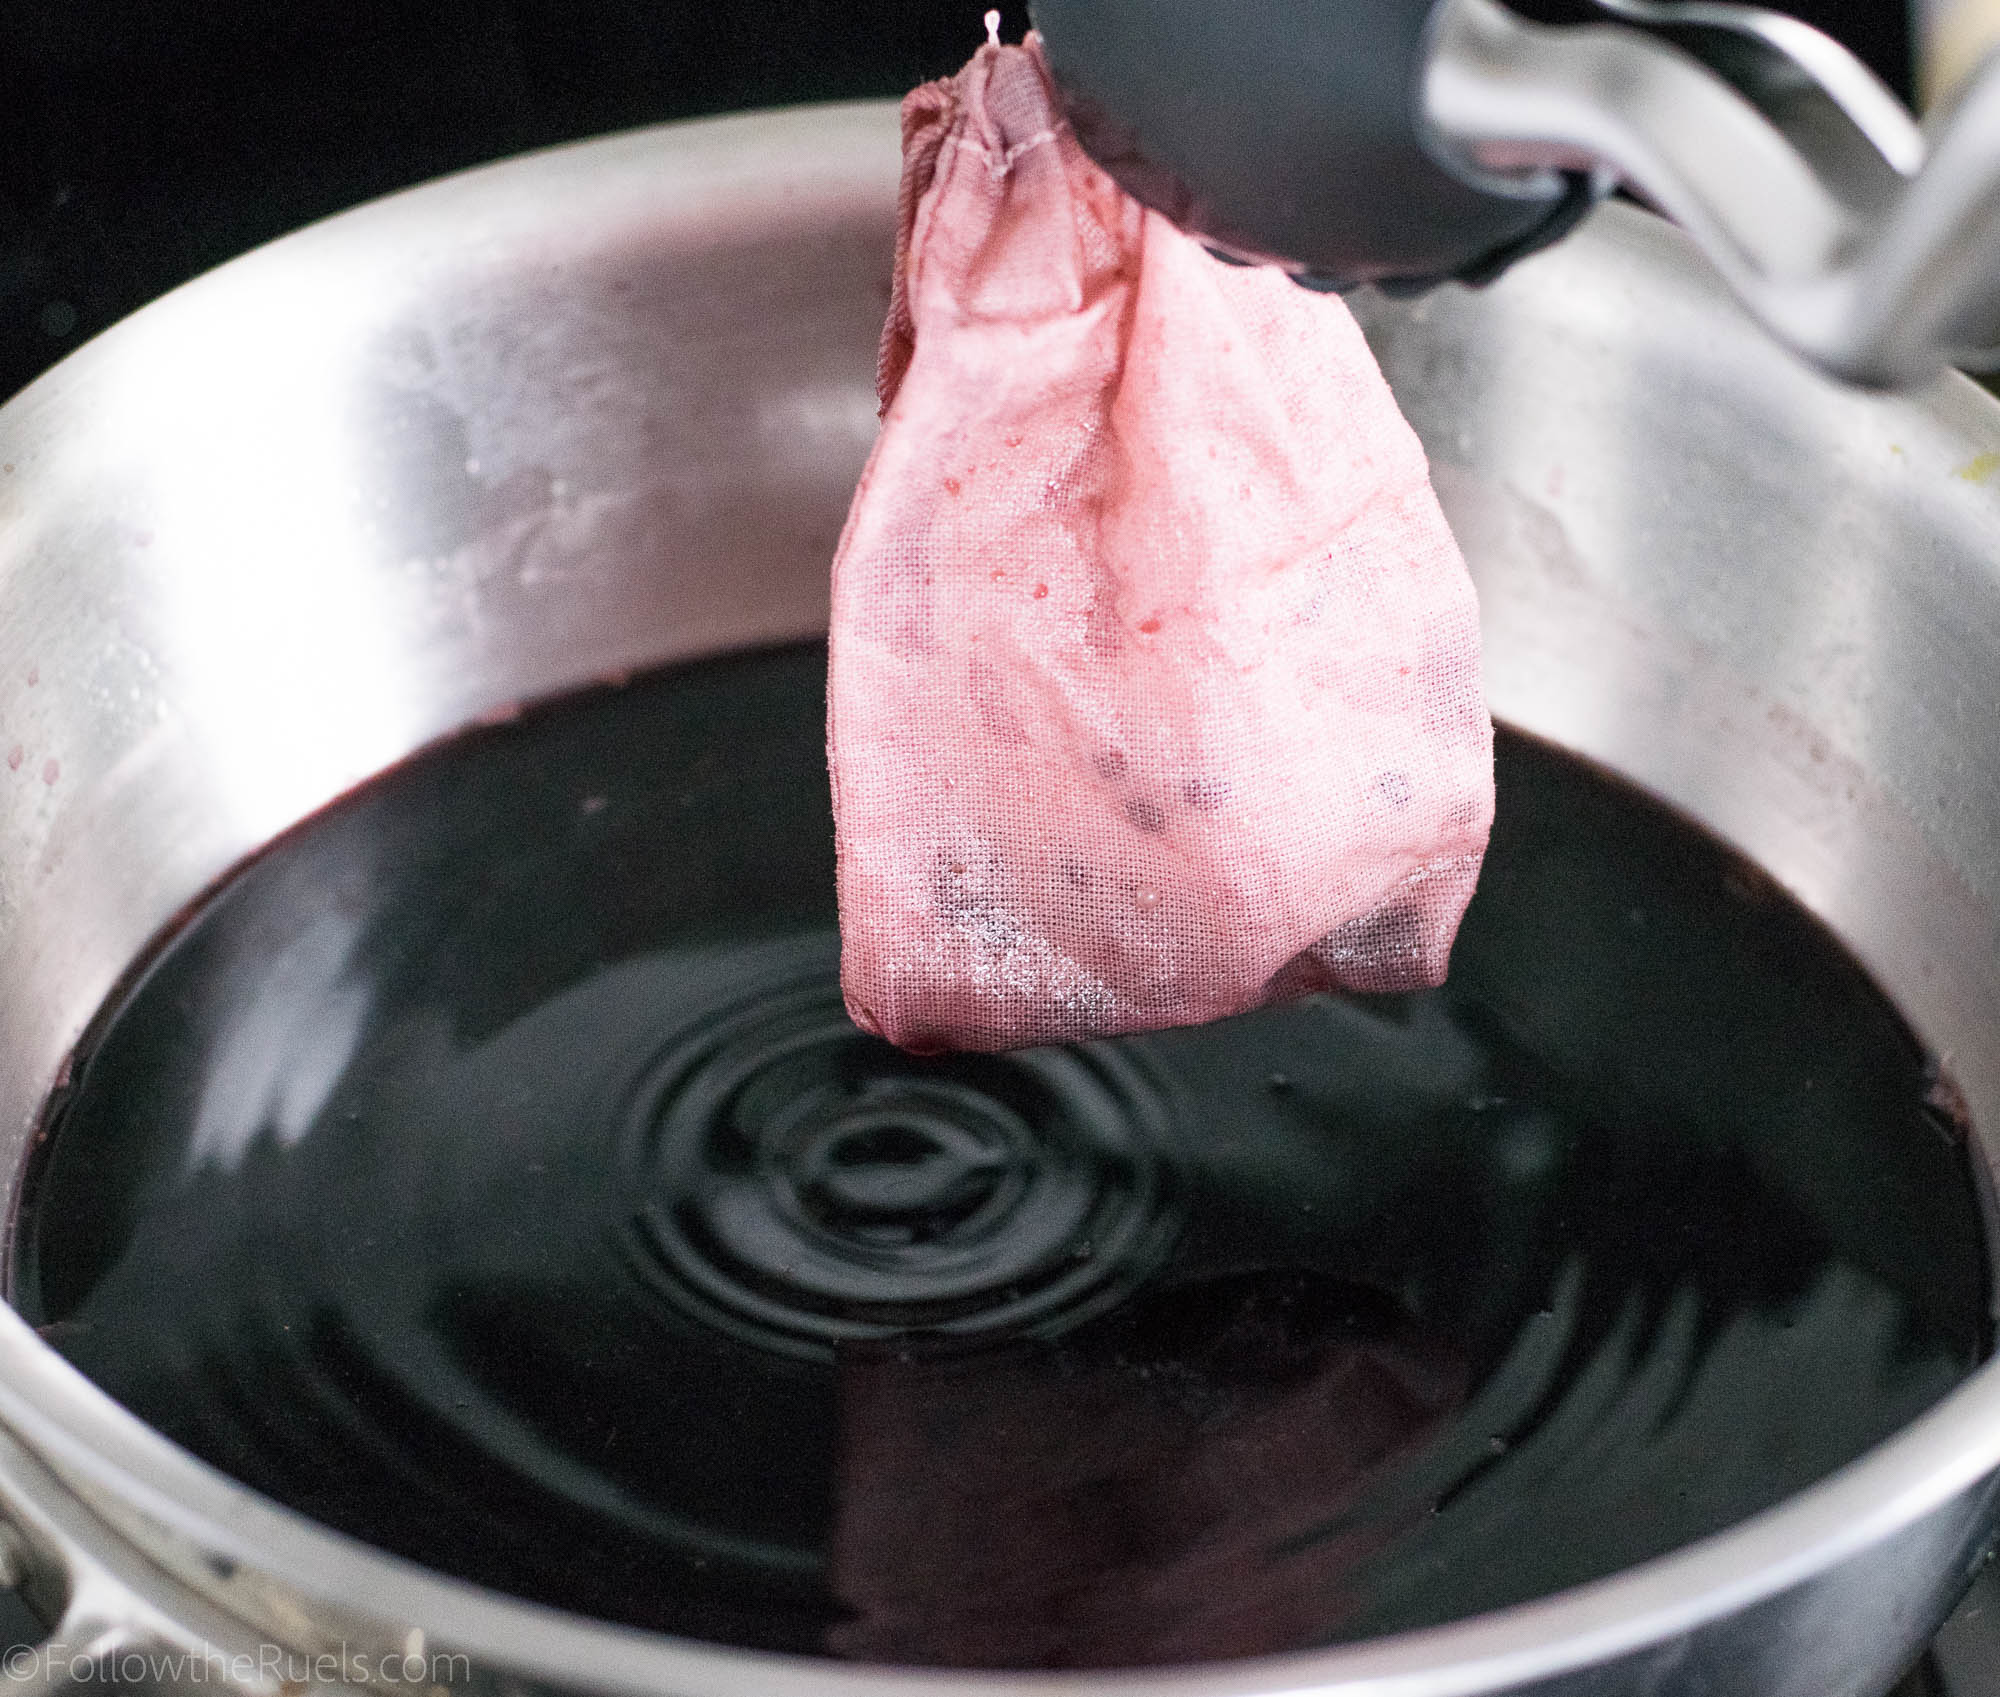
After about 15 minutes, remove the spices from the wine. Now it’s ready to serve.

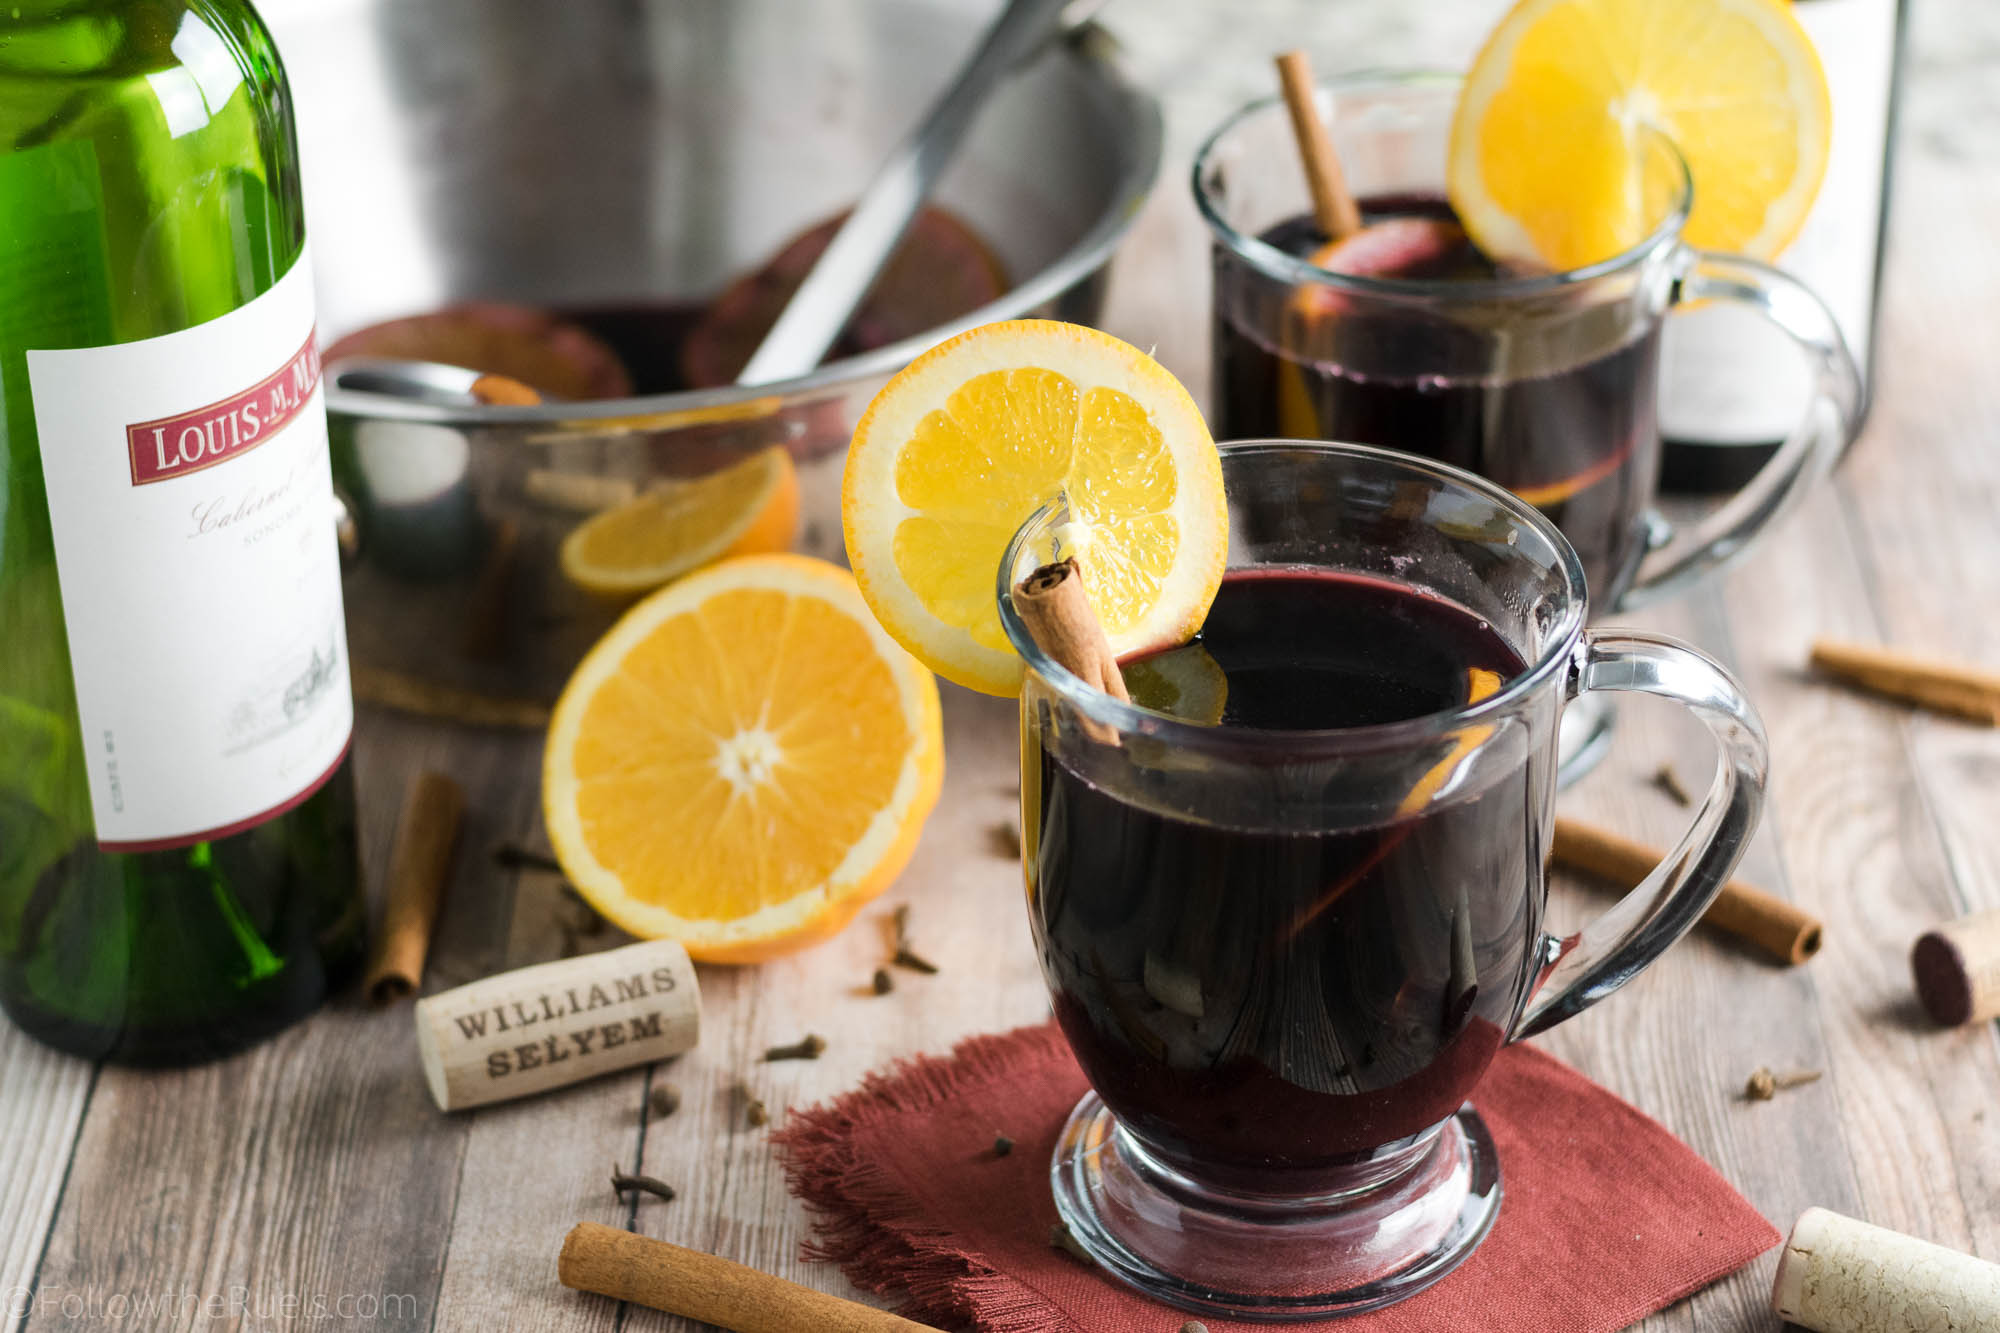
I like to add some orange slices to the wine to add a little more orange flavor. 

For those who haven’t had mulled wine before, it reminds me a lot of sangria with a little extra spice. It delicious, trust me. 

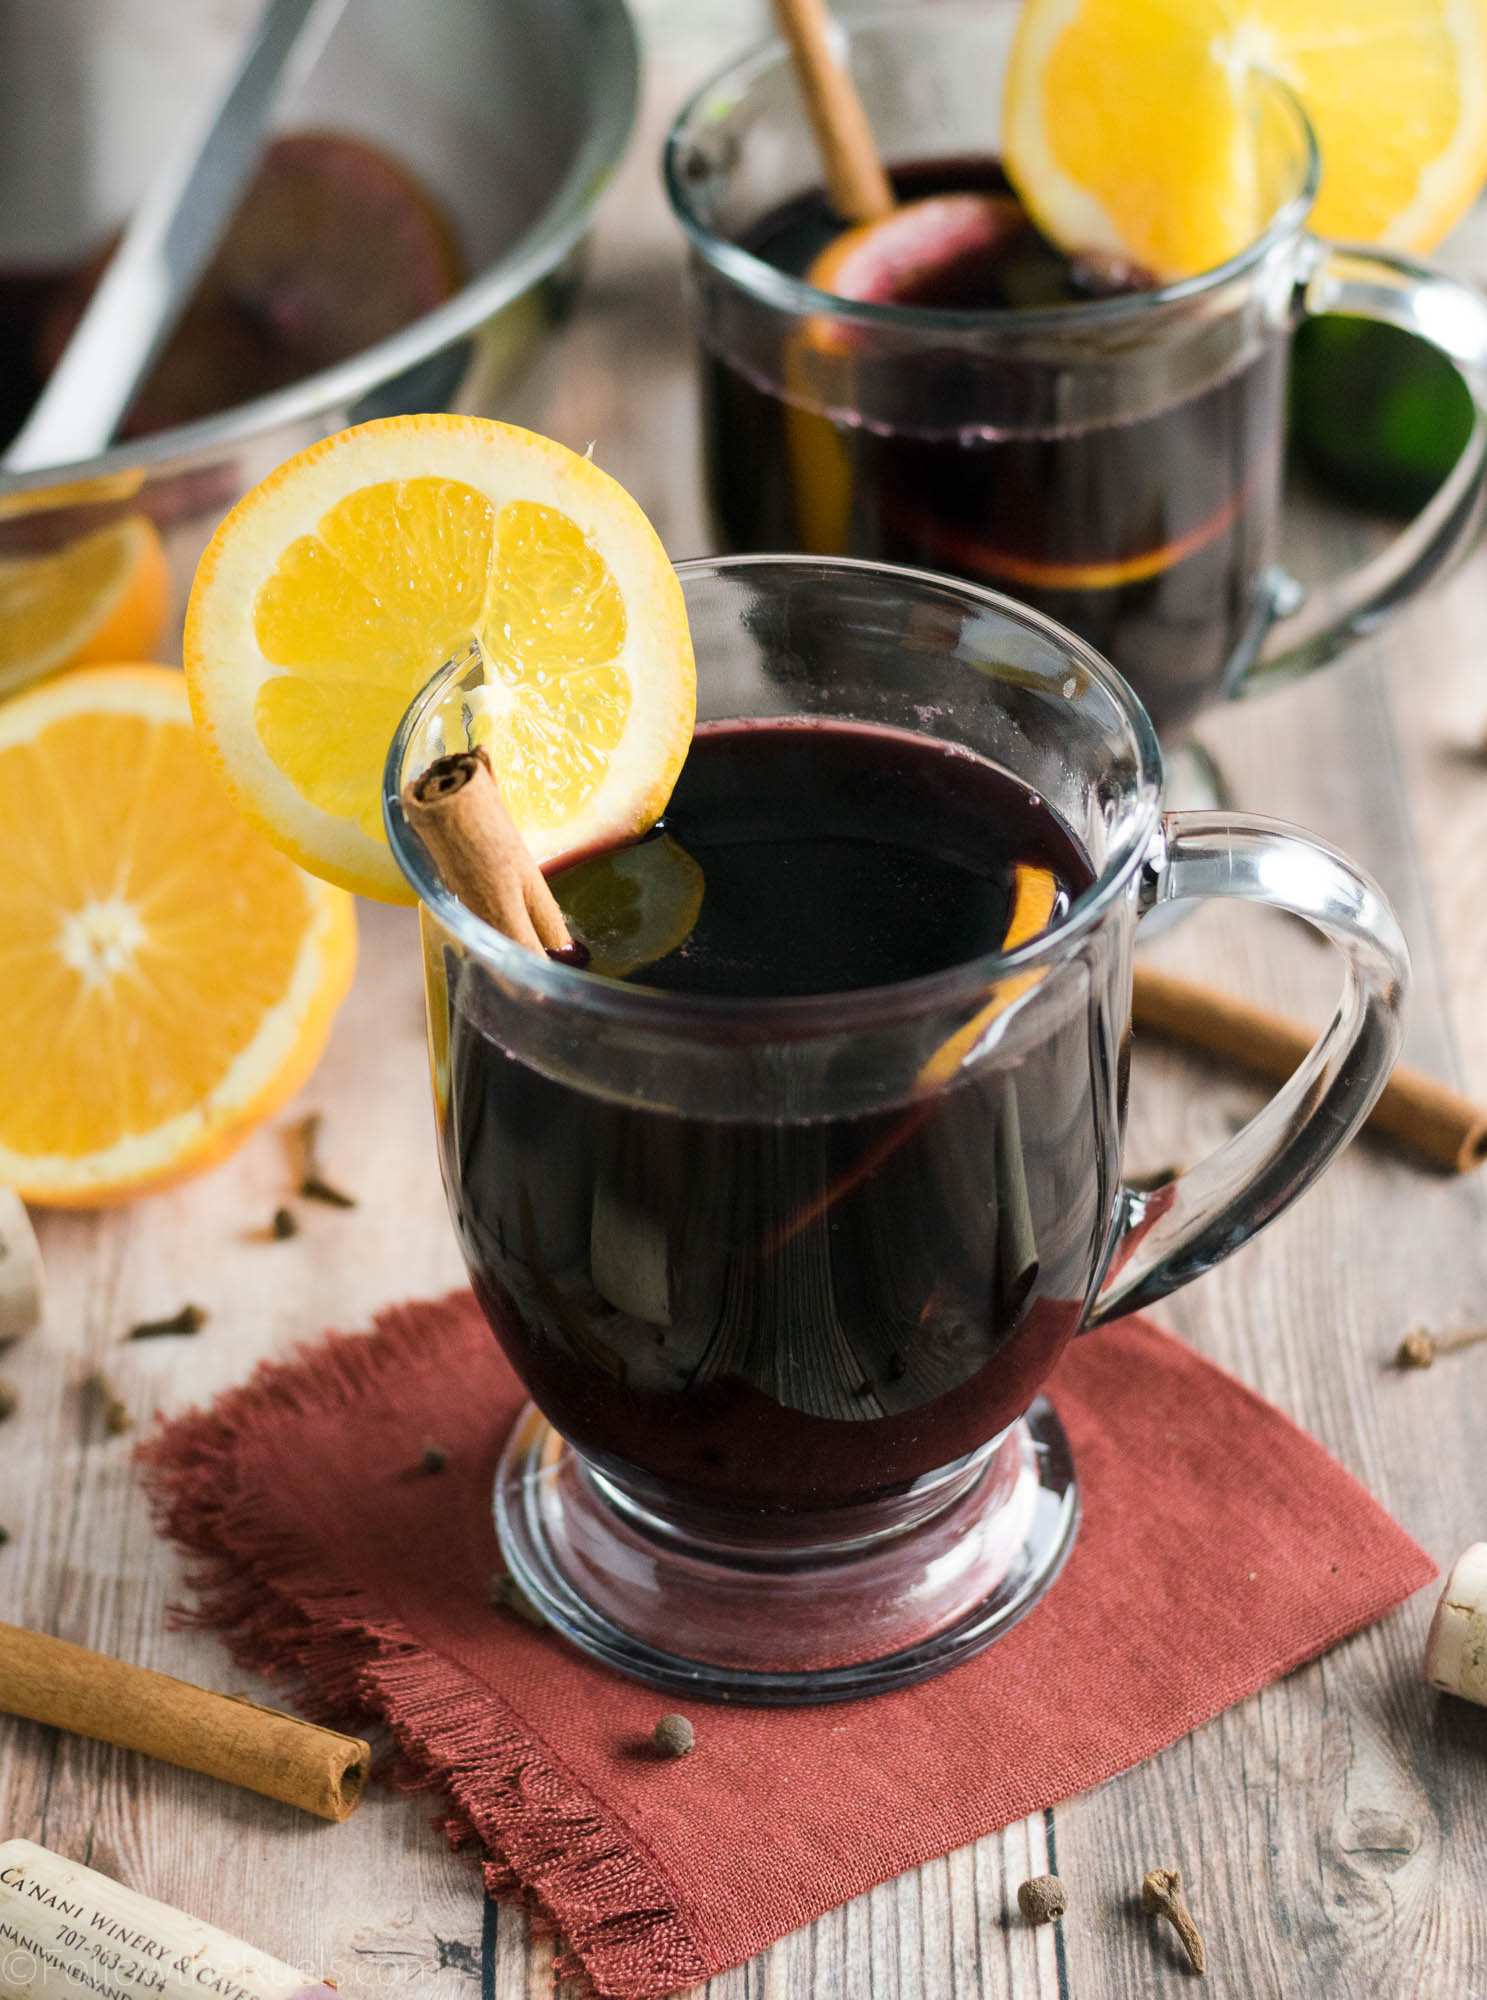
And it’s perfect for holiday parties, family gatherings, or when you can’t decide between a warm drink and wine. With mulled wine, you can have both!

[yumprint-recipe id=’153′] 

/ Filed In: Drinks
Tagged: Christmas, cinnamon, clove, drinks, holidays, mulled wine, wine

Classic Danish Butter Cookies with a Modern Twist

December 21, 2017

Danish butter cookies are one of my favorites! I don’t know about you, but around the holidays one of those blue tins always popped up around my house. Whether we got it as a gift or bought it to give as a gift, which I would proceed to eat anyways (sorry, Mom). 

This year I decided to try my hand at making my own Danish butter cookies, which turned out to be so much easier than I anticipated. The dough is just like sugar cookie dough, but not quite as dry. You want to be able to pipe it through a piping tip after all.

I also wanted to mix things up a bit and color my dough for the various shapes of the cookies. I kept it plain for the classic pretzel shape, green for the wreath, and red for the rose.

Since Thanksgiving I have been trying to think of ways I could make flower shaped cookies, using my piping tips. Little did I know the answer was right under my nose!

For the roses I used a 2D tip,the wreath a #32 tip (although you could go a tad bigger), and for the pretzel I used a #10 tip.

Now, the hardest part about these cookies is piping them. Recruit someone with strong forearms, like a baseball player, bowler, tug-of-war champion to do this part for you. 

If you don’t have access to anyone like that, just use two hands to pipe out the dough.

Once they are piped, they can get sprinkled with some sugar or go straight into the oven.

While they do puff up and spread out in the oven, they still maintain their cute shapes! I mean, those roses….I love them! 

I think these butter cookies will be one of my go-to Christmas cookies from here on out. Not only are they a classic, but you can give them a but of a modern touch with some food coloring and different piping tips. 

[yumprint-recipe id=’152′]

/ Filed In: Cookies, Cookies New
Tagged: butter cookies, Christmas, cookies, holidays, piping tips

Peppermint Bark Chocolate Shortbread Cookies

December 19, 2017

How many versions of peppermint bark are there? Tons, I bet. I think I have made half of them, myself. It’s a holiday staple!

But there can always be more, right? So I thought I would add this cookie version of peppermint bark into the mix. (Although, I’m sure someone else has already thought of this, so it’s just new to me.

What I like about these peppermint bark chocolate Shortbread cookies is that they are, well, cookies. I would pick a chocolate cookie over a chocolate bar, any day of the week. But for those that need a chocolate fix, there is a nice white chocolate coating.


Speaking of which, for the white chocolate coating of these peppermint bark cookies I just melted down some white chocolate chips and also tossed in a drop or two of peppermint extract to give it even more peppermint flavor.

Then I dunked the cookie right in the melted chocolate. You could also spread the chocolate on the cookie, or drizzle. It’s up to you!

As for the cookie itself, I made a chocolate shortbread, which is one easy cookie to make. Classic shortbread is just butter, sugar, and flour. These obviously also have some cocoa powder.

The beauty of these cookies is that you can use whatever cookie you want, be it homemade or store bought. 

Oh yes, my friends, I am not above buying some store bought chocolate cookies, dipping them into some chocolate, sprinkling with candy cane pieces, and calling them homemade. Okay semi-homemade. 

It’s the holidays. We’re all busy. Work smarter, not harder.

Okay, rant over. Now onto the finishing touche…candy canes!

I threw a couple candy canes into a zip top bag and then smashed the heck out of them until I had itty bitty pieces. Some we’re a bit ittier and bittier, but I liked the contrast of larger chunks and candy cane dust.

While the chocolate was still wet, I sprinked a generous amount of candy cane pieces of top.

And that’s it! Delicious homemade (or semi-homemade) peppermint bark chocolate shortbread cookies. 

Make them asap before the holidays are over!

[yumprint-recipe id=’151′]

/ Filed In: Cookies, Cookies New, Desserts, Eat
Tagged: chocolate, Christmas, holidays, Peppermint, peppermint bark, shortbread, white chocolate

White Chocolate Cheesecake

December 18, 2017

Cheesecake is a holiday favorite in my family. My mom has been making it for holiday parties longer than I can remember. 

For my office holiday party this year, I kept the family tradition alive and made my own version of mom’s cheesecake by adding a little bit of white chocolate. 

Not only is there white chocolate IN the cheesecake, but there is also white chocolate ON the cheesecake. The white chocolate in the cheesecake is very subtle so the extra chocolate on top helps boost that white chocolate flavor so people aren’t confused about what they are eating. 

How I Made It 

Let’s start with the crust, shall we? Because this is not your ordinary graham cracker crust. Although that would also be very nice. This is a Biscoff cookie crust. You know the cookies Cookie Butter is made out of? The cookies have a nice cinnamon spice flavor to them which is perfect with the white chocolate. 

Like a graham cracker crust, I first smashed them into bits with my handy food processor until the cookies resembled something between breadcrumbs and sand. 


Then I mixed in some butter so that all the crumbs would stick together and poured them into the bottom of a springform pan. 

To evenly distribute the crust around the bottom of the pan, I, first, used my hand to cover the bottom. Then I used the bottom of a heavy glass to tap them down into a smooth crust. 

For the cheesecake itself, I first creamed together the cream cheese and the sugar until they were well combined. 

Then I mixed in the melted white chocolate

Next came the eggs. Cheesecake requires lots of eggs, but I am too impatient to mix them in one at a time. So I just do three at a time.


Last, I added in vanilla (in this case, vanilla bean paste) and sour cream.

Finally, I poured the batter into the pan and evened out the top before popping it in the oven to bake. 

Now, cheesecake takes a little while to bake, so this is typically where I clean up a bit, check email, browse Instagram, etc. until it’s done. 

You will know your cheesecake is done when it is slightly brown around the edges but still has a little wobble in the middle. The center shouldn’t be “wet”, but it will still wobble.

If your cheesecake is browning too much around the edges, then cover it with foil and continue baking. 

After the cheesecake baked, and while it was cooling, I prepared the white chocolate ganache topping. 

I poured hot heavy cream over the white chocolate and let that sit for a bit to begin to melt. 

After a few minutes, I stirred the ganache to make sure all the chocolate pieces had melted. Then I stirred in some butter. 

Once the ganache had cooled to room temperature but was still liquid, I poured it over the cheesecake. 

At this point, my cheesecake had already cooled to room temperature, so it was safe to cover and pop in the fridge. 

You never want to put a warm cheesecake in the fridge, otherwise, the crust and the center will get really soggy and not set properly. 

I let the cheesecake and ganache set overnight in the fridge so that it was ready the next day for the Christmas party.

To dress her up a bit, I added some rosemary, sugared cranberries, and mint around the outside for a holiday wreath look.

Actually, this look was just for photos. When I reassembled the cheesecake at work, I put the cranberries and mint right on top, like you can see here on Instagram. 

Either way, I think it’s a beautiful holiday dessert and it’s delicious, too!

[yumprint-recipe id=’150′]

/ Filed In: Cakes and Cupcakes, Cakes New, Eat
Tagged: Biscoff, cake, cheesecake, Christmas, cream cheese, holiday, white chocolate

Snowflake Peppermint Marshmallows

December 17, 2017

What is better than peppermint and chocolate? I’ll tell you: nothing! Okay, maybe not nothing, but peppermint marshmallows and hot chocolate are pretty high up on my list of favorites after making these snowflake-shaped marshmallows. 

It’s the perfect treat on these cold winter days with Christmas music playing in the background. It just gets you right into the holiday spirit!

As I mentioned in this post, marshmallows are super fun to make but oh-so messy! You really have to be prepared for powdered sugar and stickiness to be all over your kitchen. But I promise it’s worth it. 


Making marshmallows starts with the gelatin. First, you first bloom the gelatin with water until it forms a thick jiggly blob, like really thick Jello. Next, pour boiling (240 degrees to be exact) sugar and corn syrup into the gelatin while you whisk it on low speed. Then, turn the speed up high and watch the liquified sugar and jiggly Jello blob magically turn into this light, fluffy, marshmallowy substance.

Once the mixture becomes pretty thick (about 10 minutes of whisking), it’s ready!

Before this whole baking experiment starts, you will want to prepare a baking sheet with parchment paper and powdered sugar. In this case, I also crushed up some candy canes and sprinkled them on the baking sheet so that they sticky marshmallow would have bits of candy cane all over. Yum!

Spread the soft marshmallow on the baking sheet and then sprinkle with more powdered sugar and candy cane dust on top. 

After a few hours, the marshmallow will set and become, well, a marshmallow!

I cut out my marshmallows using various snowflake cookie cutters to make them extra festive, but I did spray them down with some baking spray beforehand so that they wouldn’t stick as much. 

You can cut them out in any shape you like. Candy canes would be fun! Or even just big squares or circles. Eventually, they are all just going to end up in a nice hot cup of hot cocoa!

Which is exactly where my peppermint marshmallows ended up. 

I love that these marshmallows not only taste amazing on their own but when you add them to the hot cocoa, they lightly flavor it so that it becomes peppermint hot cocoa. It’s delightful!

Don’t just make these peppermint marshmallows for yourself, though. These would make a great gift or stocking stuffer! Marshmallows last quite a while, so as long as you store them in a bag, people can enjoy them long after the holidays!

However, I have no room to judge you if you keep these all for yourself. I didn’t share these with anyone! They didn’t last long enough. 

[yumprint-recipe id=’149′]

/ Filed In: Desserts, Eat, Other Sweets New
Tagged: candy canes, Christmas, cocoa, holidays, homemade, marshmallows, Peppermint

Holiday Wreath Cookies using Piping Tips

December 12, 2017

It may not surprise you to find you that I have been doing lots of holiday baking since Black Friday. Honestly, I wish I could be doing more. I had so many fun decorated cookies in mind for the holidays, but I don’t have time to do them all. 

Despite that, I did find time to make some holiday wreath cookies using my favorite piped flower techniques. Really, they are no different than these floral letters I made for Fall or for Mother’s Day. I love making cookies like this using piping tips because they look very elegant and detailed, but you and I know that they are actually pretty easy!

I used the same techniques to add a flower garland to a Christmas tree and to add flowers around a royal icing banner. Piping tips are so versatile and make the cookies look professional.

The piping tips I used for these cookies were:

  • #14 and #24 to make roses, 
  • #74 to make the large leaves, 
  • #379 to make the small leaves, and
  • #16 to make the green star-shaped filler

For some of the cookies, I added some dots just for a bit more color and texture, but I didn’t even bother with a piping tip for those, as a zip-top bag or piping bag does the job.

There are so many fun things to do with piping tips and they are one of my favorite tools to use to decorate cookies. As you can see, they are actually pretty easy to use if you use the right consistency of icing. 

Anytime I use piping tips, I use a stiff consistency icing. That means the icing is very thick. When I mix up my icing, typically I add some water to thin it down. For stiff consistency icing, I barely add water because I want the icing to form a stiff peak when I lift the spoon up from the surface. 

That ensures that all those little details from the piping tip stay put and don’t settle into a blob of icing.

And if you are wondering why my cookies are green, it’s because I made my pistachio sugar cookie recipe from my Ultimate Christmas Cookie guide. But really, you could tint any cookie dough green or leave them plain. 

Tools used:
[show_shopthepost_widget id=”2951522″]


/ Filed In: Cookies New, Decorated Cookies, Eat
Tagged: Christmas, cookies, flowers, holiday, piping tips, royal icing, wreath

Gingerbread Village Cake

December 8, 2017

 Every year around Christmas time I convince myself that I should make a gingerbread house. From scratch. But I never actually go through with it. I think I have been burned by gingerbread houses in the past. The pieces never fit together well, so they end up just awkwardly stuck together. Or the house ends up collapsing under the weight of all the candy and decorations (maybe I am a little heavy handed with the candy and decorations). 

So this year, instead of kidding myself I decided to make a gingerbread village cake! It was the best of all worlds because I could still bake the gingerbread from scratch and decorate them to my heart’s content, but I didn’t actually have to build a whole house! Except for the two little ones on top. But those were so cute, I couldn’t resist (I used this cookie cutter)

I took inspiration for my little gingerbread village cake from the canal houses in Amsterdam. I am not sure why. I certainly have never been to Amsterdam or seen a canal house in person, but that is that came to mind. 

I made the houses from my gingerbread cookie recipe and iced them with royal icing. I just cut them by hand into various shapes and sizes. Some tall and skinny, some short and fat. Some with flat tops, other with pointed tops. There wasn’t really any rhyme or reason to it, other than I wanted some variety.

Then I went to decorating. I used images from Google to help me figure out the windows, roof, doors, etc. 


For the cake itself, I adapted this recipe for a gingerbread latte cake. Talk about scrumptious! Oh my word, this cake was good! The best part, though, was the cream cheese frosting on top.


After the layers of cake were baked then chilled, I leveled them with a serrated knife. I topped the first layer with a huge dollop of cream cheese frosting and spread it evenly around the surface with an offset spatula. Then set the next layer on top of that and repeated with another huge dollop of icing.

This time, I spread the icing all the way down the sides to cover most of the cake. I didn’t do a huge layer of icing, I just wanted to catch all the crumbs first so they didn’t end up in the outer layer of icing.


After a quick chill in the fridge, just long enough for the icing to set up, I finished icing the whole cake and set it on my cake stand. The beauty of this cake is that you don’t have to be an expert icer because you are just going to cover it with the gingerbread houses.

The little houses just stick right onto the cream cheese frosting. Almost a little too well. I wanted to move one of the houses and it just lifted the icing right along with it. 


To attach the little gingerbread men, I put a dot of the frosting on the back an stuck them right on top of the house.

I did finish off a couple of the houses with a few other decorations. I had these cute holly sprinkles that I stuck right on using a bit of left over royal icing. And I added some candy canes and left over Christmas tree cookies. 

While this cake may have been a bit more work than a gingerbread house, I think I like it even more. For one, when you are done you can eat the cake along with the gingerbread cookies. It’s the best of all worlds! If you also want some candy in there, throw a few more candy decorations on top. That way there is a little something for everyone!

[yumprint-recipe id=’148′] 


/ Filed In: Cakes and Cupcakes, Cakes New, Eat
Tagged: cake, Christmas, cream cheese frosting, gingerbead house, gingerbread, gingerbread latte, holidays

The Best Gingerbread Cookies

December 5, 2017

What is your favorite holiday cookie? Mine is gingerbread! To me, gingerbread cookies signal the Christmas season. I rarely have a gingerbread cookie between January and November, so their deliciousness reserved for that very specific time of year when my stepmom makes loads of her famous gingerbread cookies.

This year I made it my mission to perfect my gingerbread cookie recipe. I made cookies last year that were good, but not good enough in my opinion. So I took a couple lessons from my stepmom’s recipe and completely reformulated the recipe. And by that, I mean that I just changed the measurements of a couple ingredients. But it sounds pretty impressive when I say “reformulated”, doesn’t it?

Oh yeah…and I made a video!

What is a bit different in these cookies is that I used both baking soda and baking powder. I didn’t want the cookies to be so hard you would break your teeth, but I also didn’t want them puffing up and spreading out so that when I baked a gingerbread man he would end up looking like the State Puft Marshmallow Man. The combination of the two makes these cookies rise just enough that they are super soft right out of the oven. Even after a few days, they are still nice and airy and not as hard as a rock.

The other trick to getting soft, not super crunchy cookies is to roll them out rather thick. Of course, I use my favorite rolling pin bands to ensure that my cookies are all about 1/4″ thick. 

After all is said and done, these cookies turn out to be perfect (in my opinion). Super flavorful without being spicy. Slightly soft without losing their shape. They are perfect for decorating, but also don’t need a lot of decoration if that’s not your jam. You can just dust them with powdered sugar or sprinkles and call it a day. 

What I am saying here guys is that YOU NEED TO MAKE THESE COOKIES!

Sorry for yelling, but it’s that important to me. If you like gingerbread or know someone who does, this recipe is for you! Consider it my early Christmas gift to you. 🙂

[yumprint-recipe id=’147′]

/ Filed In: Cookies, Cookies New, Decorated Cookies, Eat
Tagged: Christmas, cookies, ginger, gingerbread cookies, gingerbread men, holidays, molasses

Panettone Slice-and-Bake Cookies

November 30, 2017

Raise your hand if you have ever had Panettone before? You know, it’s that fruit-speckled bread that they sell in the grocery store around this time of the year. You have probably confused it with fruitcake. 

If I were Panettone, I would be insulted, because Panettone is actually good (seriously, someone tell me where to find a good fruitcake, because I surely haven’t found one). 

It’s a delicious sweet bread that is flavored with orange zest and filled with raisins and other dried fruit. Guess what else would be delicious if it were flavored with orange zest and filled with dried fruit.

You guessed it! Cookies!

(I can turn just about anything into a cookie. If I were a superhero, that would be my superpower.)

And even better, they make excellent slice-and-bake which are great for the holidays. Just whip up a batch of dough, roll it into a log, then slice it up whenever you need cookies. But I am getting ahead of myself. 


These Panettone slice-and-bake cookies get most of their flavor from a generous helping of orange zest. Like all of the orange zest. Just zest that puppy until there is no rind left. Don’t worry about measuring….it’ll be fine. 

The orange zest is mixed with the butter, sugar, eggs, and vanilla. Then the flour goes in next.


Once the dough is pretty well mixed, throw in the dried fruit. I used diced up apricots and a dried berry mix that included raisins, craisins, and dried cherries. The apricots are a little stick when they are cut up, so toss them in a little bit of powdered sugar before adding them to the dough. 

Mix all the fruit into the dough until they are evenly dispersed throughout. Then transfer the dough to a sheet of plastic wrap and roll into a nice log and find a nice place for it in your freezer.

If you want to bake these cookies immediately, well you can skip the slicing step and just spoon them onto a baking sheet. Or you can wait 30 minutes and slice them into 1/2 inch discs and pop them in the oven. You just want to wait long enough for the dough to be pretty firm so that it slices cleanly and easily.

Or you can leave the dough in there until you need it. I wouldn’t wait any longer than 2 weeks (make sure to wrap it up really well if you plan on keeping it in the freezer longer than a few hours) because then you risk the dough picking up any of that freezer stank or general freezer burn. But mostly the former.

Once these cookies come out of the oven, they will be nice and golden brown around the edges, but still nice and soft in the middle. 

These cookies were very different than most cookies I make which are either just plain sugar cookies, loaded with chocolate, filled with caramel, etc. This is certainly the first cookie I have made that had dried apricots! 

Which, by my estimation makes these cookies healthy! I’m sure you can get a full serving of fruit in if you eat enough of them (*Clearly I am not a nutritionist, so please don’t actually try to eat these cookies for their nutritional value).

Either way, make these cookies for the holidays in place of that dreaded fruitcake, or even in place of the much more appetizing Panettone. It’s like you made your very own Panettone loaf without all the hard work! 

[yumprint-recipe id=’146′] 


/ Filed In: Cookies, Cookies New, Eat
Tagged: Christmas, cookies, craisins, dried fruit, orange zest, panettone, raisins, slice-and-bake

Holiday Gifts Guide for Food Lovers

November 24, 2017


Guys! The holiday season is upon us! Are you just as excited as I am? I can’t wait to start decorating my Christmas tree (which I am probably doing as you read this) and start shopping for gifts. I love trying to find fun, useful, and unique gifts for my friends and family. But I know, from experience, that it’s not always easy.

One thing I know pretty well is food. So if you have anyone in your life that likes to eat, cook, or bake food, or drink coffee or wine, this holiday gift guide is for you! I have an exhaustive list of gift ideas that I can almost guarantee will satisfy at least one person on your list. 

FOR THE HOME COOK

1| Cookbooks. Pick out one of your favorite, most used, or interesting looking cookbooks that you think your friend or loved one would appreciate. Go one step further by bookmarking your favorite recipe (or the one that looks most delicious). If there are any unusual ingredients, spices, or cookware, add those to the gift along with the cookbook so that they have everything they need to make the recipe you picked out. 

Here are some of my favorite cookbooks:

  • Cookbook Beyond Curry Indian Cookbook. Tag recipe for Hyderabadi Lamb Biryani. Pair with a mortar and pestle, spices (like Garam Masala, saffron, cardamom pods), and a nice heavy pot.
  • Cookbook Eat Mexico. Tag recipe for Tacos al Pastor. Pair with a tortilla press, achiote paste, and any spices you think they may not have in their collection. 
  • Cookbook The Food Lab. Tag recipe for Pasta with Olive Oil and Three Flavors of Garlic. Pair with a pasta roller and cutter set (either as an attachment for their Kitchen Aid mixer or a manual set), and a nice quality olive oil. 

[show_shopthepost_widget id=”2915535″]

2| Kitchen Gear. Any home cook knows the importance of having the right gear. For instance, having the right knife, pot, or even tongs can make a huge difference. If you have a friend or loved one who would like to get more into cooking or you know needs a little upgrade in the kitchen, I highly recommend the following items:

  • A quality chef’s knife is a must-have in any kitchen
  • A cast iron skillet that can be used from grilled cheese to steaks
  • A meat thermometer, which is the only reason I no longer overcook chicken
  • A large chopping block to go along with that new chef’s knife
  • Countertop garden for anyone who likes to grow their own herbs
  • A pizza stone and peel for those who love to make pizza at home

[show_shopthepost_widget id=”2915891″] 

3| Cooking Classes. There are so many places to take cooking classes these days. Your local Sur la Table and Williams-Sonoma probably offer classes regularly. Often local colleges will offer some cooking classes open to the public. Just do a quick Google search and I am sure you can find several options to suit your loved one’s cooking or dietary preferences. Buy them a gift card or pick out a class you know they will like that you can take together!


FOR THE HOME BAKER

4| Cookbooks. The gift idea above doesn’t just have to be for home cooks, it could also be for home bakers! If you know someone, like me, who loves to bake all sorts of goodies, is addicted to the Great British Baking Show, or is constantly watching cake decorating videos on Youtube, well I have some great gift ideas for you!

  • Cookbook How to Cake It. Pair it with a squeeze bottle (Sir Squeeze A lot), cake pans, a cake turntable, and an offset spatula.
  • Cookbook Laduree Macarons. Pair it with a silicone baking mat with circles already drawn on. 
  • Cookbook Bouchon Bakery. Pair it with Valrhona 70% chocolate (needed for the chocolate chunk cookies) and black cocoa powder (needed for the Knockout Cookies).

[show_shopthepost_widget id=”2915834″] 

5| Baking Accessories. As someone who bakes A LOT, I am all too familiar with just how many baking accessories there are. Nowadays, there you can find anything from basic cookie cutters to intricate piping tips that any baker would love to have in their collection. Here are some of my favorites:

  • Russian Piping Tip set to make awesome cakes and cupcakes like this 
  • Large baking sheets (they fit so many cookies)
  • A beautiful pie dish set
  • 101 cookie cutter set because you can never have enough cookie cutters
  • Adorable measuring spoons
  • A kitchen scale, because a true baker knows the value of a kitchen scale

[show_shopthepost_widget id=”2915899″] 


FOR THE COFFEE LOVER

6| Craft coffee bar. Craft coffee is pretty much the new craft beer. Here in Charlotte, there are craft coffee places popping up everywhere. There is everything from coffee on tap, pour over coffee, and signature espresso cocktails. All for the low low price of $5-10 (yikes!). If you have a coffee lover in your life who may be spending a bit too much on coffee at these fancy coffee shops, why not give them everything they need to make their own craft coffee at home?

Start by picking out how they like to make their coffee. Do they like iced coffee? Pour over coffee? Maybe they just need a shot of espresso first thing in the morning. Don’t worry, you don’t have to buy an expensive coffee maker (unless you really love them) if you don’t want to.

  • French press (my favorite way to make my morning coffee)
  • Pour-over coffee dripper, an easy (and cheap) way to make delicious coffee
  • Cold brew coffee maker for those who like a cold cup of coffee year round
  • Single-serve coffee system for those that like their coffee ready the minute their get up in the morning
  • Espresso maker which will make the recipient feel like they are living in their favorite coffee shop
  • Single-serve espresso maker for the latte lovers
  • The coffee maker that does everything except grind coffee beans

Okay, next pick out the coffee to go with the coffee maker. I love picking out local coffee for friends and family who live across the country. If this is a gift for someone who lives in another city or state, find your favorite local coffee roaster (your local grocery store probably has some in stock) and pick up a bag of BEANS. I stress beans because they stay fresher longer. If your friend is a coffee snob, they will appreciate the coffee beans and will likely have their own coffee grinder (if not, toss one in!). If you can’t decide which coffee to get them, consider a subscription so they can try new coffee every month!

Last, add any coffee accessories.

  • Coffee tumblers to keep the coffee hot (or cold)
  • Flavored syrups, either store-bought or homemade
  • A milk frother in case you don’t get them the fancy latte maker
  • A cute seasonal coffee mug

[show_shopthepost_widget id=”2917406″] 

 
FOR THE WINE LOVER

7| A wine subscription. We have one family member who always gets a wine related gift. Every year. Without fail. It’s not because we don’t know what else to get them. It’s because we know it will be greatly appreciated! This year, I think a wine subscription is in order. I think it’s great because it lets them try things they may otherwise overlook. There are some great wine subscriptions options from single-serving subscriptions to let you try before you buy, to subscriptions that send you the whole dang bottle so you can share with your friends (or not).

  • Bright Cellars
  • VineBox
  • Tasting Room
  • Winc

8| Wine accessories. These make great stocking stuffers for any wine lover. From wine charms to modern wine bottle openers, your wine lover will be happy with any of these gadgets. 

  • Cork Pop wine bottle opener so that they can feel like every bottle of wine is a bottle of champagne
  • Insulated Wine Cups for those that want to take their wine on the go
  • Wine novelty socks just because
  • Cute wine charms or glass markers
  • Corvain wine system that allows you to pour a glass of wine without opening the whole bottle
  • Wine decanter or aerator (or both!)
  • A wine bucket for the host or hostess with the most or mostest
  • A wine carrier so they can take their wine with them wherever they go

[show_shopthepost_widget id=”2917491″] 


I hope this has helped you with any of your holiday shopping dilemmas! I know that there is often that one person that whose gift just alludes you. Well, if they love food, coffee, or wine, I am sure they will like anything on this list. If not, give me a shout and I am happy to help!

/ Filed In: Life
Tagged: baker, black friday, Christmas, coffee, foodie, gift guide, holidays, home baker, home cook, shopping

Peppermint Popcorn

December 19, 2016

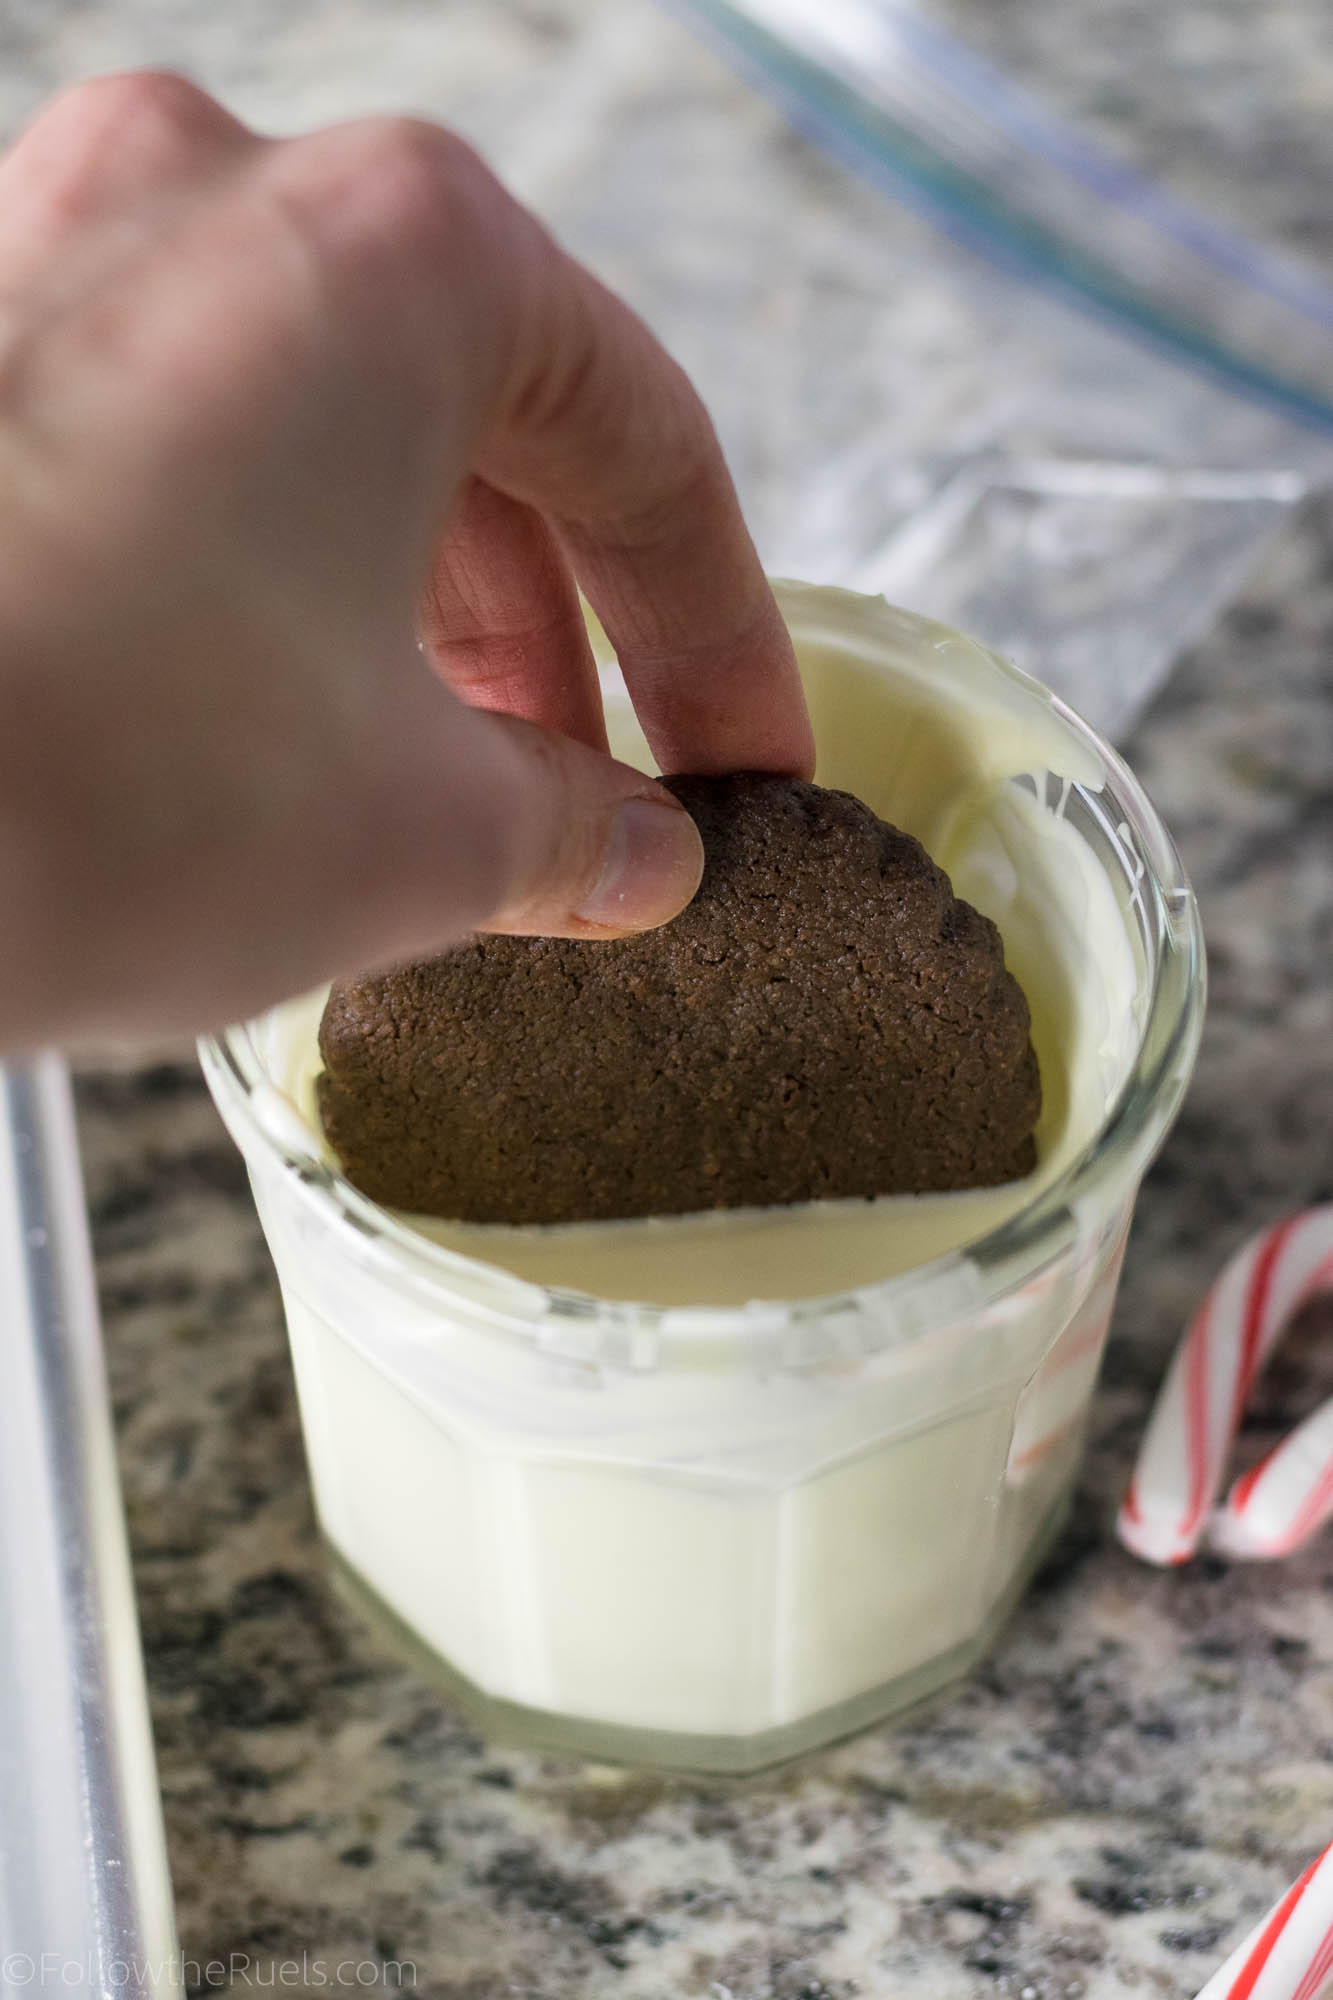
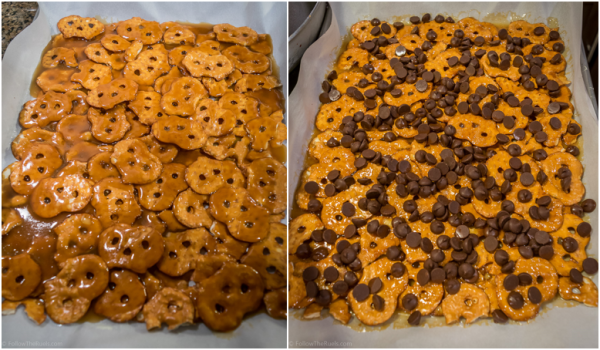
My friend, Michelle, shared this recipe with me a couple Christmases ago. She refers to it as “Christmas Crack” due to it’s addictive qualities. But since I think of this when I hear “Christmas Crack”, I am going to refer to this super easy and delicious holiday snack as Peppermint Popcorn.

Even though this recipe is only 3-4 ingredients and can be pulled together in a pinch, it is so so good! But how can popcorn covered in white chocolate and candy canes be bad?


I started this recipe by getting out all of my frustration on a bunch of innocent candy canes. I placed the unwrapped candy canes in a plastic bag and whacked them to smithereens with a meat mallet until they were candy cane dust.


Then, popped the popcorn. I prefer using an air popper most of the time. Not only is it a bit healthier, but for me it’s a bit more fool proof. I haven’t quite mastered the art of popping popcorn on the store without burning more than a few pieces.

And while the popcorn was popping, I placed the white chocolate chips in the microwave to melt. I also stirred in some peppermint extract for even more peppermint flavor.


Once the popcorn was popped, I drizzled on the white chocolate and gave the popcorn a good toss so that each piece was nice and coated in chocolate. Next, I sprinkled on the candy canes, and tossed again. I also like to toss in a little bit of salt, for that sweet, salty flavor.

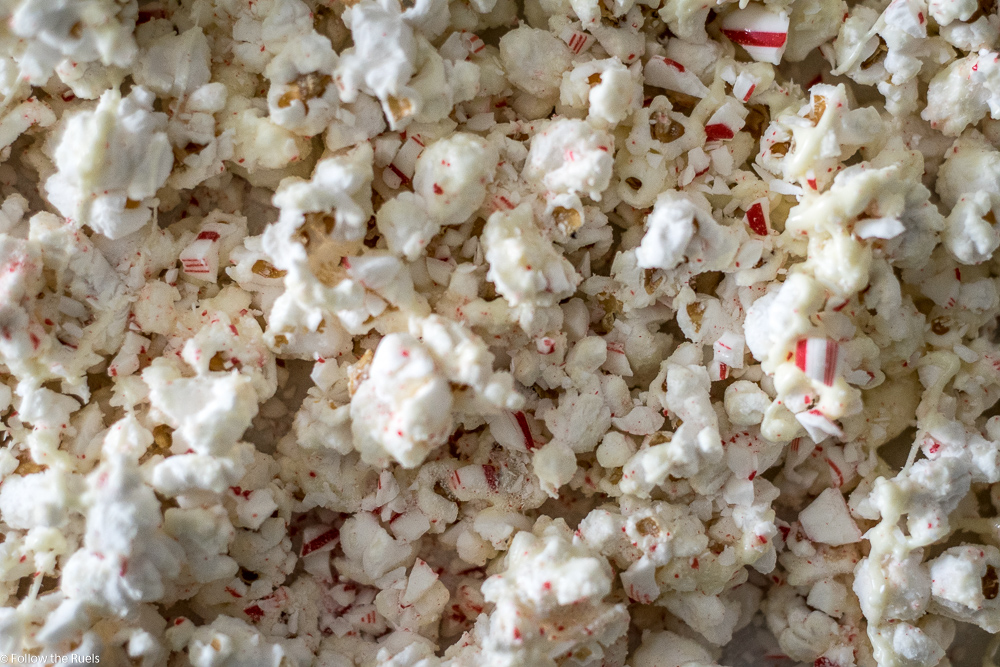
Once the popcorn was covered in chocolate and candy canes, I dumpped it out on a piece of parchment to dry. After about 10 minutes, it is ready be packed into bags to hand out to friends, or you can just eat it yourself. I probably ate about half of this myself before I remembered that I made this for other people (I have no self control!).

Michelle loves to set this out at parties for her friends to munch on. I have made this for work functions in the past as a nice alternative to Christmas candy. It still satisfies any sweet tooth, but it’s not quite as heavy as a piece of fudge or a cookie.

But that’s also what makes this popcorn so sneaky addicting. Because it’s lighter, you can eat a lot of it before realizing “holy crap, I just ate an entire bowl of this stuff!”. But it’s also delicious, so you don’t really care.

Can you tell I am speaking from personal experience? That’s pretty much what happened to me when I was packing up little gift bags of this stuff for friends. I ate an entire small popcorn bowl of this stuff. 

I guess I will just have to make another batch. Aw shucks. 😉

[amd-yrecipe-recipe:108]


/ Filed In: Desserts, Eat
Tagged: candy canes, Christmas, Peppermint, popcorn, white chocolate

Peppermint Brownie Cookies

December 9, 2016

Peppermint Brownie Cookies

I feel like there are two kinds of people in this world: those that love the brownie edge, and those that love the brownie center. Guess which one I am. I’m team brownie edge all the way. I love the crunchy, caramelized corners and sides of the brownie. Sometimes when I make a batch of brownies, I will cut off the scraggly edges and tell myself I am just making them look prettier and more uniform. But if I am being honest with myself, it’s so that I can eat all the edges. 

And that is what I love about these cookies. It is 90% brownie edge! 

What I also love about these cookies is how easy they were to make! It literally took minutes to mix everything together and pop in the oven. In just about 30 minutes I had warm, fresh peppermint brownie cookies. 


These cookies start with, what else, a bag of brownie mix! To that I mixed in some melted butter and one egg. I did not follow the recipe on the back of the box. 


Once it’s all mixed together, its pretty thick. Not at all like a brownie batter but (shockingly) more like a cookie dough. 

For that peppermint flavor, I mixed in some Andies peppermint chunks because that’s what I found at the grocery store. But if you can get your hands on some peppermint chocolate chips or even other peppermint candy, you can add those in instead. 


Another great thing about these cookies is that don’t take nearly as long to bake as a normal batch of cookies. Within a matter of minutes, the chocolate dough had spread out and crisped up around the edges, but remained a bit soft in the center.

Peppermint Brownie Cookies

For the brownie edge love, like me, these cookies are perfect. The first bite it all crunch. But the center is super soft. 

Peppermint Brownie Crunch

However, for those of you who love the soft gooey center of the brownie and are not willing to give that up. Guess what! You can pretty much make the exact same recipe in brownie form! Just follow the recipe on the back of the box and add the water and oil as necessary. 

I can’t alienate half (maybe more) of the brownie loving population. Everyone deserves a delicious bite of chocolate and peppermint. Especially during the holidays. 

[amd-yrecipe-recipe:105]

PIN NOW, MAKE LATER

Peppermint Brownie Cookies

/ Filed In: Cookies, Cookies, Cookies New, Desserts, Eat
Tagged: Andies, brownie, brownie mix, Christmas, christmas cookies, cookies, Peppermint

Christmas Oreo Truffles

December 5, 2016

Christmas Ornament Oreo Truffles

Who else is in the full swing of Christmas baking? This past weekend I probably made 10 pounds of gingerbread dough in addition to a few other Christmas treats. Even though I love it, sometimes it can all get to be too much. Too much melting, mixing, baking, frosting, etc. It’s in these moments that I am so thankful for some really easy, fool-proof Christmas treats. These Oreo Truffles, for instance. They could not be easier to make. 2 ingredients mixed in a food processor and coated in chocolate. And no matter how they look, they taste delicious!

I wanted to do something a little different with my Oreo truffles, so I placed them in a Christmas Ornament candy mold so that each truffle looked like a tiny ornament. So cute, right? It may seem like a lot of work, but I promise, it’s actually really easy!


First, to make the truffles, I processed a box (bag? container? What would you call that thing Oreo’s come in?) of Oreos. Once they were finely ground, I added in a brick of cream cheese and processed until it formed a ball. The I set the mixture aside while I worked on the molds. 


I piped melted white chocolate into the details of the mold, flipped the mold over and tapped out the extra chocolate. Then I filled the mold with semi-sweet chocolate and again flipped the mold over and tapped out the extra chocolate. 


Once the molds were ready, I rolled small balls of the Oreo truffle mixture and pressed them into the mold. Then I popped the whole thing in the freezer until the chocolate was hardened. Once out of the freezer, I popped the truffles out and repeated the process to fill the molds. I then stuck the other half of the truffle into the fresh mold, making sure that the edge of the hardened chocolate touched the melted chocolate. 

Oreo Truffles

Then I froze the truffles again until the chocolate was hard. After that, all that was left was to pop them out. I did a little touching up on some scraggly edges with a warm knife, cutting off the excess chocolate. 

See, not so hard? Right? Of course, you will need a candy mold, which you may not have laying around. If you don’t want to buy one, you could always just make them the classic way by dipping them in melted chocolate. I like dipping them in dark and white chocolate for a swirled effect. Just remember to freeze the balls first so that they stay rounded when you dip them. 


Either way, they will taste amazing and look very festive. No one can pass up an Oreo truffle!


PIN NOW, MAKE LATER

Christmas Oreo Truffles

[amd-yrecipe-recipe:103]

/ Filed In: Desserts, Eat
Tagged: chocolate, Christmas, dessert, Oreo Truffles, Oreos

The Perfect Christmas Cookies

November 25, 2016

The Perfect Christmas Cookies

I’m sharing everything you need to know to make the perfect Christmas cookies!

By now it’s probably clear that I like to make cookies. They are my go to treat whenever I have to bring something to a party, especially during the holidays. In the last couple years, I have dedicated more and more time to not just baking cookies but decorating them, too! I even teach classes on cookie decorating through a local Charlotte company, SkillPop. Not only is it fun for me to make them, I get love giving them to other people, knowing that they will be enjoyed!

It’s also clear to me that I am not alone in this. I see a MAJOR uptick in traffic to my cookie and icing recipes this time of year. And because I get so many questions about cookie decorating, I thought I would write down all my tips and tricks for you guys so you can not only make the perfect Christmas cookies, but awesome cookies year round!

Be prepared, I have basically written a novel on cookie decorating. I have broken it down into the basics: the dough, the icing: and the decorating. I have linked to a lot of my recipes and other products that I use and recommend to make your cookie decorating experience a bit easier. Know that my recipes and products are not necessary for delicious and beautiful cookies. But they will help.

The Dough 

Christmas Cookies

The dough is the foundation for the perfect Christmas cookie. For just about all my cookies I use my all time favorite sugar cookie recipe. The reason I love this recipe so much is that the cookies hold their shape perfectly, which means whatever they looked like when you cut them out is pretty much how they will look when they come out of the oven. That is key for decorating cookies, because then you have a better guide for outlining your cookie – you aren’t trying to guess what the original shape was. 

I get a lot of compliments on these this cookie recipe. While they aren’t super soft cookies, they aren’t crispy either. I try not to over bake them – taking them out of the oven at the first signs of browning – which ensures that they stay nice and tender. 


To make sure I have evenly shaped cookies every time I use a nice big rolling pin (I recently bought this rolling pin and absolutely LOVE it) and these rolling pin bands. I absolutely swear these bands and tell all my friends (and cookie decorating students) to get them. They ensure that the dough rolled out to a consistent thickness so that each cookie is exactly the same. And in case you are wondering, I use the largest (blue) band to roll out my cookies.  

Christmas Cookies

I also prefer to use the coated metal cookie cutters (like these, these, and this gift set that I bought mainly for the cookie spatula) because they are easier to clean and don’t rust. But I have cookie cutters of all types in my collection and tend to use whatever has the best shape. A tip to ensure that the cookie cutters don’t stick to the dough and potentially warp the cookie shape is to dip it in a pile of flour first, then cut out the dough. 

I also like to roll out my dough on a sheet of parchment paper. This helps me use less flour so that the dough doesn’t stick to the counter tops and makes it a lot easier to lift off the cut out cookie. 


Why you shouldn’t use store bought dough

A lot of people ask me if they can just use store bought dough. The answer is, of course you can – you can use whatever sugar cookie recipe you like best. HOWEVER, your cookies aren’t going to come out the same. Store bought dough and cookie mixes (as well as some other recipes) contain leavening agents (baking soda, baking powder, etc) in it which make the cookies softer, but they will also lose their shape when baked. See the example below. 


I rolled out a very popular brand of sugar cookie dough the exact same way I cut out the cookies in the first picture in this post (the exact same thickness). Once the cookie came out of the oven, it was almost unrecognizable.  

I know making your own dough can be a lot of work, but I promise you, it is worth it! I tend to make big batches of it and store it in the freezer (wrapped in plastic wrap and then bagged in a zip top freezer bag) this time of the year because I know I will go through lots of it. 

Make the dough your own

Chocolate Sugar Cookies

Another added plus to making your own dough is that you can make it whatever flavor (and color) you like by adding various spices and flavorings. During the holidays, I love to add cinnamon and nutmeg to my cookies for that nice holiday spice flavor, or even make chocolate sugar cookies like you see above.

This year I developed 12 new sugar cookie recipes perfect for Christmas, which I published in my Christmas Cookie Guide. 

Making Cookies in Advance

During the holidays, we tend to make LOTS of cookies. Which means, if you are trying to do it all in one day, you will be working for hours! Fortunately, you can make the dough and even bake the cookies well in advance. Here’s what I do:

If I am just making the dough in advance, I wrap it up in plastic wrap and then store in a freezer zip top bag and keep it in the freezer until I am ready to cut out the cookies. I just let the dough sit out on the counter for a couple hours to thaw before rolling it out. The dough will keep in the freezer for a month.

If I am baking the cookies in advance, I will roll out the dough and bake as normal. Then, once they are cooled, I will stack them in a freezer zip-top bag (sometimes 2) and then store them in the freezer until I need them. The cookies will last in the freezer for a couple weeks, if not longer. I like to double bag them if I think they will be in there a while. 

The Icing

The Perfect Christmas Cookies

Okay, so the sugar cookies are probably the part that most of you guys have down. You all have made cookies before so you are pretty much pros! It’s the icing that may be new to you.

I have shared my recipe for my favorite royal icing previously. The main difference between royal icing and your normal icing is the meringue powder (which can also be purchased at your local craft store). It is essentially processed egg whites and when added to powdered sugar and water, it makes the perfect icing for cookie decorating. I forms a nice flat surface on the cookie that hardens perfectly so that the cookies can be stacked and packaged without causing any damage. It can also be made thicker to make more detailed designs, like dots, letters, stripes, flowers, etc.

To color my icing, I prefer to use gel food coloring (here is my favorite brand) because it is super pigmented and won’t water down the icing as much. But no matter what, remember: a little goes a long way! Don’t go overboard with this stuff!

There are two types of icing that I use most often: flood consistency and piping consistency. They are the exact same recipe I linked above, but one uses less water than the other. One other distinction about them is that flood consistency icing takes a few hours to dry completely. Sometimes I like to let them sit overnight. The piping consistency icing will only take about 30 minutes to an hour. Just keep them in mind as you start packing up all your pretty cookies. 

Flood Consistency Icing


The perfect flood consistency icing is icing that settles back into a flat surface within 10 to 15 seconds after you drag a spoon or toothpick across the surface. I use flood consistency icing about 90% of the time. It is what I use to outline and fill (or flood) all my cookies. It is thick enough that it won’t fall over the edges of the cookies, but thin enough that it creates a nice even surface.

To get it to just the right consistency, I add a little water at a time using a spray bottle (if I am working in small batches) or a teaspoon (if I am working in big batches). I add enough water until it starts to feel like its getting a little bit runny. Then I start counting. Yes, I still have to count to 15 every time I make icing so I am sure it’s perfect! 

Piping Consistency Icing


Piping consistency icing is a bit thicker that flood consistency icing. It is what I use to add detail to a cookie. Typically I add detail once the first layer of icing has dried enough that I can pipe right on top. I don’t have an exact formula for piping consistency icing, and sometimes I want it thicker or thinner depending on what I am using it for. Generally, it will fall off the back of a spoon into a soft peak or mound, but not settle into a flat surface. In the cookie above, I used piping consistency icing to make the string of lights. I also use it to write letters, make borders, or other precise details.

I also have this handy video of the process I use to make the icing the right consistency. You can see how thick it is when it’s piping consistency (I actually ended up thinning it down even more than what’s in the video, but it’s pretty close), and how thin it is when it’s flood consistency. 


Making Icing in Advance

Just like with the cookies, you can make the icing in advance, too. However, not at far in advance. If possible, I like to make my icing the same day I am using it. However, for big projects, that may not easy to do. 

If you want to make the icing days (or even weeks) in advance, I recommend that you make the icing but DO NOT thin it down at all. Spoon the icing in an air tight container than cover the icing with plastic wrap. The plastic wrap should be touching the icing so that no air is between the plastic wrap and the icing. Then cover it with a lid and place in the fridge or freezer. You will have to let this come to room temperature before you thin it down or use it. 


If you want to make the icing just 1 day in advance, you could thin down a big batch of icing to flood consistency and store in a bowl or container the same way I described above. Then, when you are ready to decorate, just give the icing a stir and color as normal. Flood consistency icing does not keep very well because the water will start to separate from the rest of the icing. 

Decorating

Now we have our cookies and our icing, so the fun can begin! 

Outlining and Flooding


The first step in most of my cookies is outlining and filling the cookies. I start by outlining the cookie as close to the edge as I am comfortable, then filling in the outline with the same flood consistency icing. I like to fill in the outline so that there is almost no cookie showing underneath. Then I use a toothpick, or scribe tool, to move the icing around in circular motions to get an even layer of icing. 

Here’s a tip I tell everyone, when you are piping your icing, lift the tip of the piping bag up and just let the icing fall onto the cookie. Don’t drag the icing across the surface (you can watch me here). You won’t get a nice straight line if you do it that way. 

Wet on Wet Piping


One of the techniques I use a lot is called the “wet on wet” techniques. That is when I pipe wet icing directly onto the icing I just piped. By doing so, the “fresh” icing settles into the first layer of icing. For instance, in the picture above, I piped the white snowflake immediately onto the blue icing so that it completely blended into the first layer creating a cohesive surface. 

When you pipe wet icing onto wet icing, it also gives you some freedom to manipulate it a little to get just the right shape. In the picture of the Christmas light cookie, I piped an oval of white icing onto the red, then used my toothpick to drag one edge out to create that tear drop shape. 

I also use this technique to make polka dots (like the cheeks of the gingerbread men, above), stripes, scallops, etc. 

Adding Details


The cookies really start to come together for me when I add the little details. This almost always done using piping consistency icing, described above, because it creates sharp lines, dots, or other texture. 

To add the details, I wait for the first layer of icing to crust over. Usually this takes about an hour. If I am adding lots of detail I will sometimes wait overnight so that I don’t mess up the first layer of icing. Then I just pipe my designs right on top. 

Marbling Technique


I love sharing this technique with people because its looks awesome on the cookie but its actually really easy to pull off. You can see in the purple cookies above, that there is this really pretty swirl effect going on behind the gold ‘M’. It probably looks like it took a lot of time and effort to pull off. Nope, not at all. In fact, it was probably easier than outlining and flooding the cookies. 


I start with a bowl of flood consistency icing, then I pipe on contrasting color (or 2 or 3) in a haphazard design. Then I dip my cookie onto the surface and lift straight up, letting all the excess icing drip off. I sometimes twist the cookie a bit to make more of a swirled pattern. Then I just set my cookie out to dry. If there are any air bubbles, I will tap the cookie on the surface to get them to pop. 

Easy right? I think these would look really pretty with a mixture of reds and greens for the holidays. Or you can just do red and white to make them look like peppermint!

My preferred supplies

You don’t need anything special for cookie decorating. In fact, most of the time I use plain old zip top bags. Like the cheap, generic brand zip top bags. Every once and a while, if I feel extra fancy I use piping bags (like these or these), which really aren’t fancy at all. If I want to make sure I have perfect lines, dots, or other decorations (like leaves or roses), I use a piping tip. I bought this case years ago, but I tend to use my Wilton #2 and #3 most often. 

So there you have it, pretty much everything I know about decorating cookies. I hope this will help you create your own masterpieces this holiday season!

P.S. In an effort to be fully transparent, some of the links used in this post are affiliate links, which means that if you were to purchase one of the products I listed, I will receive a very small commission. All proceeds from this post will be used to make more cookies. 

/ Filed In: Cookie Decorating 101, Cookies New, Decorated Cookies, Eat
Tagged: Christmas, christmas cookies, cookies, decorating, icing, sugar cookies

The Best Decorated Christmas Cookies

December 21, 2015

Best Christmas Cookies

As you may have figured out by now, cookie decorating was one of the “hobbies” I took up this year. I watched A TON of Youtube videos to teach myself how to decorate cookies. I have to say, I have made a lot of progress and am pretty pleased with how far I have come. 

(If you want to know all my tips and trick for decorating Christmas Cookies, read this post!)

Christmas is one of the best times to make and decorate cookies, so I wanted to share with you some of my favorite decorated cookies from some very talented bloggers and bakers. 

Vintage Pastel Christmas Cookies by Glorious Treats

White Chocolate Dipped Ginger Cookies by Cooking Classy

Gingerbread Snowflakes by the Baker Lady

Christmas Mouse Cookies by Yankee Girl Yummies

Mini Gingerbread Houses by Cake Time Blog

Gingerbread Centerpiece Cookies by Haniela’s

Reindeer Cookies by Sweet Ambs (#goals)

Gingerbread Men Cookies-10

Gingerbread Men Sugar Cookies by Follow the Ruels

Christmas Macarons by Katelig

I hope you all have a wonderful holiday and time with your family. I will be taking the rest of the week off as I spend time with my husband and in-laws. 

Merry Christmas!

/ Filed In: Decorated Cookies, Desserts, Eat
Tagged: Christmas, cookies, roundup

Pretzel Christmas Crack

December 18, 2015

Pretzel-Christmas-Crack-4

I am going to be so sad when Christmas is over because I won’t have a good excuse to make cookies, candies, and other sweet treats. Clearly, they are my favorite things to make. Especially when they are so easy and require only and handful of ingredients! Like this pretzel Christmas crack!

If you haven’t had Christmas crack before, it is essentially a sweet toffee poured over a salty cracker, and topped with chocolate. Once it cools and hardens, you crack it into pieces, like you would with bark or brittle. The result is a salty, sweet, and chocolatey treat that is as addicting as….well….crack (I assume). 

The original Christmas crack (or at least the first version I have made) uses saltine crackers. But I wanted to mix it up (as usual) and instead made it with flat pretzel chips. 

Pretzel Christmas Crack-1

I laid the pretzel chips out in a thin layer on a baking sheet lined with parchment paper. Meanwhile, I boiled together butter and sugar until it formed a caramel like substance. Then I poured the caramel all over the pretzels and baked it in the oven for a few minutes. 

Pretzel Crack

Immediately after I took the pretzels out of the oven, I sprinkled on a bag of dark chocolate chips and let them soften enough so that I could spread the chocolate evenly across the top. While the chocolate was still wet, I sprinkled on some Christmas sprinkles, just because. Then I just sat back and let it cool.

Pretzel-Christmas-Crack-6

After breaking into pieces, I couldn’t wait to dig in! I really like the pretzels in this recipe because they make it extra crunch and give it a little bit more salt. The caramel surrounds them and flows into all the nooks and crannies. After the caramel bakes and cools, it hardens, too, so it is closer to a toffee consistency. Then the chocolate just puts this over the top!

Pretzel-Christmas-Crack-8

It really is one of the easiest candies/treats that I have made. And you can’t really mess it up. If you under cook the caramel, then your resulting Christmas crack will be more caramely. If you over bake it, it will be more like toffee! Either one is delicious!

I will definitely be making a version of this recipe again soon! I have like a dozen ideas bouncing around in my head. 

[yumprint-recipe id=’89’]

/ Filed In: Desserts, Eat
Tagged: candy, Christmas, pretzel

  • 1
  • 2
  • Previous Entries

Follow

Hey There!

Hey there, I'm Lindsey. I'm a number cruncher by day and a home cook and baker by night. While I love to eat healthy and find fresh and healthy alternatives for my favorite foods, I will never turn down dessert! Life is all about moderation, right?

Recipes

  • All Recipes
  • Breakfast
  • Appetizers
  • Salads
  • Main Dishes
  • Side Dishes
  • Desserts
  • Drinks

Favorite Finds

[show_lookbook_widget id=”388783″]

Theme by 17th Avenue · Powered by WordPress & Genesis