• Home
  • Eat
    • Breakfast
    • Appetizers
    • Main Dishes
      • Chicken
      • Beef
      • Seafood
      • Healthy Dishes
      • Paleo Dishes
      • Salads
    • Desserts
      • Decorated Cookies
      • Cookies
      • Bars and Brownies
      • Cakes and Cupcakes
  • Shop
    • Cookie Decorating Supplies
    • Bakeware
    • Cookware
    • Kitchen Gadgets
    • House
  • About
    • Contact
    • Bucket List
  • Cookie Decorating 101

Follow the Ruels

No Bake Cookie Dough Fudge

August 2, 2018

One of the things I miss the most since learning I was pregnant is licking the bowl! Since I do a lot of baking, you can only imagine how many cookie dough and cake batter covered bowls I have had to leave behind. It’s taken a lot of will-power but somehow I have made it 5 months. 

Finally, I decided to give in to my indulgence! Well, sort of. 

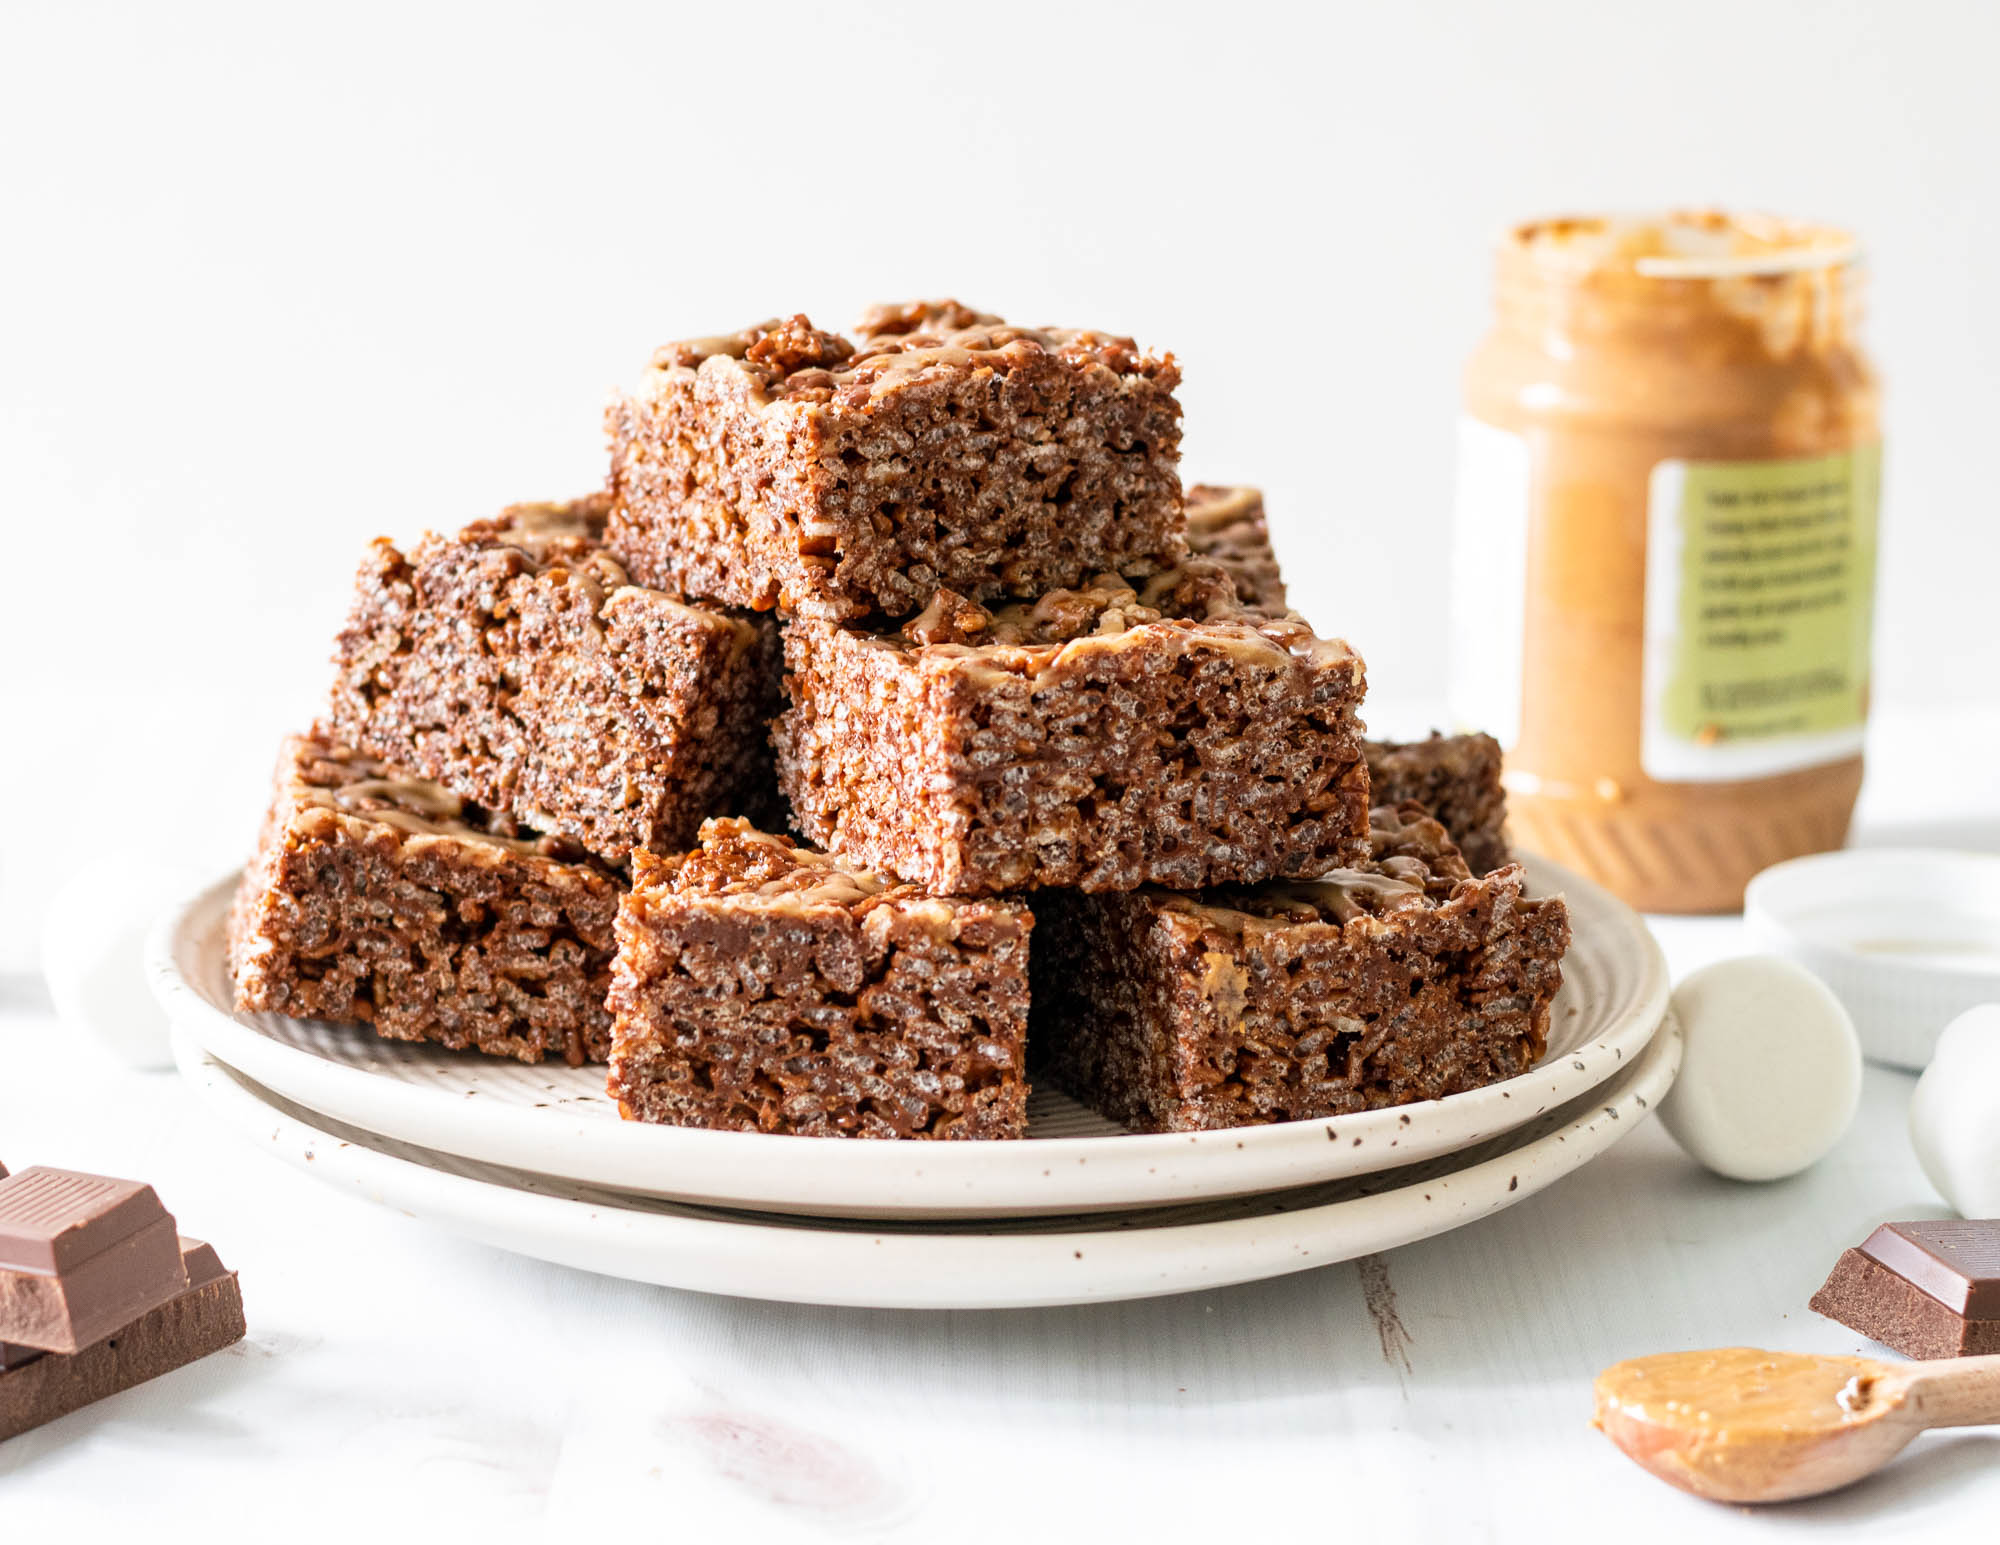
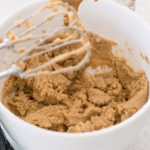
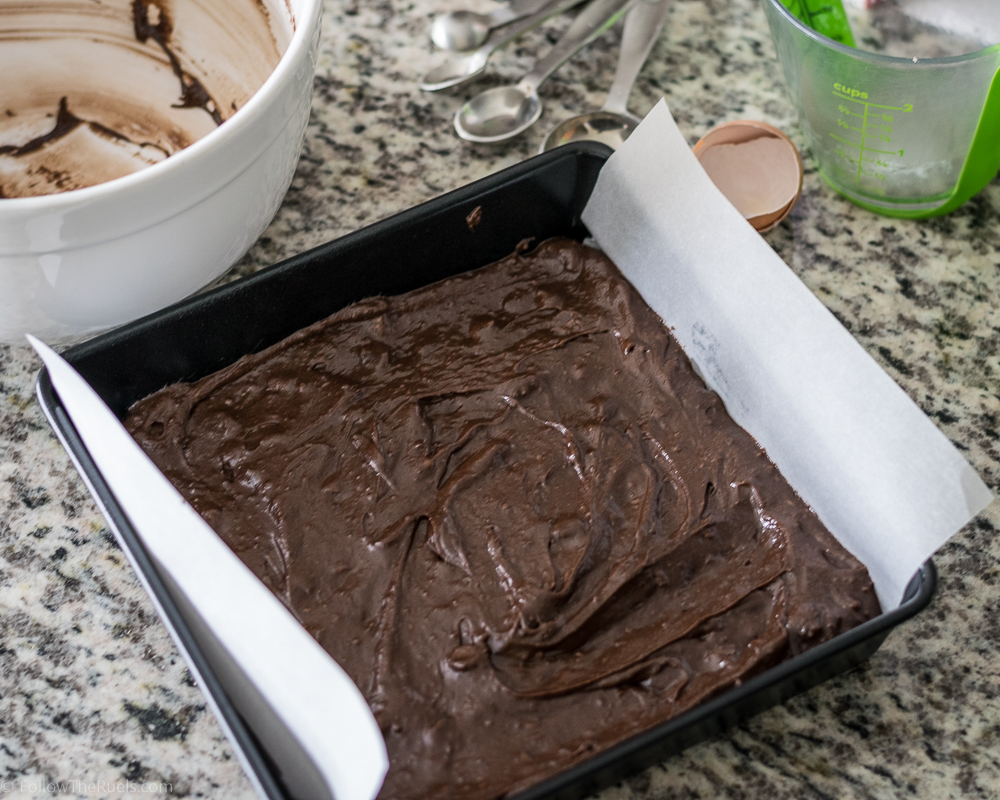
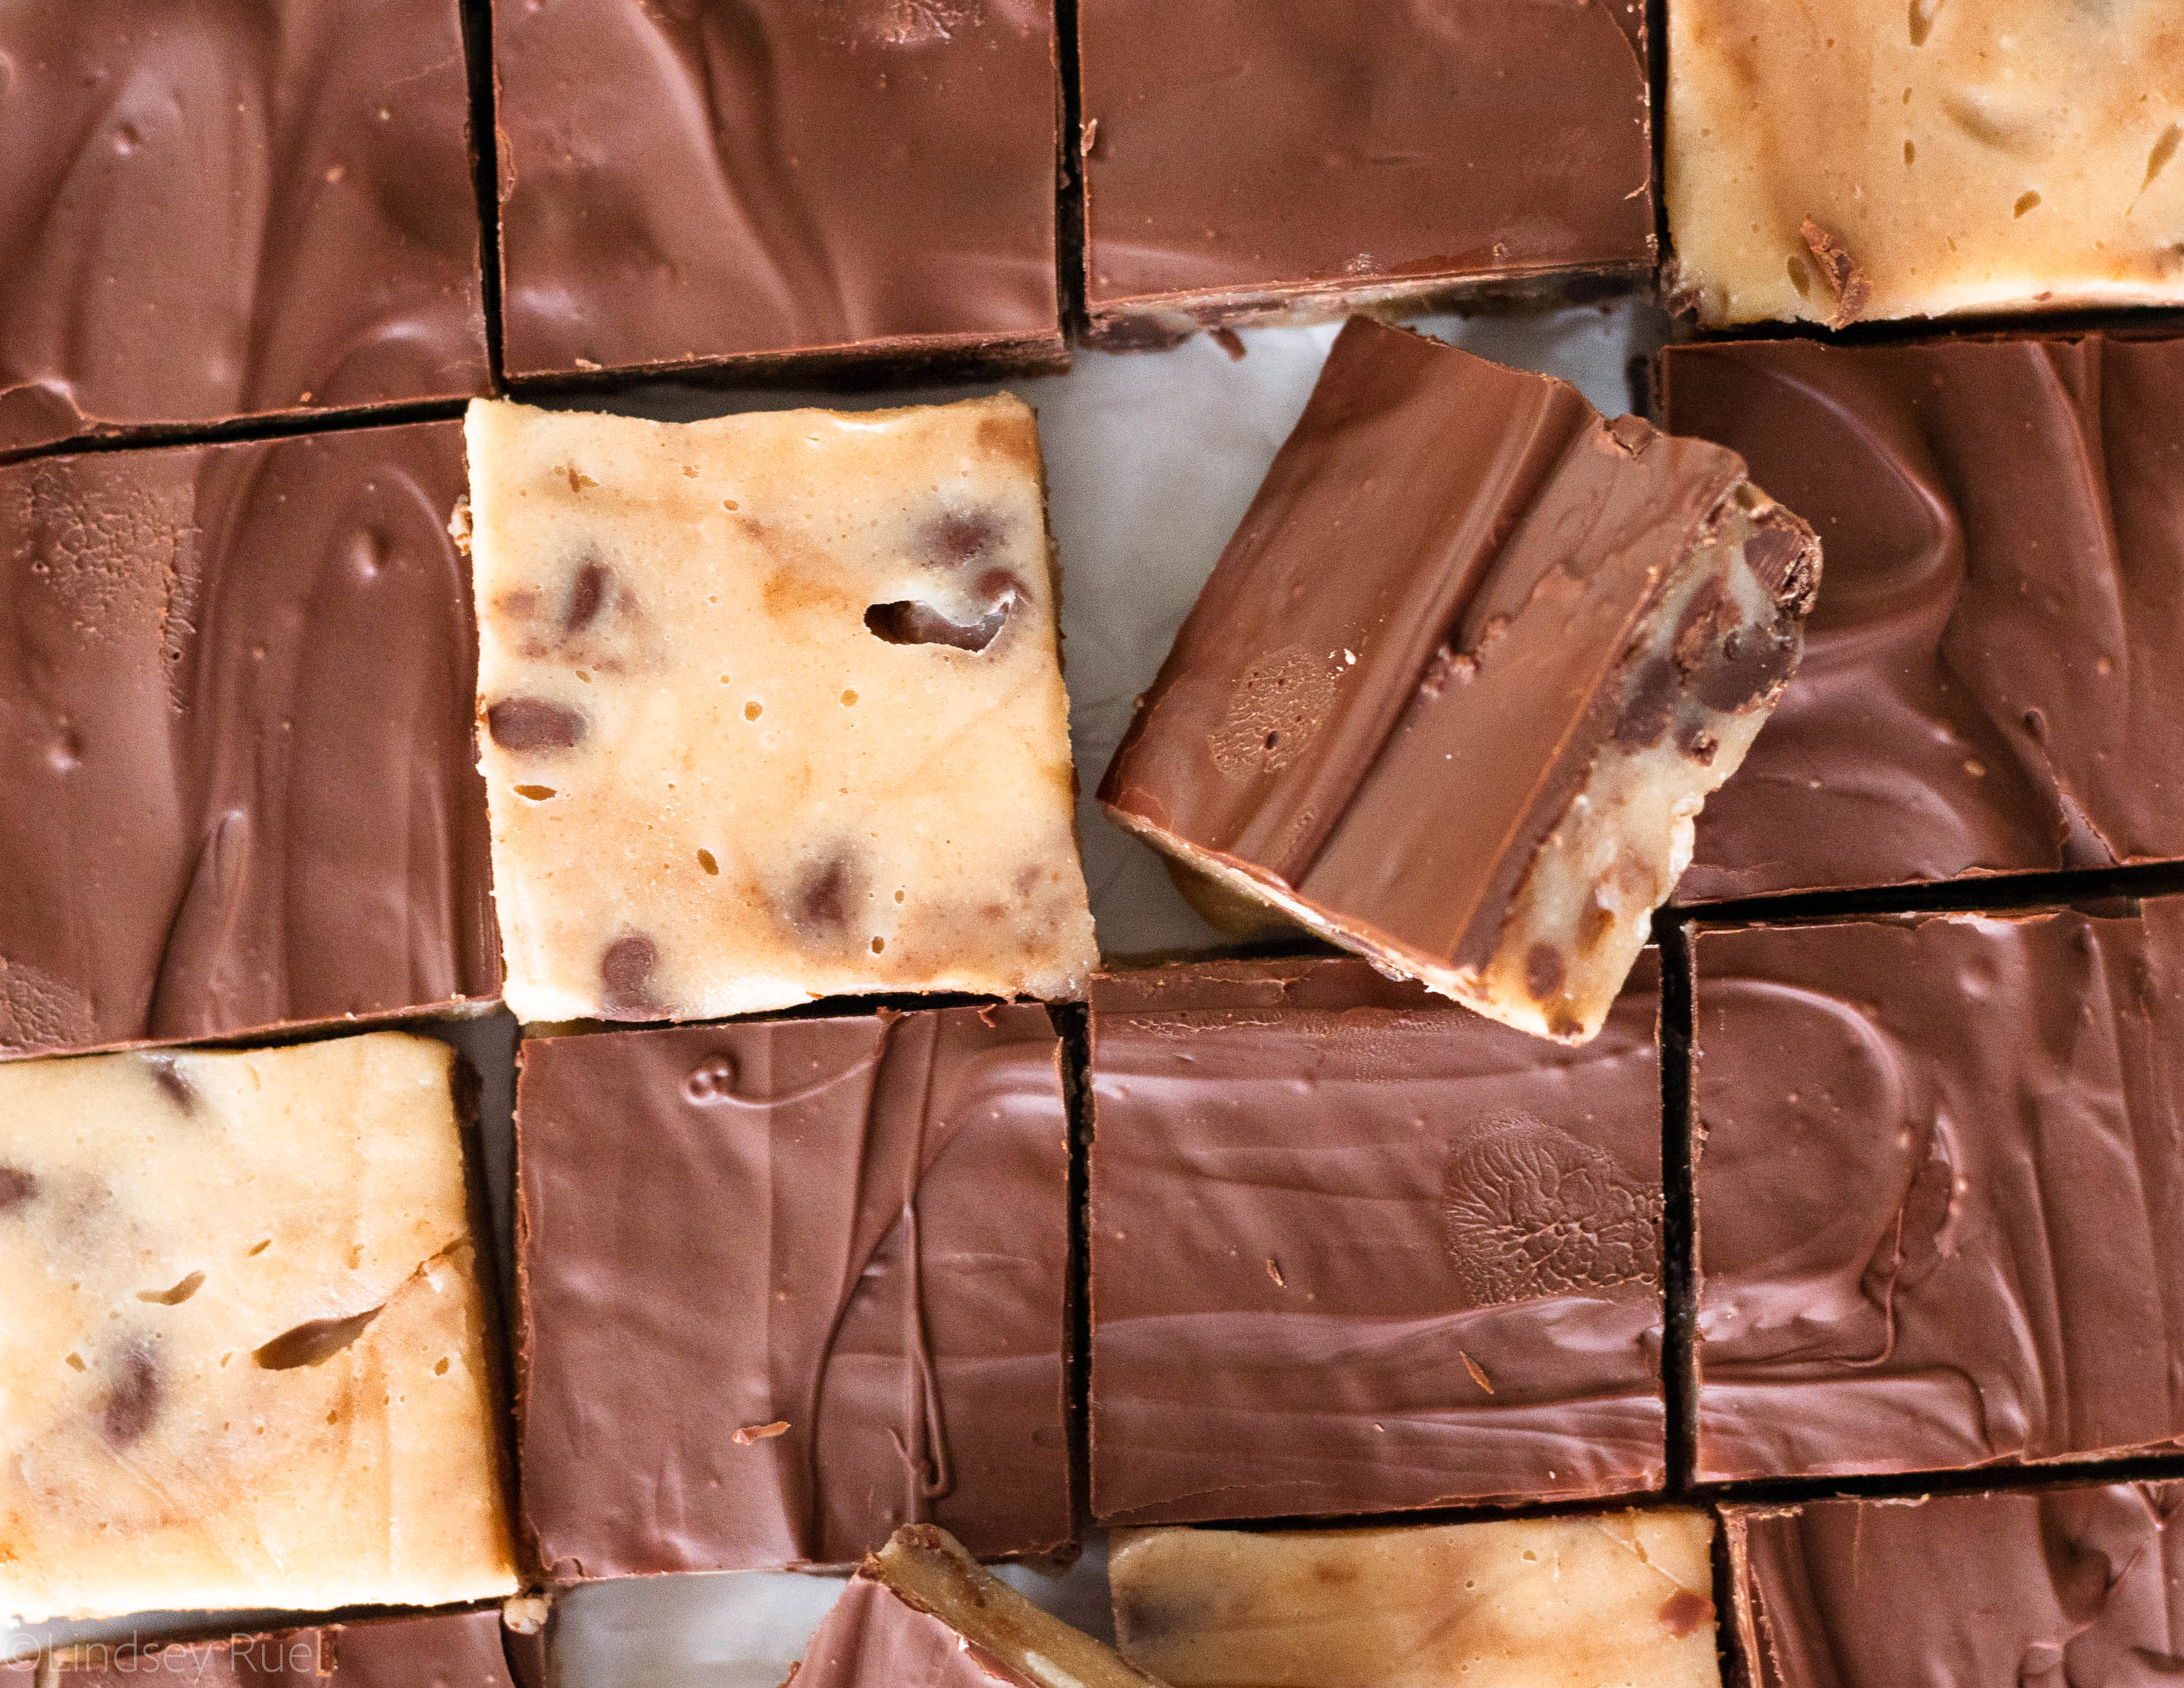
Instead of licking the dirty, cookie dough covered bowl, I decided I needed to make my own version of edible cookie dough. Thus we have the no-bake cookie dough fudge!

It’s basically like eating little squares of cookie dough, but with absolutely none of the risk! This way I can have the best of both worlds!

How to Make It

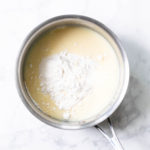
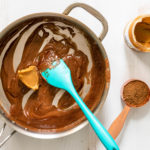
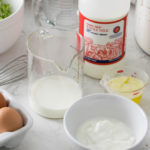
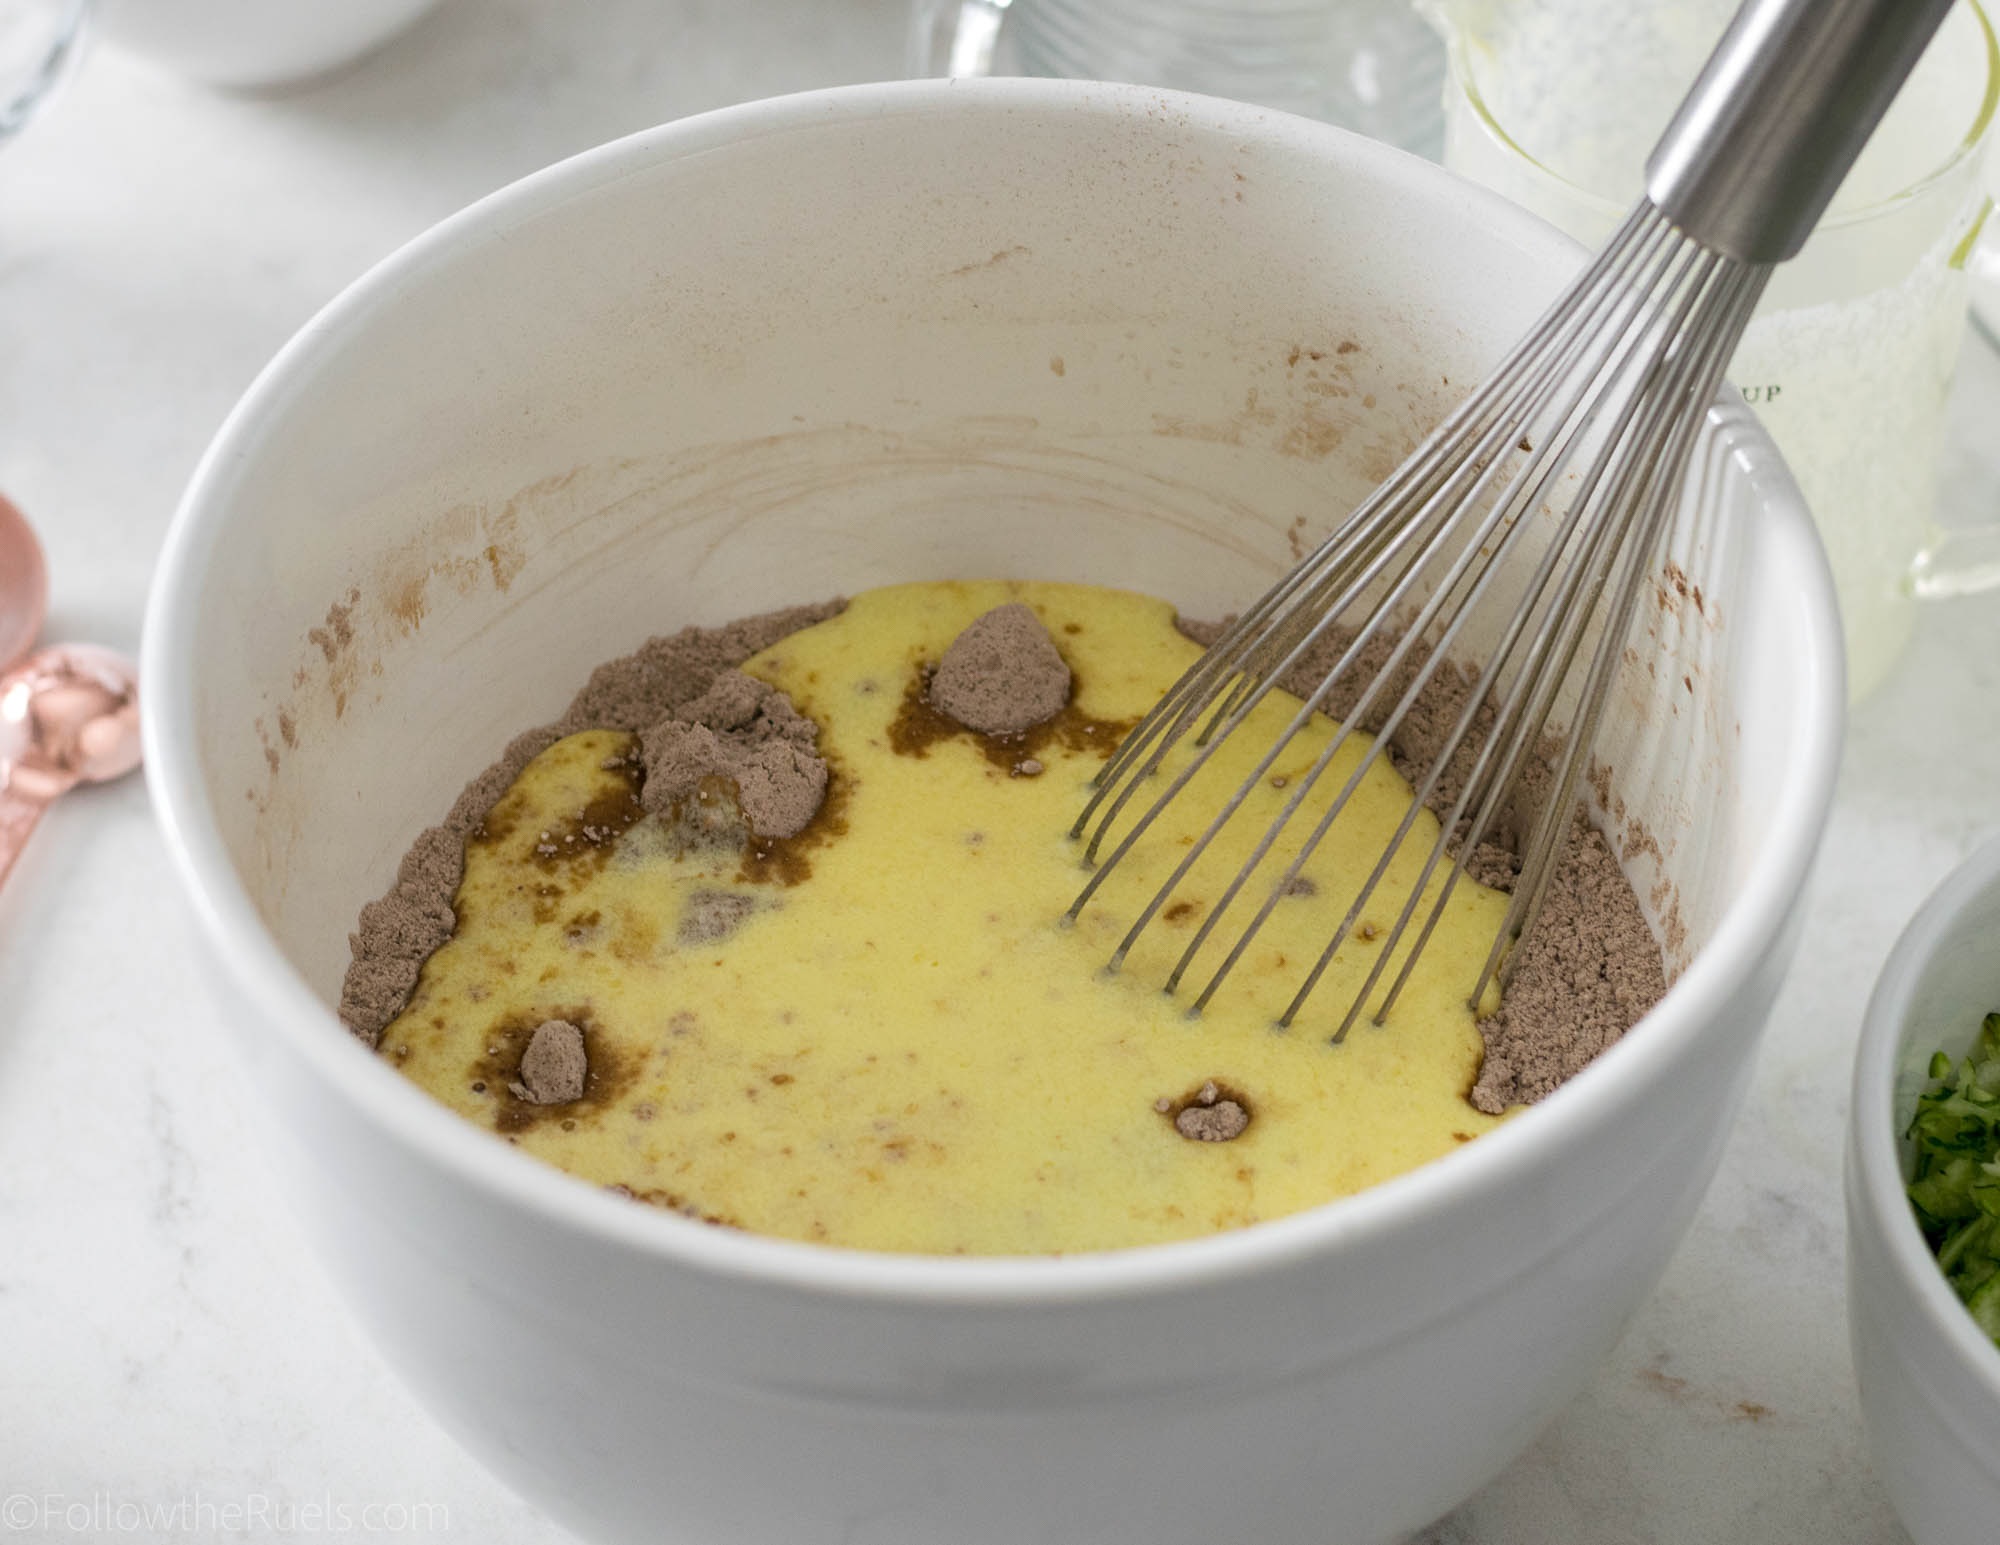
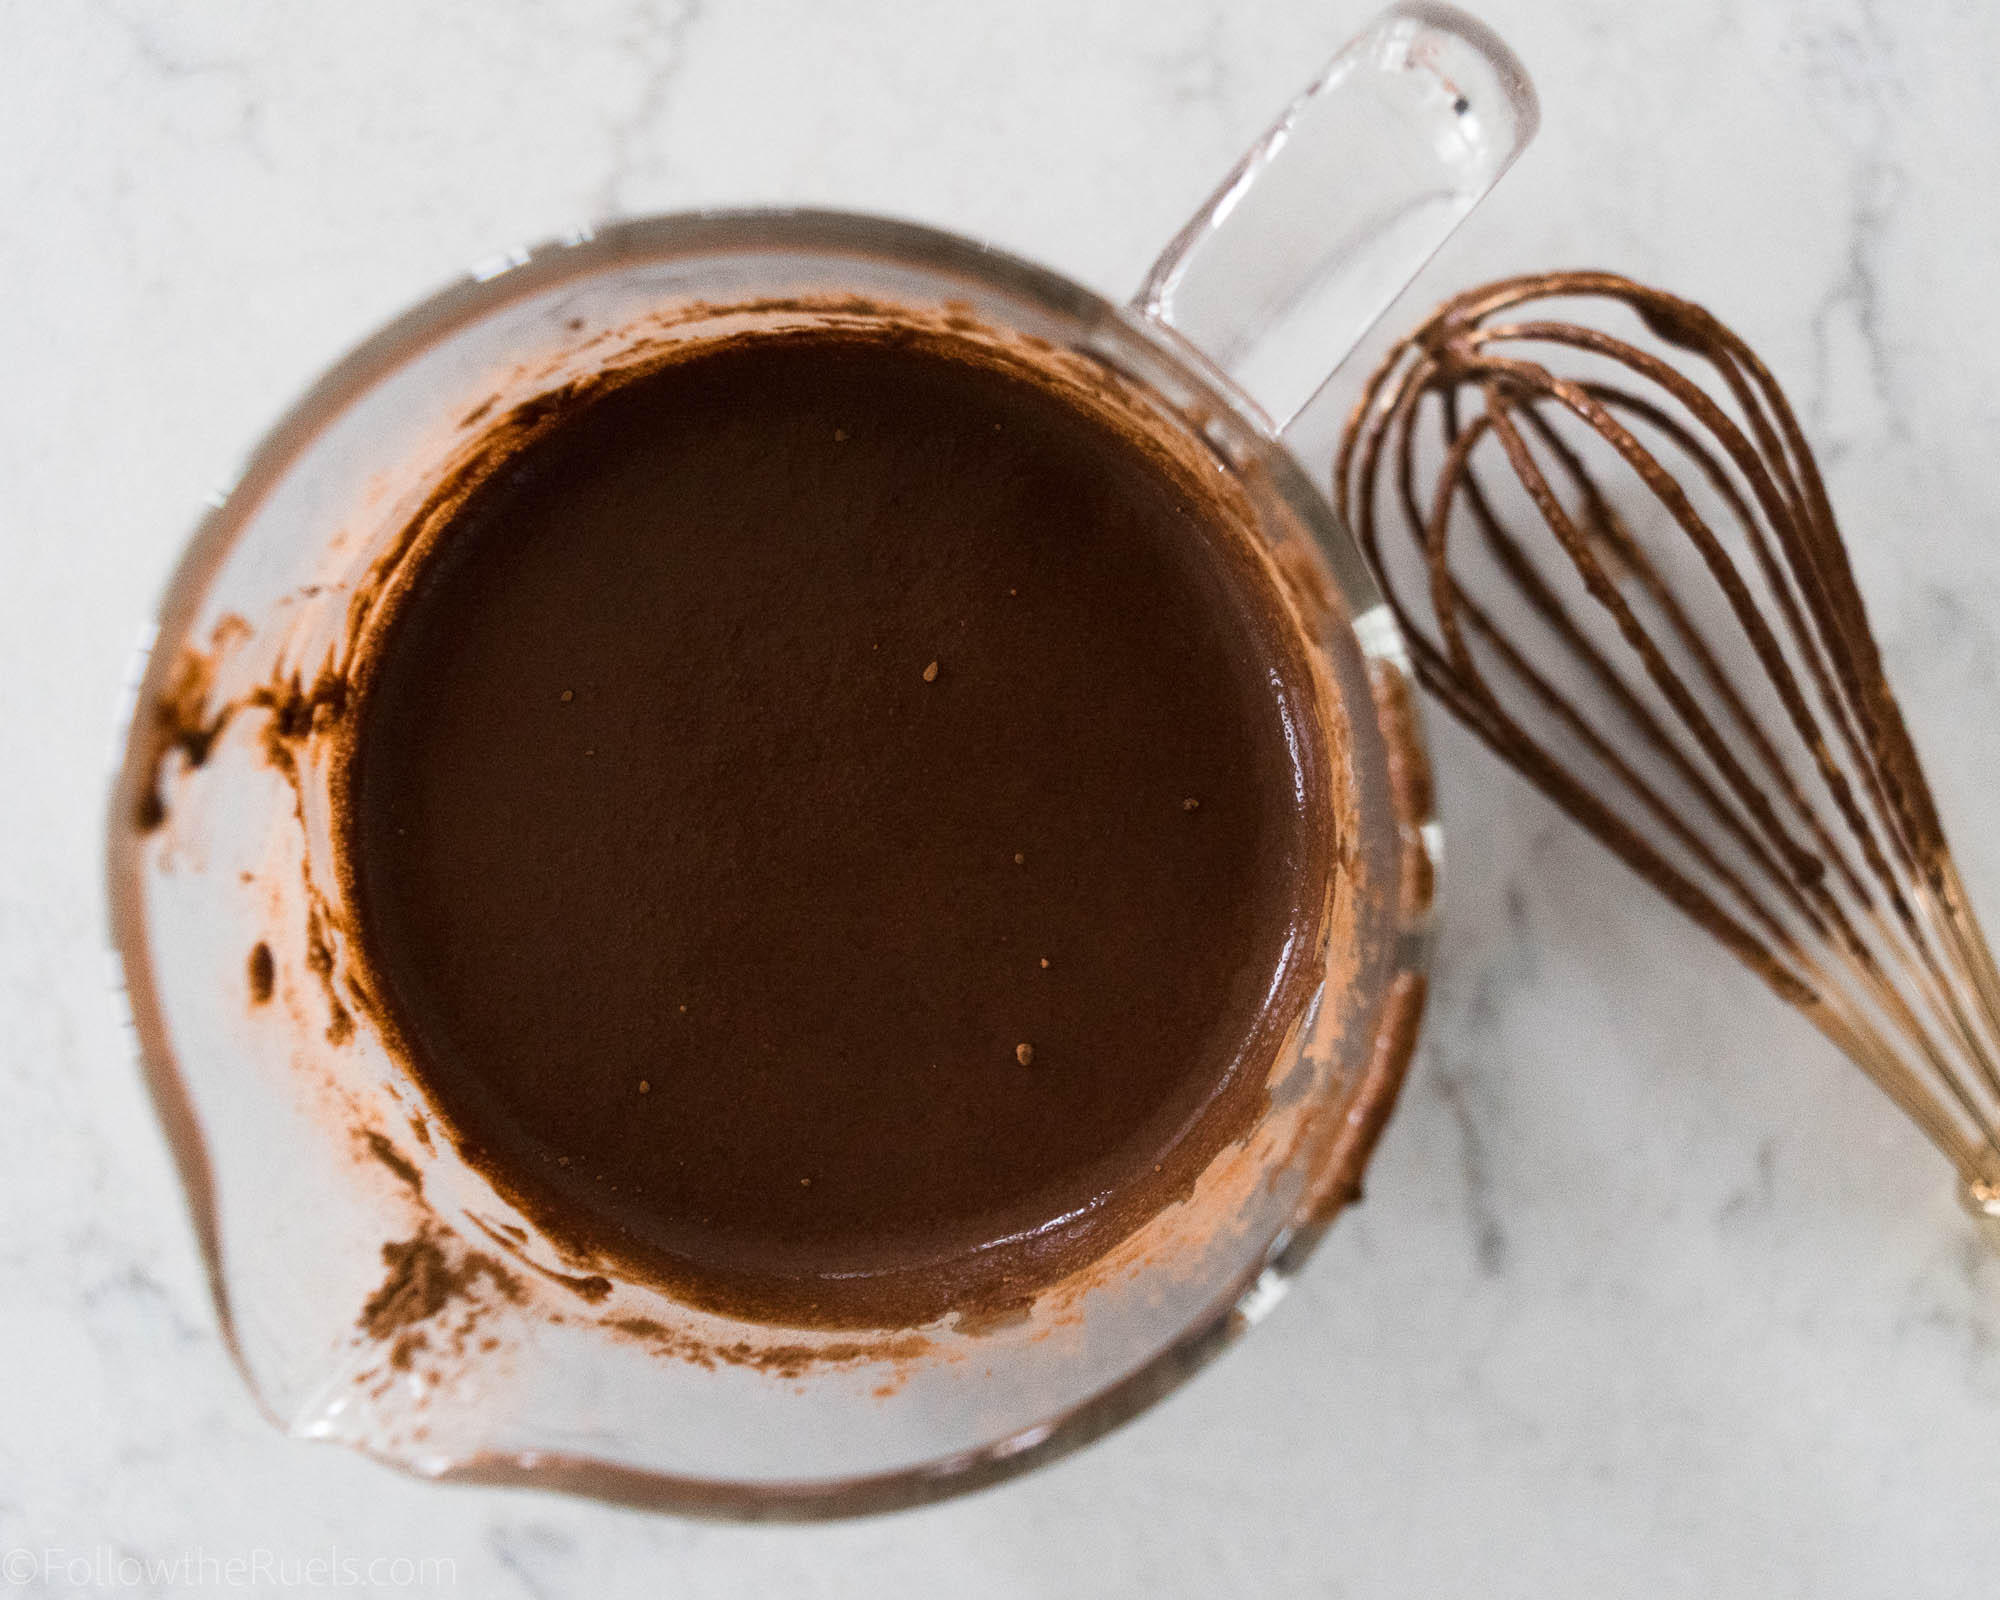
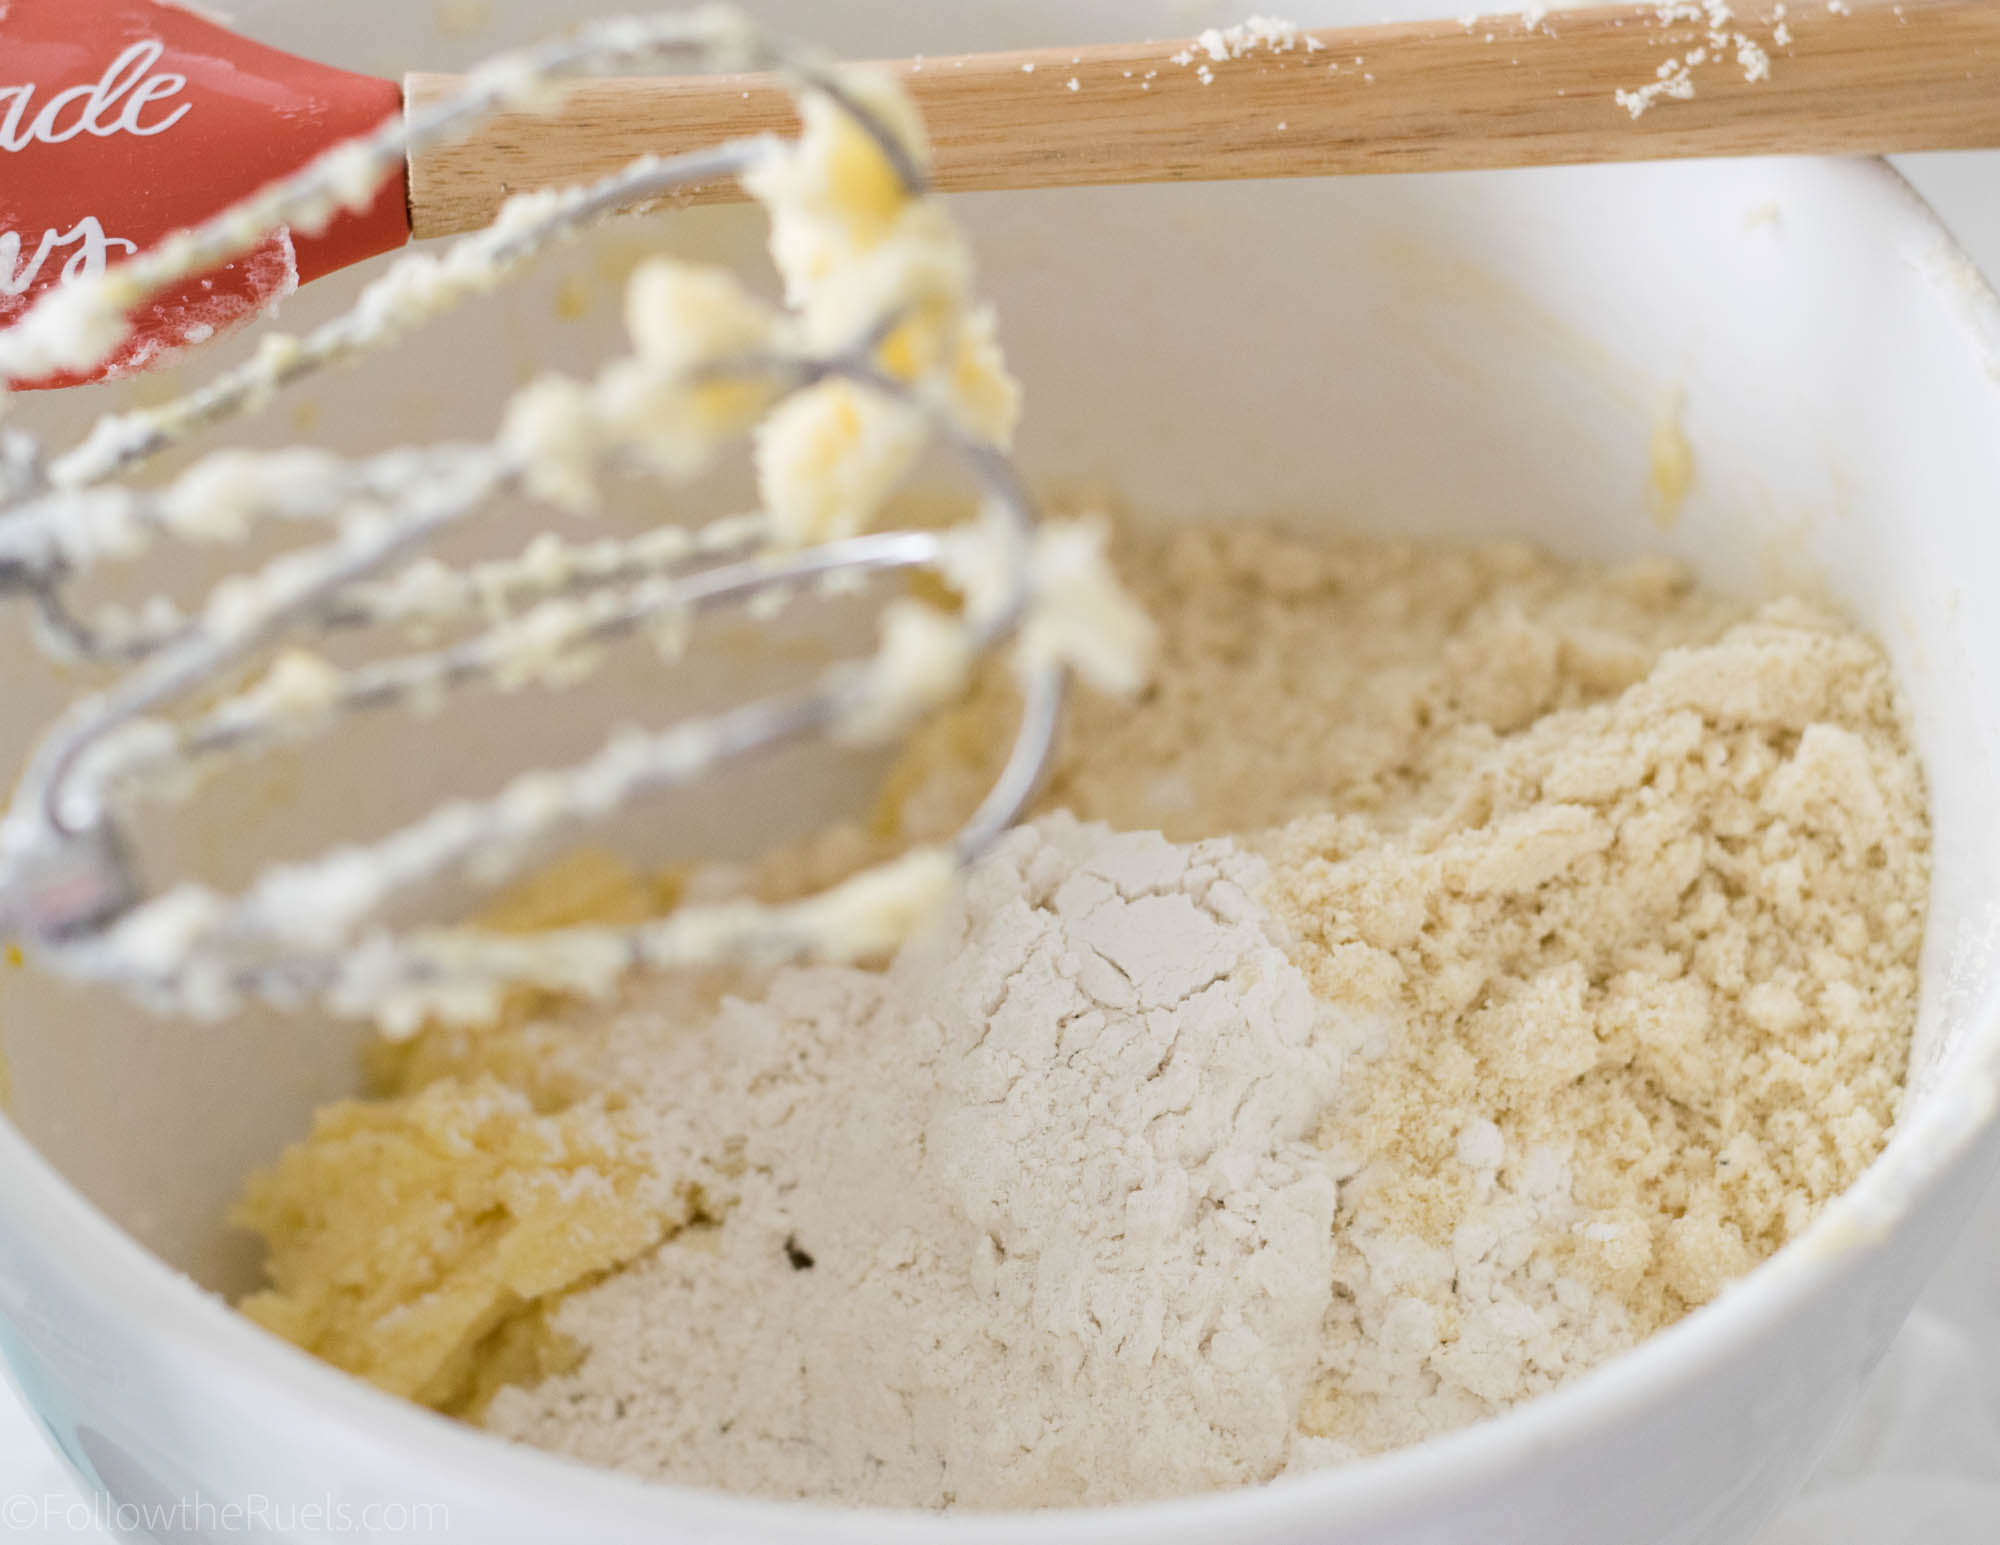
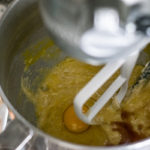
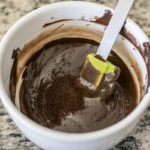
In a small saucepan, stir together flour and sweetened condensed milk. Place it over medium heat and add in butter. As the butter melts, stir it into the flour.

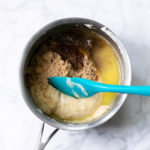
Then add in the brown sugar and vanilla and stir until you have a nice smooth mixture. 

The purpose of doing this over the stove instead of just in a bowl is two-fold. 

  1. Raw flour can actually pose a risk of salmonella as well, thus you should always heat it up before adding it into a raw mixture like this.
  2. Buy melting all the ingredients together, you ensure that you have a smooth, non-gritty fudge.

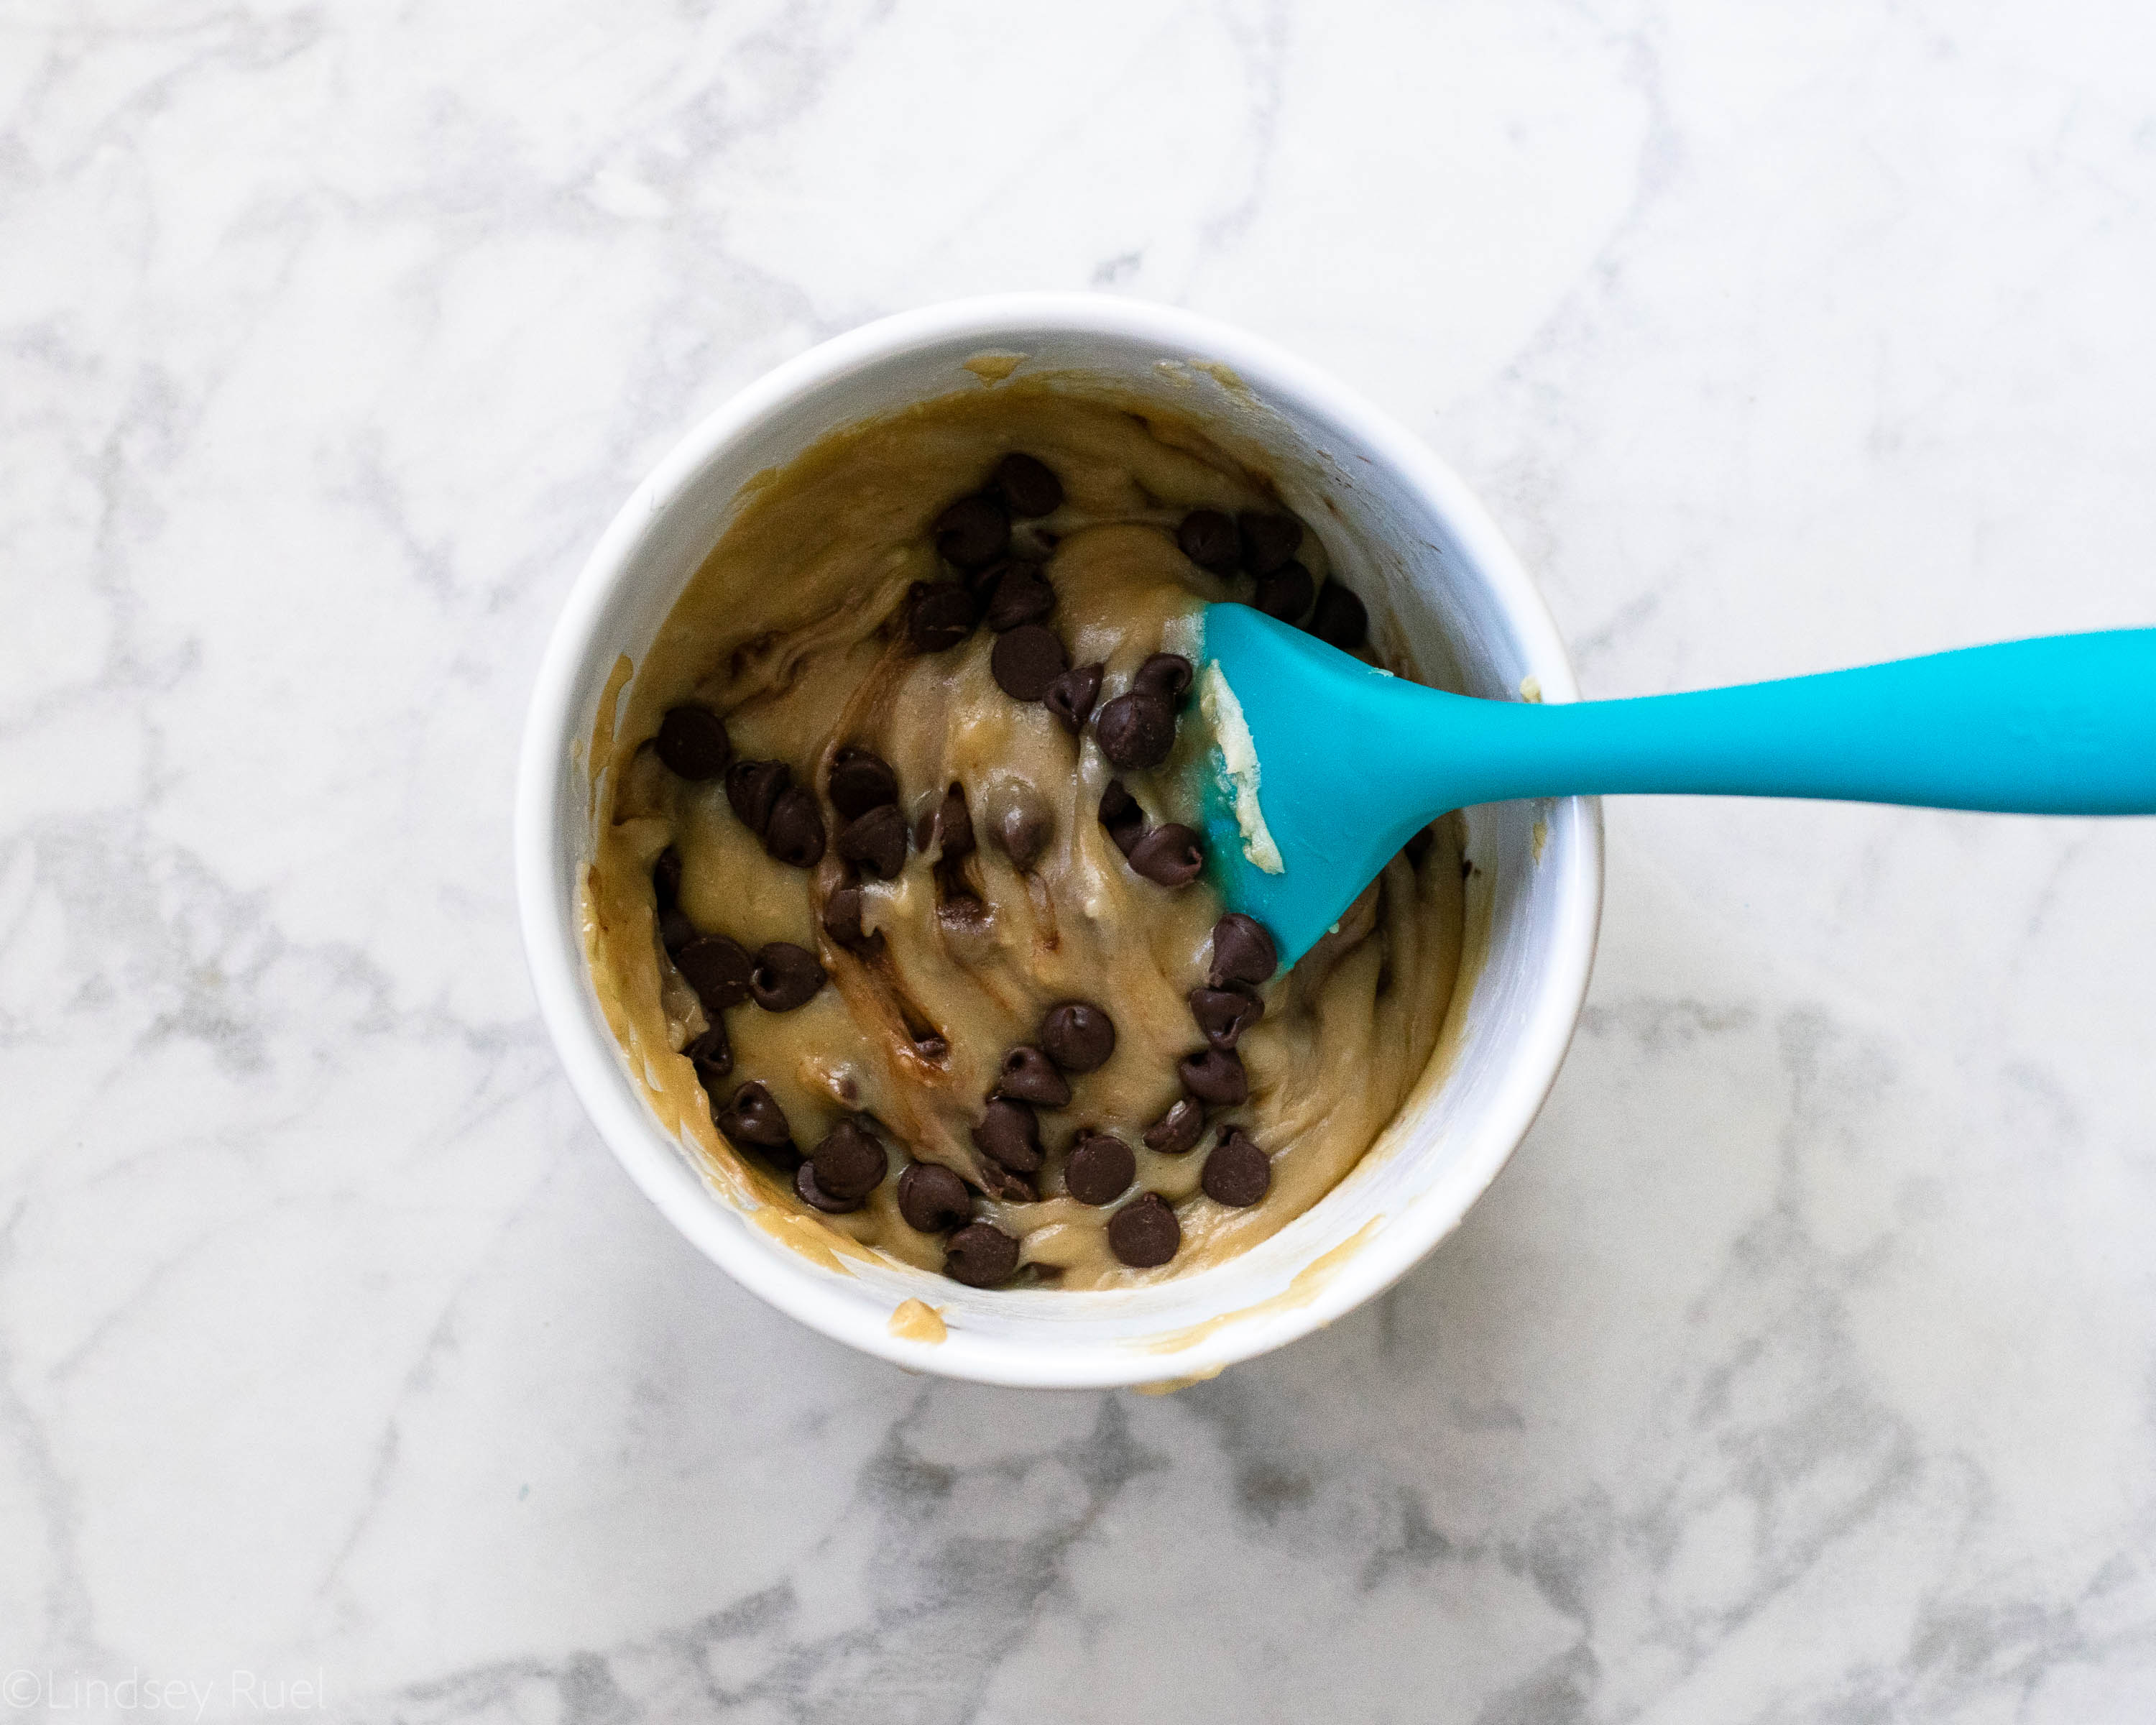
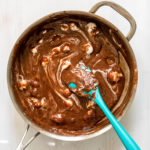
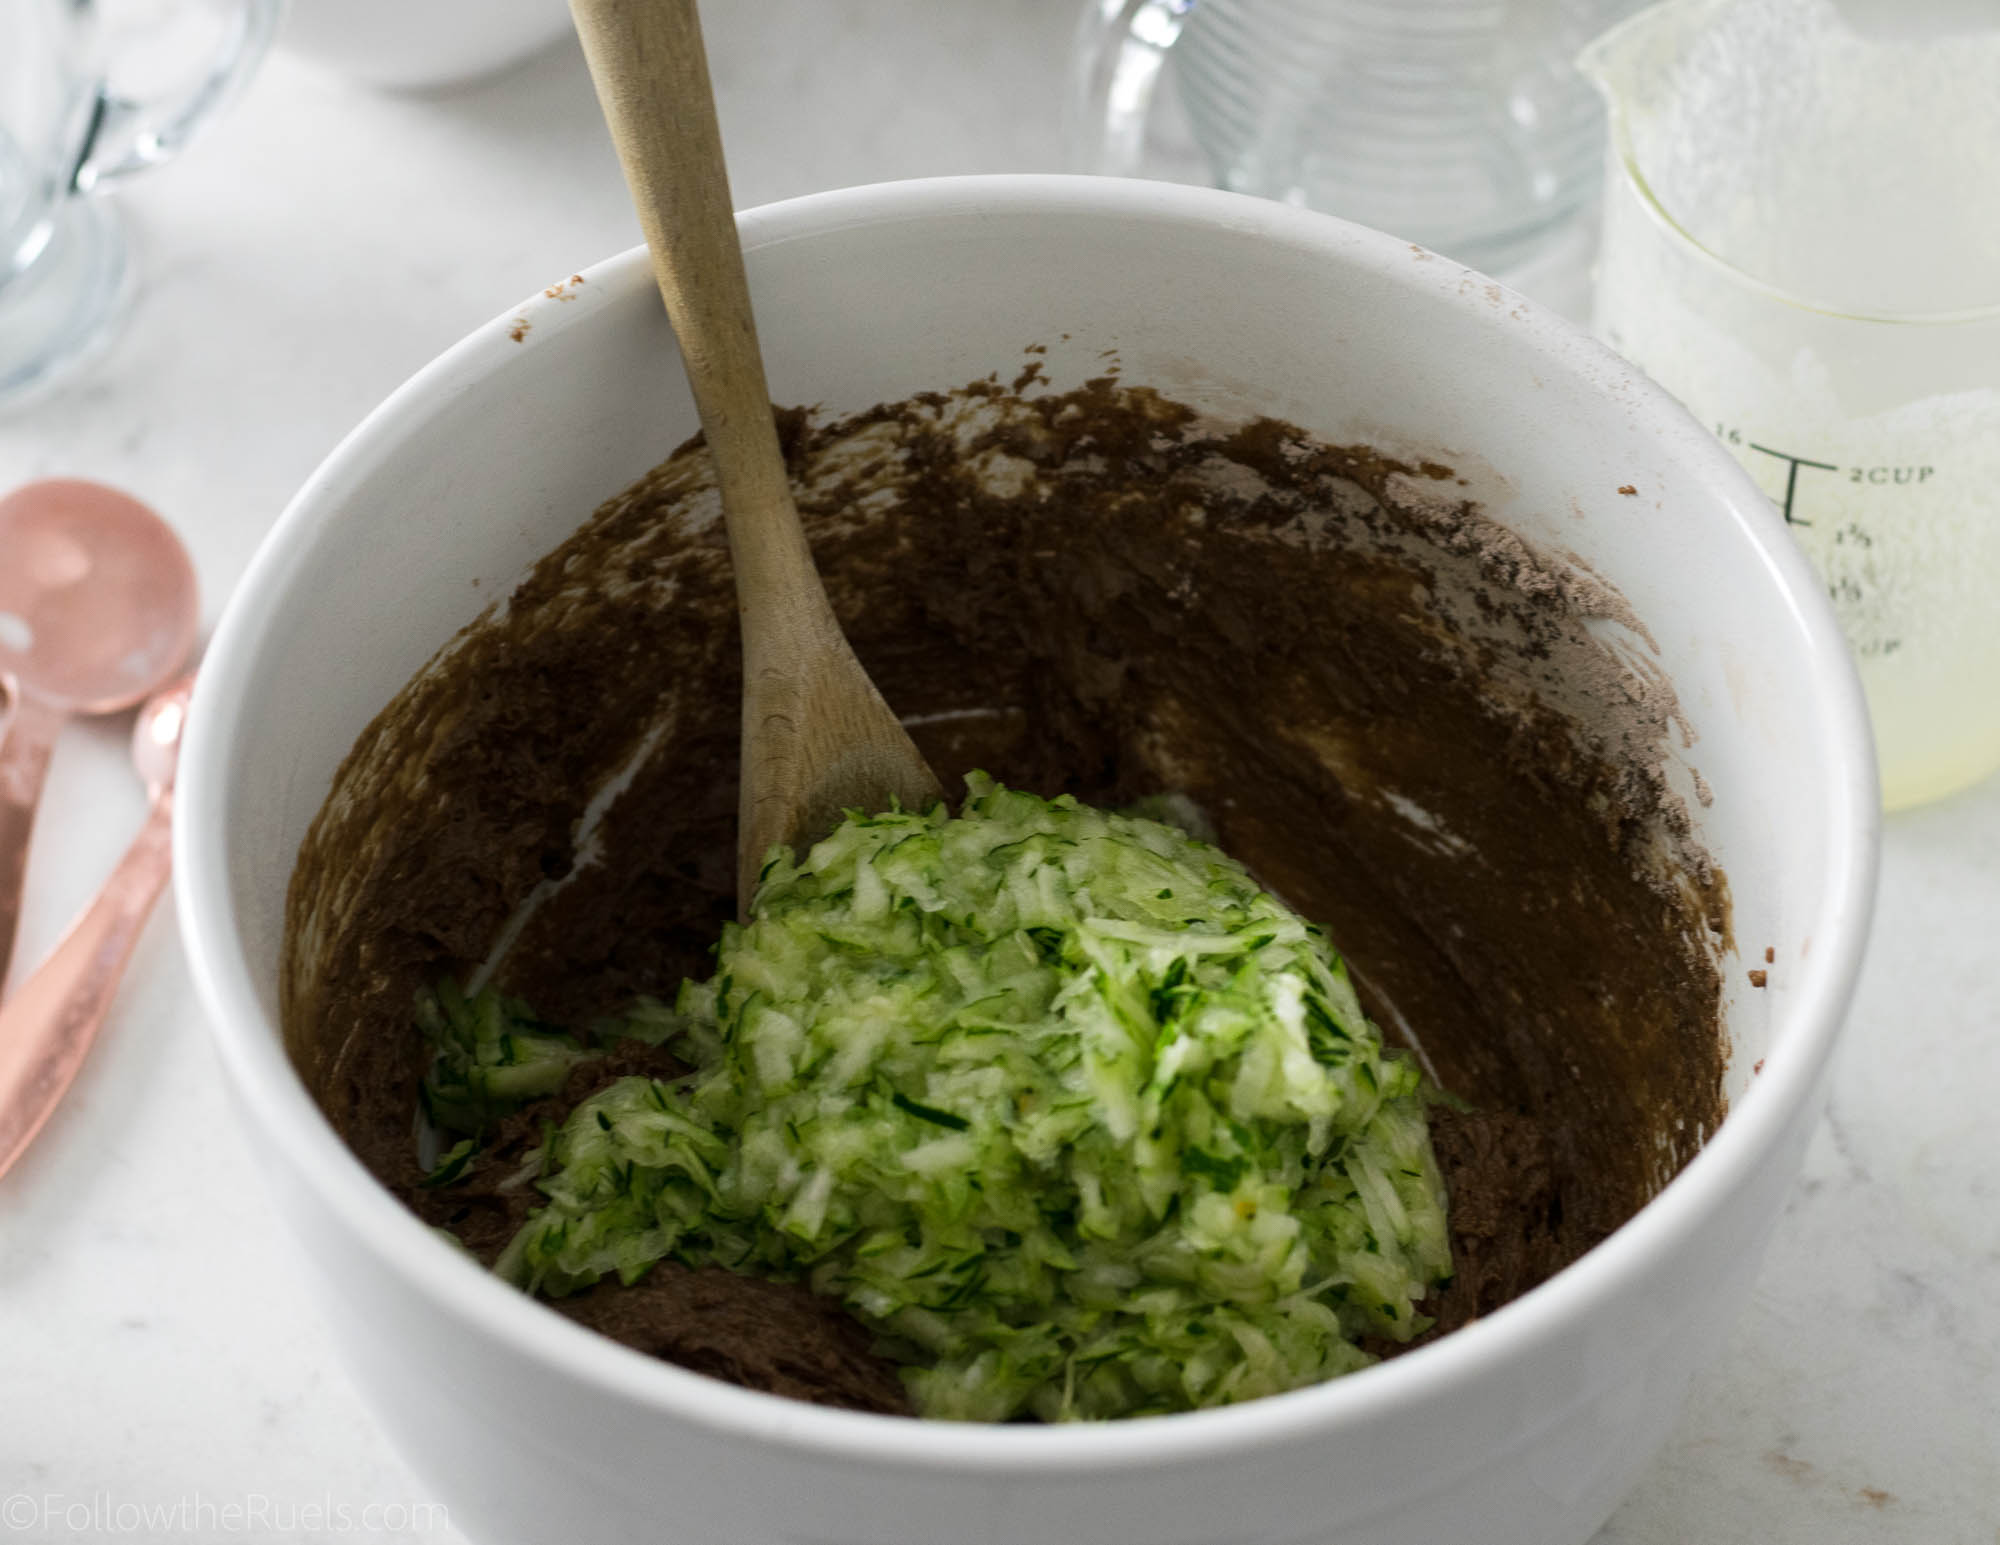
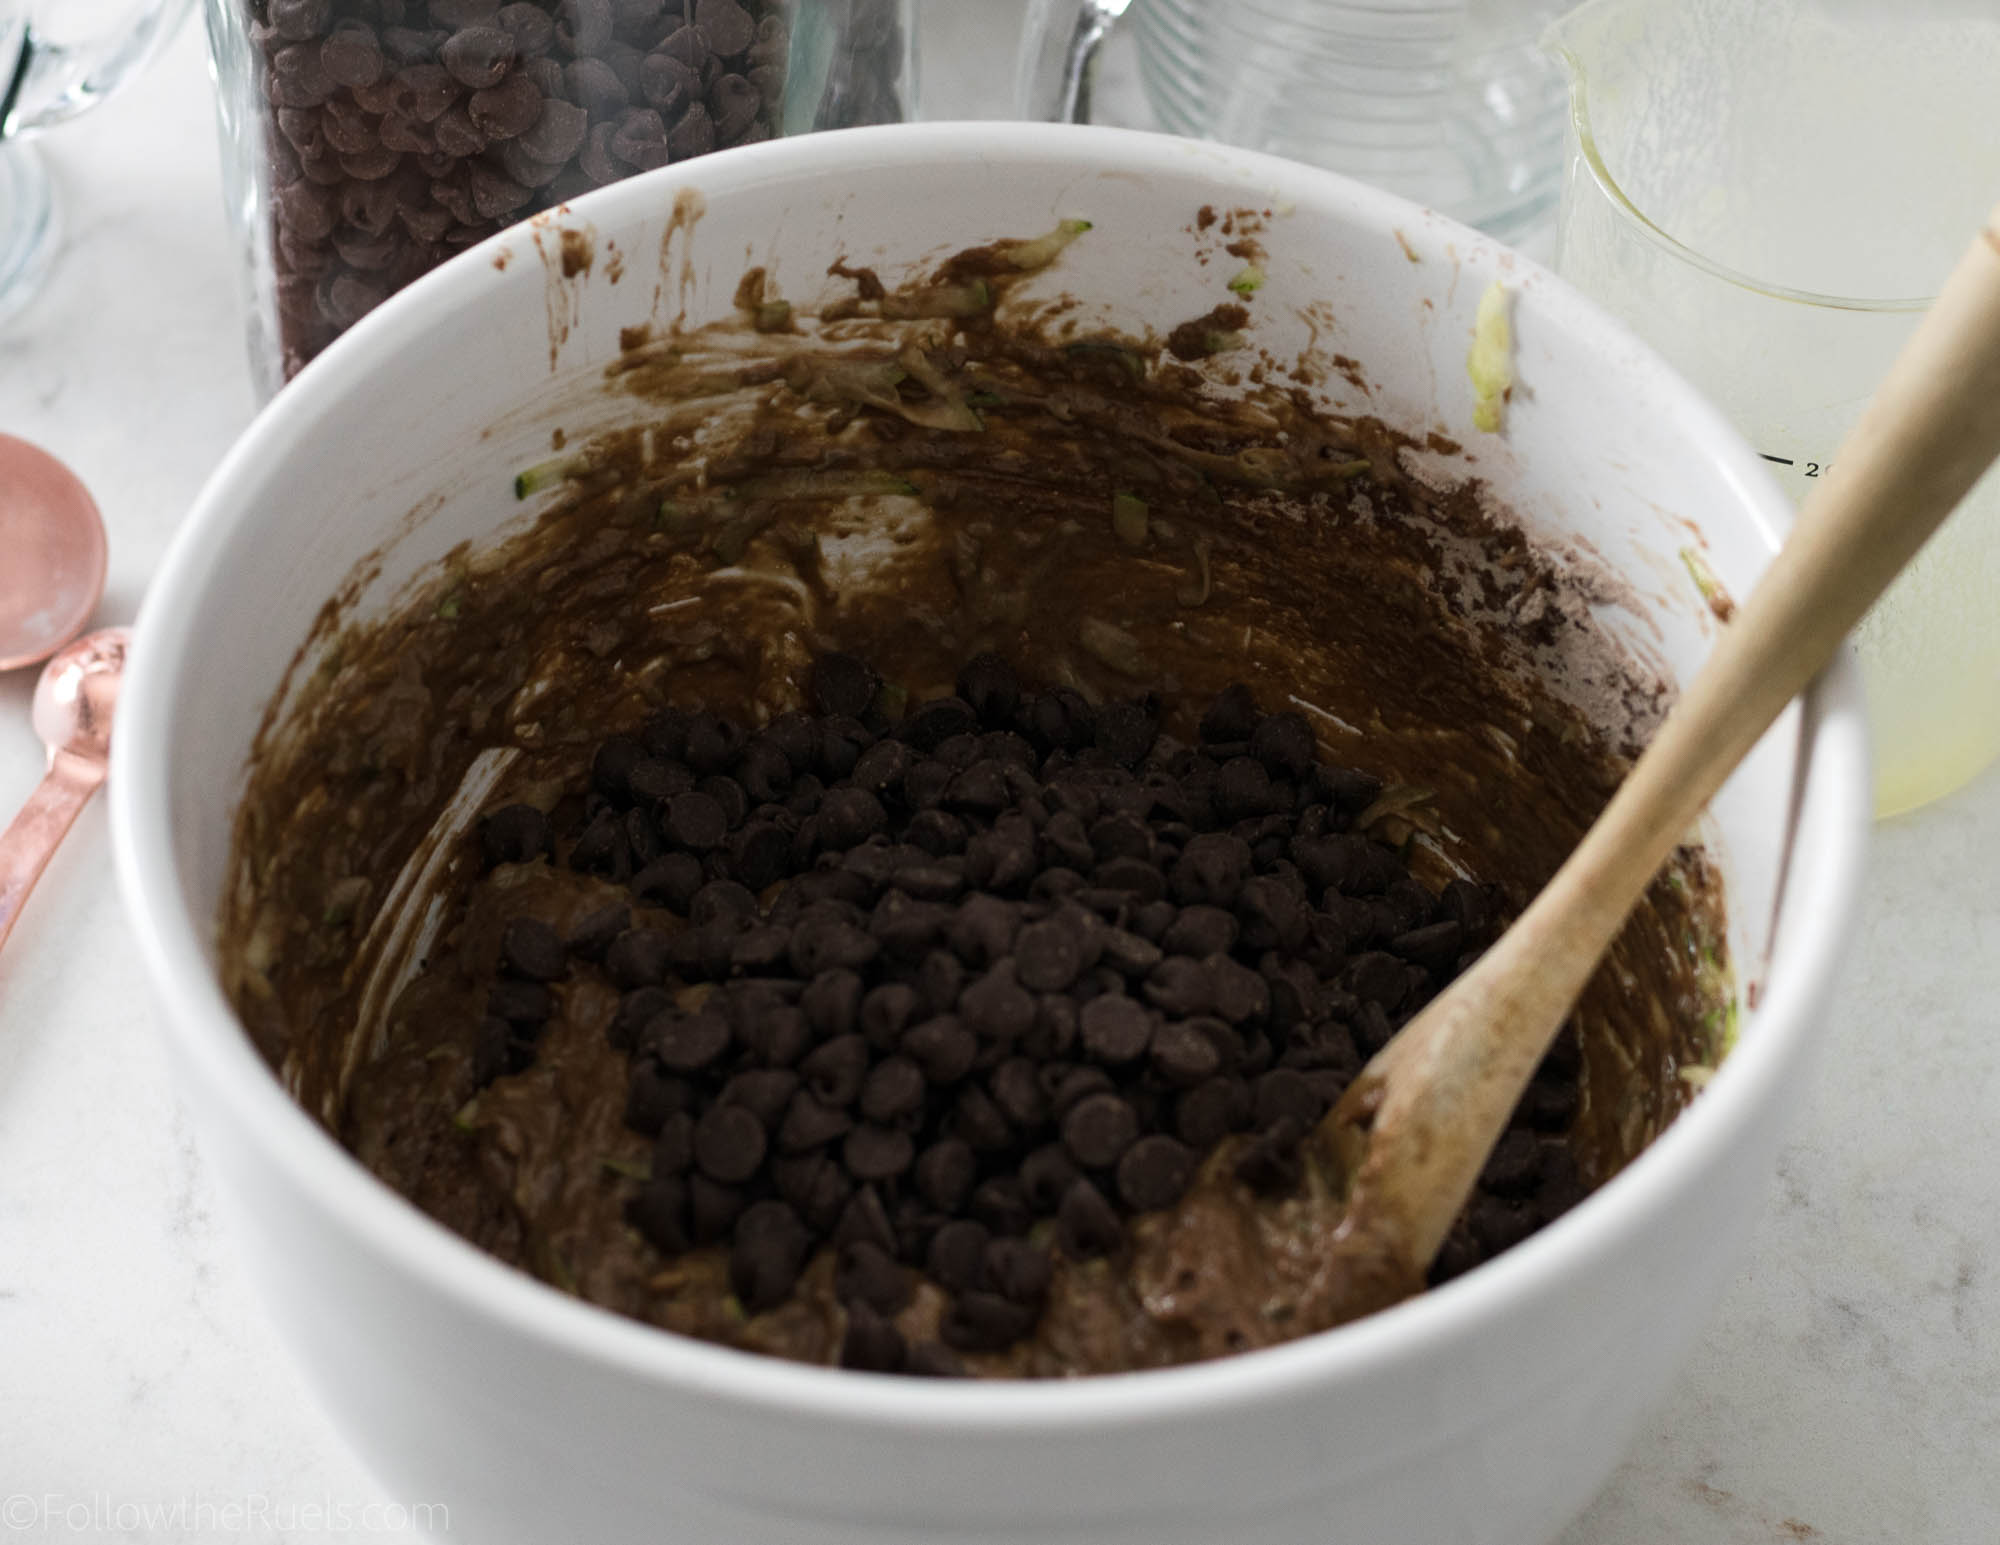
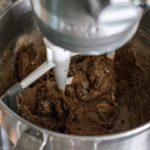
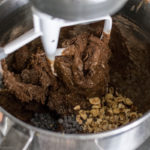
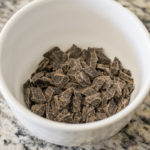
Let the mixture cool a bit, then add in your chocolate chips.

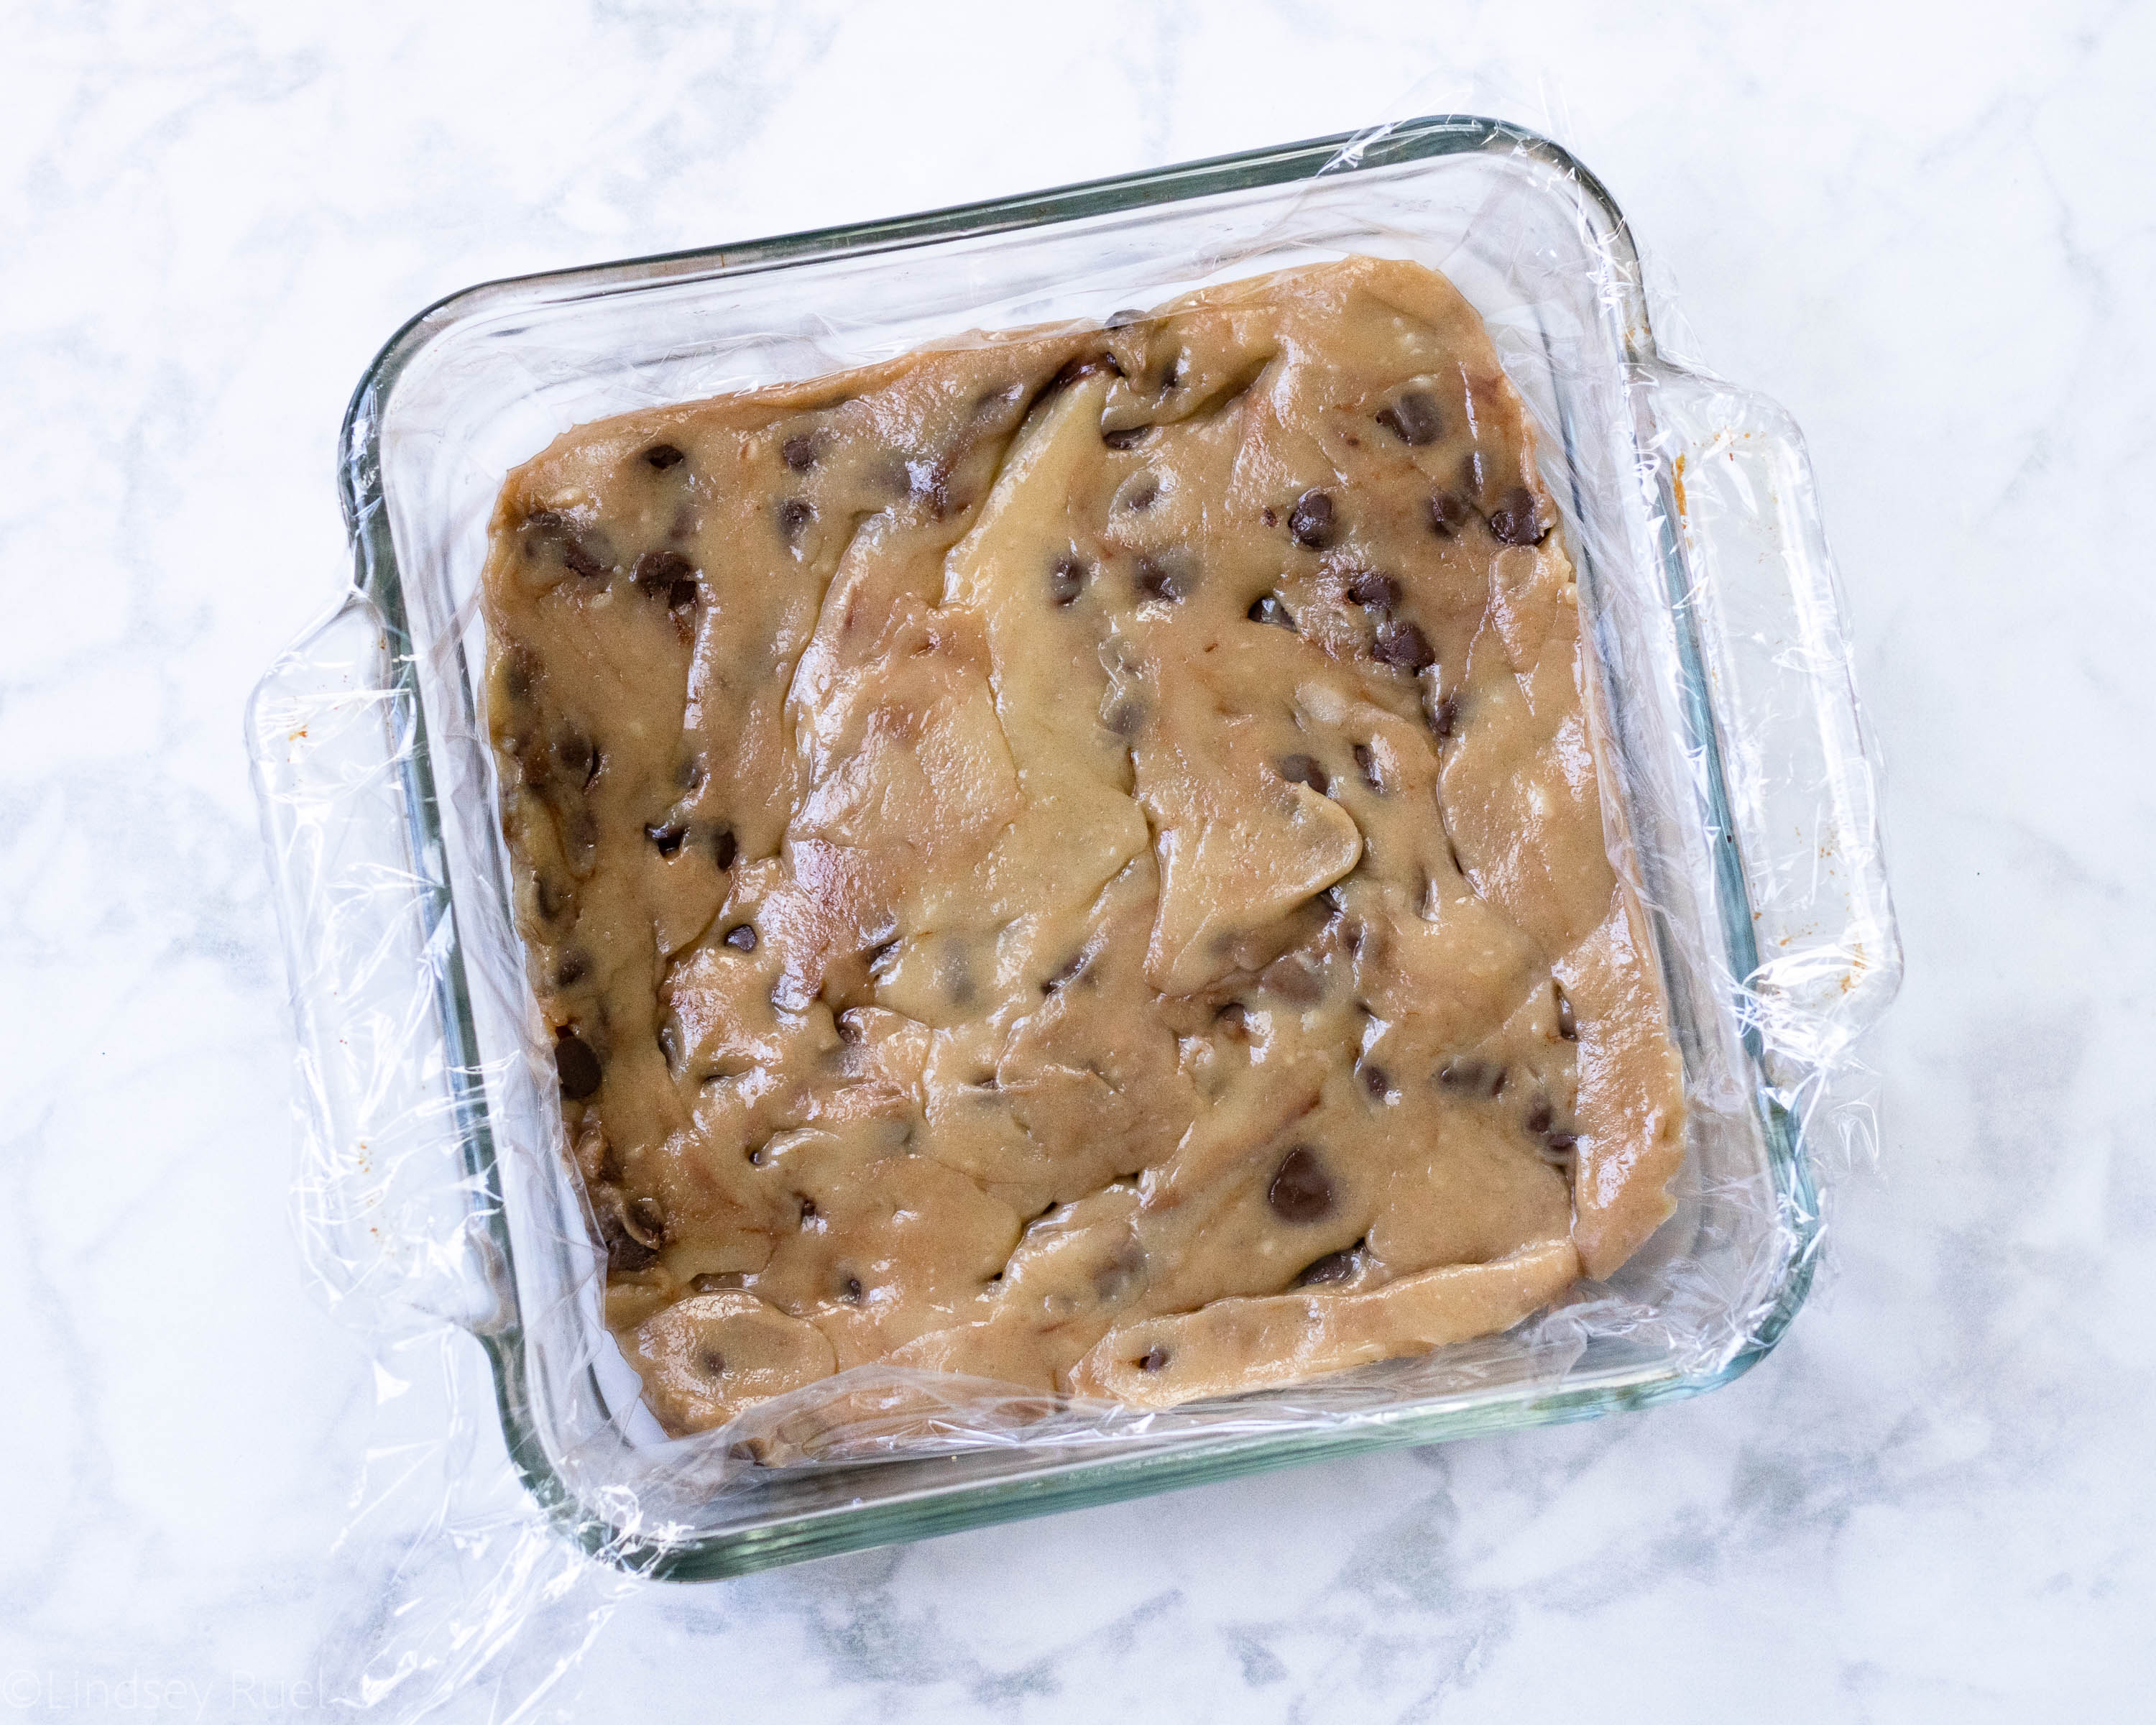
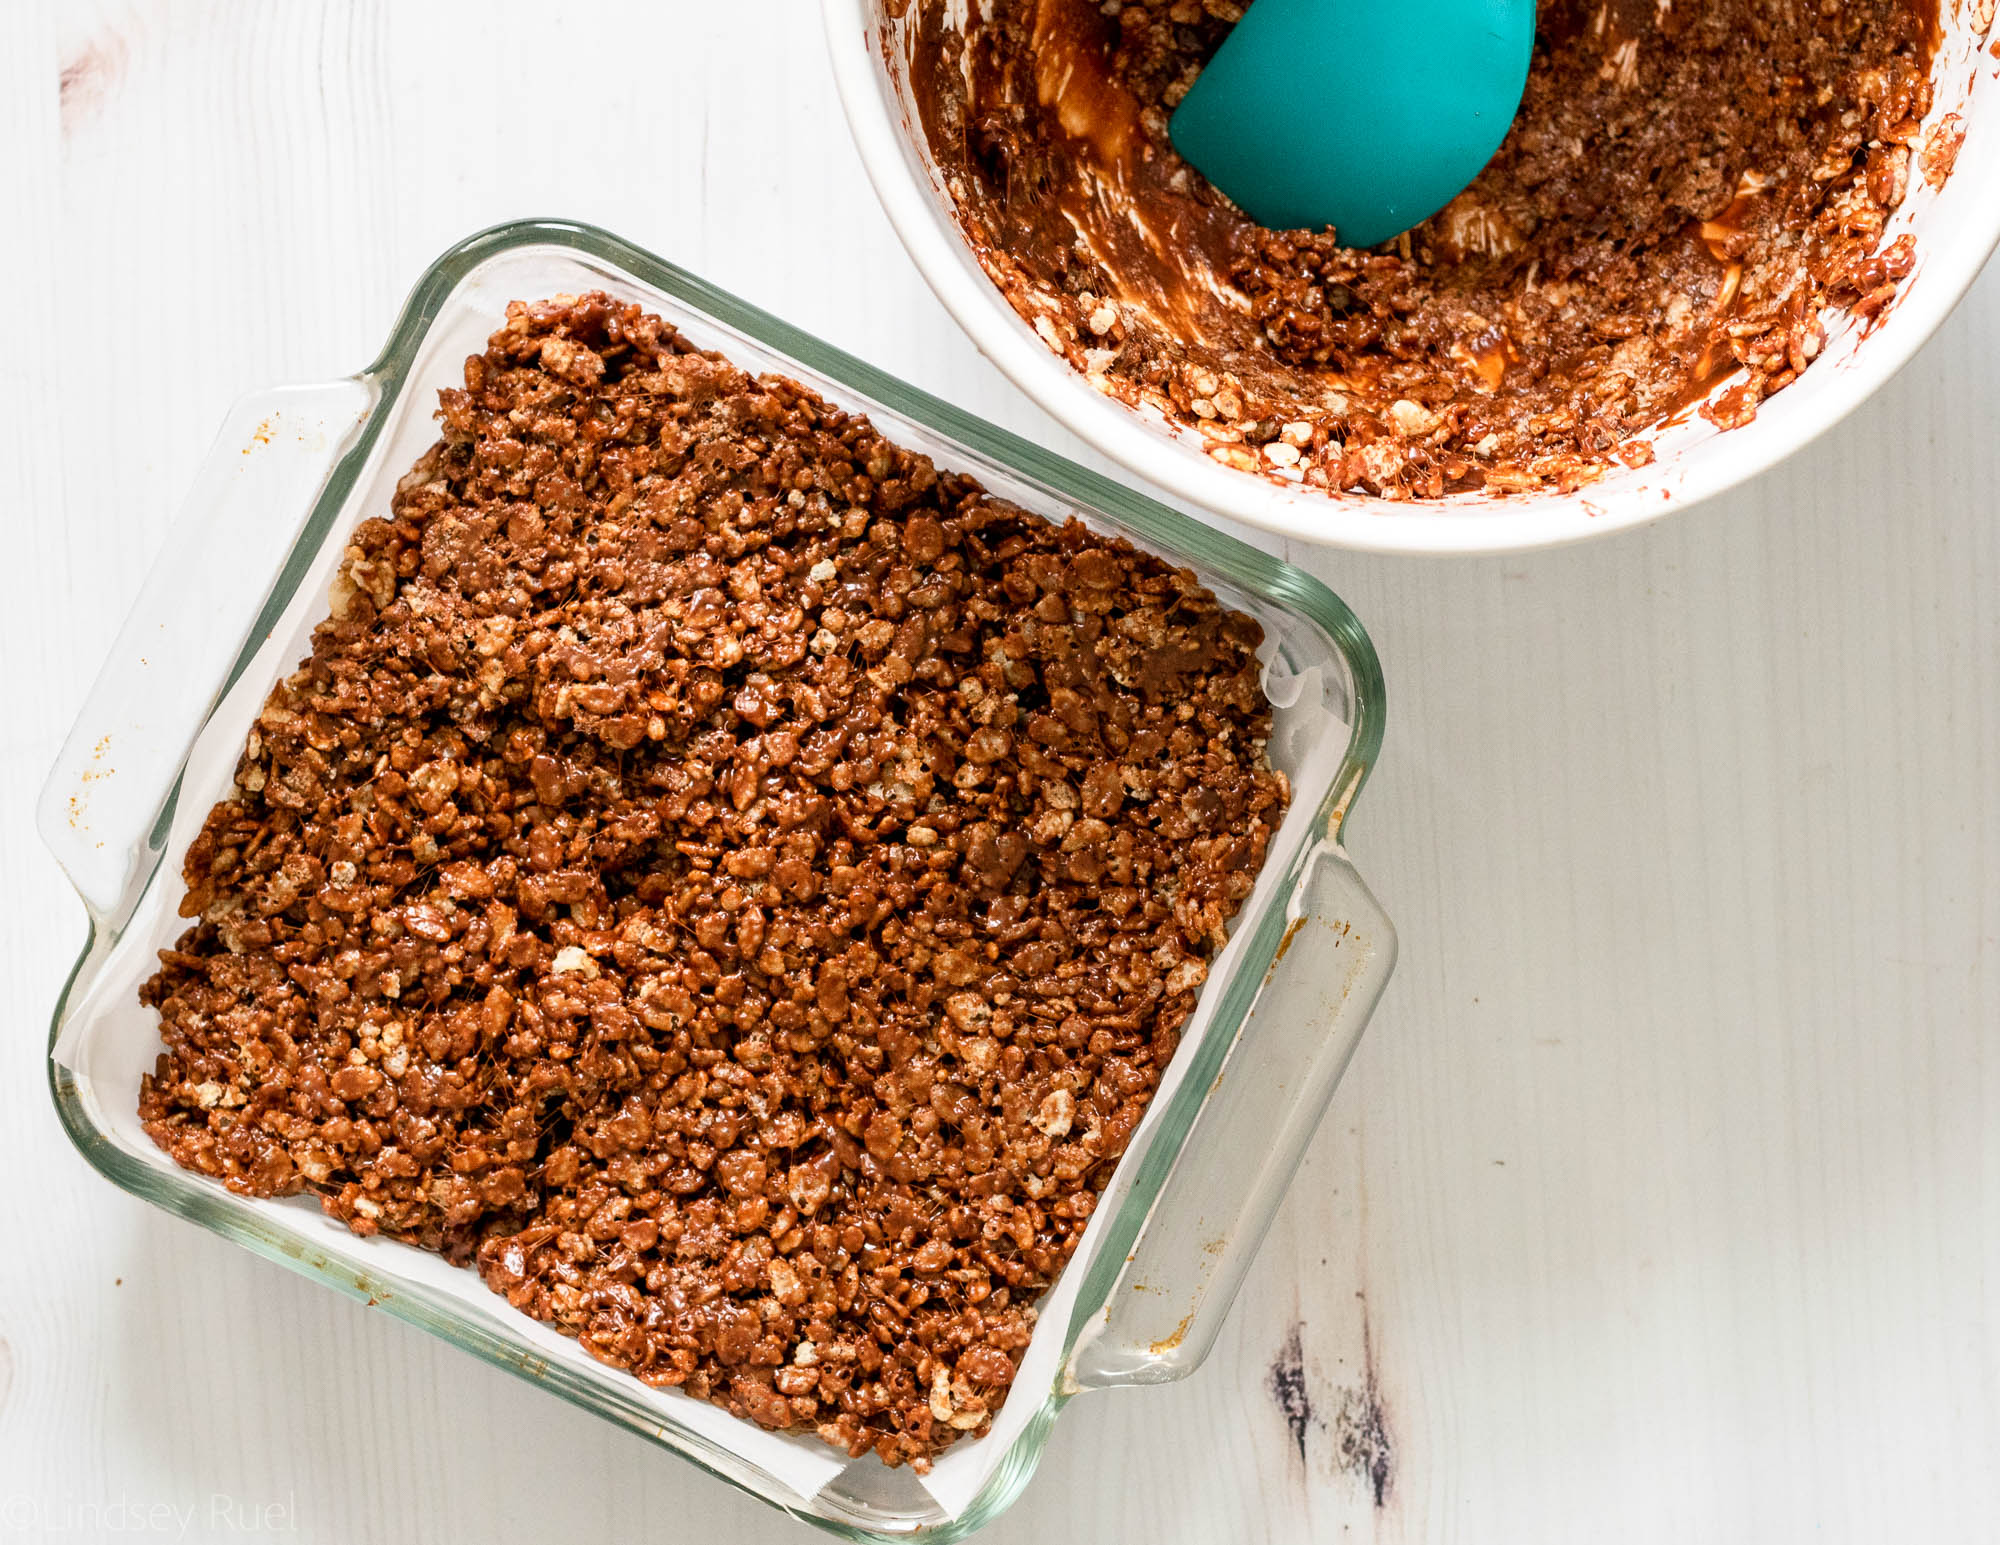
Transfer the fudge to a baking dish and pack down to form a nice smooth surface. Cover the surface with plastic wrap, then let it chill in the fridge for at least an hour.

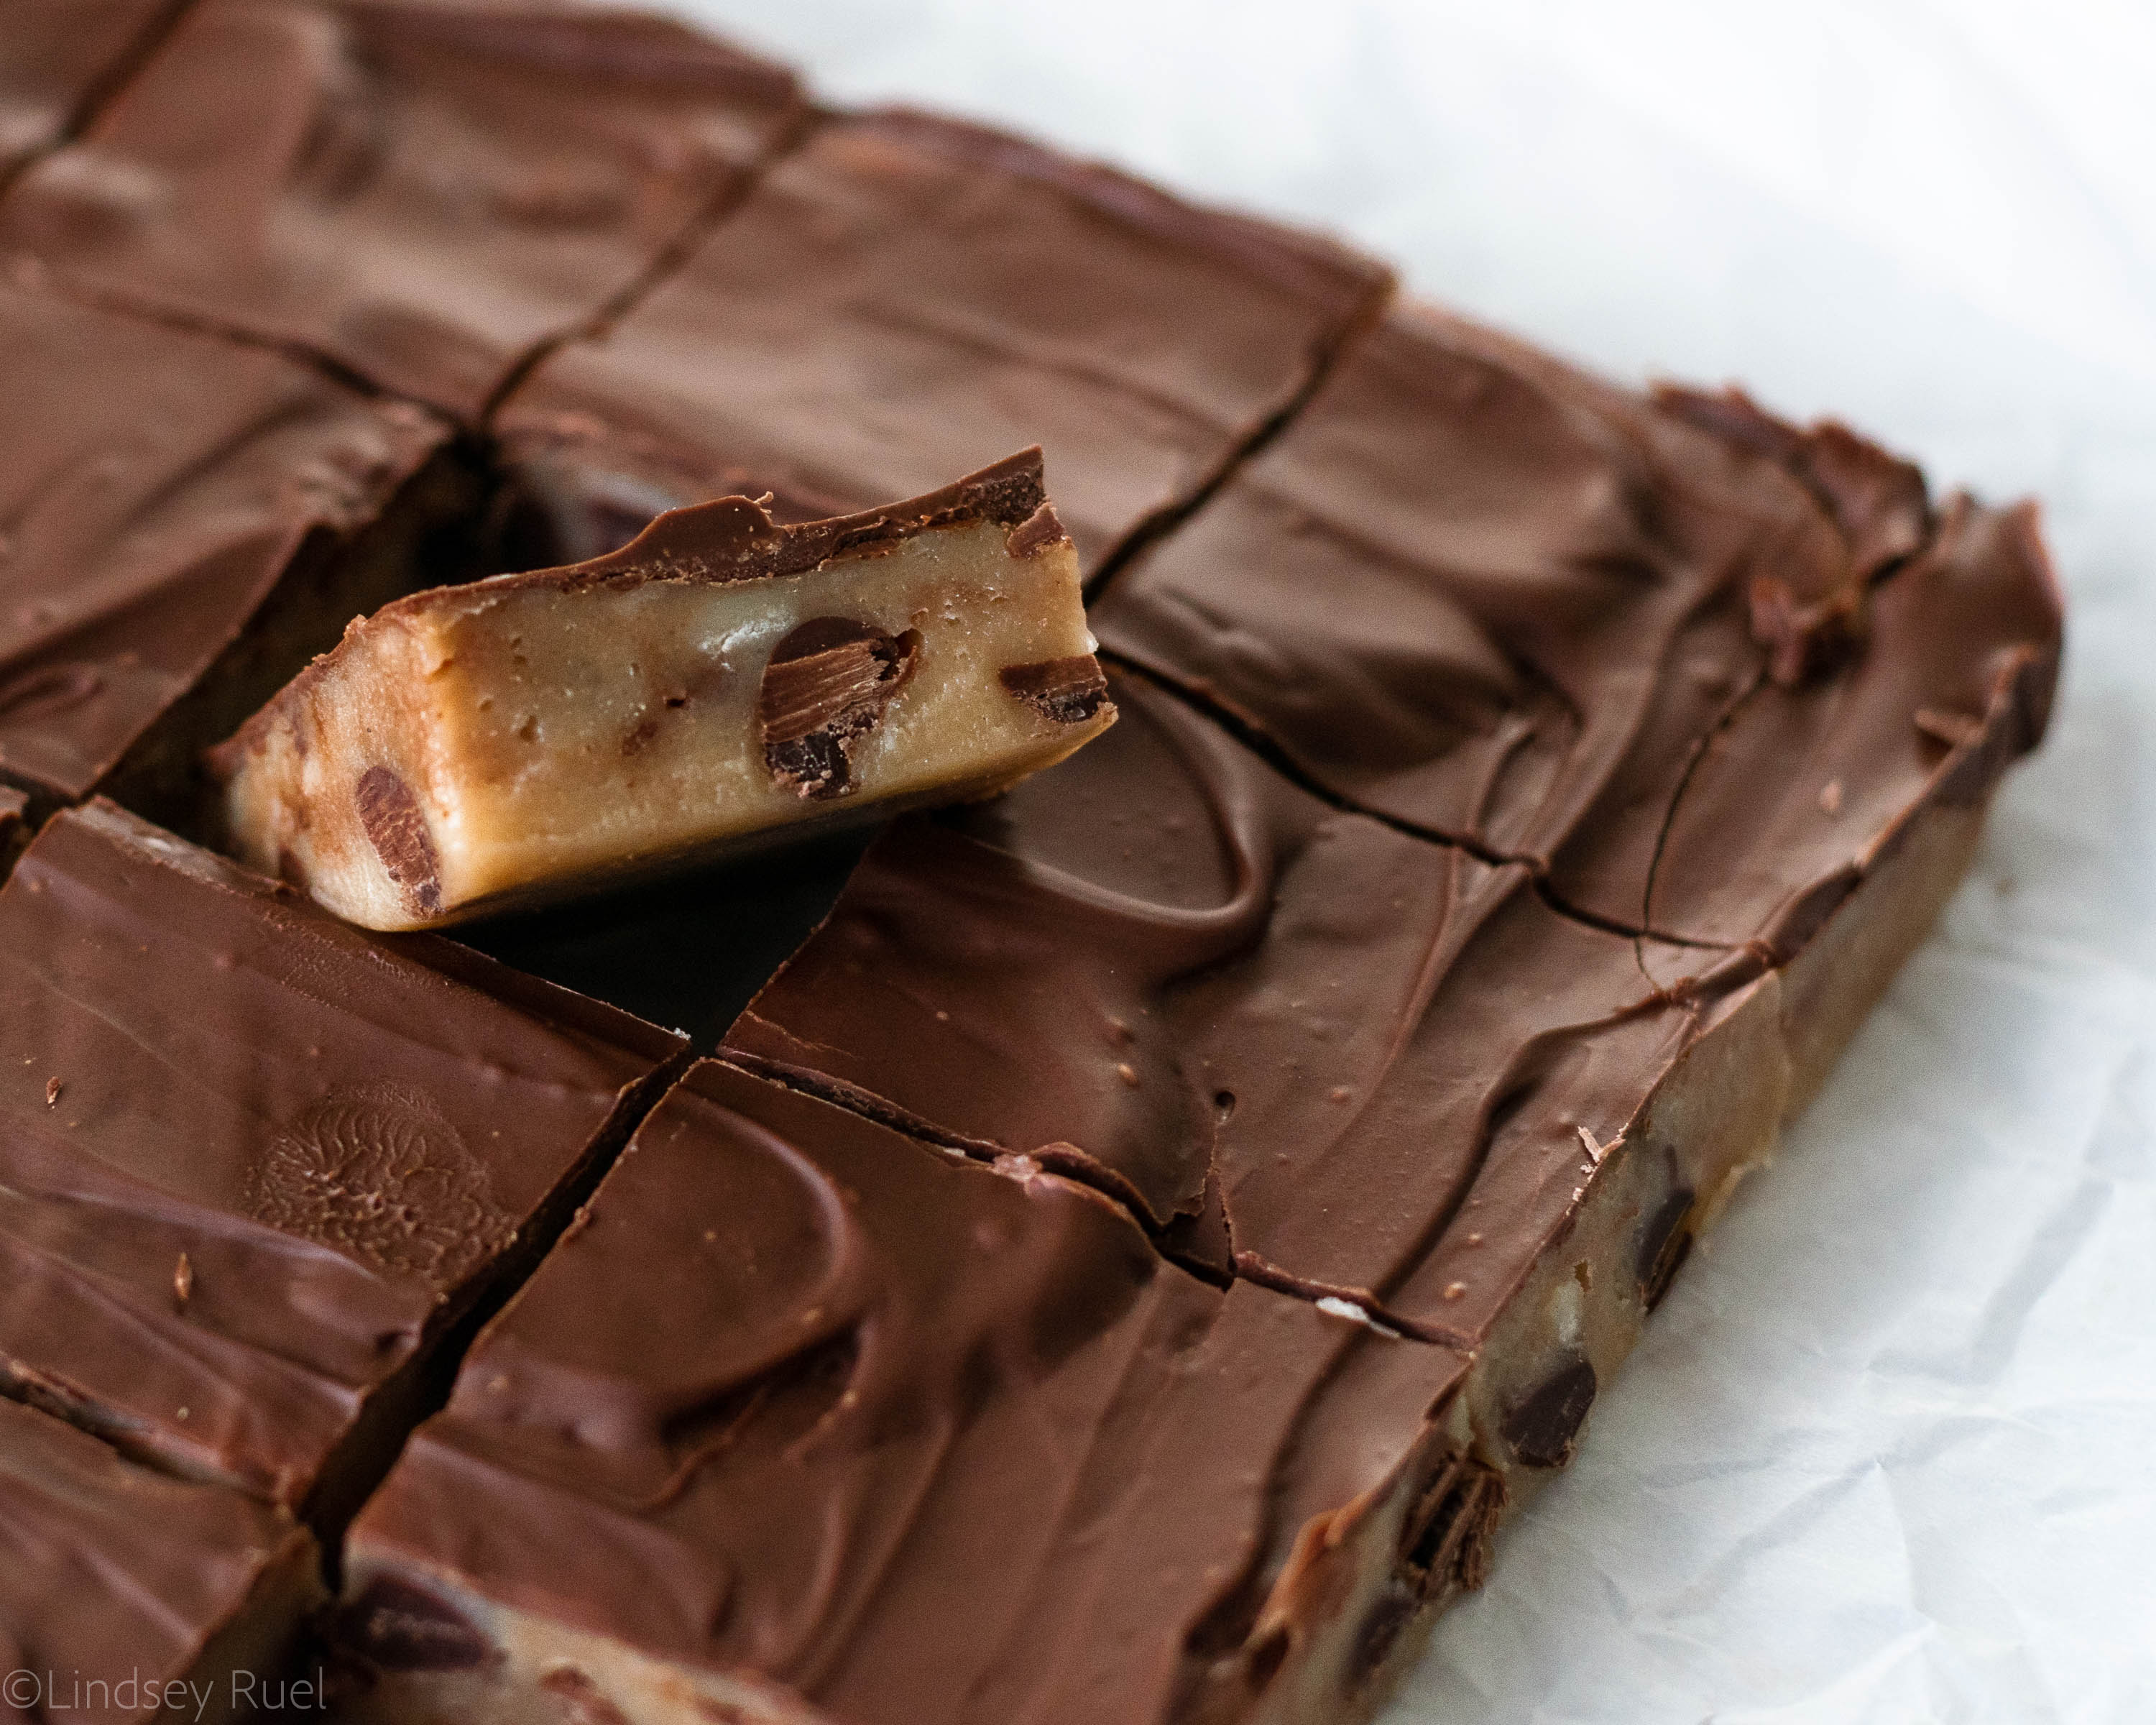
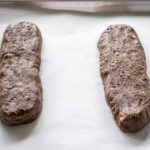
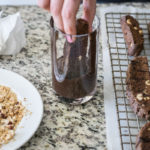
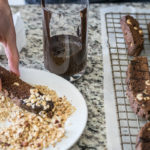
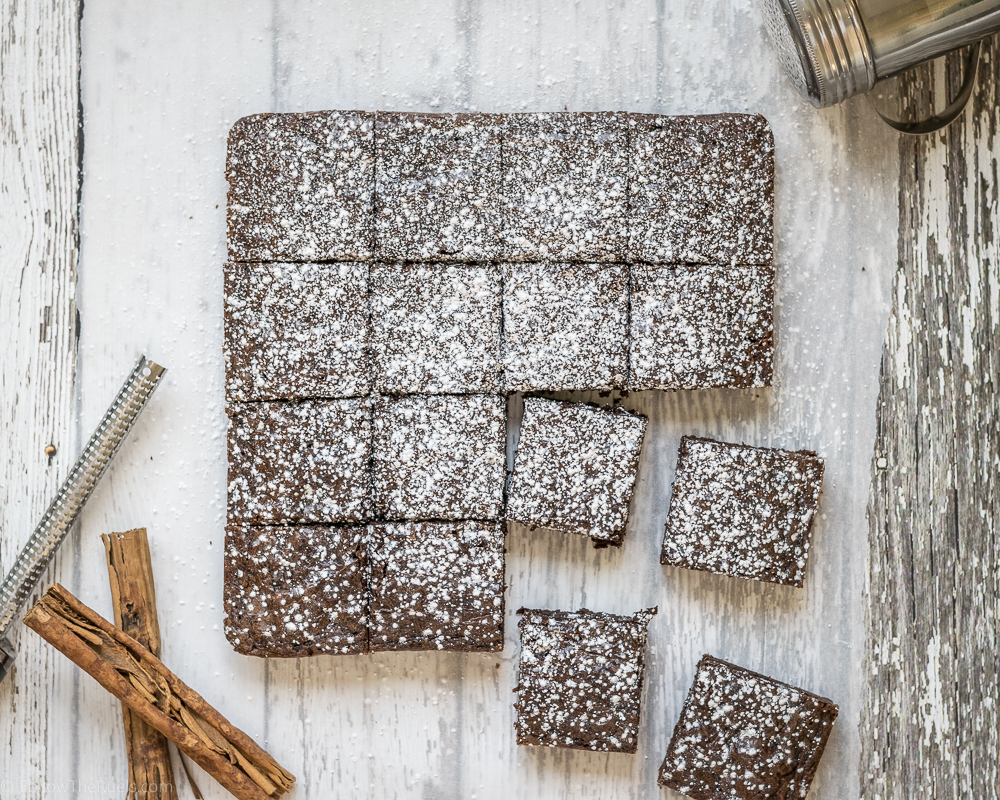
Once it’s chilled you can cover it with a layer of chocolate, or you can just cut it up into pieces and serve immediately!

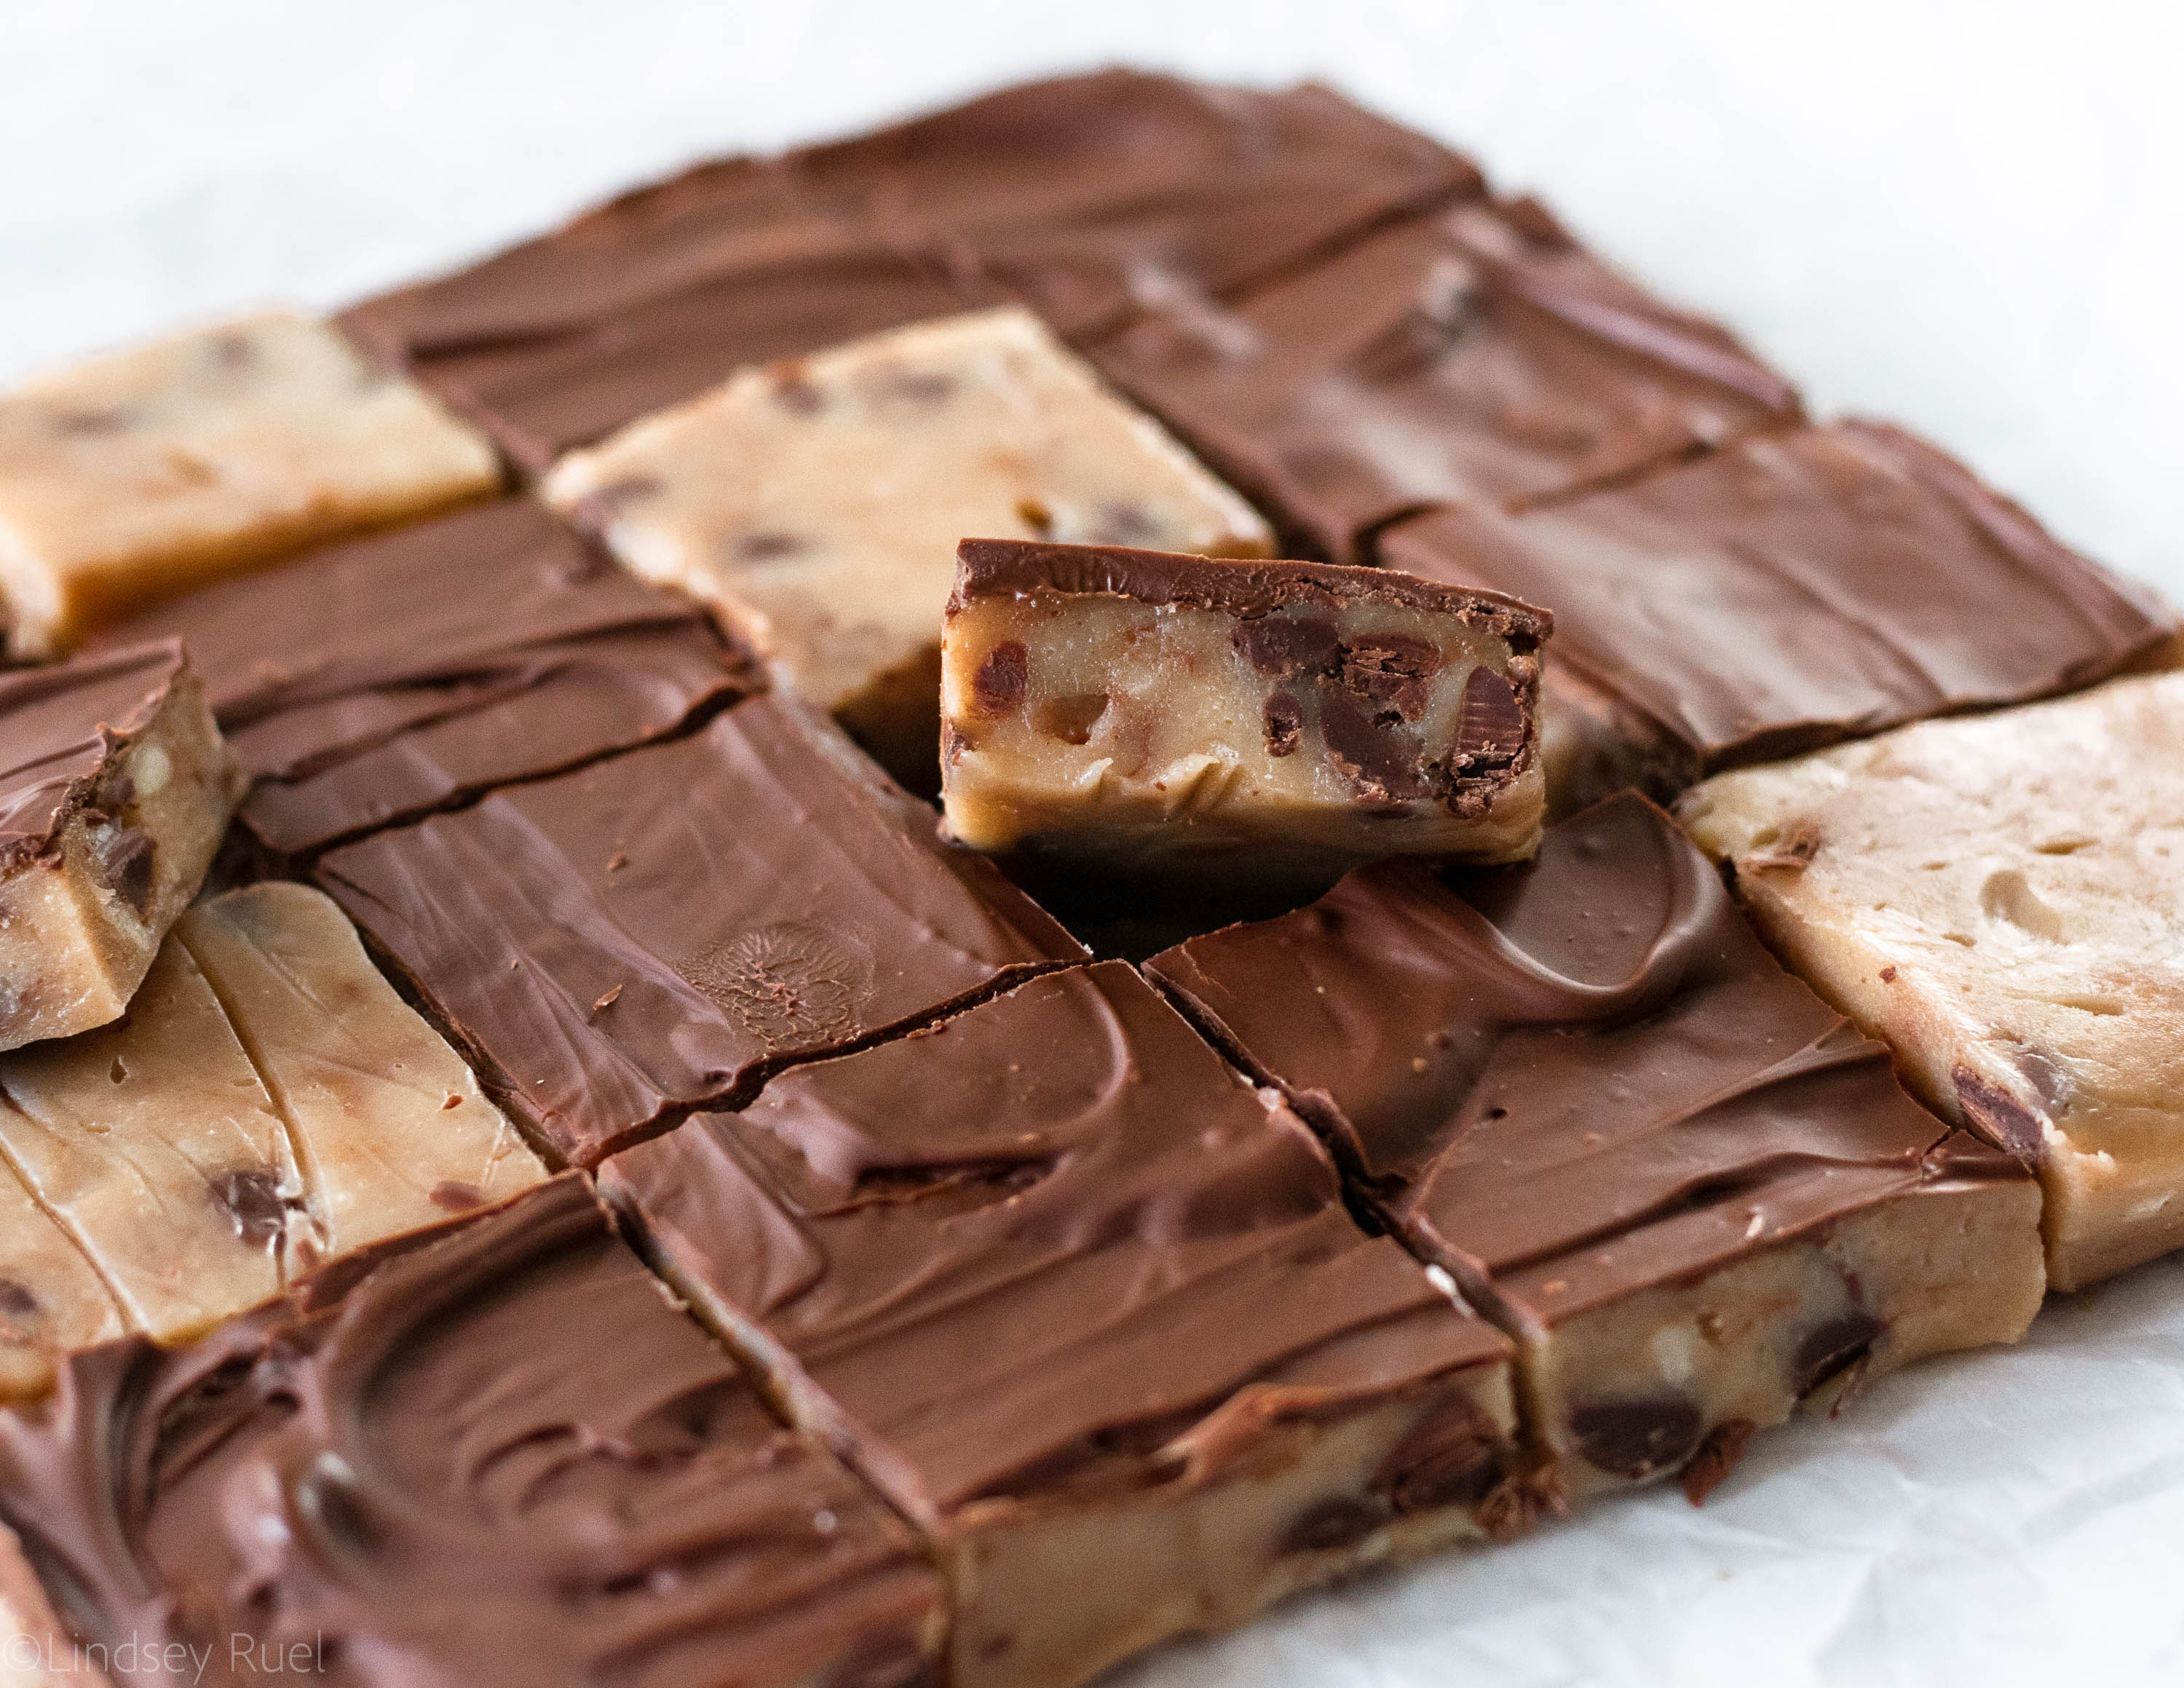
And a little goes a long way! I bet that just one little square will be enough to satisfy your craving for cookie dough!

Recipe

[amd-yrecipe-recipe:168]


/ Filed In: Bars and Brownies, Desserts, Eat, Other Sweets New
Tagged: bars, chocolate, cookie dough, fudge, no-bake

Peanut Butter Chocolate Rice Krispie Treats

July 24, 2018

I don’t know about you, but these days I loathe turning on my oven. It is just SO hot outside, I do everything in my power to avoid adding any heat inside. Which is why I have been loving no-bake desserts!

The most popular no-bake dessert has to be the Rice Krispie Treat. They are easy and quick to make, and now there are so many different flavors and varieties so you will never get bored. 

My current favorite Rice Krispie Treat flavor is this peanut butter chocolate Rice Krispie Treat! It’s like a cross between a Reeses Peanut Butter Cup and a Rice Krispie Treat. Two of my favorite things! 

The best part is that they only require a few more ingredients and they’re just as easy to make as your traditional cereal treat!

How to Make Them

In a large saucepan, melt together butter and chocolate. Once the chocolate is melted, stir in the cocoa powder and peanut butter.

Then pour in the marshmallows and let them melt a bit over the heat before stirring them into the rest of the ingredients. 

Once the marshmallows are completely melted, pour the mixture over the Rice Krispies and immediately stir to coat the cereal in that delicious marshmallow mixture. 

Then dump everything into a baking pan that has been lined with some parchment. Use a spatula to press the mixture into the corners and to flatten out into one large sheet of delicious Peanut Butter Chocolate Rice Krispie Treats.

It only takes a few minutes (about 30) for these treats to set, then you can cut into them and enjoy!

Like I said above, these are the best of both a peanut butter cup and a Rice Krispie Treat. I am just so thankful to have a sweet treat to snack on that doesn’t require an oven!

Recipe

[yumprint-recipe id=’191′]

/ Filed In: Bars and Brownies, Desserts, Eat, Other Sweets New
Tagged: cereal bar, cereal treats, chocolate, no-bake dessert, peanut butter, Rice Krispie treats, Summer

S’more Rice Krispie Treats

July 5, 2018

There are so many recipes that I make at home that never make it to the blog. Some I photograph, but the finished product just doesn’t look or taste right. 

Others I make, but never photograph, only having to make them again. 

This was almost one of those recipes. 

After the weather threatened our chances at making actual s’mores for our 4th of July cookout, I thought I would try something a little different. A total experiment. S’more Rice Krispie Treats!

However, after I made these and served them to my husband and neighbors, it was determined that they HAD TO GO ON THE BLOG.

My very picky husband literally called these S’more Rice Krispie Treats “amazing”. 

So here they are, on the blog….with almost no photos. Don’t worry, though. They are very easy to make and require very little visual guidance.

How to Make Them.

First, lay down a layer of graham crackers. My square baking dish didn’t fit them perfectly, so I had to break a few in half to get the entire bottom of the pan covered in graham crackers. 

Then, pour melted chocolate over the graham crackers and carefully spread it out so that there is a nice thin layer of chocolate over the crackers. 

Now it’s time to make the Rice Krispie treats! Follow the directions on the box or make your very own version of the classic and then dump the Rice Krispie mix on top of the chocolate covered crackers. Use a spatula to press the Rice Krispies down into the chocolate so that the entire pan is full. 

Then do everything in reverse! Melt some more chocolate, pour and spread it on top of the Rice Krispie treats, then top with more graham crackers. 

Let the entire thing sit and harden for about 30 minutes or until the chocolate has hardened. 

Finally, cut them into squares. You can use the top graham crackers as a guide, but they may not line up perfectly with the bottom grahams. 

See, so easy right? 

Recipe

[yumprint-recipe id=’188′]

/ Filed In: Bars and Brownies, Desserts, Eat, Other Sweets New
Tagged: 4th of July, chocolate, dessert, graham crackers, kid friendly, marshmallows, no-bake dessert, Rice Krispie treats, s'mores, Summer

Chocolate Dipped Watermelon

June 21, 2018

If you are looking for a super easy, somewhat healthy, all around people-pleasing dessert for any Summer party or picnic, then you have to make yourself some chocolate dipped watermelon!

How to Make It

The first thing to do is to cut the watermelon into slices. These can be as big or small as you like. They don’t even have to be slices! They can be chunks or sticks or however you like to cut your watermelon. 

Lay the slices of watermelon on a tray and let them chill in the fridge while you move onto the chocolate. 

The trick to getting a nice chocolate coating that sticks to the watermelon is to temper the chocolate. 

Tempering chocolate used to intimidate me, but it’s actually pretty easy and makes a world of difference! Instead of chalky, grainy chocolate, you will have a nice smooth, glossy chocolate coating.

To temper the chocolate you first melt about 2/3rds of the chocolate over a double boiler. Not all the pieces will be melted, but most should be starting to melt. Then stir the chocolate off the heat until all the pieces are melted. At this point, the chocolate should be pretty hot. 

Then add in the rest of the chocolate pieces and mix until they have melted into the rest of the chocolate. This may take a while because the chocolate is cooling down as more chocolate is added. By the end, all of the chocolate pieces should be melted and the chocolate should actually feel cool to the touch. I highly recommend checking out this very in-depth post about how to temper chocolate. 

Next, just dip the watermelon into the chocolate. If the watermelon has developed a lot of moisture on the surface, blot that away with a paper towel before dipping. It will ensure that the chocolate sticks. 

If you want the chocolate to cover even more of the watermelon, use a spoon or spatula to spread it up the sides. 

Because the watermelon is cold from the fridge, the chocolate will start to harden pretty quickly (which I actually prefer). So if you want to add any toppings, act fast! 

You can add sprinkles to make these chocolate dipped watermelon slices super festive. You can even sprinkle on some sea salt or chopped nuts. Go crazy!

Whichever way you dress up your watermelon, I guarantee it will be delicious and refreshing! A perfect combination for a hot Summer day!

Tools and Recipe

[show_shopthepost_widget id=”3178073″]

[yumprint-recipe id=’185′]

/ Filed In: Desserts, Eat, Other Sweets New
Tagged: 4th of July, chocolate, picnic, Summer, tempering chocolate, watermelon

Black and White Double Chocolate Chip Cookies

May 2, 2018

Can’t decide between a classic chocolate chip cookie, and a reverse chocolate chip cookie (chocolate cookie with white chocolate chips)? Well, you don’t have to! Instead, make these ying-yang-esque cookies which combine them both to make a black and white double chocolate chip cookie. 

Boy, that’s a mouthful. And so are the cookies!

If you follow me on Instagram, you may have caught my Instagram story about how my husband gave these cookies his stamp of approval. Normally, he is not a sweets eater. He is constantly turning down my invitation to try any of my baked goods. 

However, these cookies caught his eye and he asked me if he could have one (color me shocked!). After his first bite he said, “Wow, these are actually pretty good.” 

Actually pretty good. Now that’s a seal of approval if I have ever heard one. 

But really, these are so delicious. I love the combination of the classic cookie and it’s mirror image. There are so many layers of chocolate flavor, from the cocoa powder in the chocolate cookie, to the semi-sweet chips, to the super sweet white chocolate. Like I said, they are a mouthful in the best way possible!

How to Make Them

If you have ever made chocolate chip cookie dough before, you are in luck because that training will come in handy for these cookies. You will not only make one, but two chocolate chip cookie doughs which will be combined together to make these black and white double chocolate chip cookies. 

Spoon about 1 tbsp of dough onto the a baking sheet, then spoon the same amount of the other dough right next to it. 

I like to use this cookie dough scoop which makes the perfect sized cookie.

Roll the both of the cookie dough balls together to form one ball of dough. Then sprinkle a little bit of flaky sea salt on top (because every chocolate chip cookie needs a bit of sea salt). 

Once they come out of the oven, the cookies will form this ying and yang of chocolate and non-chocolate cookies. 

But together they form this wonderfully delicious cookie that combines all of the best types of chocolate. 

Supplies and Recipe

[show_shopthepost_widget id=”3122363″]

[yumprint-recipe id=’173′]

/ Filed In: Cookies, Cookies New, Desserts, Eat
Tagged: chocolate, chocolate chip cookies, chocolate chips, cocoa powder, cookies, white chocolate

Chocolate Zucchini Muffins

February 28, 2018

If you are a parent trying to sneak in extra veggies into your child’s diet…or just an adult who needs to sneak veggies into your own diet (like me), then this is the recipe for you!

Zucchini is one of those wonderful vegetables that can be a total chameleon. It can replace noodles, added to bread, and accompany some chocolate in these delicious muffins!

For those of you worried about the presence this green-skinned squash in your chocolate zucchini muffins, trust me, these muffins are way more chocolate than zucchini. At least in taste. 

The zucchini actually has no taste or texture, really. It just makes the muffins super moist and extra delicious without a whole lot of extra fat or sugar. Okay, there’s plenty of sugar in here, but not as much as you would expect for a chocolate muffin!

How to Make It

First, break out your grater and grate 1 big zucchini. That should give you more than enough zucchini to add to the batter.

I recommend that you let your zucchini drain on some paper towels while you prepare the rest of the batter so that you don’t add too much extra moisture.

Next, assemble the dry ingredients in one large bowl. Give them a good whisking to break out any lumps and bumps in the flour and cocoa powder. 


In a liquid measuring cup, combine all of the wet ingredients (except the zucchini). Mix the wet ingredients together to break up the egg and emulsify everything into one smooth liquid. 

Pour the wet ingredients into the dry and mix until it forms a very thick batter. 

Fold in the shredded zucchini which will immediately loosen up the batter so that it feels more like a regular muffin batter. 

If you want even more chocolaty goodness, toss in some chocolate chips. 

Scoop the batter into prepared muffin tins then pop them in the oven to bake. 

Note: I prefer to use an ice cream scoop for portioning out my muffins because it’s a perfect size! And much easier to use!

Once they come out of the even they will have risen slightly over the edge of the muffin liner and the chocolate chips will be soft and melted. 

Because these muffins are so moist, thanks to that zucchini, you definitely want to let them cool a bit before sinking your teeth into them. Otherwise, they will just fall apart right in your hands. Not that that’s a bad thing. I am just warning you so you can either grab a paper towel beforehand or just eat them over the sink. 

All in all, these chocolate zucchini muffins are not a bad way to sneak in an extra serving of veggies into my diet!

[show_shopthepost_widget id=”3045572″] 

[yumprint-recipe id=’163′]

/ Filed In: Breakfast, Eat, Other Sweets New
Tagged: breakfast, chocolate, chocolate chip, muffins, squash, zucchini

Chocolate Chia Seed Pudding (Paleo and Vegan)

February 21, 2018

It’s been two years since I completed the dietary test that is the Whole 30 Challenge. And while I learned a lot from the experience and have toyed with the idea of attempting it again, most of the good habits and recipes I picked up have since fallen by the wayside. 

There is one recipe, however, that I have made over and over again. Not necessarily in an attempt to be healthy, but because it’s delicious and happens to also be healthy! 

And that is chia seed pudding. 

I have made several varieties of chia seed pudding over the past two years. One that I have perfected and turn to over and over again is chocolate chia seed pudding. 

This is hands down my favorite version because it absolutely tastes just like chocolate pudding. Except there is sugar, no dairy, and is chock-full of the superfood that is the chia seed!

How to Make It

And did I mention its SUPER easy to make? Maybe easier than real chocolate pudding?

Well, it is!

For this recipe, you will need some:

  • milk (whatever type of milk you prefer – almond, cashew, cow, etc.);
  • unsweetened cocoa powder;
  • salt, which will actually bring out the sweetness;
  • sweetener, such as honey, agave, maple syrup, sugar, or sugar substitute; and
  • chia seeds (obviously)

I also like to add a bit of coffee extract to my chocolate chia seed pudding because it really emphasizes the chocolate flavor. This is totally optional since I know not everyone has coffee extract on hand. But you could also add a couple drops of your morning espresso. 

First, mix together the milk, cocoa, salt, and sweetener until mixture is nice and smooth. 

Then, add all the chia seeds and mix them in until completely incorporated. Just make sure that they don’t fall all the way down to the bottom, as they will want to do.

Next, pour the mixture into individual jars. 

Or don’t. 

You can portion this out however you would like. 

Then, pop the pudding into the fridge and wait. 

Waiting is always the hardest part. 


After a few hours (or ideally overnight) you will have a delicious chocolate chia seed pudding! 

Now, for those of you who have not had chia seeds before or have not had chia seed pudding, I will warn you. The texture is a bit different. It’s actually a little bit like tapioca pudding or cottage cheese.

I don’t mind it in the least and I am pretty sensitive to weird textures. But it may take some getting used to for the chia seed virgins. 

The sooner you do, the sooner you will have a wonderfully rich, healthy, chocolate dessert. 

[show_shopthepost_widget id=”3036895″] 

[yumprint-recipe id=’161′]

/ Filed In: Desserts, Eat, Other Sweets New
Tagged: chia seed pudding, chia seeds, chocolate, healthy, Paleo, pudding, Vegan

Nutella Linzer Cookies

February 13, 2018

I have always had a special interest in Linzer cookies. They are, obviously, Linzer. I am and Lindsey. 

You get it (right?).

But I rarely ever make them (I just eat them). Which is a crying shame because they are beautiful, delicious, and fun to make! I love the little window in the sugar-coated top cookie to let the delicious filling peak out. That filling is typically raspberry jam.

Now, I love some good raspberry jam as much as the next girl, but you know what would be better?

Nutella. 

And these Nutella Linzer cookies are absolutely perfect for Valentine’s Day! They have everything you need! A little sugar, a little chocolate, a heart cut out. Do you need anything else?

How to Make Them

The cookies that make up the Linzer are traditionally made with almond meal. However, using pure almond meal would result in a very crumbly and hard cookie. These cookies are a mix of my favorite sugar cookie and an almond cookie so that they still have that great almond flavor and texture, but aren’t overly crumbly or tough.

After the dough has been mixed, dump it out onto a sheet of plastic wrap and wrap it up into a ball. Chill in the freezer for 20 minutes or until it’s slightly firm. This will help you roll it out into a nice even sheet. 

Since the dough is rather soft, it would also help to chill the dough after it’s been rolled out which will help create evenly shaped cookies (which is pretty important when you are making cookie sandwiches). 

I like to roll my dough out on a sheet of parchment then transfer the parchment to a baking sheet, then the baking sheet to the fridge.

After a few minutes, the dough should be firm enough to cut out into shape.

Cut out circles (or whatever shape you like), then cut out the window in every other cookie. In this case, I used a small heart cookie cutter. 

Once the cookies come out of the oven and had had a chance to cool, match them up to find a tip and a bottom that are of similar size. 

Dust confectioners sugar over the top cookie and spread the Nutella over the underside side of the bottom cookie. 

Finally, reunite the top cookies with the bottom cookies to create delicious Nutella Linzer cookies. 

[yumprint-recipe id=’158′]

/ Filed In: Cookies, Cookies New, Desserts, Eat
Tagged: chocolate, cut out cookies, hazelnut, Linzer cookies, Nutella, powdered sugar, Valentine's day

Almond Butter Blossoms

January 29, 2018

Ever since I was a kid, I have been a whole-hearted peanut butter fan. I love the stuff and will eat it on just about anything. But as I have gotten older, I have grown very fond of almond butter. It is now my nut butter of choice.

Don’t tell the peanuts.

And I am certainly not the only one. For so many reasons, people are eschewing the pb for the ab. Especially those who have peanut allergies. Which is exactly who I made these cookies for. 

So many of my friends kids have peanut allergies now, I feel horrible that that can’t enjoy one of my favorite childhood cookies: the peanut butter blossom. Instead I made almond butter blossoms. 

And guess what. They are amazing! I haven’t done much baking with almond butter, but it works perfectly as a substitute for peanut butter and adds it’s own amazing yet subtle flavor. 

HOW TO MAKE THEM

Get out your flour, sugar, butter, eggs, and all those basic cookie ingredients. You will also need almond butter and honey. Yes, honey! I subtituted some of the sugar for honey which added an extra flavor that perfectly compliments the almond butter. 

If you don’t have any honey, just use plain old granulated sugar. 

First, cream together the butter, brown sugar, granulated sugar, and honey.

Then mix in the almond butter. Make sure it is good and mixed in before adding in the egg. 

Now it’s time to add the egg and vanilla. If you really want to ramp up the almond flavor, add 1/4 tsp almond extract. A little goes a long way, friends. 


Once the egg is mixed in, but not overly mixed, add in the flour, baking soda, and baking powder. If you are using unsalted almond butter, add a pinch of salt. 

Mix until it forms a stick but firm dough. 

Use a spoon or a small cookie scoop to form the dough into small 1 – 1 1/2 inch sized balls. Roll the balls in between the palms of your hands to form a smooth ball. 

Roll the ball in some sugar. I like to use turbinado sugar because it’s nice and coarse. But if you don’t happen to have that on hand (I wouldn’t expect you to),  just roll it around in some granulated sugar. 

Place the balls about 2 inches apart on a baking sheet and then pop in the oven to bake for 10 minutes, or so, until they are just barely golden brown on the bottom. 

While the cookies are in the oven start unwrapping whatever chocolate you plan to use for you cookies. Since Valentine’s Day is right around the coner, I use these Dove Chocolate Hearts. But you could, of course, use Hersey Kisses or any of your other favorite chocolates.


As soon as the cookies come out of the oven they will be nice and puffy and a little cracked on top. Immediately press your unwrapped chocolate into the center of the cookie so that the cookie puffs up around the chocolate. 

While there is nothing better than a cookie straight out of the oven, I would encourage you to wait to dig in, or serve, these cookies until they have cooled. The chocolate will start to melt from the hot cookie, so once the cookie cools the chocolate will start to come back to it’s original state. 

Then it’s ready to eat!

Even after they have cooled, the cookies are super soft but have a little crunch on the outside thanks to that sugar.

The almond butter and honey flavors are subtle but wonderful! 

These cookies are perfect for just about anyone, regardless of their love for almond butter. Even those who are loyal to peanut butter will love these cookies!

[yumprint-recipe id=’155′] 

/ Filed In: Cookies, Cookies New, Eat
Tagged: almond butter, chocolate, cookies, honey, Valentine's day

Peppermint Bark Chocolate Shortbread Cookies

December 19, 2017

How many versions of peppermint bark are there? Tons, I bet. I think I have made half of them, myself. It’s a holiday staple!

But there can always be more, right? So I thought I would add this cookie version of peppermint bark into the mix. (Although, I’m sure someone else has already thought of this, so it’s just new to me.

What I like about these peppermint bark chocolate Shortbread cookies is that they are, well, cookies. I would pick a chocolate cookie over a chocolate bar, any day of the week. But for those that need a chocolate fix, there is a nice white chocolate coating.


Speaking of which, for the white chocolate coating of these peppermint bark cookies I just melted down some white chocolate chips and also tossed in a drop or two of peppermint extract to give it even more peppermint flavor.

Then I dunked the cookie right in the melted chocolate. You could also spread the chocolate on the cookie, or drizzle. It’s up to you!

As for the cookie itself, I made a chocolate shortbread, which is one easy cookie to make. Classic shortbread is just butter, sugar, and flour. These obviously also have some cocoa powder.

The beauty of these cookies is that you can use whatever cookie you want, be it homemade or store bought. 

Oh yes, my friends, I am not above buying some store bought chocolate cookies, dipping them into some chocolate, sprinkling with candy cane pieces, and calling them homemade. Okay semi-homemade. 

It’s the holidays. We’re all busy. Work smarter, not harder.

Okay, rant over. Now onto the finishing touche…candy canes!

I threw a couple candy canes into a zip top bag and then smashed the heck out of them until I had itty bitty pieces. Some we’re a bit ittier and bittier, but I liked the contrast of larger chunks and candy cane dust.

While the chocolate was still wet, I sprinked a generous amount of candy cane pieces of top.

And that’s it! Delicious homemade (or semi-homemade) peppermint bark chocolate shortbread cookies. 

Make them asap before the holidays are over!

[yumprint-recipe id=’151′]

/ Filed In: Cookies, Cookies New, Desserts, Eat
Tagged: chocolate, Christmas, holidays, Peppermint, peppermint bark, shortbread, white chocolate

Cherry Chocolate Chip Scones

September 12, 2017

I have been buying cherries non-stop this Summer. Almost every trip to the grocery store results in at least one bag of cherries. They are a perfect snack, dessert, or filling. 

Earlier this summer I added fresh cherries to my red, white, and blue pie for Memorial Day. I added them to a batch of sangria for 4th of July. So it only seemed appropriate that I toss them into the chocolate chip scones I made over Labor Day. What a fitting way to bid farewell to the Summer.

You would think that after all these cherry baking projects that I would invest in a cherry pitter. 

I still haven’t learned my lesson.


I love making scones because they sort of like a fancy biscuit, but they are just as easy as making biscuits. 

First, cut cold butter into to the flour until it’s basically the consistency of gravel. Then stir in the liquid ingredients until it forms a sticky dough. 

Fold in the cherries and chocolate chips so they are peppered throughout the dough. Then turn the dough out onto a piece of plastic wrap and wrap up into a disc. Pop in the fridge to chill for at least an hour. I promise it will be so much easier to work with if it’s chilled.  


Now, there are several ways you can form a scone. I have made them in wedges (like above) and I have also made them in rounds (like a biscuit). I have also seen them in square form. You can pick whatever shape speaks to you. 

In this case, I didn’t feel like breaking out the rolling pin (the old girl needs a break from rolling out cookie dough) or the biscuit cutter so I took the disc of dough and cut it into 8 wedges. 

I also sprinkled a little raw sugar on top to give it a little extra crunch. 

After a few minutes in the oven, the cherry chocolate chip scones should be nice and golden brown; crunchy on the outside, and super soft and steamy on the inside. The cherries will be nice and soft and the chocolate chips will be slightly melted.

I recommend eating them shortly after they come out of the oven so that you can split one in half and melt a bit of butter on the inside. It’s the way scones are meant to be eaten. I assume. 

[yumprint-recipe id=’131′]

/ Filed In: Breakfast, Eat, Other Sweets New
Tagged: breakfast, cherry, chocolate, chocolate chip, scone, Summer

Chocolate Hazelnut Espresso Biscotti 

May 15, 2017

Today is my mom’s birthday. So everyone say “Happy Birthday” to my mom!

This year I am actually home for my mom’s birthday (and Mother’s Day). Normally I would just send her a card and maybe mail her a gift, but this year since I will be there (which I think is a gift in and of itself) I thought would kick it old school and hand make her something like I did when I was a kid. Maybe a card made out of construction paper and a macaroni picture frame. 

No. If I know my mom, there are two things she would like more than a handmade card and a macaroni picture frame (there are a lot more than two, but let’s just pretend): a nice big cup of coffee and something chocolate. Fortunately, I have the perfect recipe to make that will check both boxes! Chocolate Hazelnut Espresso Biscotti!

Biscotti is the absolute perfect treat to make for anyone in your life who is a coffee drinker. But these chocolate-hazelnut variety amp up the flavor even more. Chocolate and coffee are made for each other. 

Since this was my first time making biscotti, I referenced a few difference recipes, but this one looked the best so my recipe is largely based on it. The only difference is that my dough is flavored with both good quality cocoa powder and ground espresso. I like using the same espresso grounds that I would use to make my morning latte. They are already so finely ground and taste delicious. 

I used Gourmesso’s Colombia Arabica espresso, which was perfect because it was strong and flavorful, but not overpowering. Gourmesso, for those of you who are not familiar, makes Nespresso compatible capsules that are way cheaper than your typical capsules. For references, the Gourmesso capsules I used were 49 cents per capsule. A similar Nespresso capsule costs 74 cents. Not too shabby! Plus they have a ton of flavors and varieties.


Making biscotti dough is exactly like making cookie dough. First cream together the butter and sugar. Add in the eggs and vanilla, then mix in all your dry ingredients. 


What you will end up with is a pretty wet dough. It’s not going to be the consistency of your classic chocolate chip cookie, it will be very very sticky!

Split the dough in half and form them into two logs. Definitely wet your fingers down when you do this so that the dough doesn’t stick to your hands. 

Bake them until they have expended and cracked a bit. They will have a crispy crust, but be a little spongy when you press down on the top.

Once your biscotti logs have cooled to room temperature, you can cut them into slices. Use a serrated knife to get nice even cuts. Then lay the slices on the baking sheet, cut side down and bake again until they are nice and crunchy!


Now, these biscotti are good plain. They do not need any help. But a little extra chocolate never hurt anybody. Especially espresso-spiked chocolate. 

I mixed in a bit more espresso grounds into some melted chocolate to get this rich chocolate flavor. You may be wary about this step if you don’t want a strong espresso flavor. But really espresso just brings out the chocolate flavor more than actually imparting it’s own flavor. Like I said, they are a match made in heaven.


There are a couple techniques to top these with some chocolate. You could just take a spoon and drizzle chocolate on top. Or you can dip them in chocolate. 

To dip them, pour the melted chocolate into a tall skinny glass. Then dip the biscotti in and immediately press into some chopped hazelnuts. 

Um, yum right? Coffee and chocolate are a great combination. But hazelnuts and chocolate are just as good (if not better!). 

I dare you to have just one biscotti with your coffee or espresso. I had about five with my Vanilla Gourmesso Coffee. The crunchy cookies just soaked up the delicious coffee and it made it impossible to stop at one. 

Sounds like the perfect homemade birthday gift for mom! 

[amd-yrecipe-recipe:159] 

/ Filed In: Cookies, Cookies New, Eat
Tagged: biscotti, chocolate, coffee, cookies, espresso, hazelnuts, Latte

Mexican Chocolate Brownies

May 1, 2017

Looking at these brownies and you may think there is nothing special about them. Sure, they look like plain ol’ brownies. They even smell like plain ol’ brownies. But they are anything BUT plain ol’ brownies. 

They are Mexican chocolate brownies!

What is Mexican chocolate, you ask? Well, I am sure someone can give a very technical definition of it, but to me Mexican chocolate is a rich chocolate that is flavored with cinnamon. Sometimes it packs a little punch with some chili. All you really need to know is that it’s delicious and that it makes one damn good brownie.

Don’t worry, you don’t need any fancy or expensive Mexican chocolate to make Mexican chocolate brownies. Actually, your favorite brownie mix and a couple of spices will do the trick just nicely.

Now’s the time I will throw in my quick unsponsored PSA about my favorite brownie mix. I have still yet to find a brownie mix better than Ghirardelli. In fact, I have no motivation to make my own brownies from scratch because this mix yields some of the best brownies that I have ever made. (No they aren’t paying me to say this. I bought that bulk sized box of brownie mix with my own cash money.)

But I do have a trick to making really good brownie mix even better: Replace the water with milk and oil with butter. It will give you the richest, moistest (is that a word?) brownies. 

Now you can not take my advice and use another brownie mix or you can make your brownie batter from scratch. But if you want to make them Mexican chocolate brownies, you will need these three things: cinnamon, cayenne, and nutmeg. 

You don’t need a lot of any of them to pack a punch. In fact, I recommend only using a dash of cayenne. Just enough to give the brownies a little bit of a kick without people actually realizing what it’s from. 

I also used Ceylon cinnamon versus the cinnamon you just buy at the grocery store. I know, you are thinking, “what’s the difference?” If you subscribe to my newsletters you already know the answer. The short story is that the cinnamon that we all know and love isn’t “true” cinnamon. It’s actually a close relative of cinnamon that sort of tastes the same. Ceylon cinnamon is what is used in Mexican chocolate and has a much spicier, richer taste. Of course, if you can’t get your hands on Ceylon cinnamon, you could use the cinnamon you have in your spice cabinet. I am lucky enough to live next to a great spice shop, so I am pretty well stocked with a couple different varieties of cinnamon.

After the spices are added, they are just like any other brownie. Mix up the batter and pour it into a pan. I like to line my pans in parchment so that I can easily lift out the brownies when they are done. 

The parchment make it so much easier to get the brownies out of the pan that way they can cool faster…which means you can cut into them faster! The worst part of making brownies is the waiting! Sometimes I will stick them in the fridge to help them cool faster.

If you find that your brownies don’t have enough cinnamon or cayenne, you can always dust them with a little bit of powdered sugar mixed with either….or both. If you want really rich brownies, you could sprinkle on some cocoa powder with some cinnamon mixed in. You can’t go wrong with whatever you do. The brownies are just delicious on their own, but with the added spices they are just at a whole other level. Definitely not your plain ol’ brownie!

Just make sure you have a cup of milk handy when you dive in!

[amd-yrecipe-recipe:155]

/ Filed In: Eat
Tagged: brownies, cayenne, chocolate, cinnamon, dessert, Mexican, sweets

15 Amazing Easter Desserts

April 7, 2017

Hi, my name is Lindsey and I’m addicted to baking. How do I know? (Have you read the blog? That should be all the proof you need.) Well, I promised myself I wouldn’t do any baking this coming weekend after a tornado of flour and sugar went through my kitchen last weekend. But here I am, a week away from Easter wanting to make all of these fun desserts! As I sit here I’m strategizing how I can fit in a carrot cake, macarons, cookies, and petit fours all before Easter. I clearly have issues, folks.

(Although I would also argue that I’m just looking out for my emotional wellbeing per this article)

Since I will hopefully no baking (…well, maybe a little baking?….like one cookie?…I cant just make one cookie….how about 12 cookies….) I thought I would share with you all the things I wish I was making this weekend. Maybe both of us will be inspired by the 15 amazing Easter desserts!

No Bake Chocolate Oreo Bunny Garden Dessert from Oh Sweet Basil

Easy Easter Oreo Bark by Suburban Simplicity

Mini Easter Egg Cakes by the Cake Blog

Italian Easter Bread by Bake with Christina

Easy Easter Bunny Cookies by yours truly

Carrot Patch Cupcakes by Life Made Simple

Cheesecake Filled Chocolate Easter Eggs by Raspberri Cupcakes

Eyelet Lace Easter Cookies by this girl

Pineapple Carrots Cakes by Just a Taste

Healthy No-Bake Chocolate Peanut Butter Nests by Joy Food Sunshine

Surprise Inside Easter Bunny Cake by me

Homemade Reese’s Eggs by OMG Chocolate Desserts

Bunny Pay Thumbprint Cookies by the Bearfoot Baker

Bunny Booty Pretzels by A Soccer Mom Blog

Easter Egg Hunt Cookies by Moms and Munchinks

That solves it. I will definitely be making one of these Easter desserts this weekend. Like those adorable little bunny butt pretzels that require no actual baking. I found a loop hole! 

So, who else want to join bakers anonymous with me? I’ll bring some (homemade) donuts to the next meeting. 😉

/ Filed In: Desserts, Eat
Tagged: bunnies, cake, chocolate, cookies, dessert, Easter, marshmallow

One Bowl Chocolate Cupcake Recipe

April 3, 2017

This past weekend was a bit of a baking marathon. My kitchen now permanently smells like butter and sugar. Not that I am complaining. 

One of the many baking projects I took on this weekend was making cupcakes for a bridal shower. I tend to have these grandiose ideas when anyone asks me to make something for them. I try to come up with some unique and delicious flavors. But when push comes to shove, I always seem to fall back on some old classics. There is nothing wrong with a classic chocolate cupcake. In fact, sometimes a classic chocolate cupcake is the best cupcake. 

This particular chocolate cupcake recipe is one of my favorites because, well, it’s just dang delicious! But maybe more importantly it only dirties up one bowl! After baking dozens of cookies and cupcakes all weekend, trust me, that really is the most important thing about this recipe. 

The ingredients are pretty standard, but I always recommend to use the best possible cocoa powder whenever possible, because that is what will effect the flavor the most. I have made this exact same recipe with cheaper cocoa powder, and the cupcakes don’t have the same richness and flavor. My favorite cocoa powders are Ghirardelli, which you can get in most super markets, or Valrhona, which may be a bit harder to find in stores but can easily be found online. 


Since this is one bowl recipe, start by dumping all the dry ingredients into a big bowl – flour, cocoa powder, sugar, baking powder, baking soda, and salt. Then give it a good stir to get everything mixed together. 


Then mix in the wet ingredients. I like to measure my milk, then pour the oil right into the same measuring cup, only dirtying one measuring cup. Since this recipe calls for 3/4 cup milk and 1/4 cup oil, you should have 1 cup in the end. 

Also, this is a tip I picked up from a baking class and many Food Network shows, it’s best to mix the batter as little as possible. It should just be mixed until the flour is just barely incorporated. Too much mixing and the cake will be dense and tough.

All that to say, it’s okay if your batter has a couple lumps. It doesn’t need to be perfectly smooth. 

Next, fill the muffin tin up with batter. I try to fill mine up about 2/3rds of the way, but I haven’t quite mastered that yet. Some of my cupcakes come out too small, while others have these little muffin tops. Again, I am not complaining. Muffin tops are my favorite (except on me), but would be nice to have more uniform cupcakes. 

After a few minutes in the oven, they are good to go! They will make your kitchen smell amazing. You may even risk burning your tongue just to bite into one right away. Something I know nothing about…[as she looks around nervously].

But really, they are best once they have had a chance to cool a bit. Especially if you plan on frosting them. It is not wise to put cold, buttery frosting right on top of a warm cupcake. (Learned that the hard way.)

 The only thing easier that these cupcakes is a cupcake mix out of a box, and trust me, these taste ten times better!

[amd-yrecipe-recipe:147]

/ Filed In: Cakes and Cupcakes, Cakes New, Desserts, Eat
Tagged: cake, chocolate, cupcakes, one bowl

Lucky Charms Snack Mix

March 8, 2017

How did you eat your Lucky Charms as a kid? Were you a cereal first, marshmallow first, or all at the same time kind of Lucky Charms eater? I ate the cereal first and left all the marshmallows for the very end. I wonder what that says about me? 

Actually, I really don’t want to know. 

Since National Cereal Day was yesterday and St. Patrick’s Day is right around the corner, I thought I would do something fun with my favorite childhood cereal. I already have a great cereal candy recipe (thanks, Mom). So I just adapted that recipe a tad to make a fun Lucky Charms Snack Mix that’s perfect for St. Patty’s Day!


The recipe is incredibly easy and would be perfect activity for you and your kiddos, or if you don’t have kiddos, just make some for yourself. We are never too old for sugary cereal!

There are only 6 ingredients in this entire recipe: Lucky charms (of course), pretzel sticks, Rice Krispies, and slices almonds. Dump all of that into a bowl and mix in some white chocolate that has been spiked with a touch of almond extract. That’s pretty much all you have to do. But in case you don’t believe me, I will show you.

The best part is that it takes just minutes to make! Don’t let the speediness of the video fool you. I think from start to finish, this mix only took me 15 minutes, and that includes the time it takes for the chocolate to dry!

The almond extract also adds a bit more sweetness (like this really needs any more sweetness) and really plays up the flavor of the marshmallow pieces; which of course, are the best part. 

I couldn’t keep my grubby little hands out of the snack mix even before the chocolate had totally dried. I am pretty sure I gave myself a cavity eating this stuff, but what’s new. It was just like eating Lucky Charms back when I was a kid, but even better! Because they were covered in chocolate. 

[amd-yrecipe-recipe:138]

/ Filed In: Desserts, Eat
Tagged: cereal, chocolate, Lucky Charms, snack mix, St. Patrick's Day, white chocolate

  • 1
  • 2
  • 3
  • 4
  • Previous Entries

Follow

Hey There!

Hey there, I'm Lindsey. I'm a number cruncher by day and a home cook and baker by night. While I love to eat healthy and find fresh and healthy alternatives for my favorite foods, I will never turn down dessert! Life is all about moderation, right?

Recipes

  • All Recipes
  • Breakfast
  • Appetizers
  • Salads
  • Main Dishes
  • Side Dishes
  • Desserts
  • Drinks

Favorite Finds

[show_lookbook_widget id=”388783″]

Theme by 17th Avenue · Powered by WordPress & Genesis