• Home
  • Eat
    • Breakfast
    • Appetizers
    • Main Dishes
      • Chicken
      • Beef
      • Seafood
      • Healthy Dishes
      • Paleo Dishes
      • Salads
    • Desserts
      • Decorated Cookies
      • Cookies
      • Bars and Brownies
      • Cakes and Cupcakes
  • Shop
    • Cookie Decorating Supplies
    • Bakeware
    • Cookware
    • Kitchen Gadgets
    • House
  • About
    • Contact
    • Bucket List
  • Cookie Decorating 101

Follow the Ruels

Watercolor Ice Cream Cookies

July 30, 2018

Even though it seems like Summer is winding down, it is certainly heating up around these parts (literally). We are pushing triple digits here in Georgia, which I know most of the rest of the country is all too familiar with. 

I’m looking at you, Texas. 

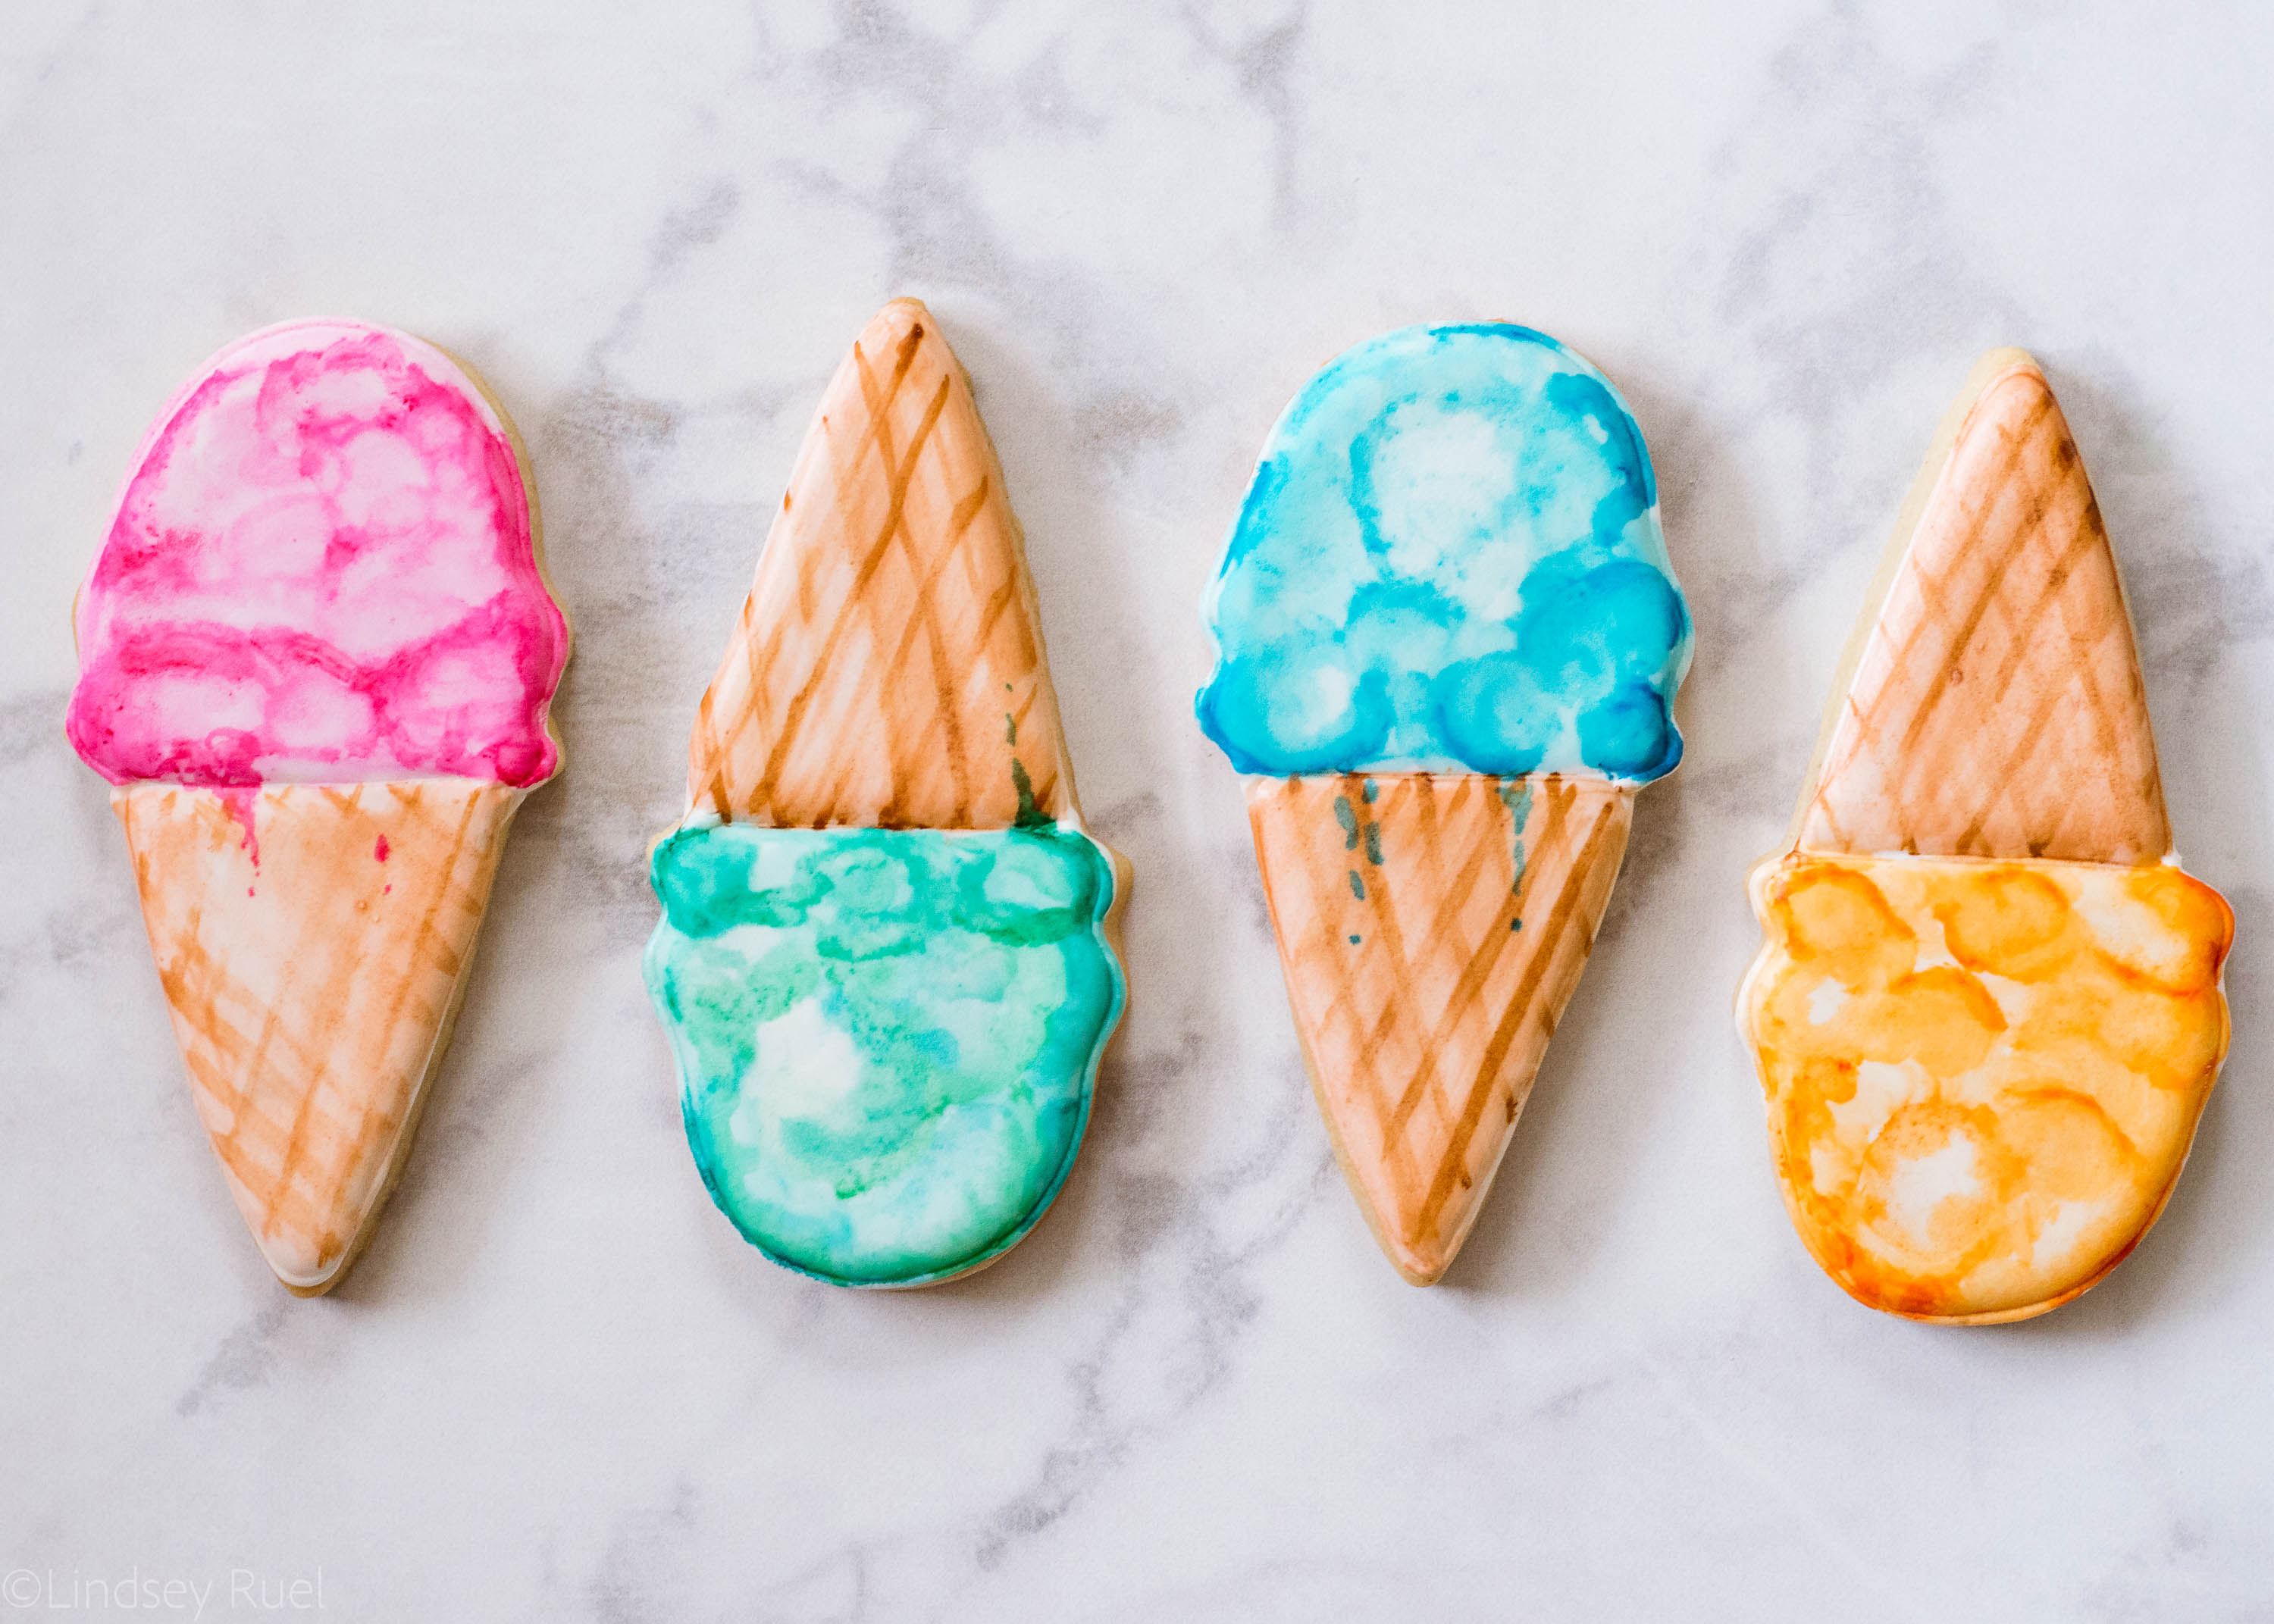
While actual ice cream would be just as good (if not better for these scorching Summer temps), I thought it would be fun to make some ice cream inspired cookies to get us through these dog-days of Summer. 

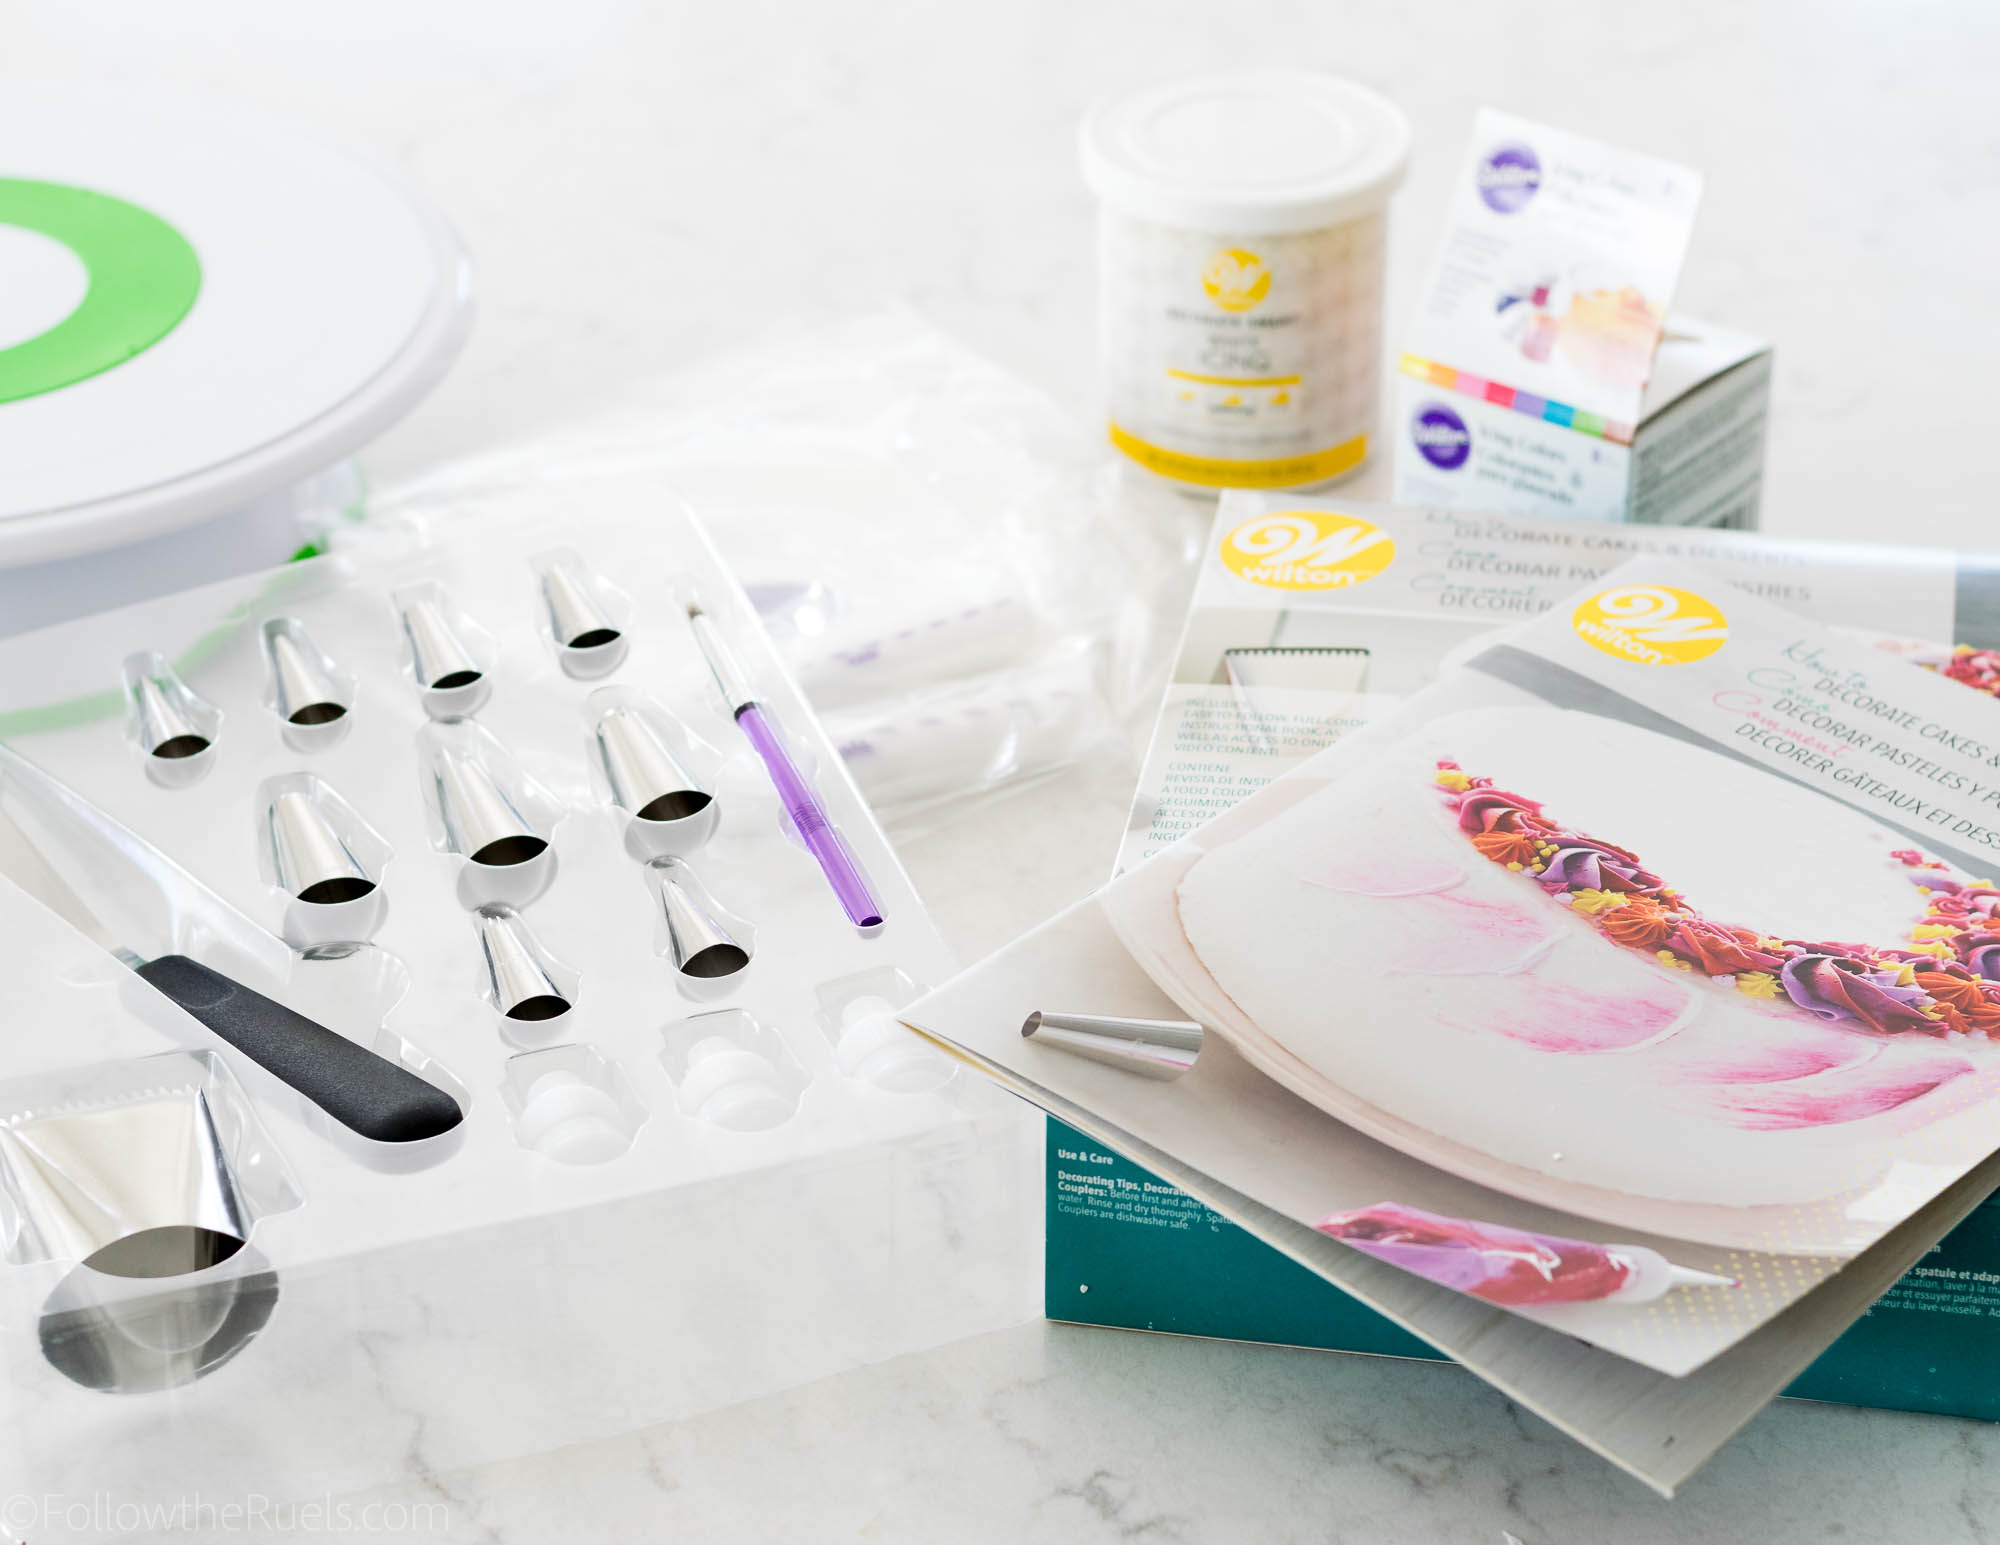
Recipes and Supplies

Of course, you will need some sugar cookies cut out into your favorite ice cream shapes. You could use my basic sugar cookie recipe, but I think one of my Summer sugar cookie recipes would be even better (shameless plug). 

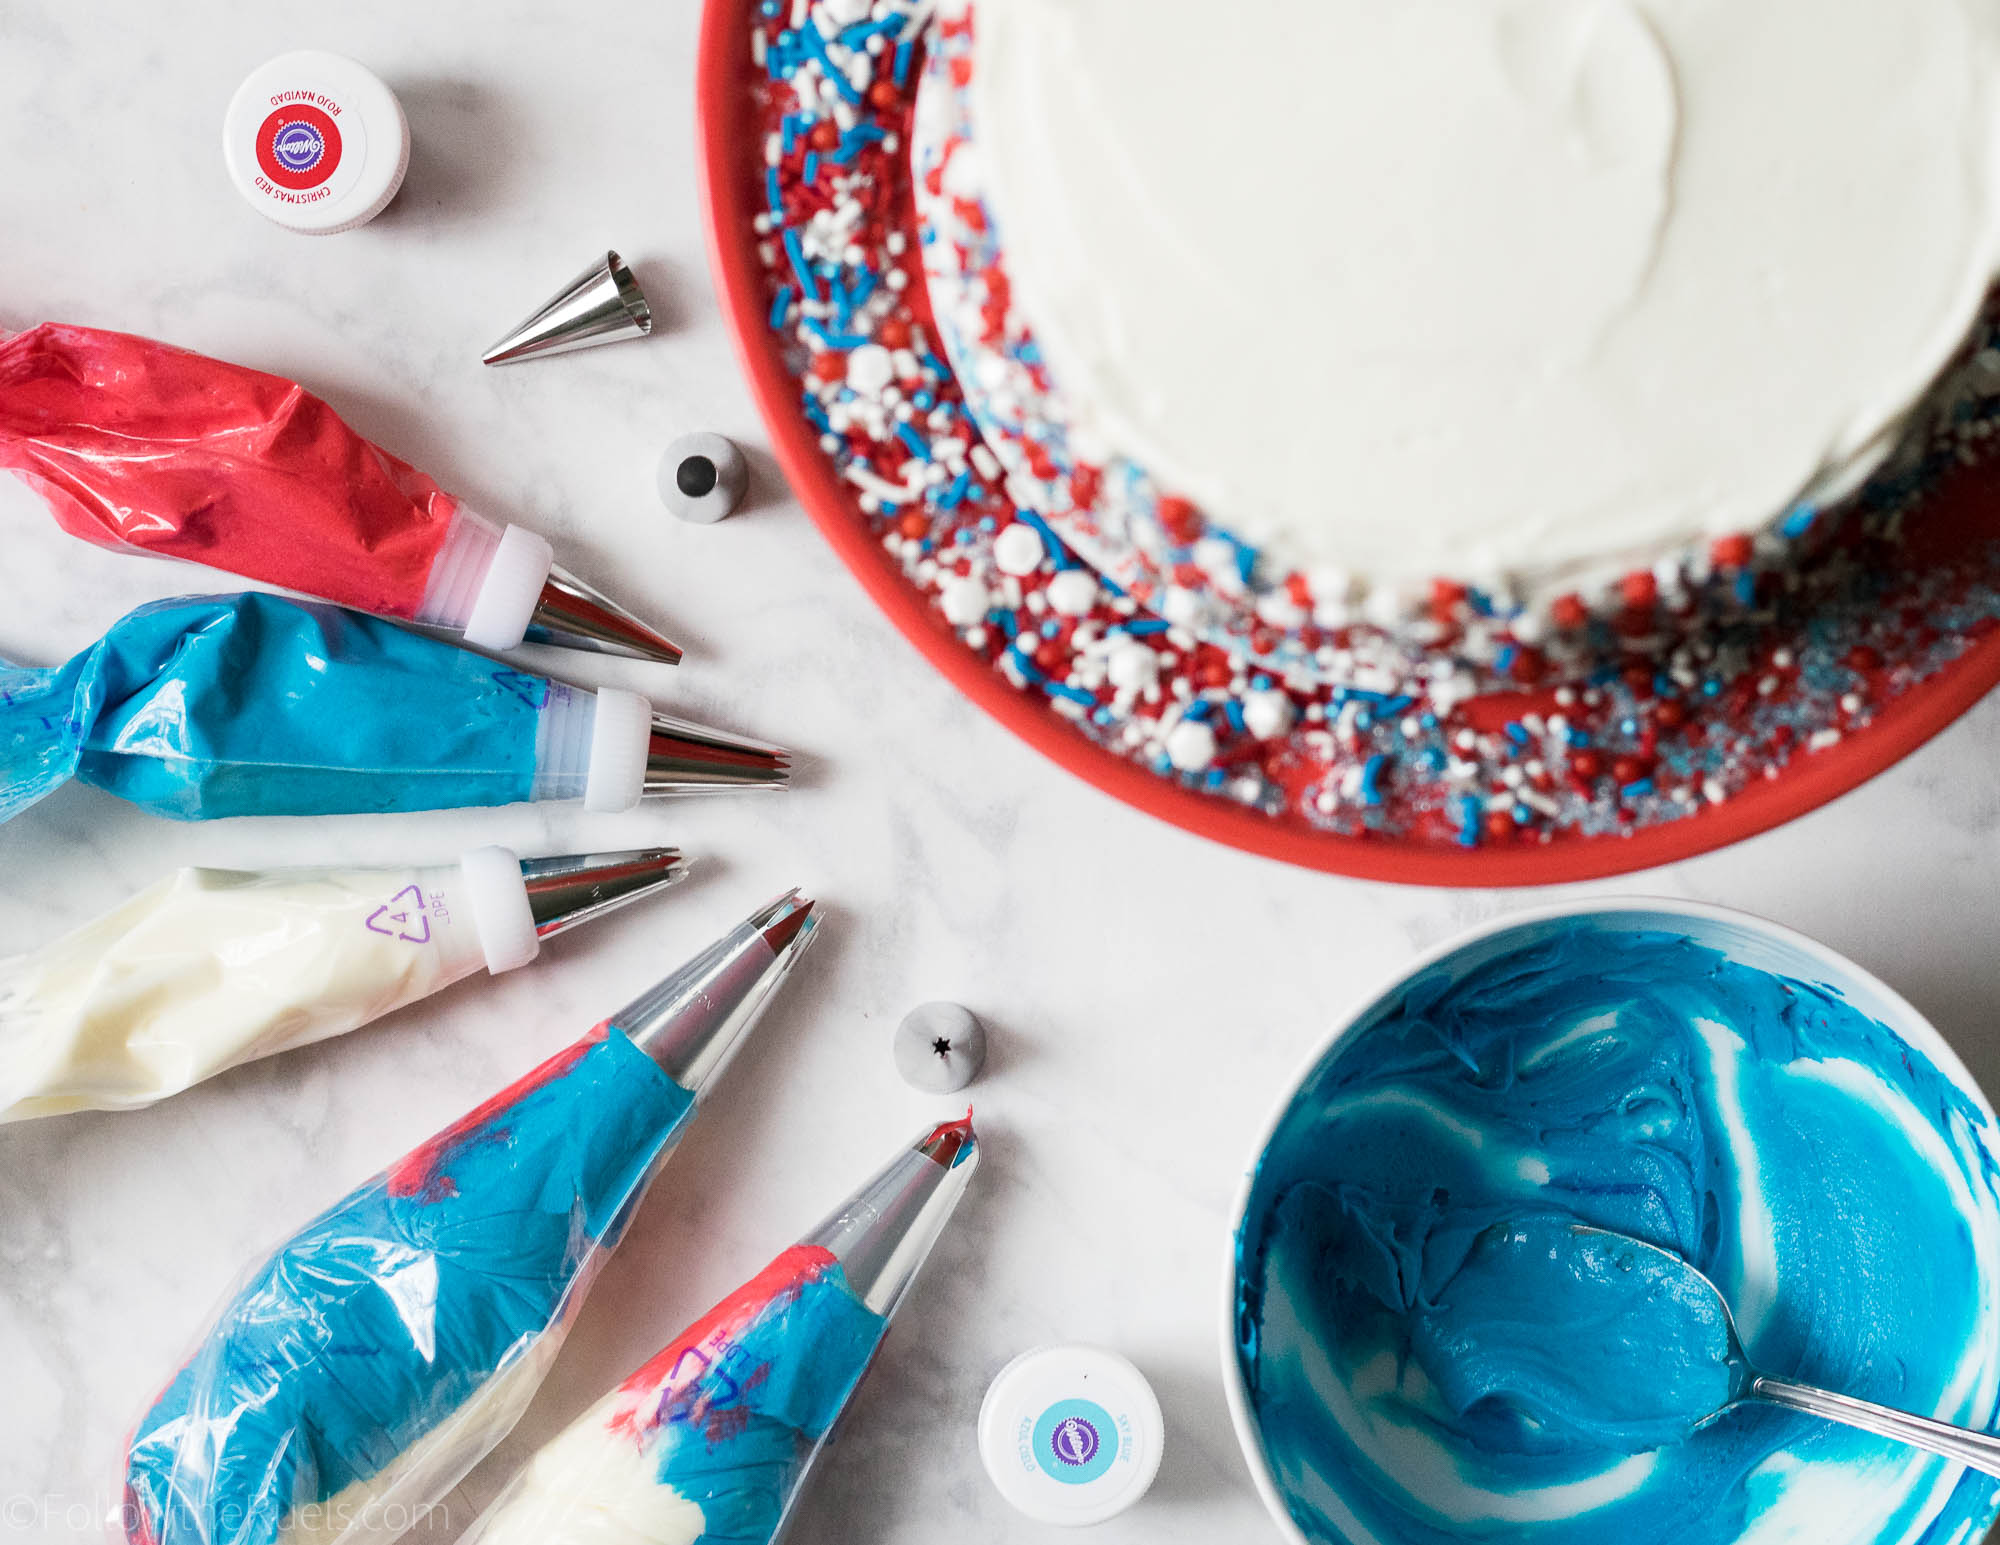
You will also want to make a batch of royal icing thinned down to flood consistency icing. 

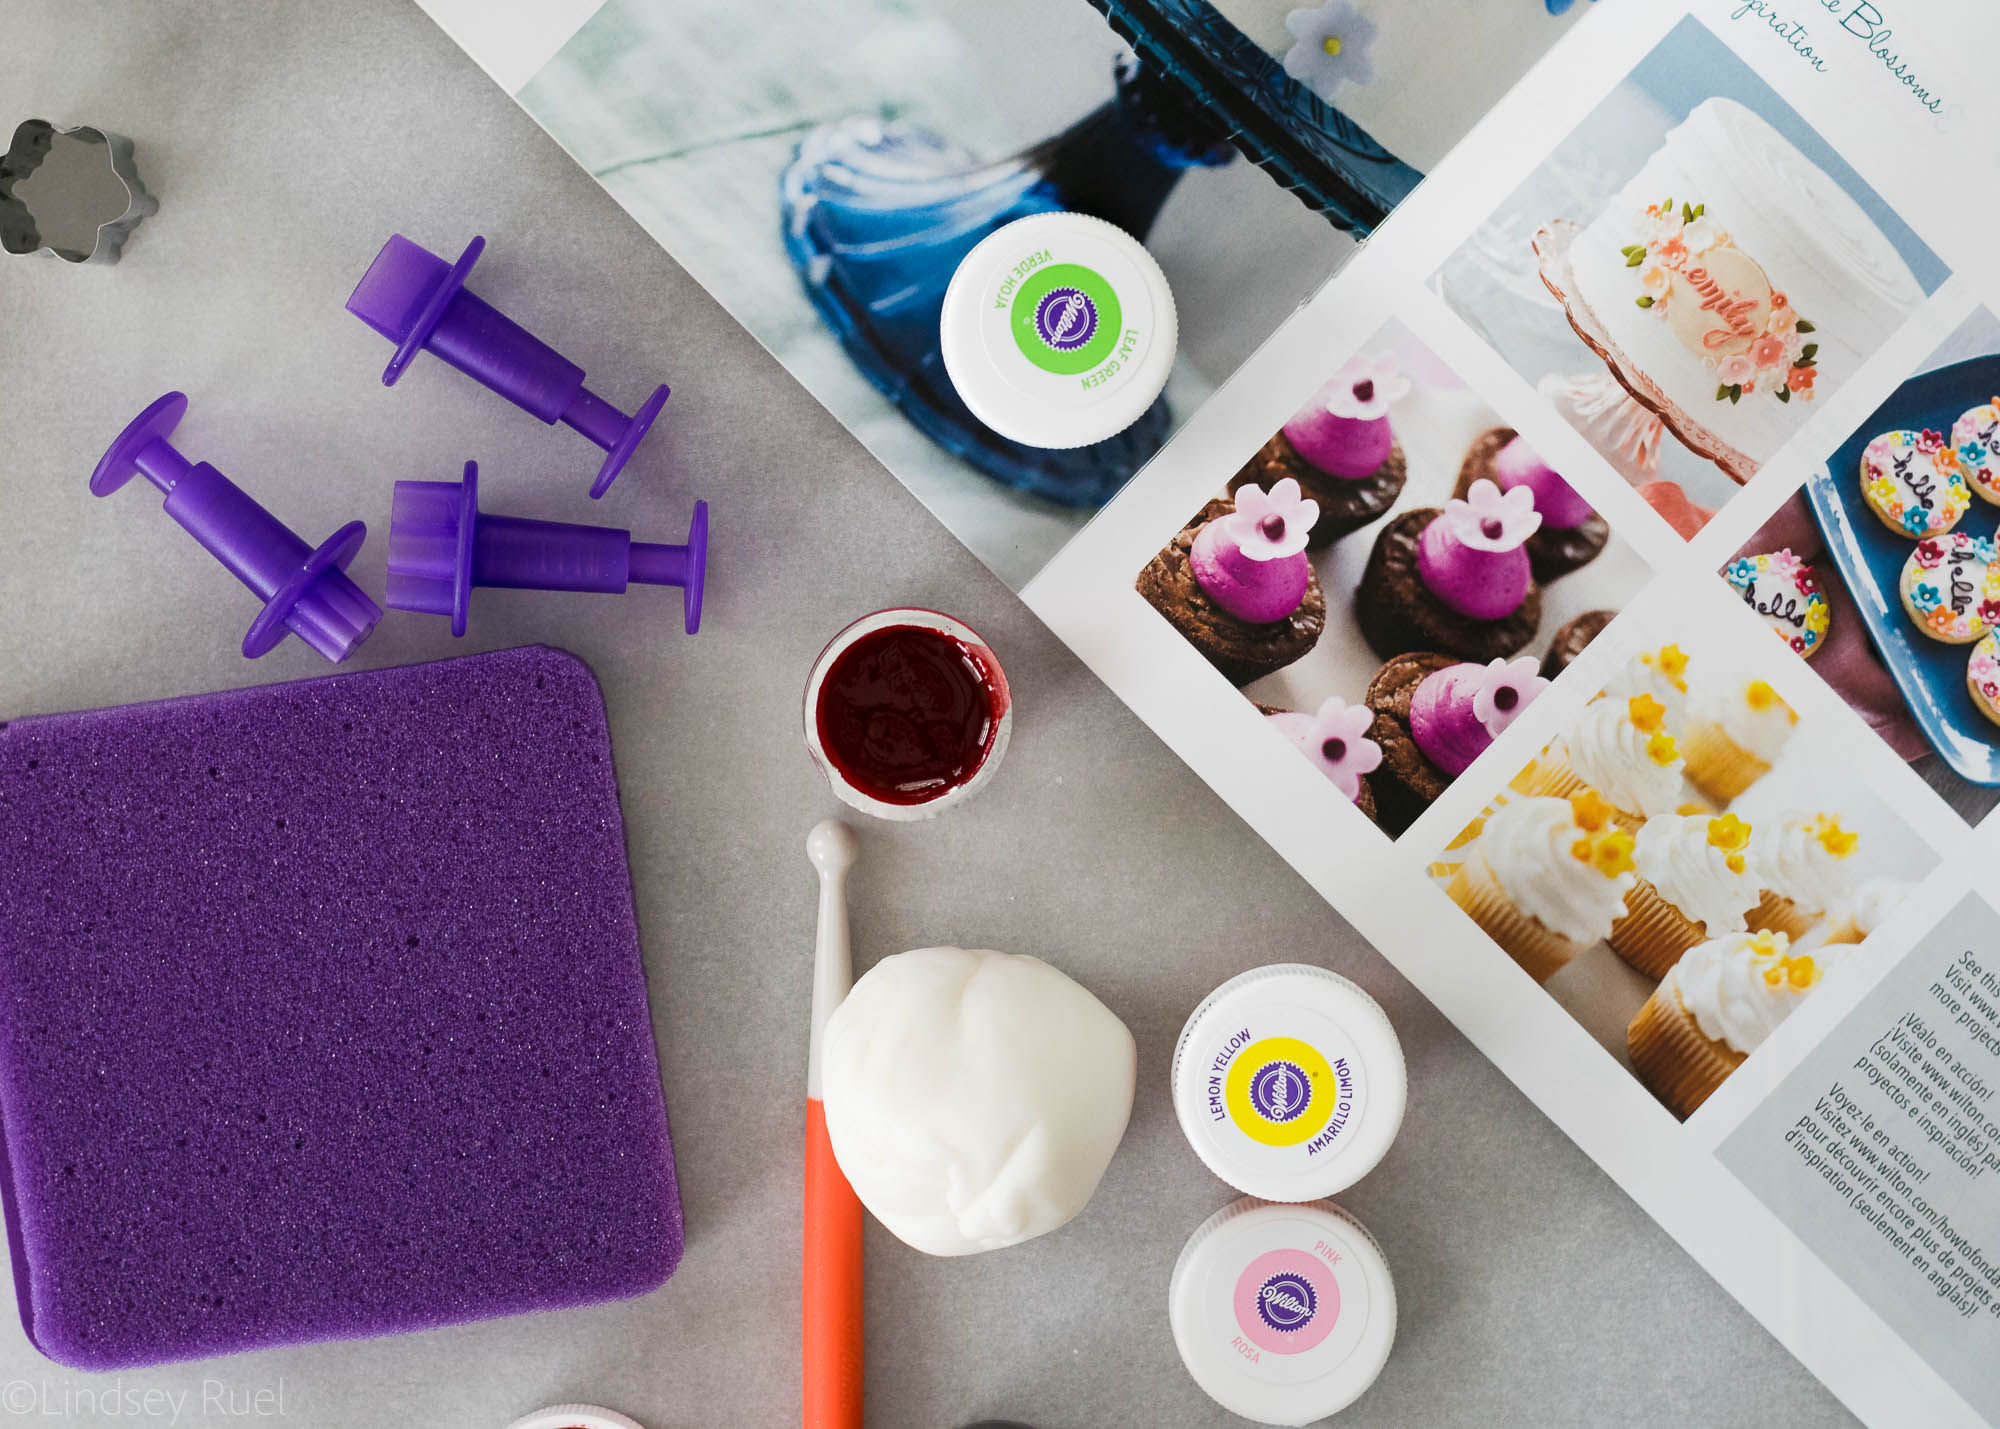
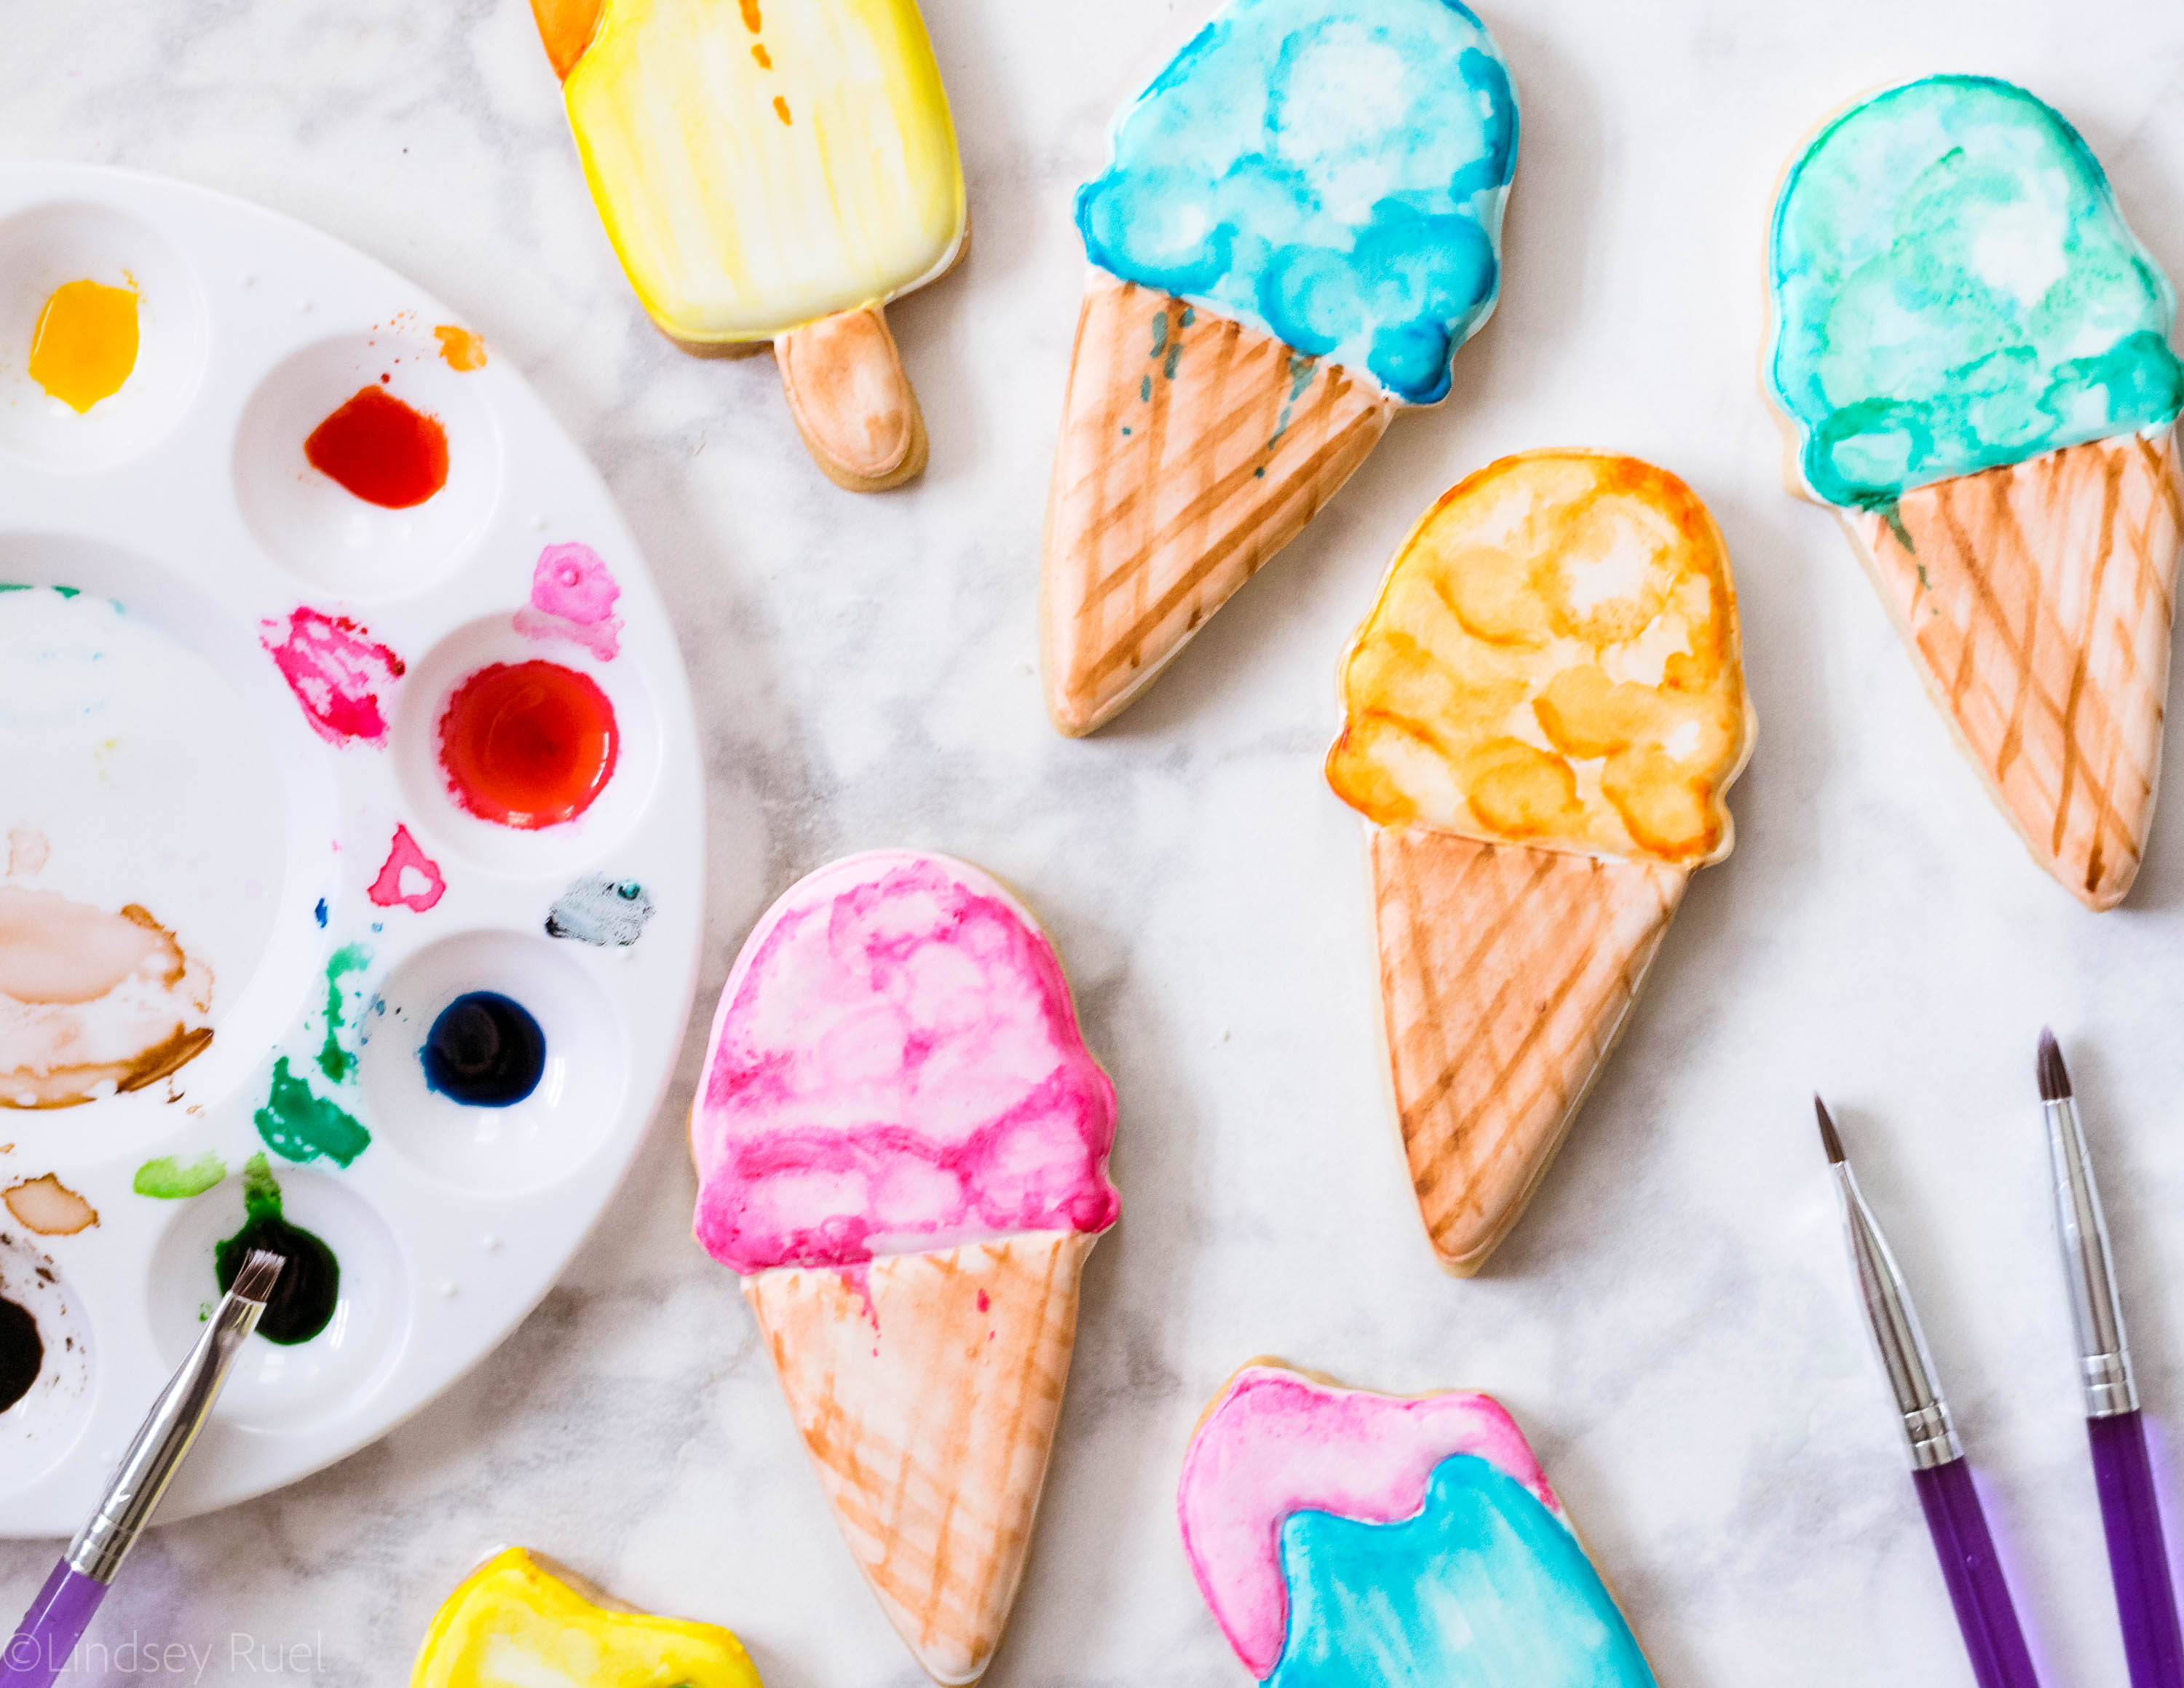
Since these are painted cookies, you will also need some gel food coloring in your favorite ice cream colors, paint brushes, and a little clear alcohol.

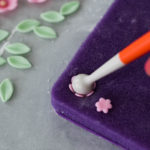
To make the edible watercolors, add one or two drops of food coloring to a plate or paint pallet, then add in a couple drops of alcohol. Stir the two together with your paintbrush until you have a nice watercolor paint. 

[show_shopthepost_widget id=”3224606″]

How to Make Them

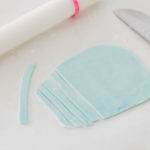
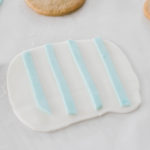
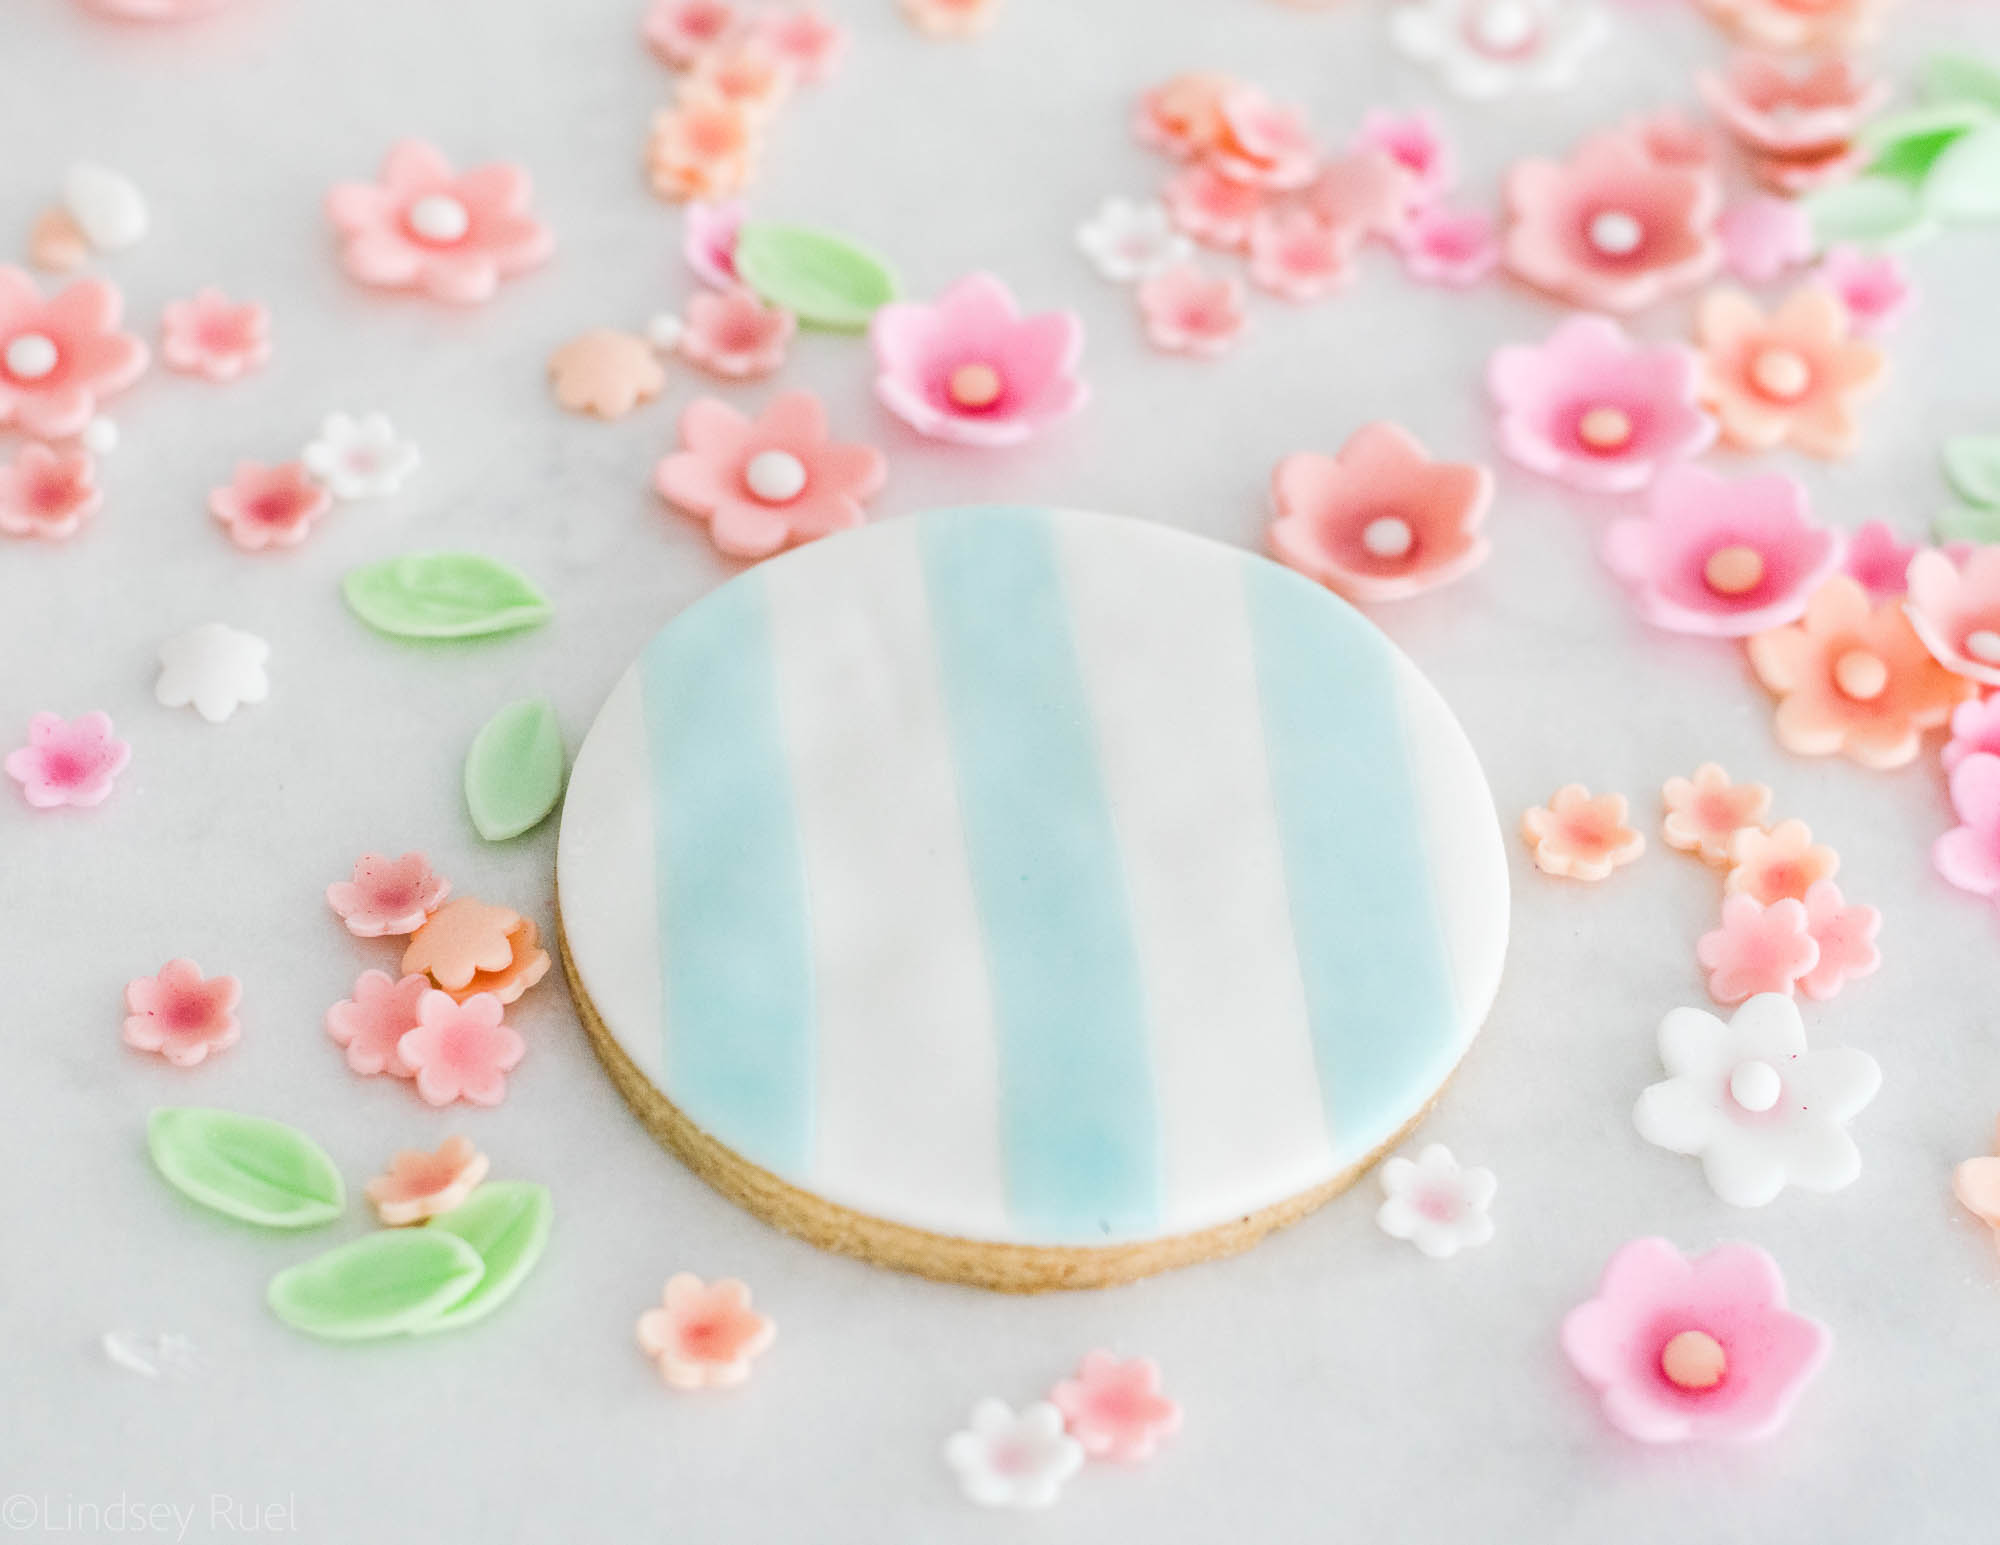
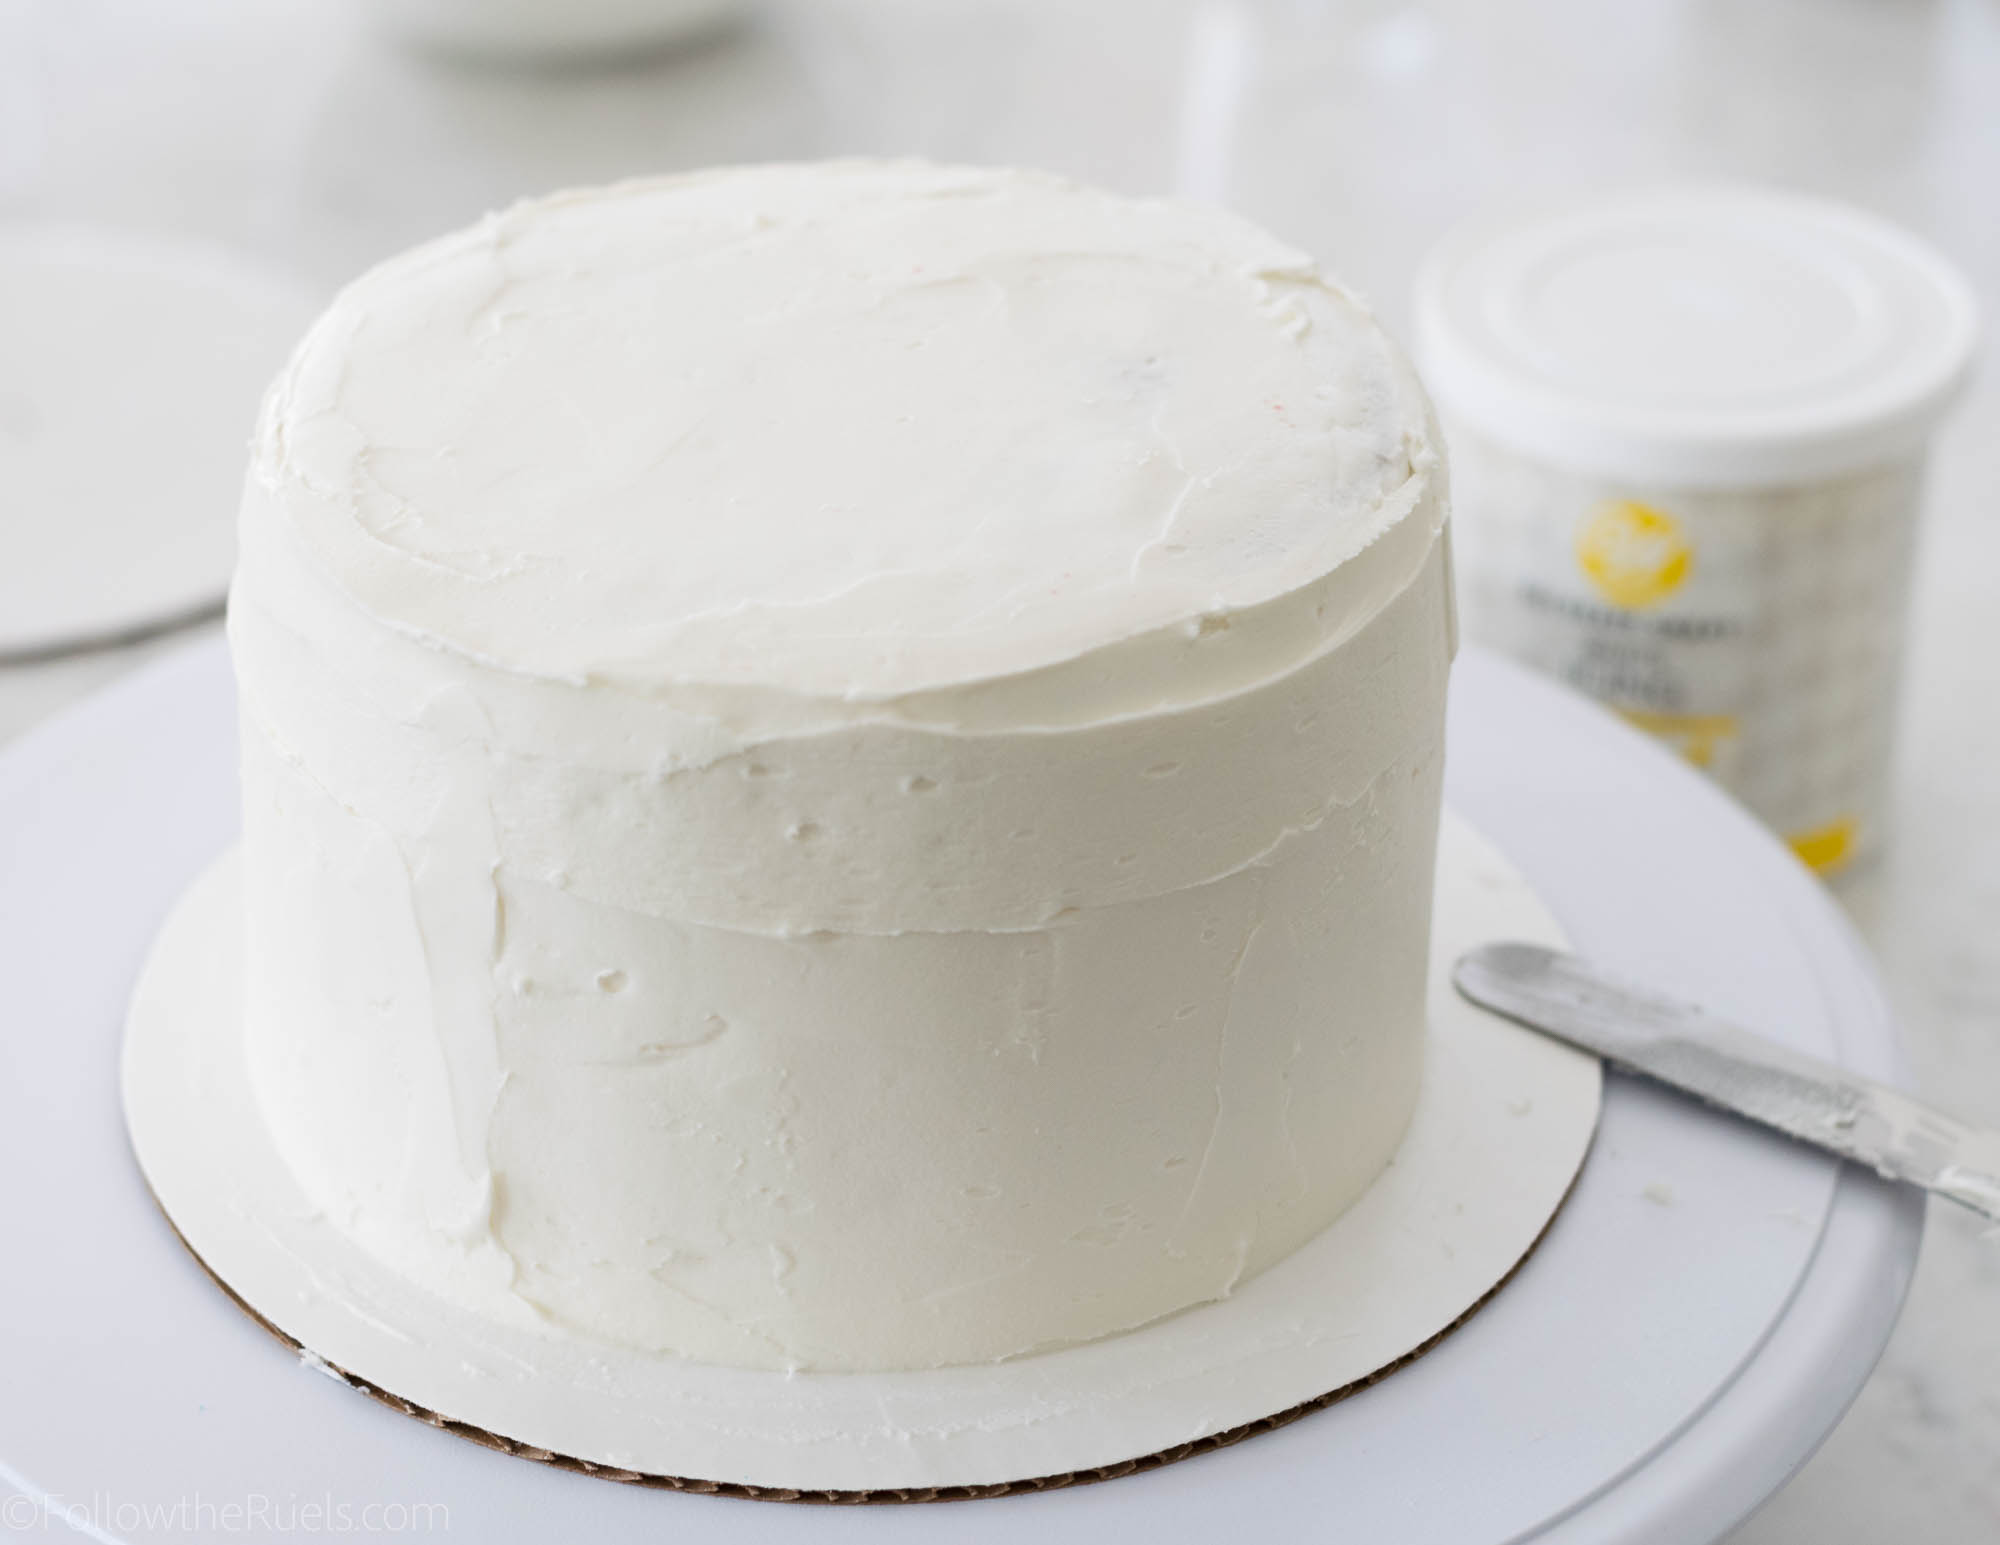
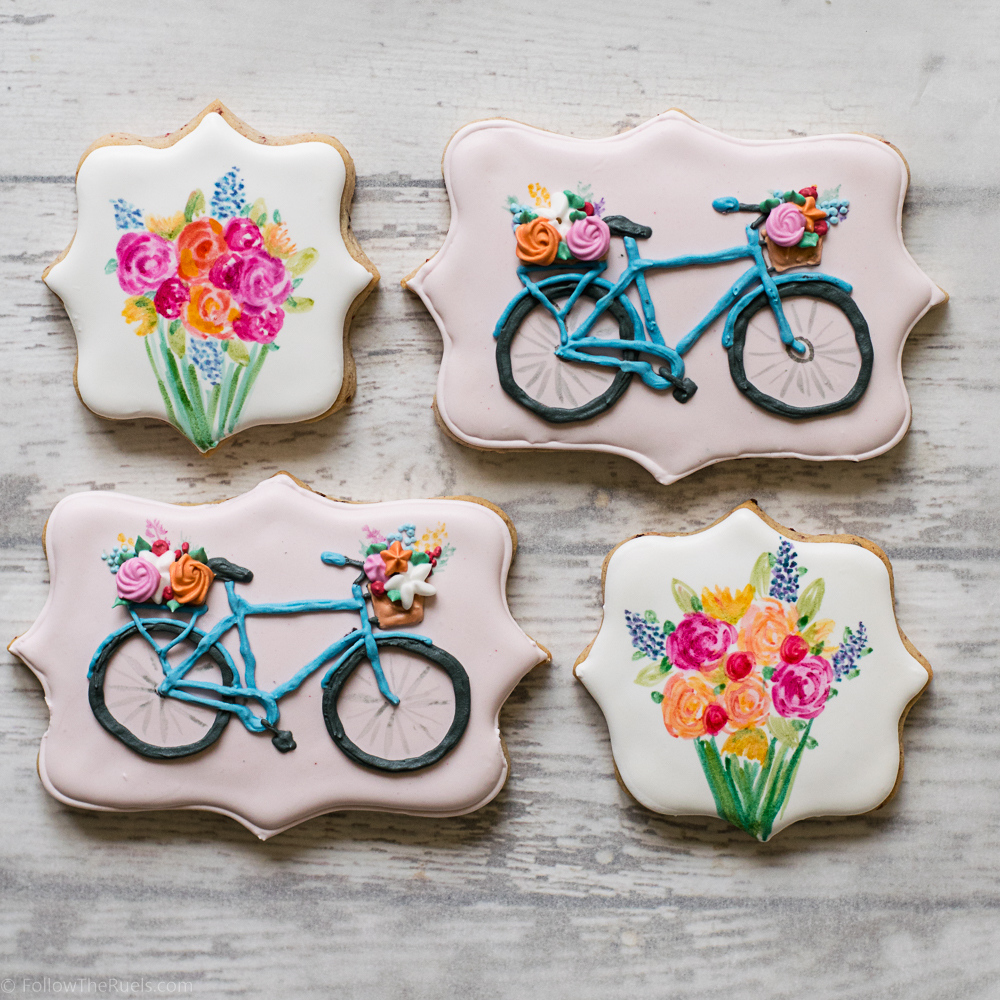
Start by outlining and filling each cookie with white icing, letting the icing dry completely before painting. 

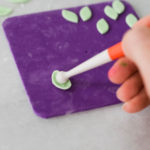
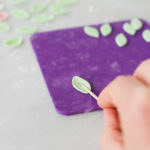
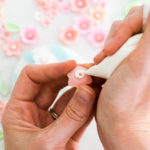
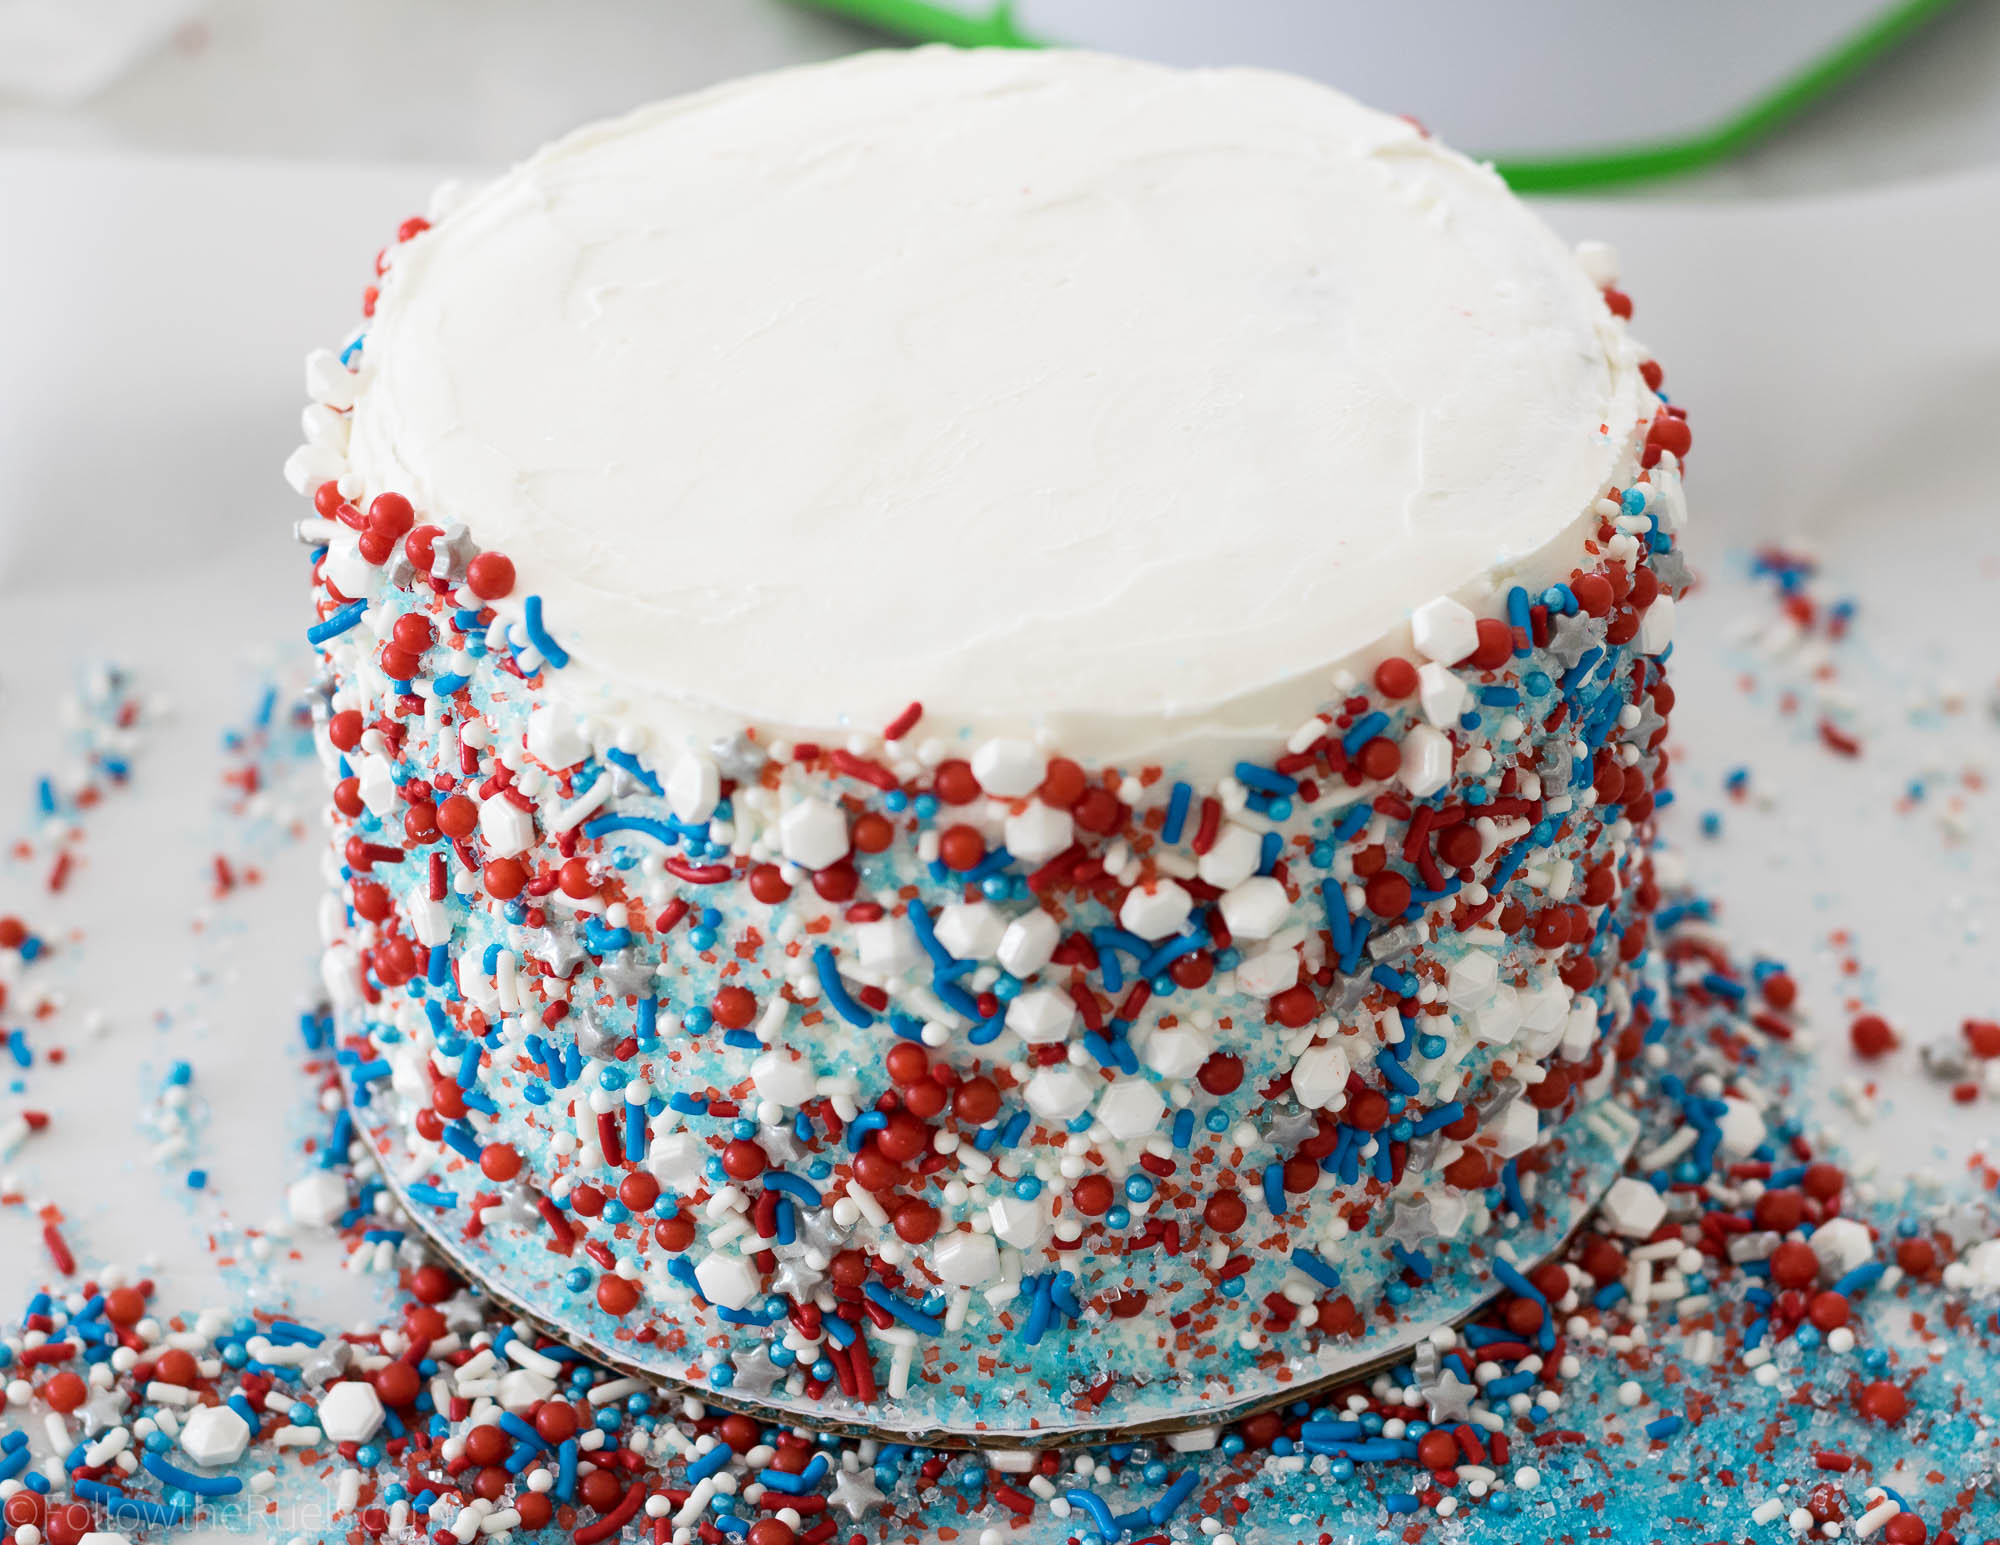
Then start painting!

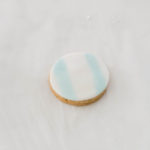
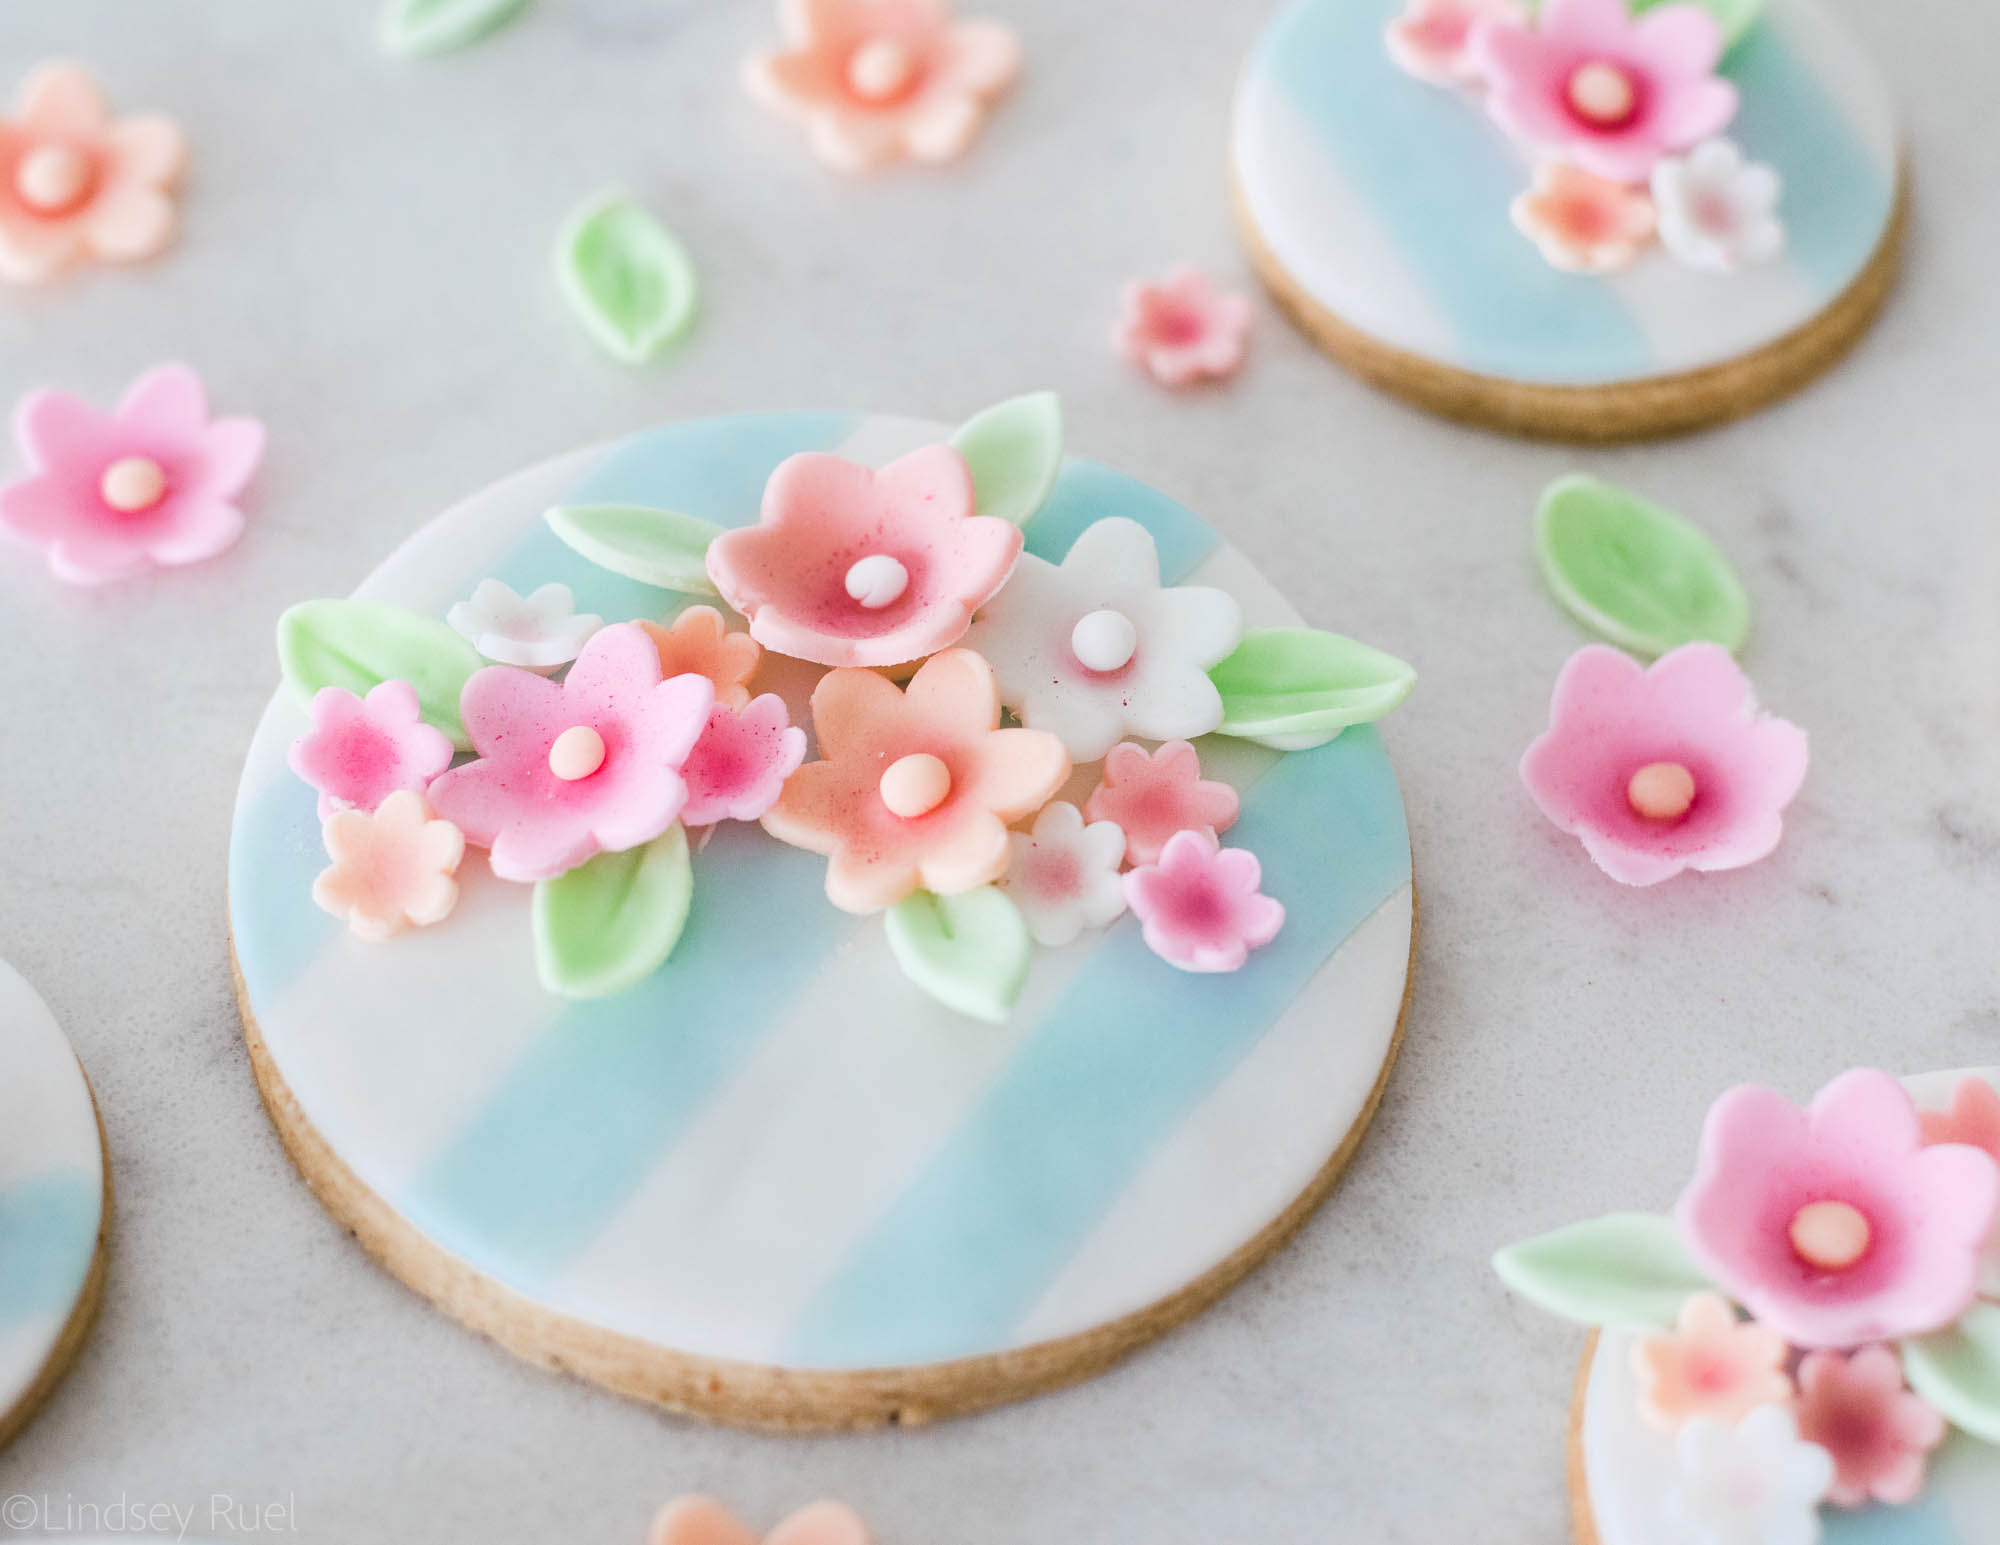
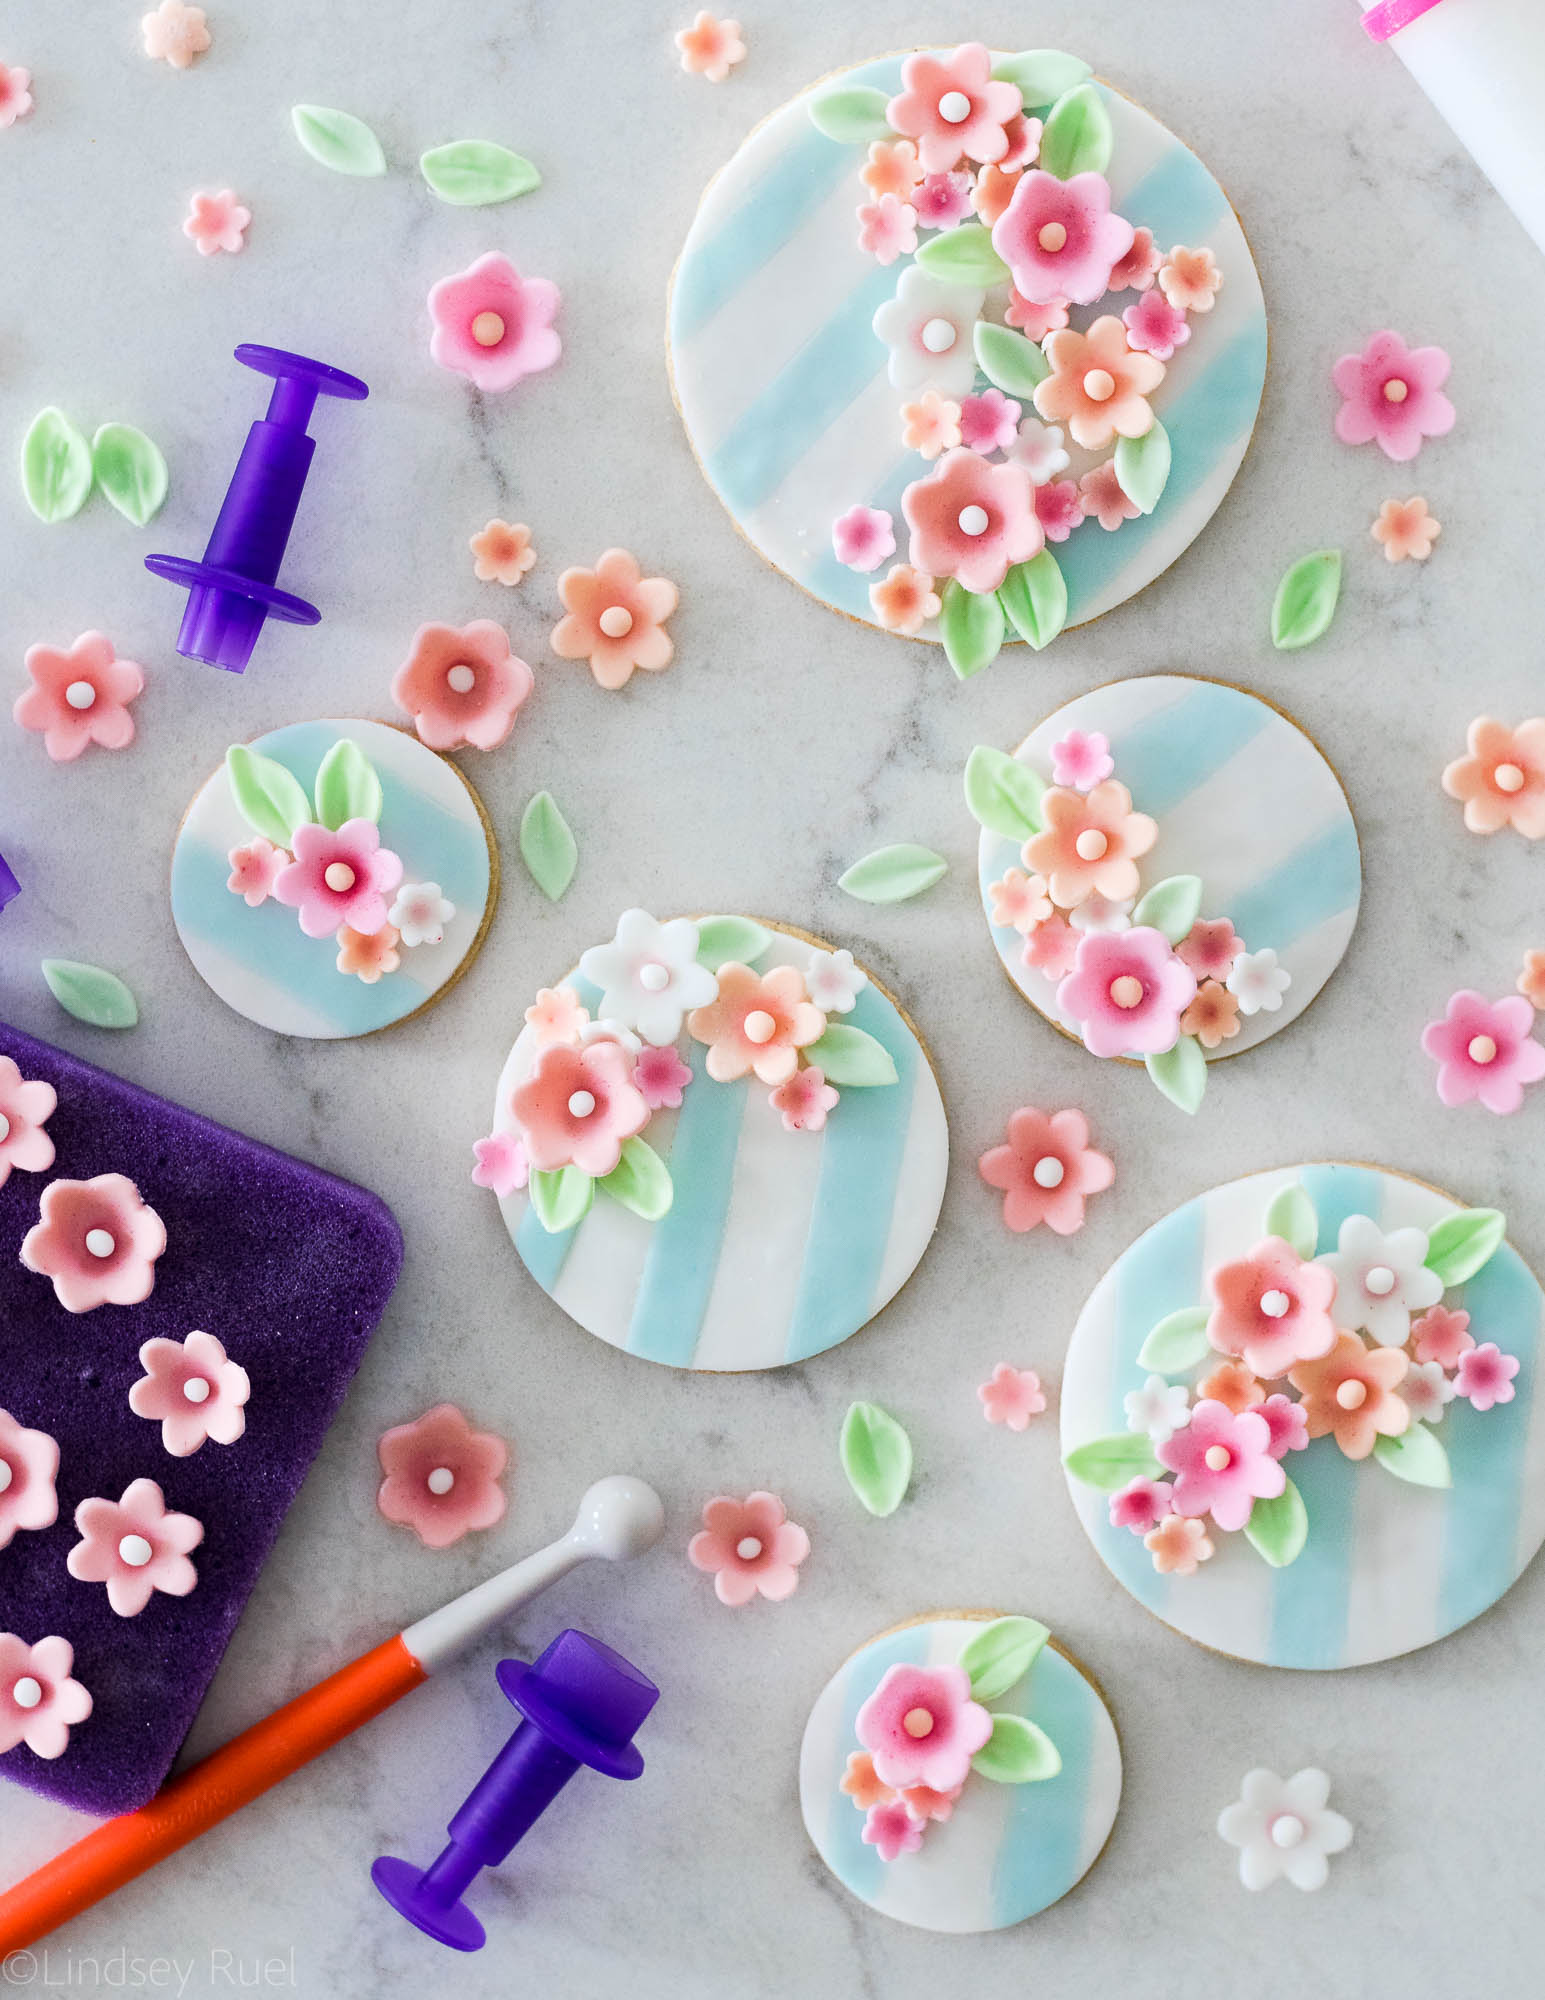
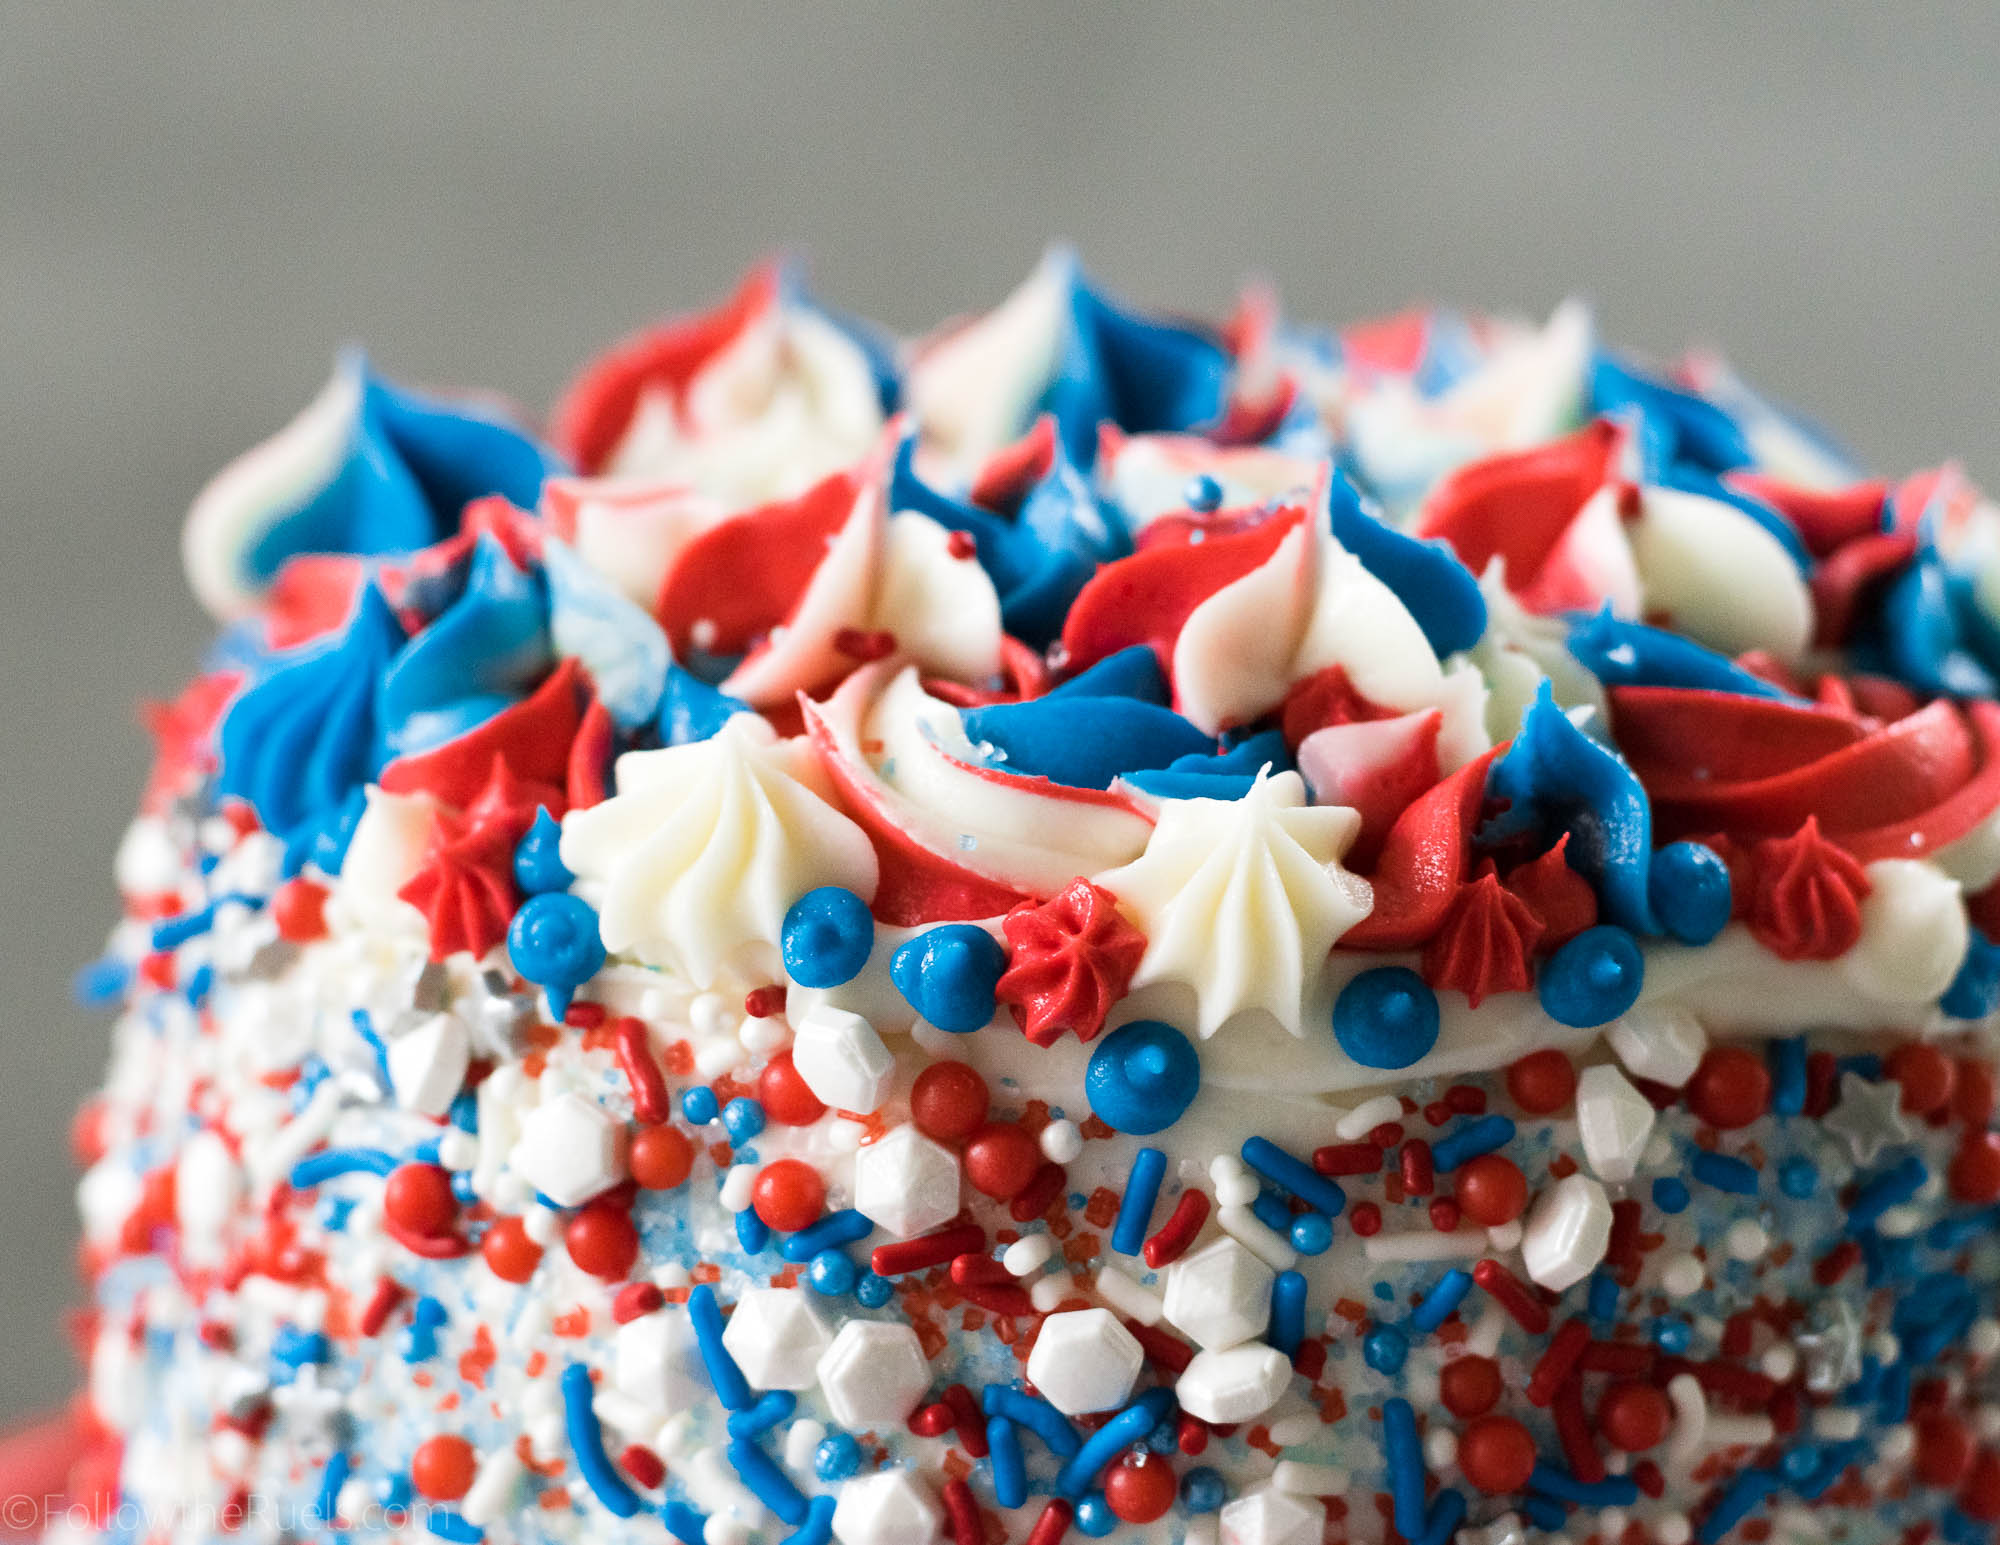
These turned out so much cuter than I could have hoped! I think I found a new favorite cookie to paint!

What do you think?

/ Filed In: Cookies New, Decorated Cookies, Desserts, Eat
Tagged: cookies, ice cream, painted cookies, sugar cookies, Summer, watercolor

Herbal Limeade

July 26, 2018

Herbal limeade is one of those things that you don’t really know what you are missing until you try it. It doesn’t necessarily sound all that appetizing or refreshing, but I guarantee it is both!

My love of herbal limeade started thanks to one of my favorite restaurants in Charlotte. They make this amazing limeade that is actually blended with rosemary, mint, and basil. It’s definitely more herbal than limeade, but it totally works! 

It’s like a green drink that you actually WANT to drink.

Since I can’t get my hands on their herbal limeade around Atlanta, I thought I would venture into making my own! My version is more limeade than herbal, but it’s still totally delicious and extra refreshing. 

Perfect for Summer!

How to Make It

Start by making your herbal simple syrup. If you have your own herb garden, raid it for a few sprigs of rosemary, mint, and a couple basil leaves. The main flavors in this limeade are rosemary and mint, so you will want more of those two. 

Place the sugar, water, herbs, and the zest of one lime into a small saucepan. Let it simmer until all the sugar has dissolved. Then turn off the heat and let the simple syrup cool with the zest and herbs still in there to extract as much flavor as possible!

While that cools, squeeze the heck out of a bunch of limes (and a few lemons). Limes are stubborn little suckers and don’t give up their juice easily, so if you have a juicer NOW is the time to use it!


Strain the lime juice into a fresh container to get rid of any seeds or pulp (unless that’s your jam), then strain the simple syrup to remove the herbs and zest. 

Add the syrup to the lime juice then add enough water until it suits your taste. I typically stick to 1 part lime juice to 2-3 parts water. 


Stick a few more sprigs of rosemary and mint in there to keep the herbal flavor alive and well while you sip on your delicious, refreshing, and (dare I say) healthy (?) beverage!

Tools and Recipe

[show_shopthepost_widget id=”3222699″]

[yumprint-recipe id=’192′] 


/ Filed In: Drinks, Other Sweets New
Tagged: basil, drinks, lemons, limeade, limes, mint, rosemary, Summer

Peanut Butter Chocolate Rice Krispie Treats

July 24, 2018

I don’t know about you, but these days I loathe turning on my oven. It is just SO hot outside, I do everything in my power to avoid adding any heat inside. Which is why I have been loving no-bake desserts!

The most popular no-bake dessert has to be the Rice Krispie Treat. They are easy and quick to make, and now there are so many different flavors and varieties so you will never get bored. 

My current favorite Rice Krispie Treat flavor is this peanut butter chocolate Rice Krispie Treat! It’s like a cross between a Reeses Peanut Butter Cup and a Rice Krispie Treat. Two of my favorite things! 

The best part is that they only require a few more ingredients and they’re just as easy to make as your traditional cereal treat!

How to Make Them

In a large saucepan, melt together butter and chocolate. Once the chocolate is melted, stir in the cocoa powder and peanut butter.

Then pour in the marshmallows and let them melt a bit over the heat before stirring them into the rest of the ingredients. 

Once the marshmallows are completely melted, pour the mixture over the Rice Krispies and immediately stir to coat the cereal in that delicious marshmallow mixture. 

Then dump everything into a baking pan that has been lined with some parchment. Use a spatula to press the mixture into the corners and to flatten out into one large sheet of delicious Peanut Butter Chocolate Rice Krispie Treats.

It only takes a few minutes (about 30) for these treats to set, then you can cut into them and enjoy!

Like I said above, these are the best of both a peanut butter cup and a Rice Krispie Treat. I am just so thankful to have a sweet treat to snack on that doesn’t require an oven!

Recipe

[yumprint-recipe id=’191′]

/ Filed In: Bars and Brownies, Desserts, Eat, Other Sweets New
Tagged: cereal bar, cereal treats, chocolate, no-bake dessert, peanut butter, Rice Krispie treats, Summer

Watermelon Cucumber Granita

July 11, 2018


There comes a time every Summer when I just dread turning on the oven. 

It’s already so hot outside and the AC is struggling to keep up; why would add any more heat to its load? 

Granita is the perfect thing to make when you want to avoid using your oven but still want something sweet. It’s super refreshing (especially this watermelon cucumber granita) and super easy to make!

How to Make It

Start by chopping up a bunch of watermelon and cucumber. For something like this, you can leave the skin on the cucumber if you’d like. It will just get filtered out later. 


Add all the fruit and veg to a blender or food processor. The juice of a lime (or lemon), and just enough water to get the blender to do its job. If your watermelon is juicy enough, you may not need any!

Pour the blended mixture through a sieve to strain out all the pulp.

You should be left with a beautiful red juice that is seriously delicious.

Honestly, you can stop right here and pour this over a couple ice cubes for a refreshing Summer beverage. 

But let’s continue turning this into watermelon cucumber granita, shall we?


Pour the juice into a shallow dish and then place it in the fridge. Every 2 hours or so (or every time you remember), take the dish out and scrape a fork over the surface. For the first few hours, it may seem like you aren’t doing much. Once it starts to set up you will start making really fine ice crystals. 

It doesn’t take too long to completely freeze leaving you with a beautiful (did I mention healthy?) dessert!

I like to eat this watermelon cucumber granita all on its own. However, it would also be delicious alongside some vanilla ice cream or whipped cream if you need something a bit richer.

It will definitely help you beat the Summer heat!

Supplies and Recipe

[show_shopthepost_widget id=”3199502″]

[yumprint-recipe id=’189′] 


/ Filed In: Desserts, Eat, Healthy Dishes, Other Sweets New
Tagged: cucumber, frozen, granita, ice, no-bake, Summer, watermelon

S’more Rice Krispie Treats

July 5, 2018

There are so many recipes that I make at home that never make it to the blog. Some I photograph, but the finished product just doesn’t look or taste right. 

Others I make, but never photograph, only having to make them again. 

This was almost one of those recipes. 

After the weather threatened our chances at making actual s’mores for our 4th of July cookout, I thought I would try something a little different. A total experiment. S’more Rice Krispie Treats!

However, after I made these and served them to my husband and neighbors, it was determined that they HAD TO GO ON THE BLOG.

My very picky husband literally called these S’more Rice Krispie Treats “amazing”. 

So here they are, on the blog….with almost no photos. Don’t worry, though. They are very easy to make and require very little visual guidance.

How to Make Them.

First, lay down a layer of graham crackers. My square baking dish didn’t fit them perfectly, so I had to break a few in half to get the entire bottom of the pan covered in graham crackers. 

Then, pour melted chocolate over the graham crackers and carefully spread it out so that there is a nice thin layer of chocolate over the crackers. 

Now it’s time to make the Rice Krispie treats! Follow the directions on the box or make your very own version of the classic and then dump the Rice Krispie mix on top of the chocolate covered crackers. Use a spatula to press the Rice Krispies down into the chocolate so that the entire pan is full. 

Then do everything in reverse! Melt some more chocolate, pour and spread it on top of the Rice Krispie treats, then top with more graham crackers. 

Let the entire thing sit and harden for about 30 minutes or until the chocolate has hardened. 

Finally, cut them into squares. You can use the top graham crackers as a guide, but they may not line up perfectly with the bottom grahams. 

See, so easy right? 

Recipe

[yumprint-recipe id=’188′]

/ Filed In: Bars and Brownies, Desserts, Eat, Other Sweets New
Tagged: 4th of July, chocolate, dessert, graham crackers, kid friendly, marshmallows, no-bake dessert, Rice Krispie treats, s'mores, Summer

Peach Cobbler Bars

July 3, 2018


As a new Georgia resident, I feel like it my duty to make my own version of peach cobbler. 

There are so many different versions of peach cobbler out there, I wanted to do something a bit different. Which is why I made my peach cobbler into bars! 

These peach cobbler bars are just as easy to make, just as delicious, but I think they are a bit easier to eat than your traditional peach cobbler. They are perfect for a Summer picnic, cookout, or any old get together!

How to Make Them

Start by making the crust/crumb topping which is fairly similar to a shortbread cookie. 

Whisk together flour, baking powder, brown sugar, and salt. Then cut in cold cubes of butter until it forms a crumb texture. 

In a measuring cup, mix together the egg, milk, and vanilla. Pour the wet ingredients over the crumbs and mix in until a very shaggy dough forms. 

Press a little more than half of the dough into the bottom of a square dish. Top with peaches that have been tossed with a bit of sugar, cornstarch, and nutmeg. 

Sprinkle the rest of the crumb mixture over the top of the peaches, making sure that most of the area is covered.

Bake at 350 until the top is golden brown.

Let the bars cool for at least 15 minutes, if not longer, before cutting. 

These peach cobbler bars are delicious at any temperature. But I think they are best served slightly warm. And with a side of ice cream.

Supplies and Recipe

[yumprint-recipe id=’187′]

/ Filed In: Desserts, Eat, Other Sweets New, Pies and Tarts
Tagged: bar, bar desserts, fruit, peach cobbler, peaches, Summer

Berry Patriotic Pie (2 Ways!)

July 2, 2018

Here’s a last minute, super easy, and very patriotic dessert for you to bring to your 4th of July shindig (or shindigs if you are just that popular!).

A berry patriotic pie!

See what I did there? 

I actually loved this so much, I made it twice. Once as a slab pie and once as individual mini pies. Both were extremely easy since I cut a lot of corners and used both premade pie dough and frozen berries. 

Work smarter, not harder, people. 

Some of you may scoff at my use of premade pie crust and frozen berries, but let me tell you, it in no way affected the taste of this pie. It was delish! But if you are one of those people who really loves to make things from scratch (trust me, I get it), by all means, make your own pie crust. I have an excellent recipe here. 

So this post will be a little different. I am going to walk you through how I assembled the slab pie and the little mini pies (or tarts), but they are both the exact same recipe, which you will find at the end. 

How to Make a Berry Patriotic Slab Pie

If you are making your own pie dough, do that first, then let the pie dough chill before rolling it out. 

If you are using store-bought pie dough, combine both sheets of pie dough together, and roll it out so that it fits a rectangular baking sheet. I am using a small quarter sheet pan for this. You can also use a casserole dish or normal round pie dish.

For the slab pie, I went with an ombre effect. To do that, I first separated out each type of berry and arranged them from darkest to lightest. This is completely unnecessary, and you can instead mix all the berries together to make one delicious berry pie. 

Mix all the berries with the sugar mixture, which consists of granulated sugar, corn start, and lemon zest.

If keeping the berries separate, mix a portion of the sugar mixture into each bowl of berries. I mixed in 3-4 tbsp for every cup of berries. 

Then spoon the berries into the pie crust. 

Use the extra dough to create a desired pattern on top. I went with stars and stripes which I created using a star-shaped cookie cutter and a pizza cutter. 

The “rope” around the outside was created by taking long and skinny pieces of dough, pinching them together on both ends, then twisting until they looked like a rope. I made several of these to put around the edge.

Bake the pie at 400 degrees for 15 minutes, then reduce and bake at 350 for another 30 – 40 minutes, or until the berries are bubbling and the pie crust is golden. 

To ensure your pie crust doesn’t break off mid-bake, adhere the pieces to the bottom pie crust with a bit of an egg wash. 

How to Make Berry Patriotic Mini Pies

Again, start with either homemade or store-bought pie dough. Roll out the pie dough into one big sheet and cut out circles about 1/2″ wider than the opening of the tart pan. 

Press the dough into the bottom and along the sides of the tin. 

Mix together the berries and sugar mixture.

For these mini pies, I combined the red berries together, and the “blue” berries together. 

Spoon the berries into the pie shells and then top with the extra pie dough. 

Similar to the slab pie, I cut out stars and stripes and placed stars on the “blue” pie and stripes on the “red” pie.

Brush the tops of the pie crust with an egg wash so they turn a nice golden brown color. 

And, just like the slab pie, bake at 400 for 15 minutes, then reduce the temperature, and bake at 350 for another 20 minutes. The mini pies bake much quicker.

So there you have it! Two ways to make a super cute and berry patriotic pie (or pies)! Who knew making a pie could be so easy?

Now, tell me the truth, which version is your favorite? I think I like the mini ones, personally…but maybe it’s because my slab pie just didn’t want to behave!

Supplies and Recipe

[show_shopthepost_widget id=”3190306″]

[yumprint-recipe id=’186′]

/ Filed In: Desserts, Eat, Other Sweets New, Pies and Tarts
Tagged: 4th of July, berry, berry pie, mini pie, patriotic, pie crust, pies, semi-homemade, Summer, tart

Fondant Flower Sugar Cookies

June 29, 2018

Disclaimer: Wilton provided me with their new decorating kits and other supplies in exchange for a blog post about their new products. However, all thoughts and opinions in this post are my own.

Fondant isn’t just for wedding cakes anymore!

Well, you guys know that already. I have been using fondant on cookies for a while now (exhibit 1, 2, 3). But these cookies take fondant to a whole new level, IMO, thanks to the Wilton Fondant Shapes and Cutout Kit. 

I was so inspired by the photo on the front of the box that I was dying to make a similar cake. But, sometimes I need to know my strengths (and weaknesses), and I knew I could execute a similar look on a cookie. 

The cookies were a lot of fun to create, and actually kind of therapeutic. Working with fondant is a lot like working with modeling clay. It can be very forgiving and if you mess up, you can just roll it up and try again. These cookies are definitely something that just about anyone can recreate with the right tools!

How to Make Them

Start by dying fondant in the desired shades of colors. A little fondant goes a long way, so you may only need a gumball (or smaller) -sized ball of fondant per color. 

To dye the fondant, dab a tiny amount of gel food coloring onto the fondant. Then using your hands, stretch and knead the fondant until the color is evenly incorporated. If the color is too light, add additional food coloring.

Tip: Use food-safe gloves to prevent getting food coloring all over your skin. 

Roll out the fondant with the fondant roller and the thinnest of the roller bands. Punch out various sized flowers and leaves. 


Place the cut-out flowers onto the foam and press down using the ball tool to create a more dimensional flower. 

To add some more dimension and color, brush some pink luster dust in the center of the flower. Add a little ball of the same or different color fondant to the center of the flower. Attach with a dab of water. 


To add a little more detail to the leaves, use the smaller end of the ball tool to roll around the edges. Use a toothpick to add a little line down the center. 

Allow to dry and harden while you work on the next step.


To create the striped fondant, dye a small ball of fondant a light blue (or your color of choice). Roll out the blue fondant using the fondant roller, then cut into equal sized strips. 

Roll out the plain white fondant and attach the strips of colored fondant with a little bit of water. 

Place a piece of parchment on top of the fondant and roll out the fondant with the fondant roller and widest fondant roller guide. 

Cut out the fondant using the same sized cookie cutter as the cookies the fondant will be placed on. 

Tip: Work in small batches because once your roll out the striped fondant, you will not be able to re-roll it and maintain the stripes. 


Attach the fondant to the cookie by brushing a little bit of water onto the back of the fondant then sticking it to the cookie. Use your finger to smooth out the top and edges of the fondant. 

There is not a lot of rhyme or reason for placing the flowers on the cookie. I like to start by adding the biggest flowers first, then adding smaller flowers around it. 

I also like to make sure that the arrangement is asymmetrical. So if there is one large center flower with two small flowers on one side, I won’t add two flowers to the other. I will make sure the two sides are not balanced which will make it look a bit more natural. 


“Glue” the flowers onto the cookies with a bit of stiff consistency royal icing. 

Layer the flowers and leaves until you are happy with the arrangement. Allow the royal icing to dry for about 15-20 minutes before stacking or packaging. 

Tools and Recipes

As I mentioned above, almost all of the tools I used came from the How to Decorate with Fondant Shapes and Cut-Outs including the fondant cutters, the fondant roller, the ball tool, and the foam.

I also used Wilton fondant in white and their gel food coloring, both of which I already had on hand but they had provided me with extras. 

For the exact colors of the flowers and leaves, I used very small amounts of the following colors:

  • Pink + Red
  • Pink + Brown
  • Pink + Orange + Brown
  • Orange + Pink
  • Leaf Green + Blue
  • Leaf Green + Brown

Then, of course, I left one ball of fondant just plain white. In all of the cases, the first color listed was the main color, then I added a tiny amount of the second color just to add a different tint. It’s a little bit of trial and error. 

The cookies themselves were made with a version of my favorite sugar cookie recipe. I am still working on perfecting the flavor, but my basic cookie is always a winner. Or you could try the lavender-vanilla recipe (scroll to the bottom of the post for the recipe) for a nice floral twist. 


/ Filed In: Cookie Decorating 101, Cookies New, Decorated Cookies, Desserts, Eat
Tagged: decorated cookies, floral, flowers, fondant, patel, Spring, stripes, sugar cookies, Summer, Wilton

Chocolate Dipped Watermelon

June 21, 2018

If you are looking for a super easy, somewhat healthy, all around people-pleasing dessert for any Summer party or picnic, then you have to make yourself some chocolate dipped watermelon!

How to Make It

The first thing to do is to cut the watermelon into slices. These can be as big or small as you like. They don’t even have to be slices! They can be chunks or sticks or however you like to cut your watermelon. 

Lay the slices of watermelon on a tray and let them chill in the fridge while you move onto the chocolate. 

The trick to getting a nice chocolate coating that sticks to the watermelon is to temper the chocolate. 

Tempering chocolate used to intimidate me, but it’s actually pretty easy and makes a world of difference! Instead of chalky, grainy chocolate, you will have a nice smooth, glossy chocolate coating.

To temper the chocolate you first melt about 2/3rds of the chocolate over a double boiler. Not all the pieces will be melted, but most should be starting to melt. Then stir the chocolate off the heat until all the pieces are melted. At this point, the chocolate should be pretty hot. 

Then add in the rest of the chocolate pieces and mix until they have melted into the rest of the chocolate. This may take a while because the chocolate is cooling down as more chocolate is added. By the end, all of the chocolate pieces should be melted and the chocolate should actually feel cool to the touch. I highly recommend checking out this very in-depth post about how to temper chocolate. 

Next, just dip the watermelon into the chocolate. If the watermelon has developed a lot of moisture on the surface, blot that away with a paper towel before dipping. It will ensure that the chocolate sticks. 

If you want the chocolate to cover even more of the watermelon, use a spoon or spatula to spread it up the sides. 

Because the watermelon is cold from the fridge, the chocolate will start to harden pretty quickly (which I actually prefer). So if you want to add any toppings, act fast! 

You can add sprinkles to make these chocolate dipped watermelon slices super festive. You can even sprinkle on some sea salt or chopped nuts. Go crazy!

Whichever way you dress up your watermelon, I guarantee it will be delicious and refreshing! A perfect combination for a hot Summer day!

Tools and Recipe

[show_shopthepost_widget id=”3178073″]

[yumprint-recipe id=’185′]

/ Filed In: Desserts, Eat, Other Sweets New
Tagged: 4th of July, chocolate, picnic, Summer, tempering chocolate, watermelon

Strawberry Shortcake Ice Cream Sandwiches

June 20, 2018

I feel like it went from Spring to Summer in the blink of an eye. 

Okay, maybe it’s because we have been traveling for the better part of a month, but all of a sudden it just got hot!

Which means it’s ice cream season! Not that I need any special season to help myself to some ice cream, but it certainly helps with the thermometer is pushing 90 or 100 degrees. 

I also can’t get enough fruit during the Summer, especially strawberries, which is why I thought I would combine one of my favorite strawberry desserts with a bit of ice cream for the ultimate Summer treat. 

Everyone makes their strawberry shortcake with whipped cream, but why not throw a little ice cream in there instead and call it a strawberry shortcake ice cream sandwich!?

How to Make It
The Shortcake

The shortcake in these strawberry shortcake ice cream sandwiches is the most intensive step in the process. But if you can make a biscuit, you can make shortcake! Trust me, homemade shortcake is well worth the moderate effort it takes to make them!

Start by mixing together flour, sugar, baking powder, baking soda, and salt. Then add in the chilled and cubed butter.

Cut the butter into the dry ingredients until it resembles cake crumbs. You can use two knives, a pastry cutter, or your hands. I used a combination of a pastry cutter and my hands. 

Pour in the milk, just a little bit at a time. Mix until a sticky yet firm dough forms. It’s okay if you don’t use all of the milk. 

Since these are drop biscuits, drop the dough using a spoon or ice cream scoop onto a lined baking sheet about 2-3 inches apart. 

If you want a flatter shortcake (easier to actually eat as an ice cream sandwich), press the biscuit down with your hand. Then brush the top with a bit of melted butter and sprinkle with some coarse sugar. Then pop in the oven and bake until golden.

The Strawberries

Fresh strawberries are best for strawberry shortcake, but if you also want your strawberries to be extra juicy and create a strawberry syrup to drizzle down the ice cream, I recommend tossing them in a bit of sugar. 

Slice your strawberries however you prefer, then sprinkle over about 1-2 teaspoons of granulates sugar. Toss the strawberries to coat, then let sit for at least 10 minutes, or while the shortbread bakes. 

Assemble

Assembling the strawberry shortcake ice cream sandies is the best part! 

Slice the baked and cooled shortcake in half like a hamburger bun using a serrated knife. Then pile on the strawberries. Top the strawberries with a healthy scoop of your favorite vanilla ice cream and even more strawberries. 

Top it off with the other half of the shortcake and you have yourself a delicious Summer treat! 

Tools and Recipe

[show_shopthepost_widget id=”3177040″]

[yumprint-recipe id=’184′]

/ Filed In: Cakes and Cupcakes, Cakes New, Desserts, Eat, Other Sweets New, Pies and Tarts
Tagged: biscuit, ice cream, ice cream sandwich, shortcake, strawberry, strawberry shortcake, Summer

4th of July Firework Cake

June 13, 2018

A lot of times, my motto is less is more. 

But not with this cake. The motto for this cake is MORE is MORE!

Which is perfect for 4th of July, and hence why I am calling it the 4th of July firework cake, because it reminds me of a firework. Just all the red, white, and blue, all over the place. 

Wilton Cakes was kind enough to send me one of their new cake decorating kits and I had so much fun coming up with this cake which was inspired by a few of the various cake designs they had in their book.

I decided to cover the entire sides of the cake in red, white, and blue sprinkles and then cover the top of the cake in red, white, and blue buttercream stars and rosettes. 

Other than the sprinkles, frosting, and food coloring, which I already had on hand, everything I used to decorate the cake came with the How to Decorate Cakes and Desserts Kit which made it incredibly easy to make!

How to Make It

As I mentioned above, I used the How to Decorate Cakes and Desserts kit, which comes with an awesome instruction and inspiration book (below) and all the supplies you will need to decorate your cake.

The kit also comes with 10 piping tips, 3 couplers, a spatula, decorating brush, and 24 piping bags in two different sizes. 

I also used their tiltable turntable, gel food coloring, and white buttercream icing. 


The instruction book shows you everything from how to bake your cake, cut your cake, layer your cake, and frost your cake. Since I am still learning how to decorate cakes, a lot of their instruction was very helpful.

Since the theme for this cake is “more is more” I added these red, white, and blue non-pareliels to give it a marbled funfetti look. If you want a true funfetti look, I recommend using jimmies instead of nonpareils. 


I used a box cake mix for this cake to make things easy on myself. You can see my tips for making a boxed cake mix taste homemade here. 

The cake is made up of two layers baked in a 6″ cake pan. For a larger cake, double the amount of batter and bake it in an 8″ or 9″ cake pan. 

Once the cake is baked, cooled, and leveled, spread the buttercream icing over the first layer. Top with the second layer of cake and another layer of icing, this time spreading it around the entire cake to seal in the crumbs. 

Chill the cake for about 30 minutes. 

After the crumb coat has chilled, spoon the buttercream into a large piping bag fitted with the specialty tip 789. Pipe the buttercream around the sides of the cake so that there is a nice thick layer of icing. 

Use the off-set spatula to spread the icing around the cake. It doesn’t have to be pretty, because the sides will be covered with sprinkles. 

How to Decorate It

Speaking of sprinkles, mix together all the red, white, and blue sprinkles you can get your hands on. I like mixing together jimmies with some larger round sprinkles and sanding sugars. I also through in a few novelty sprinkles. 

To cover the sides of the cake, place the cake in the center of a baking sheet covered with parchment. Pat the sprinkles all around the sides of the cake. Reuse any extra sprinkles that have fallen away.

Finally, prepare the piping bags to decorate the top of the cake. 

For the larger piping tips (2D and 1M) mix together red, white, and blue icing by spreading lines of icing on a sheet of plastic wrap. Roll the plastic wrap into a tube, then feed the tube into the piping bag with the piping tip inside. You made need to cut off any excess plastic wrap so the icing flows through.

Then prepare three other piping bags, all fitted with a coupler and a smaller piping tip. Fill each one with a different color. 


Start by piping the larger stars and rosettes first. Then fill in with the smaller decorations. Don’t be afraid to layer them on top of one another. Also feel free to change out the piping tips using the couplers to get lots of various shapes. 

Once you are done, sprinkle a few sprinkles right on top. 

And viola! Your very own super patriotic cake! Perfect for 4th of July!

Supplies and Recipe

Follow my How to Make Boxed Cake Mix Taste Homemade tutorial for an easy semi-homemade cake. Or I highly recommend my vanilla cupcake recipe, which will make 1 6″ round two layer cake. Double to make a larger cake. 

  • How to Decorate Cakes and Desserts Kit: http://bit.ly/2xChT1U
  • Icing Gel Set: http://bit.ly/2xMNBd8
  • Turntable: http://bit.ly/2Hi9yjH
  • White Buttercream Icing: http://bit.ly/2kQK9F3
  • Red, white, and blue sprinkles: https://www.wilton.com/shop-sprinkles/


/ Filed In: Cakes and Cupcakes, Cakes New, Desserts, Eat
Tagged: 4th of July, cake, cake decorating, layer cake, patriotic, Summer

Blueberry Angel Food Cake

May 24, 2018

Angel food cake was my go-to dessert in college. Mainly because it was a tad healthier than your average cake, but also because the boxed cake mix made it easy to make at home.

Angel food cake has a reputation for being difficult to make from scratch. But I’m here to tell you, it’s really not! It definitely took me a while to build up the courage to ditch the boxed mix and make it from scratch, but once I did I realized it really isn’t so bad. 

Plus, when you make it from scratch at home you can play around with the recipe and make it your own! Like adding in blueberries! 

Well, freeze dried blueberries.

Which make a super delicious and subtly flavored blueberry angel food cake. 

How to Make It

First things first. Process the blueberries until they form a fine powder. You can do this by processing them in a food processor or by tossing them in a zip-top bag and giving them a good wack.

Next, sift all the dry ingredients together. It’s super important to sift everything because you want it to be as light as possible.

Then start making the meringue which is the foundation of the cake.

Slowly start beating the egg whites until a little bit of foam forms, then add the cream of tartar and lemon juice. 

After a little more foam builds, add in about a third of the sugar. Beat for another 30 seconds or so and add a little more sugar. Finally, when the egg whites are almost done, add in the rest of the sugar.

The meringue should be in medium stiff peak form, meaning it can form a peak, but the tips fall over.


Now slowly fold the dry ingredients into the meringue a little at a time. Try not to deflate the meringue.

Spoon the batter into your cake pan, or in my case, a mini cake pan, then bake until a toothpick comes out clean. It takes about 15-20 for the small pan and 30-35 for a standard pan.

Once out of the oven, let the cake cool upside down over a cooling rack or balanced on a wine bottle. This helps ensure that your cake doesn’t deflate and lose all that beautiful air you worked so hard to incorporate into the cake.

If all of those things are done well, you should have yourself a beautiful, light, airy, and delicious blueberry angel food cake! Perfect for any occasion, or just to make for yourself. 

You definitely don’t have to worry about the guilt with this recipe. It is about as “light” as any cake can be! Plus, it probably packs a full serving of fruit thanks to those freeze-dried blueberries. 

Tools and Recipe

[show_shopthepost_widget id=”3147139″]

[yumprint-recipe id=’180′]

/ Filed In: Cakes and Cupcakes, Cakes New, Desserts, Eat
Tagged: angel food, blueberry, cake, egg whites, light, meringue, Summer

Cherry Chocolate Chip Scones

September 12, 2017

I have been buying cherries non-stop this Summer. Almost every trip to the grocery store results in at least one bag of cherries. They are a perfect snack, dessert, or filling. 

Earlier this summer I added fresh cherries to my red, white, and blue pie for Memorial Day. I added them to a batch of sangria for 4th of July. So it only seemed appropriate that I toss them into the chocolate chip scones I made over Labor Day. What a fitting way to bid farewell to the Summer.

You would think that after all these cherry baking projects that I would invest in a cherry pitter. 

I still haven’t learned my lesson.


I love making scones because they sort of like a fancy biscuit, but they are just as easy as making biscuits. 

First, cut cold butter into to the flour until it’s basically the consistency of gravel. Then stir in the liquid ingredients until it forms a sticky dough. 

Fold in the cherries and chocolate chips so they are peppered throughout the dough. Then turn the dough out onto a piece of plastic wrap and wrap up into a disc. Pop in the fridge to chill for at least an hour. I promise it will be so much easier to work with if it’s chilled.  


Now, there are several ways you can form a scone. I have made them in wedges (like above) and I have also made them in rounds (like a biscuit). I have also seen them in square form. You can pick whatever shape speaks to you. 

In this case, I didn’t feel like breaking out the rolling pin (the old girl needs a break from rolling out cookie dough) or the biscuit cutter so I took the disc of dough and cut it into 8 wedges. 

I also sprinkled a little raw sugar on top to give it a little extra crunch. 

After a few minutes in the oven, the cherry chocolate chip scones should be nice and golden brown; crunchy on the outside, and super soft and steamy on the inside. The cherries will be nice and soft and the chocolate chips will be slightly melted.

I recommend eating them shortly after they come out of the oven so that you can split one in half and melt a bit of butter on the inside. It’s the way scones are meant to be eaten. I assume. 

[yumprint-recipe id=’131′]

/ Filed In: Breakfast, Eat, Other Sweets New
Tagged: breakfast, cherry, chocolate, chocolate chip, scone, Summer

How to Cook an Artichoke

August 22, 2017

I grew up eating artichokes. Maybe it’s a California thing. If my memory serves me correctly (which it probably doesn’t, considering these memories are many years old), every Saturday during the Summer my dad would grill a steak and he would serve it alongside an artichoke and a healthy bowl of melted butter. 

Now that I live outside of California, I rarely see artichoke served in any other way than with spinach and cheese in dip form. Almost never do I see it served plain with a side of butter or other dipping sauce. And that is really the best way to eat an artichoke. Au natural! 


There are several ways to cook an artichoke, but the best way I have found is boiling it. It keeps the artichoke moist and tender, which is really the only way you want your artichoke. 

But first you have to prep your artichoke. I like to trim the stem of the artichoke so that there is just a little nub left and then a cut off the top. Then I peel the outer leaves off and trim the tops with my kitchen shears. 

Like avocados, artichokes brown pretty quickly. So as soon as I am done trimming the ‘chokes I pop them in a bowl of cold water with lemon juice. I also rub a cut lemon on the top cut portion. 

Once all the artichokes are prepped, I dump them in a pot of boiling water that I enhance with the lemons from earlier, a bay leaf, and some salt. After about 40 minutes, the ‘chokes are nice and tender.

Ok, so artichokes are fine on their own. And that’s putting it nicely. The best thing about eating artichokes is that you dip them in something super fatty and delicious like butter or mayonnaise. 

Butter is a classic. It’s my favorite way to eat artichokes. But aioli (fancy mayonnaise) is also great. Something about that creamy, salty, garliciness is perfect with the artichoke. 

A new-found favorite is roasted garlic olive oil. It’s like dipping the artichoke into, well, roasted garlic olive oil. Delicious. 

And I guess I am assuming that you know how to eat an artichoke. For those of you are new to artichokes, they are pretty easy to eat. I just pick the leaves off, dip it into my dip of choice, then scrape the flesh off the base of the leaf with my teeth. I know it sounds weird, but it’s delicious. 

Once pretty much all the leaves are gone, I pick off all the smaller leaves and then cut out the choke, which is the actual spiky center of the artichoke. Do not eat the choke. What you are after is the heart. After all the choke is removed, you are left with the heart, which you can just dip into butter and eat whole. It’s the best part. It’s what all that hard work was for. 

It’s the best part. It’s what all that hard work was for. 

[yumprint-recipe id=’127′] 


/ Filed In: Eat, Side Dishes
Tagged: artichokes, Summer, vegetables

Pretty Bicycle Cookies

August 7, 2017

This past Sunday I spent a couple hours making cookies for a friend of ours who is moving to start her next adventure in life. I wanted to send her off with some cookies and these pretty bicycles with baskets of flowers somehow popped into my mind. Do they have anything to do with her move or where she is going? Nope. I just thought they were pretty. 

How can anyone turn down these pretty bicycles in cookie form? It makes me what to immediately go buy a blue bicycle even though the last time I rode a bike I nearly broke my leg. Clearly the person who coined the phrase “it’s just like riding a bike” had never met me. 

I digress…

You may be thinking that piping an entire bicycle with royal icing is extremely hard. While not the easiest thing to pipe, it’s actually just about as easy as tracing!

As I demonstrated in this post, you can easily trace just about any image onto dried royal icing with tissue paper and an edible ink pen. They trace over your image with royal icing. Easy peasy lemon squeezy!

For the flowers in the bike’s baskets, I painted some background leaves and flowers with gel food coloring that I diluted with some clear extract, like almond extract (sometimes I use vodka). Then I piped over them with some other flowers using my favorite piping tips. 

Here are all the recipes and supplies I used to make the cookies:

  • Royal Icing Recipe (I made 1 batch for about a dozen cookies)
  • Raspberry Lemonade Sugar Cookie recipe from my Summer Cookie Pack (or you can use my Sugar Cookie recipe)

Piping Tips:

  • #2 (small circle) tip for the wheels and body of the bike
  • #1 (small circle) for the pedal and handles of the bike
  • #14 flower tip for the pink rose
  • #24 flower tip for the peach rose
  • #225 flower tip for the white flower
  • #349 leaf tip for the leaves

Other Supplies:

  • Edible ink pen
  • Piping bags
  • Food safe brushes
  • Food coloring
  • Plaque Cookie Cutters

I hope you enjoy these cookies and maybe you will even make them for yourself or a friend! 

 
[show_shopthepost_widget id=”2775305″]

/ Filed In: Cookies New, Decorated Cookies
Tagged: bicycles, cookies, decorated cookies, flowers, royal icing, Spring, Summer

My Favorite Summer Wines

July 28, 2017

I’m a wine girl at heart. It’s my go-to drink out at a bar, at dinner, at a wedding, or at home after a long day at work. (Side note: if you ever see me out and want to buy me a drink, I will happily accept any glass of white wine. I just thought I would let you know for future reference.)

While I have my go-to wines that I will drink year round, my tastes change a bit with the season. I find myself drinking more light and crisp whites and fruity reds during the Summer. Of course, I am not a wine expert (although I have watched Somm and Somm: Into the Bottle, sooo…) but over the years I have learned to look for flavors that are in season during the Summer, such as citrus, berry, stone fruit, jalapeno, or tropical fruit. These are typically the best wines for those hot Summer days or to pair with anything hot off the grill. 

My Favorite White Wines

White wines are my go-to year round, but especially during the Summer. My favorites tend to be those that have a lot of citrus notes, like grapefruit, orange peel, or lemon because they are so light and refreshing. I will also tend to try anything with hints of peach, nectarine, melon, pear, apple….basically anything you would toss in a fruit salad. 

My favorite white wines definitely check all of those boxes. Lots of fruitiness going on. And since I describe wine like a bowl of Fruit Loops, I thought I would find the best reviews on Vivino to help convey my thoughts in a much more eloquent manner.

  • Roi Dagobert Dry Riesling – “Dry and good. Not setting the world alight but easy drinking.” – Fergus (Well, Fergus, maybe you aren’t setting the world alight, ever think of that?!!)
  • Maso Canali Pinot Grigio – “Grassy and acidic. Not shy or sweet. Enjoyable. A balance of crisp and smooth. Peachy.” – Stephen (I appreciate that Stephen also described the wine’s personality. There is nothing I hate more than an outgoing wine.)
  • Converge Zone Cellars Chenin Blanc – “light, crisp, refreshing” – Ellery (Okay, that was the only comment on this one…even I could have come up with that.)
My Favorite Rosés

Rosés are somewhat of a new wine for me. Up until last Summer, my only association with rosé was White Zinfindel. Not really my cup of tea (or wine!). But ever since trying the first rosé on my list I have been a fan! 

  • Charles & Charles Rosé – “My first bottle exploring what is Rose. No longer dominated by White Zin’s, it is a refreshing departure. Fruity, dry and light. Perfectly enjoyed on the front porch on a warm night. Beautiful.” – Dave (Damn Dave, just taking the words right out of my mouth.)
  • Brin de Rosé Rosé – “Nice floral and potpourri on the nose. Beautiful and clean pink color. Light red berry and citrus on the tongue. Light bodied, dry and extremely refreshing. Medium acidity bring the refreshing/tingly feeling to the corner of your mouth. Simple finish that leaves your wanting more. Perfect pool side.” – James (Now that’s a review.)
  • Kirkland Rosé – “Very solid Rose. Especially for the price. Serve nice and chilled. Very crisp and light. Slight hints of sweetness balanced by subtle fruit flavors like strawberry.” – José (Can’t beat that Costco value!)
My Favorite Red Wines

Let’s be honest, if it weren’t for my husband (and sangria), I probably wouldn’t drink any red wine in the Summer. But since my husband only drinks reds, I have come to love a few that we will drink again and again. Most of my favorite reds have very strong flavors of cherry, vanilla, raspberry, and orange. Really any wine that would also be good as a sangria. 

  • Kudos Pinot Noir – “Raspberry and tart red cherry. Light bodied but concentrated fruit flavors. Dry clean finish that lacks intrigue. The focused bright fruit keeps me coming back for more sips. Long Monday Pinot.” – Patrick (This isn’t any ol‘ Monday Pinot…it’s a looooong Monday Pinot. Get it straight.)
  • Montecillo Rioja – “2005 was a very good year for Rioja and this Gran Reserva doesn’t disappoint. Translucent ruby red color. Cedar, vanilla, and spice in the nose. Medium to light body, low acidity, and fine groping tannins. Topical Rioja flavors and structure with good balance. Medium length finish with a spicy and slightly bitter end.” – Adrian (First, Adrian knows his shiz. Second, I don’t like the sound of ‘groping tannins’. Keep your hands to yourself, tannins.) 
  • 19 Crimes Shiraz – “HANDCUFF ME TO THIS WINE FOR SOME S&M!……….Sip and Muse. What were YOU thinking I meant?! Complex. Deep. Bold. Elegant. Rough. Tough. Girded. Graceful. 19 Crimes always mesmerize me. Confuses me. Leads me astray down perilous purgatorial paths that leave me panting. Try it. It would be a CRIME not to. It might imprison you in its crazy clutches, but trust me, it’s worth doing TIME for this wine!” – Linda (I think Linda needs a boyfriend…)
Where I Buy Wine

In case you are wondering, we buy most of our wines at Costco. Actually, that’s how we found a lot of these wines. My husband always looks to see which ones are low in stock, then picks up a bottle because “it must be good!”. The only problem with Costco is that they don’t have as much variety as some other wine stores. Our favorite here in Charlotte is Total Wine. They seem to have just about everything. We even found the exact bottle of wine that Billy and I had on our first date (from some really obscure vineyard in Provence). 

You can also buy your wine from Amazon because Amazon sells everything now. But I did notice that their selection wasn’t great. Maybe it will get better as they get more distributors. 

Wine Accessories

You don’t need a lot of accessories to enjoy a good glass of wine, but there are a few things that I have picked up over the years that can certainly help. First is our wine opener. A friend gifted this to us a couple years a go and we haven’t looked back. It’s like popping open a bottle of Champagne every time!

Second are these wine ice cubes. They come in lots of shapes and forms, but essentially they keep your wine cool if you are a slow drinker like me.

The last thing (or things) is this wine thermos. We took it with us to the beach and it kept a bottle of wine pretty cool almost all day. Think of it as a Yeti for your wine. It also makes a great gift, which is how we got it…from the same friend that got us the wine bottle opener. I wonder if she’s trying to tell me something?

One last thing I will mention is the Vivino app. It’s an app that lets you track your favorite bottles of wine. You take a picture of the bottle and rate it, then it will save it to your list and build recommendations off of wines you have liked. It’s a pretty great way to keep track of your favorite bottles!

Have I inspired you to pour yourself a nice tall glass of wine? I have certainly inspired myself. Cheers!

[show_shopthepost_widget id=”2757435″]

/ Filed In: Drinks, Eat
Tagged: drinks, Summer, wines

  • 1
  • 2
  • 3
  • Previous Entries

Follow

Hey There!

Hey there, I'm Lindsey. I'm a number cruncher by day and a home cook and baker by night. While I love to eat healthy and find fresh and healthy alternatives for my favorite foods, I will never turn down dessert! Life is all about moderation, right?

Recipes

  • All Recipes
  • Breakfast
  • Appetizers
  • Salads
  • Main Dishes
  • Side Dishes
  • Desserts
  • Drinks

Favorite Finds

[show_lookbook_widget id=”388783″]

Theme by 17th Avenue · Powered by WordPress & Genesis