• Home
  • Eat
    • Breakfast
    • Appetizers
    • Main Dishes
      • Chicken
      • Beef
      • Seafood
      • Healthy Dishes
      • Paleo Dishes
      • Salads
    • Desserts
      • Decorated Cookies
      • Cookies
      • Bars and Brownies
      • Cakes and Cupcakes
  • Shop
    • Cookie Decorating Supplies
    • Bakeware
    • Cookware
    • Kitchen Gadgets
    • House
  • About
    • Contact
    • Bucket List
  • Cookie Decorating 101

Follow the Ruels

Chocolate Chia Seed Pudding (Paleo and Vegan)

February 21, 2018

It’s been two years since I completed the dietary test that is the Whole 30 Challenge. And while I learned a lot from the experience and have toyed with the idea of attempting it again, most of the good habits and recipes I picked up have since fallen by the wayside. 

There is one recipe, however, that I have made over and over again. Not necessarily in an attempt to be healthy, but because it’s delicious and happens to also be healthy! 

And that is chia seed pudding. 

I have made several varieties of chia seed pudding over the past two years. One that I have perfected and turn to over and over again is chocolate chia seed pudding. 

This is hands down my favorite version because it absolutely tastes just like chocolate pudding. Except there is sugar, no dairy, and is chock-full of the superfood that is the chia seed!

How to Make It

And did I mention its SUPER easy to make? Maybe easier than real chocolate pudding?

Well, it is!

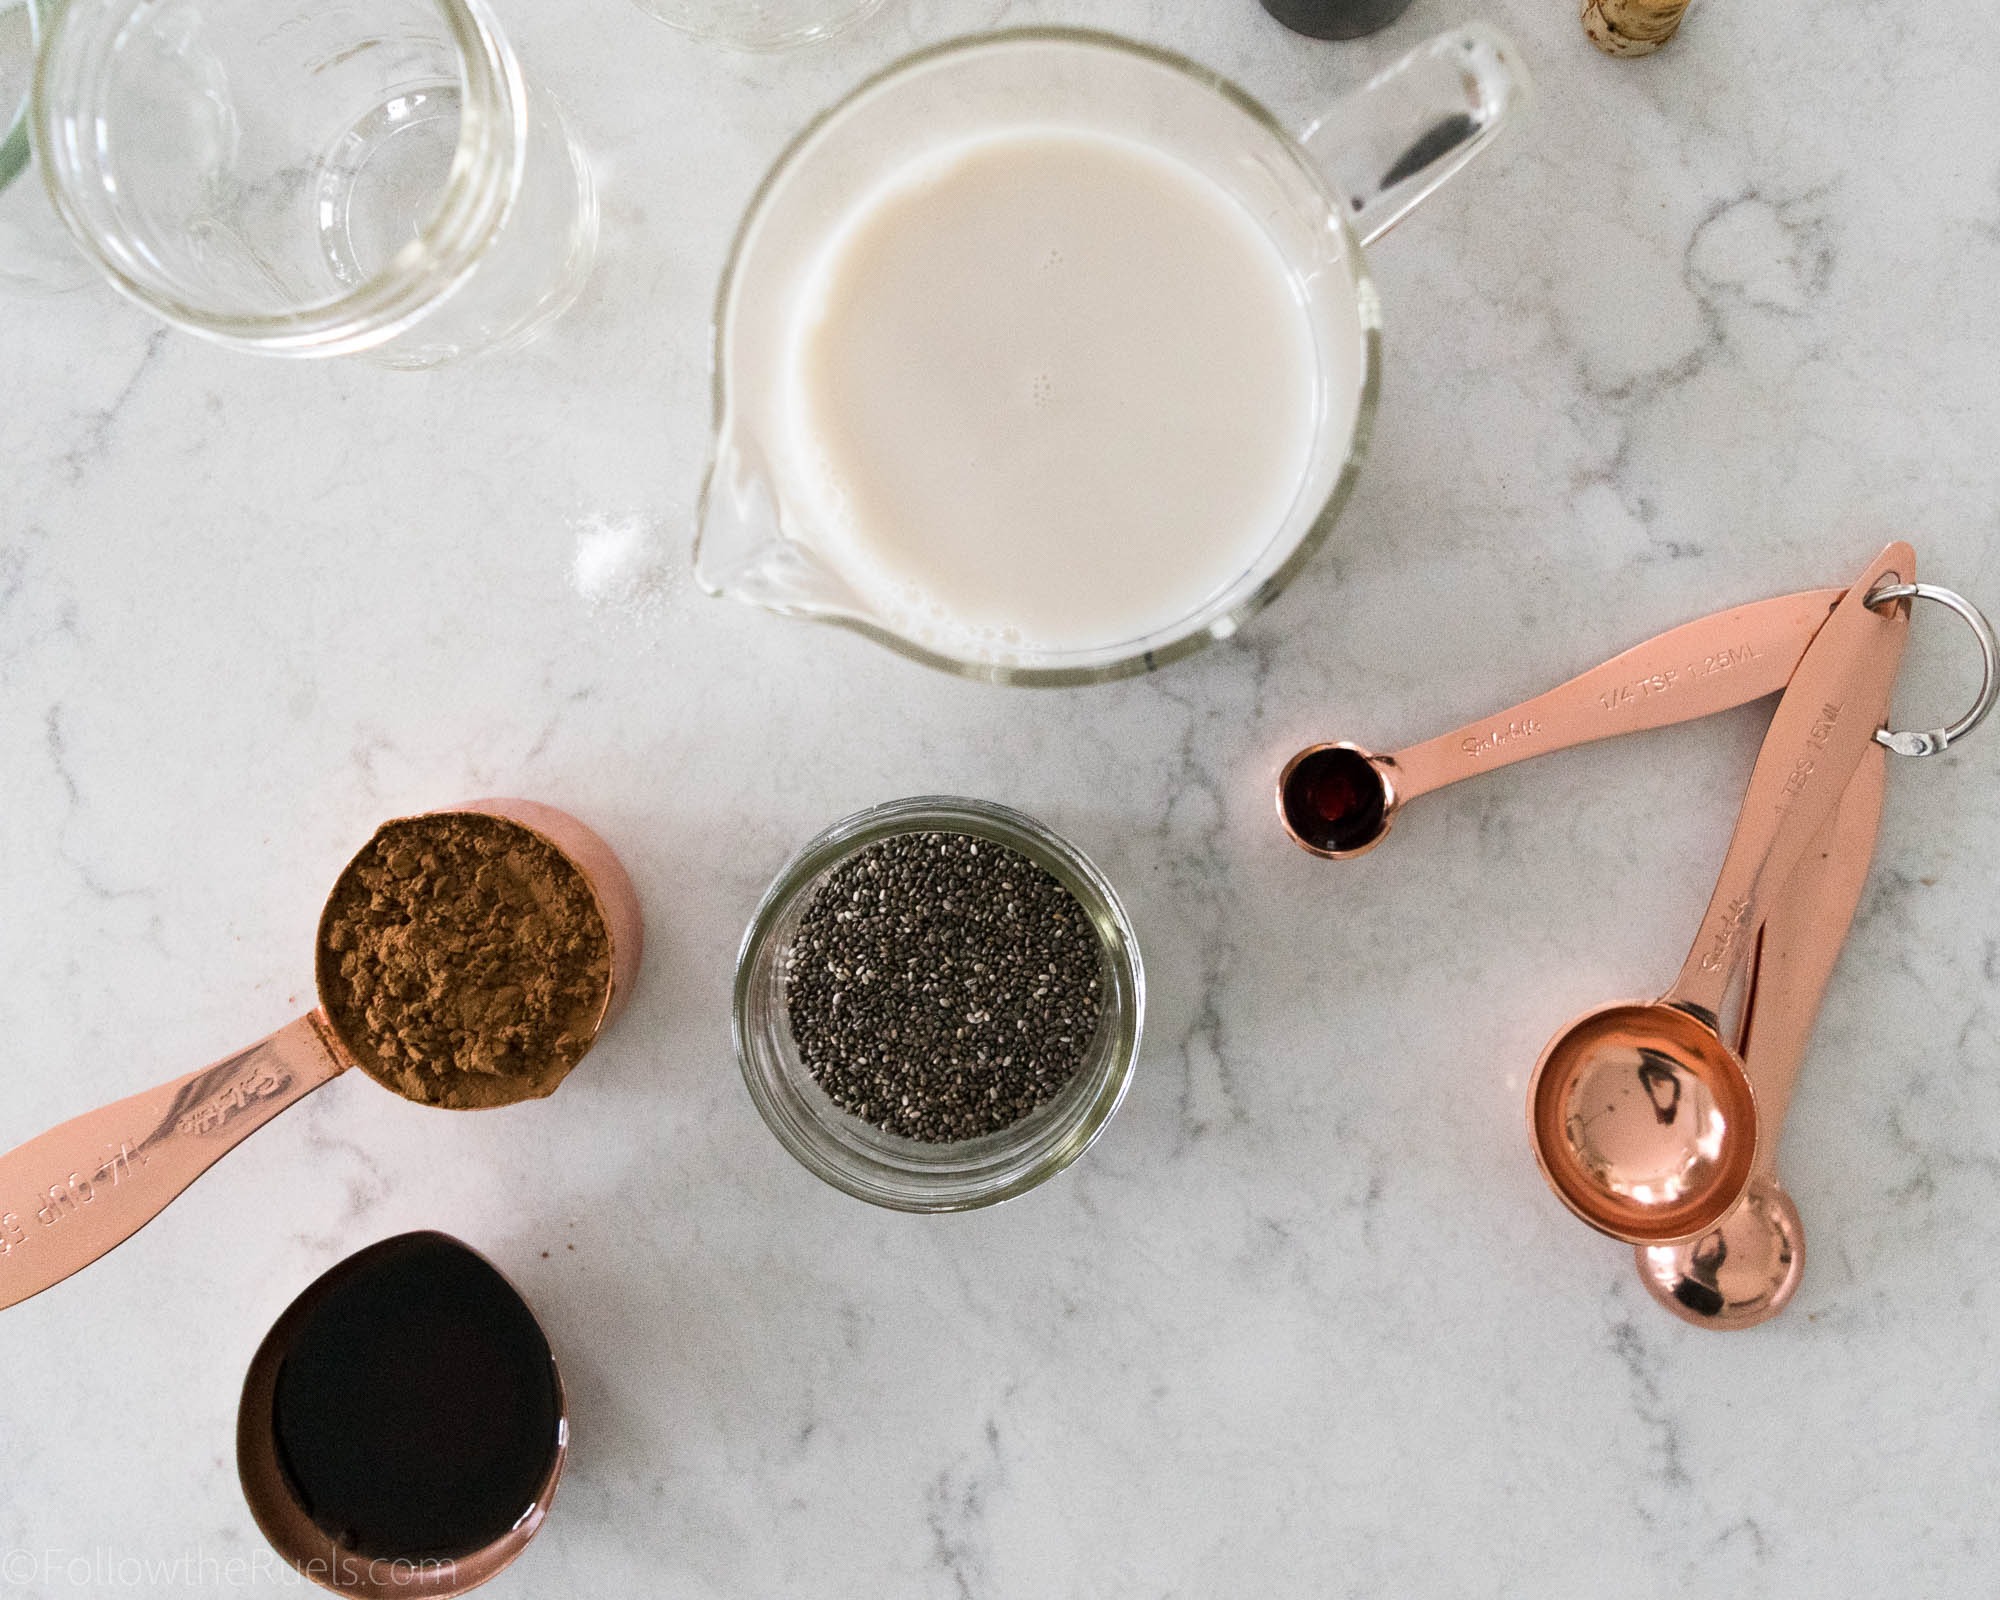
For this recipe, you will need some:

  • milk (whatever type of milk you prefer – almond, cashew, cow, etc.);
  • unsweetened cocoa powder;
  • salt, which will actually bring out the sweetness;
  • sweetener, such as honey, agave, maple syrup, sugar, or sugar substitute; and
  • chia seeds (obviously)

I also like to add a bit of coffee extract to my chocolate chia seed pudding because it really emphasizes the chocolate flavor. This is totally optional since I know not everyone has coffee extract on hand. But you could also add a couple drops of your morning espresso. 

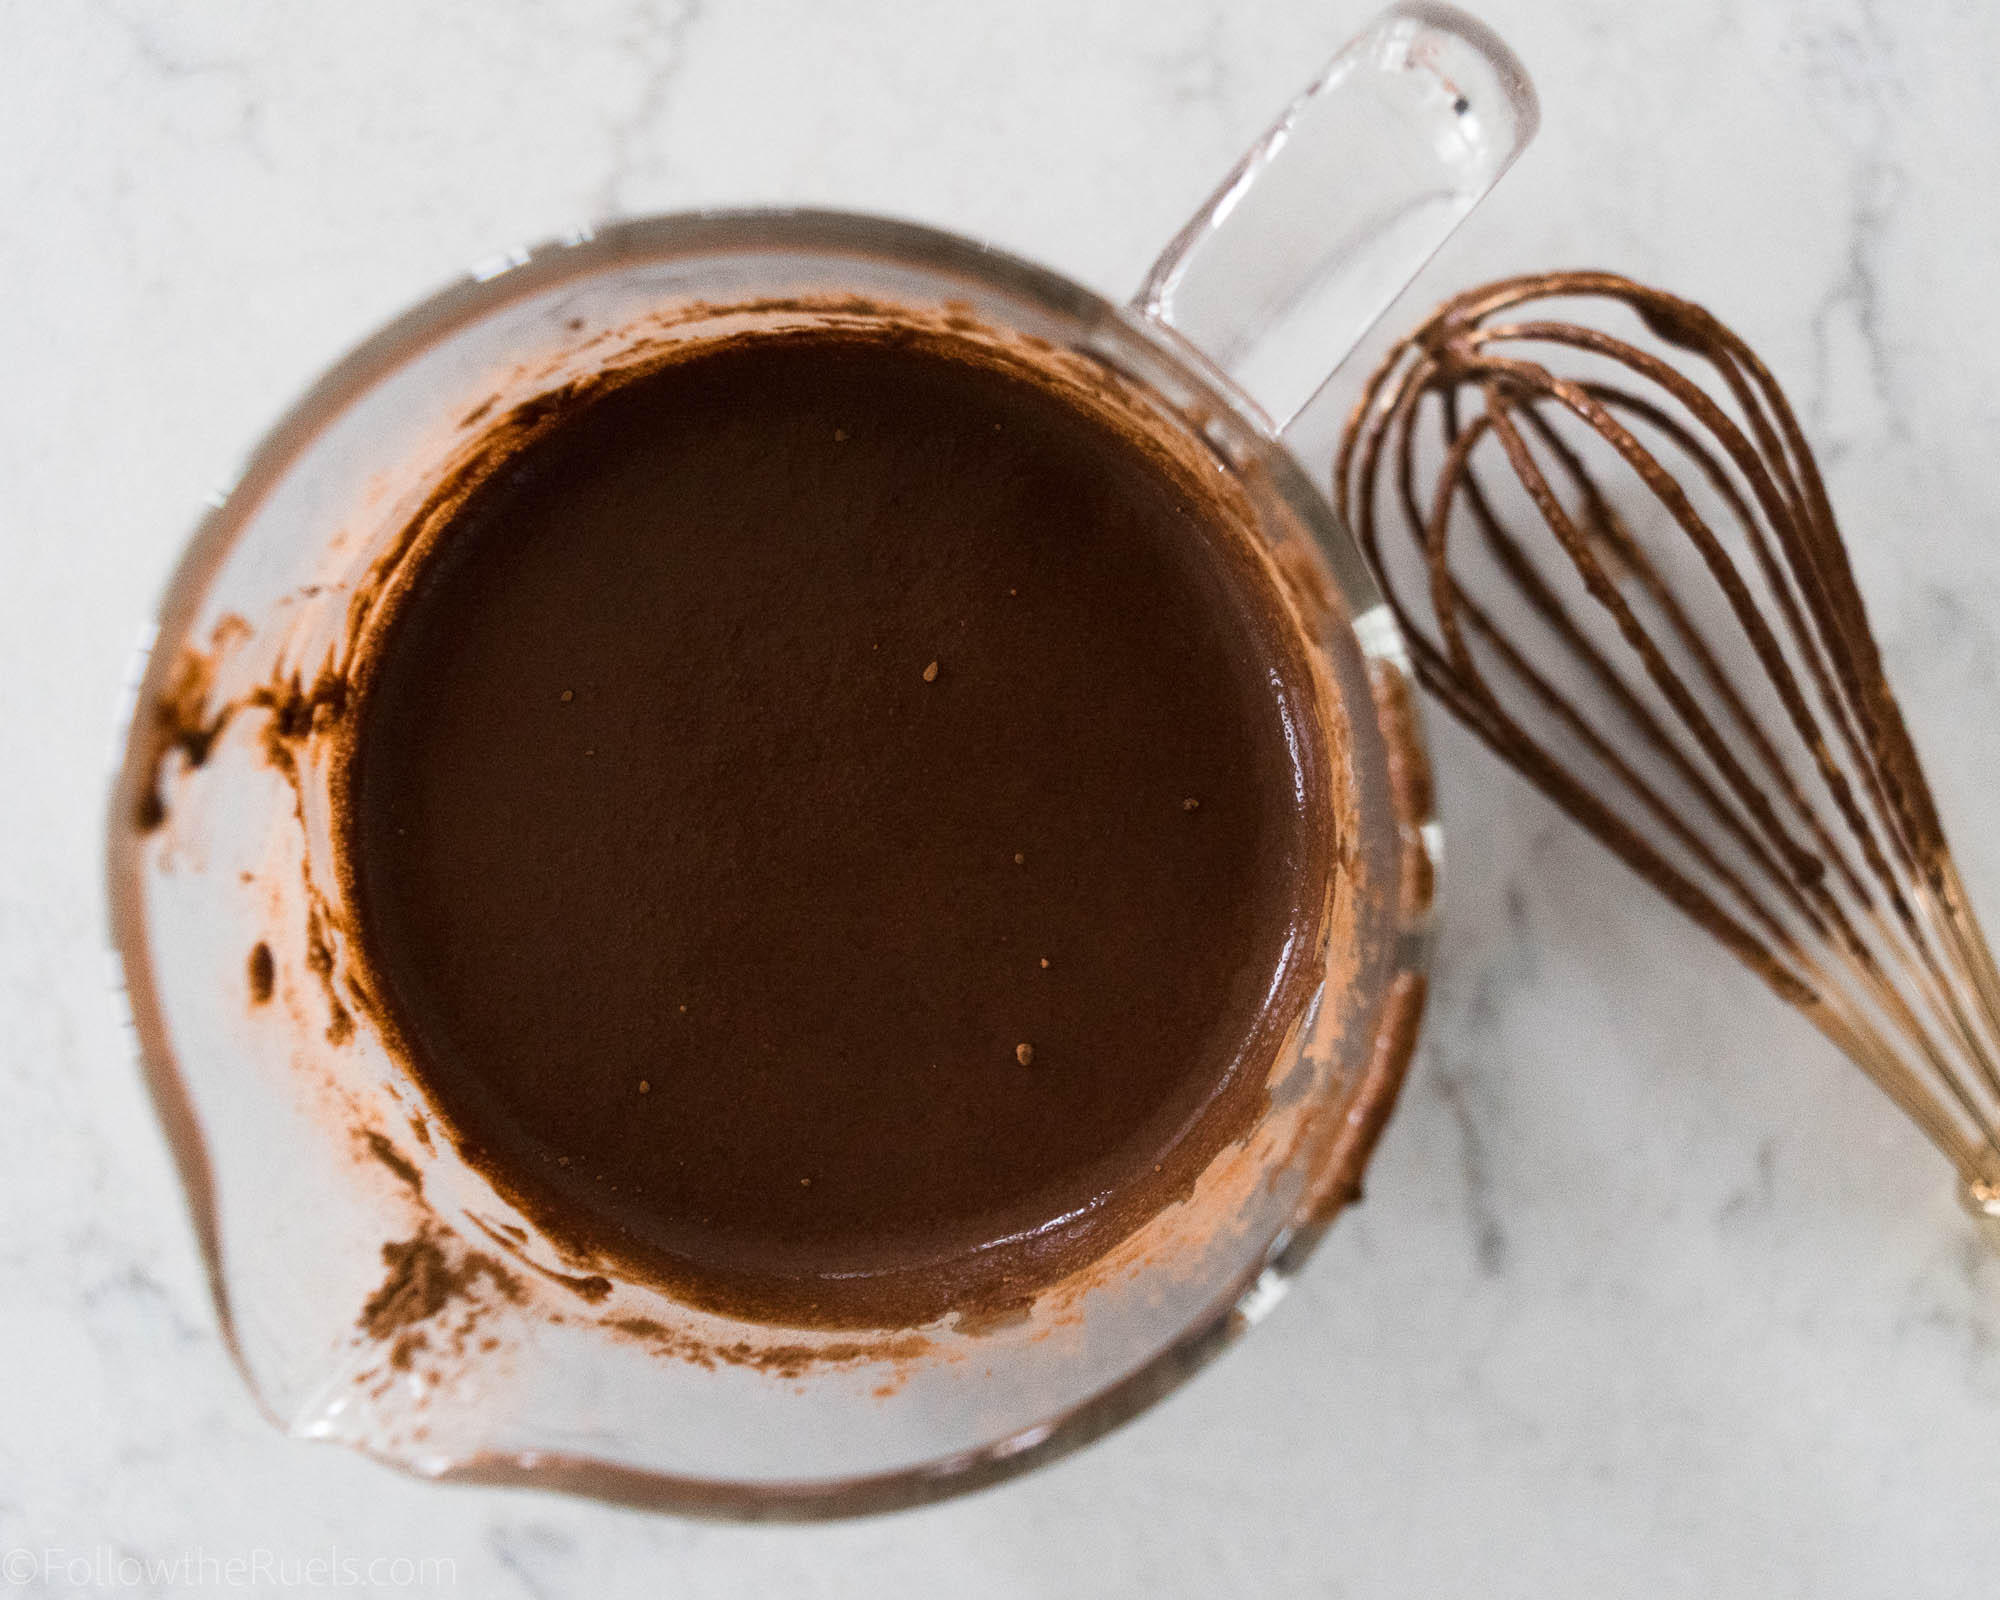
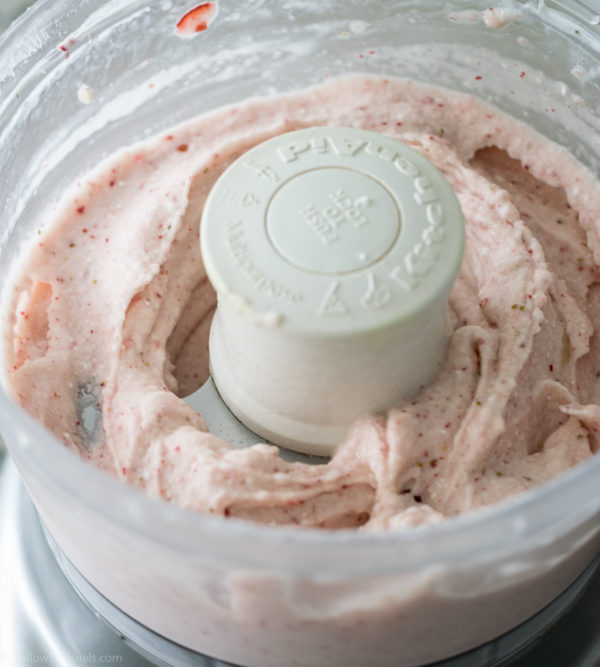
First, mix together the milk, cocoa, salt, and sweetener until mixture is nice and smooth. 

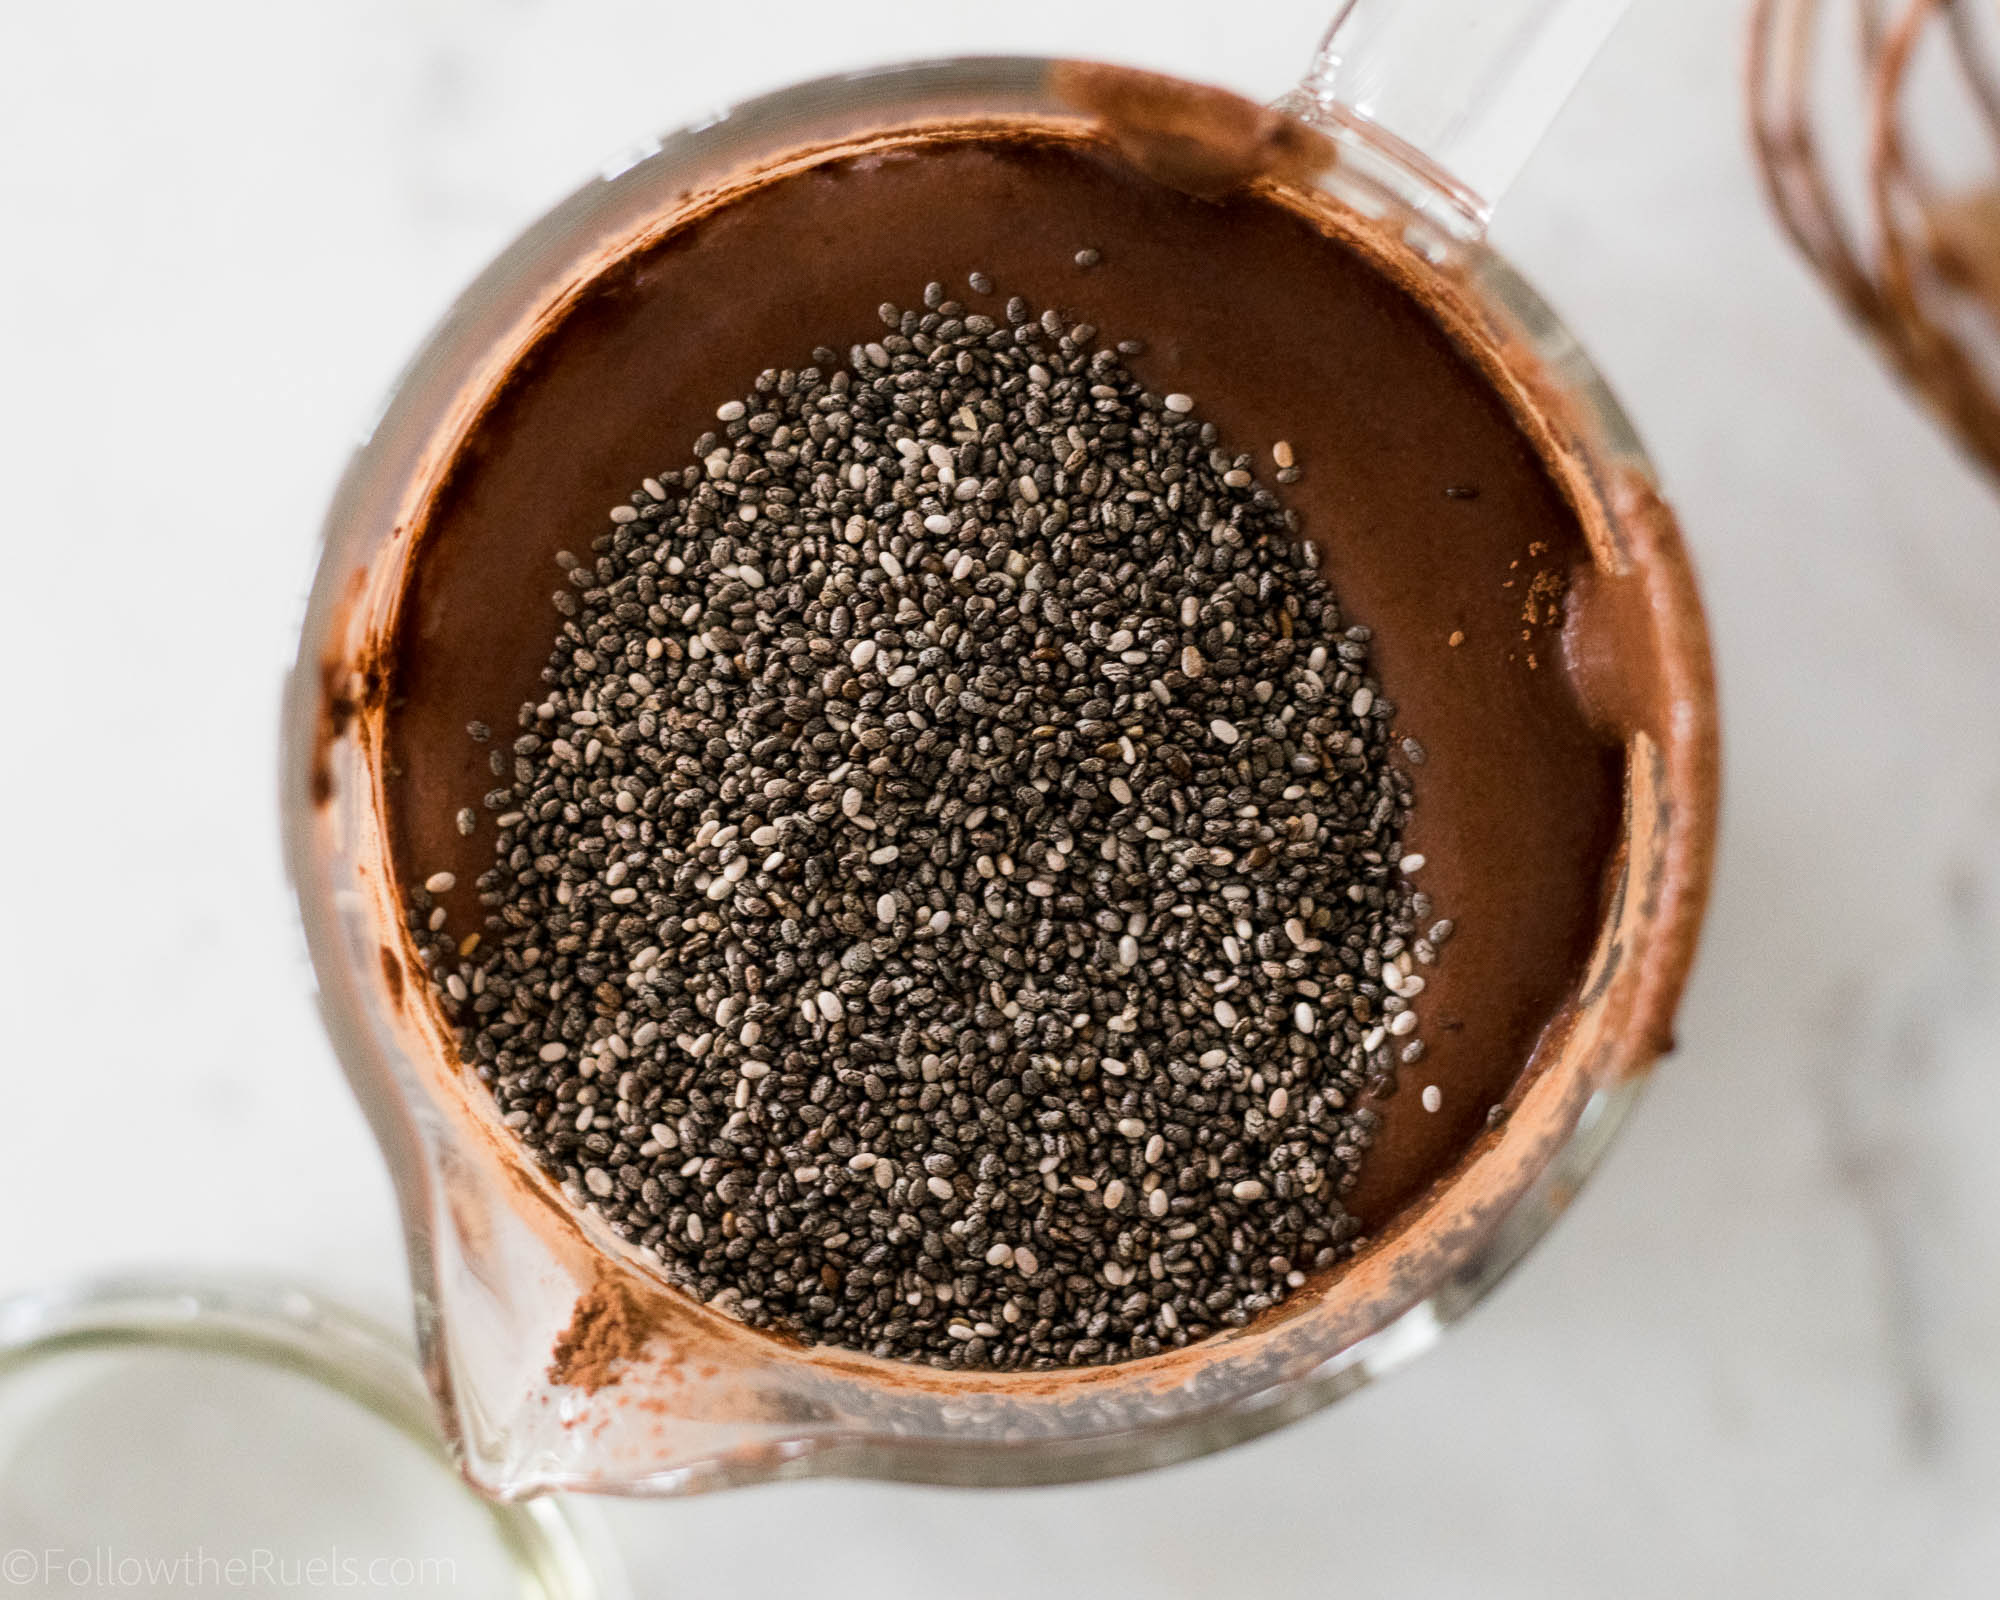
Then, add all the chia seeds and mix them in until completely incorporated. Just make sure that they don’t fall all the way down to the bottom, as they will want to do.

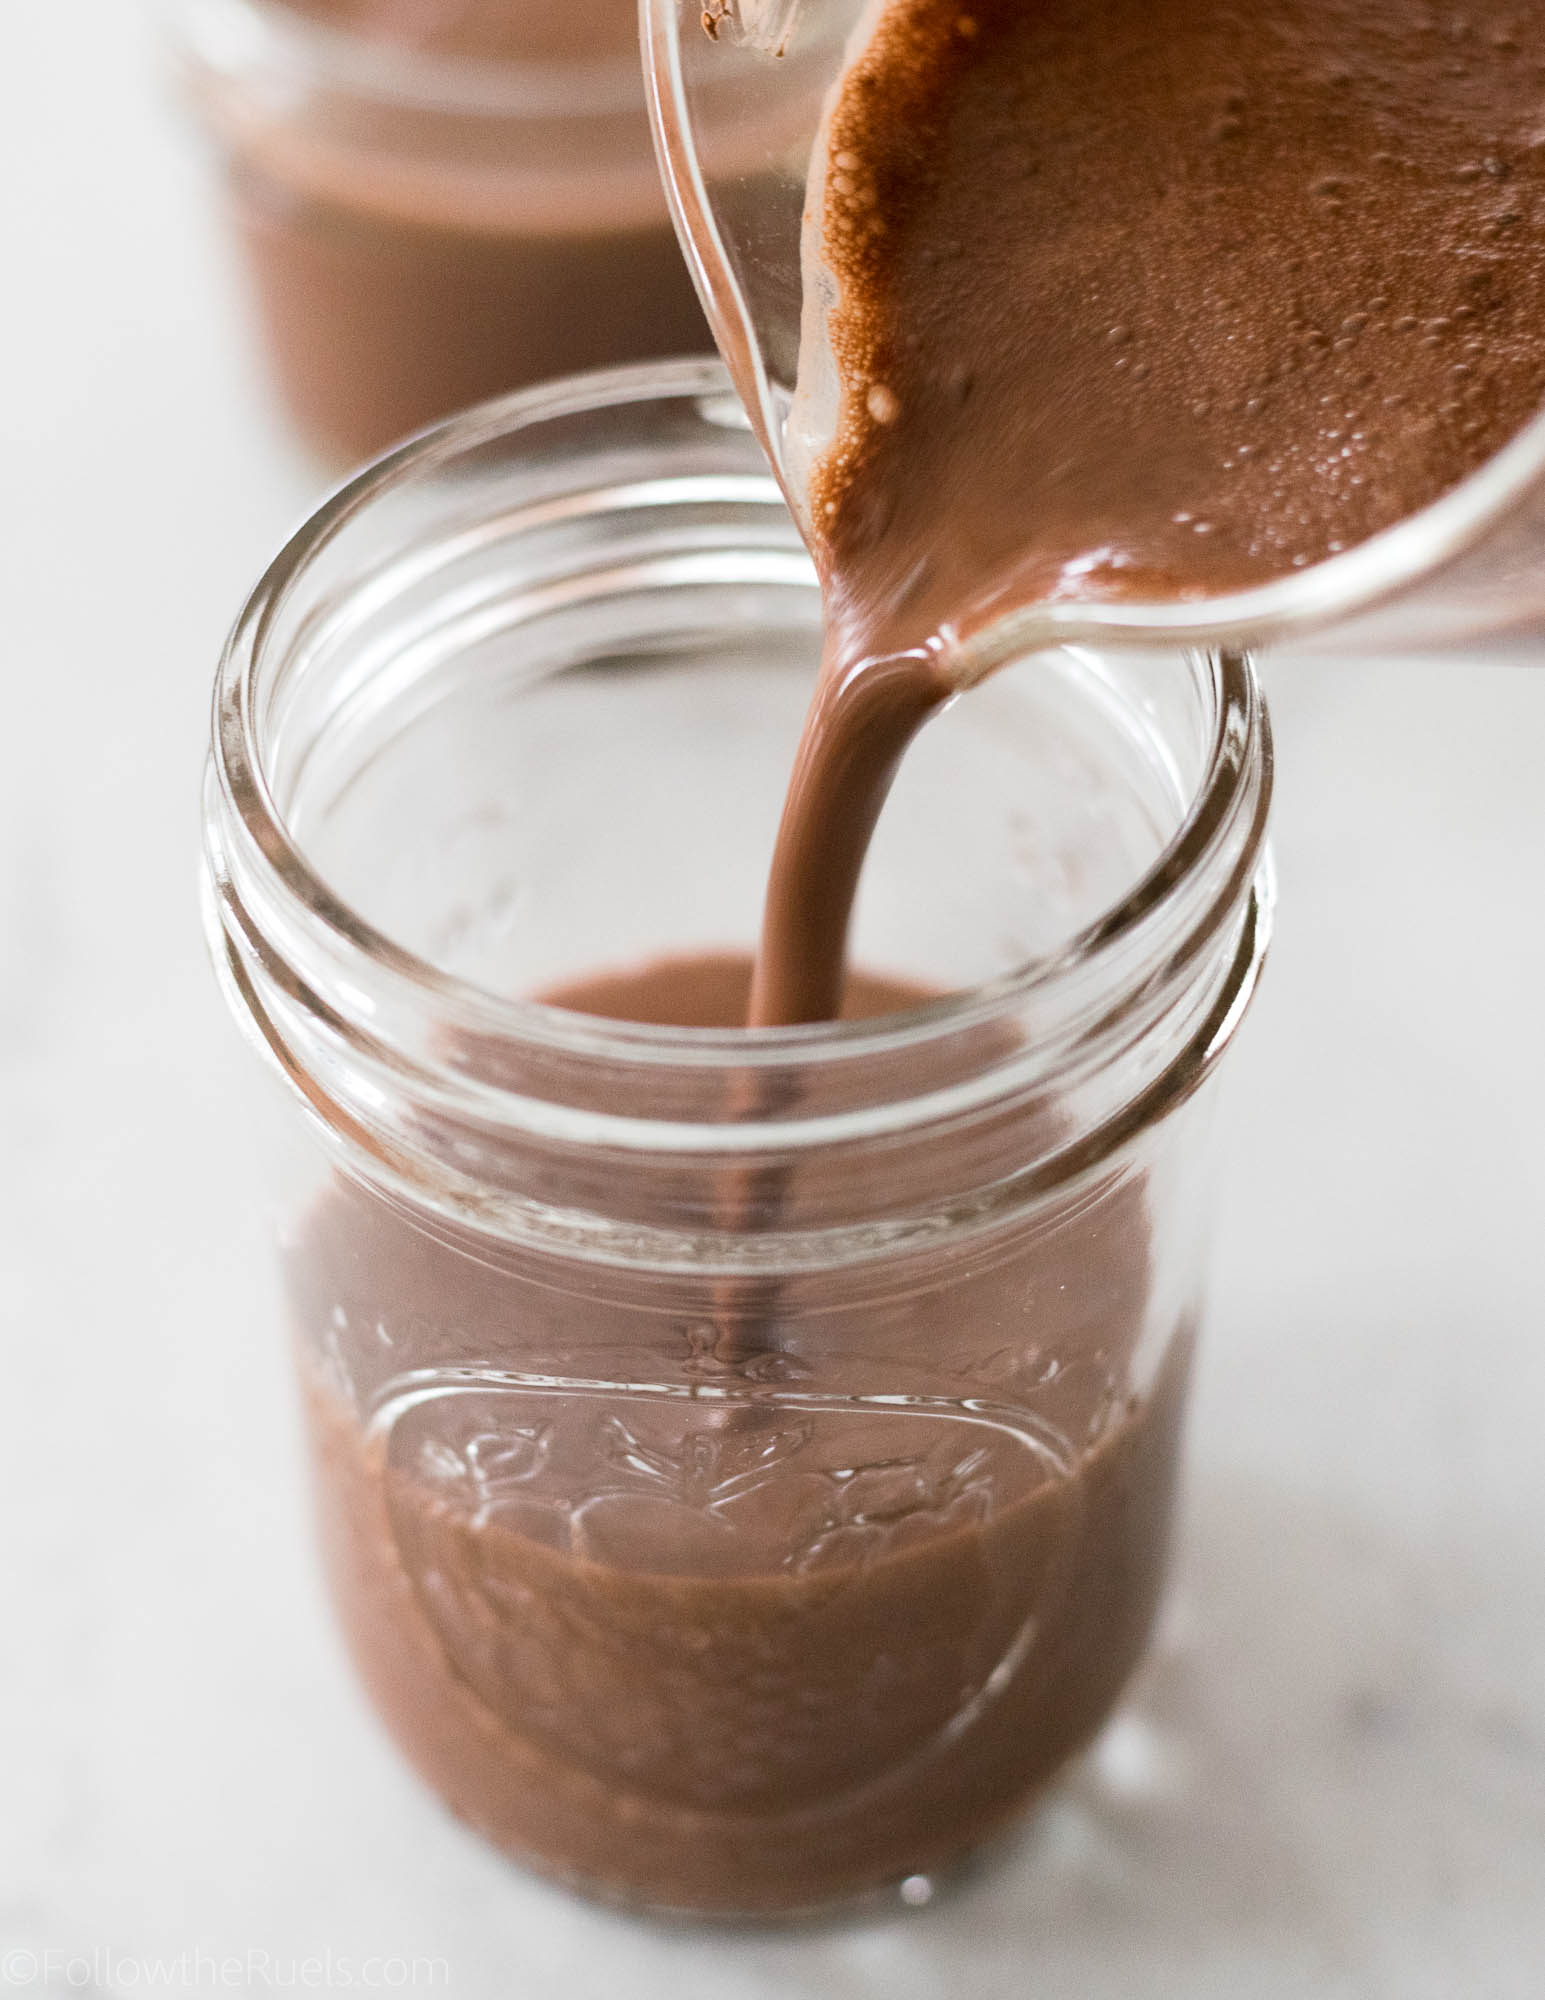
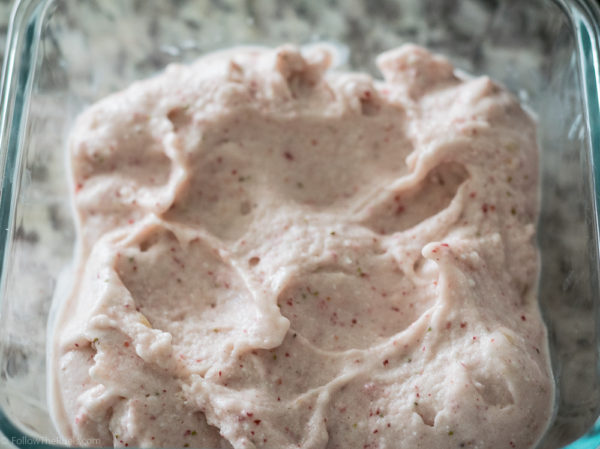
Next, pour the mixture into individual jars. 

Or don’t. 

You can portion this out however you would like. 

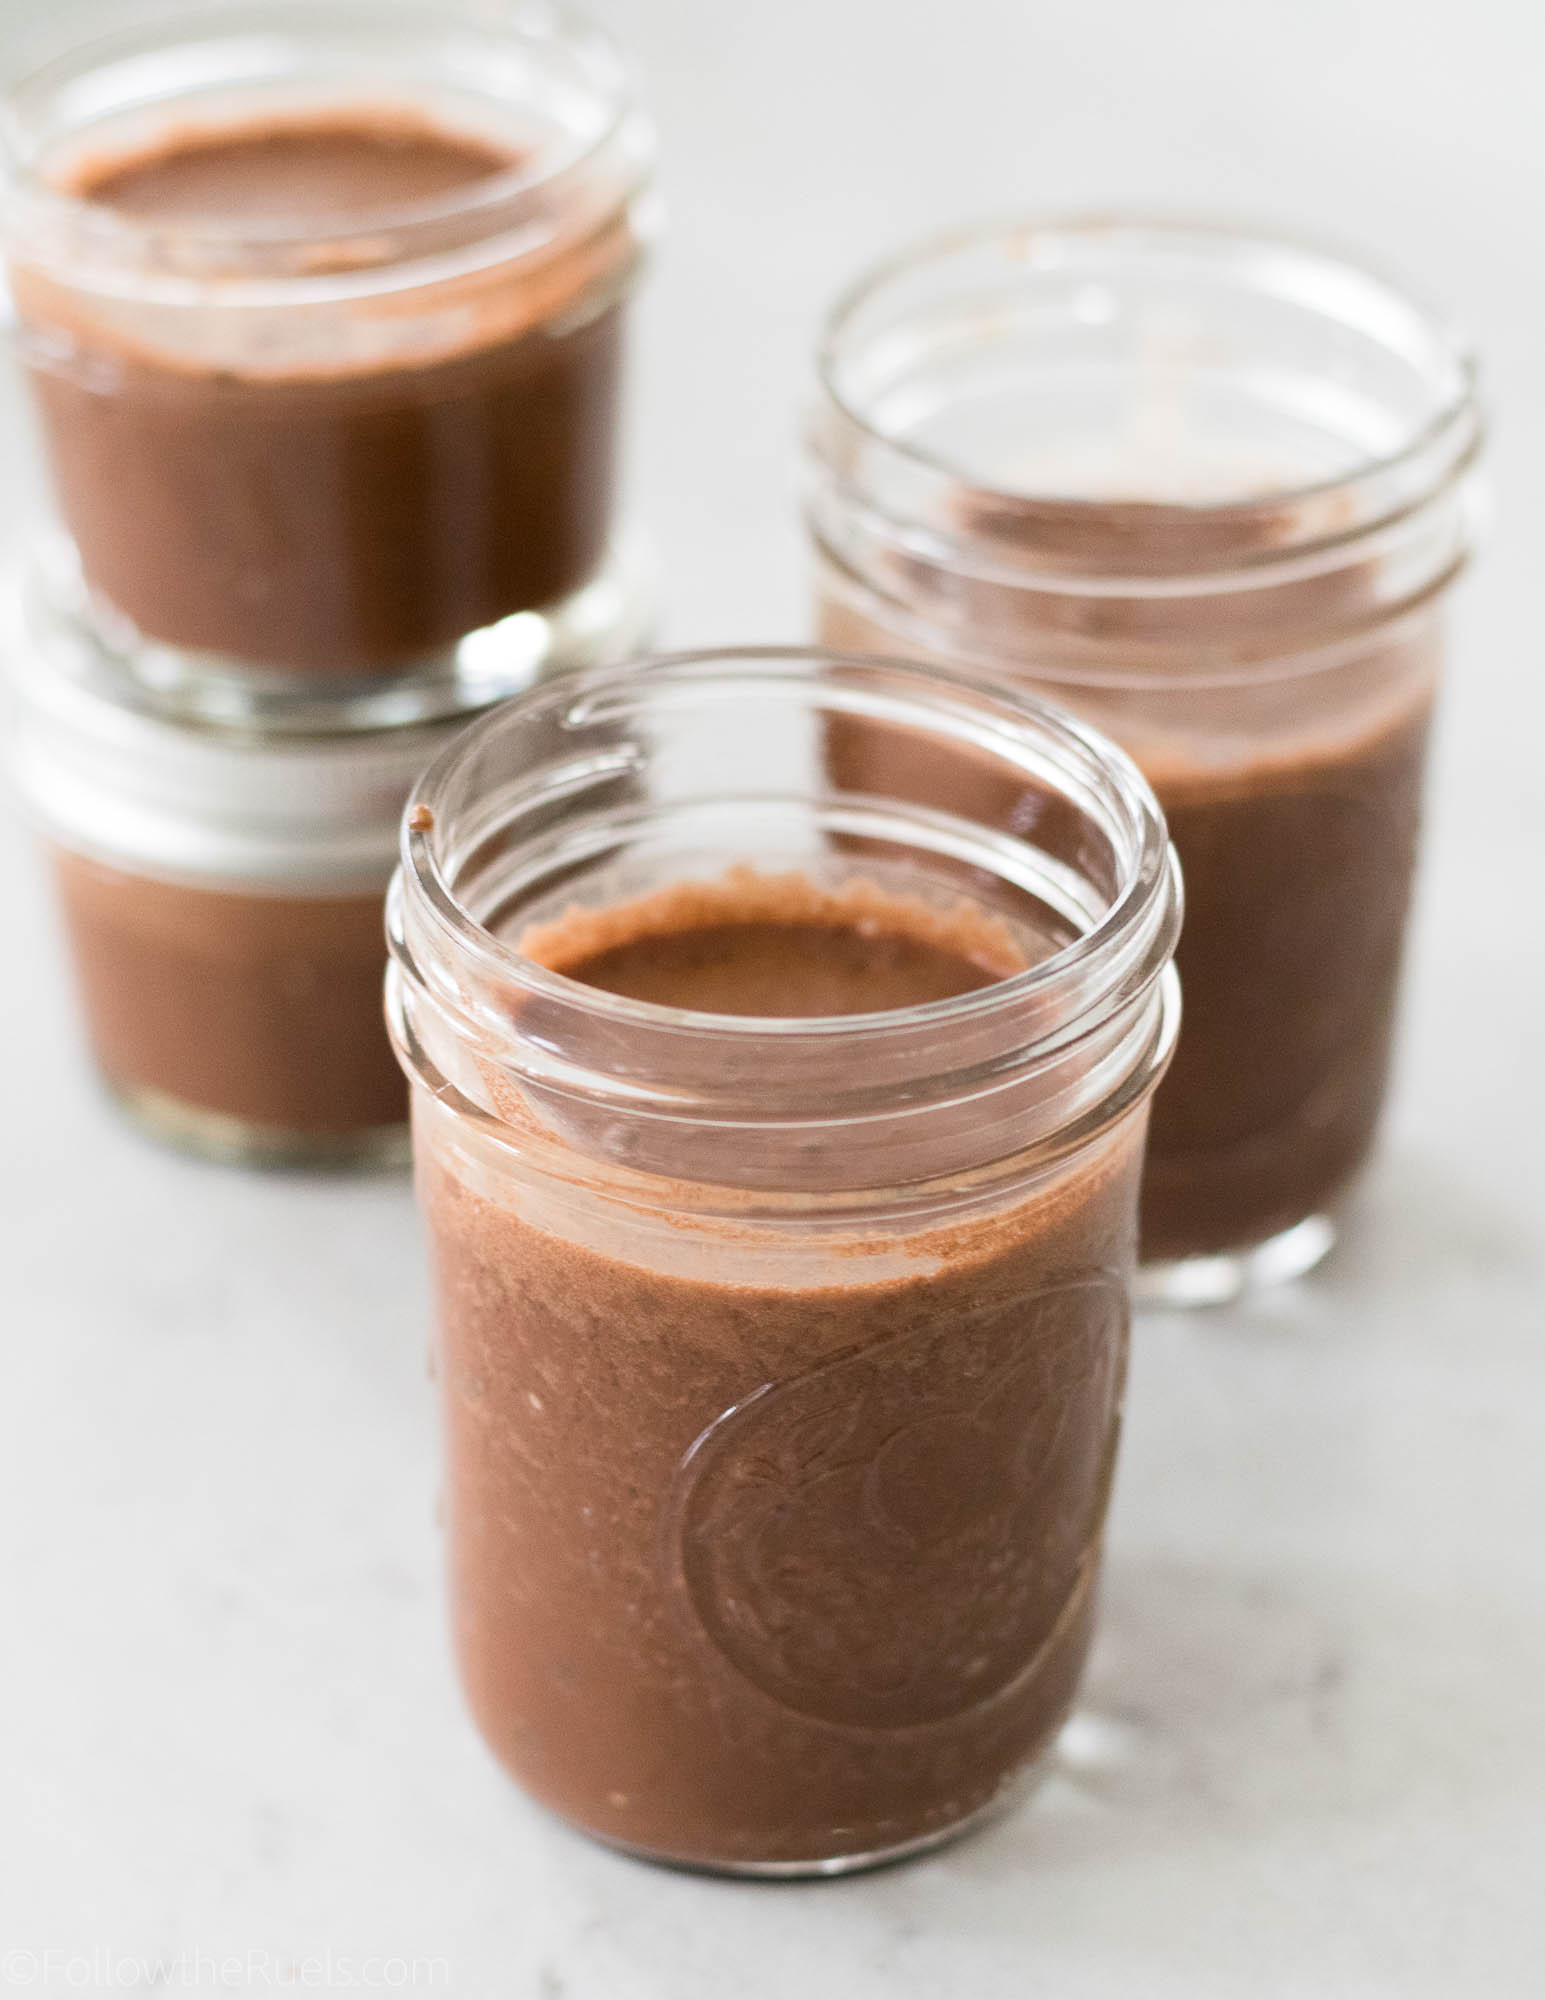
Then, pop the pudding into the fridge and wait. 

Waiting is always the hardest part. 


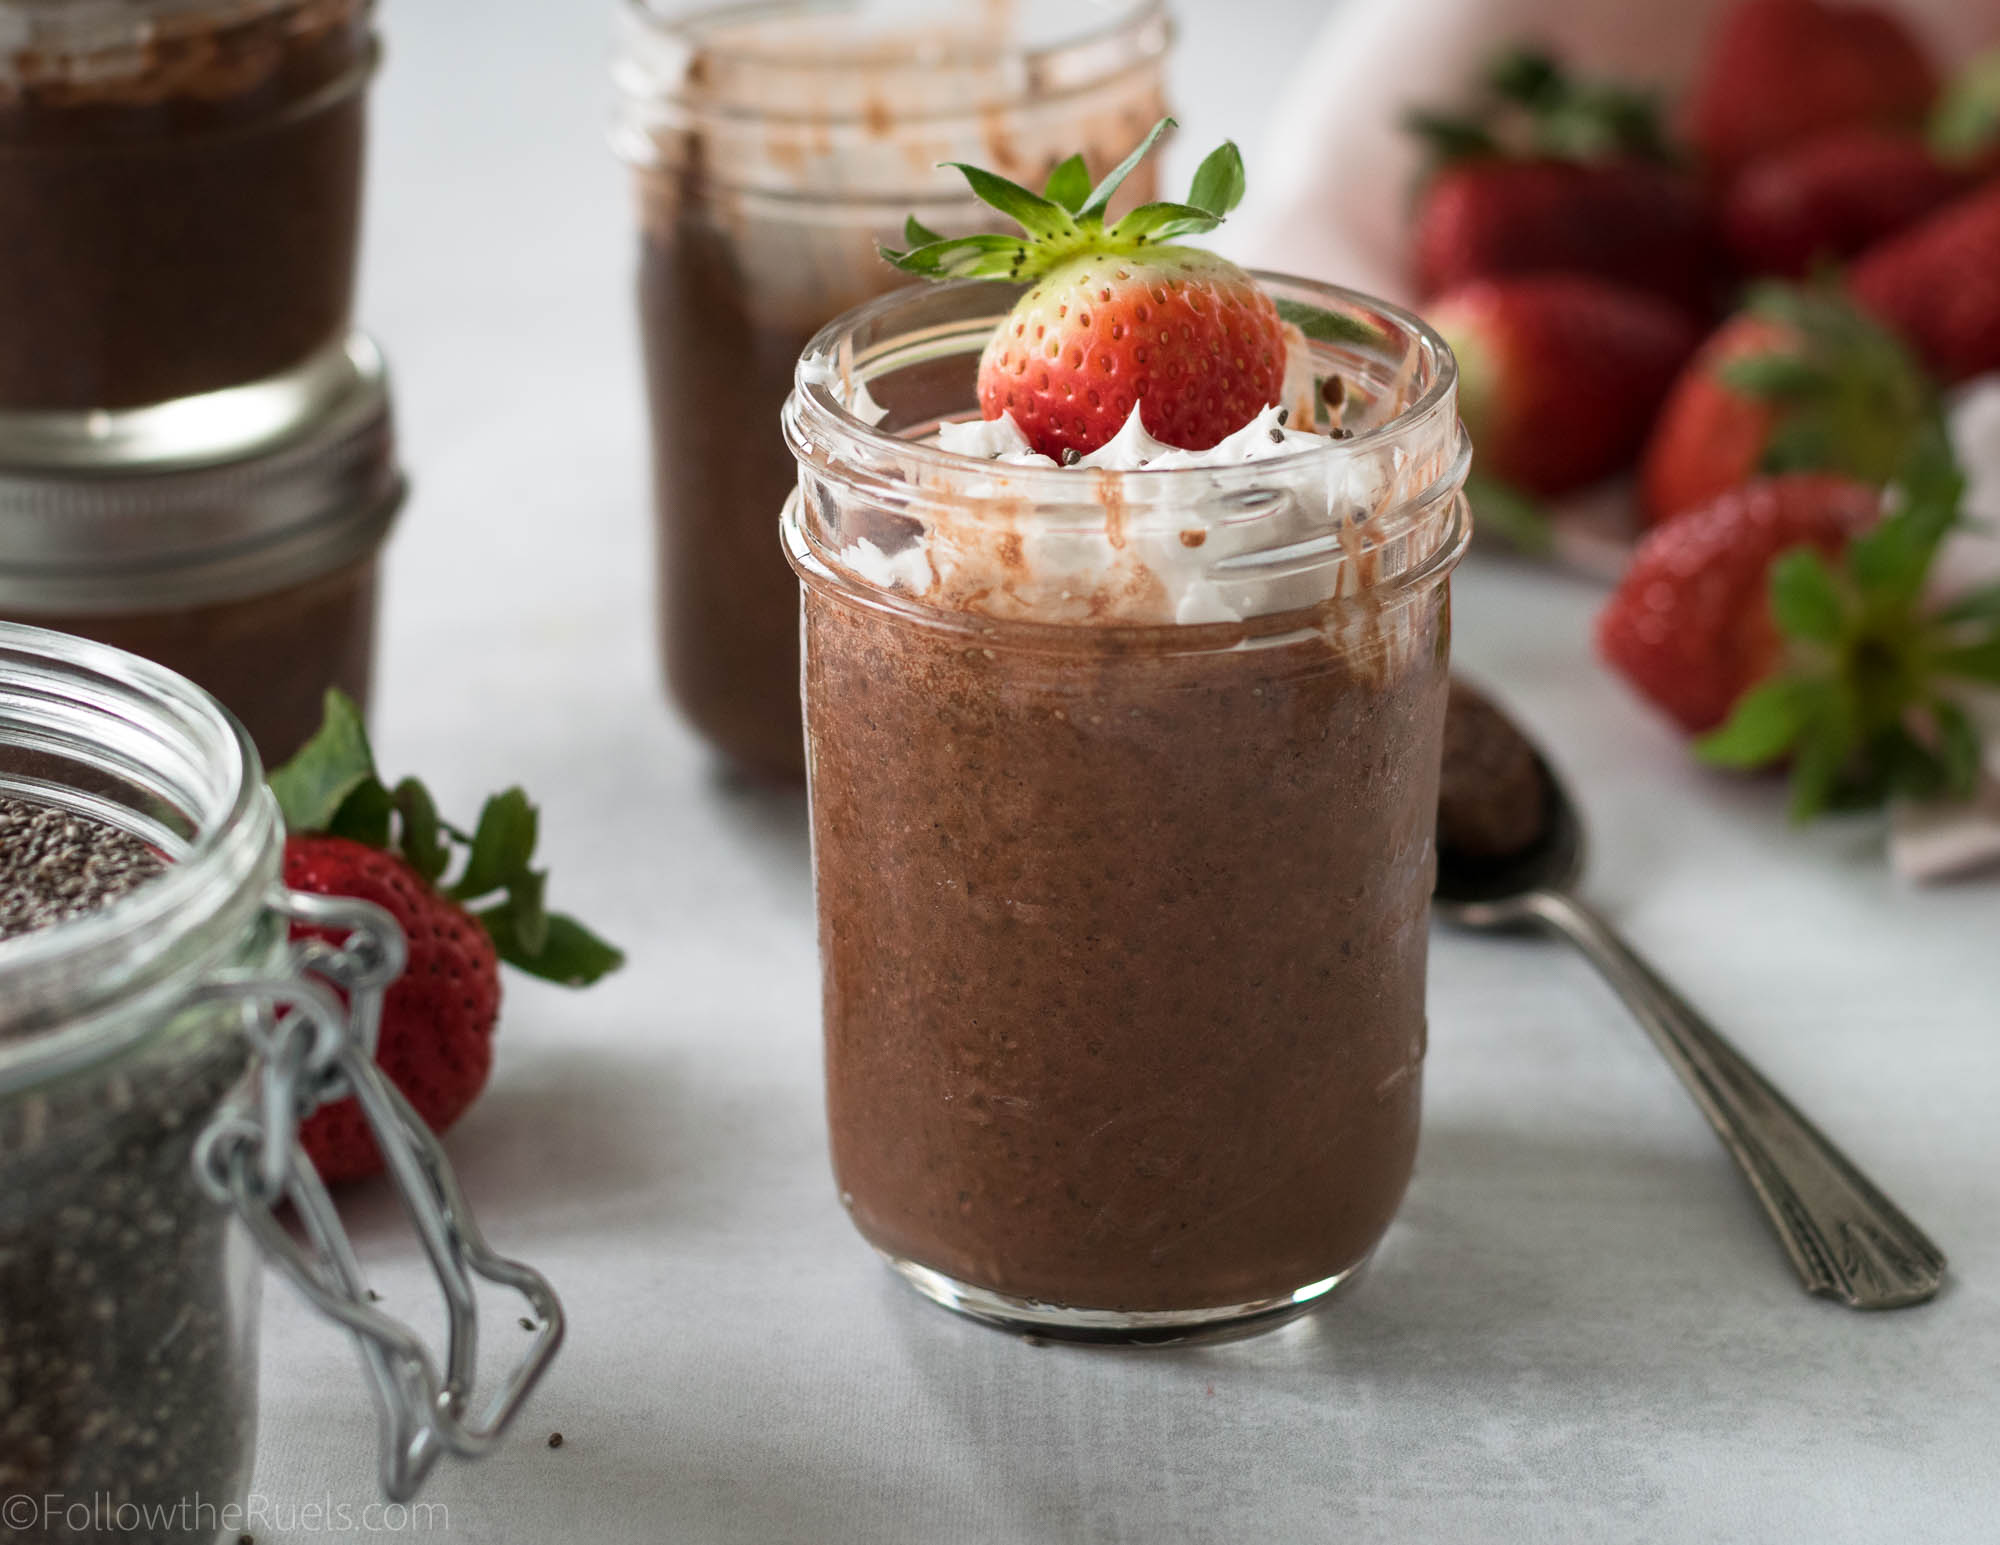
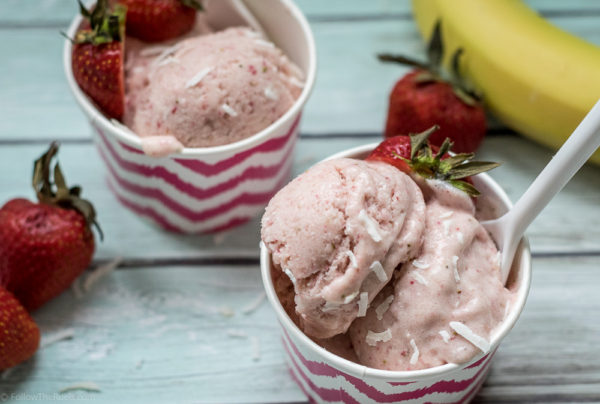
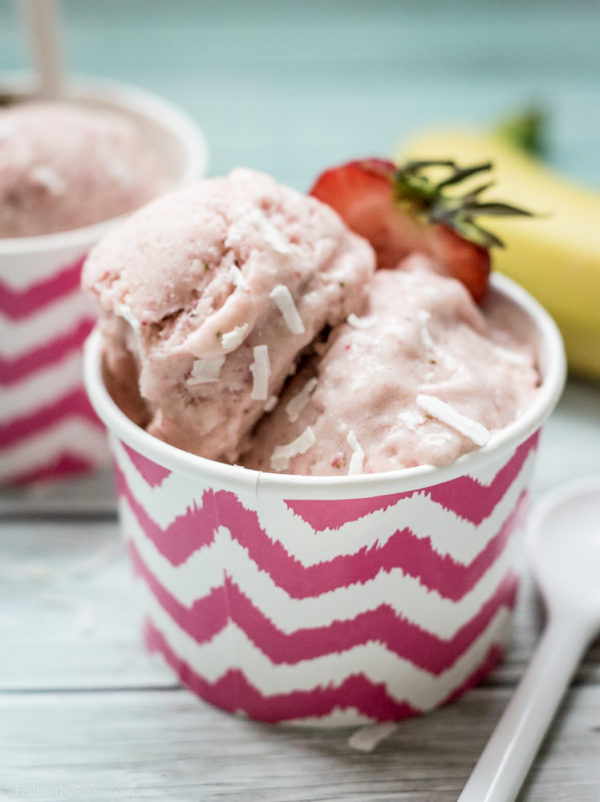
After a few hours (or ideally overnight) you will have a delicious chocolate chia seed pudding! 

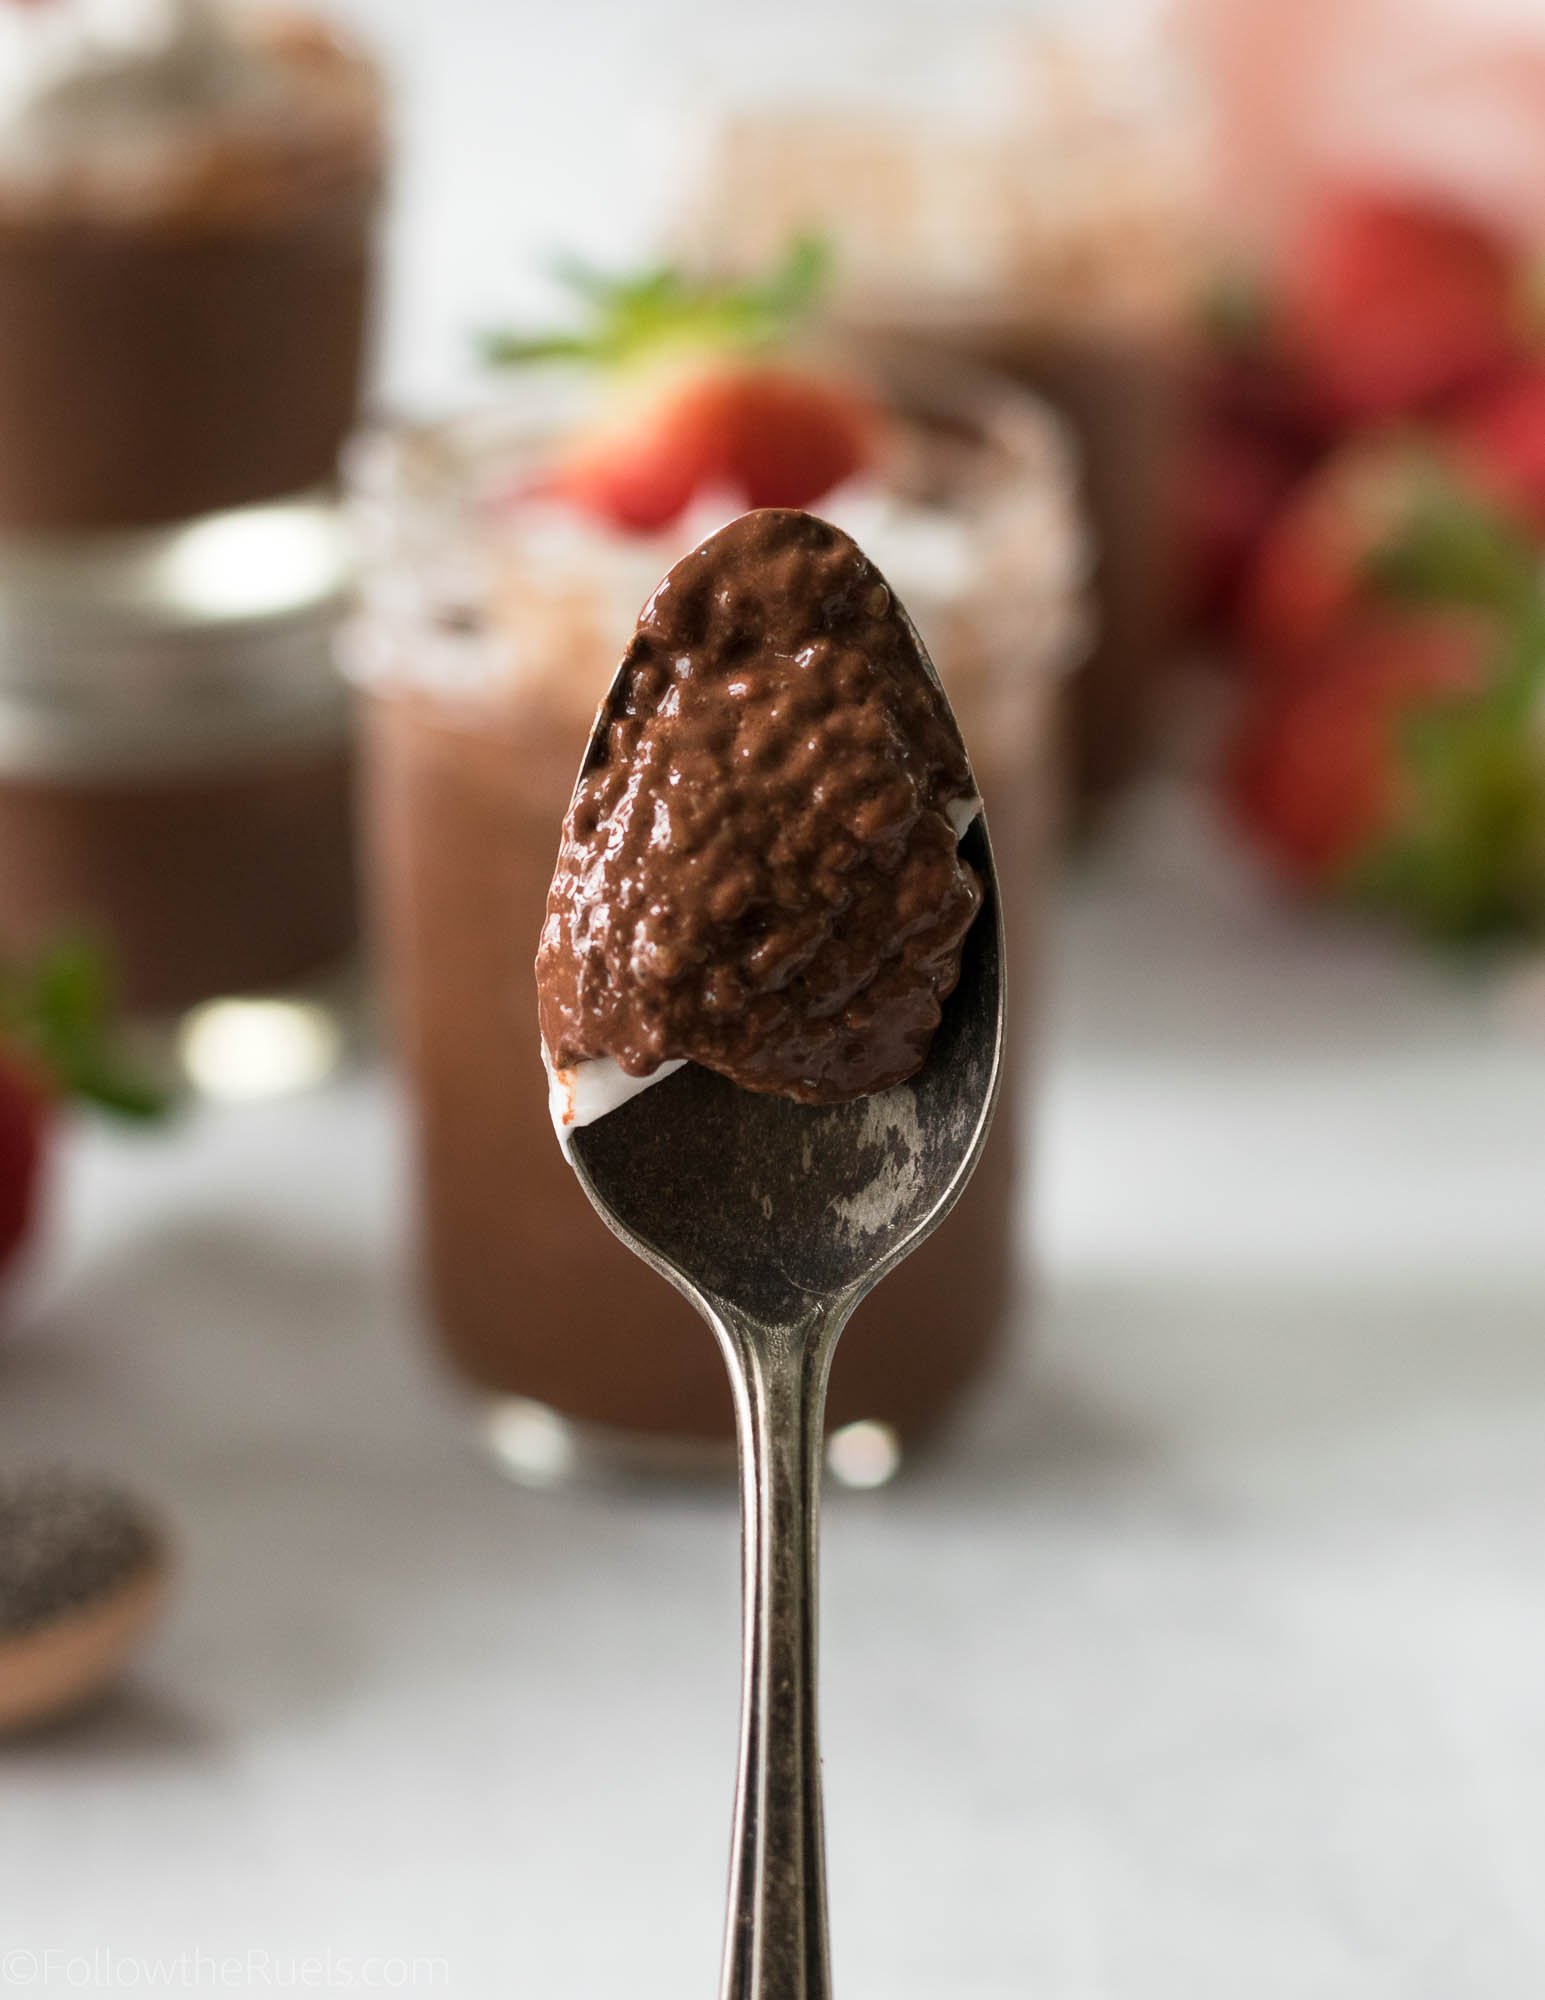
Now, for those of you who have not had chia seeds before or have not had chia seed pudding, I will warn you. The texture is a bit different. It’s actually a little bit like tapioca pudding or cottage cheese.

I don’t mind it in the least and I am pretty sensitive to weird textures. But it may take some getting used to for the chia seed virgins. 

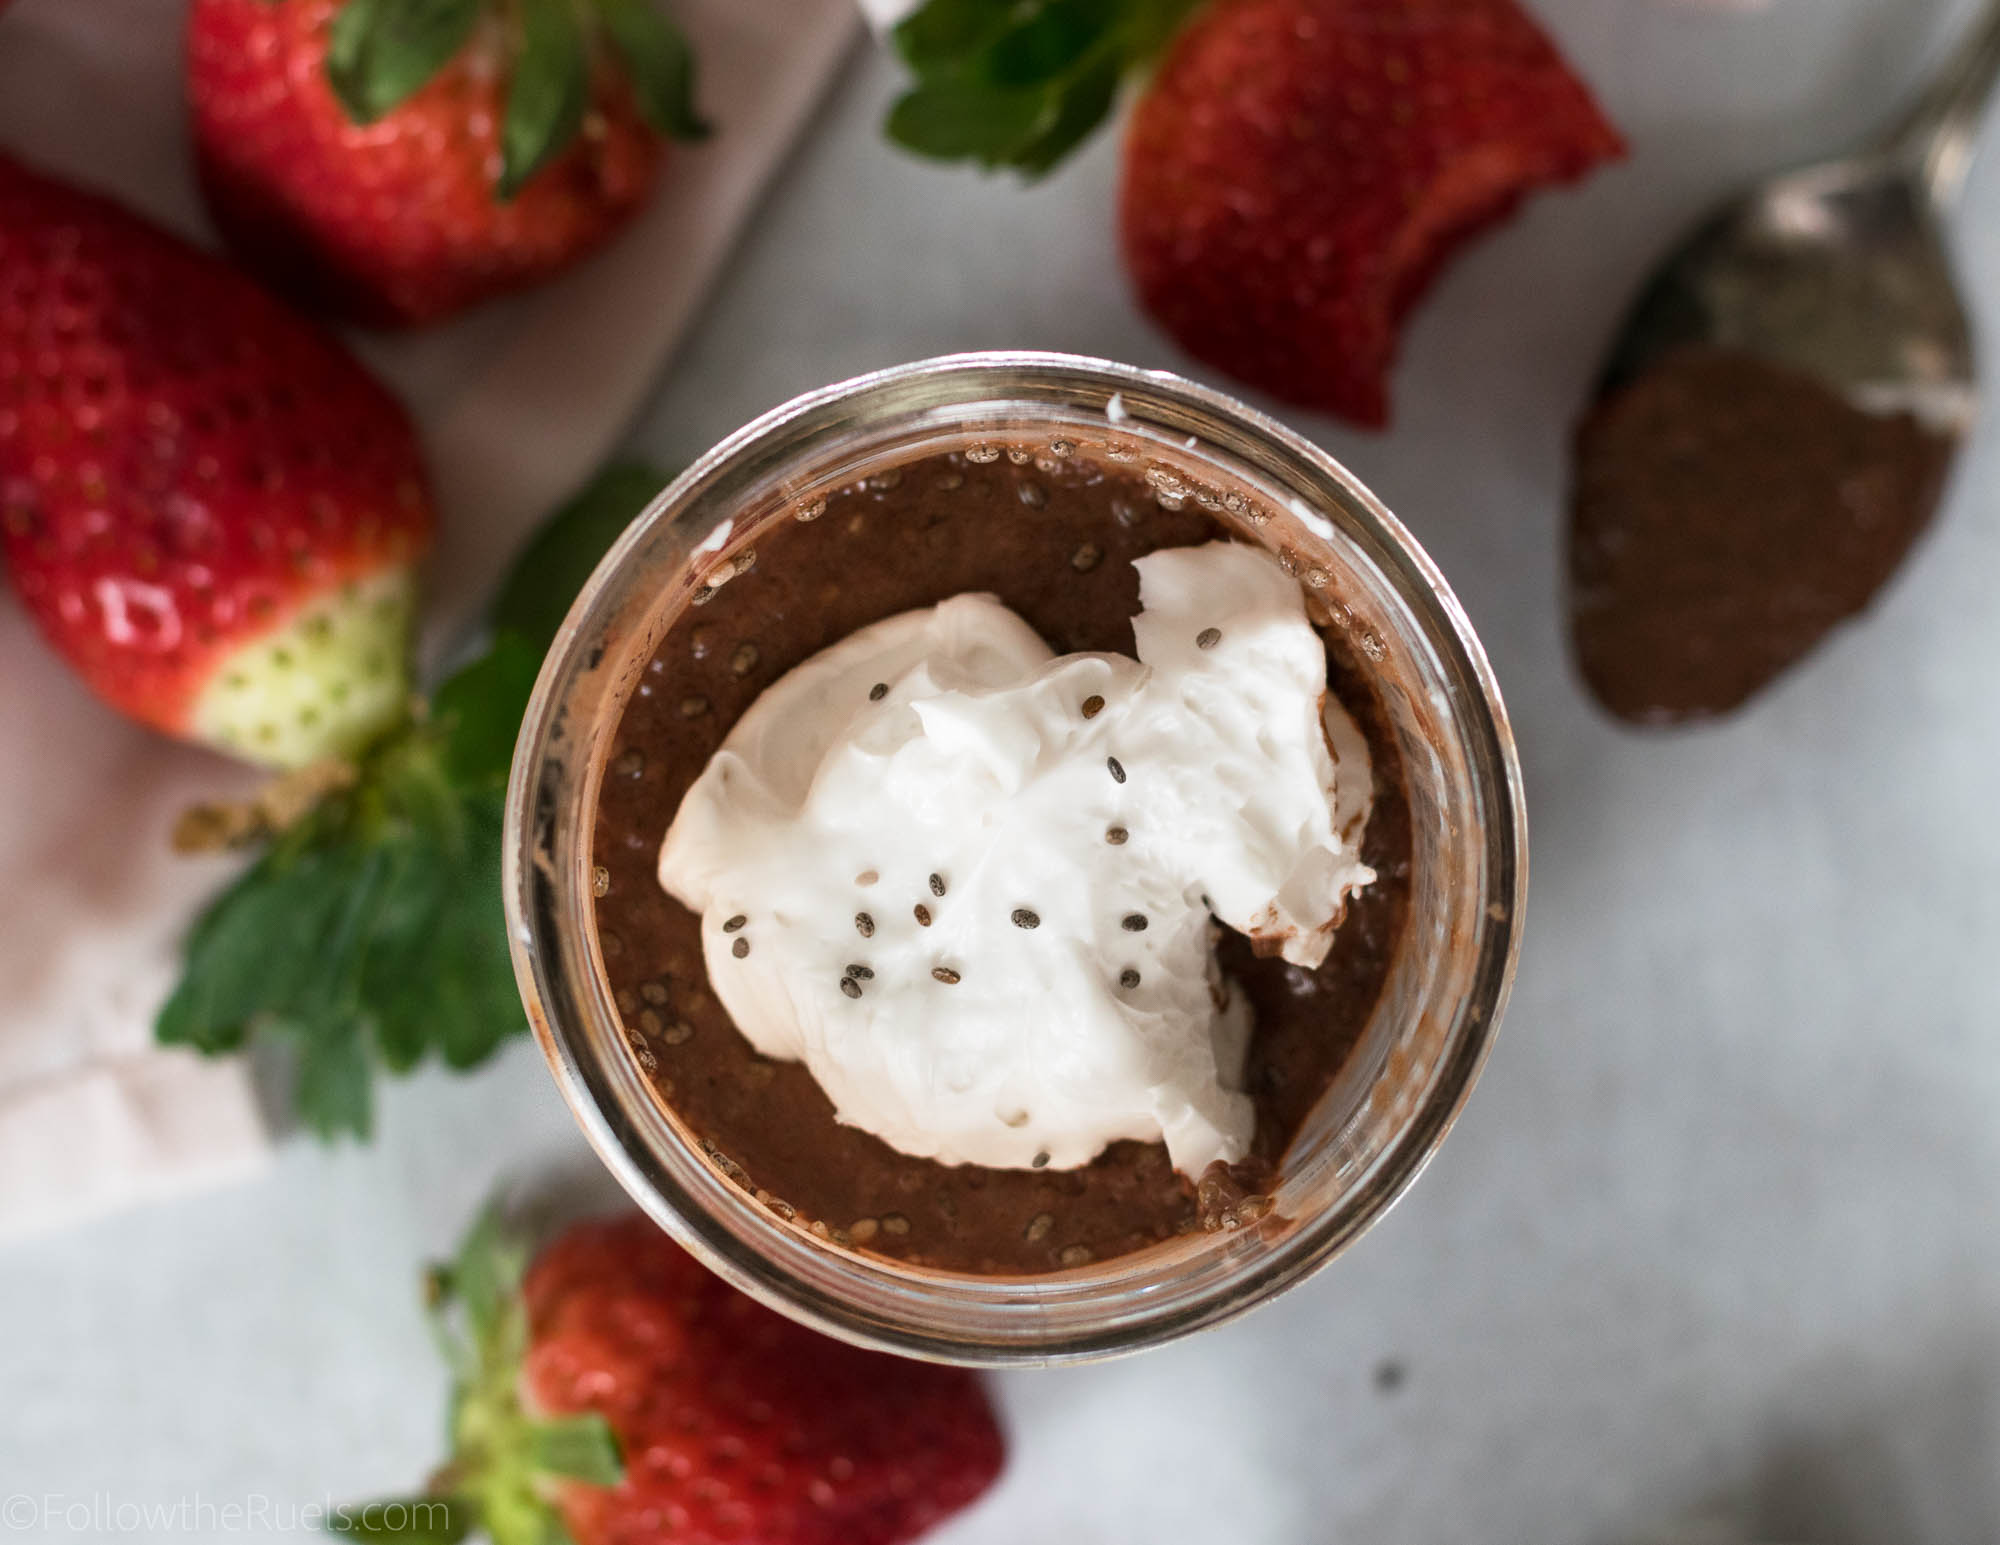
The sooner you do, the sooner you will have a wonderfully rich, healthy, chocolate dessert. 

[show_shopthepost_widget id=”3036895″] 

[yumprint-recipe id=’161′]

/ Filed In: Desserts, Eat, Other Sweets New
Tagged: chia seed pudding, chia seeds, chocolate, healthy, Paleo, pudding, Vegan

Pineapple Teriyaki Chicken Bowl

August 1, 2017

There is a reason my teriyaki chicken recipe is a household favorite: it’s so dang easy to make and it makes enough food to feed two people for a couple days. Oh, and it’s delicious. And healthy. Are those enough reasons?We make it at least once a month and serve it all sorts of ways. Our current favorite is this pineapple teriyaki chicken bowl version. Pineapple and teriyaki chicken are perfect together, so why not serve it straight out of a pineapple?

Our current favorite way to serve it up is this pineapple teriyaki chicken bowl version. Pineapple and teriyaki chicken are perfect together, so why not serve it straight out of the pineapple?


Making the chicken is the easiest part. Throw everything in a crockpot in the morning and let it cook all day. By the time you get home, you chicken will basically be falling apart.  

For this dish, shred the chicken with two forks into small pieces.  

But don’t throw away that cooking liquid! My husband came up with the awesome idea of making a sauce out of it! Stran the liquid of all the little bits, mix in a bit of corn starch (agar agar  or collagen/gelatin if you are Paleo), then pour it into a pot to reduce.  After about 5 minutes, you should have a sauce that is thick enough to stick to the back of a spoon. 

You will also want a bit of pineapple to toss in with the chicken. If you want to turn your pineapple into a bowl, just score it around the edge and through the center with a knife, creating 4 squares. Then use a spoon to scrape out the pineapple chunks. Pour out any juice in the pineapple and set aside to be filled. Then chop the large pineapple chunks into smaller bite sized ones. 

All that’s left to do is to toss the chicken with some of the sauce and pineapple. Then serve it up with a bit of rice (or cauliflower rice in this case) inside the pineapple! 

Honestly, there really isn’t a better way to eat this meal. Who can resist eating straight out of a pineapple? And, in case you were so distracted by the pineapple to keep track, this recipe can be totally Paleo if you don’t use corn starch and serve it with cauliflower rice.

So there you go – if you want to trick your kids or loved ones into eating Paleo (or just healthy), just serve it out of a pineapple. 

[yumprint-recipe id=’121′]

/ Filed In: Chicken, Eat, Healthy Dishes, Main Dishes, Other Savories New
Tagged: cauliflower, Paleo, pineapple, teriyaki chicken

Homemade Sugar Free Barbecue Sauce

May 26, 2017

This is the perfect recipe to kick off a holiday weekend! I know a lot of you are going to be out grilling this weekend, and you will almost certainly be reaching for some barbecue sauce! Barbecue is my condiment of choice for just about anything – ribs, chicken, fries…you name it. But have you ever looked at the ingredients on a bottle of barbecue sauce? One of the first two ingredients is always sugar! GAH!

Don’t get me wrong, I have a mild addiction to the sugar in just about any form. But I would rather eat my sugar in the form of a cookie than sneaking around in my barbecue sauce. 

Which is why I tried to come up with my very own recipe for a sugar free version that I would like just as much as the Sweet Baby Rays in our fridge. 

The problem is that barbecue sauce just needs to have some sweetness (in my opinion) to be good. So how can you add that without adding sugar? 

I did it in a couple ways. The first, slightly unconventional way, was through the use of a pureed caramelized onion. It may sounds kind of strange, but believe me, it works. I just love the flavor of caramelized onions to begin with, so adding it to the sauce would do nothing but good things. 

The second way was through adding in some natural sweeteners like honey and molasses. Most barbecue sauces have molasses or brown sugar in them anyways, so it is an important flavor to add to the sauce.

The last way was by adding a bit of pineapple juice. Amazingly, pineapple juice concentrate is in some of your favorite commercially prepared barbecue sauces anyways. Not sure if its for the flavor, sweetness, or something else. But in my case I added it because pineapple is very sweet, but also has a nice tart taste that balances out the rest of the flavors. 

[BT Dubs, that orange thing up there on the right is my honey jar! I found this awesome little mason jar top that I just popped onto a store-bought honey jar. I love it!]

There are lots of other ingredients that go in barbecue sauce, like tomato sauce, vinegar, mustard powder, garlic powder, smoke flavor, etc. etc. Really, the flavors you add are up to you and what you prefer. If you like spicy sauce, add some cayenne. I just chose the flavors and spices that would be found in most of your standard barbecue sauces because that’s what I like!

After a few minutes over the stove, the sauce is pretty much done! It’s really simple actually. If you want a smoother sauce, you could pour it into a blender and give it a couple turns. That also seems to help all the flavors come together even more. 

Now the sauce is ready to marinate, slather, bathe, coat, or spread onto any darn thing you like! I immediately added it to a slow cooker with a couple of chicken breasts to make some pulled barbecue chicken. It was delicious! Albeit, not as sweet as that Sweet Baby Rays, but it was still fantastic! A little sweet, a little smokey, and a little tart. Yum!

I recommend storing the sauce in an airtight jar or container. You could also pop it into an old barbecue sauce bottle, or into your own squeeze bottle. It should last in the fridge for a week or two. I will tell you, I have a bottle that is over 3 weeks old in the fridge that still looks good and I’m tempted to use it for dinner tonight. Don’t worry, I will inspect it thoroughly beforehand. 

Worst case, I just whip up another batch!

[amd-yrecipe-recipe:162]


/ Filed In: Eat, Healthy Dishes, Paleo Dishes
Tagged: barbecue sauce, bbq, healthy recipe, Paleo, sugar free

Slow Cooker Barbacoa Tacos

March 27, 2017

This barbacoa recipe has quickly become one of our favorites! The first time I made it, I used the recipe straight out of the Fed and Fit cookbook (which is awesome, b.t.dubs). While the recipe was great, I am never one to settle with a recipe straight out of the cookbook. I have to tweak it until I love it!

I have probably tweaked this recipe 5 different times. Photographing it twice for the blog, ultimately deciding that it wasn’t right yet.  This last time, my husband basically told me to stop. Do not pass go. Do not collect $200 dollars. It was perfect!

Honestly, the difference in all the recipes in pretty minimal, in terms of the ratio of spices. The big difference in the last recipe that I used 100% Savory Spice Shop spices*. About 75% of my spice cabinet is already filled with Savory Spices, but earlier that day I picked up a few more and used them to round out the spice blend for this recipe. 

And boy is this spice blend packed with a ton of flavor: chili powder, chipotle chili powder, cayenne pepper, cumin, Mexican oregano, and cloves to be exact.

It just makes such a difference when you use fresh, good quality spices, like the ones at Savory Spice. I wanted to pick uSp a new jar of chili powder to replace my bulk sized jar that was probably two year old.  (Come on, what kind of food blogger am I using such poor quality spices? It’s embarrassing, really.) And now only do they have just dozens of different types of chilies, they have three different varieties of plain ol’ chili powder! I didn’t realize there could be more than one. 

We picked up the medium just to be on the safe side. 

So to get this bad boy cooking, start by covering the beef very generously in that delicious spice blend so that there is barely any meat showing through. If you have the time, I recommend letting it sit for a bit so the meat has a chance to absorb all those flavors. But if you are running short on time, you can immediately sear the beef on all sides so that they get a nice crust. 

Then just transfer them over to your slow cooker and add in a couple cloves of garlic, a bay leaf, apple cider vinegar, and stock and let your slow cooker go to work.

Just before you are ready to serve this, maybe 30 minutes before, squeeze over the juice of a lime, then shred it up into pieces.

All that’s left is to plate it up in some tortillas and top it with your favorite taco toppings! I love to top my barbacoa with a bit of queso fresco or cotija cheese. Maybe a little onion and cilantro. My husband likes to sneak on some jalapeno. But truly, this barbacoa is good all on it’s own. Be prepared to eat the left overs straight out of the slow cooker. 

The best part (maybe?) is that this recipe can easily be made into a Paleo meal by serving it in lettuce wraps! The first two times I made this recipe, that’s exactly what I did. It’s fantastic!

*Full disclosure, my local Savory Spice shop did provide some of the spices used in the recipe. But to be fair, I already had (and purchased) 4 of the 6 spices used in the recipe. I highly recommend using good quality and fresh spices in all your recipes, which is why I love Savory Spice. Not to mention they are right up the road and have hundreds of different spices, so I have no excuse but to stop in and pick up a new spice to play with in the kitchen!

[amd-yrecipe-recipe:145]

/ Filed In: Eat, Main Dishes, Other Savories New
Tagged: barbacoa, beef, low-carb, Mexican, Paleo, slow cooker, tacos, whole 30

The Best Baba Ghanoush Recipe

March 6, 2017

Ok guys, confession time. I have this weird obsession with baba ghanoush. I love the stuff. This love affair started several years ago after trying the creamy eggplant dip at a Mediterranean restaurant in Dallas and was reignited during my experience on the Whole 30 diet last year. 

Recently it has reached a whole new level thanks to our new favorite restaurant here in Charlotte, Yafo Kitchen. They make the best baba ghanoush I have ever had. The stuff is practically addicting. I will order an extra large side of the stuff just so I can take it home and eat it throughout the week. I also try and find new and creative ways of trying to trick the staff at the restaurant what their secret ingredient is. So far, no one has given it up.

But lucky for all of us, I think I figured it out on my own. Now I can make the best GD baba ghanoush anytime I want, and so can you! 


Start with two good sized eggplant and stab them all over with a knife. Unless you want them to blow up in the oven, that’s your call. 

Broil them until they are completely charred and wrinkled, but also totally soft inside. 


Cut the eggplants open and spoon out all the delicious flesh. 

Now here’s the fun part! Put all that flesh into a salad spinner (it’s not just for salad anymore, guys!) and give it a good spin to get out all that extra moisture. Then throw all of it into the food processor. 

[Big thanks to Serious Eats for that tip!]


Too the egg plant, add some good tahini. How do I know if it’s good tahini? The less English there is on the bottle, the better! But the stuff from Trader Joe’s will also work just fine. 

Now here is where this stuff goes from good, to great. Add in some sumac (probably not something you have lying around your spice cabinet, but I highly recommend getting yourself some if you like Middle Eastern food) and smoked paprika.

The smoked paprika is the kicker. It gives the baba ghanoush this mildly sweet and smokey flavor that is just heavenly. You can skip the sumac. Do not skip the smoked paprika. 

We aren’t done yet. The last step is adding the garlic. However, I do not recommend adding a whole clove of garlic to the food processor. It will make the garlic flavor very harsh and almost spicy. 

I recommend mincing it very finely then “pureeing” it with the side of a knife. Sprinkle a bit of salt over the garlic, then run blade of the knife at about a 75 degree angle over the garlic. Then mix it into the baba ghanoush at the very end. 

Don’t you just want to stick your fave right into that work bowl? Just me? 

You may change your mind after trying this baba ghanoush. I don’t care if you don’t really like eggplant. Or even if you have tried the dip before and didn’t like it. Try this one and I will almost guarantee that you will like it. I forced my husband to try it, even though he isn’t a fan of eggplant, and he actually liked it.

Actually, what he said was “I think this is better than Yafo’s”. Sure he might be biased and only said that to get in my pants, but let’s just pretend that it’s true, okay. 

At the very least, it is so good that I licked the bowl clean, an honor I only reserve for cake batter and cookie dough. 

[amd-yrecipe-recipe:137]

/ Filed In: Eat, Jaimie, Other Savories New, Paleo Dishes, Side Dishes
Tagged: appetizer, dip, eggplant, Paleo, tahini, vegetarian, whole 30

Paleo Spaghetti Squash Lasagna

February 22, 2017

Spaghetti squash is one of my favorite ingredients to cook with. It’s incredibly healthy, low in carbs, delicious, and generally pretty easy to cook. It can also be swapped out in a lot of your favorite recipes, not just spaghetti! 

I have topped spaghetti squash with everything from chicken enchiladas to beef stroganoff. But one of my favorite recipes is this spaghetti squash lasagna! 

Now if you have never worked with spaghetti squash before you may be a little bit intimidated. I totally get it. I was right there with you once. Fortunately, my mom has been making spaghetti squash for years, way before it was cool, so I have learned a lot from her. 


The hardest part, by far, is cutting the darn thing! It’s seriously a pain in the butt, but I have a couple recommendations to make it a bit easier. 

  • Microwave the whole squash for 1 minute. This will soften the squash slightly, making it easier to cut.
  • Before cutting around the squash, cut off the stem. It will ensure you get to evenly sized halves. 
  • Use a serrated knife which will help cut through the outer shell.
  • Don’t cut using a saw like motion. Cut by sticking the tip of the knife all the way through and then pressing down with the base of the knife. It may take a couple cuts to get all the way through.

Once the squash is split in half, I scrape out the seeds then drizzle the flesh with a little bit of olive oil and sprinkle with salt and pepper. Then off to the oven it goes!

There are of course other ways to cook a spaghetti squash, but when time is not really an issue, oven roasting them is my favorite! The flesh gets very soft, but also a bit caramelized, which makes it taste so much better. 


After a few minutes in the oven, the squash is ready to become spaghetti. Its as easy as dragging a fork across the surface. The flesh should be soft so that this doesn’t not require a lot of effort. If it does, pop it back in the oven or microwave until it’s soft. 


Ok, while the spaghetti squash was roasting, I worked on all the other components of the lasagna. First up, the meat sauce. I seasoned some ground beef with salt, pepper, paprika, and garlic. Then I added in some whole tomatoes, which I smashed down into a sauce. 


The next component is the ricotta cheese. Or in this case, nut cheese. Did I mention this was Paleo? 

Don’t worry, you won’t miss the cheese. Nut cheese is surprisingly delicious and super flavorful. I love it because you still get that salty, savory, creaminess you would get from normal cheese. 

Nut cheese is also pretty easy to prepare. I basically blend up some soaked cashews with a bit of oil, lemon juice, garlic, salt, and pepper until its just short of cashew butter. It should still have a bit of texture, but not chunky. 


Finally, it’s time to assemble. I like to spread the nut cheese over the top of the spaghetti squash. You will probably pull up some of the noodles, but it’s okay – it doesn’t have to be pretty. I then top all of it with a generous helping of meat sauce. 

Now if you wanted to be a rebel and use real cheese, this would be where you swap in the ricotta and top this off with some mozzarella cheese. It won’t be Paleo, but it will still be a heck of a lot more healthy than your classic lasagna. 

After another quick bake in the oven so that all the components get nice friendly with one another, this Paleo spaghetti squash lasagna is ready to eat! Since everything was basically pre-portioned in the spaghetti squash itself, there is no messy cutting and serving of the lasagna. You know what I’m talking about. 

So the first few bites of this spaghetti squash lasagna are good and all, but when you get into the center where all that nut cheese is, it gets really good. The creamy savory-ness of that nut cheese just rounds out the whole thing, making you forget that there really is no cheese in this entire dish! 

Can you tell I love this recipe? That’s probably why I make it whenever I’m looking for something healthy, but comforting all at the same time!

[amd-yrecipe-recipe:132]

PIN NOW, MAKE LATER

PRODUCTS USED: 

[show_shopthepost_widget id=”2447992″]

/ Filed In: Eat, Healthy Dishes, Main Dishes, Other Savories New, Paleo Dishes
Tagged: dairy-free, healthy, lasagna, low-carb, meat sauce, nut cheese, Paleo, spaghetti squash, tomato sauce, whole 30

Yellow Curry Chicken Meatballs

February 20, 2017

Over the past year I have fallen head over heels in love with yellow curry. I really can’t explain it, but I love the stuff. Without fail, at every Thai restaurant we visit, I will try the yellow curry and compare it to the last yellow curry I had. Then I come home and tweak my yellow curry recipe or jut try something a little bit different. 

Like these yellow curry chicken meatballs. 


I started with some ground chicken and almond meal. These meatballs are unintentionally Paleo. I had every intention of making a typical meatball with breadcrumbs, but it turned out, we were out of breadcrumbs. Almond meal to the rescue! 

To the chicken I added some of my curry seasoning and an egg, and I mixed it all together. Then I formed them into golf-ball sized meatballs. I placed them into a hot skillet to brown on all sides. 


Once the meatballs had browned, I added in some sliced onion and let them sweat down until they were soft and slightly caramelized. 


After about 7 minutes, I sprinkled in the rest of the curry seasoning. I like to sprinkle this in before I add the coconut milk so that the spices can get a little nice and toasty. 

After that, I just added the meatballs back into the pan to cook the rest of the way through and to let them soak up all that nice curry flavor!

I served these up with some cauliflower rice, but jasmine rice would also be great if you aren’t Paleo. 

We loved the different take on the classic yellow curry chicken! The meatballs were super flavorful and tender. I have a feeling these would be a really great appetizer or party snack. I would scrap the rice for toothpicks instead.

They would probably be a great introduction to the world of yellow curry! Then someone else could fall in love with it as much as I have! 

[amd-yrecipe-recipe:131]

/ Filed In: Eat, Main Dishes, Other Savories New, Paleo Dishes
Tagged: chicken, curry, dinner, healthy, meatballs, Paleo, Thai, yellow curry

Delicious Cauliflower Pizza Crust

February 17, 2017

Ok folks, I know what you are thinking, “cauliflower pizza crust….real original!”. Oh yeah, I can hear your sarcasm from here. But here me out, guys! This one is actually really good! 

I have tried a lot of cauliflower crusts over the past couple years and they have always been a little lack-luster. Of course cauliflower crust will never be like pizza crust. It’s made of vegetables after all. But I knew it could taste better than bland old cauliflower. 

My solution: roasting the cauliflower. 

To me, roasting the cauliflower makes a HUGE difference. It not only gives the cauliflower a nice nutty flavor, but it helps to dry it out so it’s not so watery when it’s processed. 


My other secret to this anything-but-bland cauliflower pizza crust is roasted garlic. I just threw a couple of cloves in the with cauliflower while it roasted. Then everything got thrown into the food processor to transform the cauliflower and garlic to something that resembled mashed potatoes. 

Now at this point the cauliflower still has quite a bit of moisture in it. So to get rid of some of the excess moisture, I laid out two big paper towels and dumped the cauliflower mixture on top. Then I wrapped the towels around the cauliflower and pressed out any remaining moisture. 

Once my cauliflower was as dried out as it was going to get, I mixed in some spices, an egg, and cheese.


Then I dumped the mixture out onto a parchment lined baking sheet and pressed it into a rectangle (although, a circle will also work) that was about 1/4 inch thick. I wanted this crust to be pretty thin so that would get nice and crispy all the way through. Nothing is worse than a soggy crust that just falls apart. 

To make sure it was nice and crispy, I baked it first before adding the toppings. Then I added my favorite pizza toppings: sauce, cheese, and pepperoni. 

After another turn in the oven, the cheese got nice and melted and the crust crisped up even more around the edges. 

While this cauliflower pizza crust will never fully take classic pizza crust’s place in my heart, it has found it’s own cozy corner. It is healthy without really tasting like it. Sure, you will know you are eating cauliflower. But it’s flavorful, roasted garlic cauliflower. Basically the best kind of cauliflower there is. 

So if you want a healthier pizza option that still tastes delicious and that crispy crust that you love about pizza, you need to try out this crust. Especially if you have tried and been very disappointed by other cauliflower crusts. I think this one will win you over, and may even win your heart. 

That was cheesy….just like this pizza. 

Ok, I’m done. 

[amd-yrecipe-recipe:129]

PIN NOW, MAKE LATER

/ Filed In: aug 2018 savory new, Eat, Healthy Dishes, Other Savories New
Tagged: aug 2018 savory new, cauliflower, crust, dinner, healthy, low-carb, Paleo, pizza crust

How to Make the Perfect Zucchini Noodles

January 6, 2017

So I made the mistake of making my first grocery store trip on Monday, February 2nd at 4:00 pm. You know who else was doing their grocery shopping at that very moment? 

EVERYONE!

I should have known how crazy the store would be when 1) I couldn’t find a parking spot, and 2) couldn’t find a shopping cart. Once I got inside, I couldn’t find anything on my list! The store was cleaned out! Well, not completely. Just of all the healthy stuff. It’s almost like everyone had started a diet or something…

Once I realized they were out of zucchini, I just upped and left. Apparently everyone and there mother plans on cooking with zucchini this week. And I have a sneaking suspicion they will be making zucchini noodles!

Sounds like the perfect time to share my method for making the perfect zucchini noodles!

My method for making zucchini noodles starts out just like any other…by spiralizing the zucchini. I use my Kitchen-Aid attachment, but you can use counter-top or a handheld spiralizer if you want something a bit more budget friendly.

My advice, start with the handheld version, which you can get for under $10, just to make sure you like zucchini noodles. If you do, you can consider upgrading to another device.  


After all the zucchini has been spiralized, I lay them down on a couple layers of paper towels then sprinkle them with salt. The salt actually draws out some of the moisture which helps reduce the sliminess of the zucchini noodles. 

Then, to get rid of that moisture, I press some paper towels into the noodles to soak up all that zucchini juice. 


Now this next step, which I think is key, comes from the genius that is my husband. He always hears me complain about how my zucchini noodles are soggy, no matter what I do. So he came up with the bright idea of spinning them through a salad spinner!

I thought he was a little crazy at first, but I was amazed at how much extra water came out of those noodles! Soggy noodles no more!!

From this point, there are several ways I like to cook my zucchini noodles. 

  1. Saute them – The primary way I cook my zucchini noodles is by sauteing them in a teaspoon of oil (especially herb infused oil) for just a few minutes. 
  2. Blanch them – I only cook my noodles this way if I am adding them to soup or something else that’s already pretty soggy. 
  3. Don’t cook them – Zucchini noodles are also good raw! I like to add raw zucchini noodles to salads for some fun textures. 

So there you have it, my method for ensuring that I have perfect zucchini noodles every time! And if you need some inspiration for some zucchini noodles recipes, I have quite a few coming to the blog soon!

[amd-yrecipe-recipe:113]

PIN NOW, MAKE LATER

/ Filed In: aug 2018 savory new, Eat, Healthy Dishes, Other Savories New
Tagged: low-carb, noodles, Paleo, zoodles, zucchini

Pecan and Herb Crusted Pork

November 16, 2016

Pecan and Herb Crusted PorkEvery so often I get on these kicks where everything I seem to make has the same ingredients. Last month, it just about everything I made had pumpkin. This month, it seems like everything I’ve made has had pecans in it. Well, not just pecans, but maple syrup, too. First it was this cake. Now it’s this pecan and herb crusted pork tenderloin. And it’s not the last pecan recipe you will see this month, either.

I have been trying to come up with some Fall recipes that could also double as a Thanksgiving turkey substitute. I know…no turkey on Thanksgiving is practically un-American. But 1) not everyone likes turkey, and 2) not everyone wants to commit to to making a turkey if they aren’t serving a dozen or more people. 

Since my husband and I rarely travel home for Thanksgiving, this pecan and herb crusted pork is something I would make for just the two of us and still feel like we are having a hearty Thanksgiving meal. In fact, the crust itself smells just like Thanksgiving. It has all your those delicious Thanksgiving flavors you’d probably find in your favorite stuffing recipe: sage, thyme, rosemary, pecans….yum, right? 

Pecan and Herb Crusted Pork

To get the pork nice and flavorful, I first, marinated it in a puree of the herbs, olive oil, garlic, and maple syrup. After the pork had rested overnight, I rolled it in some crushed up pecans. Since the pork was covered in the sticky herb pesto (thank you maple syrup!), the pecans stuck right to it. 

Pecan and Herb Crusted Pork

Now all that was left was to roast the pork.

I placed the pork loins on a baking sheet and covered them with tin foil so that the pork stayed moist and the pecan crust wouldn’t burn. Since the pork took an hour or so to roast, I decided to use that time to multi-task and roast up a nice side of maple coated brussels sprouts. Why not put maple syrup on everything?

Pecan and Herb Crusted Pork

This pork recipe lived up to every expectation. I didn’t even miss the turkey. Sorry, turkey…you’ve been replaced. What I love about the pork is that it stays so much more moist than turkey, and this particular recipe had so much flavor! Sometimes I am disappointed with my Thanksgiving turkey because not only is it dry, but it’s kind of bland. Which is why I make sure to have a bite of stuffing along with every bite of turkey. But this pork is practically coated in all the flavors in stuffing….and….it’s actually pretty healthy! 

And if you are like me, that means you can have an extra helping of pie later.  

PIN NOW, MAKE LATER

Pecan and Herb Crusted Pork

[amd-yrecipe-recipe:97]

/ Filed In: Eat, Main Dishes, Other Savories New, Paleo Dishes
Tagged: dinner, maple syrup, Paleo, pecans, pork, recipe, Thanksgiving

Homemade Marinara Sauce

June 17, 2016

Homemade Marinara Sauce

Store bought marinara sauce, or spaghetti sauce, was one of those products I never thought twice about buying, assuming it was all “healthy”. It wasn’t until my first Whole 30 when I was constantly reading labels that I realized how much sugar (and other weird ingredients) is in that stuff! While I was disappointed that one of my favorite easy meals was now ruined by my new found nutritional education, it forced me to figure out how to make my own.

During my first Whole 30, I made zucchini noodles and marinara sauce almost every week. At first the sauce was a little bland or runny. But then I learned my favorite herb combinations and the perfect cooking process so that I wouldn’t end up with a bowl of watery tomato soup. It definitely took some trial and error, but I think I finally have found my favorite marinara sauce recipe!

Homemade marinara sauce

It starts with a big can of San Marzano tomatoes. They are whole, peeled tomatoes and are so soft to juicy that they break right apart when you press a wooded spoon. I add the tomatoes to a pan of sautéed onions and garlic along with a mix of Italian herbs, such as basil, oregano, and thyme. I prefer to use dried herbs in this sauce mainly because I have them on hand all the time, but also because fresh herbs can wilt down and change flavor if they are sit in the sauce too long. For some freshness, I add some fresh basil right at the end. 


I let everything simmer on the stove for about an hour. For the first 30 to 45 minutes, I leave the cover on so that none of the moisture escapes. Then for the last few minutes I take the lid off and let that moisture evaporate so that the sauce is thick and clings to the noodles.

Zoodles and marinara sauce

From here the sauce could be used in a number of different ways. My favorite ways to use the sauce are to pour it over some zucchini noodles, pour it over some cooked ground turkey to make a meat sauce, drizzled over chicken breasts with some Parmesan cheese, or spread over a pizza crust. Nowadays I make a big batch every couple weeks and keep a jar of it in the fridge just in case. I still have my easy go-to meals but now I know exactly what I’m eating, which I find pretty cool.

Homemade pasta sauce


[amd-yrecipe-recipe:46]

/ Filed In: Eat, Healthy Dishes, Jaimie, Other Savories New
Tagged: healthy, Italian, marinara sauce, Paleo, tomato sauce

Sun Dried Tomato and Basil Egg Casserole

May 25, 2016

Sun Dried Tomato and Basil Egg Casserole Recipe

I have probably eaten more eggs in the past 6 months than I have in the last 6 years. I may be exaggerating a little, but not by much. Since changing up my diet at the beginning of the year to be more protein and fat rich, I have had to learn to enjoy more egg-filled breakfasts. Something that did not come easy to me. At the beginning of my first Whole 30, I reluctantly ate eggs for breakfast just about every morning thinking that all I had to do was get through those 30 days, then I could go back to my oatmeal or yogurt. Well, guess what. 5 months later I am still eating eggs for breakfast.

While now I appreciate the nutrition and energy they give me to start the day, they can still be a little boring. I am always trying to find new ways to cook them, finding inspiration everywhere from blogs to the Trader Joes. The latter is exactly where the inspiration for this recipe came. I was rummaging through their meat section reading the back of every label trying to find a sausage that didn’t have sugar in it when I came across this sun dried tomato and basil chicken sausage. From there the wheels started turning and eventually I decided that a sun dried tomato and basil egg casserole would be a great new way to eat my eggs in the morning. 

Sun Dried Tomato and Basil Chicken Sausage Egg Casserole

Can you tell I do all my shopping at Trader Joe’s? I promise, this isn’t a sponsored post, it’s just that it’s where about 80% of the food in my kitchen came. Of course, the sun dried tomato and basil chicken sausage is the muse of this dish, but I am pretty certain you can find a similar sausage flavor at almost any store. For some additional flavor and to add some veggies to this egg casserole, I also added some peppers and onions. To make it easy on myself, I used the fire roasted peppers and onions, but you could also saute up your own and they would be great!


I first sauteed up the sausage then added it to the bottom of a baking dish along with the peppers, onions, and sun dried tomatoes. I poured over the eggs then topped it off with some freshly chopped basil. 

Basil, pepper, onion, and tomato egg casserole

The egg casserole only took about 30 minute to bake. I know it’s completely cooked through when the egg on top is no longer runny. Once it’s out of the oven I like to let it cool for a bit before I cut into it. Hot eggs can just fall apart when they are cut into. 

Chicken Sausage and Basil Egg Casserole

What I love about an egg casserole like this is that it’s an easy breakfast or brunch option to make for a large group, or it can be made in advance and eaten throughout the week, which is exactly what I did. It fed me for a week and I didn’t get sick of it. The flavors in this are wonderful if not a little bit unexpected. It tastes decidedly Italian thanks to the basil and peppers, but eggs and Italian food aren’t two things I normally put together. Fortunately, it totally works! How could sausage and eggs not work? 

[amd-yrecipe-recipe:34]

/ Filed In: Eat, Paleo Dishes
Tagged: breakfast, chicken, eggs, healthy, Paleo, whole 30

Burger Bowl

May 16, 2016

Burger Bowl

For those of you who have been on a diet before can definitely understand how hard it is to eat out. You have to question everything that goes into the dish, including that things were cooked in, or whether they have found a way to sneak in sugar or fat somewhere you would least expect it. One the easiest things for me to eat out while on the Whole 30 was a burger, oddly enough. Of course I became that annoying customer who had to modify just about everything, but I had ordering burgers down to a science (“I’ll have the Classic Burger, no bun, no condiments, and can I add avocado on top?”).

Then one day the most magical thing happened – I discovered the burger bowl! One of our favorite burger spots in town actually makes a deconstructed burger in a giant bowl. It was amazing! It was pretty much made for anyone who is eating Paleo. It didn’t have any condiments or dressing and I didn’t have to change anything on my order (“One burger bowl, please!”). It felt so good not to be the high maintenance customer again.  I knew I had to add this to my list of Whole 30 meals! 


The burger bowl is incredibly easy to put together. I start with a bed of romaine lettuce that I tossed in lemon juice and olive oil. I then added some thick slices of tomato, grilled onions, and some roasted sweet potatoes (to add that french fry element). Then I topped it all with a 4 ounce burger patty that is simply seasoned with salt and pepper. 

Burger Bowl-6

I actually topped this off with some condiments because I had to cut this round of Whole 30 short thanks to an ill-timed case of food poisoning.  I wanted to add just a little bit more flavor (and color) to the bowl, but its not like it really needed it. 

Burger Bowl-8

And just like the burger bowl at Bang Bang burger, this one totally hit the spot! It satisfied that craving for a juicy burger without that pesky bun. Who needs a bun anyways?

[amd-yrecipe-recipe:31]

/ Filed In: Eat, Jaimie, Other Savories New, Paleo Dishes
Tagged: burger, gluten free, Paleo, salad, whole 30

Mediterranean Chicken Bake

May 13, 2016

Healthy Mediterranean Chicken Bake

Even though I love the process of cooking and will happily embark on a recipe that I will know will take hours, there are some days where I just don’t want to. I want to come home and have dinner ready for me, or at the very least ready for me to pop in the oven with very little prep work. And although rewarding in other ways, I have found Paleo cooking rarely meets that criteria. There are so many ingredients to prep and various stages of a recipe to make up for the lack of gluten, dairy, etc.

That is exactly what inspired this Mediterranean Chicken Bake. It’s low maintenance with little prep work and can be made ahead of time if needed. It basically consists of lots of delicious veggies, chicken breast, and a mixture of herbs and spices. All I had to do was chop up the veggies and chicken and toss them together in a baking dish then bake until everything is nice and roasted. 


I used a combination of artichoke hearts (I used frozen), onion, broccoli, tomato, bell pepper, and mushrooms. And for the spices I mixed lots of garlic with basil, oregano, paprika, crushed red pepper, salt, and pepper with some olive oil and lemon juice. I also topped it all with some pine nuts, but for those who want some extra flavor and are not afraid of a little dairy, some feta cheese would be amazing with this!

Healthy Mediterranean Chicken Bake

Of course you could bake your chicken and veggies separately, but then you would have another dish to clean, and nobody wants that. I love cooking everything together because then all the flavors meld together and chicken stays nice and moist. 

This would also be a great dish to make ahead of time. I would mix everything together in the dish and the stick it in the fridge until it’s ready to be baked. That was I could immediately come home and toss this in the oven. Which is exactly what I need after a long day at work!

Paleo Mediterranean Chicken Bake

I would also recommend serving this over rice or quinoa if that’s on your diet. Since I made thing while I was on the Whole 30, I couldn’t, but I will be making this again soon and adding some quinoa on the side to soak up all the delicious flavors!

[amd-yrecipe-recipe:30]

/ Filed In: Eat, Paleo Dishes
Tagged: artichoke, chicken, healthy, Paleo, vegetables

Paleo BLT Lettuce Wraps

May 11, 2016

Paleo BLT Lettuce Wraps

I actually debated whether I should post this recipe at all. I mean, BLT lettuce wraps aren’t all that scientific. Bacon. Lettuce. Tomato. That’s all it is. Doesn’t take a genius to figure this one out. I am sure you didn’t need me telling you how to put this one together. 

Despite their simplicity, I was delighted by how good these were. Maybe I just haven’t had a BLT in so long I forgot what a good sandwich it is, but even without the bread, these lettuce wraps were a hit with me and my bread-loving husband. 


So humor me here as I go through the extremely elementary details of these super simple BLT lettuce wraps. It would probably help if you read this with the same sarcastic tone that I am writing this in. 

It all starts with some freshly washed romaine lettuce hearts. I like romaine hearts because of their boat like shape that cradles the tomato and bacon perfectly. I then topped each leaf of lettuce with a couple slices of tomato and one big slice of crispy bacon. 

Paleo BLT Lettuce Wraps

I did add a smear of mayonnaise to some of the lettuce to add a little something else to make it feel more like a sandwich. If I had had a ripe avocado on hand, I would have smeared on some mashed avocado in it’s place. And you know what else would be good, using some Ranch Dressing instead! Has anyone put Ranch on a BLT before? I bet it’s delicious!

Paleo BLT Lettuce Wraps

Once the smear was on, I just piled everything together into a nice little wrap. We ate these with a side of homemade sweet potato chips that were so good, it was almost like were were eating a BLT sandwich with a side of fries. 

Paleo BLT Lettuce Wraps

And the fact that they were so easy to make, basically taking as long as it would to cook bacon, they will be a staple in our house for quick weekend (and even weekday) meals!

[amd-yrecipe-recipe:29]

/ Filed In: Eat, Paleo Dishes
Tagged: BLT, lettuce wraps, Paleo, sandwich

No Churn Strawberry Banana Ice Cream

May 9, 2016

No Churn Strawberry Banana Ice Cream

Boy it’s starting to feel like Summer. It got up to almost 90 degrees here this weekend. Perfect ice cream weather! Of course, since I am trying to stick to a Paleo diet right now, real ice cream is out of the question. No diary or sugar allowed for me! But that doesn’t mean my craving for ice cream is going away anytime soon. 

Instead of diving head first into a carton of cookie dough ice cream, I decided to McGuyver some frozen bananas into a no churn strawberry banana ice cream (maybe more or a sorbet?) that would satisfy my craving. Being on a Paleo diet means getting really creative with the foods you can eat to make them into the foods you can’t. 


In the morning, I chopped up some strawberries and bananas and tossed them in the freezer. When I got home, the fruit was nice and frozen and all I had to do was blend them up with a bit of coconut milk. It’s essentially like making a smoothie, but much thicker and colder. The blender did warm up the mixture a bit, so I poured it into a shallow dish and popped it in the freezer for a couple hours to let it set up. 

Easy no churn strawberry ice cream!

After that, it was good to go! I scooped out nice big scoops of ice cream and topped it with some shredded coconut. And boy did it hit the spot. Sure, I would have loved a few chocolate chips thrown on top, but this certainly was delicious all on it’s own.

Delicious, healthy ice cream made with just strawberries and bananas!

It’s perfect for a warm Summer day since it’s so light and refreshing! And it won’t derail anyone’s plans on getting that bikini body since it’s 95% fruit! I will definitely be making versions of the ice cream all Summer long. I am going to try chocolate next!


[amd-yrecipe-recipe:28]

/ Filed In: Desserts, Eat, Healthy Dishes
Tagged: banana, ice cream, Paleo, strawberry

  • 1
  • 2
  • 3
  • Previous Entries

Follow

Hey There!

Hey there, I'm Lindsey. I'm a number cruncher by day and a home cook and baker by night. While I love to eat healthy and find fresh and healthy alternatives for my favorite foods, I will never turn down dessert! Life is all about moderation, right?

Recipes

  • All Recipes
  • Breakfast
  • Appetizers
  • Salads
  • Main Dishes
  • Side Dishes
  • Desserts
  • Drinks

Favorite Finds

[show_lookbook_widget id=”388783″]

Theme by 17th Avenue · Powered by WordPress & Genesis