• Home
  • Eat
    • Breakfast
    • Appetizers
    • Main Dishes
      • Chicken
      • Beef
      • Seafood
      • Healthy Dishes
      • Paleo Dishes
      • Salads
    • Desserts
      • Decorated Cookies
      • Cookies
      • Bars and Brownies
      • Cakes and Cupcakes
  • Shop
    • Cookie Decorating Supplies
    • Bakeware
    • Cookware
    • Kitchen Gadgets
    • House
  • About
    • Contact
    • Bucket List
  • Cookie Decorating 101

Follow the Ruels

Apple Muffins

August 22, 2018

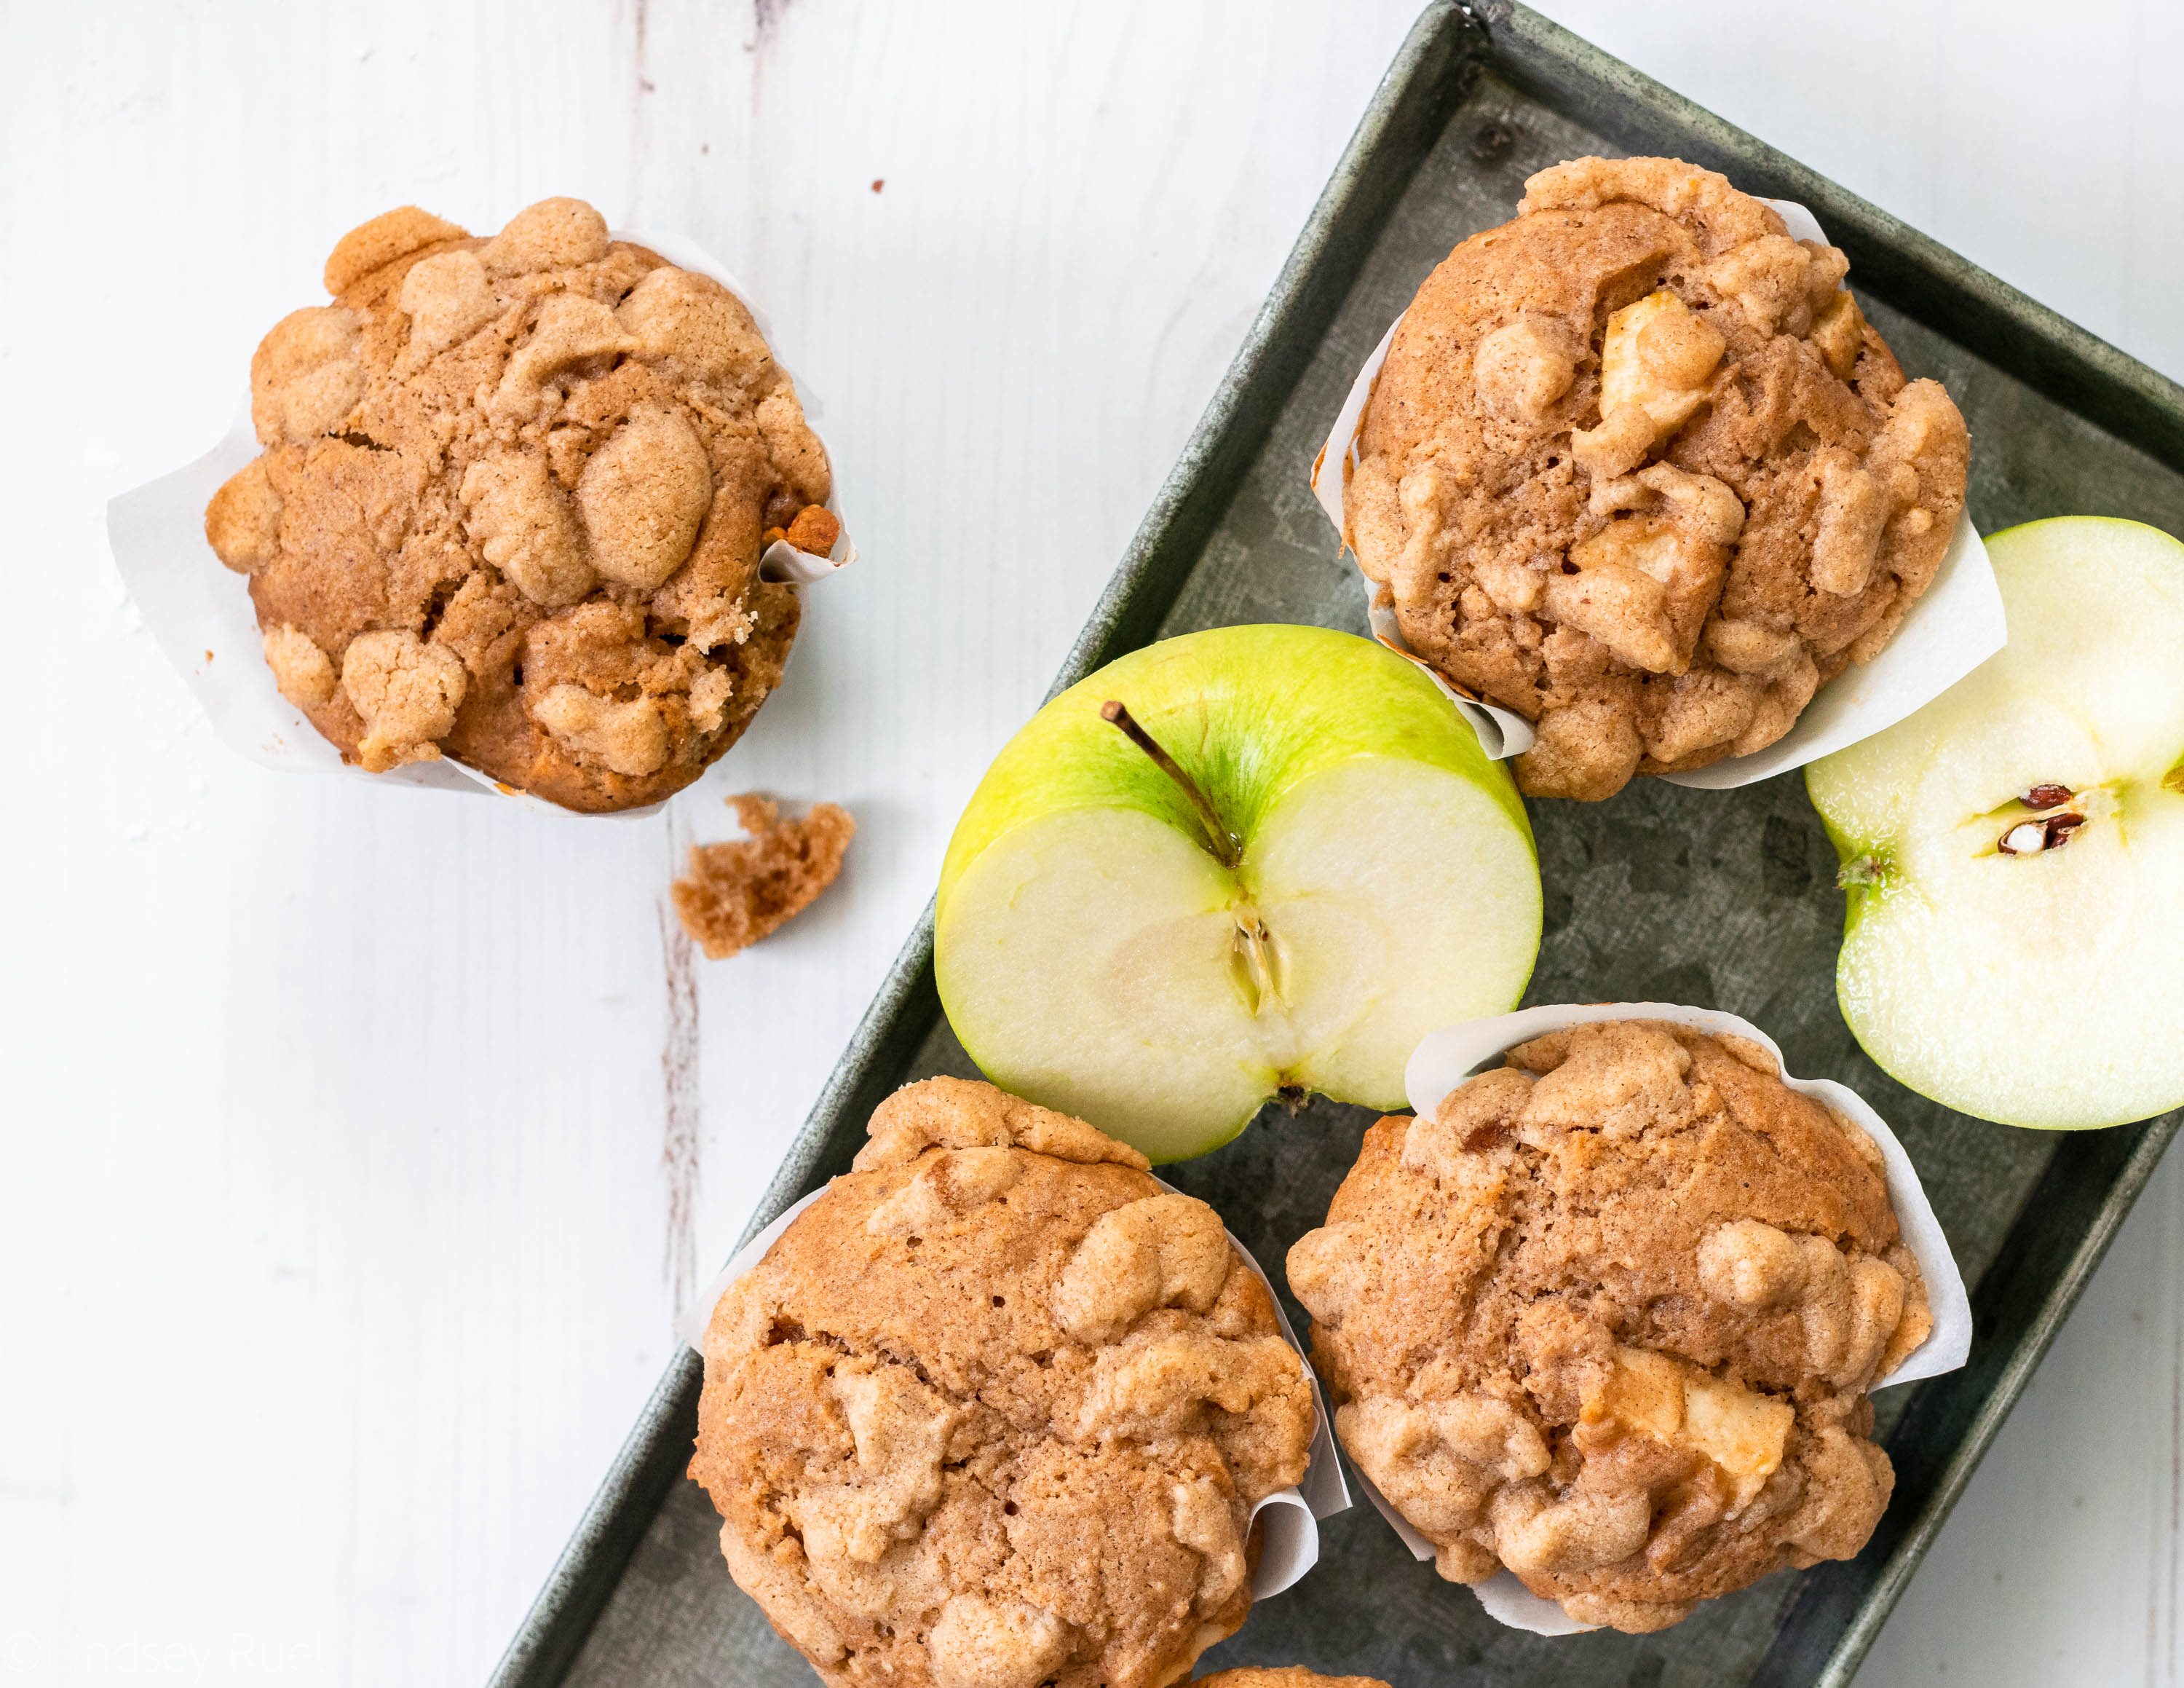
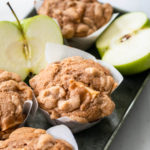
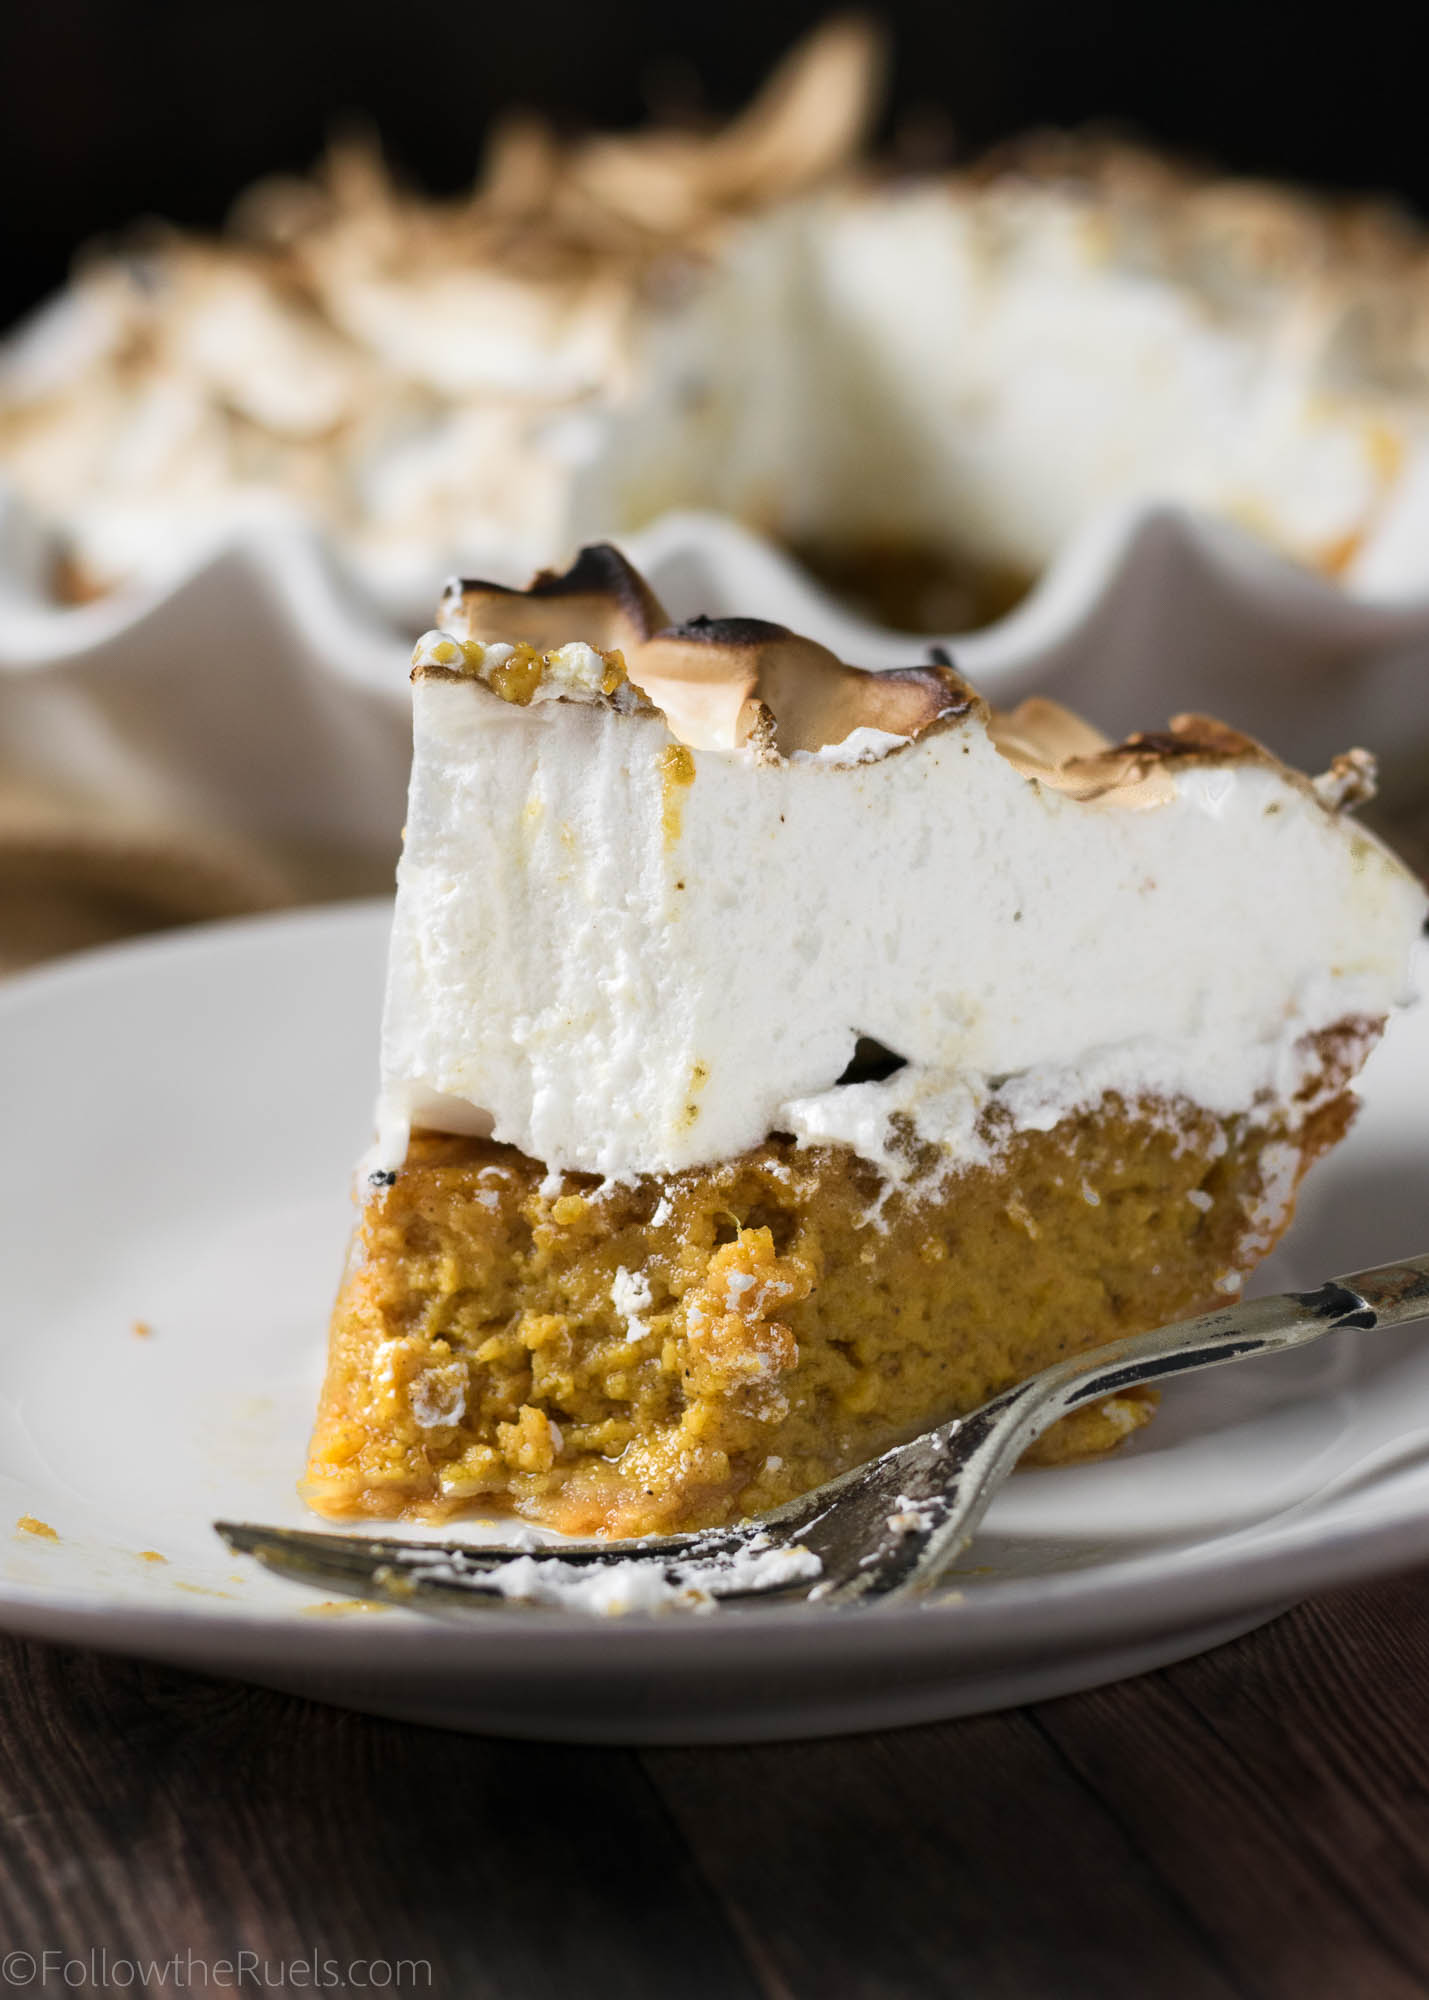
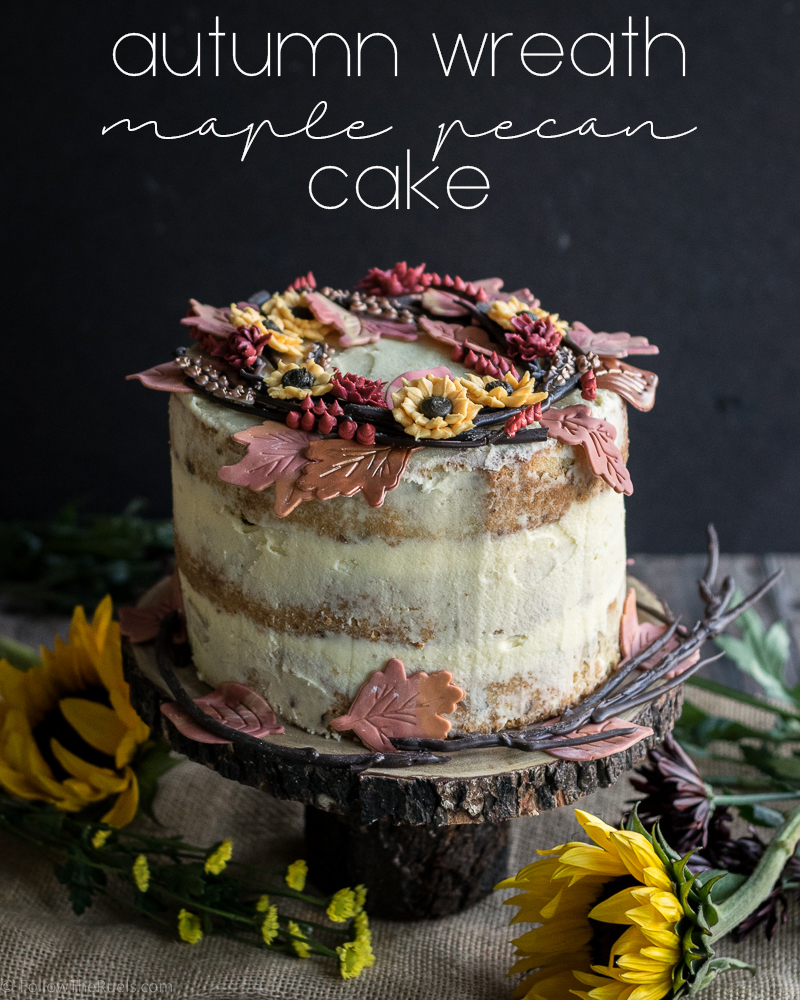
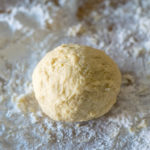
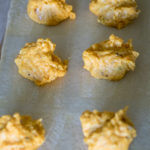
This is the third makeover of this recipe that I’ve done and it may be my favorite yet! 

With Fall right around the corner, I have been hankering for anything “Fall spiced”, which includes all things apple, pumpkin, and more! These apple muffins certainly check off that box with the sweet and tart apples mixed with the cinnamon-y spice of apple pie spice. They certainly are getting me in the mood for Fall!

How to Make Them

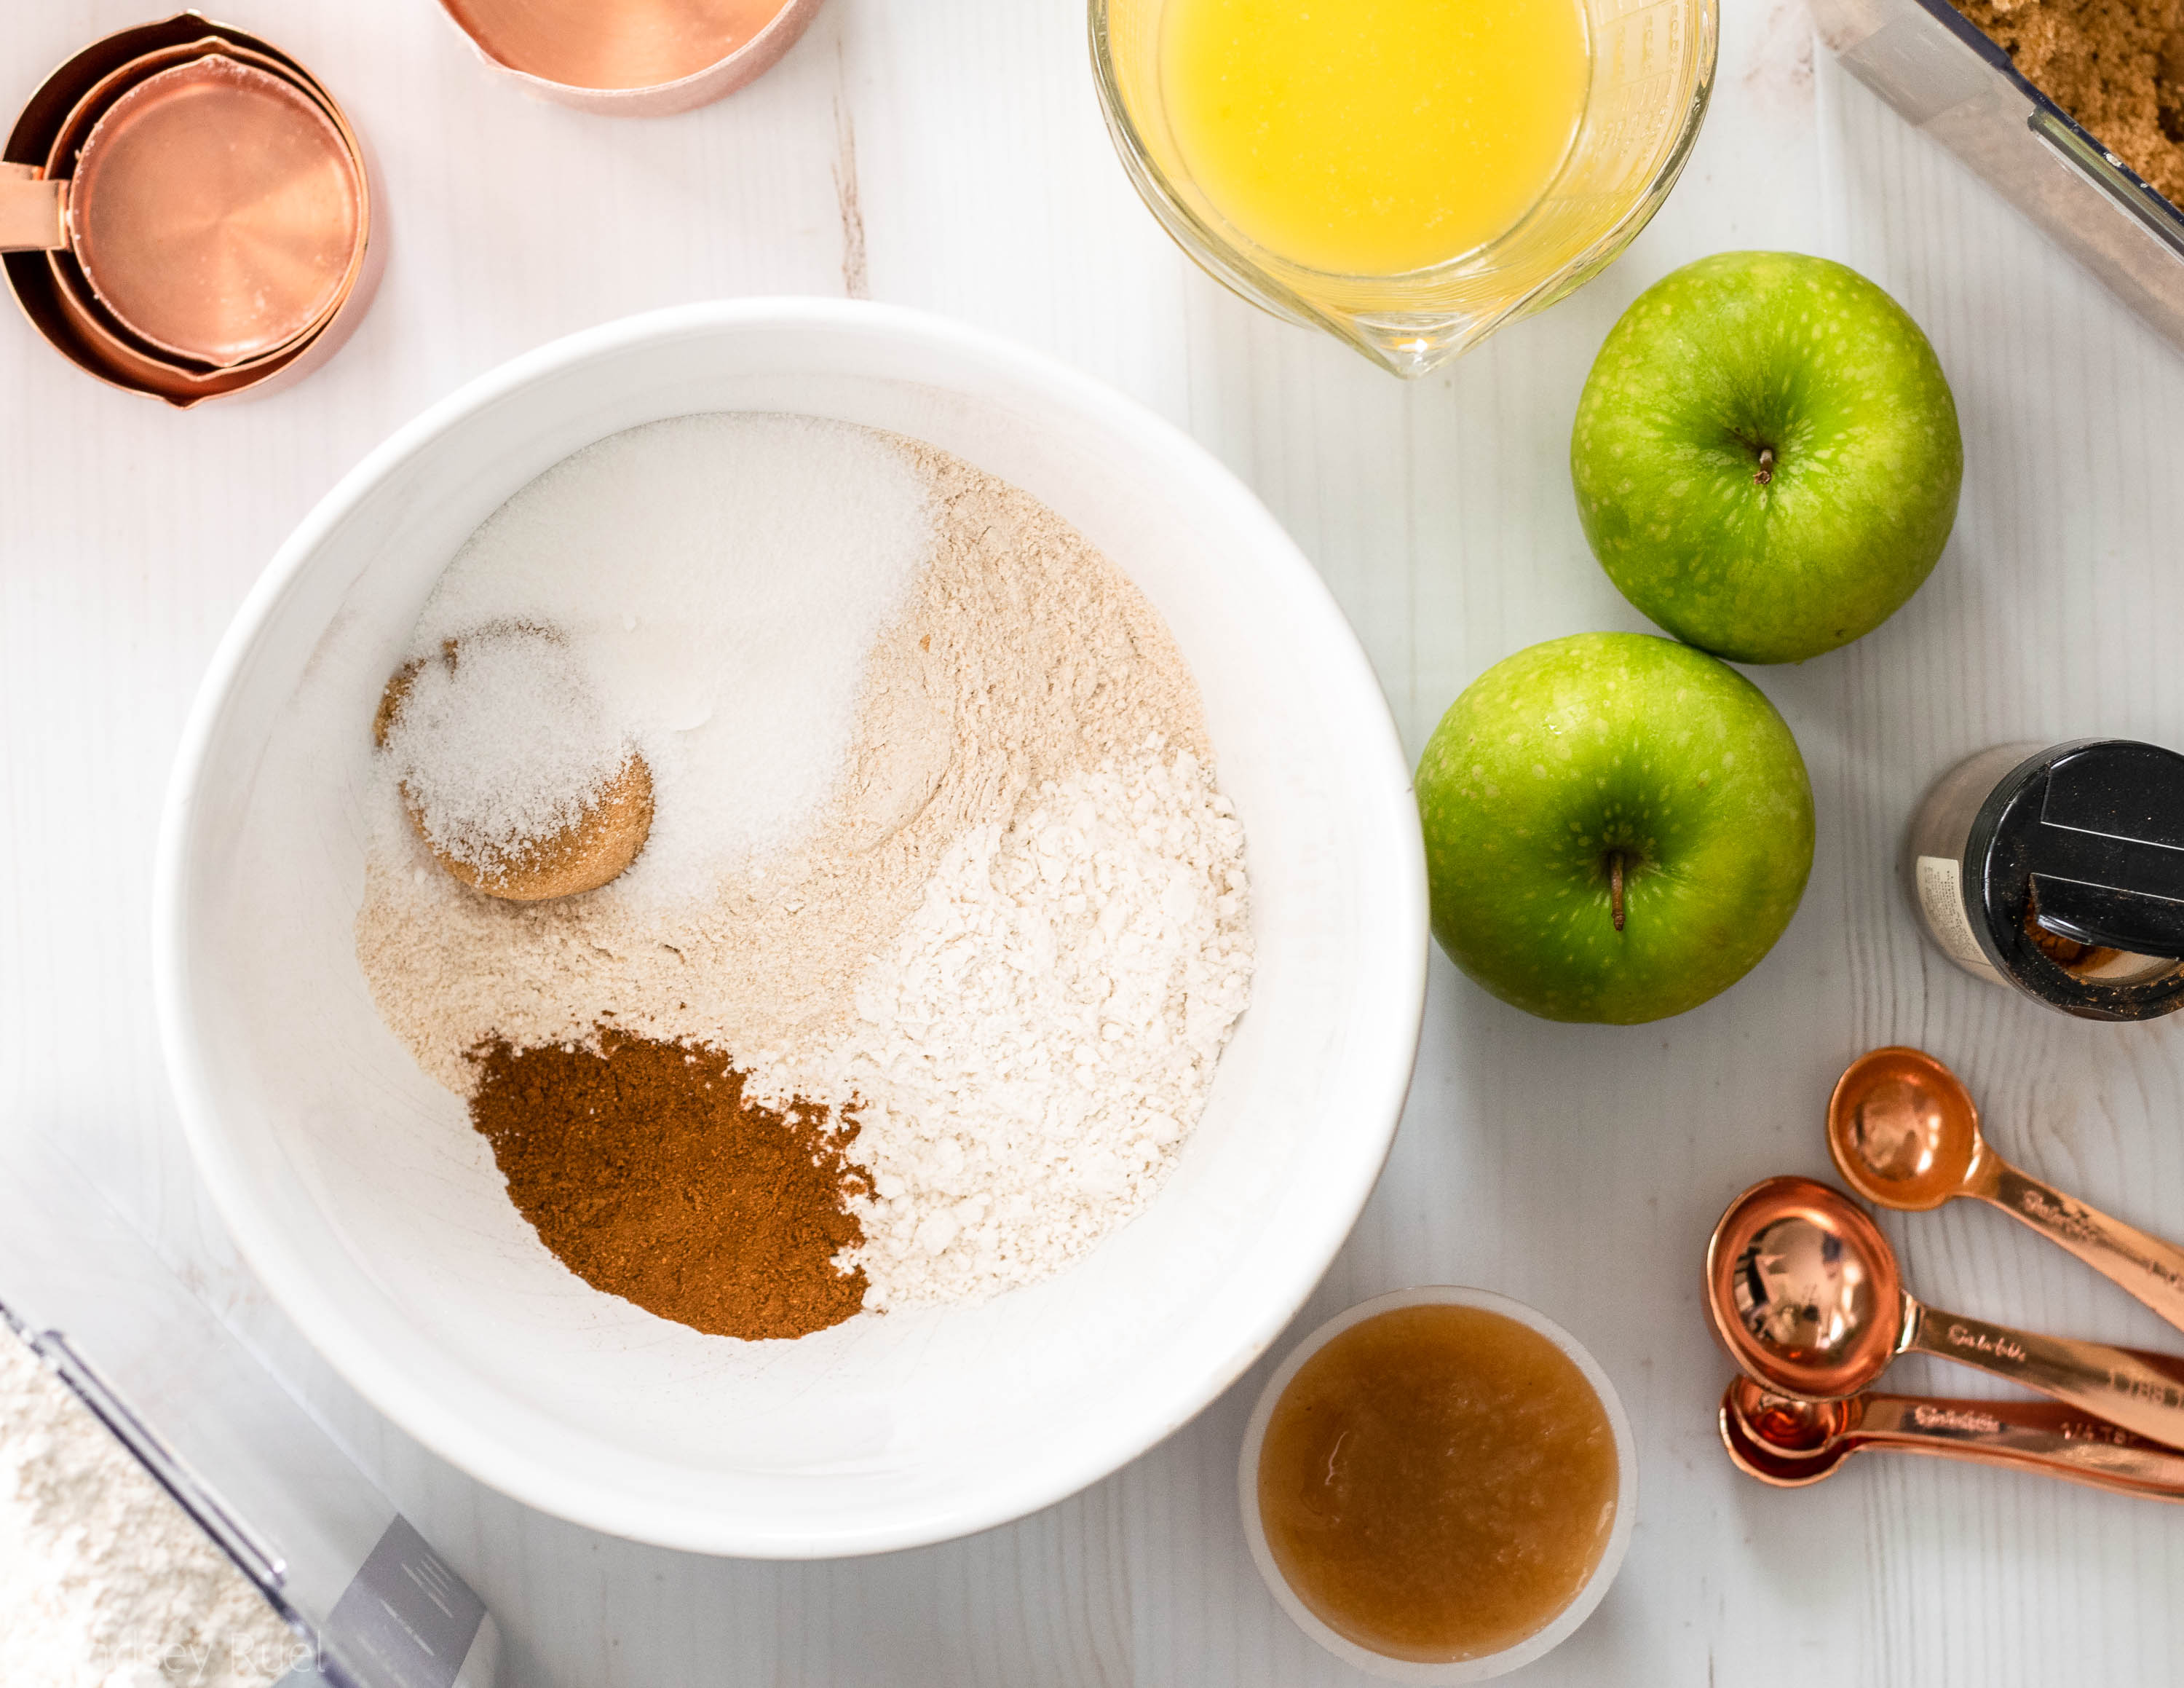
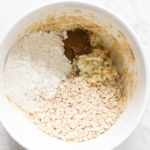
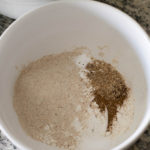
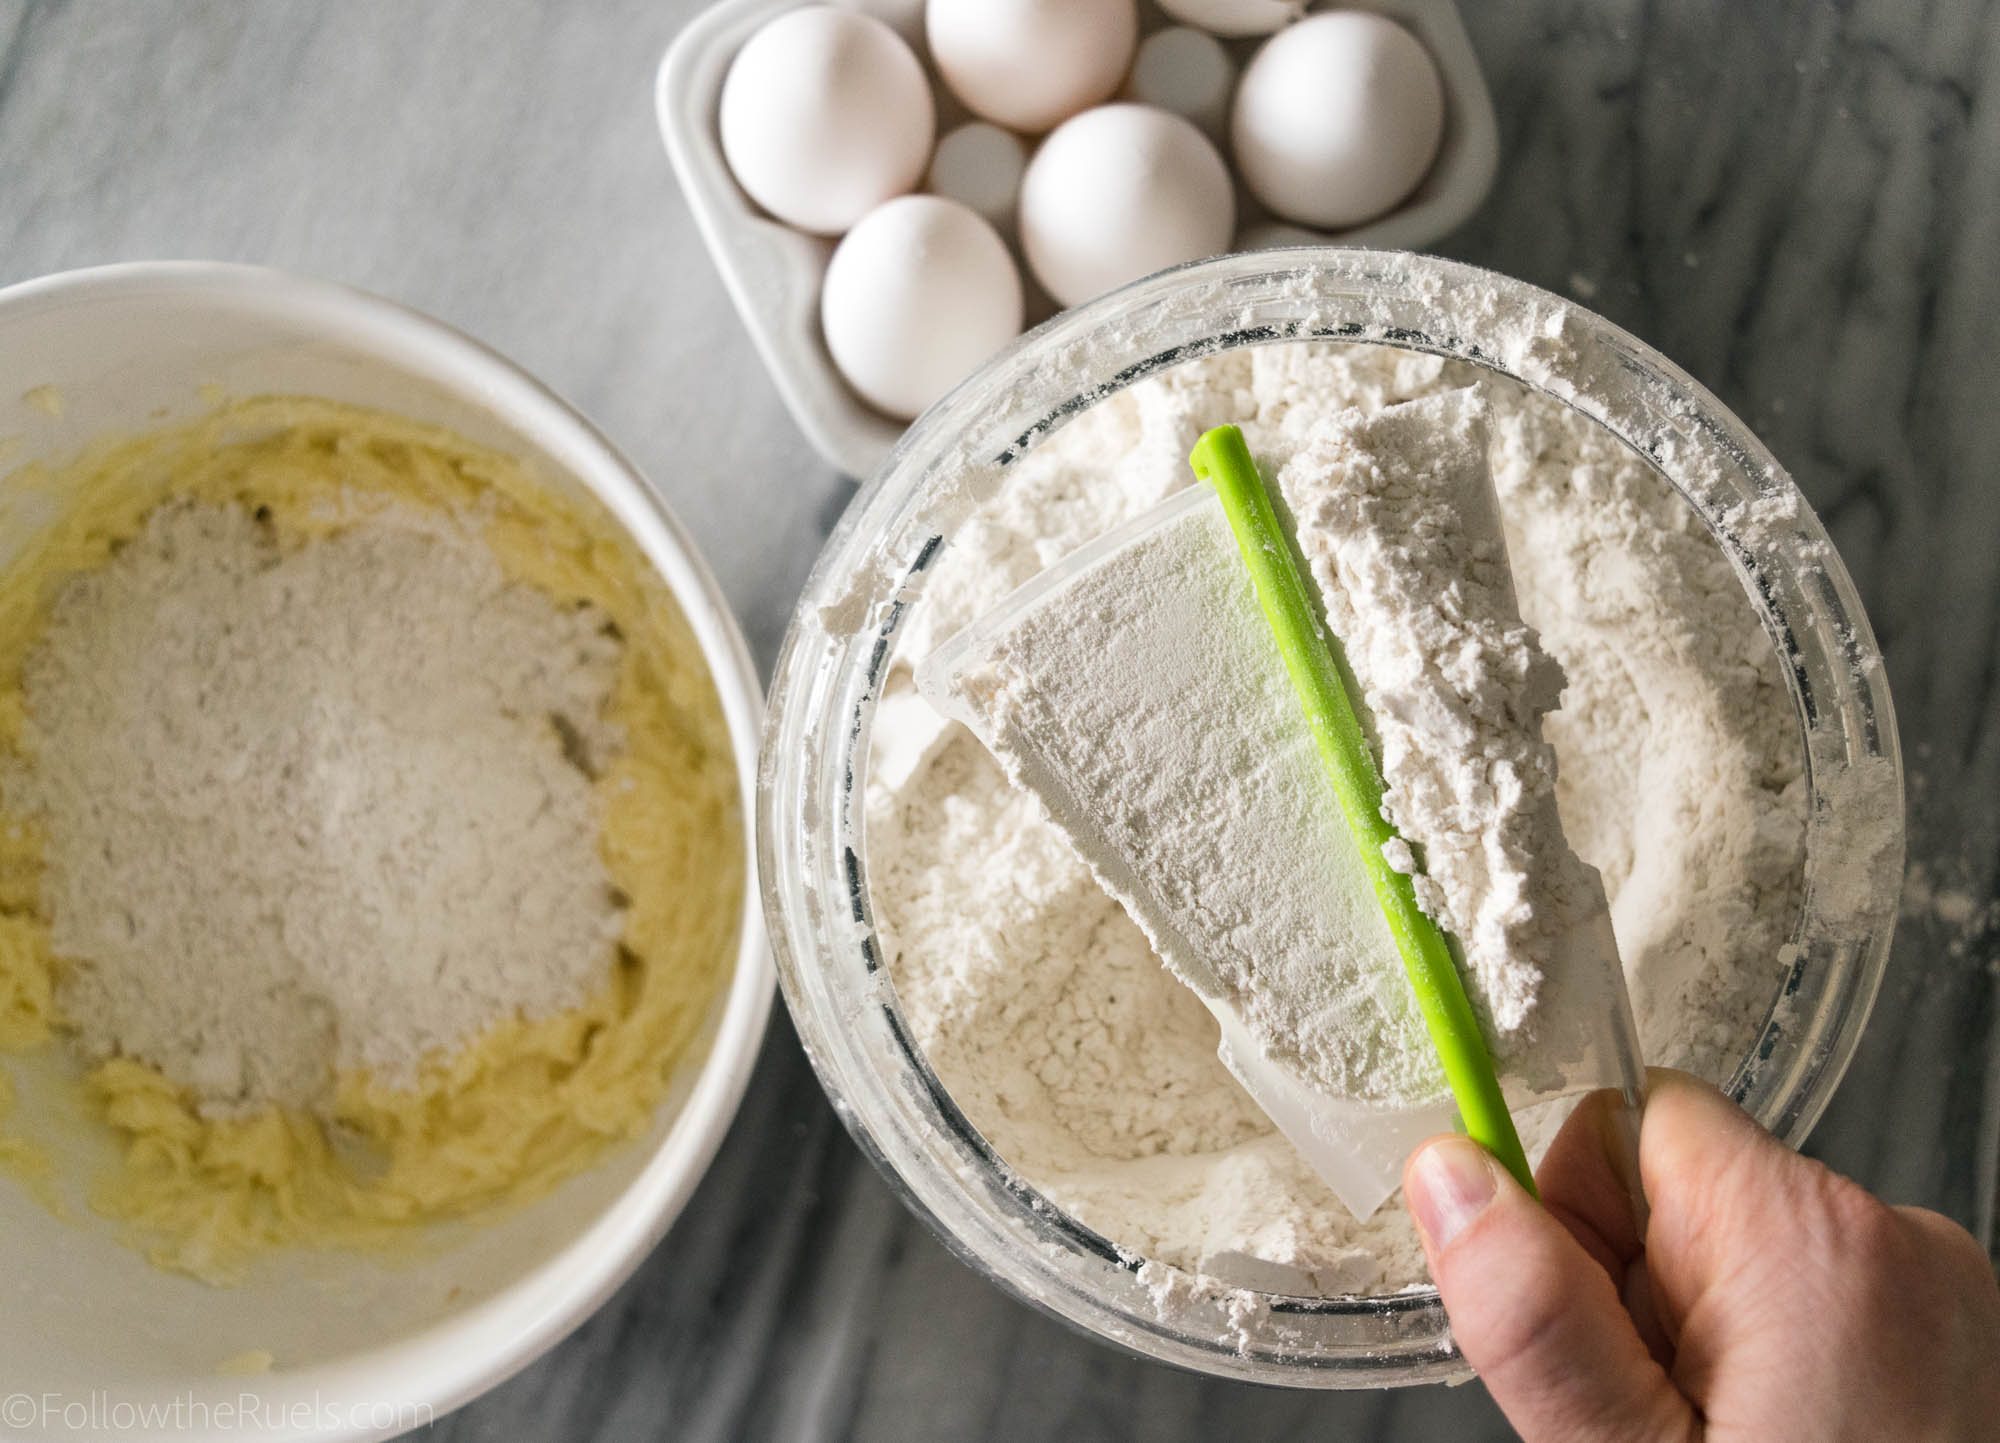
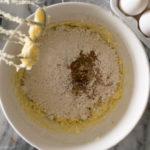
First, mix together the dry ingredients: flours, sugar, baking powder, baking soda, salt, and spices. 

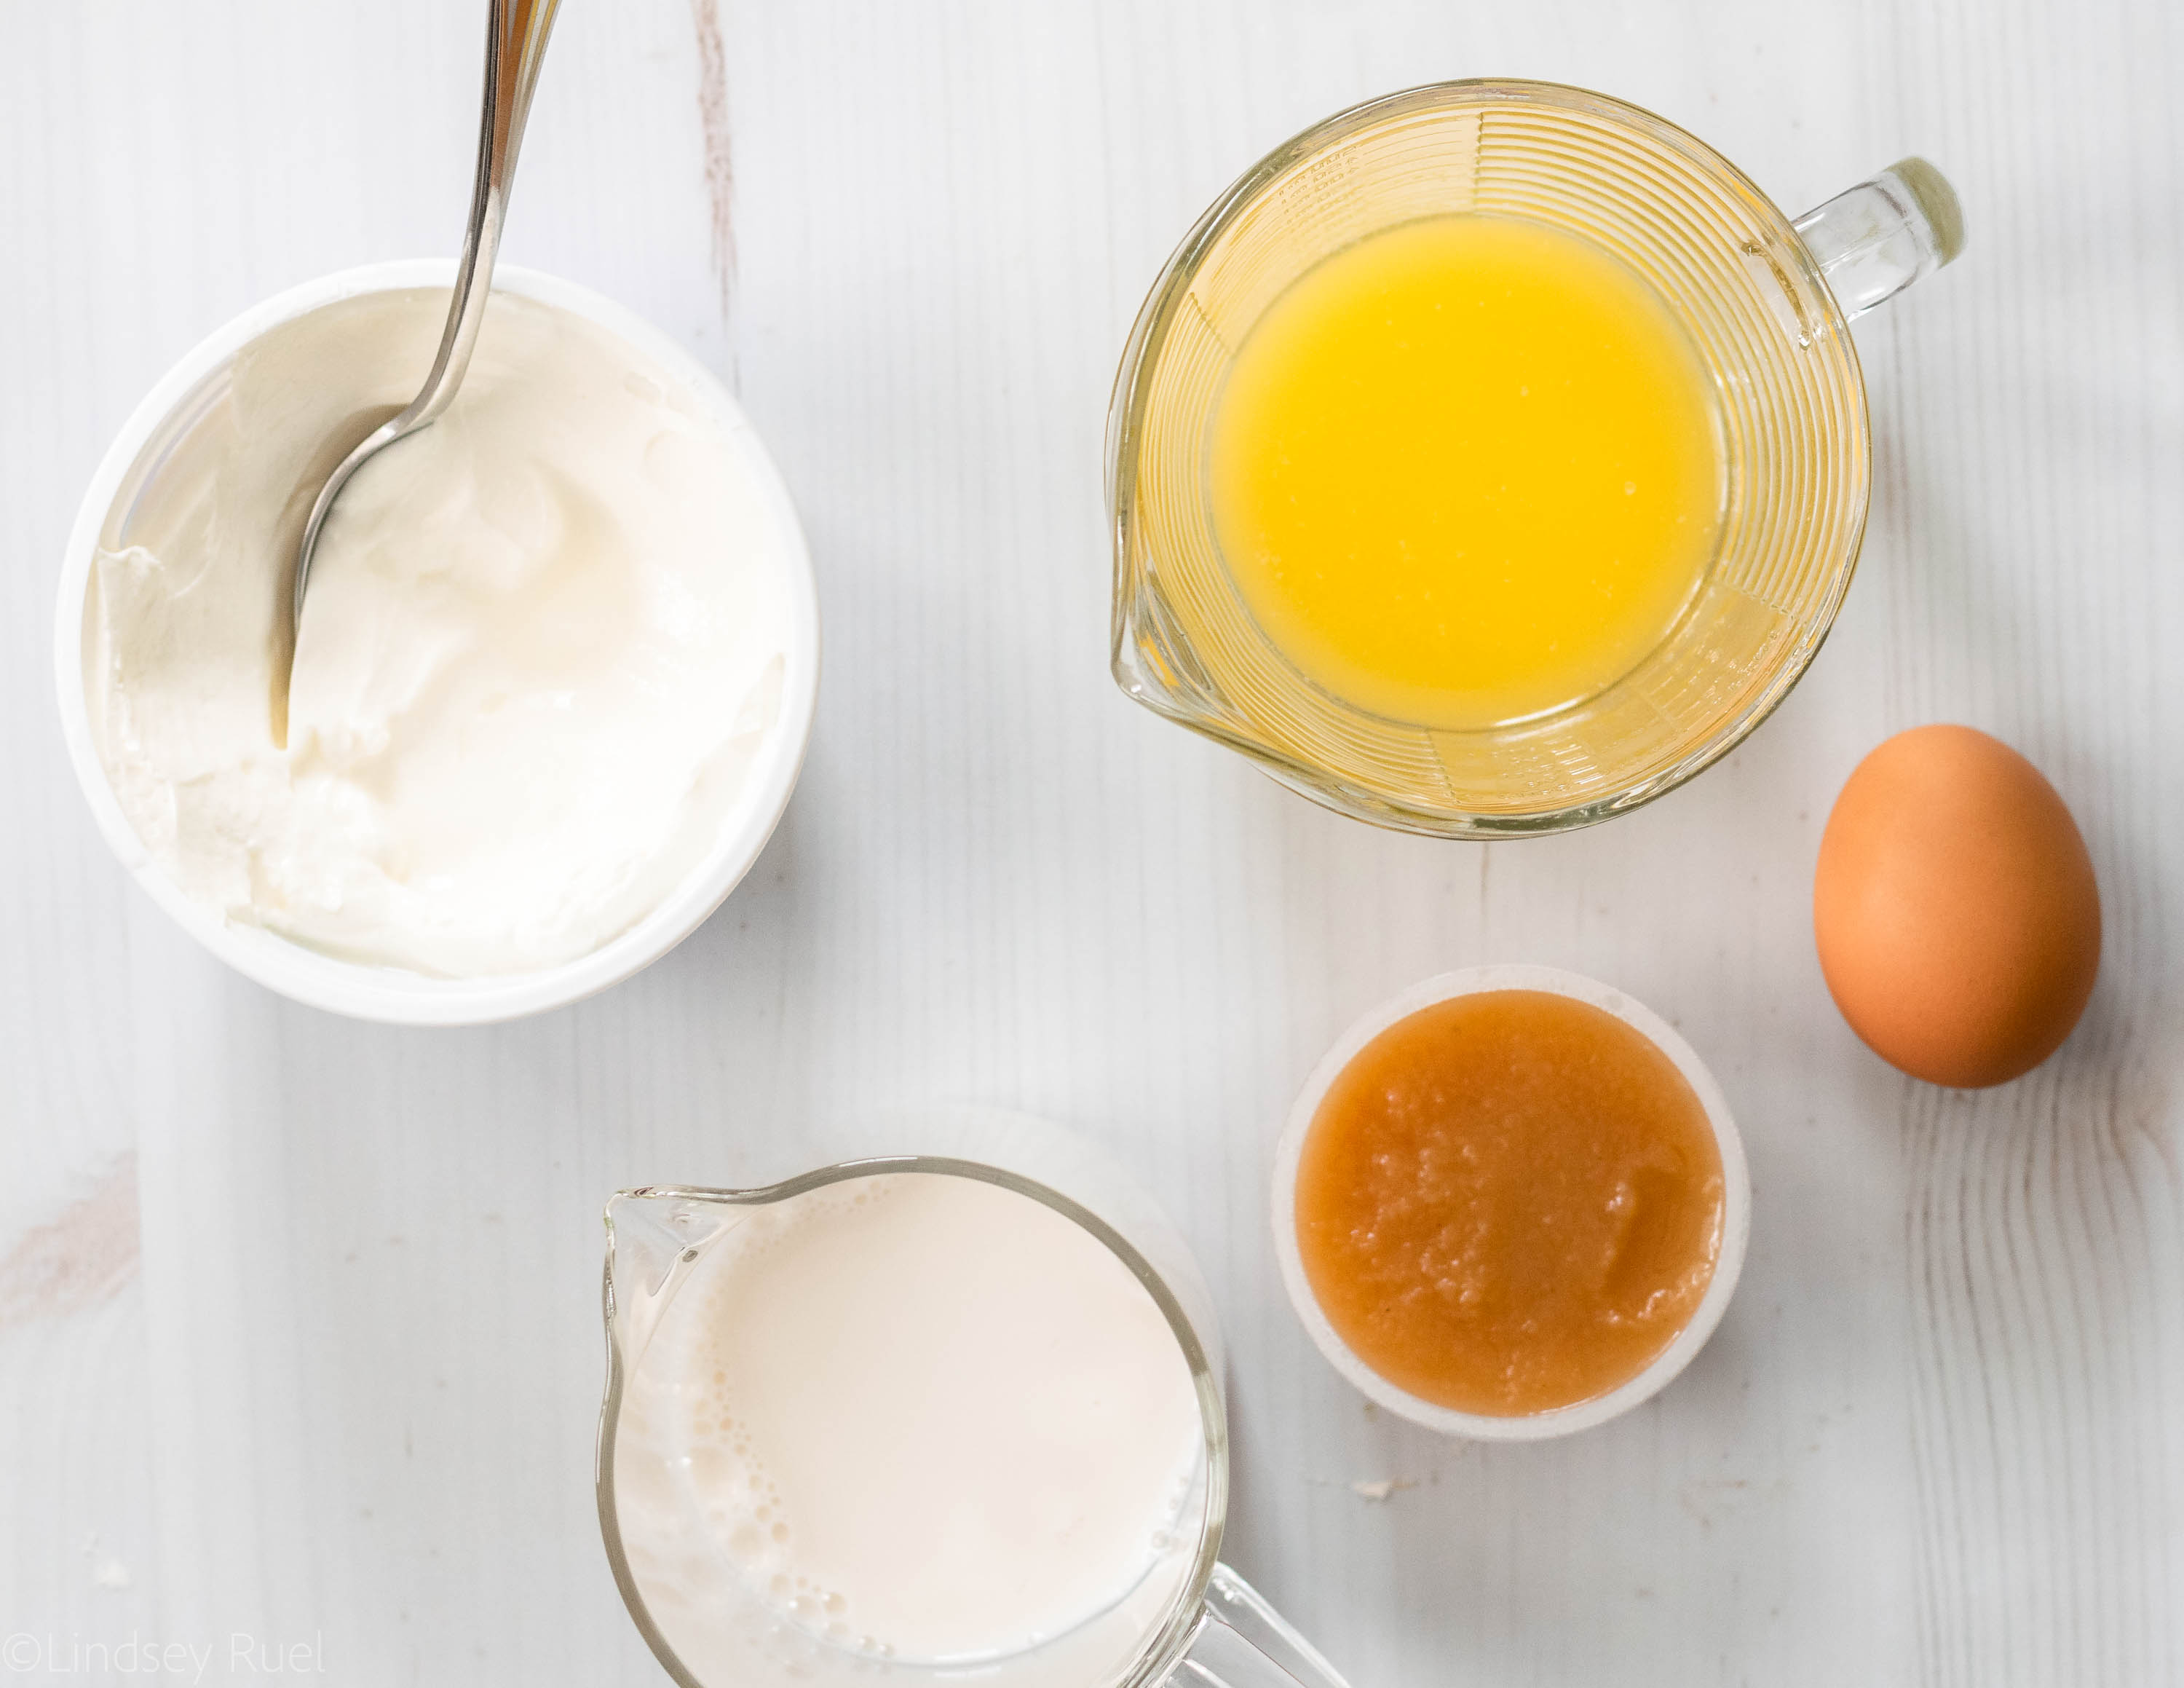
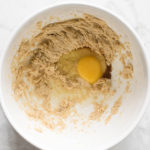
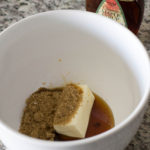
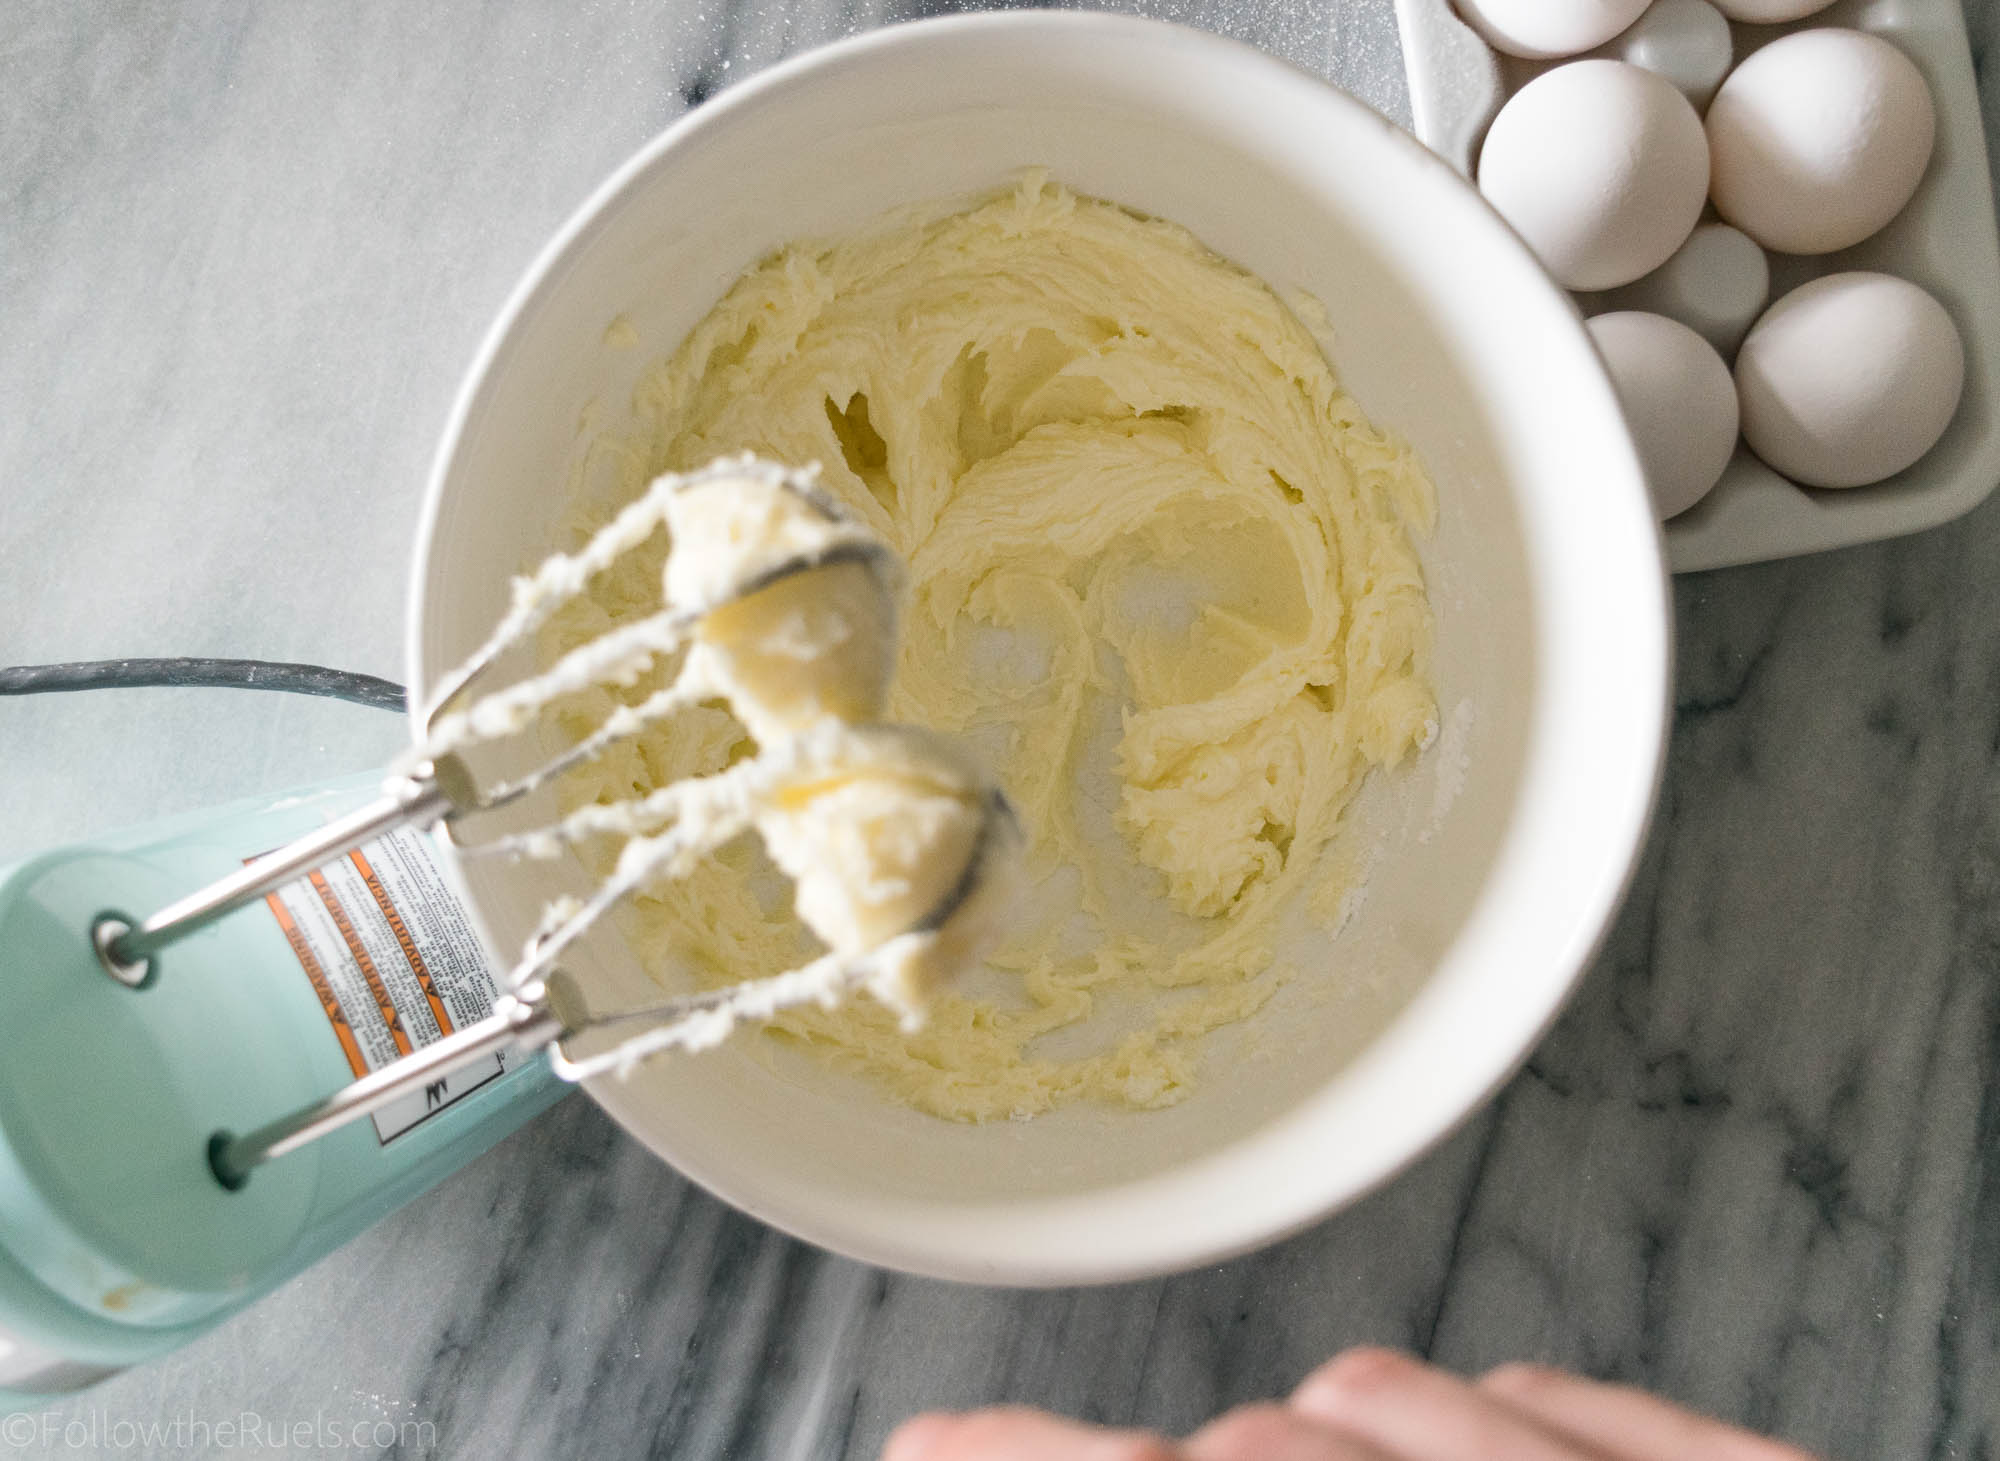
Then combine most of the wet ingredients. I like to whisk the milk (make sure it’s warm), butter, sour cream, applesauce, and vanilla together first so that it forms a smooth slurry. If your butter starts to harden because the other ingredients are too cold, pop it in the microwave for 20 seconds or so until you can whisk it smooth. 

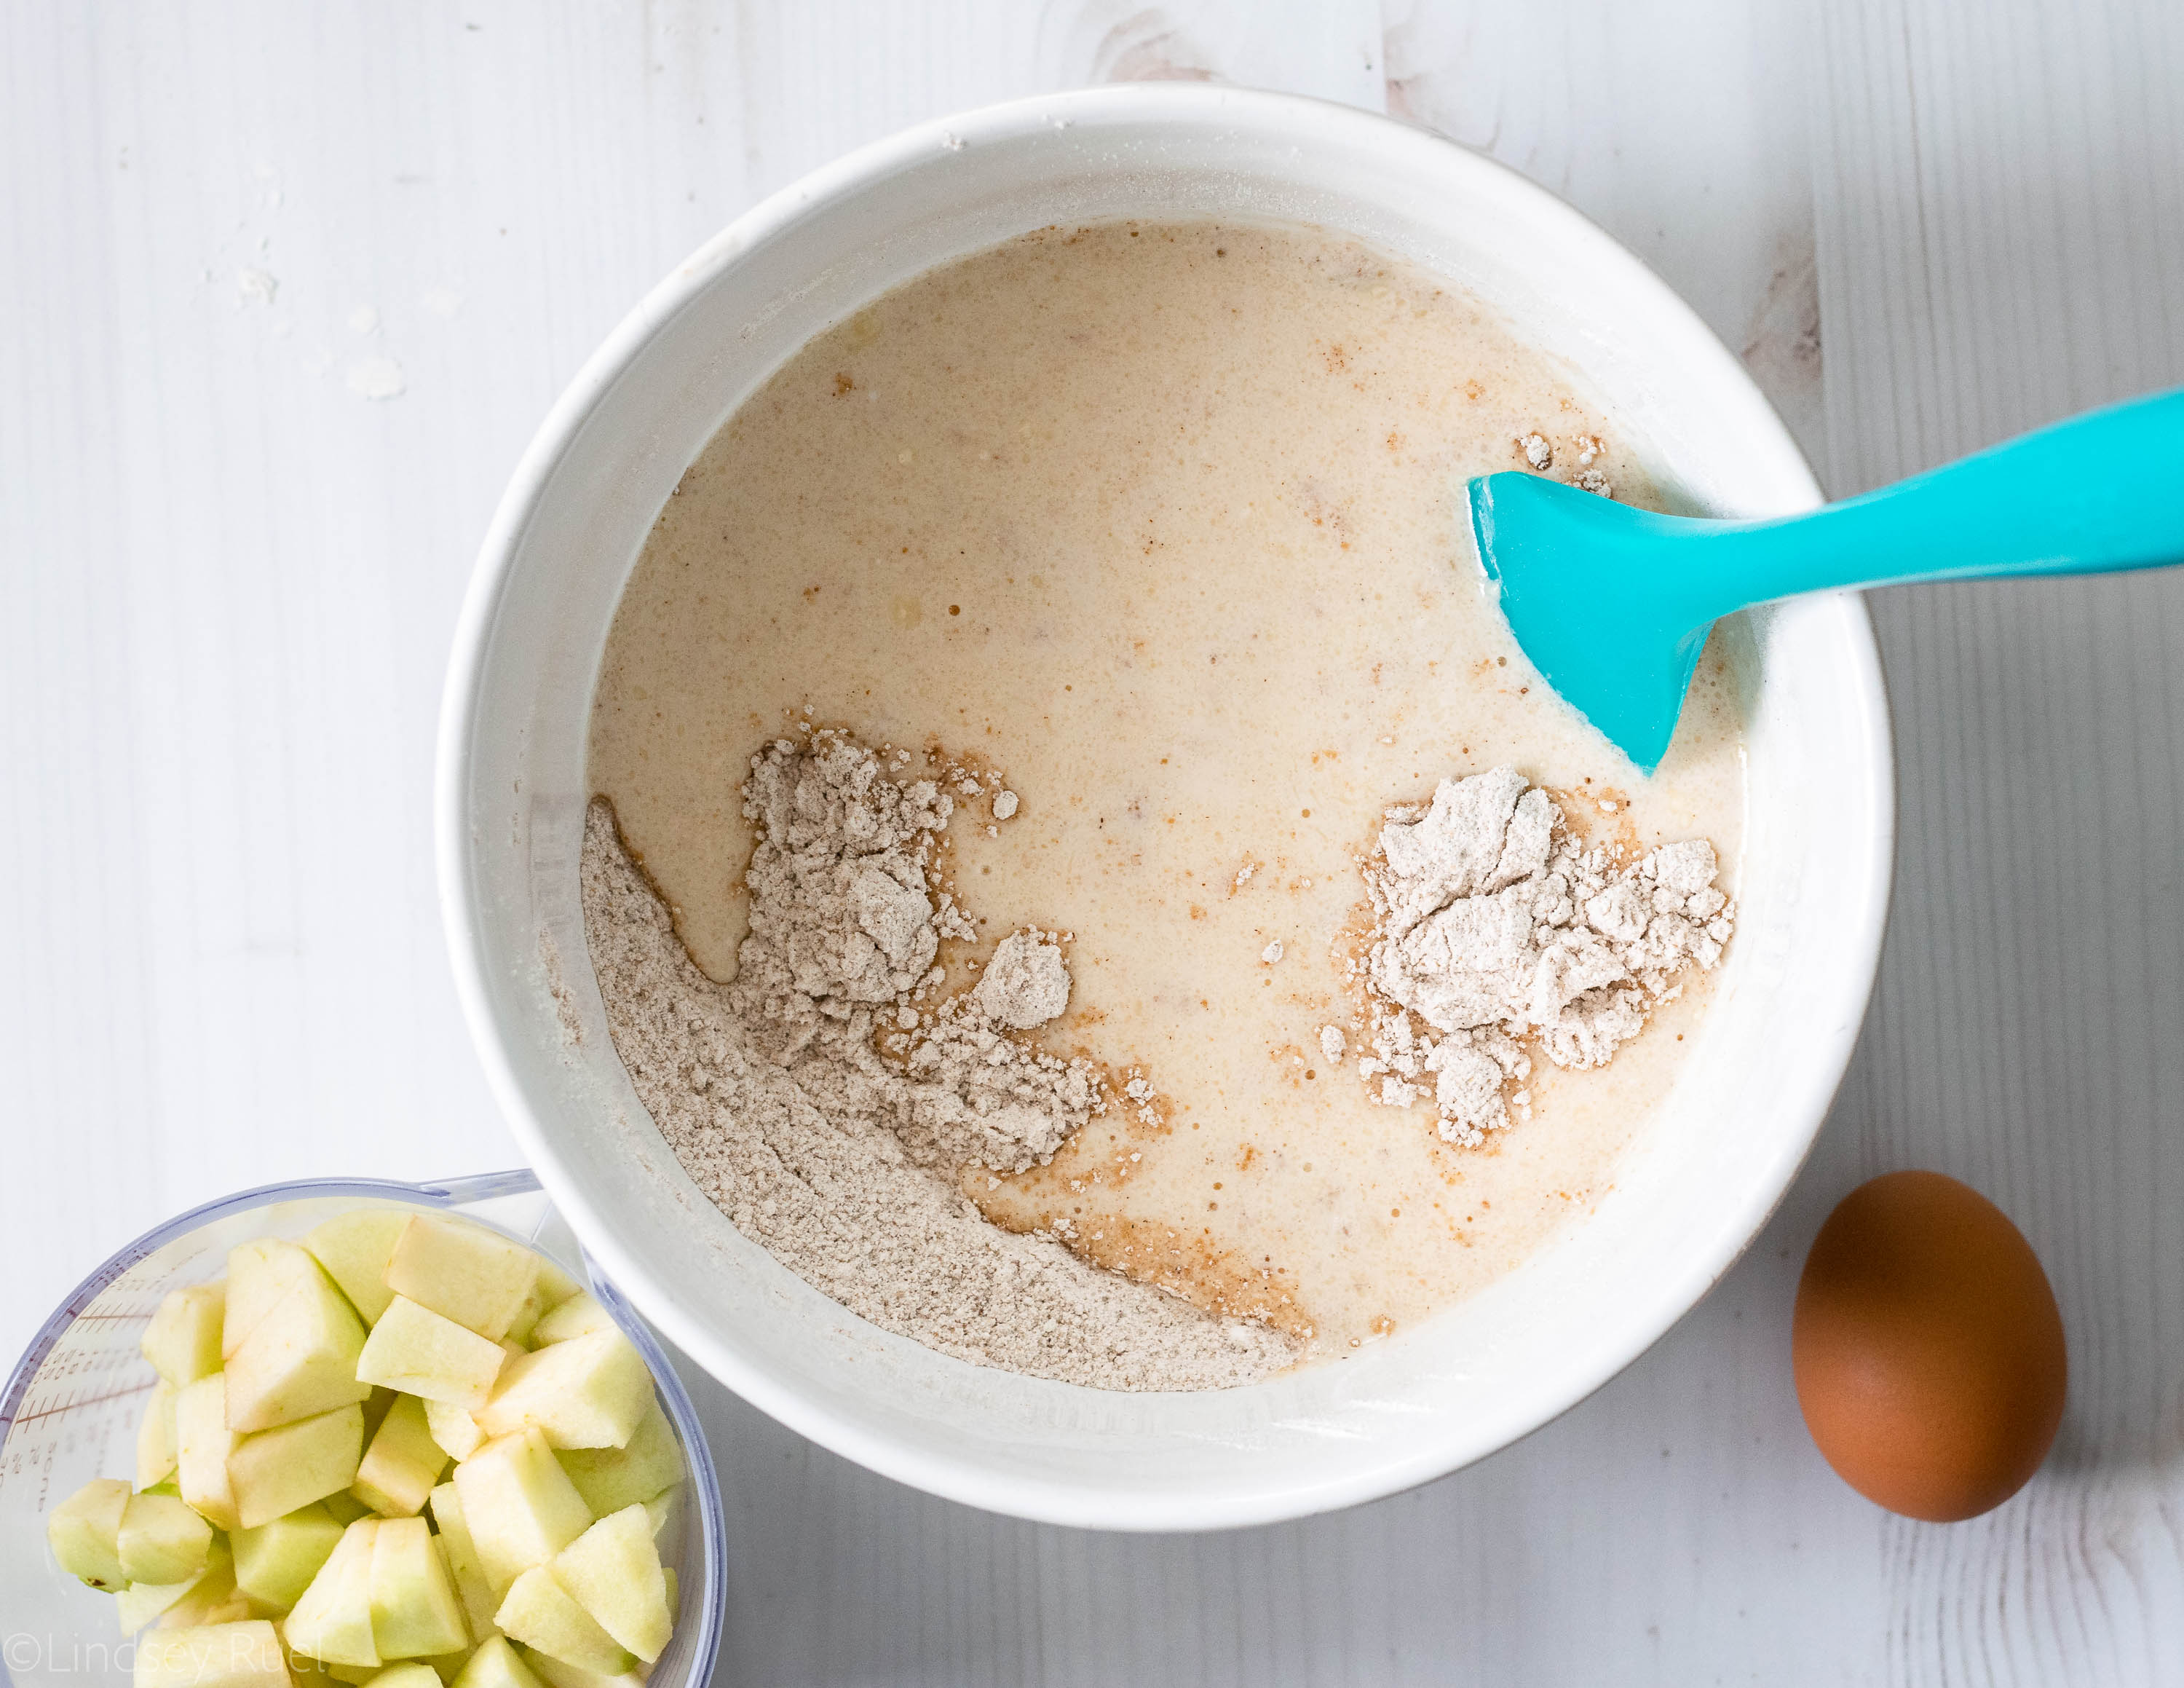
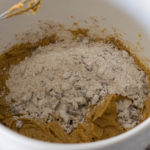
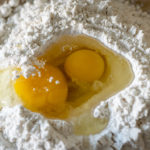
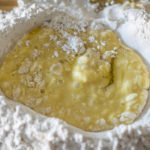
Pour the wet ingredients into the dry and now add the egg. Mix until the batter until it is just combined. 

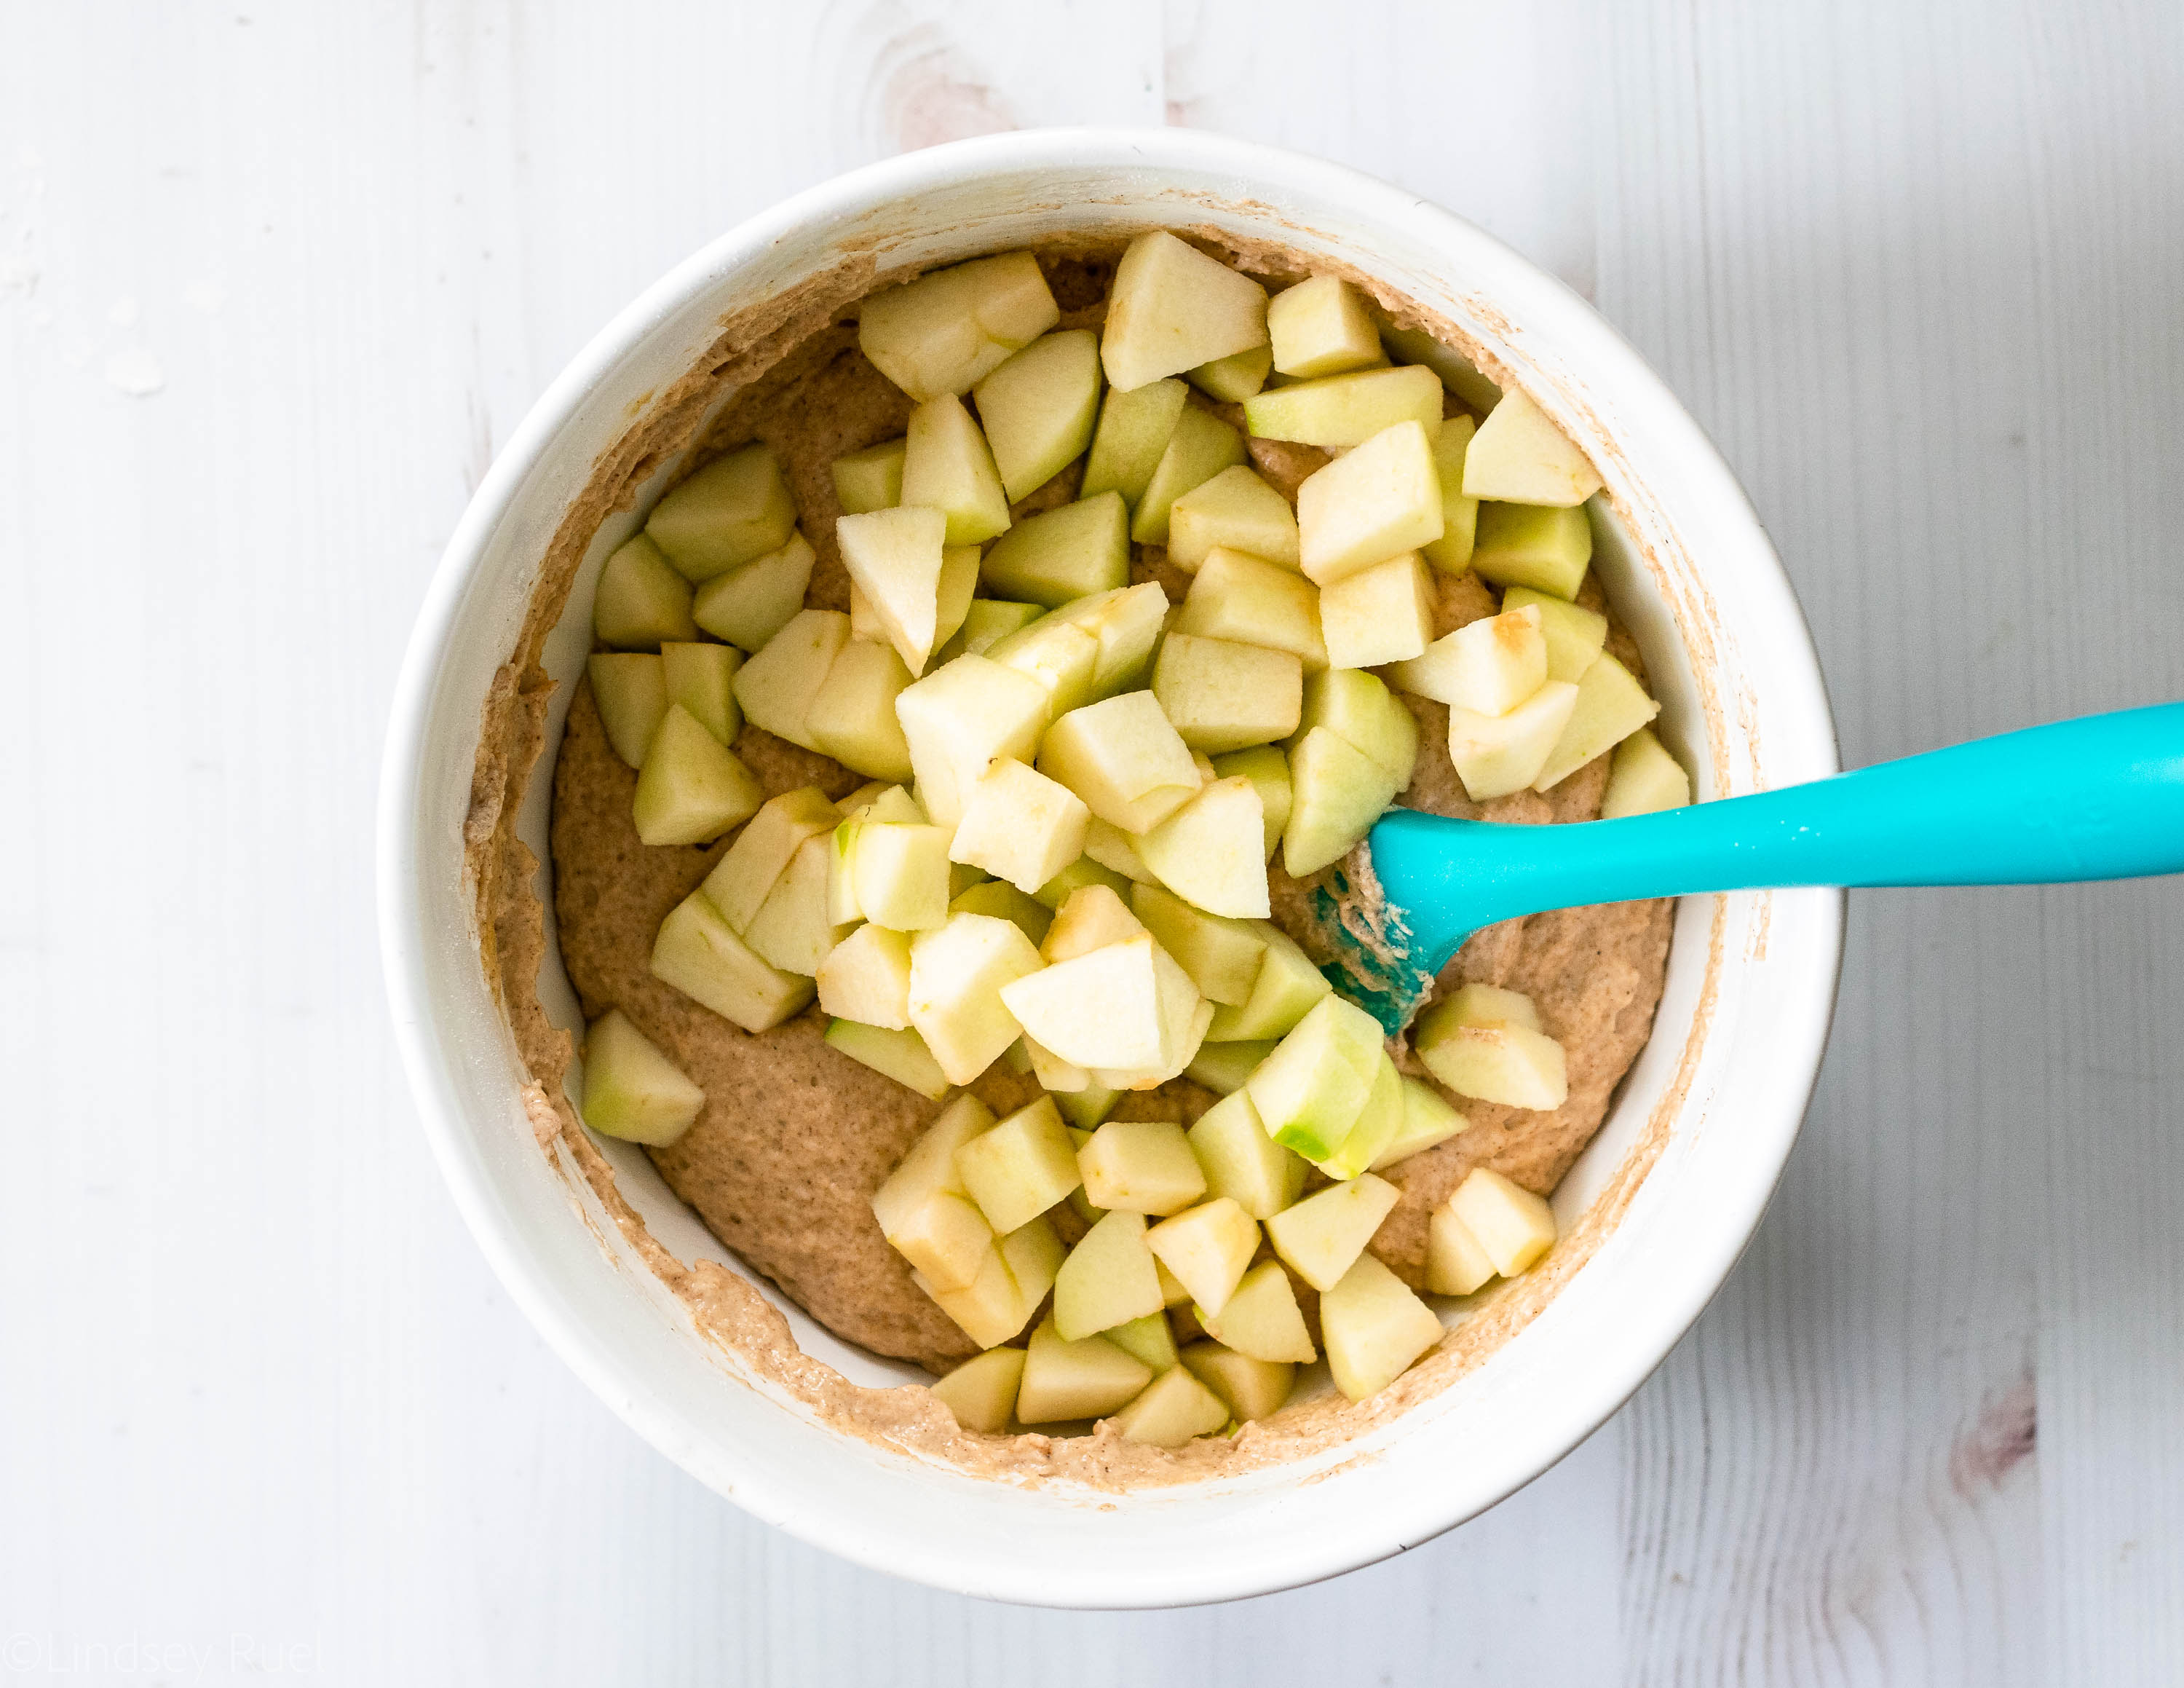
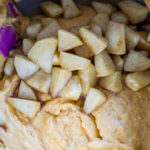
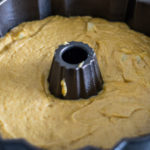
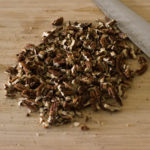
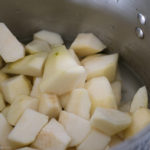
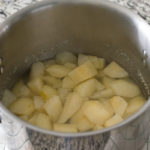
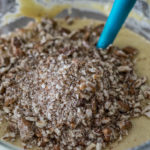
Fold in the chopped up apples then portion the batter into the muffin pan.

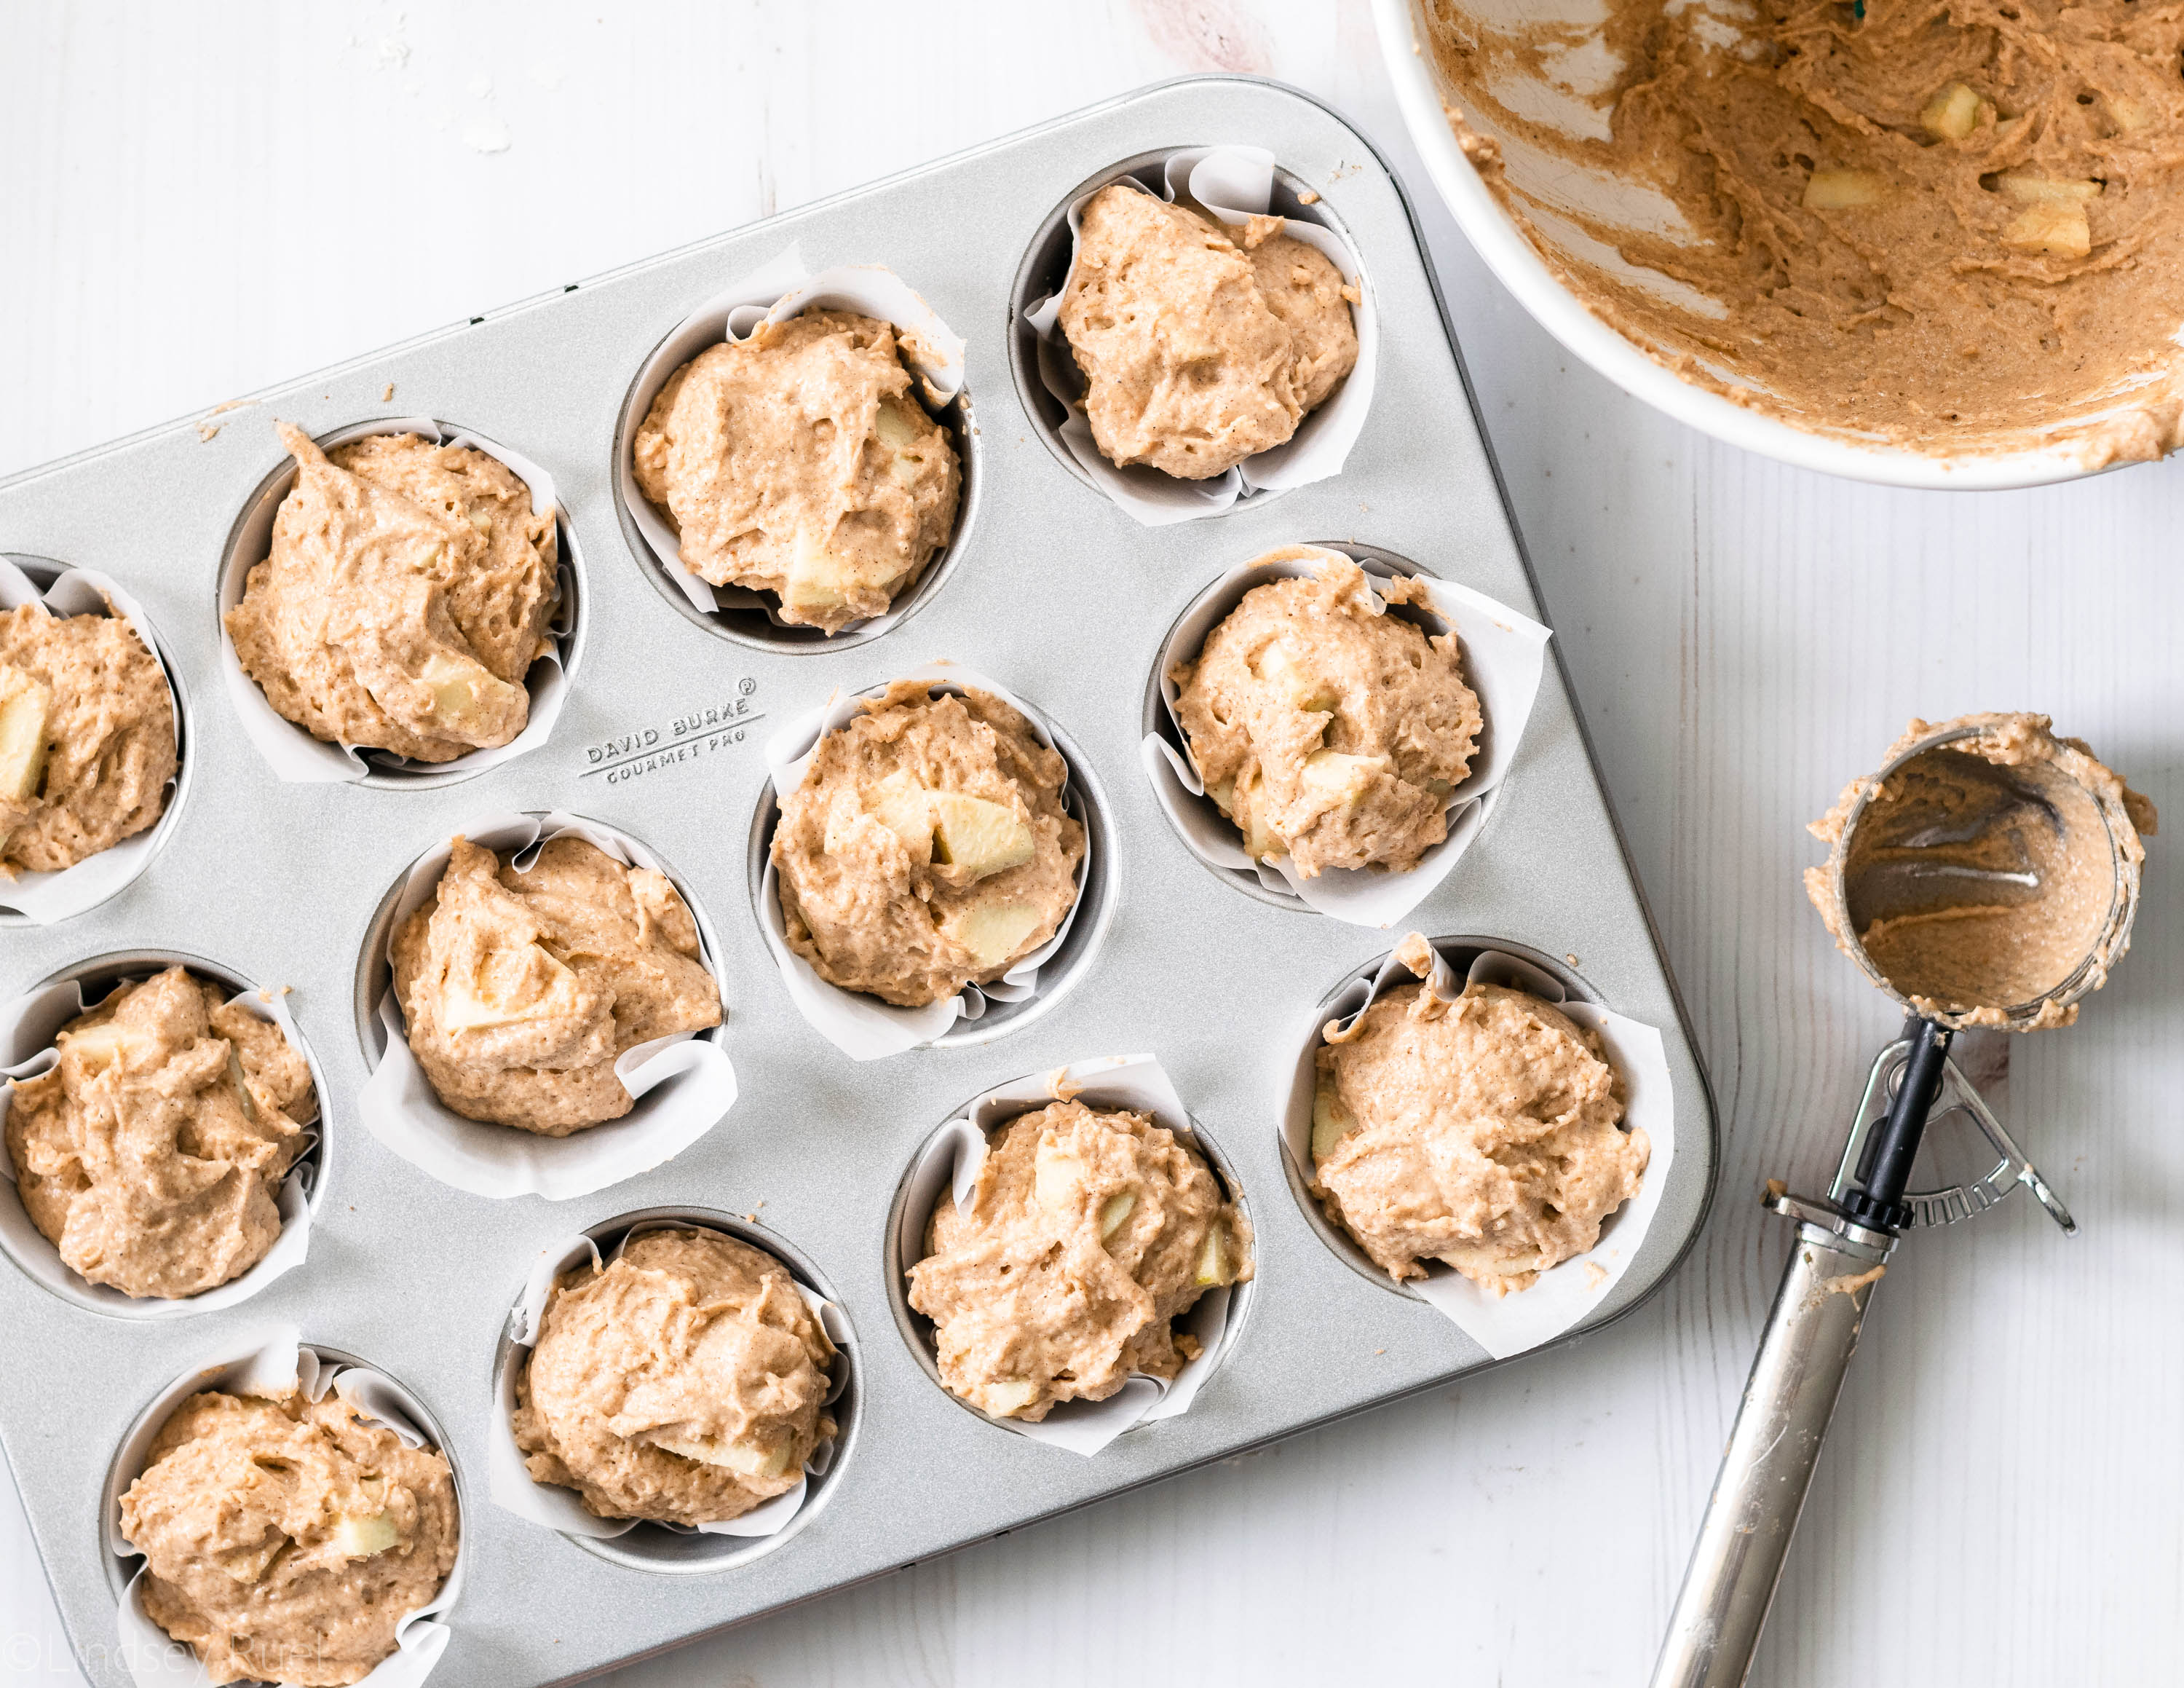
I like to use my ice cream scoop for this because it seems to make the perfect sized muffin!

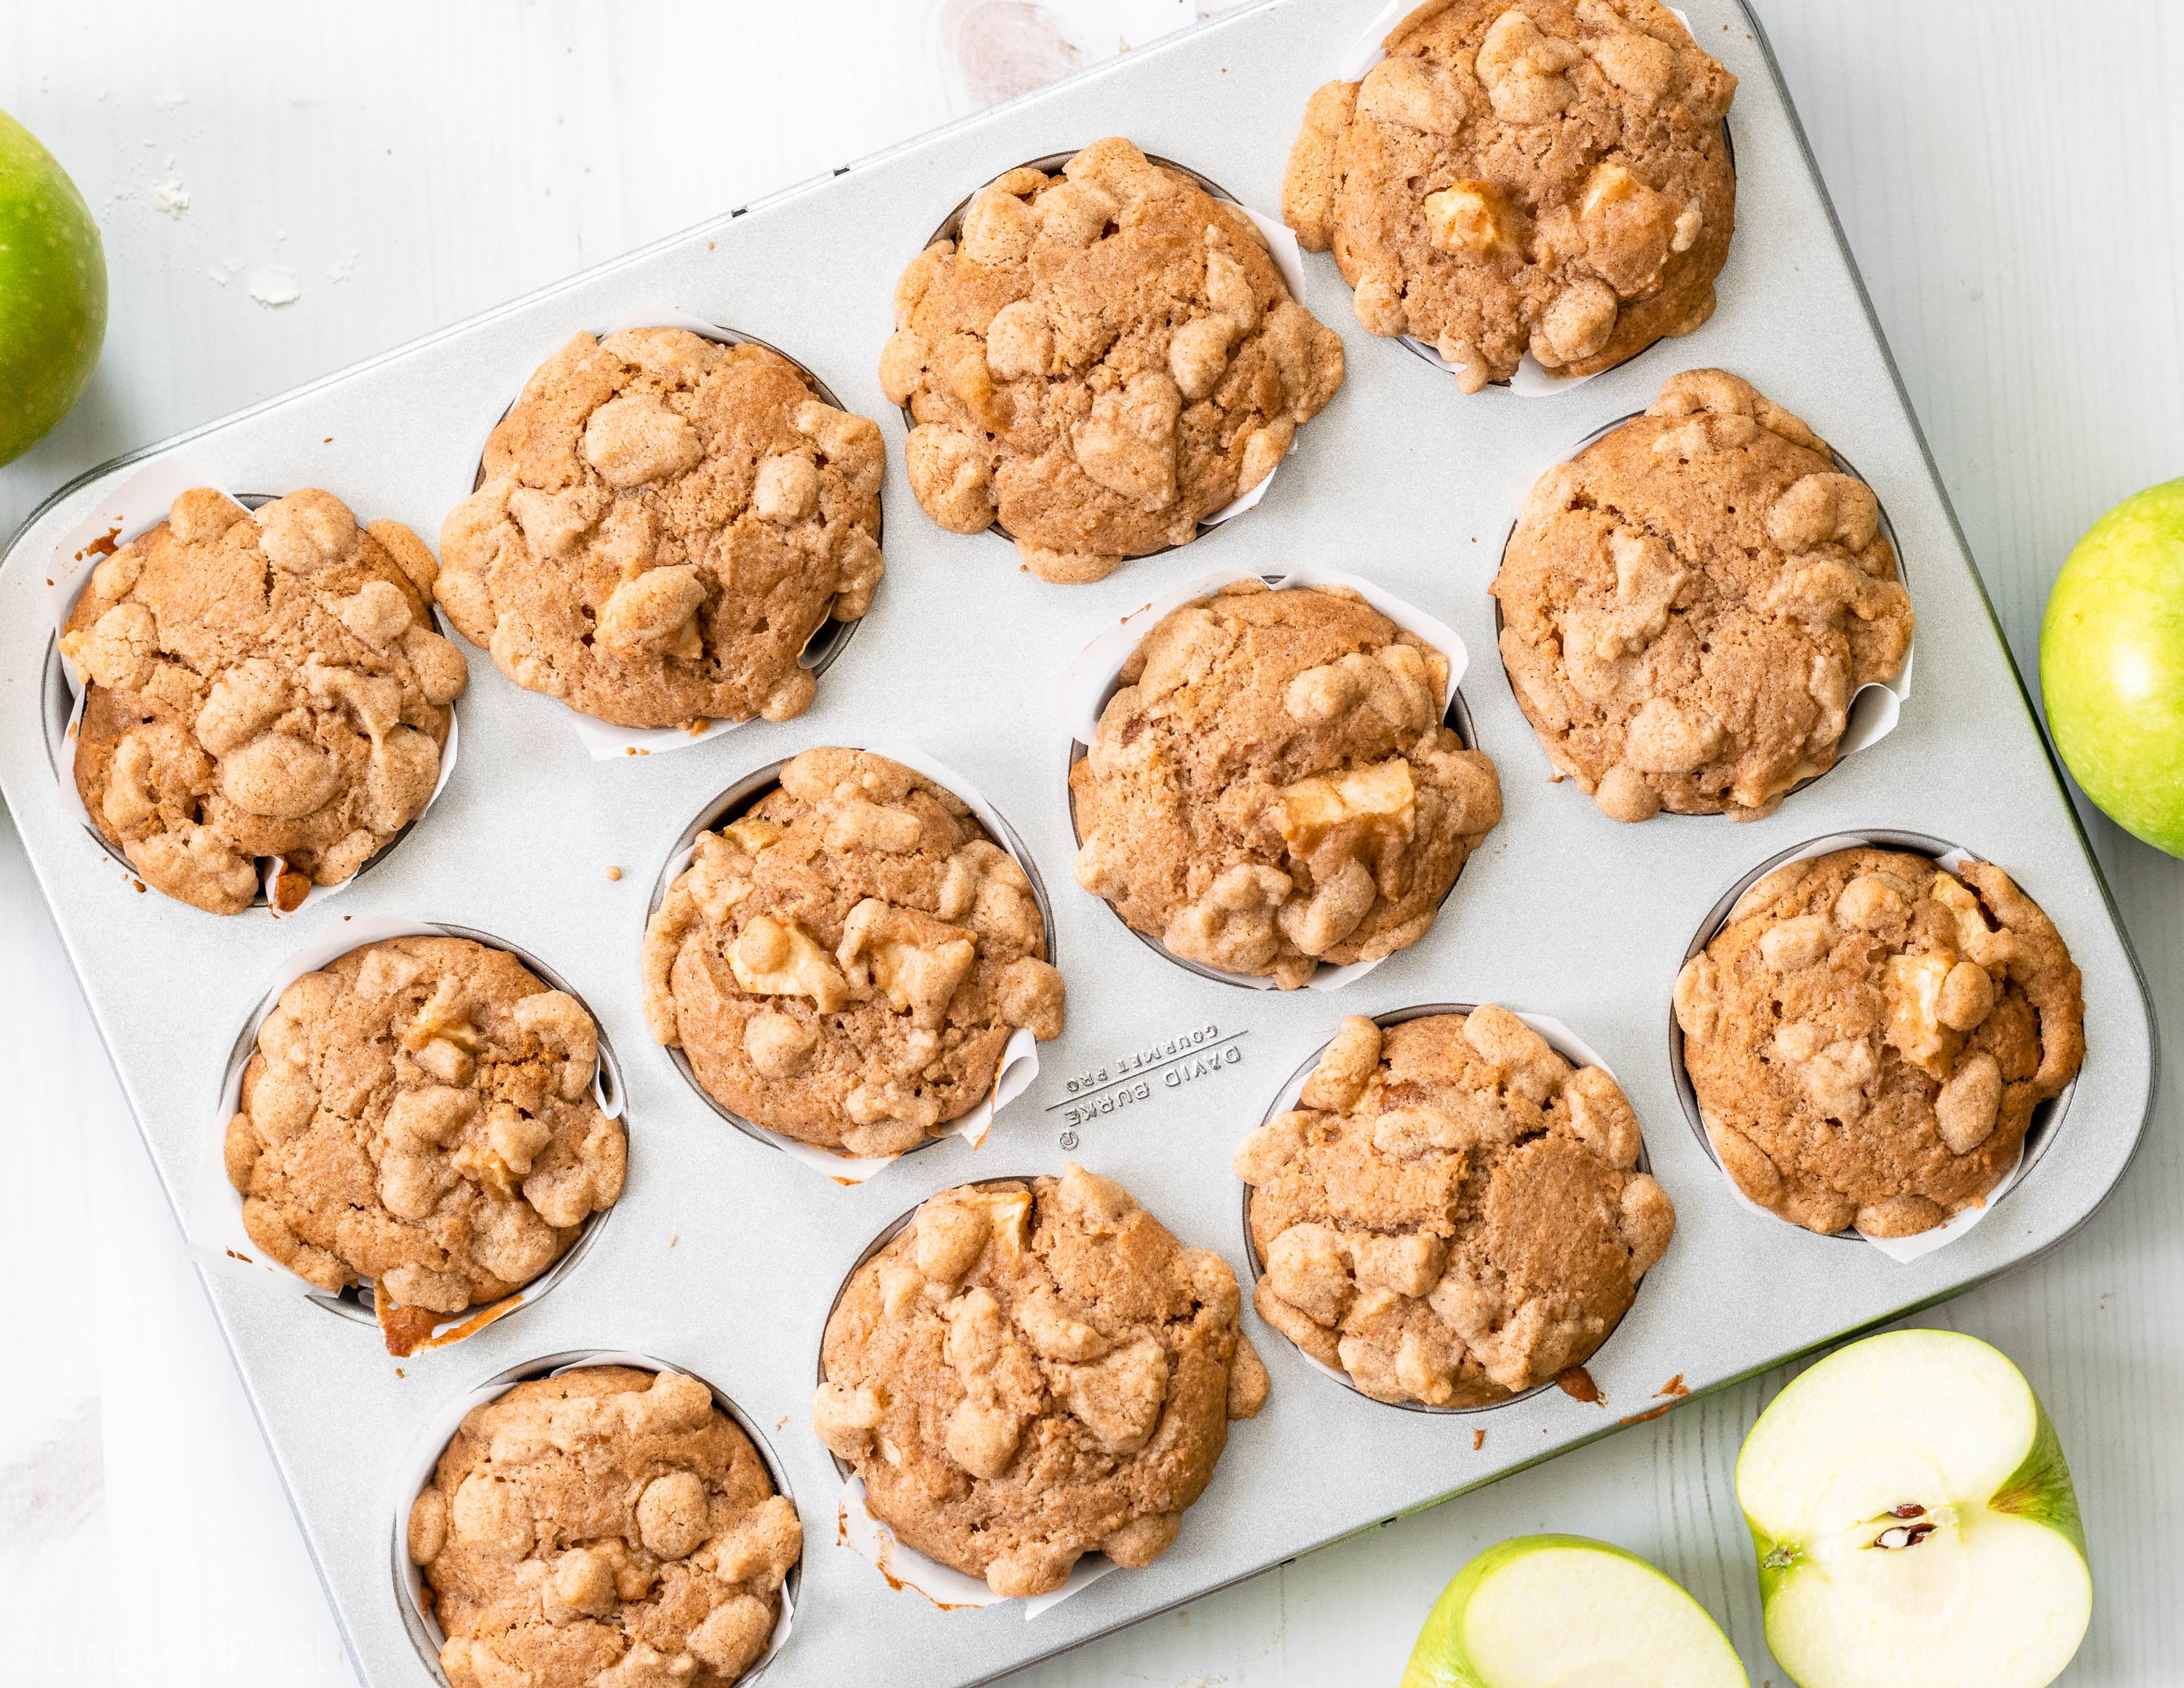
Bake the muffins at 350 degrees for 20-25 minutes, or until they are nice and brown on top and a toothpick comes out clean.

Definitely let them cool for about 10 minutes before trying to eat. The apples inside will be steaming hot if you dive into them too early!

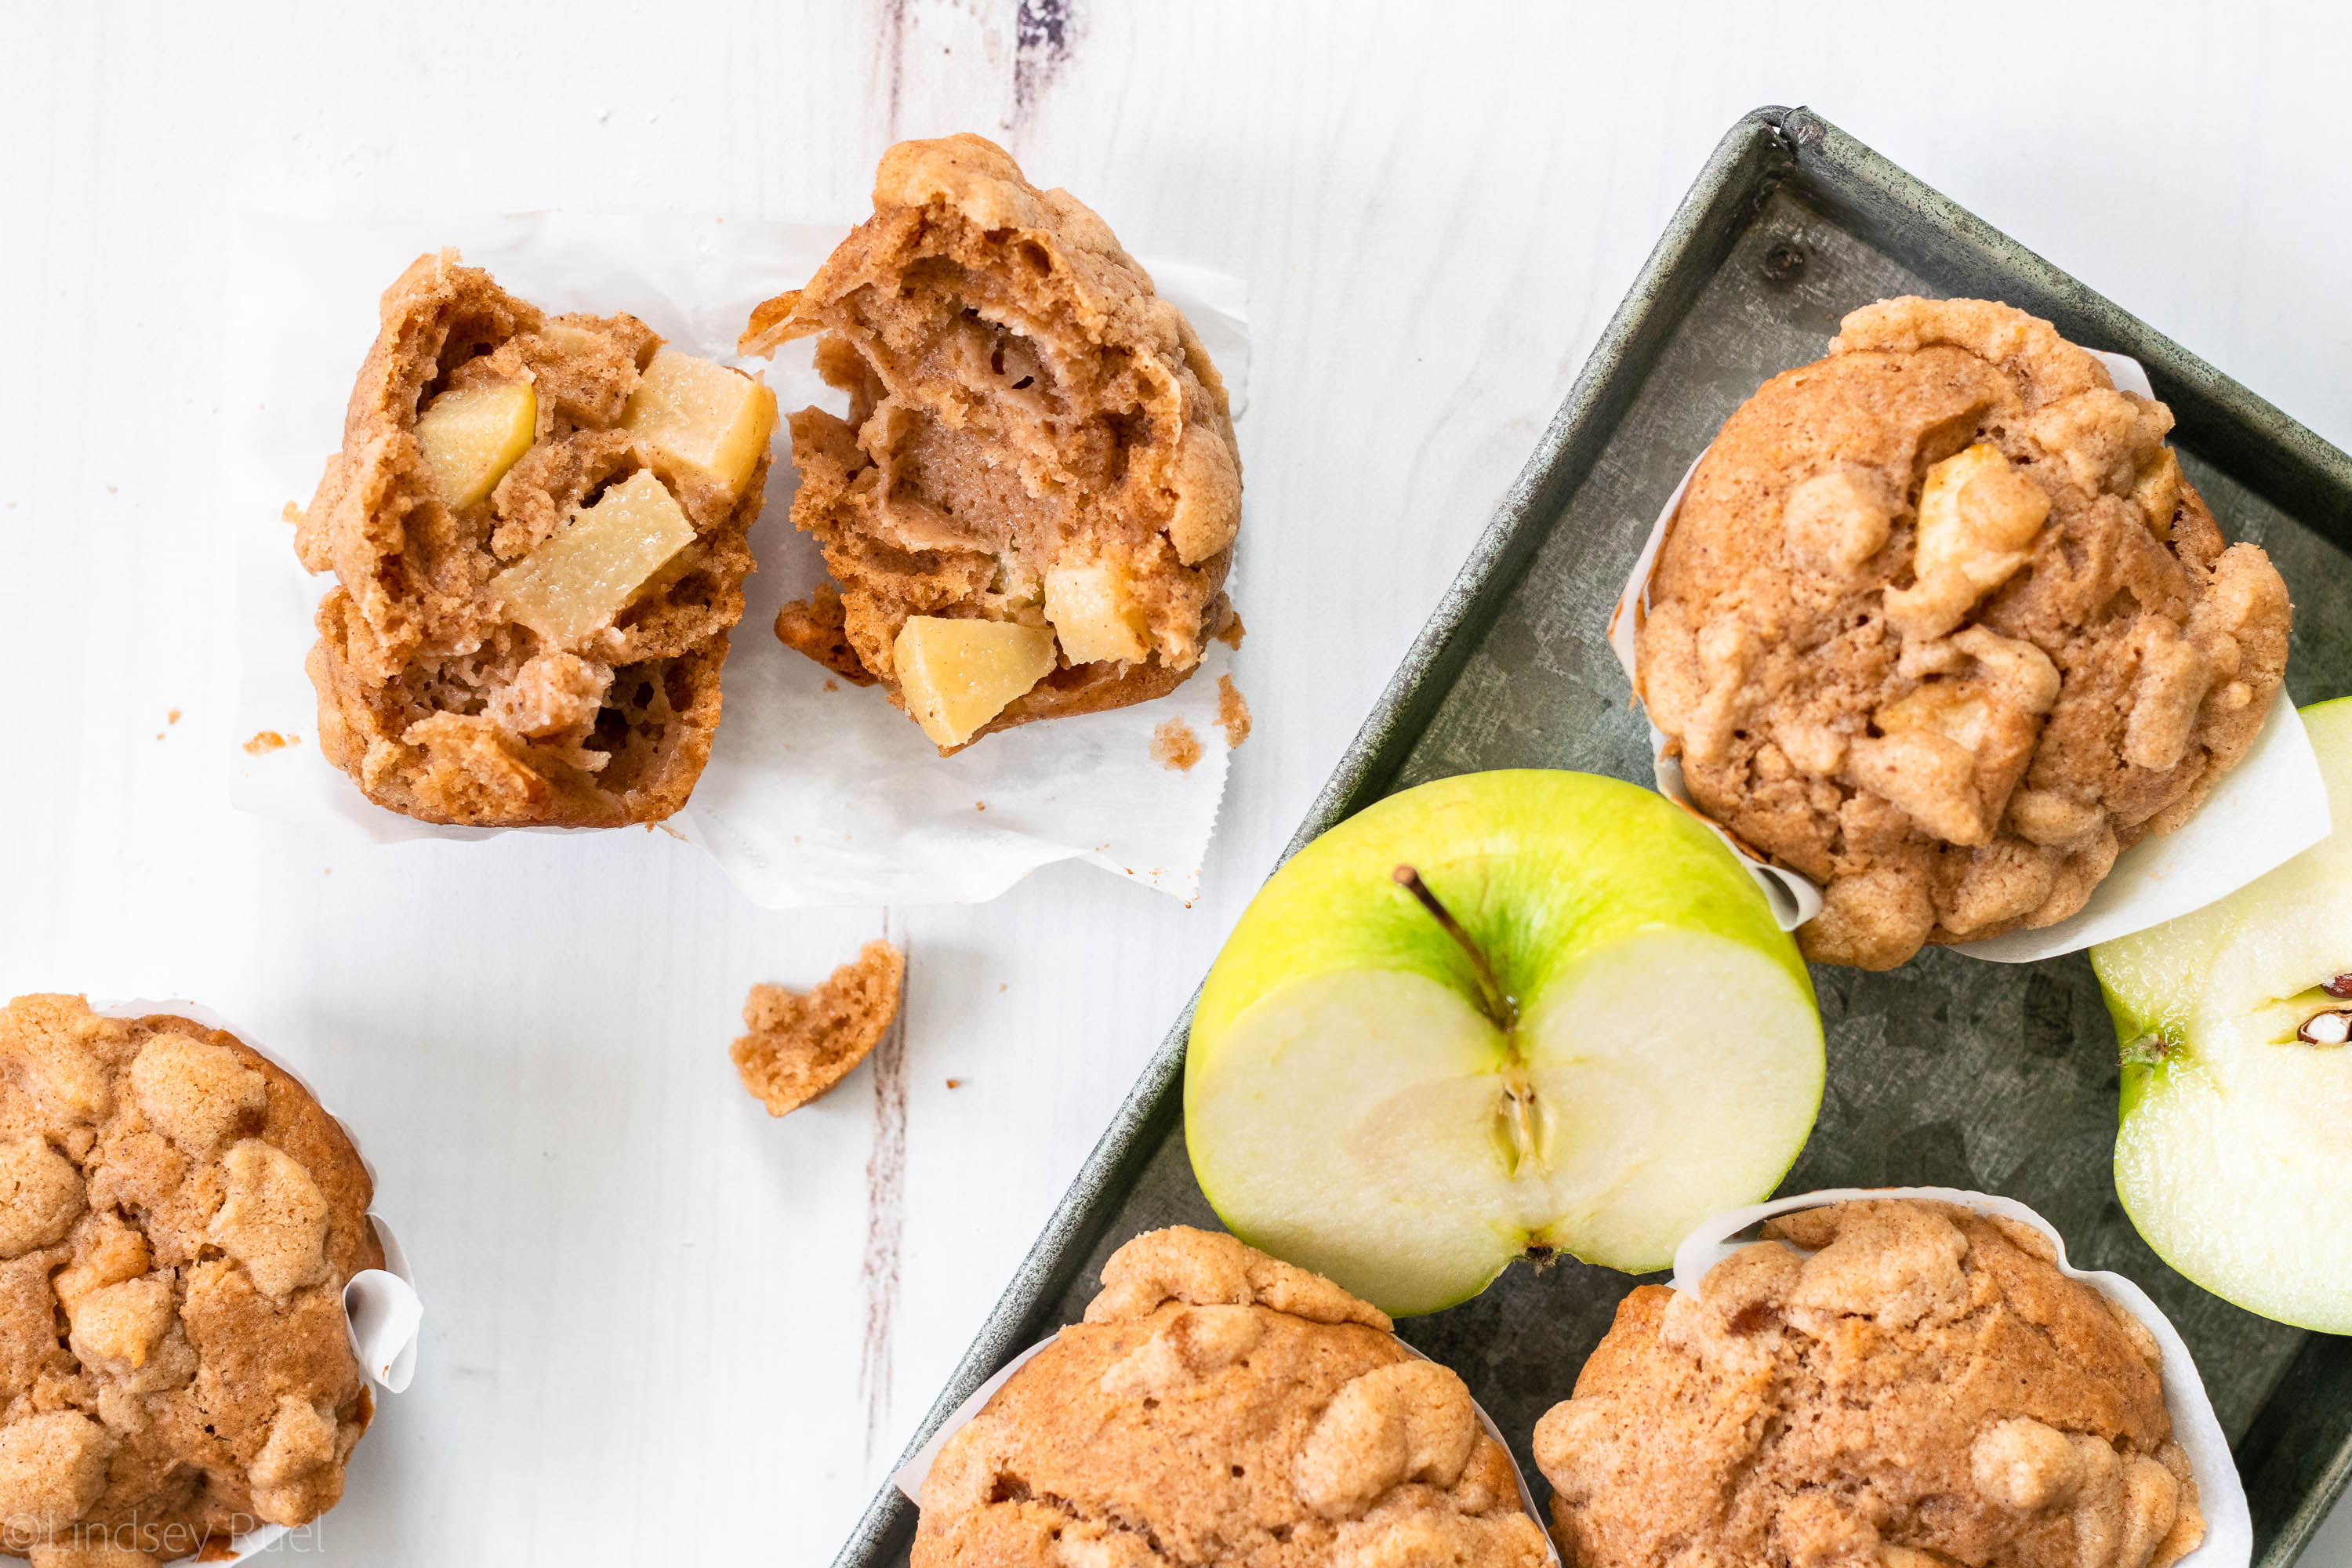
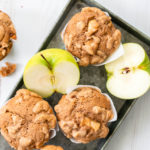
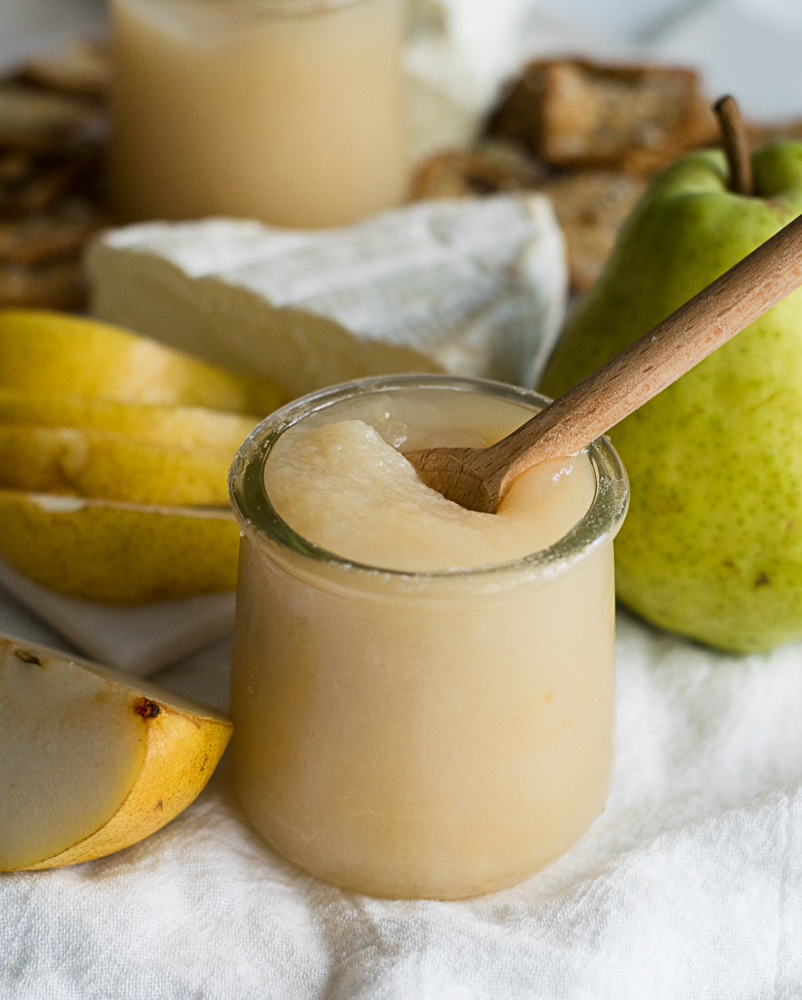
After that, have at them! They are a wonderfully delicious breakfast treat any time of year, but especially now as we head into apple season! 

This is a great recipe to have under your belt if you plan on going apple picking this year!


Recipe

Ingredients

  • 1 cup all-purpose flour
  • 1 cup whole wheat flour
  • 1/2 cup brown sugar
  • 1/4 cup granulated sugar
  • 1 tbsp apple pie spice
  • 1 tbsp baking powder
  • 1/4 tsp baking soda
  • 1/4 tsp salt
  • 1/2 cup butter, melted
  • 1/2 cup applesauce (unsweetened)
  • 1/2 cup sour cream
  • 1/4 cup milk (warm or room temp)
  • 1 tsp vanilla
  • 1 egg
  • 2 apples, peeled and chopped (approx. 2 cups)

Instructions

  1. Preheat oven to 350 degrees. Line a muffin tin with liners and set aside.
  2. In a large bowl, combine flours, sugars, spices, baking powder, baking soda, and salt. Whisk until there are no more lumps.
  3. In a small bowl or measuring cup, combine butter, applesauce, sour cream, milk, and vanilla. Whisk until smooth.
  4. Pour wet ingredients into the bowl with dry ingredients. Add in the egg and mix until all ingredients are combined.
  5. Fold in the apple pieces.
  6. Scoop approximately 1/4-1/3 cup of the batter into each muffin tin cavity. Bake at 350 degrees for 20-25 minutes until the tops are brown and a toothpick inserted into the center comes out clean.
  7. Let cool for 10 minutes before serving.

/ Filed In: Breakfast, Eat, Other Sweets New
Tagged: apple, apple pie spice, apple spice, Fall, muffins

Thanksgiving Turkey Cake

November 21, 2017

This is about the closest thing I am going to get to a Thanksgiving turkey this year. And I am totally okay with that!

We had friends over for a little Friendsgiving this past weekend and I used it as an excuse to make this Thanksgiving turkey cake. I had seen quite a few similar cakes on Pinterest and Instagram, so I thought I would throw my hat into the ring. 

I think he turned out rather handsome, if not a little goofy looking. But there is nothing wrong with goofy.

To make him, (Yes, I decide that it is a “him” and I named him Tom. Tom the Turkey.) I made one batch of this pumpkin spice cake. I also whipped up a batch of my cream cheese frosting for the filling. Since I wanted his outer layer to be brown, I made a chocolate ganache which I then whipped to form a frosting.

Chocolate ganache is actually pretty simple to make. However, I totally understand if you want to run out and grab a can of chocolate frosting or bake your own chocolate buttercream.


All you do is pour hot cream over chopped chocolate and let it melt. Once it has completely melted, you toss it in the fridge to harden. I recommend doing this overnight as it does take a few hours. When it is nice and set, transfer it to a bowl of a stand mixer and whip it up. Ta-da! 

I used that whipped chocolate ganache to completely cover my entire cake. 

Then I stuck in the feathers that I made with my red, orange, and yellow candy melts.

Added some eyes using leftover cream cheese frosting.

And a beak and a little red thing….anyone know what that’s called?

Now you can make your very own Tom the Thanksgiving turkey cake! But you don’t have to name your’s Tom. You don’t have to name it at all. It’s kind of weird to name your food.

Recipes used:

  • How to Cake It’s Pumpkin Spice cake
  • My Cream Cheese Frosting
  • Savory Sweet Life’s chocolate ganache

Supplies used:
[show_shopthepost_widget id=”2907438″]
 

/ Filed In: Cakes and Cupcakes, Cakes New, Desserts, Eat
Tagged: cake, cake decorating, Fall, pumpkin, Thanksgiving

Sweet Potato Meringue Pie

November 16, 2017

Sweet potato pie is one of those Thanksgiving traditions I was completely oblivious to until I moved to the South. The extent of my knowledge of sweet potatoes for Thanksgiving started and ended with sweet potato casserole. You know, that super sweet “casserole” that is topped with loads of marshmallows and somehow always gets served as a side dish and not as a dessert. Yeah, I never quite understood sweet potato casserole. 

I totally understand sweet potato pie! If you are going to dress sweet potatoes up with sugar and butter, call it what it is! Dessert! Put it in a pie crust and call it a pie. It’s delicious. And, if you just can’t seem to get on board with sweet potatoes without the marshmallows, I’ve got you covered! Just top that baby off with a healthy meringue topping that is just as good (dare I say, better?) than a marshmallow topping. 

It’s the best of both worlds!

Here’s how I made it:


Starting with the pie crust, I rolled out my favorite pie dough and transferred it to my pie dish. 

Then I covered the pie dough with tin foil and filled it with pie weights to partially bake (par-bake). 

Note: I was a little hasty in par-baking the crust and didn’t freeze it beforehand so it ended up shrinking. To prevent shrinkage (hold the jokes), freeze the pie dough in the pie dish before placing it in the oven.


While the pie crust baked, I microwaved the sweet potatoes until they were completely soft and I could easily spoon the potato away from the skin. 


I added the sweet potatoes, along with sugar and butter in a large bowl and gave it a good whisk until it was smooth. Then I added the egg, egg yolks, cream, vanilla, and spices and gave it another good mix until it was completely smooth. Then all of that got poured into the par-baked pie crust.

Custard pies can be a little tricky to know when they are completely done baking. The pie should still have a little wiggle in the middle, but the top should be totally dry and the pie closest to the crust should be set. 

Once the pie reached that point, I removed it from the oven and let it cool to room temperature. It will continue to set as it sits out and cools. 

I used the waiting time to clean up and make my meringue. I used the French method, which I describe in detail in this buttercream post. Once the meringue formed semi-stiff peaks, I just dumped it right onto the pie.


You can spread your meringue out however you like. I wanted it to look a little spiky so first spread the meringue our across the pie, then used the spatula to form little peaks across the top by pulling the spatula up in short quick motions. 

Finally, I placed the pie back in the oven under the broiler to caramelize the meringue. You could also use a kitchen torch if you wanted to have more control over your caramelization.

But, you know, I like to live life on the edge sometimes. I just stick my pie under the broiler and wait to see what happens. 

I loved cutting into this and seeing that meringue piled high on top. The meringue may be my favorite part of this pie! 

Meringue is just so perfect on top of a dense custard pie like sweet potato pie. That super soft meringue just balances everything else out. It’s like a lighter version of a whipped cream topping. It provides a little extra sweetness, but not nearly as much as a marshmallow topping would, and helps cut through the richness of the pie itself.

Have I convinced you to make this for Thanksgiving? Well, I certainly convinced myself!
[show_shopthepost_widget id=”2898553″]
 

[yumprint-recipe id=’145′]

/ Filed In: Eat, Other Sweets New, Pies and Tarts
Tagged: Fall, meringue, pie, sweet potato, sweet potato pie, Thanksgiving

Caramel Apple Oatmeal Cookies

November 14, 2017

A couple weekends ago I put out an Instagram poll asking folks what I should bake over the weekend. Most people voted between pumpkin pie, apple pie, cookies, and Rice Krispie treats (so, just about everything I posted last week). One follower had a very specific request: Caramel Apple Walnut Oatmeal Cookies. 

I mean, those just sounded too good NOT to make so I added it to my list of baking experiments.

Fortunately for all of us, they turned out amazing! Imagine a soft oatmeal cookie wrapped around a hunk of gooey caramel. Oh baby! Fresh from the oven, there is nothing better!


I started off by making a basic oatmeal cookie dough. But I replaced 1/2 cup of butter with shredded apple. To shred the apple, I took the apple straight to a box grater and grated it until I hit the core. The shredded apple adds lots of flavor, some moisture, and cuts out some of the fat from the butter! You could almost call these cookies somewhat healthy. 

Except for that huge chuck of caramel right in the middle. That really negates any of the health-factor from the apples.

I scooped out balls of the cookie dough and stuck a caramel square right in the middle. Then I covered up the caramel with a bit more dough and rolled it into a ball.

After a quick stop in the oven these cookies are ready for the taking! I highly recommend only letting these puppies cool for a few minutes so that you can enjoy them while the caramel is still ooey gooey.

However, they are still perfectly yummy at room temperature, but the caramel will just be chewy instead of gooey.

If you don’t want one chunk of caramel in the middle of the cookie, you could instead add caramel chips. That was actually the original recommendation by the follower who posted this recipe idea. Unfortunately, I didn’t have any caramel chips and was too lazy to go to the store, so caramel squares it was! 

It basically comes down to whether you want caramel disbursed throughout your cookie or one caramel center surprise.

There are no wrong answers. It’s caramel. And apples! And cookies! Those will always be the right answer in my book!

 
[show_shopthepost_widget id=”2894812″]

[yumprint-recipe id=’144′] 

/ Filed In: Cookies, Cookies New, Eat
Tagged: apple, caramel, caramel apple, cookies, Fall, oatmeal cookies, pecans

Maple Pecan Pumpkin Bread

October 10, 2017

I know everyone is a little pumpkin obsessed these days (present company included), but there is one Fall flavor combination that I think I prefer even more: maple pecan! Even Starbucks is getting on the bandwagon with their maple-pecan latte, which is delicious, btw.

Last Fall I made this maple pecan cake which may just be my favorite cake of all time (it tastes like a giant stack of pancakes). So, this Fall I couldn’t wait to get the gang back together and make some more delicious maple pecan treats. Since it is October after all, I couldn’t leave pumpkin completely out of the mix. Hence, we have maple pecan pumpkin bread!


This recipe is very similar to my glazed pumpkin bread recipe. The only changes I made were to replace some of the sugar with maple syrup to give the bread a subtly sweet maple flavor; it also makes the bread extra moist! 

To start, cream together butter, brown sugar, and maple syrup for about a minute, then add in the eggs and pumpkin and mix until the are incorporated. Move that bowl aside and whisk together the flour (in this case I used both AP and whole wheat flour), baking powder, baking soda, and pumpkin spice just until there are no lumps or clumps. Then mix half of the flour mixture into the butter mixture. 


The other half of the flour mixture will actually be tossed with the chopped pecans before being mixed in with the rest of the batter. This helps keep the pecans evenly disbursed throughout the bread.

Then, pour the batter into a loaf pan and sprinkle a few extra pecans right on top. Finally, bake the loaf at 350 degrees for almost an hour. Just sit back, clean some dishes, and wait for your kitchen to fill up with the most wonderful maple, pecan, pumpkin spice scent. Seriously, someone should bottle that scent and make it into a candle!

The hardest part of most recipes (for me, at least), is waiting for the baked goods to cool before I dig in. Since this pumpkin bread takes almost an hour to bake, by the time it comes out of the oven the anticipation is killing me. Oh, and the smell. Have I mentioned how good it smells? (Seriously, someone make this a candle! I will buy your first 20.) Yeah, that won’t help either. 

But I encourage you to wait as long as possible before slicing into this amazing loaf. It will take at least 20 minutes for it to cool enough to cut into without crumbling into pieces. 

The wait will be worth it. 

Promise.
[show_shopthepost_widget id=”2849857″]
 

[yumprint-recipe id=’137′]

/ Filed In: Breakfast, Eat, Other Sweets New
Tagged: Fall, maple, pecan, pumpkin, pumpkin bread, pumpkin spice, quick bread

Fall Pumpkin Cookies

October 5, 2017

While Fall is one of my favorite seasons (who doesn’t love reprieve from the hot, humid Summer?), I still end September dragging my feet to get into the “Fall spirit”. But come October, and I am in the full Fall mode! In the last week alone, I have made four pumpkin spice recipes. This has got to be a new personal record. 

These cookies are actually one of those recipes. On Tuesday I shared my pumpkin spice sugar cookies which are freaking delicious. They only deserve the best Fall decoration!

I mean, you can’t make pumpkin spice sugar cookies and not make them into adorably decorated pumpkin cookies, right? 

You should know by now that I love throwing royal icing flowers on just about every cookie I make. They are fun way to really dress up a cookie. Plus people are generally pretty impressed with flowers on cookies (little do they know, it’s incredibly easy!). 

I also drew inspiration from my own Mother’s Day cookies and made some floral Fall letters, which I love. Again, they look so intricate and detailed, but really the piping tips do all the work. 

Speaking of which, these are the piping tips I used for the flowers and leaves (all are Wilton brand, most are included in this set):

  • #14 (Rosette)
  • #16 (Rosette)
  • #24 (Rosette)
  • #225 (Drop Flower)
  • #107 (Drop Flower)
  • #349 (Small Leaf)
  • #67 (Big Leaf)

I also used couplers along with my piping bags so that I could switch out my piping tips. For instance, on the pumpkins, I piped red rosettes, but on the letters, I switched to a drop flower tip. Couplers just make it easy to switch out colors and piping tips so you don’t have to have a million different tips. 

Wouldn’t these be so great for Thanksgiving!? I also made a bunch of letters to spell out “Thankful”, which would be a really pretty display on a Thanksgiving dessert table. 


Recipes:

  • Pumpkin Spice Sugar Cookies 
  • Classic Sugar Cookies
  • Royal Icing

Supplies Used:
[show_shopthepost_widget id=”2843280″]
 

/ Filed In: Cookies New, Decorated Cookies, Desserts, Eat
Tagged: cookie decorating, cookies, decorated cookies, Fall, pumpkin spice, royal icing

Pumpkin Spice Sugar Cookies

October 3, 2017

You just can’t escape it. Everywhere you look, something is flavored pumpkin spice. Coffee, candles, even peanut butter. 

Well, friends, if you are looking for some respite from the pumpkin spice overload, this is not the place. Today I am sharing my pumpkin spice sugar cookie recipe that is every bit as good as it sounds! (So good, my mother and law has already requested that her Christmas cookies are pumpkin spice flavored.) It’s my same favorite sugar cookie recipe spiced up with just the right amount of pumpkin spice. 

If you have made my sugar cookie recipe (or any cookie recipe for that matter), you know that it starts with butter and sugar. 

I like to cream the butter and sugar until it’s light and fluffy. Then I mix in the eggs and vanilla until the eggs are completely incorporated (and emulsified) into the butter.

To the butter, sugar, eggs, and vanilla I add in the flour and spices. Of course, most recipes will tell you to mix the flour and other dry ingredients together in a separate bowl. But I like to live life on the edge and just add them straight into the bowl with the other wet ingredients. 


For the spices, I used a mixture of cinnamon, nutmeg, cloves, ginger, and a bit of allspice. Then I mix everything together until it’s just combined! Once the dough is ready, I form it into a disc then wrap it in plastic wrap and place it in the fridge until I am ready to roll out the dough.

I find that rolling out the dough is so much easier when the dough is a bit stiff. The cookies hold their shape much better and are less likely to stick to counter. 

To make sure all my cookies are exactly the same thickness, I use these rolling pin bands. I also love this rolling pin! 

While the cookies bake, they will fill your kitchen with the most wonderful smell. Think about how great your kitchen smells with you make normal sugar cookies. Then add pumpkin spice!

You don’t even have to decorate them, and I guarantee they will be a hit! But if you would like to decorate them, I will show you how I did it later this week! You can make them simple pumpkins or add some more fun details like burlap, flowers, and leaves. They are the perfect cookies for Fall!

 
[show_shopthepost_widget id=”2840452″]

[yumprint-recipe id=’136′]

/ Filed In: Cookies, Cookies New, Desserts, Eat
Tagged: cinnamon, clove, cookies, Fall, ginger, nutmeg, pumpkin spice, sugar cookies

Simple and Easy Pear Sauce

September 21, 2017

Wine country is pretty much adult Disneyland, don’t you think? You are surrounded by so many great vineyards creating amazing wines, and also surrounded by lots and lots of good food. 

A few weeks ago my husband and I (and my best friend from high school and her bf) went out to Sonoma and Napa for a long weekend and it was absolutely amazing. Of course, the highlights were all the wonderful wines that we had. But when it comes to food, hands down our favorite meal was at Thomas Keller’s Ad Hoc. I had very high expectations going into the meal, and they were all met or exceeded. 

One of the more interesting dishes of the night was the cheese plate that came out right before dessert. On it were a few homemade crackers, a delicious local goat cheese, and a pear sauce. At first, we didn’t really know what to do with the pear sauce, other than putting it on the cracker, but it turned out to be amazing. The pear sauce on its own was heavenly, and it perfectly complimented the goat cheese. Of all the wonderful things we had to eat that night, it was the pear sauce that we kept talking about. My friend and I convinced ourselves that we needed to try to make it when we got home. 

Well, looks like I got to it first, Michelle. 🙂 

Because I was making this a little bling, and just going off of what I knew about making apple sauce, I decided to use a couple different types of pears. If you can get your hands on more than one variety of pear, use them all! However, if you just like one type of pear, by all means, just use that one. I just felt like Thomas Keller wouldn’t just use one type of pear. 


To get your pears ready to be pureed, peel and core the pears, then cut them into 1-inch chunks. Add them to a big pot with some water, lemon juice, and a few spices. 


Bring the pot to a boil and let cook, covered for about 30 minutes. The pears should be nice and soft. Then use an immersion blender or a normal blender (just be careful) to blend the pears to a nice smooth puree. 


And that’s all it takes to make some fantastic pear sauce. Yes, it’s just like applesauce, but made with pears. And let me tell you, it’s delicious with cheese! Of course, you can just eat this on its own. I ate most of the pear sauce right out of the jar with a spoon for a delicious treat. 


But let me tell you how to really class up this simple little sauce – throw it on top of a cracker with some cheese. Serve it to your friends and they will think you are just so sophisticated making homemade pear sauce and serving it on a cheese board. But we all know it’s actually pretty easy. And delicious. I mean, if you can’t trust Thomas Keller to tell you what’s delicious, who can you trust?

[yumprint-recipe id=’133′]

/ Filed In: Eat, Paleo Dishes, Side Dishes
Tagged: appetizer, cheese board, Fall, healthy snack, pears, puree, sauce, snack

Autumn Wreath Maple Pecan Cake

November 11, 2016

Autumn Wreath Maple Pecan Cake

I feel bad for Thanksgiving. As soon as the page has been turned on October and Halloween is over, everyone sets their sights on Christmas. Starbucks already has their red cups out, Christmas decorations are front and center at just about every store, and I have already seen a few people put up their lights and trees. 

And even though I love Christmas as much as the next person, lets pump the breaks here folks and give Thanksgiving it’s fair share! And even though Thanksgiving is really all about the food (nothing wrong with that), it should also be a time to reflect on everything that we are thankful for. 

Autumn Wreath Cake

One thing I am definitely thankful for is this cake! I know I say everything I make is good (well, not everything, but anything that ends up on the blog), but this cake is AMAZING. And I don’t throw that term around all willy nilly. I mean it!


I started with a basic vanilla cake, but I swapped out some of the sugar for maple syrup and then folded in some toasted pecans. When I tasted the batter, I was actually a little disappointed in the maple flavor. It just wasn’t popping like I thought it would. Then, when I stated a bite after it had baked, that maple flavor really exploded! 

The cake by itself tastes like a stack of pancakes that has been drenched in butter and maple syrup. I mean….come on! How could you refuse a slice of that? The pecans not only add a nice crunch, but that deliciously nutty, buttery flavor. 

Maple Pecan Cake

But it’s not just about the cake flavor, its also about the decoration. This is the first time I had really attempted to decorate a cake this elaborately. Just like with cookie decorating, I picked up most of my tricks from watching lots and lots of You Tube videos (you can learn anything on YouTube). One of my favorite channels is How To Cake It! You must watch her videos, she is amazing!

Maple Pecan Cake

Anyways, I started by leveling all my cakes and removing the caramelized edges. Because I wanted this to be a “naked” cake, I wanted all the edges to look perfect and to be able to see the little pecan pieces through the buttercream. 

maple-pecan-cake-14

In between each layer, I spread on a generous portion of Italian meringue buttercream and the scattered on some toasted pecan pieces. Once all the layers had been stacked up, I topped it off with the rest of the buttercream and spread the excess down the sides of the cake. I made sure to fill in any gaps between the layers. Then, with a bench scraper, I scraped off all the excess. 

While the cake chilled in the fridge, I made the wreath decorations. The leaves are made out of various colors of fondant rolled together and cut out with some leaf shaped pie crust cutters. The branches are made out of melted chocolate, piped out to fit on top of the cake. And the flowers are piped out with buttercream using some really awesome techniques that were also learned from YouTube. 

maple-pecan-cake-15

Once the branches had hardened and the flowers were hard from the freezer, I assembled everything into a wreath! Doesn’t it look pretty!

I think it would be perfect as the center piece for a Thanksgiving or Friendsgiving dinner! Or just make the cake (sans decor) and eat it anytime. Trust me…you won’t regret it. 

Maple Pecan Cake

You can watch how I made the cake in the short video below. I apologize in advance for the poor quality, I am still learning how to work my new camera and the editing software. But I am hoping to do a lot more videos, since that is practically how I learned everything I know. 😉


PIN NOW, MAKE LATER

Autumn Wreath Maple Pecan Cake

[amd-yrecipe-recipe:96]


/ Filed In: Cakes and Cupcakes, Cakes New, Desserts, Eat
Tagged: buttercream, cake, cake decorating, Fall, maple, pecan

Butternut Squash Ravioli

November 7, 2016

Butternut Squash Ravioli

Butternut squash is probably one of my favorite things to cook with during the Fall! It is so versatile. I like to roast it in the oven and serve it along side some chicken or  beef, puree it into a soup, or in this case make a filling for ravioli. 

It had been a while since I made homemade ravioli, or pasta in general. I had forgotten how much better it is than the store bought stuff. Sure, it take  a little more time and an investment in the proper equipment (I have this), but if you are willing to put in the effort, you will be rewarded greatly. 

The pasta itself is actually pretty simple and only requires 2 ingredients (3 if you want to add salt): eggs and flour. 


I start by piling the flour on to my cutting board the made a well right in the center. I would recommend making the well wide and shallow so that the eggs don’t leak out (like you can see in the picture above). Then I slowly start mixing the eggs and flour together, by whisking the eggs with a fork, then gradually mixing in a little flour at a time. At the same time, I push up the walls of the flour well until I have added in enough flour so that a loose, shaggy ball of dough has formed. At this point, I knead the dough with my hands, still adding in flour so until the dough is a little tacky and has formed a tight ball. I didn’t end up using all the flour in my original pile, but that’s okay. You just want enough flour to form a tacky ball. Adding too much flour will just yield a really dry and crumbly pasta.

Once it’s a nice dough ball, I just wrap it in some plastic wrap then let it rest in the refrigerator while I prep the filling.  


The filling starts…you guessed it…butternut squash! I like to buy the pre-peeled, pre-chopped butternut squash from Trader Joes when I am in a pinch. If I had used the whole butternut squash, I would have started by peeling off the skin with a paring knife, cutting it in half, removing the seeds, then chopping it into big chunks. 

I tossed the butternut squash chunks in some olive oil, then roasted them in the oven until they were tender. I then popped the roasted squash into a food processor with some garlic that I roasted along side the squash, Parmesan, and ricotta. 

Homemade Pasta

Once the filling was ready, I started rolling out the pasta dough. I start by feeding the dough through on the thickest, then each time changed it to the next setting down until it was about as thin as I wanted. My pasta roller has 6 settings, I rolled it to 5. 


I layed out the long sheet of pasta dough on my counter then spooned a healthy portion of the filling out on the only dough, leaving enough room in between so that I could cut out each ravioli. To make sure the top layer of the dough would stick, I used a pastry brush to brush water around the filling. Once the other half of the dough was folded back over, I pressed the dough down around the filling to seal it in.

Butternut Squash Ravioli

Once all the ravioli were ready, I dropped them into a pot of boiling water for about 2 minutes. They really don’t take long to cook, you have to watch them like a hawk. But you should know when they are ready when they start to float. Assuming they weren’t floating right when you dropped them in. In that case, there is still some extra air trapped in there, and just let them cook for 2 minutes or when all of it’s little friends start to float, too. 

Butternut Squash Ravioli
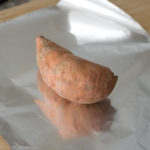
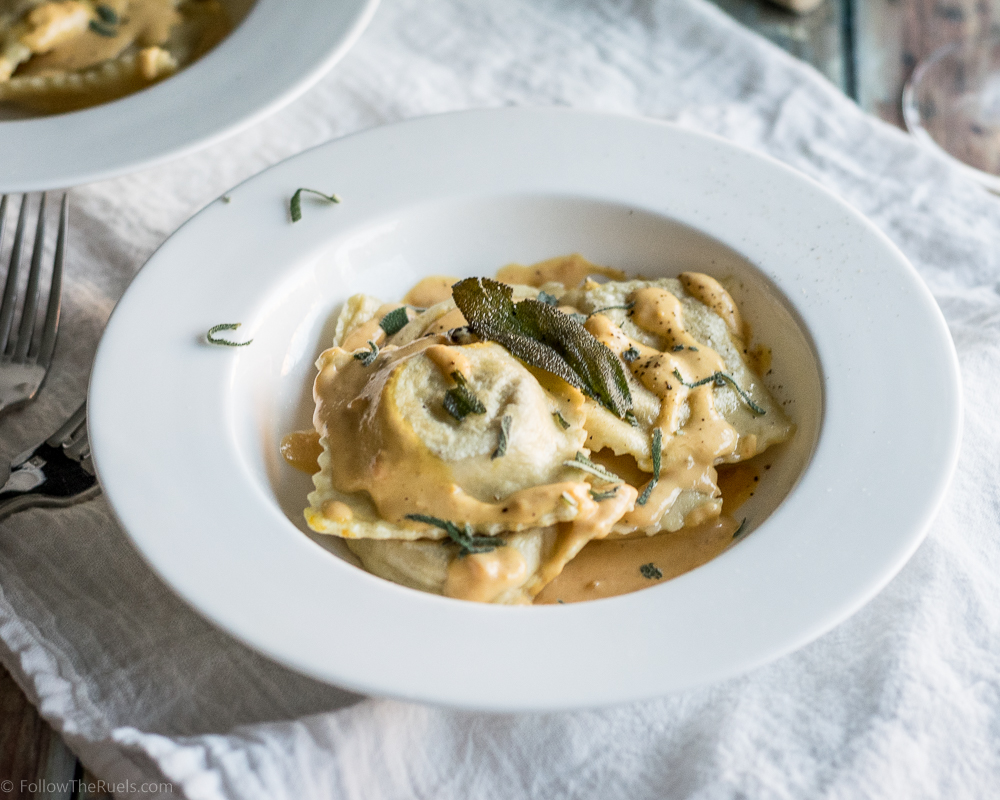
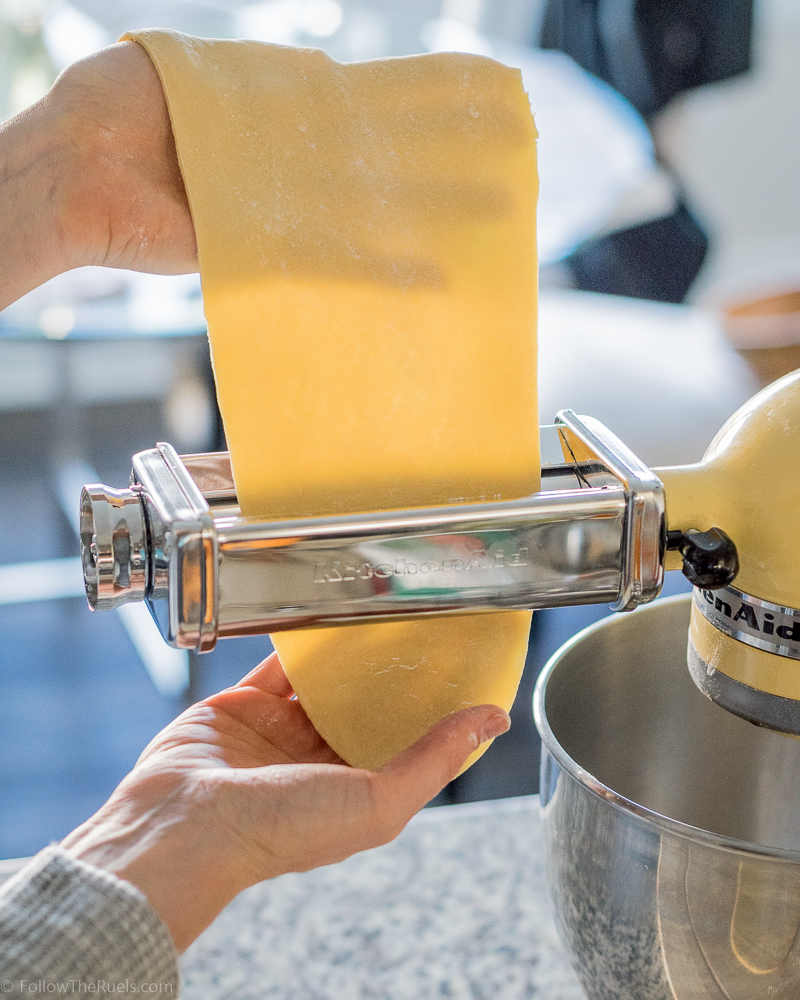
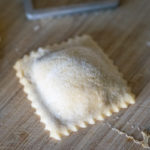
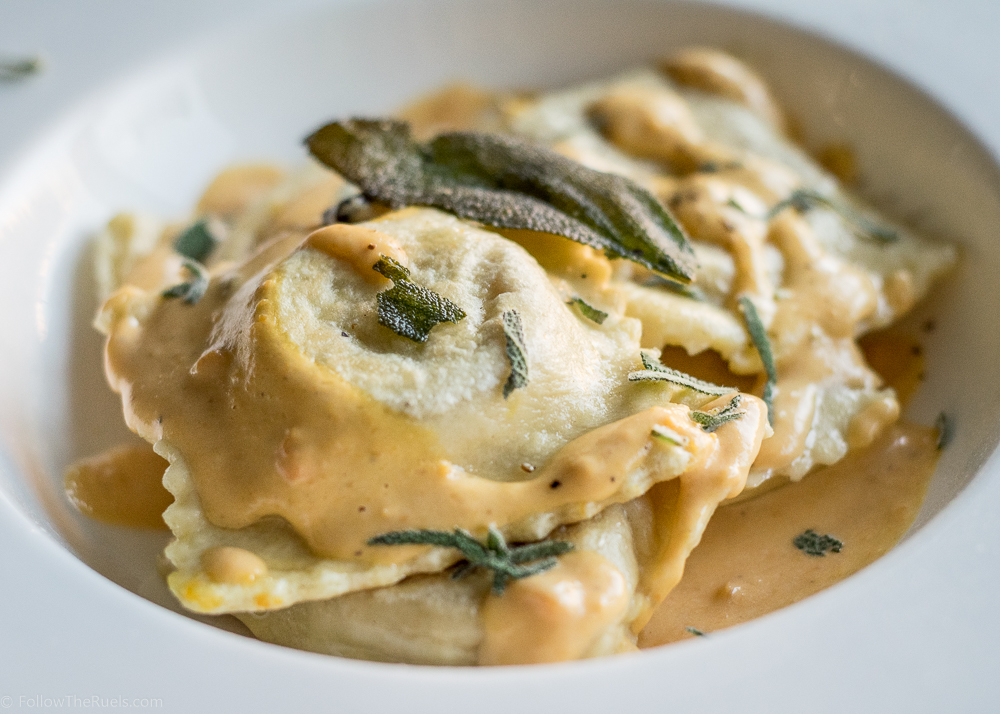
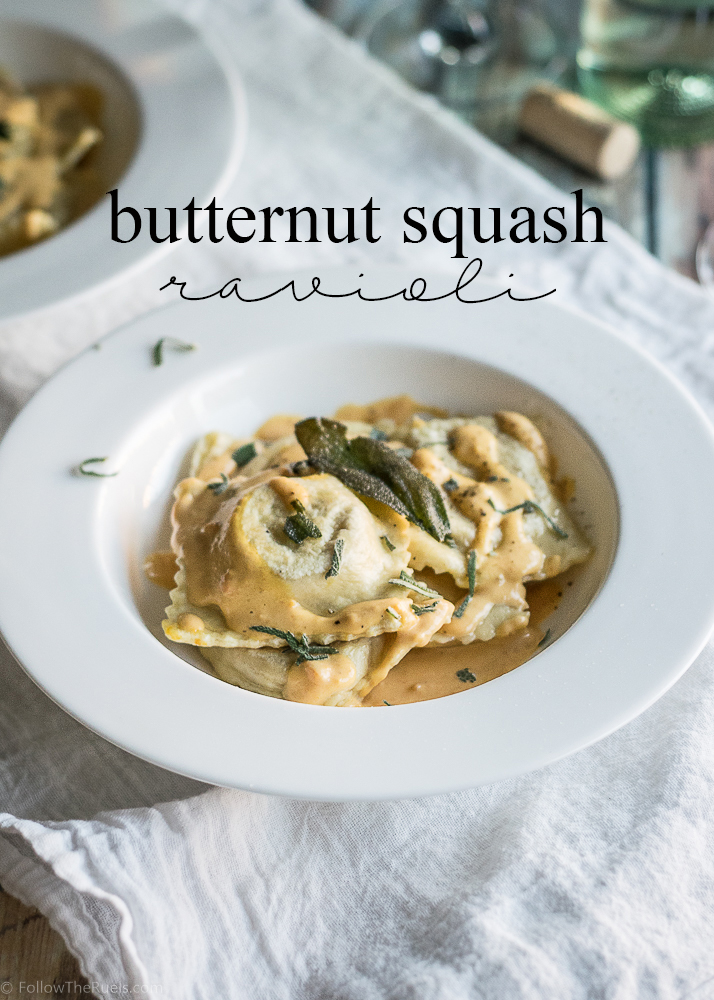
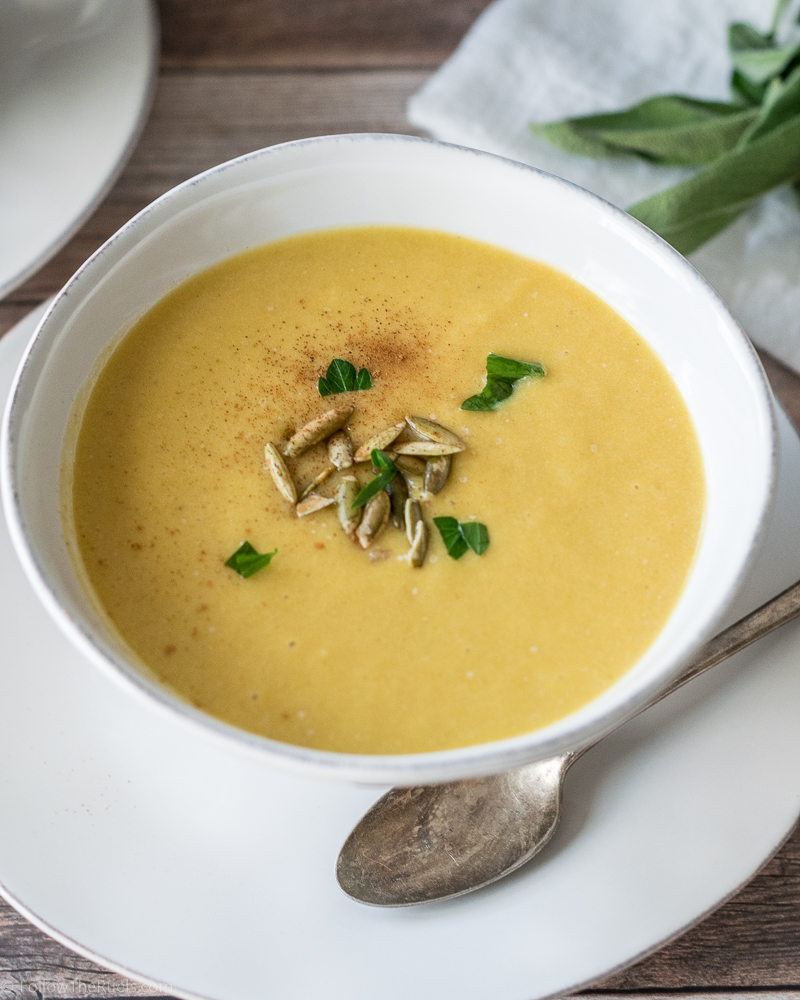
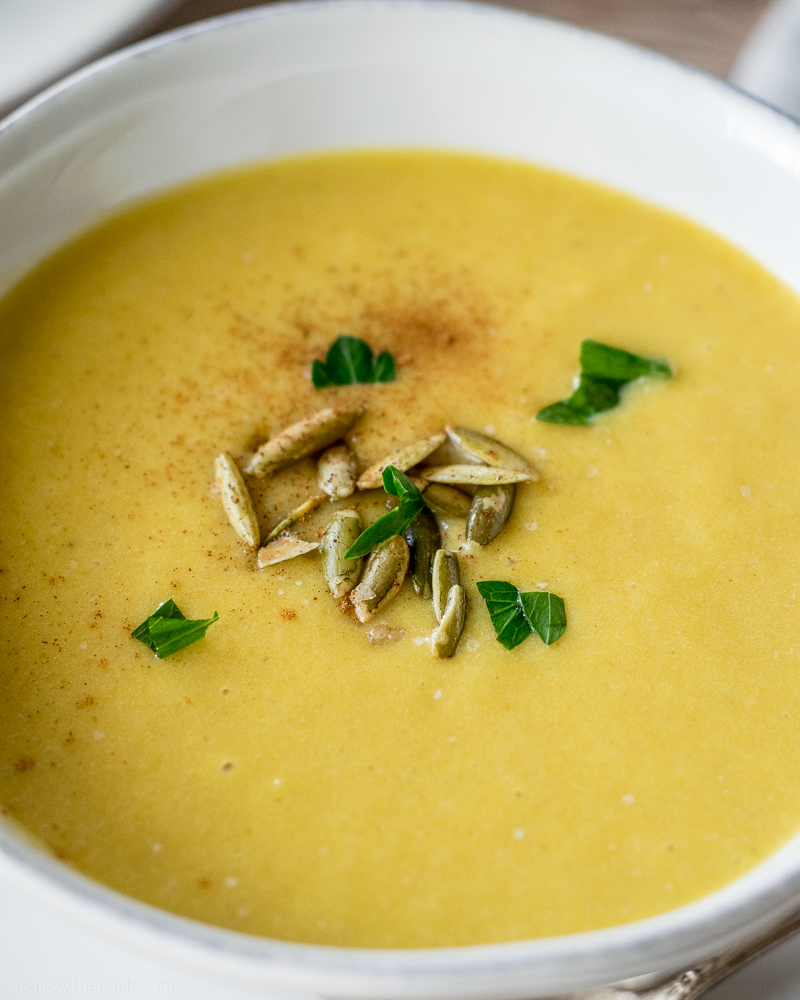
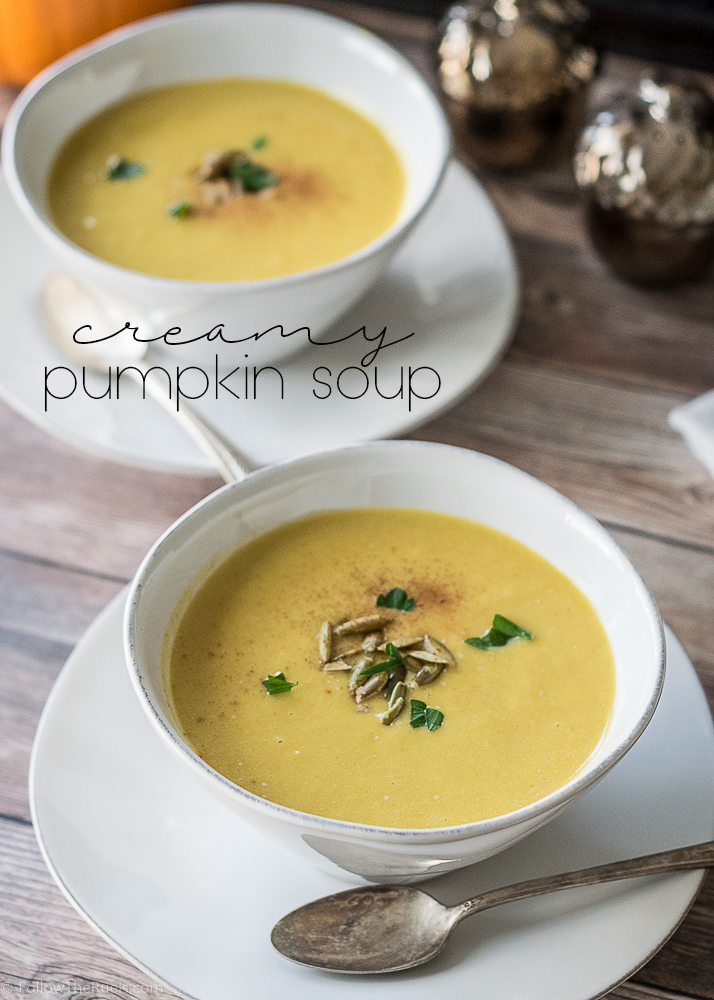
There is so much flavor packed in these butternut squash ravioli, I didn’t want to overpower it with a bold sauce. Originally I had planned on just sauteing them in some browned butter with sage, but because I had some left over filling, I ended up mixing it with some cream and reducing it over the stove to make a yummy cream sauce. And it was yummy!

Each ravioli is packed with lots of flavor. Creamy, rich, and delicious. The butternut squash and roasted garlic are an amazing combination. Adding a little bit of extra sage just puts it over the top. 

This ravioli has inspired me to make my own pasta more often. While it is definitely a process, requiring some serious time commitment and planning, the proof (as they say) is in the pudding. I would definitely not be able to pick up anything this good at the store. Or I would be spending a pretty penny at a fancy Italian restaurant.

No thanks. I’ll just make it myself. 

PIN NOW, MAKE LATER

Butternut Squash Ravioli

[amd-yrecipe-recipe:94]

/ Filed In: Eat, Main Dishes, Other Savories New
Tagged: butternut squash, Fall, pasta, ravioli, roasted garlic, sage

Healthy and Hearty Turkey Chili

November 2, 2016

Healthy Turkey Chili

As soon as the temperature gets below 70 degrees, I break out my stock pot and make a batch of chili. I love chili. I could eat it year round, but I can really only enjoy it when it starts to get a little cold and you can tell that Fall is right around the corner.

This particular chili recipe is one that I have been tinkering with for years. I made my first batch of chili using the recipe on the back of the seasoning mix you pick up at the store. Over the years, I have made a quite few changes. Mainly, trying to make it more healthy and more flavorful. Not that there is anything wrong with that classic chili. 

Hearty Turkey Chili

But just because I have made this chili a bit healthier, doesn’t make it any less filling and satisfying. Every spoonful is packed with lean ground turkey, kidney beans, tomatoes, and other delicious veggies. I personally like to sneak in any extra veggies I can find into my chili. I almost always make mine with onion, bell pepper, tomato, and jalapeno. Sometimes I will sneak in some carrot, spinach, or kale. And if I have an extra sweet potato lying around, I will dice that up and throw it into the pot as well. 

Turkey Chili recipe

But it wouldn’t be chili without the spices. I use 5 different chilies and peppers to spice my chili: chili powder, chipotle chili powder, cayenne pepper, paprika, and a jalapeno. To compliment the chilies, I like to add a generous amount of garlic, a touch of cumin, and a splash of Worcestershire.

I let all of those flavor meld together over the stove for at least 30 minutes, then when it’s ready I spoon an very healthy serving into a bowl and top with some of my favorite chili toppings: cheese, sour cream, and avocado. I will also sometimes toss on some cilantro, chives, maybe even some oyster crackers! And of course, I always have a piece of corn bread on hand to sop up all that extra chili goodness. 

PIN NOW, MAKE LATER

Hearty Turkey Chili 

[amd-yrecipe-recipe:91]


/ Filed In: Eat, Main Dishes, Other Savories New
Tagged: beans, chili, Fall, healthy, soup, turkey

Mason Jar Pumpkin Pies

October 28, 2016

Mason Jar Pumpkin Pies

Pumpkin pie and I have’t always seen eye to eye (and I swear I didn’t try to make that rhyme). Maybe it was because Thanksgiving wasn’t really my favorite holiday. Or because, as a kid, I didn’t want my dessert to have vegetables in it. Now that I am older, not only have I grown to like pumpkin pie, but I also like the idea of having a serving of vegetables with dessert. 

I will add, though, that my favorite part of pumpkin pie (both then and now) was the crust! That’s what I really like about these little mason jar pumpkin pies….the ratio of pie to crust is strongly in my favor. It’s almost 50/50! But, if you aren’t a crust-lover like me, you could skip the bottom crust and just fill the entire mason jar with the pumpkin pie filling and just top it with a little bit of crust. 


But is definitely not what I did. I started by making my own pie crust (super easy, btw, when you make it in a food processor!), then cut out little rounds of crust and pushed them into the bottom of the mason jars. I pricked the pie dough with a fork, the par baked for a few minutes. I then poured the the pumpkin pie filling in to the jars and baked them on a baking sheet until they were set up around the sides, but still a jiggly in the center. 

At that point, I added some additional crust on top then continued to bake the pies until the top layer of crust had browned. 


Once they came out of the oven for the final time, I added a special touch that I learned from Alton Brown – bruléeing some brown sugar on top to create a crunchy, sugary, crust. This was my first time trying this technique, and I will never NOT add a brulée topping on my pumpkin pie again! I would have never thought of it on my own, but it really put this relatively ordinary pie over the top. 

Mason Jar Pumpkin Pies


The other thing I love about these pies is that they are the perfect portion size. If I had a whole pie in front of me, I would “limit” myself to a sliver, then continue to cut off more and more slivers until I had practically eaten half the pie! These little pies are already portion controlled…and portable! 

I think these would be so fun for a Friendsgiving or holiday party, don’t you!?

[amd-yrecipe-recipe:89]

PIN NOW, MAKE LATER

Mason Jar Pumpkin Pies

/ Filed In: Desserts, Eat
Tagged: dessert, Fall, Mason Jars, pumpkin, pumpkin pie, Thanksgiving

Salted Caramel Pumpkin Apple Bunt Cake

October 19, 2016

Salted Caramel Pumpkin-Apple Cake

If there is one thing you can’t say “no” to, it’s a hungry pregnant woman. At least, I can’t. If you are creating a human life, I will make you any food you want. That’s why when my 6-month pregnant friend  and co-worker asked me to recreate a muffin she loved, I had to give it a shot. 

One morning she called me over to her desk and told me to try the muffin she picked up for breakfast. It was a pumpkin muffin, but it was stuffed with apples, and had some sort of caramel glaze. Sounds delicious, right? It was! So I took a couple notes and told her I would come up a recipe for her to try.


I started with a pumpkin base, which I adapted from my pumpkin bar and pumpkin bread recipe. To that, I added some apples that I sauteed in butter, sugar, and cinnamon until then were soft. I folded the apples into the cake batter and then poured it into a bunt cake pan. I could have made these muffins or cupcakes, but I thought a bunt cake would be more fun. Plus, I had just bought this bunt cake pan so I wanted to take it for a spin. 

Salted Caramel Pumpkin-Apple Cake

Once it had come out of the oven and was cooled, I poured over some caramel sauce. I actually used those caramel candies you would buy for dipping apples into, but if I had the time (and the cream), I would have made my own caramel sauce to pour on top. 

Salted Caramel Pumpkin-Apple Cake

While the sauce was still a bit sticky, I sprinkled on some sea salt and pepitas for an extra crunch. 

Then I took the cake to my friend for a taste test. The verdict? It was good! I would have never paired pumpkin and apples, but it really worked! It was like apple pie filling meets a pumpkin cake. It was the perfect Fall flavor combination. And the salted caramel just sent it over the top. Literally the icing on the cake. 

Salted Caramel Pumpkin-Apple Cake

[amd-yrecipe-recipe:86]

/ Filed In: Desserts, Eat
Tagged: apple, bunt cake, cake, Fall, pumpkin, salted caramel

Glazed Pumpkin Bread

October 5, 2016

Glazed Pumpkin Bread

I started a new job on Monday. While I am still at the same company, I am in a whole new department on an entirely different floor. While I am excited about this new job, it was really hard to leave all my friends in my old department. I would like to say that my coworkers were sad to see me go, too, but I think they are really going to miss all the baked goods I bring in. Actually, I don’t have to assume…many people down right told me that they expected me to still drop off cookies and muffins. 

So on my last day in the group, I decided to wake up a bit early and make them one last treat – pumpkin bread. And if you are wondering why there are no pictures of the process, it’s because this was thrown together before the sun came up. 


Whipping up the batter for this quick bread was really easy and, well, quick. But it does take some time to bake. Which was fine for me. I put it in the oven then I went on upstairs and got ready for work. It actually worked out really well. It also helped that since it was my last day in the job, I wasn’t too worried about being late. 

But because of the time crunch, I didn’t really have a chance to test this out before I brought it into the office. Sure, I licked the bowl and the batter was delish, but of course things could have changed in the oven. Once it was dropped off in the break room, I waited for someone else to cut in so that I could finally steal a bit. Fortunately, it was good….it was really good. That pumpkin bread was gone within the hour.

Glazed Pumpkin Bread

I’m going to miss my old coworkers. They were such good recipe taste testers and barometers, and they didn’t even know it! I always knew I had a good recipe if the food was I brought was gone by lunch or someone asked for the recipe. I guess I will have to keep dropping off some baked goods for them. 

PIN NOW, MAKE LATER

Glazed Pumpkin Bread from Follow the Ruels

[amd-yrecipe-recipe:83]


/ Filed In: Desserts, Eat
Tagged: bread, breakfast, Fall, loaf, pumpkin, quick bread

Quinoa and Brussels Sprout Stuffed Acorn Squash

October 3, 2016

Quinoa and Brussels Sprout Stuffed Acorn Squash

Of all the squashes in the grocery store this time of year, acorn squash probably gets the least amount of love. Everyone is going straight for the butternut, pumpkin, or spaghetti squash leaving the acorn squash all by it’s lonesome. 

Well, I would like to change that because acorn squash is delicious and very versatile. My favorite way to eat acorn squash is to stuff it. I stuff it with anything from ground turkey to lentils and vegetables. What ever you would stuff in a bell pepper or pile on top of a spaghetti squash, you can probably stuff in the acorn squash. 

This time around I stuffed my acorn squash with a stuffing made up of chicken sausage, brussels sprouts, and quinoa. I was thinking of doing a classic Thanksgiving stuffing, but then I thought I would do something a bit healthier. I replaced the bread with quinoa and the pork sausage with chicken sausage. 


I started by roasting the acorn squash in the oven, and at the same time preparing the stuffing. I first made the quinoa and sauteed the sprouts, onions, sausage, and spices. Once the quinoa was ready, I added it to the sprouts and mixed everything together. The timing worked out perfectly, so that the stuffing was ready once the squash was nice and tender. From there, I just packed the stuffing into the squash and baked it together for a just a few minutes. 

Sausage Stuffed Acorn Squash

I love meals like this – stuffed squash, stuffed peppers – because they are pretty easy to throw together, there are easily adaptable, and generally pretty healthy. So even though 1 serving (1/2 squash, stuffed) is pretty big, its pretty healthy. There is the healthy carbohydrates from quinoa, vitamins K and C from the brussels sprouts, protein from the sausage, and vitamin A and potassium from the squash. That’s a pretty well rounded meal!

PIN NOW, MAKE LATER

Quinoa and Brussels Sprouts Stuffed Acorn Squash

[amd-yrecipe-recipe:82]

/ Filed In: Eat, Healthy Dishes
Tagged: brussels sprouts, chicken, Fall, quinoa, squash

Creamy Pumpkin Soup Recipe

September 30, 2016

pumpkin-soup-4

I will admit that I am relatively inexperienced when it comes to cooking with pumpkin. Sure, I can bake with pumpkin that comes out of a can, but something about that chubby little gourd intimidates me a bit. Maybe because I think of it more as a decoration than a vegetable. 

But really, it’s not any different than some of my other favorite Fall vegetables, like butternut, spaghetti, and acorn squash. Which is why I decided to stretch myself a bit and try making some savory pumpkin foods instead of staying in my comfort zone of sweet pumpkin foods. 

The first recipe I decided to tackle is a pumpkin soup. I figured I could adapt my favorite butternut squash soup recipe pretty easily to work with pumpkin. (I’m really breaking outside that comfort zone, guys. Watch out!)


I started by peeling and chopping up 1 medium sized pie pumpkin. Then I roasted the pumpkin in the oven for about 20 minutes until it was tender. 

And just a quick reminder, you don’t want to use a pumpkin that you find outside the super market waiting to be carved. You want to use a pie pumpkin, which is much smaller and can be found with your other Fall squash in the produce section. 

Creamy Pumpkin Soup

Once the pumpkin is nice and roasted, I add it to a pot with sauteed onions, garlic, shallot, stock, milk, and spices. Once all the flavors are all melded together, I transferred the soup to a blender to blend until smooth. You could also use an immersion blender for this task, but if you do use a blender or food processor, make sure to it doesn’t splatter all over the place. 

Creamy Pumpkin Soup

I like to serve this with a few pepitas on top and a dash of cinnamon. I didn’t want this soup to taste like pumpkin pie, but cinnamon and pumpkin just go so well together! You could also drizzle in some truffle oil (truffles are good on everything) or spoon in some sour cream to make this extra creamy. But this soup is great on it’s own and the perfect lunch or dinner for a crisp Fall day. 

PIN NOW, MAKE LATER

Creamy Pumpkin Soup

[amd-yrecipe-recipe:81]

/ Filed In: Eat, Healthy Dishes
Tagged: Fall, pumpkin, soup, squash

  • 1
  • 2
  • 3
  • Previous Entries

Follow

Hey There!

Hey there, I'm Lindsey. I'm a number cruncher by day and a home cook and baker by night. While I love to eat healthy and find fresh and healthy alternatives for my favorite foods, I will never turn down dessert! Life is all about moderation, right?

Recipes

  • All Recipes
  • Breakfast
  • Appetizers
  • Salads
  • Main Dishes
  • Side Dishes
  • Desserts
  • Drinks

Favorite Finds

[show_lookbook_widget id=”388783″]

Theme by 17th Avenue · Powered by WordPress & Genesis