• Home
  • Eat
    • Breakfast
    • Appetizers
    • Main Dishes
      • Chicken
      • Beef
      • Seafood
      • Healthy Dishes
      • Paleo Dishes
      • Salads
    • Desserts
      • Decorated Cookies
      • Cookies
      • Bars and Brownies
      • Cakes and Cupcakes
  • Shop
    • Cookie Decorating Supplies
    • Bakeware
    • Cookware
    • Kitchen Gadgets
    • House
  • About
    • Contact
    • Bucket List
  • Cookie Decorating 101

Follow the Ruels

15 Amazing Easter Desserts

April 7, 2017

Hi, my name is Lindsey and I’m addicted to baking. How do I know? (Have you read the blog? That should be all the proof you need.) Well, I promised myself I wouldn’t do any baking this coming weekend after a tornado of flour and sugar went through my kitchen last weekend. But here I am, a week away from Easter wanting to make all of these fun desserts! As I sit here I’m strategizing how I can fit in a carrot cake, macarons, cookies, and petit fours all before Easter. I clearly have issues, folks.

(Although I would also argue that I’m just looking out for my emotional wellbeing per this article)

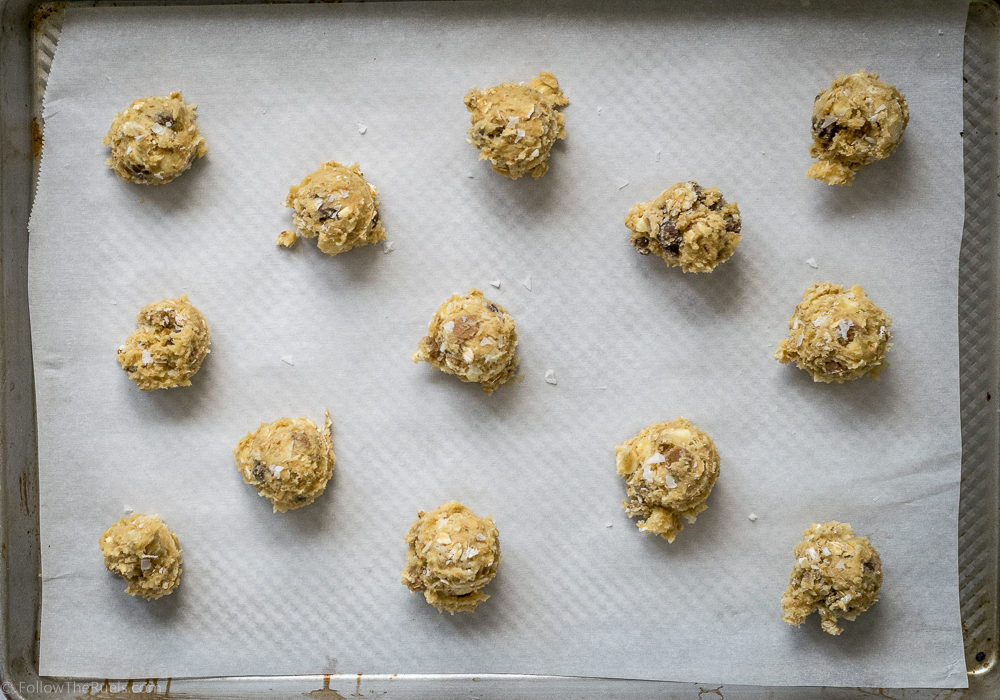
Since I will hopefully no baking (…well, maybe a little baking?….like one cookie?…I cant just make one cookie….how about 12 cookies….) I thought I would share with you all the things I wish I was making this weekend. Maybe both of us will be inspired by the 15 amazing Easter desserts!

No Bake Chocolate Oreo Bunny Garden Dessert from Oh Sweet Basil

Easy Easter Oreo Bark by Suburban Simplicity

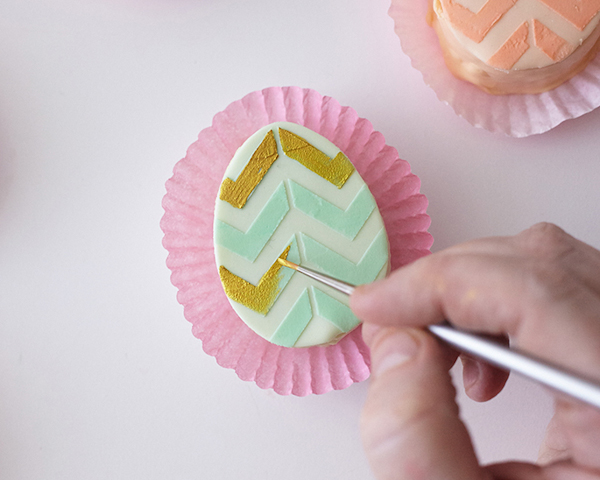
Mini Easter Egg Cakes by the Cake Blog

Italian Easter Bread by Bake with Christina

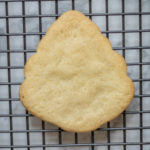
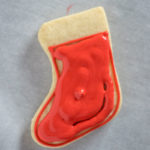
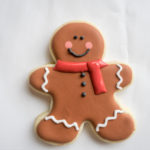
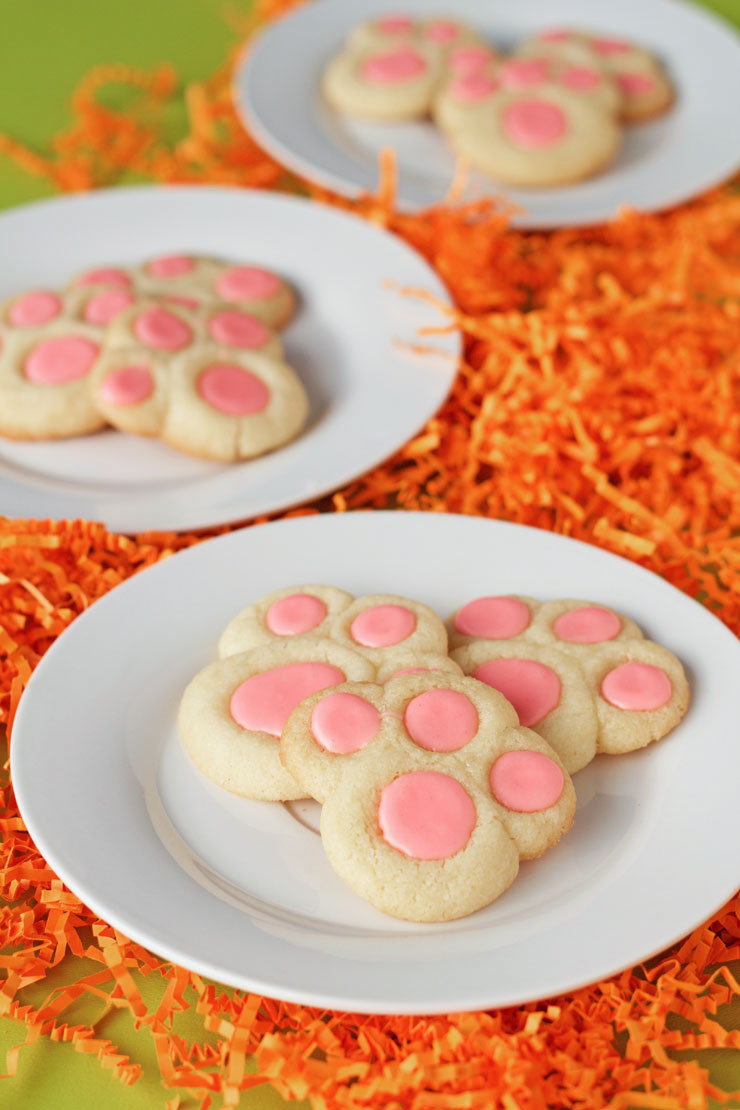
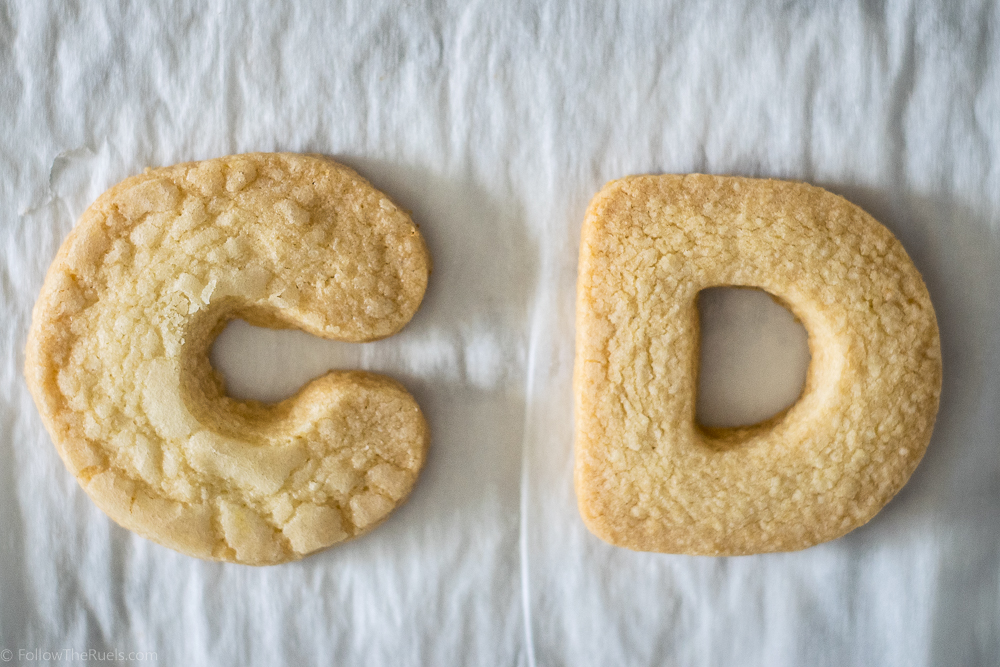
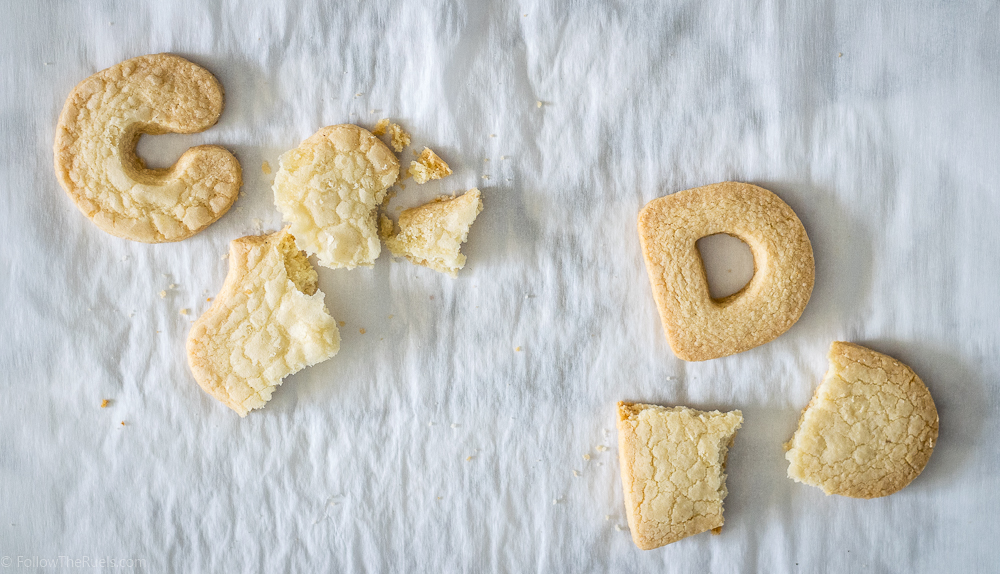
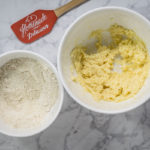
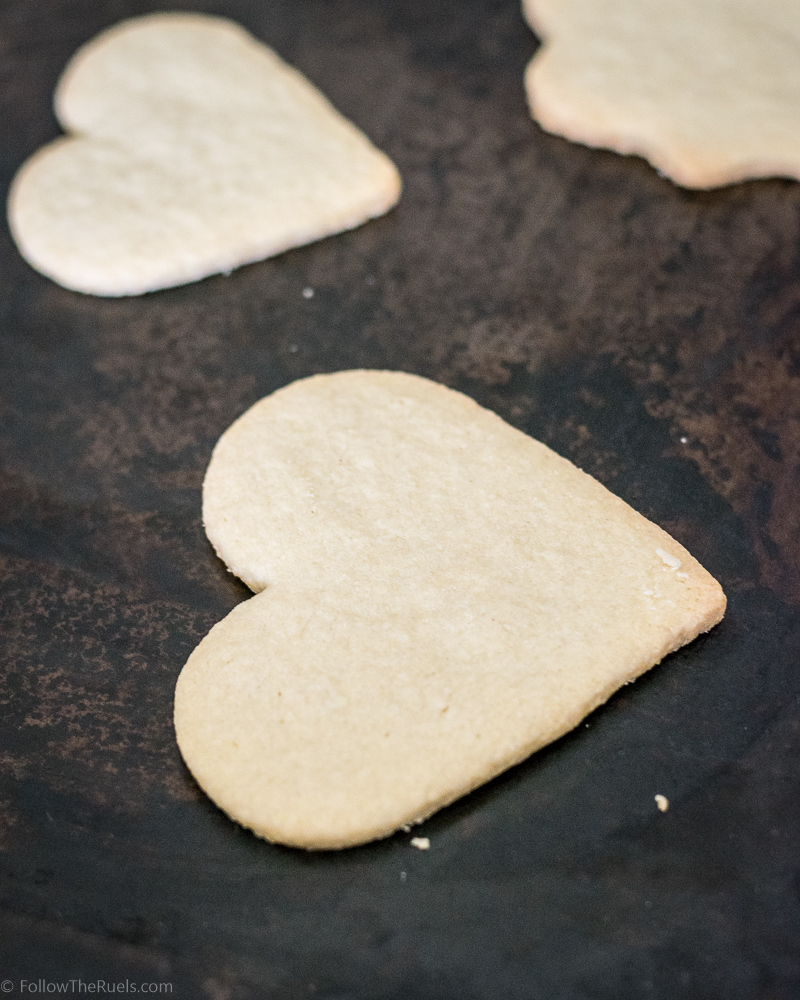
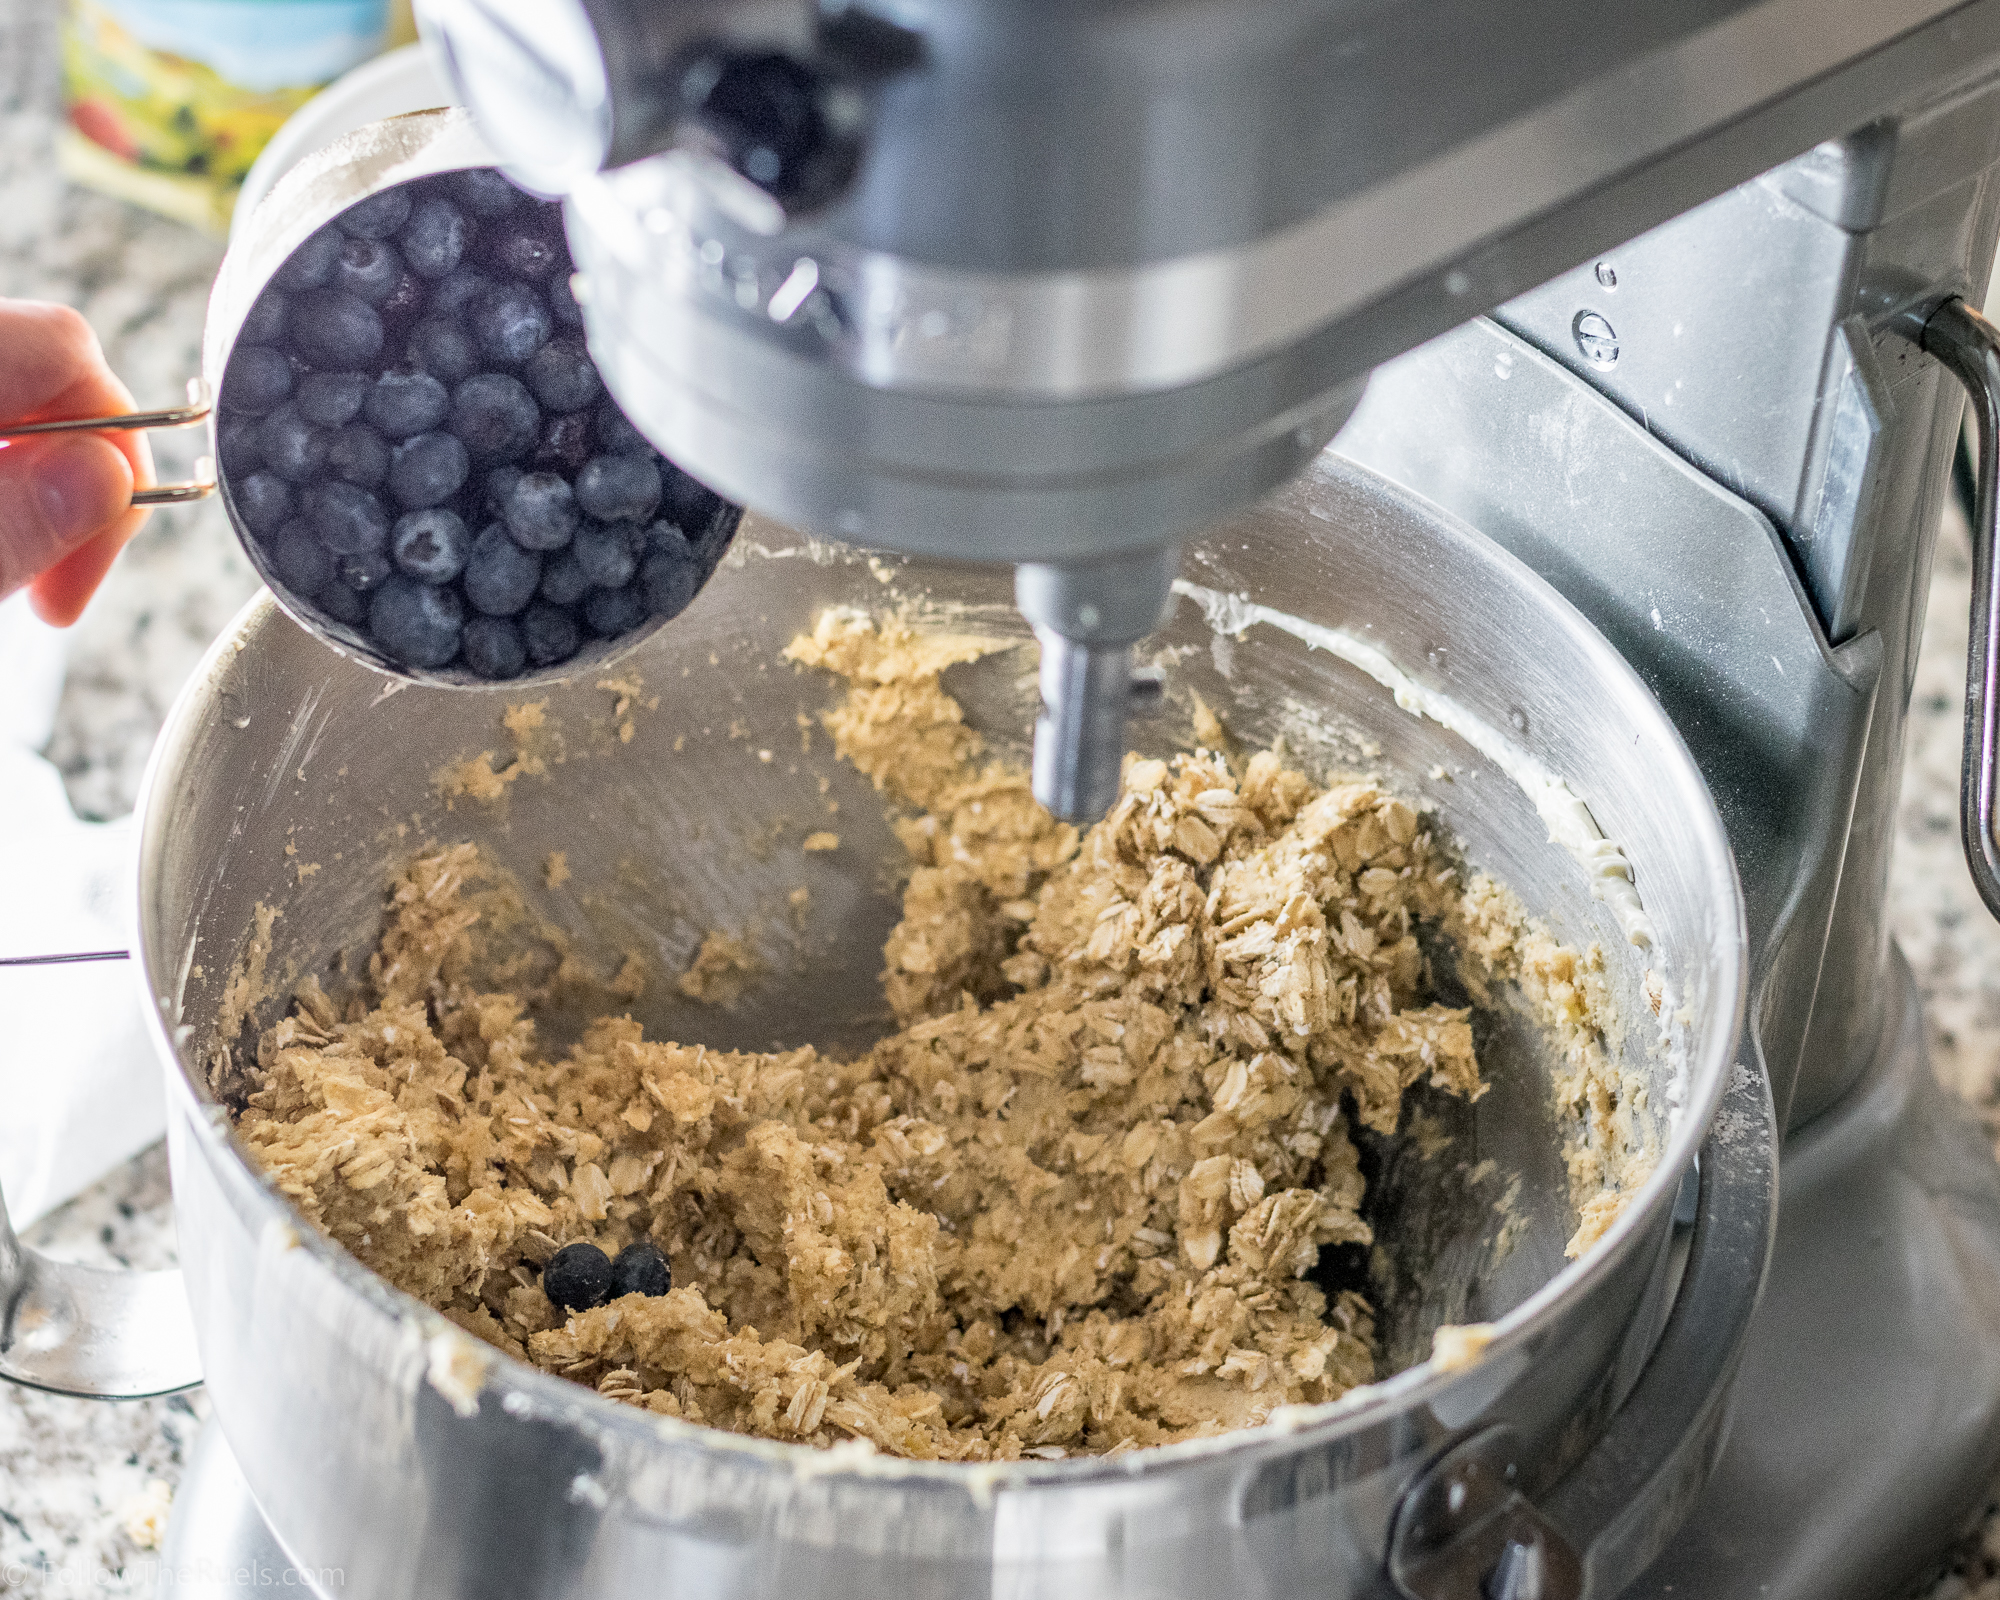
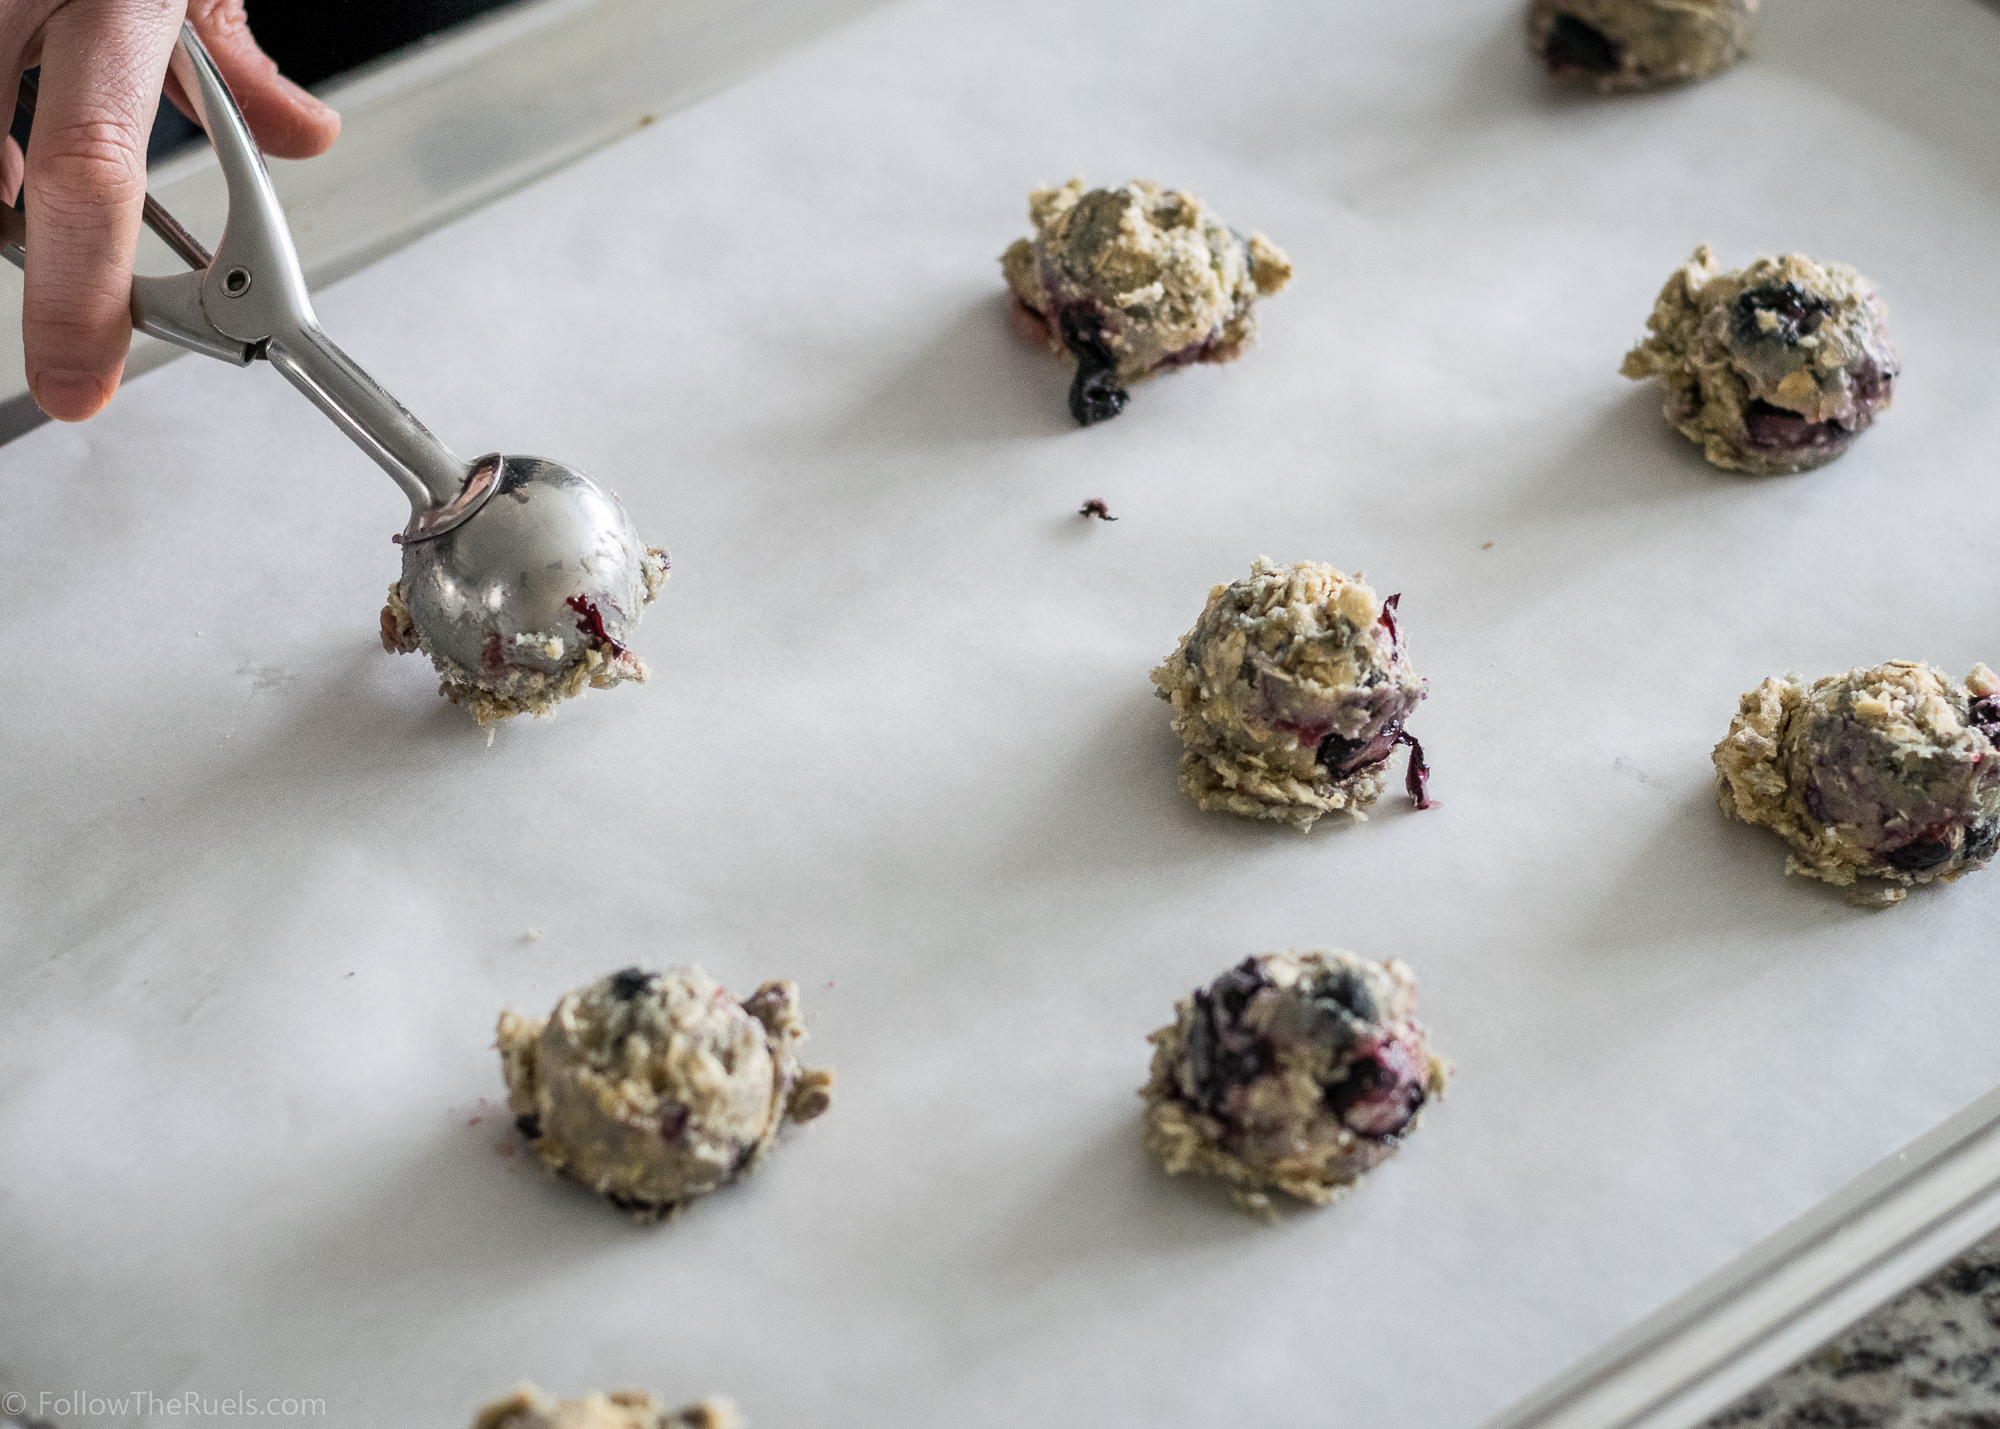
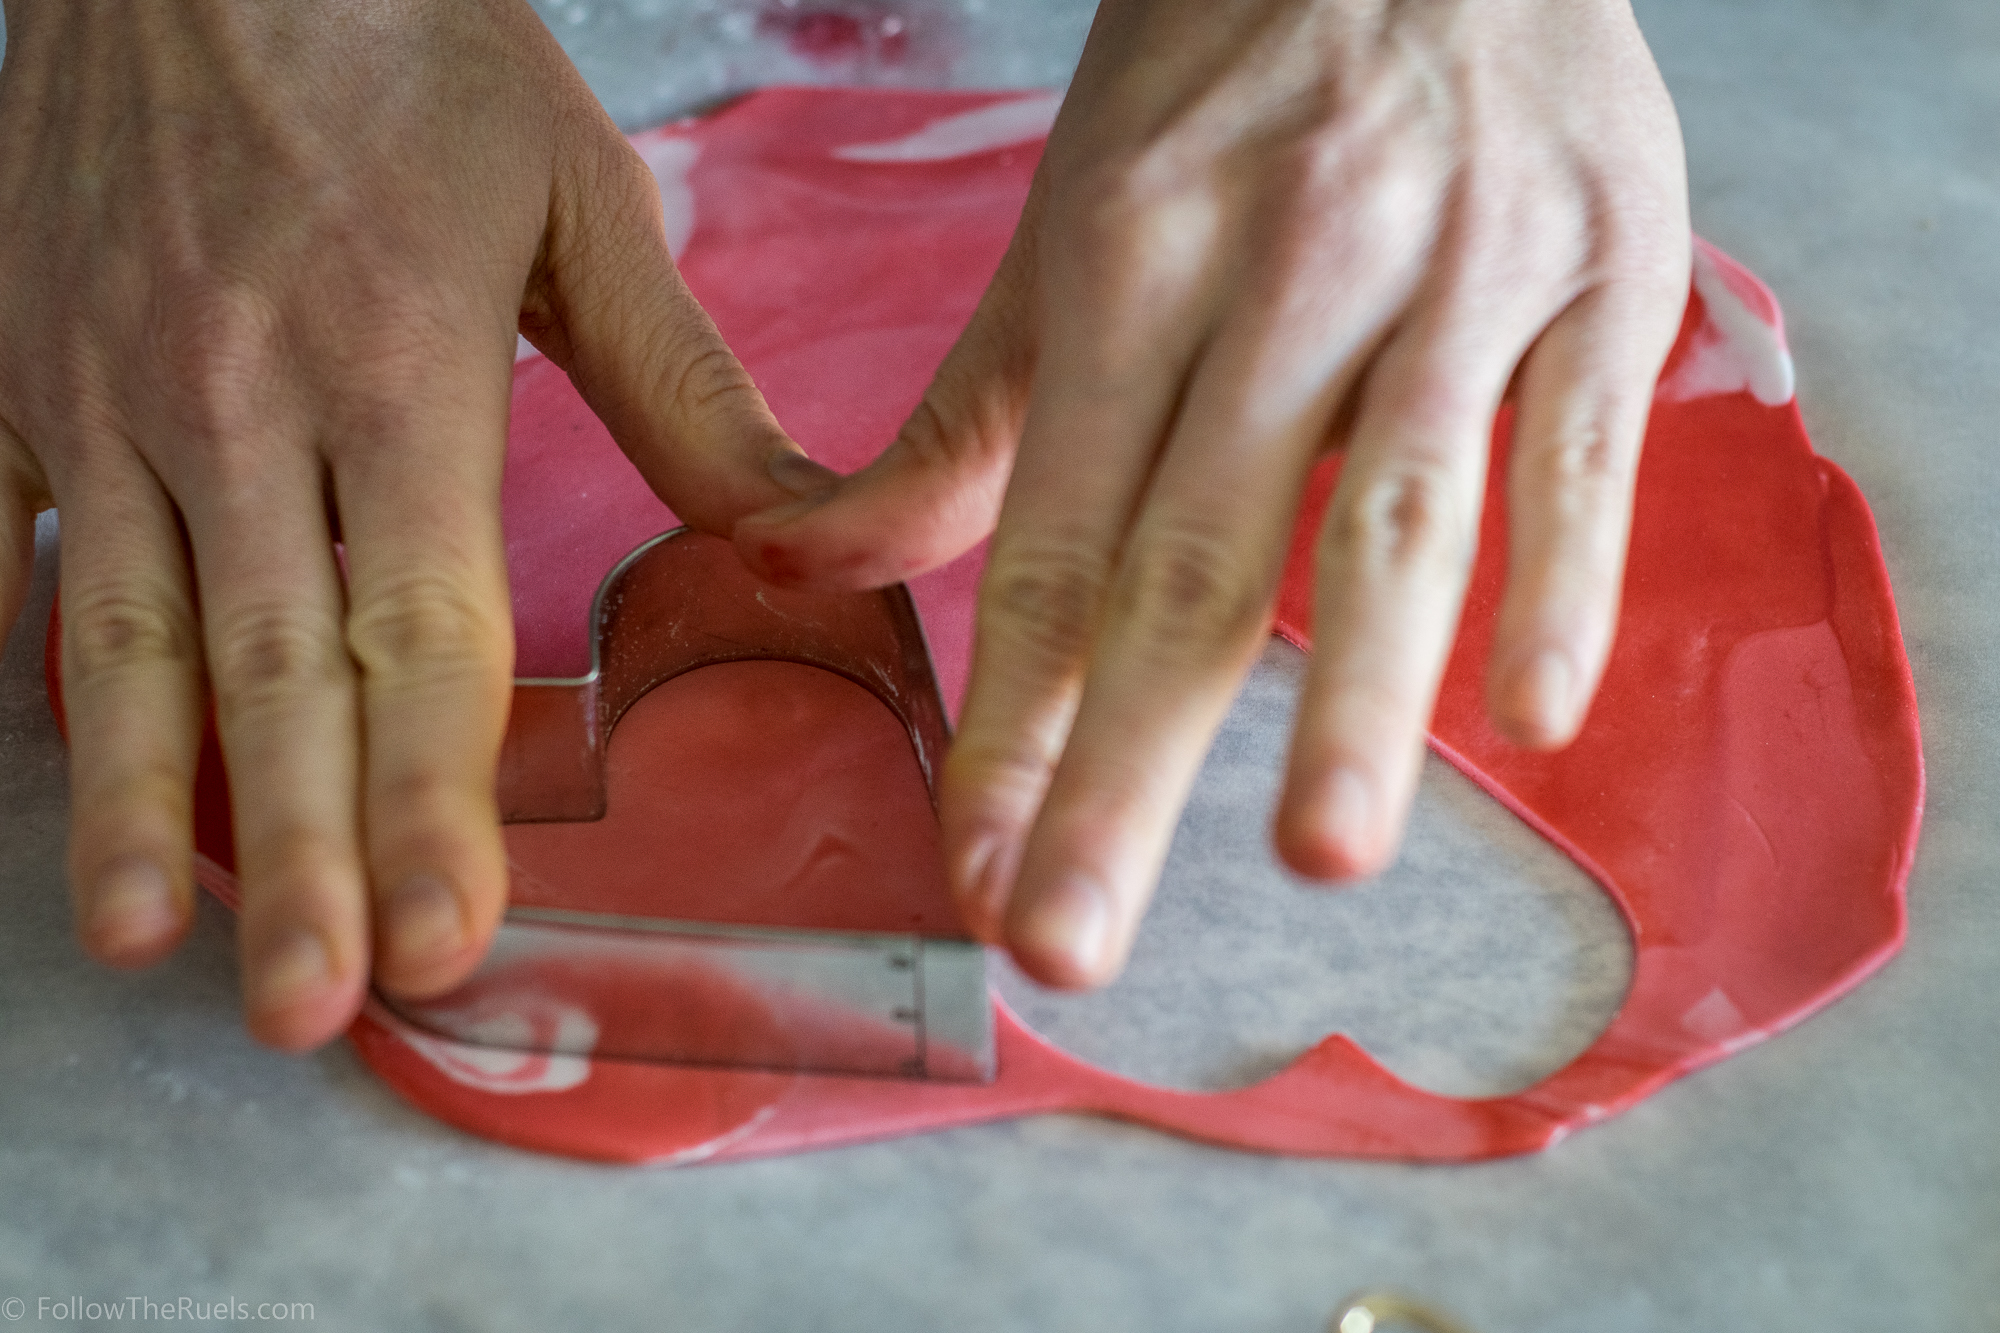
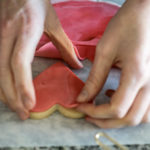
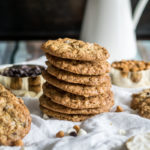
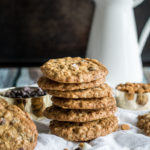
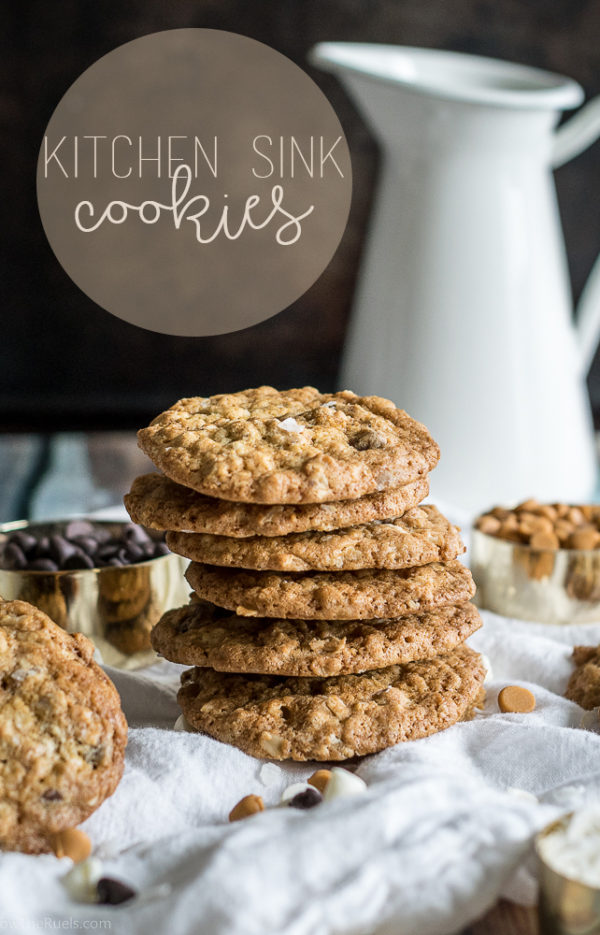
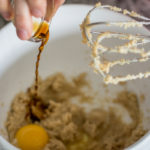
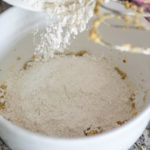
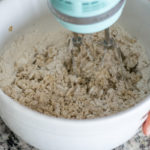
Easy Easter Bunny Cookies by yours truly

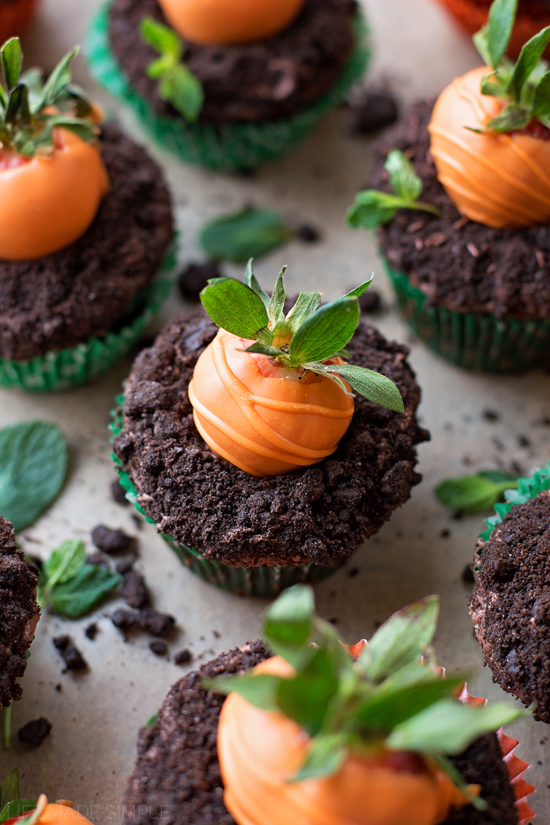
Carrot Patch Cupcakes by Life Made Simple

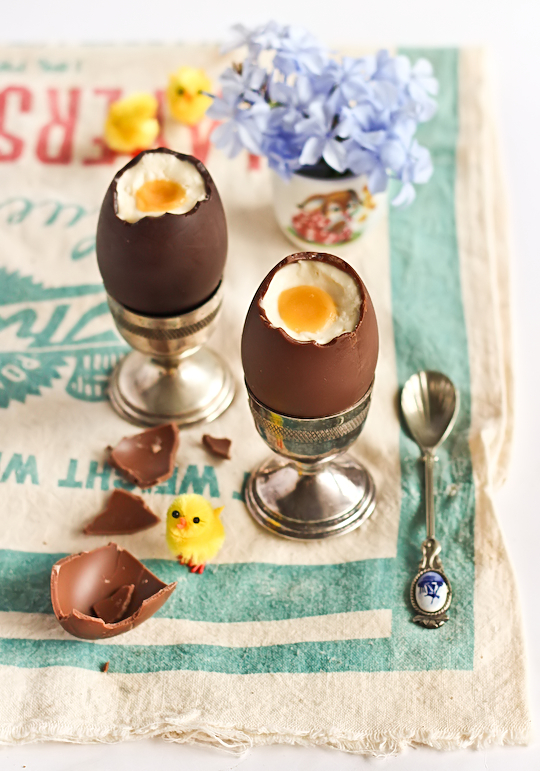
Cheesecake Filled Chocolate Easter Eggs by Raspberri Cupcakes

Eyelet Lace Easter Cookies by this girl

Pineapple Carrots Cakes by Just a Taste

Healthy No-Bake Chocolate Peanut Butter Nests by Joy Food Sunshine

Surprise Inside Easter Bunny Cake by me

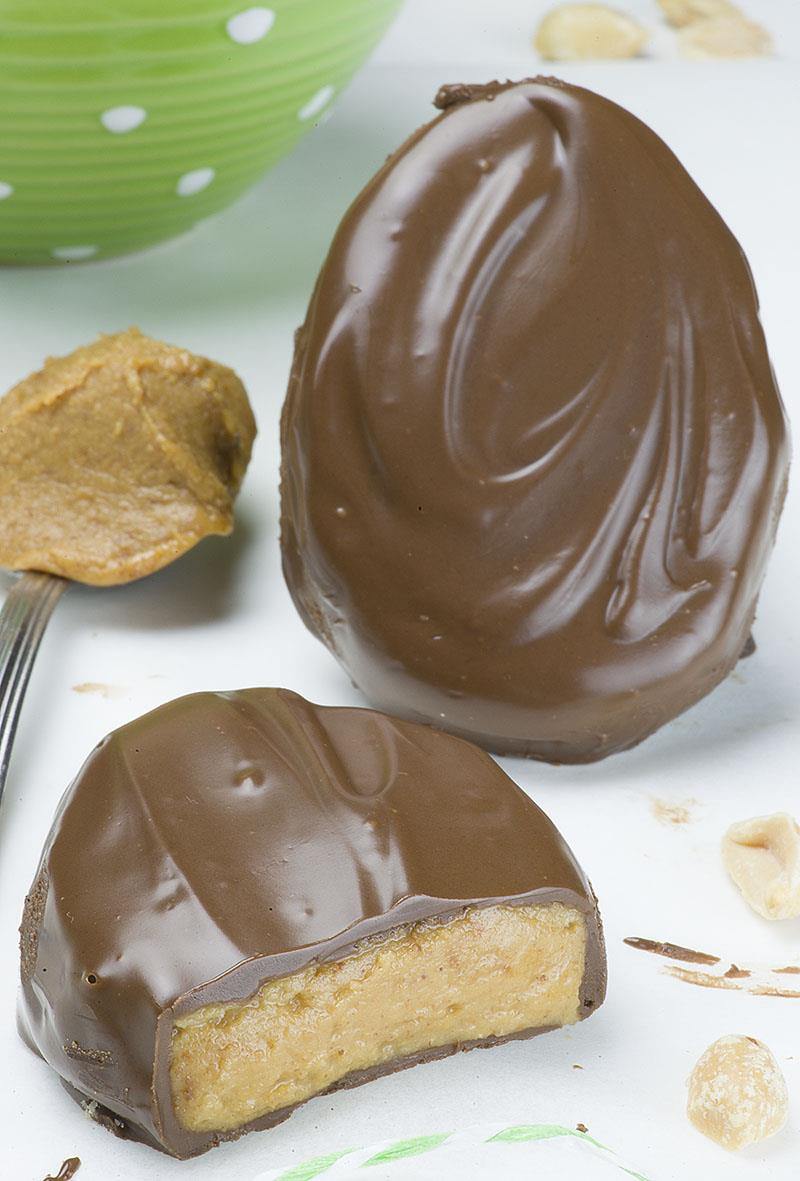
Homemade Reese’s Eggs by OMG Chocolate Desserts

Bunny Pay Thumbprint Cookies by the Bearfoot Baker

Bunny Booty Pretzels by A Soccer Mom Blog

Easter Egg Hunt Cookies by Moms and Munchinks

That solves it. I will definitely be making one of these Easter desserts this weekend. Like those adorable little bunny butt pretzels that require no actual baking. I found a loop hole! 

So, who else want to join bakers anonymous with me? I’ll bring some (homemade) donuts to the next meeting. 😉

/ Filed In: Desserts, Eat
Tagged: bunnies, cake, chocolate, cookies, dessert, Easter, marshmallow

Eyelet Lace Easter Egg Cookies

March 31, 2017

Quick post today, guys! But it’s a good one, I promise because it has a video! Aren’t those so much better than the ones where I just drone on and one? Probably.

I made these cookies after my cookie decorating class this past weekend. Since this was an intermediate class, one of the techniques that I taught was this eyelet lace effect. I love it uses some pretty basic piping techniques, but it looks much more complicated. 

Just see for yourself!

Unfortunately I didn’t catch the part where I added the flowers. But I have shown you guys that effect in another video, so hopefully you can put the two together!

If you want to make some bunnies to go with your eggs, they are super easy! Just outline and fill the cookies. Once they are crusted over (about 20 minutes) add three small dots scattered around the cookie. Then go in and add some flowers! Easy peasy lemon squeasy! (Ok, I know yall are rolling your eyes at me, but I literally taught these same cookies to a bunch of people who little to know cookie decorating experiences, and their cookies turned out awesome! It’s amazing what a couple piping tips can do!)

Here are some of the things I used to make these cookies:

  • toothpick or scribe tool
  • piping tips #1, #16, #18, #24, #224, #349
  • flood consistency icing in white and the colors of your choice
  • piping consistency icing in white
  • stiff consistency icing in various colors for flowers and leaves

If you try these cookies, I would love to see what you create! 

As always, I used my favorite sugar cookie recipe, with a little lemon zest added, and royal icing recipe. 

Have a hoppy Easter!

PRODUCTS USED: 
[show_shopthepost_widget id=”2566372″]

/ Filed In: Cookies New, Decorated Cookies, Eat
Tagged: bunnies, cookies, Easter, Easter Eggs, royal icing, sugar cookies

Gluten Free Sugar Cookie Recipe

March 3, 2017

There are a lot of cookie recipes on this little blog of mine. Lots. I have at least 4 different versions of my favorite sugar cookie recipe. But what I haven’t had until now is a gluten free sugar cookie recipe!

This recipe actually came about through my cookie decorating classes! I had a couple girls in my Halloween class ask if I could make them gluten free cookies instead of my normal sugar cookies. Never one to turn down a challenge, I obliged. While that first batch of gluten free sugar cookies were okay, I knew they could be better!

The perfectionist in me kicked in (it lays pretty dormant throughout most of the year, and really only makes an appearance when cookies are involved) and I knew I had to find the perfect gluten free sugar cookie recipe

I essentially put aside a weekend, canceled all my plans (I had none) to devote myself to this baking challenge. Fortunately, it only took a couple hours on a Saturday (which means I had the recipe of the day to catch up on my DVR…adulting, am I right?). The 4th recipe turned out to be so good I didn’t feel like I need to experiment any further. 

But before I get ahead of myself, let’s discuss these four cookies, shall we?

Trial A:

Recipe: 4 parts GF flour to 1 part almond meal, plus a bit of baking powder. 

Results: A crumbly cookie that completely lost it’s shape when baking. 

Trial B:

Recipe: Half GF flour and half almond meal, plus baking powder. Also, baked 5 minutes longer than A.

Results: A big ol’ disaster! 

Trial C:

Recipe: Doubled the GF flour from recipe A and eliminated the baking powder. 

Results: The shape is a lot better, but the taste and texture are still a bit off. 

Trial D:

Recipe: Increased the amounts of both GF flour and almond meal from recipe B, keeping the ratio roughly 50/50, and eliminated the baking powder. 

Results: A delicious cookie with perfect edges and a great texture (although slightly over-baked)

Clearly recipe D was the winner! And really, it all came down to the texture. I could tell the minute I started rolling out the dough for Trial D. The dough felt like my normal sugar cookie dough. It wasn’t too soft or delicate. It rolled out really well and clearly made the best cookie. 


You can see the difference in texture in the pictures above. When I tried to break C in half, the cookie just kinda fell apart. When I broke D in half, it did just that! I don’t know about you but I don’t like my cookies to crumble into a pile of sand after every bite. Gross!

Okay, enough of the nerdy recipe experimenting stuff. Let’s get to the actual recipe!


This recipe starts like my favorite sugar cookie recipe, with butter and sugar, eggs and vanilla. I also added almond extract (my favorite of all the extracts) because it’s delicious and it compliments the almond flavor that will already be in the cookie. Then, like I said above, I mix in an even ratio of gluten free flour and almond meal until I had a pretty solid ball of dough. Something that would feel tacky to the touch but not so soft that your finger sinks right into it. If you think your dough is too soft, add more almond meal.

Baking these cookies is really no different that any other sugar cookie. I did chill the dough for at least 30 minutes before I rolled it out. This dough will inherently be a little bit softer than normal dough, so you may want to work in small batches, keeping the unused dough in the fridge.

I baked the cookies at 350 degrees for 10-12 minutes. I watched them closely after the 10 minute mark because I really didn’t want them to over bake. If they over bake the dry out even more and they get kind of scaly on top (you can see what I am talking about in the picture of the broken D cookie above). Just as soon as they barely start to brown on the edges, it’s time to take them out!

The resulting cookies are delicious and slightly nutty thanks to all that almond meal. I think they would make a great substitute for any sugar cookie for those of you who have cut out gluten from your diet for one reason or another. Even as someone who does not have a gluten intolerance, I gladly taste tested these cookie over and over again.

It was all in the name of science. 🙂

[amd-yrecipe-recipe:136]

PRODUCTS USED:

 [show_shopthepost_widget id=”2479028″]

/ Filed In: Cookies, Cookies New, Eat
Tagged: almond meal, cookie decorating, cookies, gluten free, King Arthur, sugar cookies, vanilla

Blueberry Oatmeal Cookies

February 24, 2017

What is it about baked blueberries. I mean, they are great all on their own. But baked into a muffin, cupcake, or pie and they are fantastic! You think it has something to do with the flour, sugar, and butter it’s baked in? 

Yeah, me neither. 

Well, these blueberry oatmeal cookies are no exception. In fact, they may be my new favorite blueberry baked good. Ever. Move over blueberry muffin, there’s a new star around here!

Despite what you may be thinking, there isn’t anything all that special about these cookies except the blueberries. I started off with my favorite oatmeal cookie recipe, and instead of adding cinnamon, raisins, nuts, chocolate chips, or anything else you might add to oatmeal cookies, I added some fresh lemon zest and fresh blueberries. 

After the blueberries were folded into the dough, I scooped them out using my favorite cookie scoop onto a parchment lined baking sheet. 

[PSA: If you aren’t covering your baking sheets with parchment when you bake you are doing yourself a HUGE disservice. Not only to they ensure that your cookies will lift right off, but you don’t have to clean your baking sheet afterwards (unless you really want to)! I just just crumple up my parchment and throw it away!] 

Then I baked these cookies just like normal and 15 minutes later they came out of the oven looking and tasting delicious!

They kind of reminded me of a blueberry muffin top, which as you know is the best part of any muffin. They are crunchy around the edges and soft in the middle. The blueberries burst with flavor every time you bite into them. And the lemon zest just makes everything taste super fresh. 

I think I ate half a dozen of these blueberry oatmeal cookies before I stop myself from eating any more. I hadn’t actually baked these for me, I baked the cookies for a friend of mine who recently had her first baby! These blueberry oatmeal cookies are especially great for new, breastfeeding, moms because there is no chocolate (and, thus, caffeine), and the oatmeal is really good for breast milk production (so I am told by Google). 

But don’t wait until your friends have babies to make these cookies. You should make them immediately and thank me later. 

[amd-yrecipe-recipe:133]

PIN NOW, MAKE LATER

PRODUCTS USED 

[show_shopthepost_widget id=”2455223″]

/ Filed In: Cookies, Cookies New, Eat
Tagged: baking, blueberry, cookies, oatmeal, oatmeal cookies

Easy Marbled Fondant Valentine’s Day Cookies

February 10, 2017

We are only a few short days away from Valentine’s Day my friends. Which means I am trying my hardest to get in all my Valentine’s Day posts! One post that I have been meaning to share for a while, but kept getting pushed to the back burner, is these SUPER EASY Fondant Valentine’s Day cookies. 

I stress the SUPER EASY because they are just that. If you have ever played with Play-Doh as a kid, then you know everything you need to know to recreate this marbled effect. 

The reason I love working with fondant so much is that it doesn’t require any icing. Don’t get me wrong. I love working with royal icing. But making up all the icing and decorating each cookie is time consuming. Sometimes you just want to do something simple and easy. You know what I mean?

Also fondant doesn’t require any special skills or equipment. All you need is fondant, a rolling pin, and cookie cutters. The last two I assume you already have if you are making cookies. But if not, you could sub the rolling pin for a wine bottle (I know you have one of those lying around!) and a drinking glass for a cookie cutter.


So to get the marbled affect I first divided my fondant into different pieces and colored them all with various shades of red. To dye the fondant, I added a drop or two to the fondant, then stretched and folded the fondant on top of itself. I would highly recommend wearing food safe gloves for this, if you have them, so your hands don’t turn bright red.

After all my pieces of fondant were various shades of red, I rolled them into ropes and stacked all them together to form one multicolored piece of fondant. From this point on I just kind of haphazardly folded and stretched the fondant (just like I did when I was coloring it), in different directions, until I was happy with the effect. 


Note: the more folding you do, the more the colors will blend together. Eventually, it will just turn into one color, so stop before you over do it.

Once I liked how my fondant was looking, I rolled it out into a really thin sheet. If you have a fondant roller and/or rolling pin bands I would recommend rolling it as thin they will allow. Most people aren’t huge fans of fondant because it can be a little gummy. But if its rolled really thinly, hardly anyone will notice!


After it’s all rolled out I cut it with the same cookie cutter that I used to cut out my cookies. Then I brush one side of the fondant with water and stick that to the cookie. I use my fingers to rub out any lumps or bumps. I also like to run my fingers around the cut edge to make sure that it’s nice and smooth. 

And….that’s it! Now tell me that’s not easy. I dare you!

If you make these for Valentine’s Day I can almost guarantee that people will be impressed with your cookie decorating skills. You don’t need to tell them that a 5 year old could make them. That little secret can stay between us. 

Happy Valentine’s Day!

[amd-yrecipe-recipe:127]

ITEMS USED IN THIS POST

[show_shopthepost_widget id=”2413095″]

/ Filed In: Cookies New, Decorated Cookies, Eat
Tagged: cookie decorating, cookies, fondnt, Valentine's day

Rustic Floral Valentine’s Day Cookies

February 6, 2017

It’s been a while since I have decorated a cookies. Actually, it’s only been about an hour. But at the time of making these rustic Valentine’s Day cookies, it had been a while. After the cookie-decorating marathon that is Christmas, I had to take a break. But what better occassion than Valentine’s Day to get back into the cookie decorating game. 

I also used the opportunity to teach myself how to create the wood effect. I have seen a bunch of amazing cookies on Pinterest and I knew it would be a fun thing to try for Valentine’s Day! The best part was that it was a lot easier than I expected. 

But since a cookie that looks like tree bark isn’t very romantic, I added some flowers. And to put it over the top, I carved my husband’s and my initials into it! So cute, right?

Wanna see how I did it?!

I loved the mixture of the wood and the flowers. I actually loved the carved initials cookie so much that I still have it! I put it in bag and it’s sitting on my desk. 

I also loved these cookie so much, I taught this technique in my last cookie decorating class. I think people really liked them, especially the flowers! It’s amazing what a difference piping tips can make.

If you want to make these at home, here are some things you will need:

  • 1 stiff bristled brush
  • toothpick or scribe tool
  • piping tips #18, #20, #224
  • 2 colors of brown piping consistency icing (you don’t want it to thick, or else you won’t be able to spread it very well, but also not to thin that it won’t hold texture)
  • 2-3 colors of pink stiff consistency icing 
  • 1-2 colors of green stiff consistency icing

If you try these cookies, I would love to see what you create! 

As always, I used my favorite sugar cookie recipe (although these would be great with my chocolate sugar cookie, too!) and royal icing recipe. 

PIN NOW, MAKE LATER

PRODUCTS USED:
[show_shopthepost_widget id=”2436432″]


/ Filed In: Cookies New, Decorated Cookies, Eat
Tagged: cookie decorating, cookies, floral, royal icing, sugar cookies, Valentine's day, video

Kitchen Sink Cookies

January 13, 2017

In case you didn’t hear, this past weekend the South got hit with a bit of snow. If you live in the North East or Midwest, you would laugh at what we consider snow. But here in the South, we go a little crazy.

I stopped by the grocery store the night before the impending snow to stock up on some essentials: butter and eggs. If I am going to be stuck inside all weekend, you better believe I will be doing some baking!

I made a lot of things that weekend, but my favorite were these amazingly random cookies! I didn’t have enough chocolate chips for a full batch of chocolate chip cookies, but I did have a little bit of everything else. I pretty much threw everything except the kitchen sink in these cookies…

…coconut flakes, oats, milk chocolate, white chocolate, and peanut butter chips.

Hence the name.

I used my favorite chocolate chip cookie as a base, then added in all the goodies and hoped for the best! 

Because these cookies needed a little something more (obviously), I added some flaky sea salt to the tops them. All chocolate chip cookies should have some sea salt on top, if you ask me. There’s nothing better than that salty sweetness. 


And despite the the completely random mix of ingredients in these cookies, they turned out amazing! Somehow all those flavors actually go together. Who would have thought!?

I will definitely be making these cookies again. Probably tomorrow.

[amd-yrecipe-recipe:116]

PIN NOW, MAKE LATER


/ Filed In: Cookies, Cookies, Cookies New, Eat
Tagged: chocolate chip, coconut, cookies, oatmeal, peanut butter, white chocolate

Milk and Cookie Cups

December 12, 2016

Milk and Cookie Cups
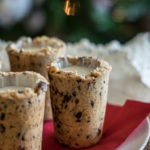
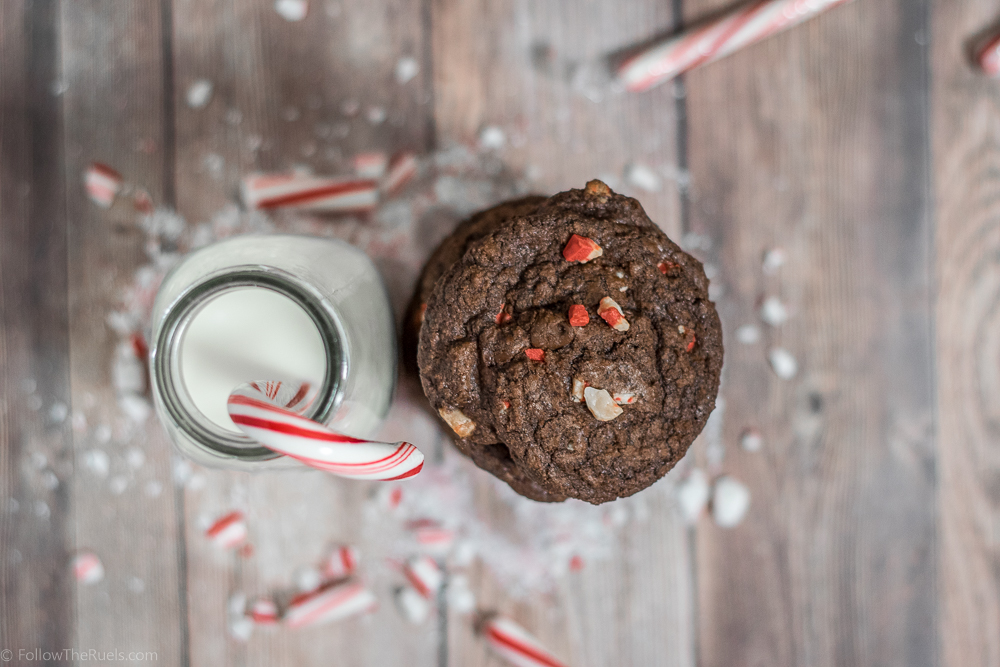
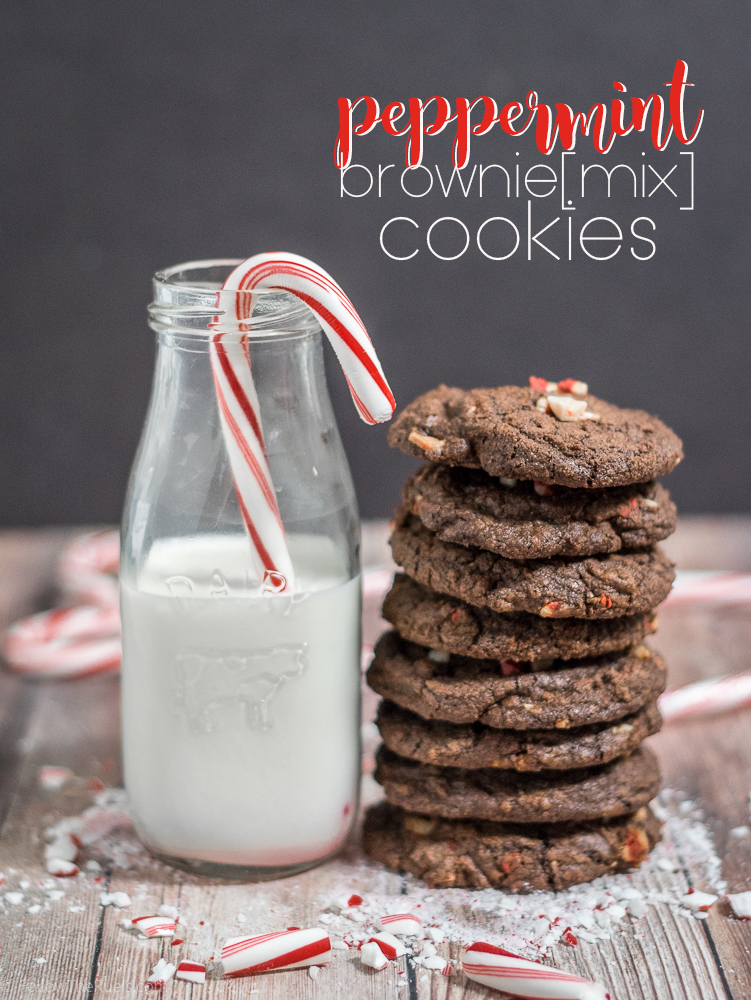
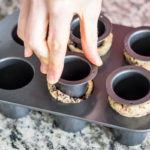
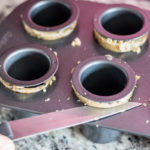
Have you ever thought to yourself, “I wish these milk and cookies were more portable!”. Well I can think of one person who probably has. Santa! Think of all the time it takes to sit down and eat all those cookies. The dunking, the chewing, the drinking…that time could be better spent delivering presents! 😉

Even if you aren’t Santa, these milk and cookie cups are a fun alternative way to drink your milk! Or whatever else you like to drink with your cookies – eggnog, chocolate milk, espresso, Schnapps (there’s no judgement here).

Cookie cups are actually pretty easy if you have a cookie cup pan. I picked mine up from Michael’s, but I imagine you can find it anywhere. And if you don’t have a cookie cup pan, I have also made the same cookies in a popover pan.


I made my cookie cups chocolate chip cookie cups, but the dough isn’t your typical chocolate chip cookie dough. Its much drier and has a similar consistency to pie dough. Classic chocolate chip cookie dough would puff up too much, distorting the shape of the cup. This dough only puffs up a bit, but still retails the cup shape that I want.


And instead of chocolate chips, I used very finely chopped chocolate so that it wouldn’t make the dough lumpy and hard to fit into the pan. It ended up working perfectly because the chocolate melted perfectly.


To the fill the pan, I took a big of hunk of dough and pressed it into the cavity, then I pressed the cup mold into the dough and cut off the extra with the knife.

If I were making these in a popover pan, I would press the dough up against the wall of pan and use a shot glass to form the cup cavity.

Milk and cookie cups

Once out of the oven, I painted the inside of the cup with some melted white chocolate. This is to that the milk, or other liquid, poured into the cup won’t make the cup a soggy mess.

Milk and Cookie Cups
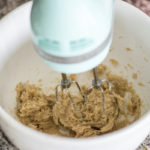
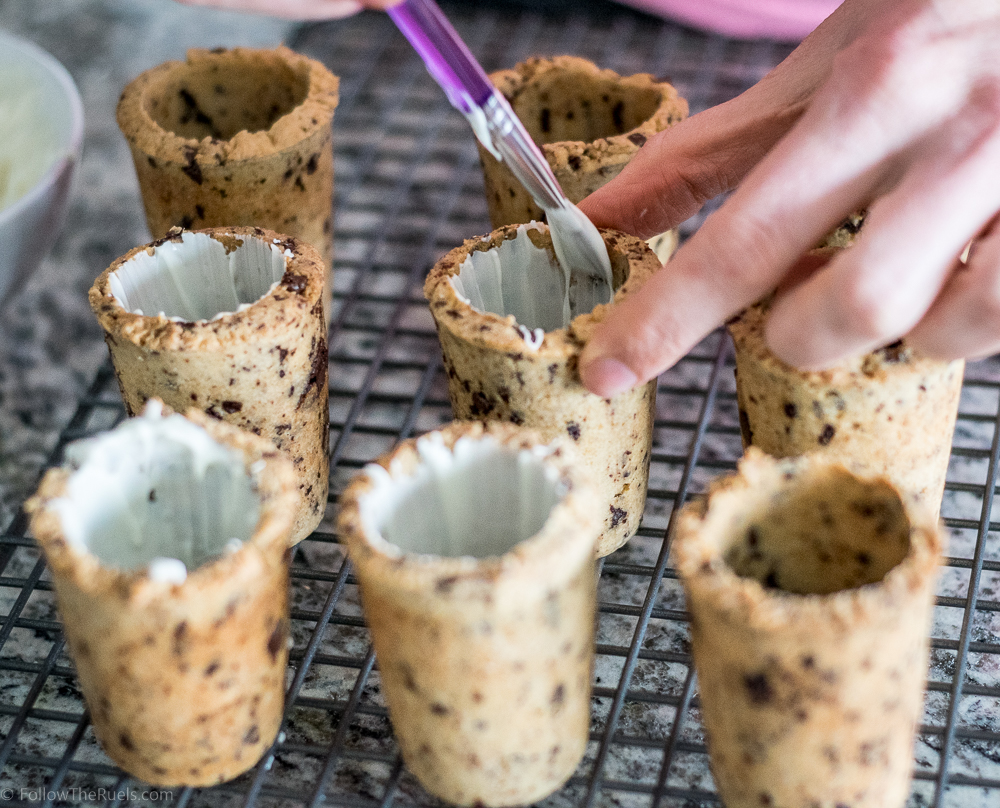
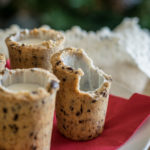
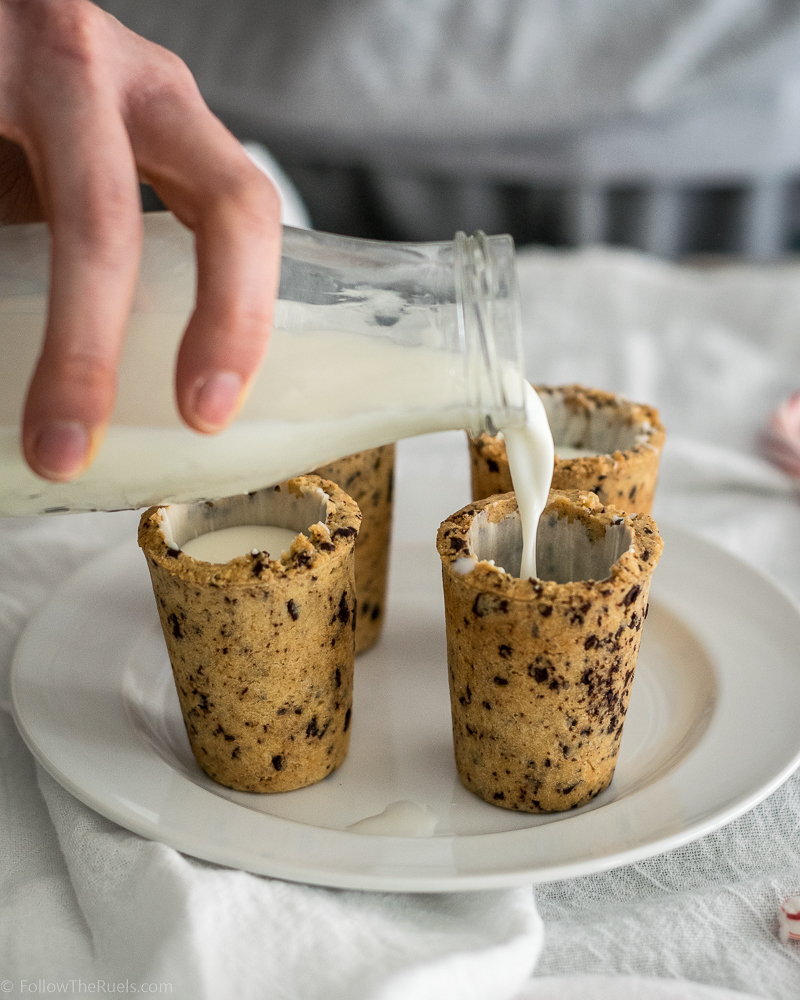
All that’s left is to pour in the milk and put them out for Santa!


These milk and cookie cups are not just a great treat for Santa, but they would be great for kids! Or even adults (maybe if you add a spiked beverage inside). I have also seem something similar filled with espresso. How fun would that be for a holiday brunch? And you don’t even have to limit yourself to liquids. You could fill it with pudding, ice cream or whatever you like.

[amd-yrecipe-recipe:106]

/ Filed In: Cookies, Cookies, Cookies New, Eat
Tagged: chocolate chip, cookie cups, cookies, milk and cookies

Peppermint Brownie Cookies

December 9, 2016

Peppermint Brownie Cookies

I feel like there are two kinds of people in this world: those that love the brownie edge, and those that love the brownie center. Guess which one I am. I’m team brownie edge all the way. I love the crunchy, caramelized corners and sides of the brownie. Sometimes when I make a batch of brownies, I will cut off the scraggly edges and tell myself I am just making them look prettier and more uniform. But if I am being honest with myself, it’s so that I can eat all the edges. 

And that is what I love about these cookies. It is 90% brownie edge! 

What I also love about these cookies is how easy they were to make! It literally took minutes to mix everything together and pop in the oven. In just about 30 minutes I had warm, fresh peppermint brownie cookies. 


These cookies start with, what else, a bag of brownie mix! To that I mixed in some melted butter and one egg. I did not follow the recipe on the back of the box. 


Once it’s all mixed together, its pretty thick. Not at all like a brownie batter but (shockingly) more like a cookie dough. 

For that peppermint flavor, I mixed in some Andies peppermint chunks because that’s what I found at the grocery store. But if you can get your hands on some peppermint chocolate chips or even other peppermint candy, you can add those in instead. 


Another great thing about these cookies is that don’t take nearly as long to bake as a normal batch of cookies. Within a matter of minutes, the chocolate dough had spread out and crisped up around the edges, but remained a bit soft in the center.

Peppermint Brownie Cookies

For the brownie edge love, like me, these cookies are perfect. The first bite it all crunch. But the center is super soft. 

Peppermint Brownie Crunch

However, for those of you who love the soft gooey center of the brownie and are not willing to give that up. Guess what! You can pretty much make the exact same recipe in brownie form! Just follow the recipe on the back of the box and add the water and oil as necessary. 

I can’t alienate half (maybe more) of the brownie loving population. Everyone deserves a delicious bite of chocolate and peppermint. Especially during the holidays. 

[amd-yrecipe-recipe:105]

PIN NOW, MAKE LATER

Peppermint Brownie Cookies

/ Filed In: Cookies, Cookies, Cookies New, Desserts, Eat
Tagged: Andies, brownie, brownie mix, Christmas, christmas cookies, cookies, Peppermint

Red Velvet Sugar Cookies

December 7, 2016

Red Velvet Sugar Cookies

After the chocolate sugar cookies I made a couple months ago, I got this little idea in my head to make red velvet sugar cookies, too. I was going to wait for Valentine’s day, but I couldn’t help but think they would also be perfect for Christmas!

The recipe is almost identical to the chocolate sugar cookie recipe, with only some minor adjustments: less cocoa powder, add apple cider vinegar, add red food coloring. 

Red Velvet Sugar Cookies

Thankfully, I didn’t use nearly as much red food coloring as I anticipated. Sometimes red can be a tricky color to make because a lot of times it will end up pink. But I think having that cocoa powder in the dough really helped enrich the color of the red. I only had to use 1 tsp of the gel food coloring to make it that vibrant red dough. 

However, if you use liquid food coloring, you may have to add a bit more. 


And just like with my other sugar cookies, I like to let this dough rest in the fridge for a bit to chill and also help the flavors all meld together. But, if you are in a big of a time crunch, you can roll these out right away. 

Red Velvet Sugar Cookies

Isn’t the red dough so pretty??

Red Velvet Sugar Cookies

I just think they turned out so wonderfully! The red is so vibrant and they taste wonderful! Just like red velvet! I think they would be delicious smeared with a little cream cheese frosting and topped with some sprinkles. Which would be great for Christmas, but also would be great for Valentine’s Day with pink sprinkles. Oh! What about 4th of July if  you add some blue sprinkles? These cookies are turning out to be more versatile than I thought!  

Or you could go simple and just dust them in powdered sugar, appropriate any time of year.

Or…

Red Velvet Christmas Cookies

You could decorate them with royal icing for the holidays!! I just used my favorite royal icing recipe to make some festive designs. The best part is you don’t have to do as much icing because you want the red cookie to show through!

I bet who ever is on the receiving end of these cookies (even if its just your stomach) will be delighted!


[amd-yrecipe-recipe:104]

/ Filed In: Cookies, Cookies New, Eat
Tagged: cookies, red velvet, sugar cookies

The Perfect Christmas Cookies

November 25, 2016

The Perfect Christmas Cookies

I’m sharing everything you need to know to make the perfect Christmas cookies!

By now it’s probably clear that I like to make cookies. They are my go to treat whenever I have to bring something to a party, especially during the holidays. In the last couple years, I have dedicated more and more time to not just baking cookies but decorating them, too! I even teach classes on cookie decorating through a local Charlotte company, SkillPop. Not only is it fun for me to make them, I get love giving them to other people, knowing that they will be enjoyed!

It’s also clear to me that I am not alone in this. I see a MAJOR uptick in traffic to my cookie and icing recipes this time of year. And because I get so many questions about cookie decorating, I thought I would write down all my tips and tricks for you guys so you can not only make the perfect Christmas cookies, but awesome cookies year round!

Be prepared, I have basically written a novel on cookie decorating. I have broken it down into the basics: the dough, the icing: and the decorating. I have linked to a lot of my recipes and other products that I use and recommend to make your cookie decorating experience a bit easier. Know that my recipes and products are not necessary for delicious and beautiful cookies. But they will help.

The Dough 

Christmas Cookies

The dough is the foundation for the perfect Christmas cookie. For just about all my cookies I use my all time favorite sugar cookie recipe. The reason I love this recipe so much is that the cookies hold their shape perfectly, which means whatever they looked like when you cut them out is pretty much how they will look when they come out of the oven. That is key for decorating cookies, because then you have a better guide for outlining your cookie – you aren’t trying to guess what the original shape was. 

I get a lot of compliments on these this cookie recipe. While they aren’t super soft cookies, they aren’t crispy either. I try not to over bake them – taking them out of the oven at the first signs of browning – which ensures that they stay nice and tender. 


To make sure I have evenly shaped cookies every time I use a nice big rolling pin (I recently bought this rolling pin and absolutely LOVE it) and these rolling pin bands. I absolutely swear these bands and tell all my friends (and cookie decorating students) to get them. They ensure that the dough rolled out to a consistent thickness so that each cookie is exactly the same. And in case you are wondering, I use the largest (blue) band to roll out my cookies.  

Christmas Cookies

I also prefer to use the coated metal cookie cutters (like these, these, and this gift set that I bought mainly for the cookie spatula) because they are easier to clean and don’t rust. But I have cookie cutters of all types in my collection and tend to use whatever has the best shape. A tip to ensure that the cookie cutters don’t stick to the dough and potentially warp the cookie shape is to dip it in a pile of flour first, then cut out the dough. 

I also like to roll out my dough on a sheet of parchment paper. This helps me use less flour so that the dough doesn’t stick to the counter tops and makes it a lot easier to lift off the cut out cookie. 


Why you shouldn’t use store bought dough

A lot of people ask me if they can just use store bought dough. The answer is, of course you can – you can use whatever sugar cookie recipe you like best. HOWEVER, your cookies aren’t going to come out the same. Store bought dough and cookie mixes (as well as some other recipes) contain leavening agents (baking soda, baking powder, etc) in it which make the cookies softer, but they will also lose their shape when baked. See the example below. 


I rolled out a very popular brand of sugar cookie dough the exact same way I cut out the cookies in the first picture in this post (the exact same thickness). Once the cookie came out of the oven, it was almost unrecognizable.  

I know making your own dough can be a lot of work, but I promise you, it is worth it! I tend to make big batches of it and store it in the freezer (wrapped in plastic wrap and then bagged in a zip top freezer bag) this time of the year because I know I will go through lots of it. 

Make the dough your own

Chocolate Sugar Cookies

Another added plus to making your own dough is that you can make it whatever flavor (and color) you like by adding various spices and flavorings. During the holidays, I love to add cinnamon and nutmeg to my cookies for that nice holiday spice flavor, or even make chocolate sugar cookies like you see above.

This year I developed 12 new sugar cookie recipes perfect for Christmas, which I published in my Christmas Cookie Guide. 

Making Cookies in Advance

During the holidays, we tend to make LOTS of cookies. Which means, if you are trying to do it all in one day, you will be working for hours! Fortunately, you can make the dough and even bake the cookies well in advance. Here’s what I do:

If I am just making the dough in advance, I wrap it up in plastic wrap and then store in a freezer zip top bag and keep it in the freezer until I am ready to cut out the cookies. I just let the dough sit out on the counter for a couple hours to thaw before rolling it out. The dough will keep in the freezer for a month.

If I am baking the cookies in advance, I will roll out the dough and bake as normal. Then, once they are cooled, I will stack them in a freezer zip-top bag (sometimes 2) and then store them in the freezer until I need them. The cookies will last in the freezer for a couple weeks, if not longer. I like to double bag them if I think they will be in there a while. 

The Icing

The Perfect Christmas Cookies

Okay, so the sugar cookies are probably the part that most of you guys have down. You all have made cookies before so you are pretty much pros! It’s the icing that may be new to you.

I have shared my recipe for my favorite royal icing previously. The main difference between royal icing and your normal icing is the meringue powder (which can also be purchased at your local craft store). It is essentially processed egg whites and when added to powdered sugar and water, it makes the perfect icing for cookie decorating. I forms a nice flat surface on the cookie that hardens perfectly so that the cookies can be stacked and packaged without causing any damage. It can also be made thicker to make more detailed designs, like dots, letters, stripes, flowers, etc.

To color my icing, I prefer to use gel food coloring (here is my favorite brand) because it is super pigmented and won’t water down the icing as much. But no matter what, remember: a little goes a long way! Don’t go overboard with this stuff!

There are two types of icing that I use most often: flood consistency and piping consistency. They are the exact same recipe I linked above, but one uses less water than the other. One other distinction about them is that flood consistency icing takes a few hours to dry completely. Sometimes I like to let them sit overnight. The piping consistency icing will only take about 30 minutes to an hour. Just keep them in mind as you start packing up all your pretty cookies. 

Flood Consistency Icing


The perfect flood consistency icing is icing that settles back into a flat surface within 10 to 15 seconds after you drag a spoon or toothpick across the surface. I use flood consistency icing about 90% of the time. It is what I use to outline and fill (or flood) all my cookies. It is thick enough that it won’t fall over the edges of the cookies, but thin enough that it creates a nice even surface.

To get it to just the right consistency, I add a little water at a time using a spray bottle (if I am working in small batches) or a teaspoon (if I am working in big batches). I add enough water until it starts to feel like its getting a little bit runny. Then I start counting. Yes, I still have to count to 15 every time I make icing so I am sure it’s perfect! 

Piping Consistency Icing


Piping consistency icing is a bit thicker that flood consistency icing. It is what I use to add detail to a cookie. Typically I add detail once the first layer of icing has dried enough that I can pipe right on top. I don’t have an exact formula for piping consistency icing, and sometimes I want it thicker or thinner depending on what I am using it for. Generally, it will fall off the back of a spoon into a soft peak or mound, but not settle into a flat surface. In the cookie above, I used piping consistency icing to make the string of lights. I also use it to write letters, make borders, or other precise details.

I also have this handy video of the process I use to make the icing the right consistency. You can see how thick it is when it’s piping consistency (I actually ended up thinning it down even more than what’s in the video, but it’s pretty close), and how thin it is when it’s flood consistency. 


Making Icing in Advance

Just like with the cookies, you can make the icing in advance, too. However, not at far in advance. If possible, I like to make my icing the same day I am using it. However, for big projects, that may not easy to do. 

If you want to make the icing days (or even weeks) in advance, I recommend that you make the icing but DO NOT thin it down at all. Spoon the icing in an air tight container than cover the icing with plastic wrap. The plastic wrap should be touching the icing so that no air is between the plastic wrap and the icing. Then cover it with a lid and place in the fridge or freezer. You will have to let this come to room temperature before you thin it down or use it. 


If you want to make the icing just 1 day in advance, you could thin down a big batch of icing to flood consistency and store in a bowl or container the same way I described above. Then, when you are ready to decorate, just give the icing a stir and color as normal. Flood consistency icing does not keep very well because the water will start to separate from the rest of the icing. 

Decorating

Now we have our cookies and our icing, so the fun can begin! 

Outlining and Flooding


The first step in most of my cookies is outlining and filling the cookies. I start by outlining the cookie as close to the edge as I am comfortable, then filling in the outline with the same flood consistency icing. I like to fill in the outline so that there is almost no cookie showing underneath. Then I use a toothpick, or scribe tool, to move the icing around in circular motions to get an even layer of icing. 

Here’s a tip I tell everyone, when you are piping your icing, lift the tip of the piping bag up and just let the icing fall onto the cookie. Don’t drag the icing across the surface (you can watch me here). You won’t get a nice straight line if you do it that way. 

Wet on Wet Piping


One of the techniques I use a lot is called the “wet on wet” techniques. That is when I pipe wet icing directly onto the icing I just piped. By doing so, the “fresh” icing settles into the first layer of icing. For instance, in the picture above, I piped the white snowflake immediately onto the blue icing so that it completely blended into the first layer creating a cohesive surface. 

When you pipe wet icing onto wet icing, it also gives you some freedom to manipulate it a little to get just the right shape. In the picture of the Christmas light cookie, I piped an oval of white icing onto the red, then used my toothpick to drag one edge out to create that tear drop shape. 

I also use this technique to make polka dots (like the cheeks of the gingerbread men, above), stripes, scallops, etc. 

Adding Details


The cookies really start to come together for me when I add the little details. This almost always done using piping consistency icing, described above, because it creates sharp lines, dots, or other texture. 

To add the details, I wait for the first layer of icing to crust over. Usually this takes about an hour. If I am adding lots of detail I will sometimes wait overnight so that I don’t mess up the first layer of icing. Then I just pipe my designs right on top. 

Marbling Technique


I love sharing this technique with people because its looks awesome on the cookie but its actually really easy to pull off. You can see in the purple cookies above, that there is this really pretty swirl effect going on behind the gold ‘M’. It probably looks like it took a lot of time and effort to pull off. Nope, not at all. In fact, it was probably easier than outlining and flooding the cookies. 


I start with a bowl of flood consistency icing, then I pipe on contrasting color (or 2 or 3) in a haphazard design. Then I dip my cookie onto the surface and lift straight up, letting all the excess icing drip off. I sometimes twist the cookie a bit to make more of a swirled pattern. Then I just set my cookie out to dry. If there are any air bubbles, I will tap the cookie on the surface to get them to pop. 

Easy right? I think these would look really pretty with a mixture of reds and greens for the holidays. Or you can just do red and white to make them look like peppermint!

My preferred supplies

You don’t need anything special for cookie decorating. In fact, most of the time I use plain old zip top bags. Like the cheap, generic brand zip top bags. Every once and a while, if I feel extra fancy I use piping bags (like these or these), which really aren’t fancy at all. If I want to make sure I have perfect lines, dots, or other decorations (like leaves or roses), I use a piping tip. I bought this case years ago, but I tend to use my Wilton #2 and #3 most often. 

So there you have it, pretty much everything I know about decorating cookies. I hope this will help you create your own masterpieces this holiday season!

P.S. In an effort to be fully transparent, some of the links used in this post are affiliate links, which means that if you were to purchase one of the products I listed, I will receive a very small commission. All proceeds from this post will be used to make more cookies. 

/ Filed In: Cookie Decorating 101, Cookies New, Decorated Cookies, Eat
Tagged: Christmas, christmas cookies, cookies, decorating, icing, sugar cookies

Halloween Macarons

October 17, 2016

Halloween Macarons

I was hoping to have this post up last week, but my computer decided to stick a wrench in those plans. I turned my computer on on Tuesday morning and had a very ominous warning that my computer’s fan was not working. Like any good computer owner, I decided to go to work and not worry about it, hoping that it would just heal itself. Computers can do that, right? 

Sadly, I came home and the fan was still not working. I was able to start my computer anyways, but ran the risk of my processor overheating. The last thing I did before I completely ruined my computer was to upload the video of me making the macarons to YouTube. Between that video and the photos I somehow decided not to delete off of my memory card, I actually have a post for you today!

Halloween Macarons

And this one I am really excited about! I have been wanting to do something fun with macarons for the holidays, so why not start with Halloween?! These Halloween Macarons were actually really easy to make, maybe easier than decorating cookies because they are so much smaller. 

I started by making my favorite Laduree Macaron recipe. When the batter was just about mixed together, I split it into 3 bowls, dyed one orange, one black, and one white. Yes, I actually dyed the batter white even though it’s pretty white already. The white food coloring really helped brighten and lighten up the batter, making it perfect for my mummies!

After the macarons were baked and cooled, I got to work decorating! The orange macarons turned into Jack-O-Lanterns. The black macarons turned into spider webs. And you know what happened to the white ones. 

I could explain all that in a post….but wouldn’t it be better to watch me do that? Yeah…I thought so. 

Here is the recipe for the macarons: Laduree Macaron Recipe & Video

I made the full recipe (normally I just make a third for 12 macarons), and then split the batter to make 3 different colors, or about 12 of each. 

Here is the recipe for the royal icing: The Best Royal Icing for Decorating Cookies

Because the macarons are smaller than your average cookie, I had a lot of icing left over. You could probably halve this recipe and still have enough. Here is how I divided the icing:

  • Approx. 1/3 of icing in black flood consistency icing (web background, mummies eyes, and background of jack-o-lantern)
  • Approx. 1/3 of icing in orange flood consistency icing (jack-o-lantern)
  • Approx. 1/4 of icing in white flood consistency icing (mummy, spider web)
  • Remaining in black piping consistency icing (spider)

You could fill the macarons with just about whatever you want, I chose to fill it with dark chocolate ganache. You can find the recipe I used here. But, nutella, buttercream, or a jam would also work well. 

Let me know if you try out these Halloween macarons, or even if you attempt the designs on a normal cookie! I would love to see your creations!

 PIN NOW, MAKE LATER

Halloween Macarons

/ Filed In: Cookies, Cookies New, Desserts, Eat
Tagged: cookies, Halloween, holiday, macaron

Chocolate Sugar Cookies

October 10, 2016

Chocolate Sugar Cookies

We are heading into cookie season. Well, for me it’s always cookie season. But it really picks up with all the holidays coming up. 

I have been wanting to try some other sugar cookie flavors for a while, and have been testing out a chocolate sugar cookie flavor, which I think will come in really handy for Christmas cookies! It is very similar to my classic sugar cookie recipe and creates the perfect cookie for decorating since the edges stay nice and crisp.

Chocolate Sugar Cooke Dough

Really the only difference with this cookie recipe is the addition of cocoa powder and a bit more sugar. I also like adding a little bit of coffee extract (which you can easily make at home by soaking coffee beans in vodka for a couple weeks) in addition to the vanilla because the coffee flavor really enhances the cocoa flavor. 

Chocolate Sugar Cookies

One of the biggest questions I get about my cookie dough recipe is how to know when the dough is the right texture or consistency. Some people find the dough to be too dry then some people will make the exact same recipe and it will be so moist that it sticks to their counters. So, here is what I do:

After the butter, sugar, eggs, and extracts are all mixed together, I mix in the first cup of flour. Then I mix in the next 1/2 cup and test the dough.

I test the dough by pressing it with a finger and if the dough sticks to my finger it’s not ready.

Add 1/2 cup more, then test. 

Add 1/2 cup more, then test.

By this point, the dough should be tacky, but not stick to my fingers. If it does, I keep adding flour 1/4 cup at a time. 

Chocolate Sugar Cookies

I hope that helps clarify the recipe. Because you want these cookies to keep their shape when they bake, it’s best for the dough to be pretty dry. They aren’t going to be like Lofthouse-soft sugar cookies. They are going to be more like a shortbread cookie. Unfortunately, I don’t know of a way to get the best of both worlds. 

The great thing about these chocolate sugar cookies is that the cocoa powder has a bit of extra fat in it which makes these cookies a little bit more moist than normal. Almost like a brownie in cookie form….almost. 

Either way, be prepared to see a lot of these chocolate sugar cookies on Instagram and Snapchat in the next couple months. They are going to be my go-to recipe between now and Christmas. 

PIN NOW, MAKE LATER

Chocolate Sugar Cookies

[amd-yrecipe-recipe:85]


/ Filed In: Cookies, Cookies New
Tagged: chocolate, christmas cookies, cookies, sugar cookies

Funfetti Sugar Cookies

September 19, 2016

Funfetti Sugar Cookies

Guys! It’s been so long since I have written a blog post! Anything posted in the last 3 weeks was written before we left for Germany. Honestly, the break was nice. Especially last week, when I took a legitimate break and didn’t post anything. But the timing couldn’t have been better because work was crazy and I had so many extracurricular activities. I would have had a break down if I had made myself post anything. 

But now I am back and so excited to share this funfetti sugar cookie recipe with you! 

Funfetti Sugar Cookies

This past weekend I spent pretty much every free minute in the kitchen making cookies for a friend who’s company is turning 1! Very exciting, right? Her company, SkillPop, hosts pop-up classes for adults on any number of subjects from personal finances to water coloring. I am actually teaching a cookie decorating SkillPop class this week!

But instead of just making any old sugar cookie, I decided to make funfetti sugar cookies. Because to me, a it isn’t a birthday without funfetti!

Funfetti cookie dough

The recipe is essentially my sugar cookie recipe with sprinkles added. I also added lemon zest to the dough and lemon juice to the icing to really make the flavor pop.

While I did end up covering these cookies with icing, they little bits of sprinkles still made an appearance. They are like a little fun surprise when you bite into the cookie. 

PIN NOW, MAKE LATER

Funfetti Sugar Cookies

[amd-yrecipe-recipe:77]


/ Filed In: Cookies, Cookies New, Eat
Tagged: birthday, cookies, funfetti, sprinkles, sugar cookies

Mexican Hot Chocolate Cookies

August 26, 2016

Mexican Hot Chocolate Cookies

So this is actually an old recipe that I had published way back in the day. However, if you were to go back and look for it, the pictures won’t load and the recipe isn’t correct. Not all the helpful is it? I finally decided to take one for the team and make a batch of these yummy Mexican Hot Chocolate cookies so that I could post an updated recipe. 

It’s a hard job, but someone has to do it. 

What I love about these cookies is that they are so unexpected. They look like a chocolate cookie, but they are so much more than that. They are definitely chocolatey. But they are also spicy! Not like “whoa, that’s hot” kind of spicy. Like a “hmmm…what is that flavor I’m tasting?” kind of spicy. Don’t worry, it totally works! The cinnamon and chocolate flavor combination is somewhat unusual, but they go together so well. The cinnamon almost makes the chocolate a little sweeter by balancing out the bitterness. 

Mexican Hot Cocoa Cookies-1

But the kicker is that teeny tiny bit of cayenne pepper that I throw in there, too. I don’t actually tell people that it’s in there because it’s not all that evident. No one is going to take a bite and immediately think there is cayenne pepper in the cookie. But its just that little but of heat that you pick up a the end that really makes these cookies interesting, in the most delicious sort of way. 

Mexican Hot Cocoa Cookies-5

To add to the “hot chocolate factor” I of course add some marshmallows. Why the heck not!? Because marshmallows will melt completely if I threw them in with the batter, I actually just stick them on the top of the cookie when they are about 5 minutes away from being completely baked. The cookie is still soft and the marshmallow just sinks right in. The last 5 minutes of baking, the marshmallow puffs up and gets very soft. 

Mexican Hot Cocoa Cookies-3

These are definitely not your average cookie, but they are so good! Soft, rich, sweet, and a teeny bit spicy. If the extra spices make you nervous, you can omit them from the recipe and just make hot chocolate cookies. But I promise they won’t be as good!

[yumprint-recipe id=’174′] 

/ Filed In: Cookies, Cookies New, Desserts
Tagged: chocolate, cinnamon, cookies, hot cocoa, marshmallows

Peanut Butter Chocolate Chip Cookies

August 19, 2016

Peanut Butter Chocolate Chip cookies

Is there any better flavor combination than peanut butter and chocolate? Seriously! Name one that’s better! I dare you!

Even though I don’t eat as much peanut butter these days (damn you, Whole 30!), every once and a while I get a serious craving for peanut butter and chocolate. What do I do to satisfy that craving? Make peanut butter chocolate chip cookies! (Or one of the Reese’s Eggs I store in my freezer after Easter. You know…if I’m in a pinch.)

When these cravings hit…and they hit hard…I don’t have time want to take the time to try to come up with my own recipe. So I turn to the wonderful Internet and it’s plethora of recipes to find one that a) looks good, and b) doesn’t require any ingredients I don’t already have on hand. I have tried quite a few and for some reason have been a little disappointed. The recipes I have tried are often WAY too dry. I know peanut butter cookies are often on the drier side, but there’s got to be a sweet spot where they are still a bit crunchy, but also not a cracker!

Well, I was determined to figure it out. 

Peanut Butter Chocolate Chip Cookies

After some trial and error, I found that the trick is brown sugar. Brown sugar helps keep the cookies moist so they are a lot softer than your average peanut butter cookie. Brown sugar also reacts with the baking soda so that they rise a little bit more making them more soft and less dense. 

Peanut Butter Chocolate Chip Cookies-10

My other new trick that I picked up from my favorite chocolate chip cookie recipe, is a sprinkle of sea salt on top. I think a sprinkle of sea salt should be mandatory on just about all chocolate chip cookies. It takes them to a whole new level!

[amd-yrecipe-recipe:69]

/ Filed In: Cookies, Cookies New, Eat
Tagged: chocolate, chocolate chip, cookies, peanut butter

  • Newer Entries
  • 1
  • 2
  • 3
  • 4
  • 5
  • 6
  • Previous Entries

Follow

Hey There!

Hey there, I'm Lindsey. I'm a number cruncher by day and a home cook and baker by night. While I love to eat healthy and find fresh and healthy alternatives for my favorite foods, I will never turn down dessert! Life is all about moderation, right?

Recipes

  • All Recipes
  • Breakfast
  • Appetizers
  • Salads
  • Main Dishes
  • Side Dishes
  • Desserts
  • Drinks

Favorite Finds

[show_lookbook_widget id=”388783″]

Theme by 17th Avenue · Powered by WordPress & Genesis