• Home
  • Eat
    • Breakfast
    • Appetizers
    • Main Dishes
      • Chicken
      • Beef
      • Seafood
      • Healthy Dishes
      • Paleo Dishes
      • Salads
    • Desserts
      • Decorated Cookies
      • Cookies
      • Bars and Brownies
      • Cakes and Cupcakes
  • Shop
    • Cookie Decorating Supplies
    • Bakeware
    • Cookware
    • Kitchen Gadgets
    • House
  • About
    • Contact
    • Bucket List
  • Cookie Decorating 101

Follow the Ruels

Seven-Minute Frosting

August 6, 2018

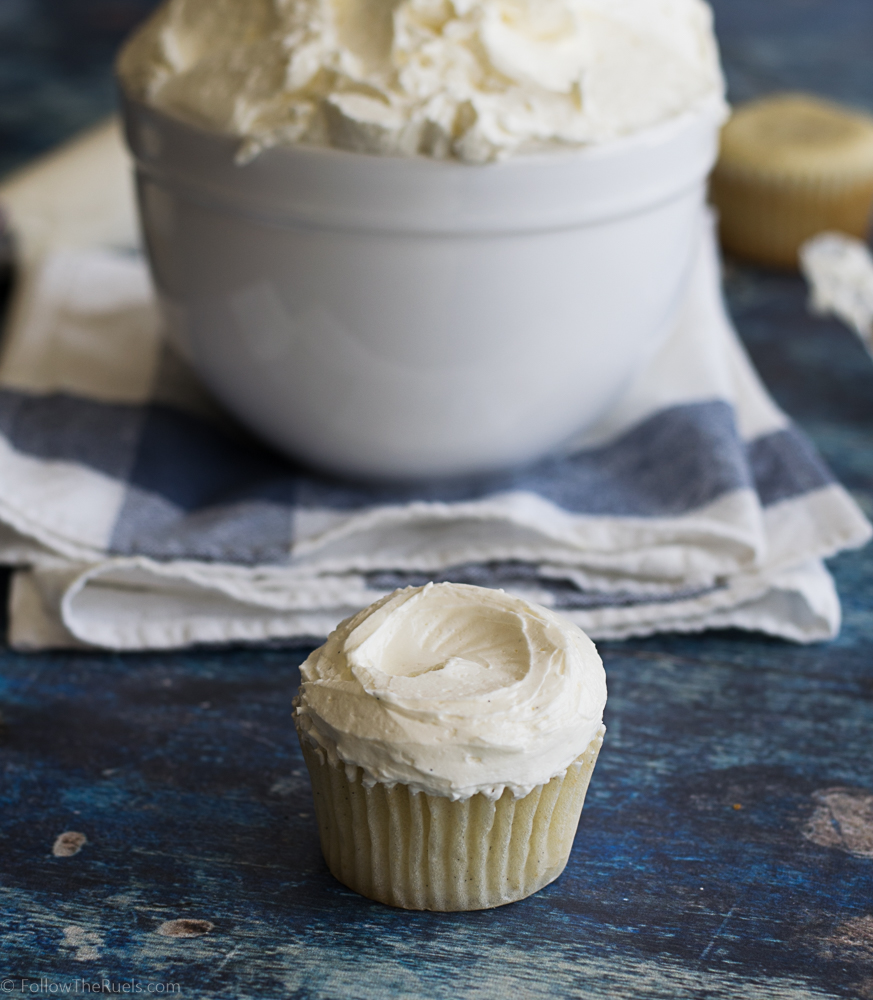
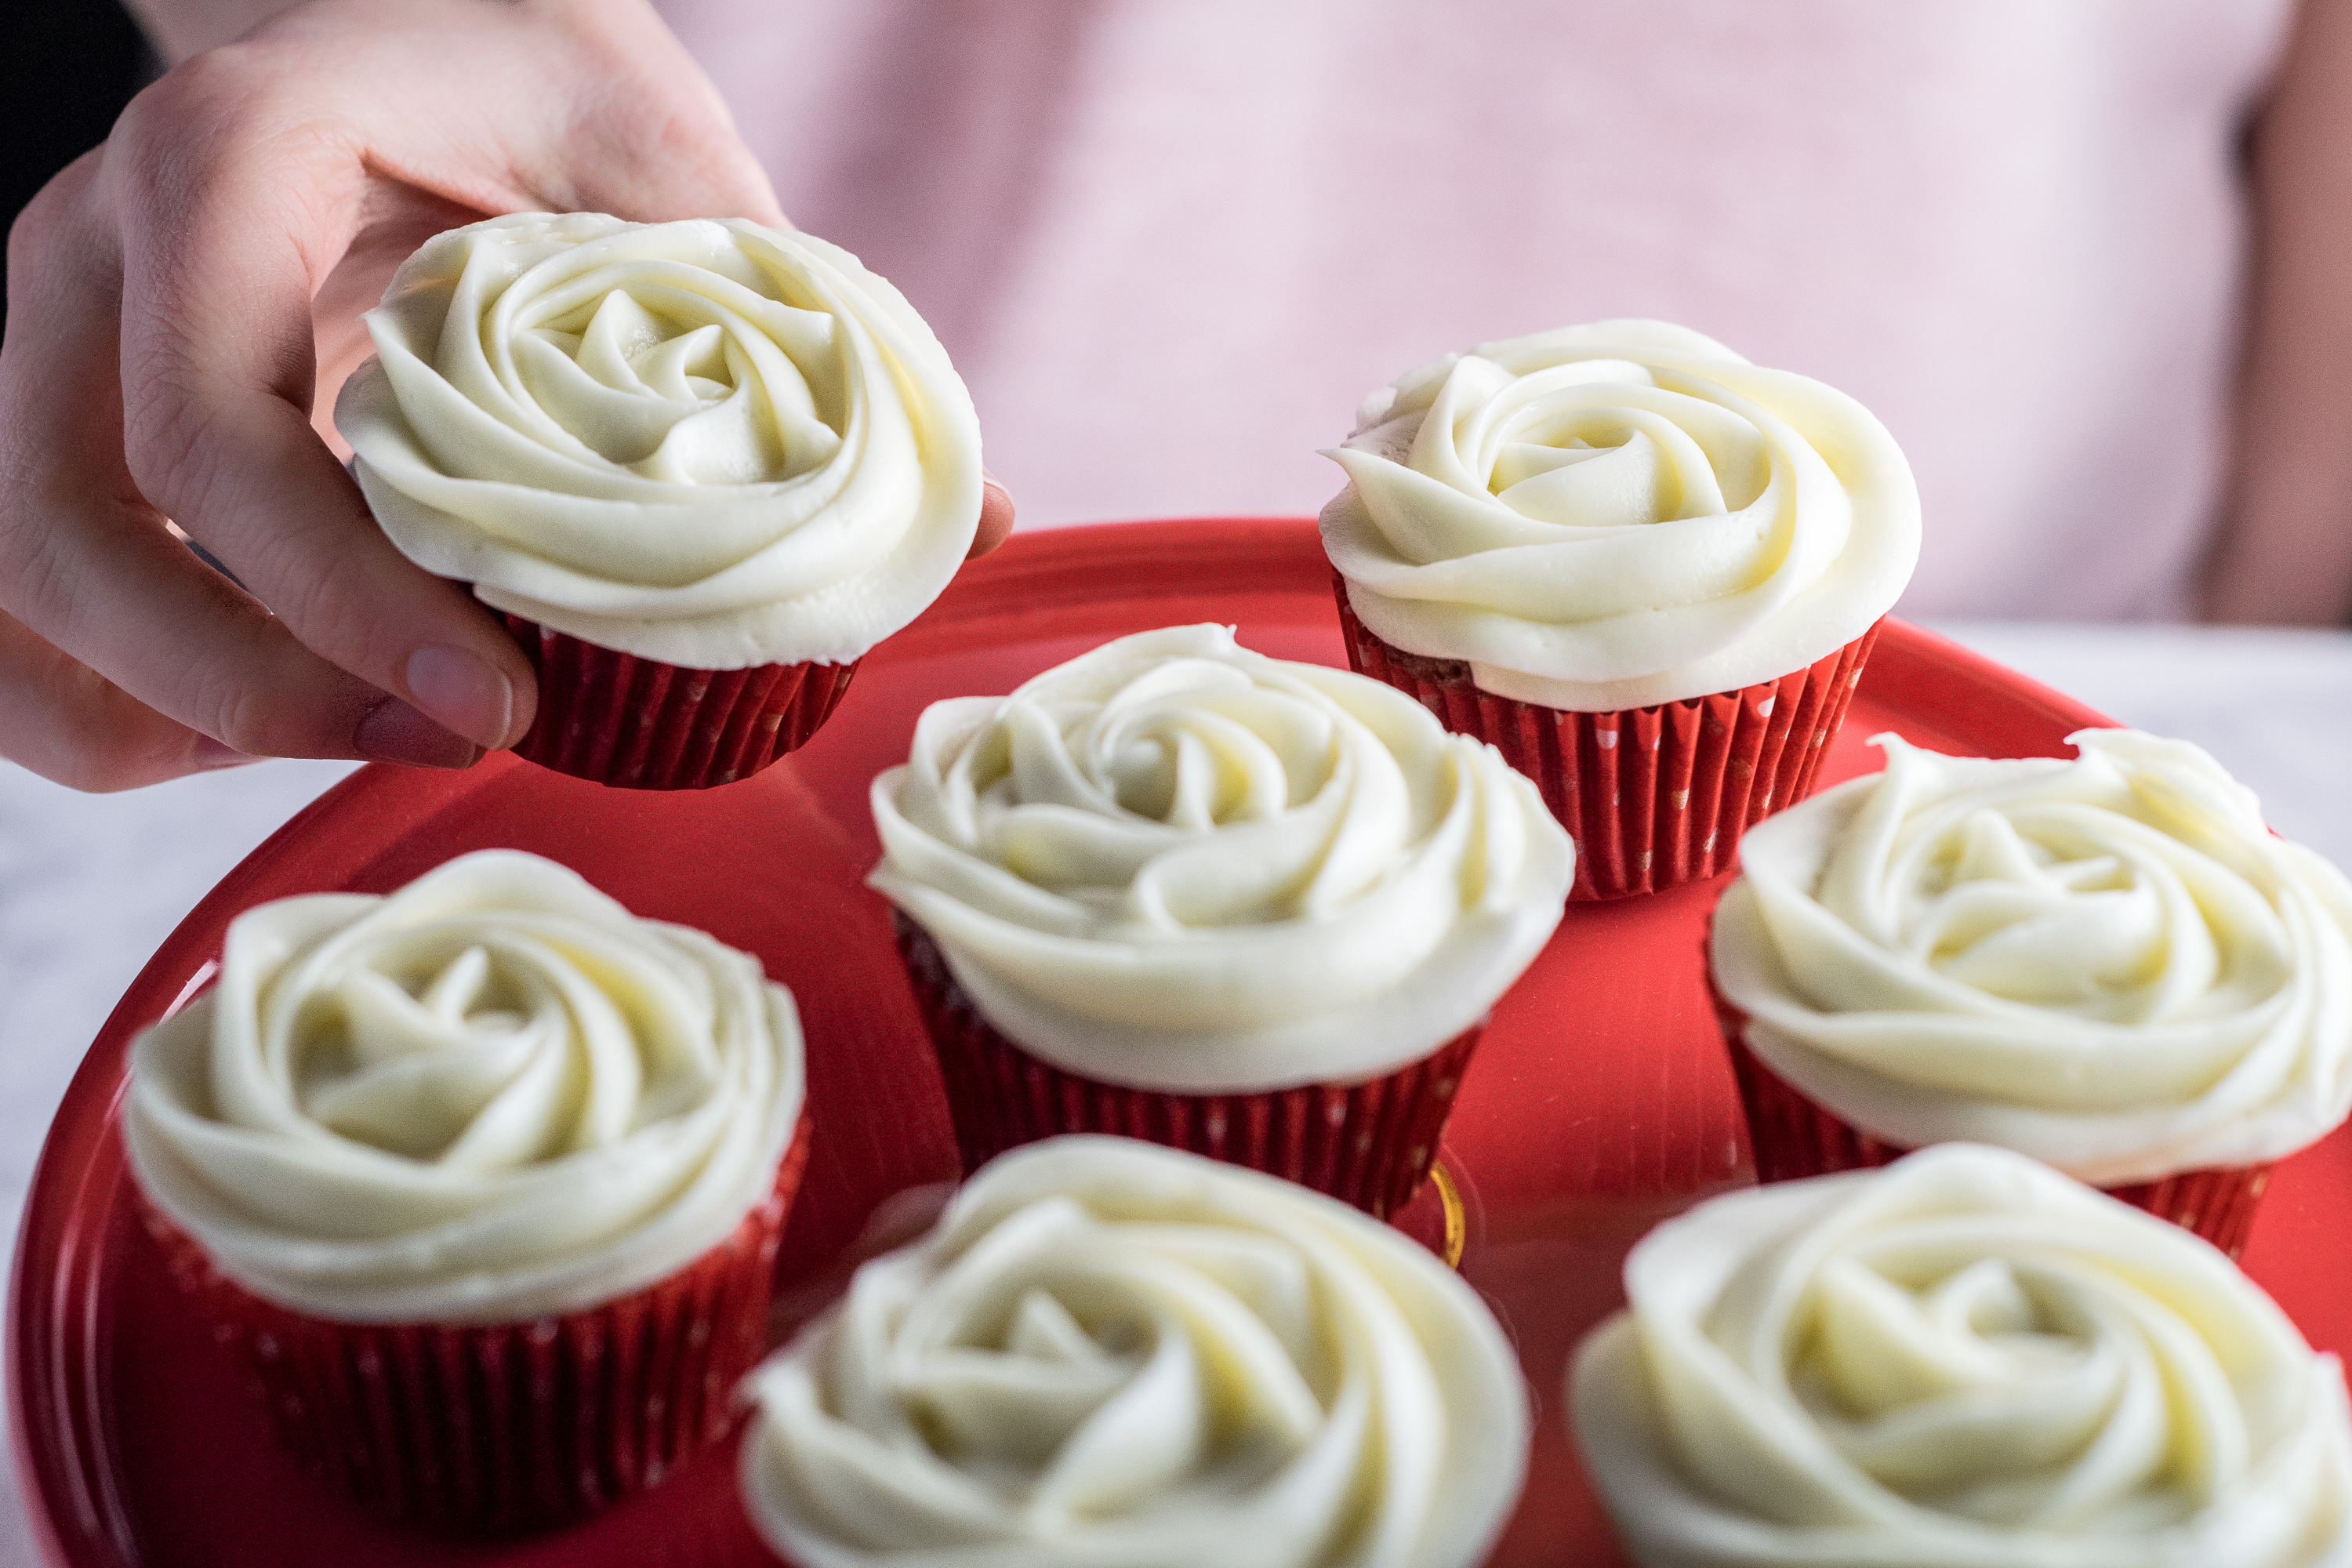
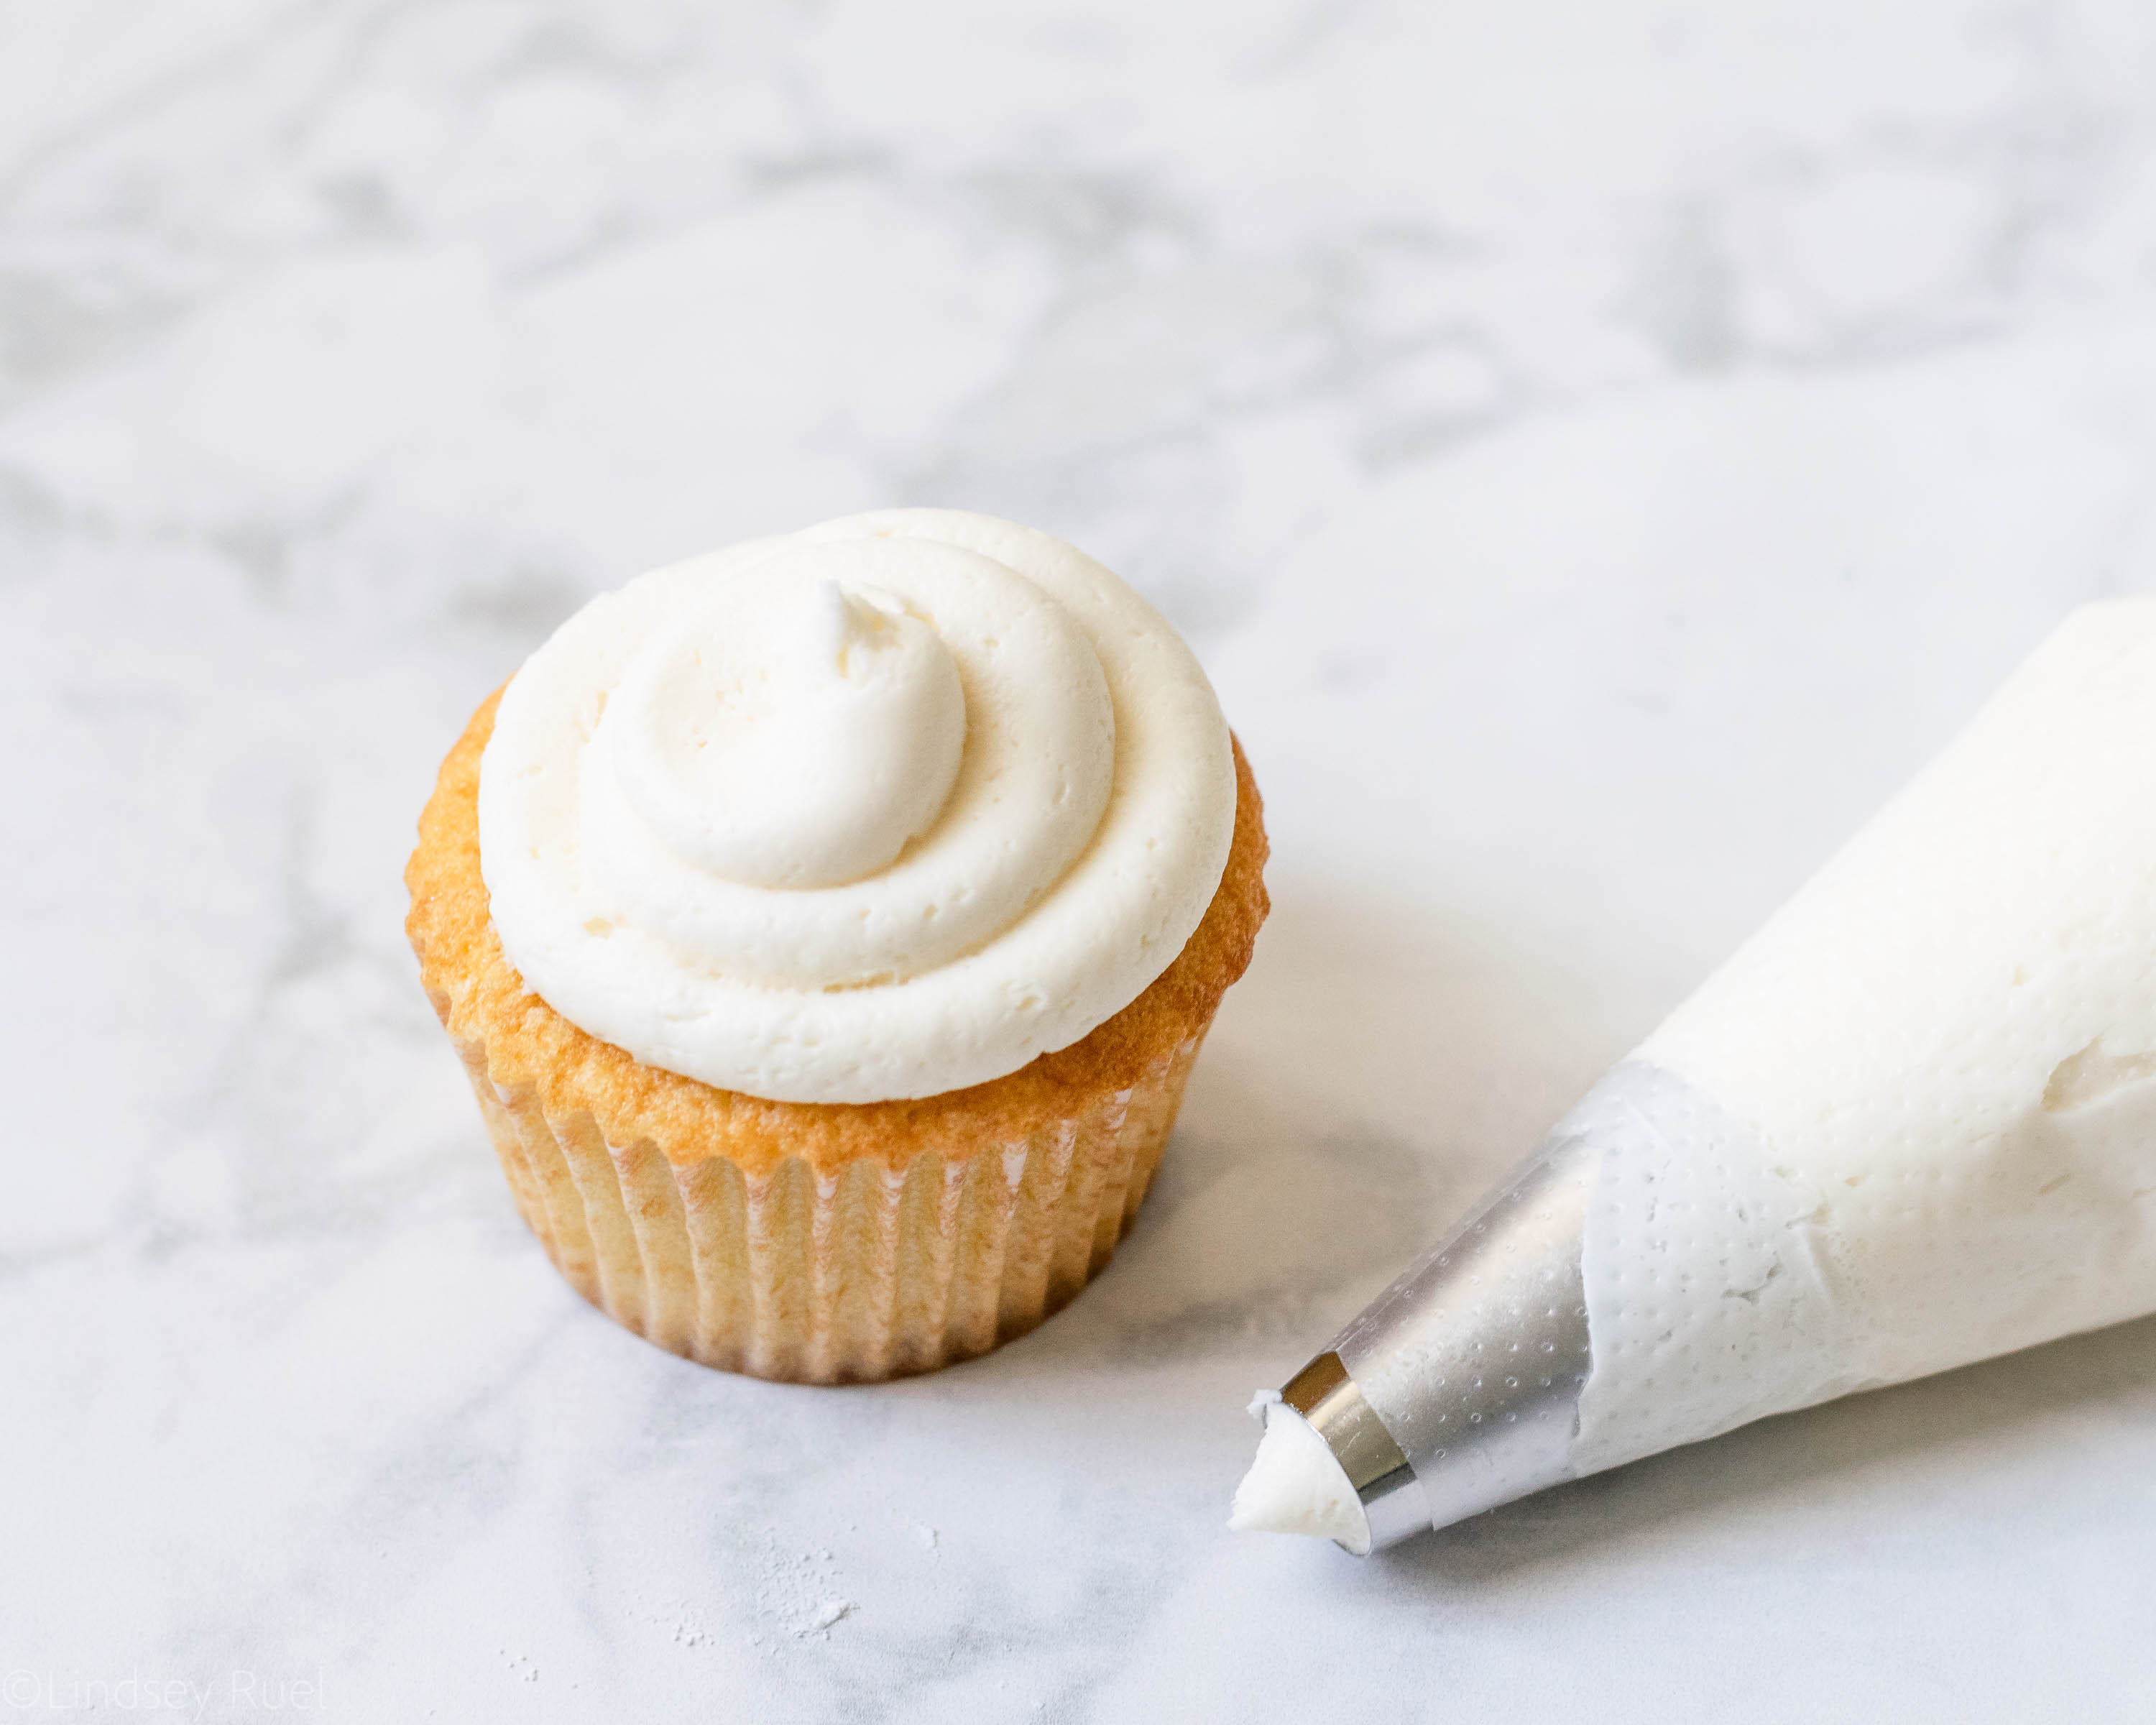
I can’t believe it has taken me this long to share my quick and easy seven-minute frosting with you guys! While I won’t say it’s my favorite buttercream (my Swiss meringue buttercream still takes the cake, literally), it is the perfect frosting to make when you are in a pinch. 

And in case you are wondering if it actually takes seven minutes to make. Yes, it does! The last time I made the frosting I turned on the stopwatch on my phone. From beginning to end (including measuring and sifting) it took just seven minutes!

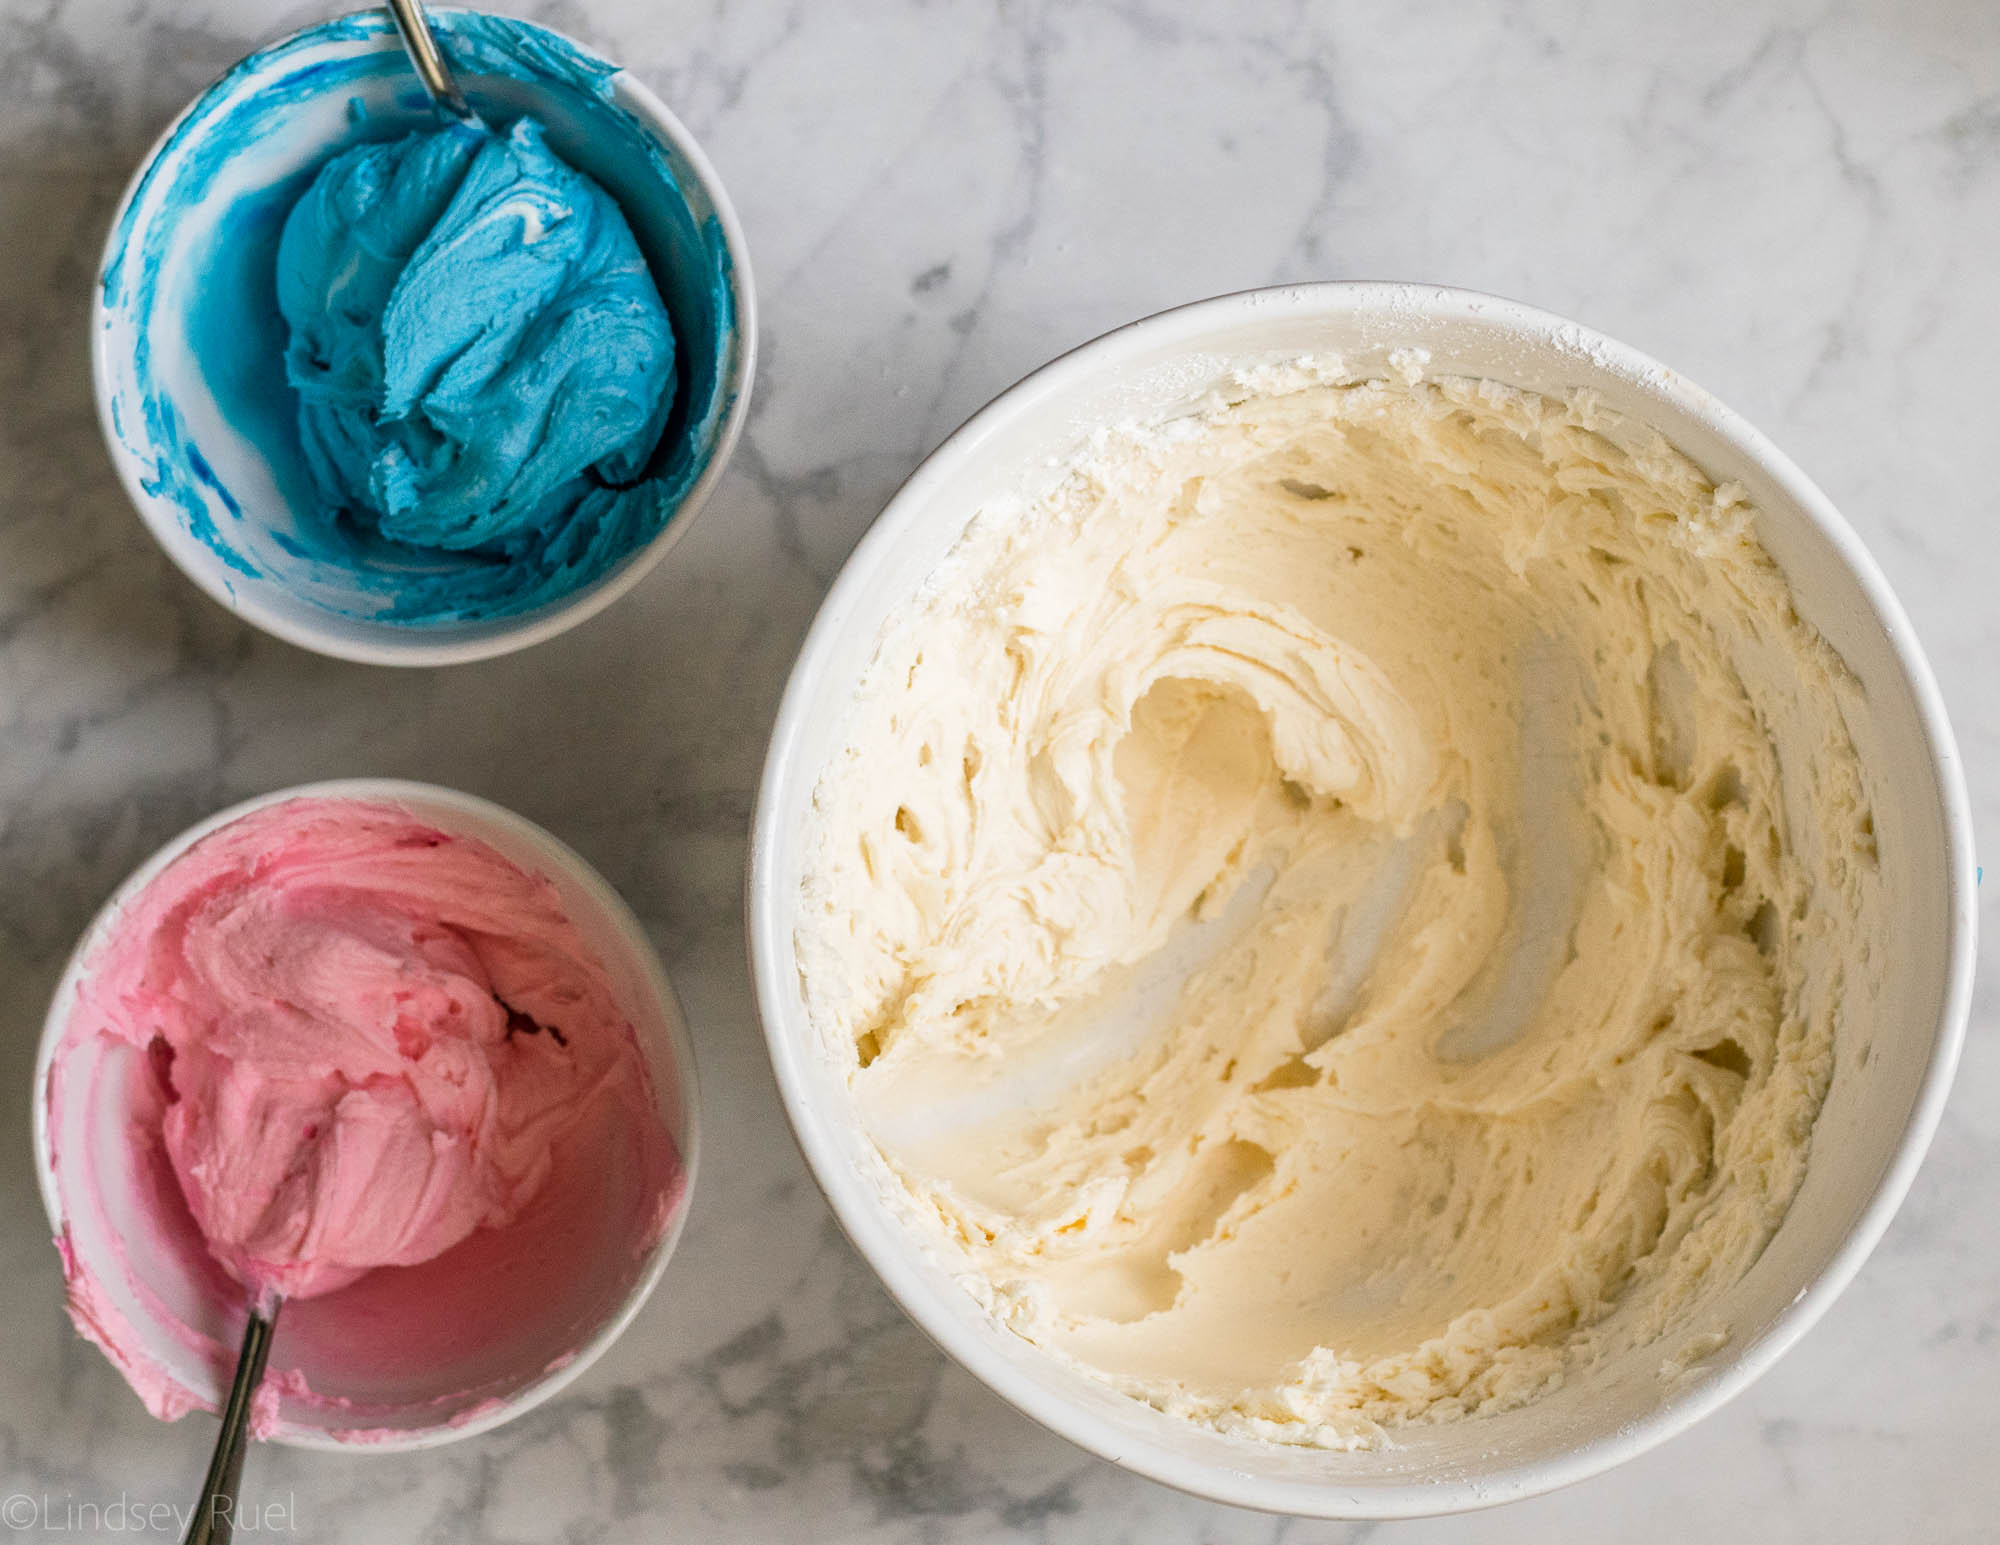
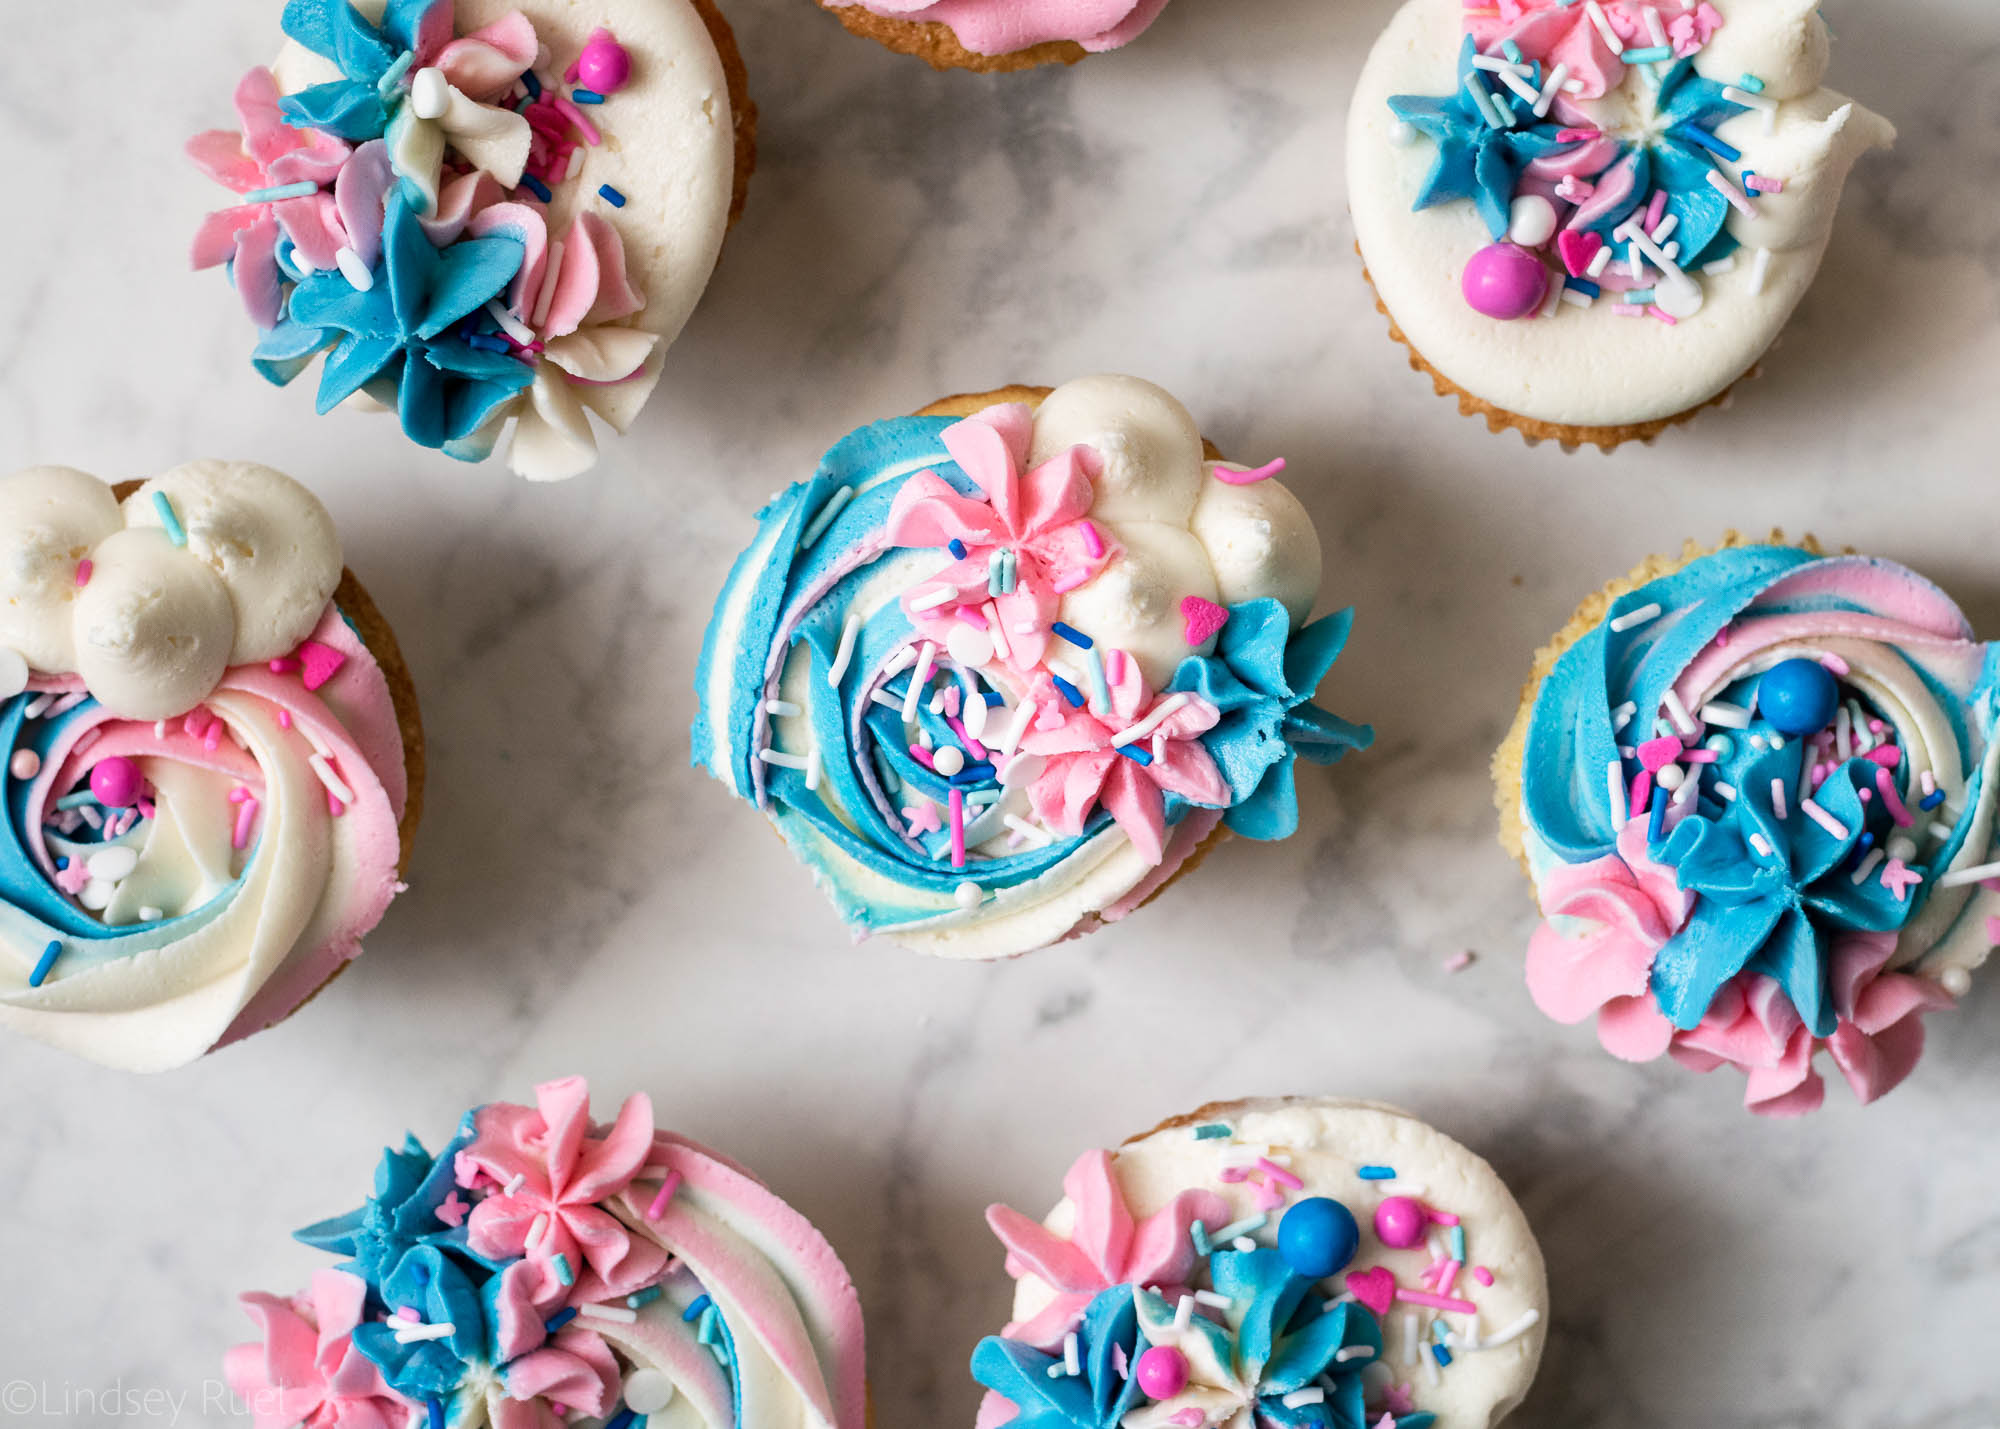
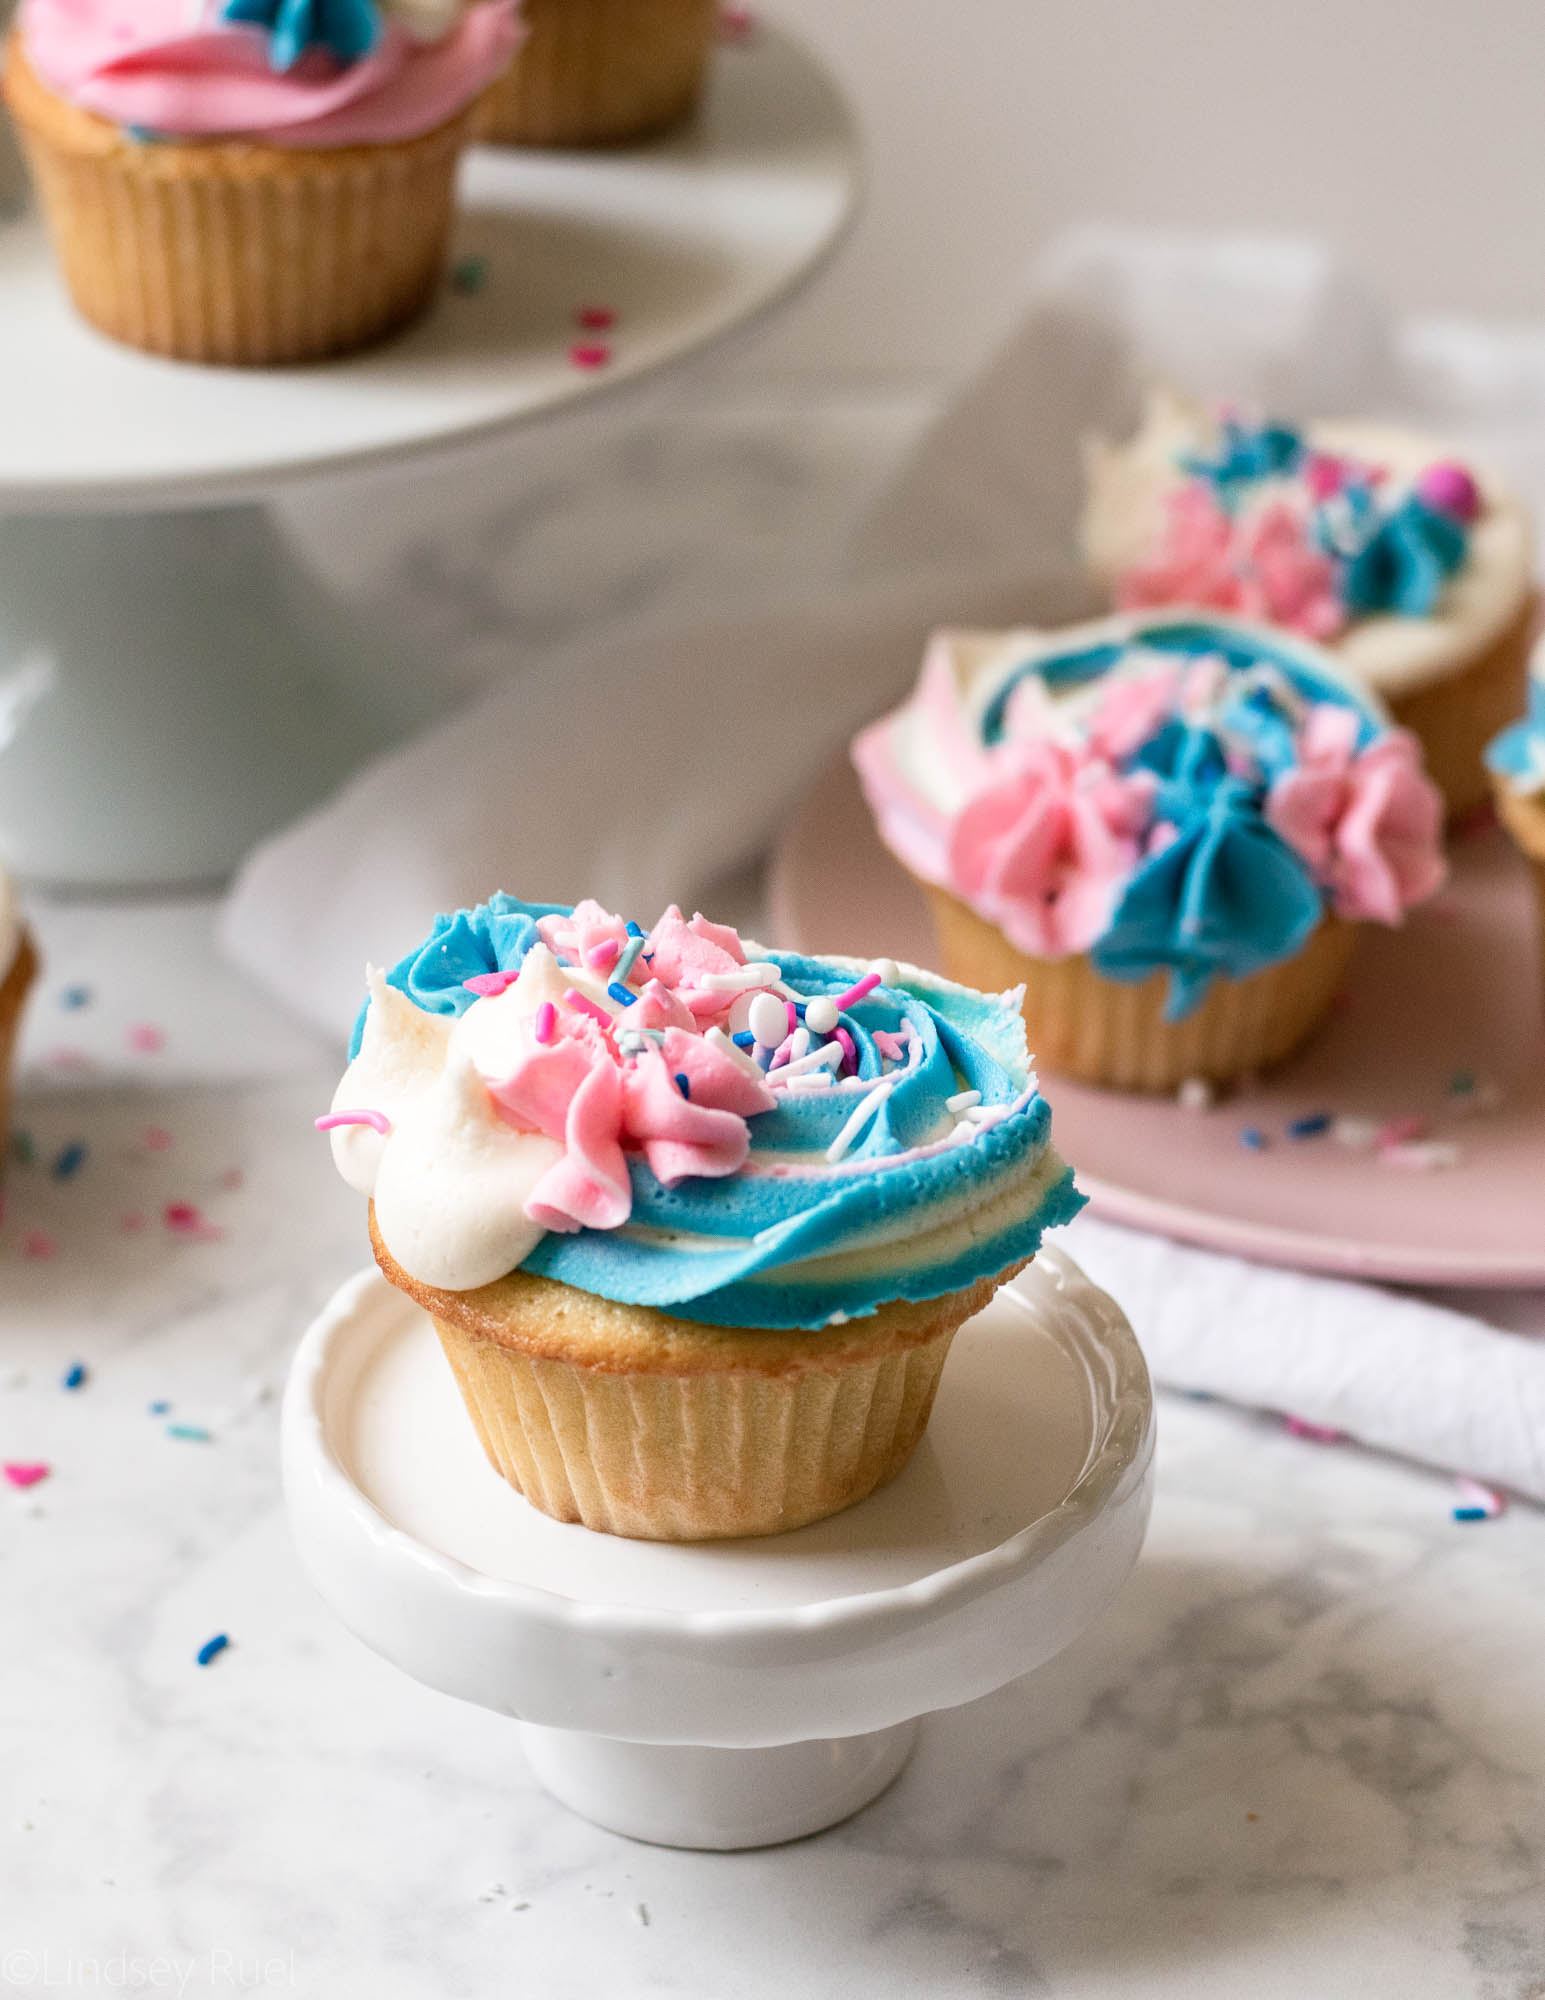
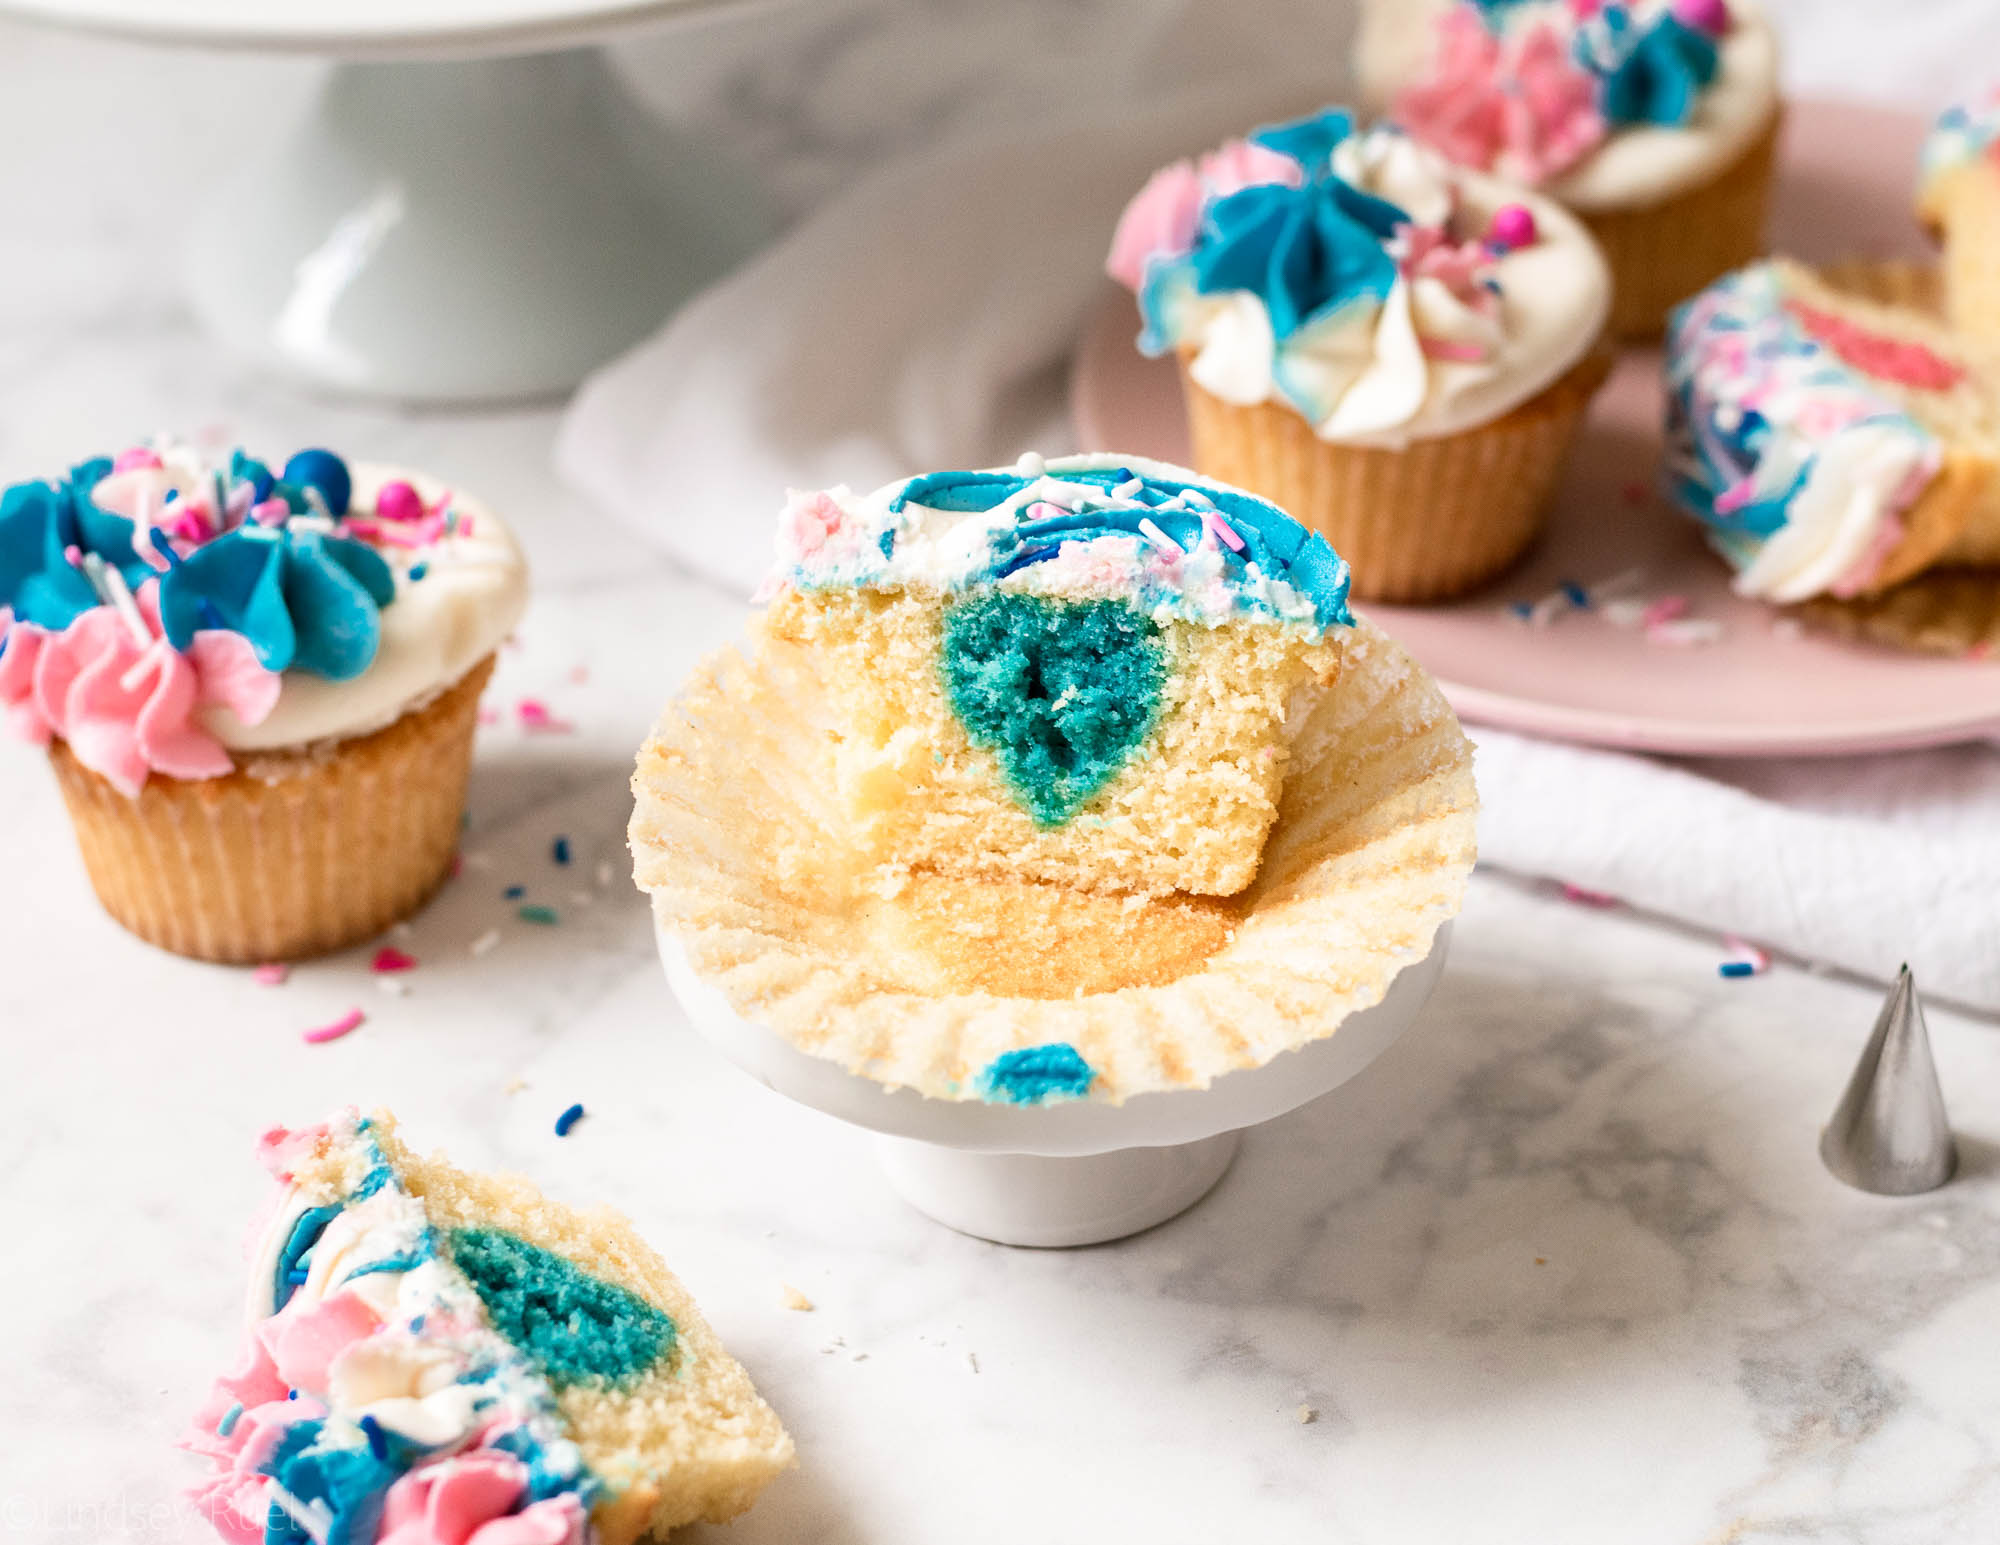
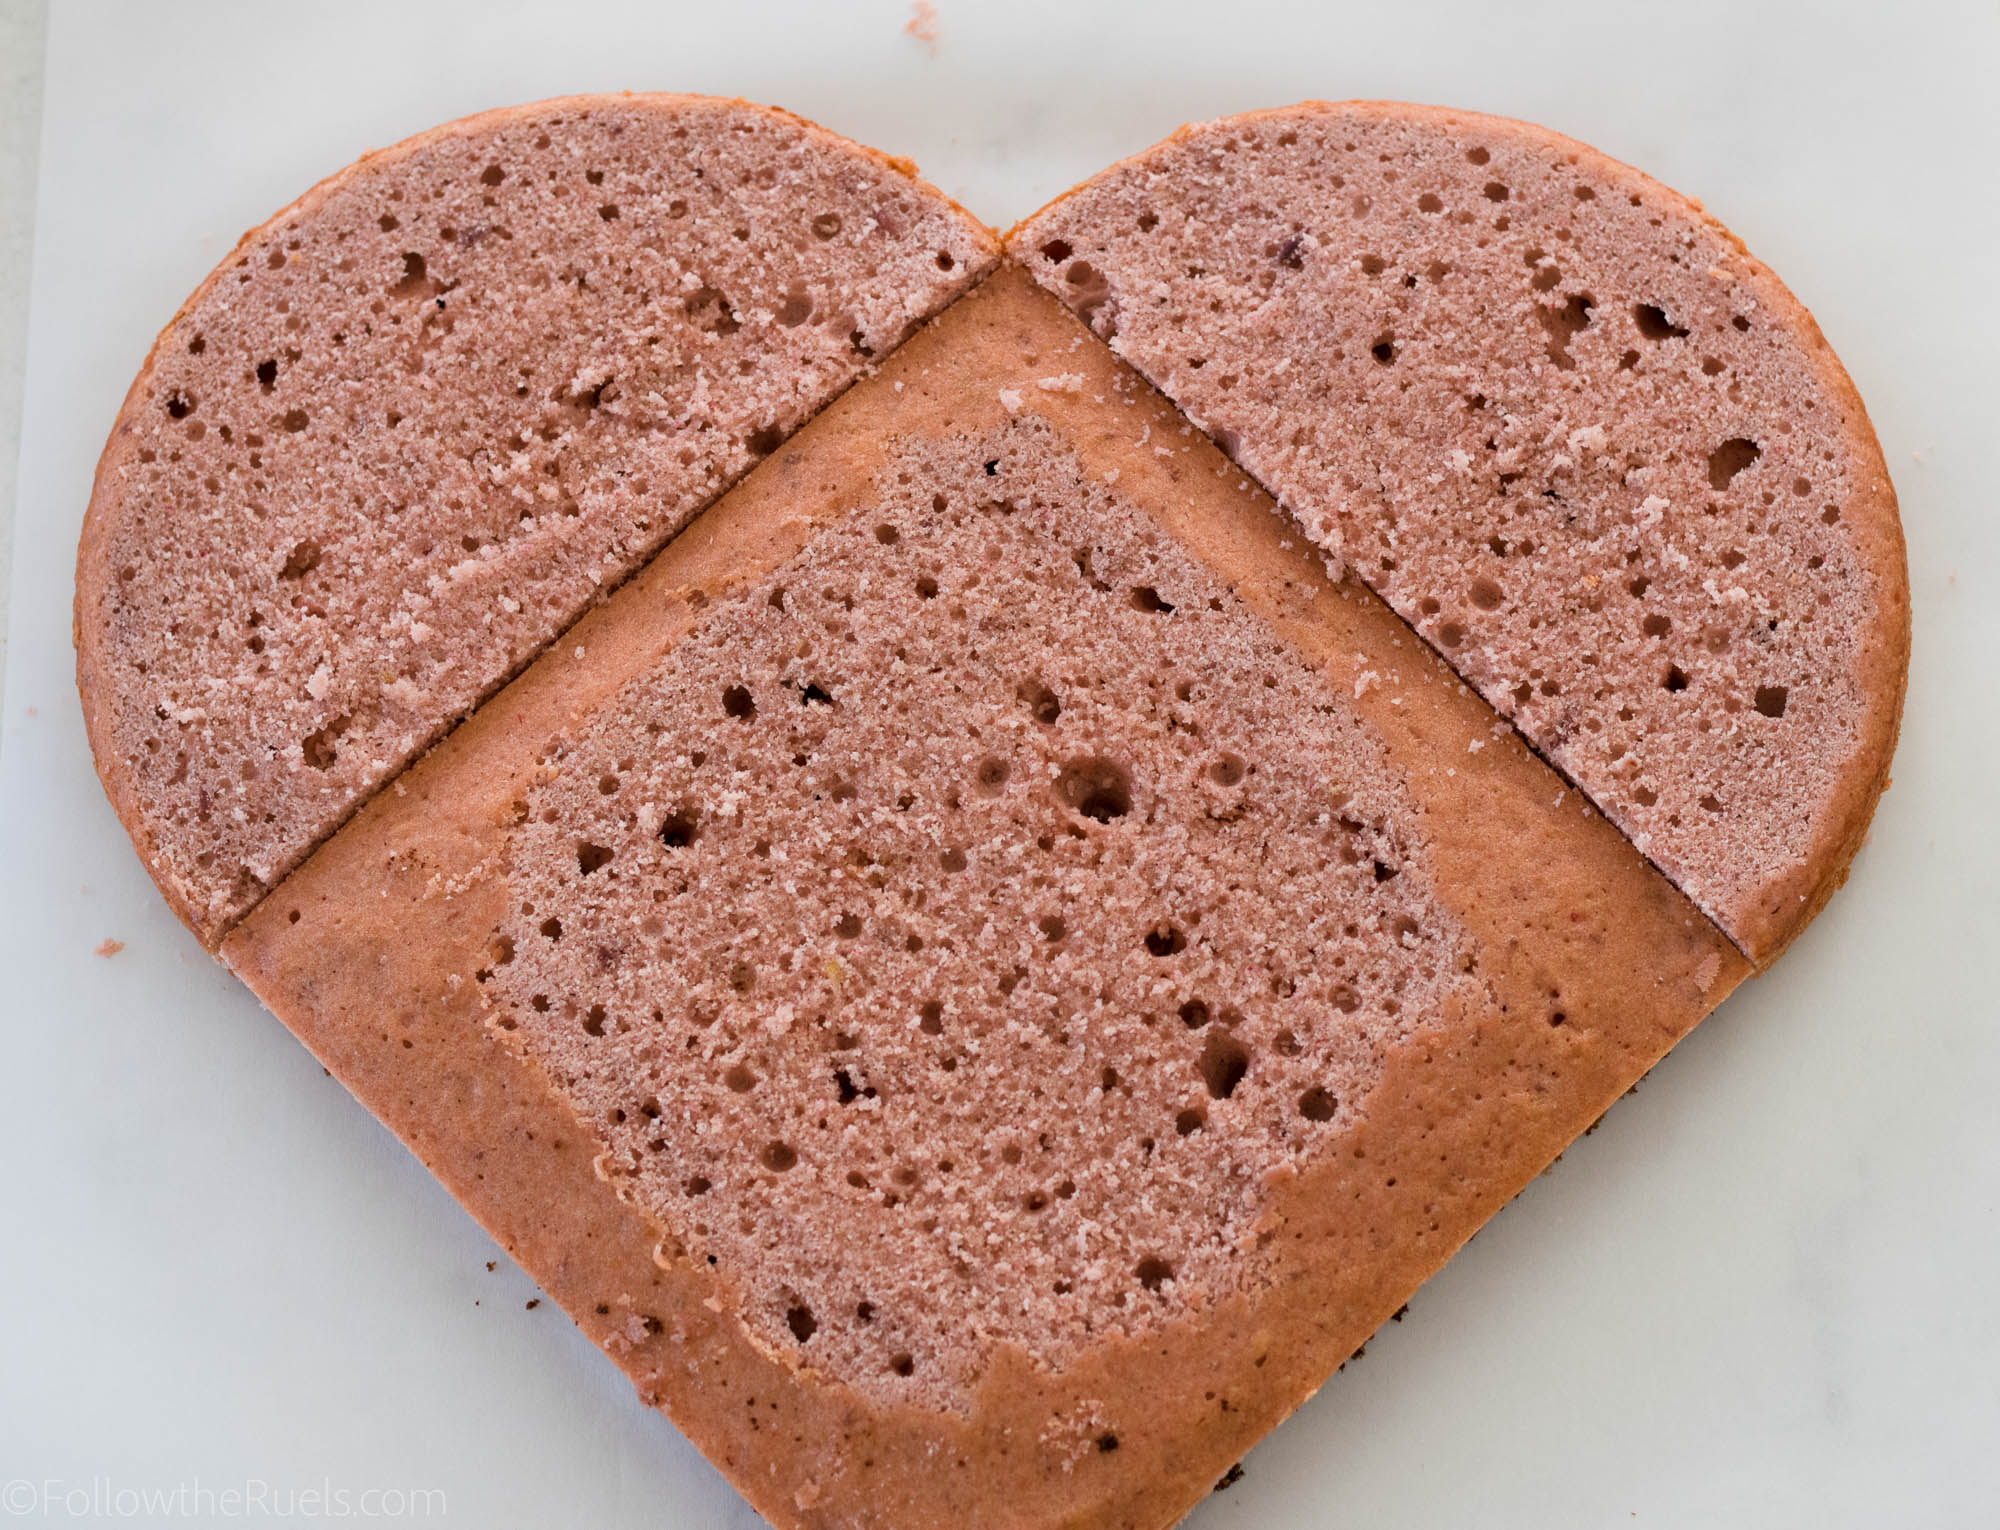
The reason this frosting is so quick to make is that it’s essentially an American buttercream. That is a buttercream that is just made with butter, powdered sugar, a little milk, and flavoring. But unlike some American buttercreams that can be a little dense and too buttery, this one strikes a good balance.

There is also a little trick involved to ensure your frosting isn’t super dense and totally lifeless. Read on to find out what it is!

How to Make It.

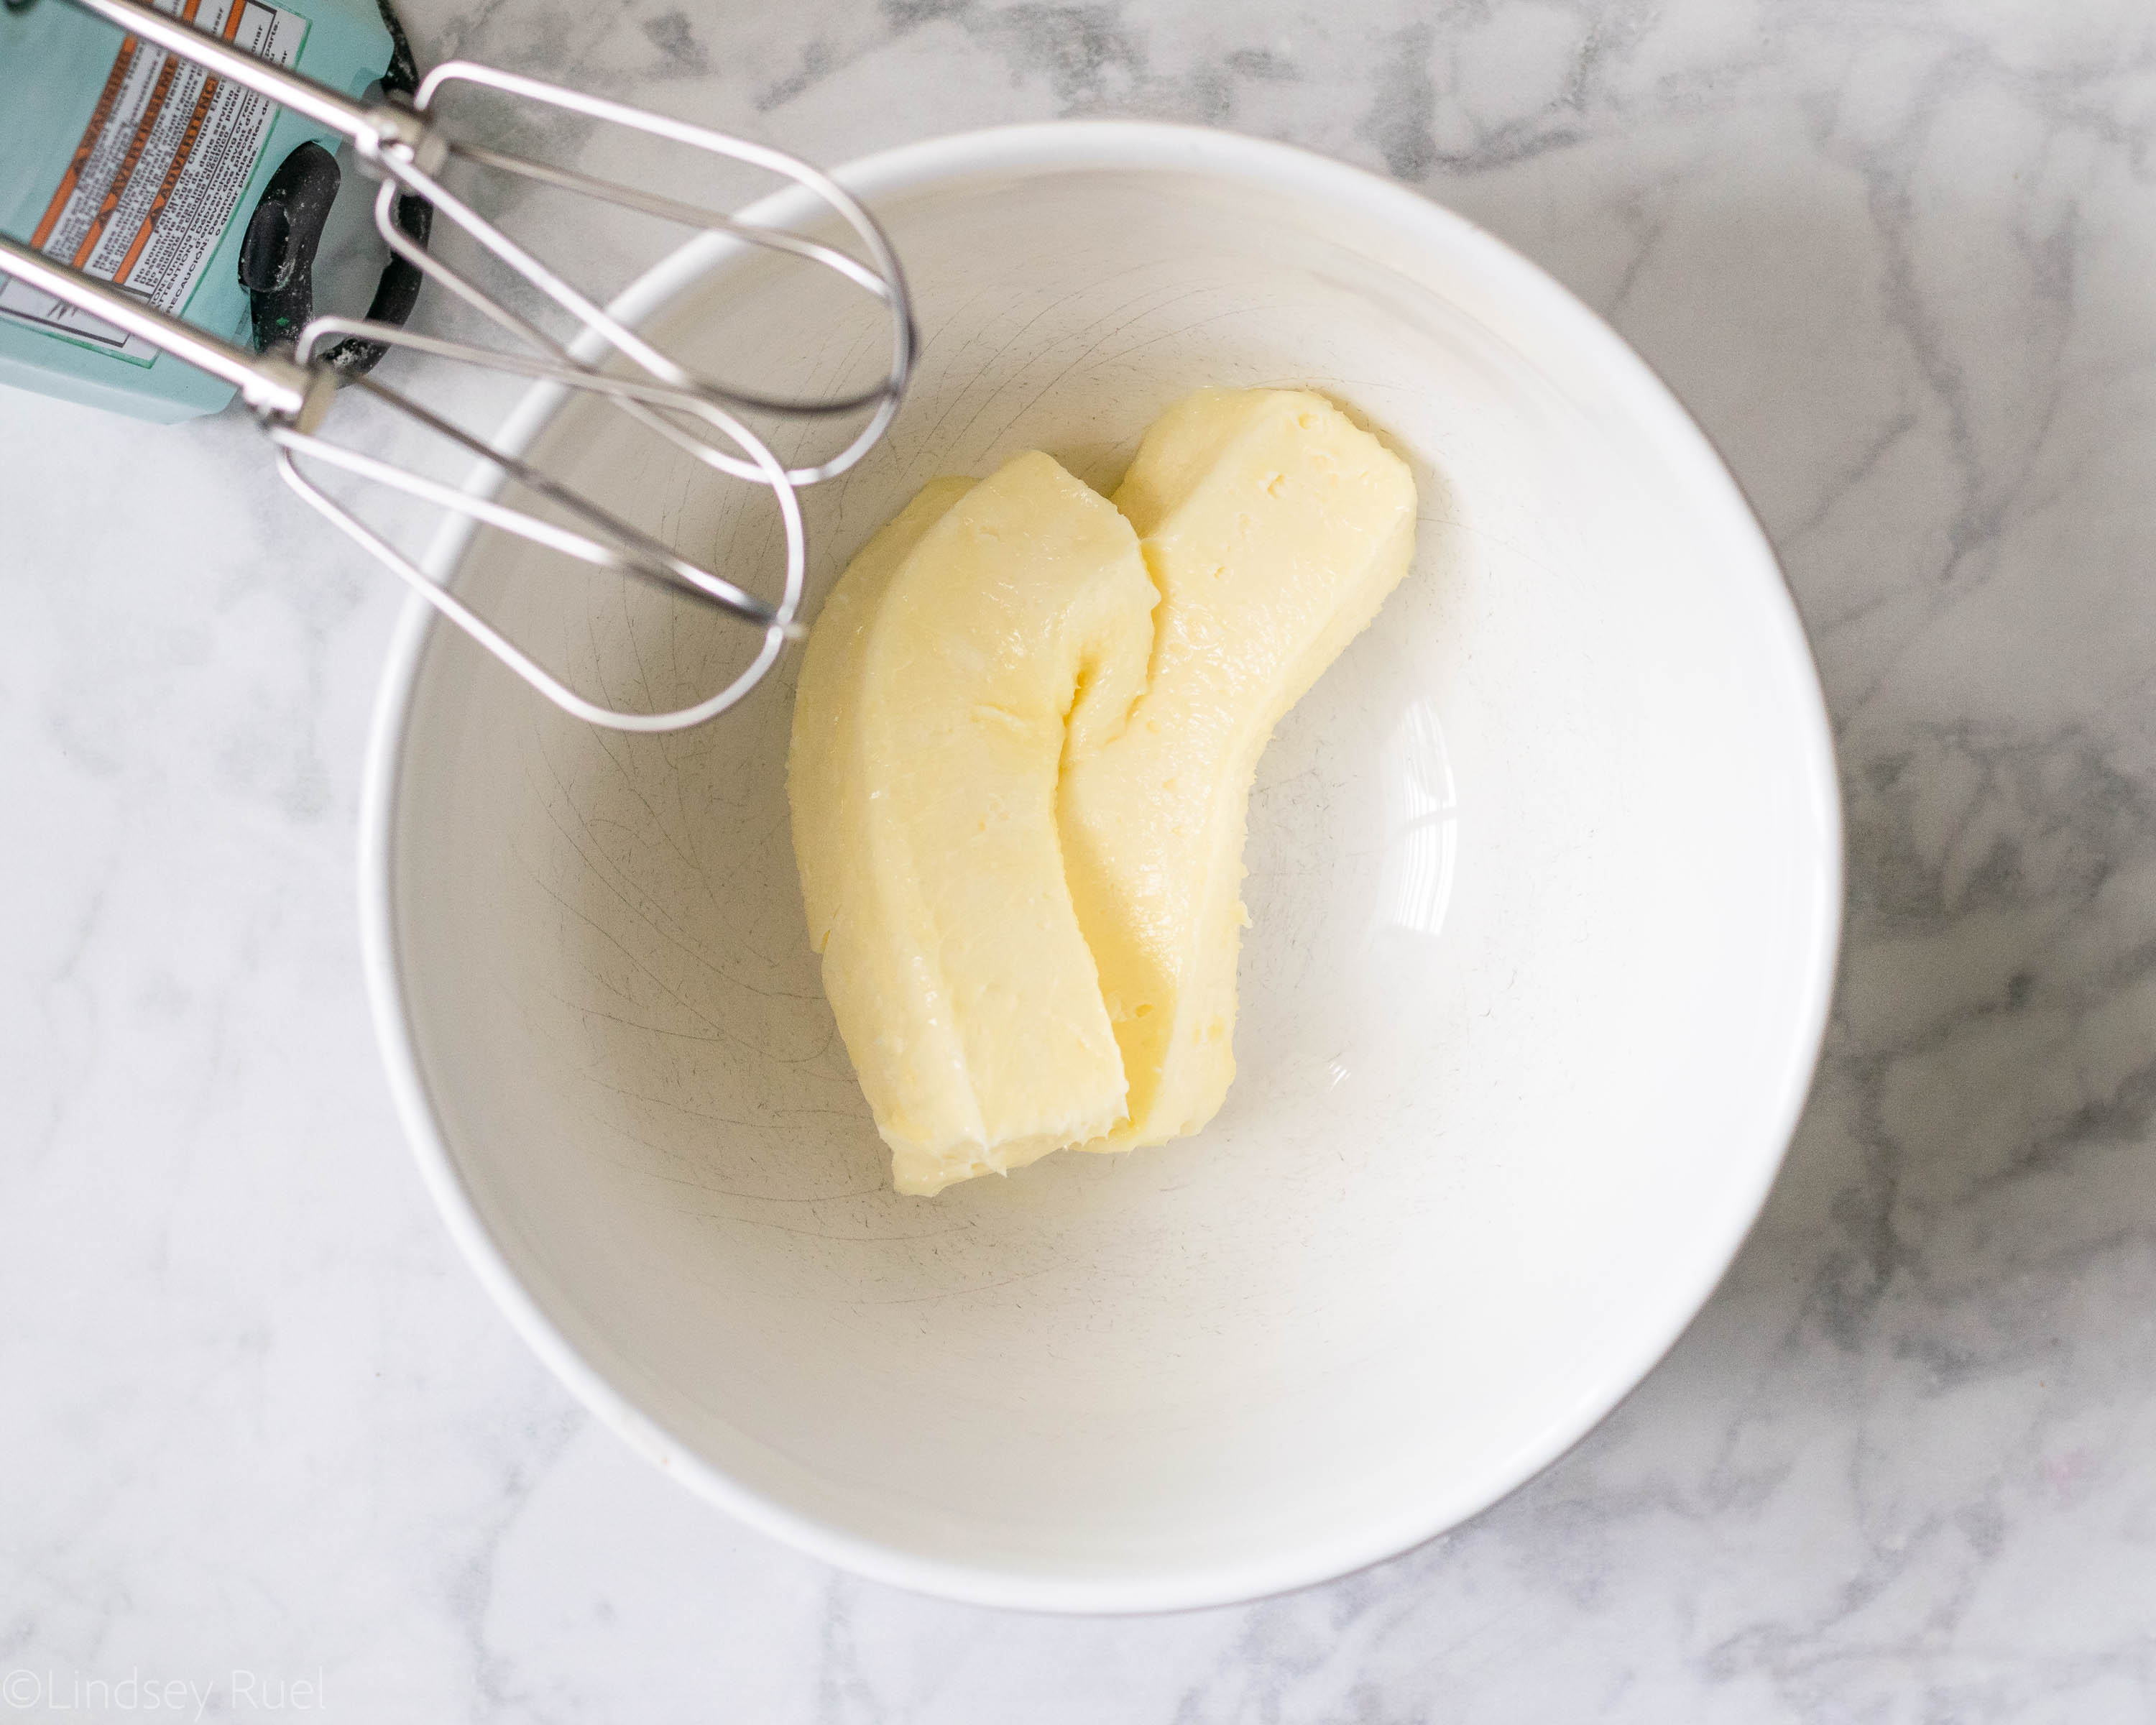
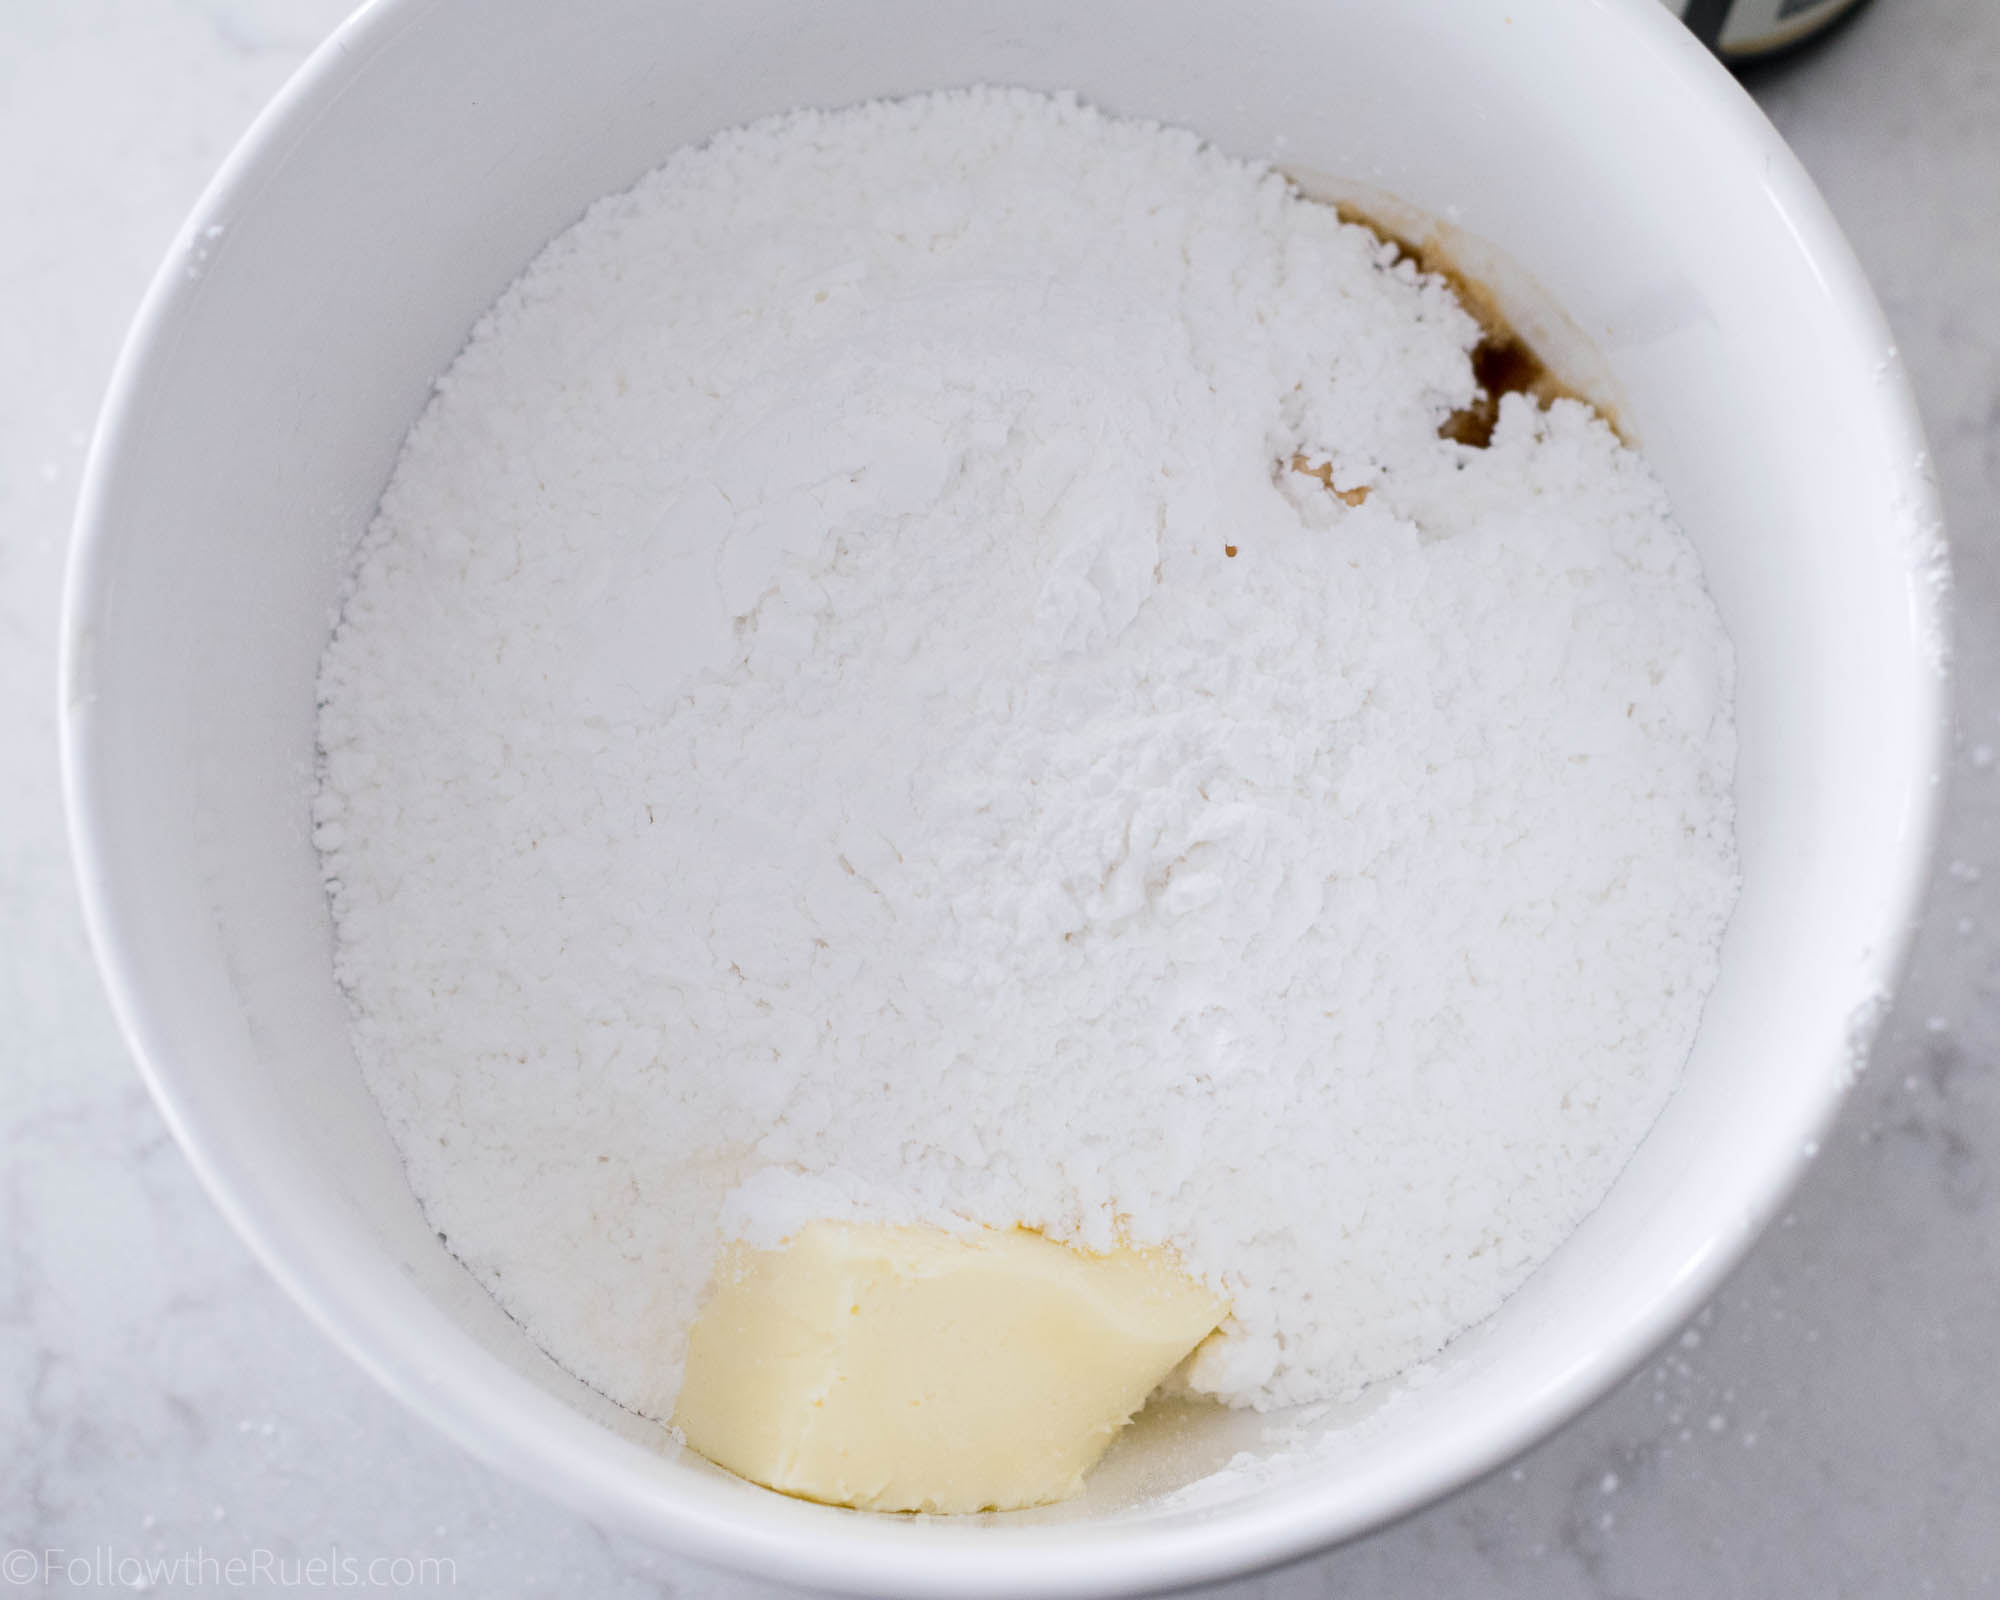
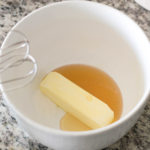
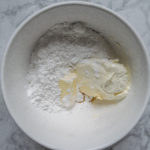
Step number one to making this delicious, yet easy seven-minute frosting is to start with good quality butter. Please do not use margarine or even that baking butter than contains added oil. You want 100% dairy, high fat, unsalted butter. You don’t have to spend an arm and a leg on the super high-quality French butter. But just make sure that it’s real butter made from cream.

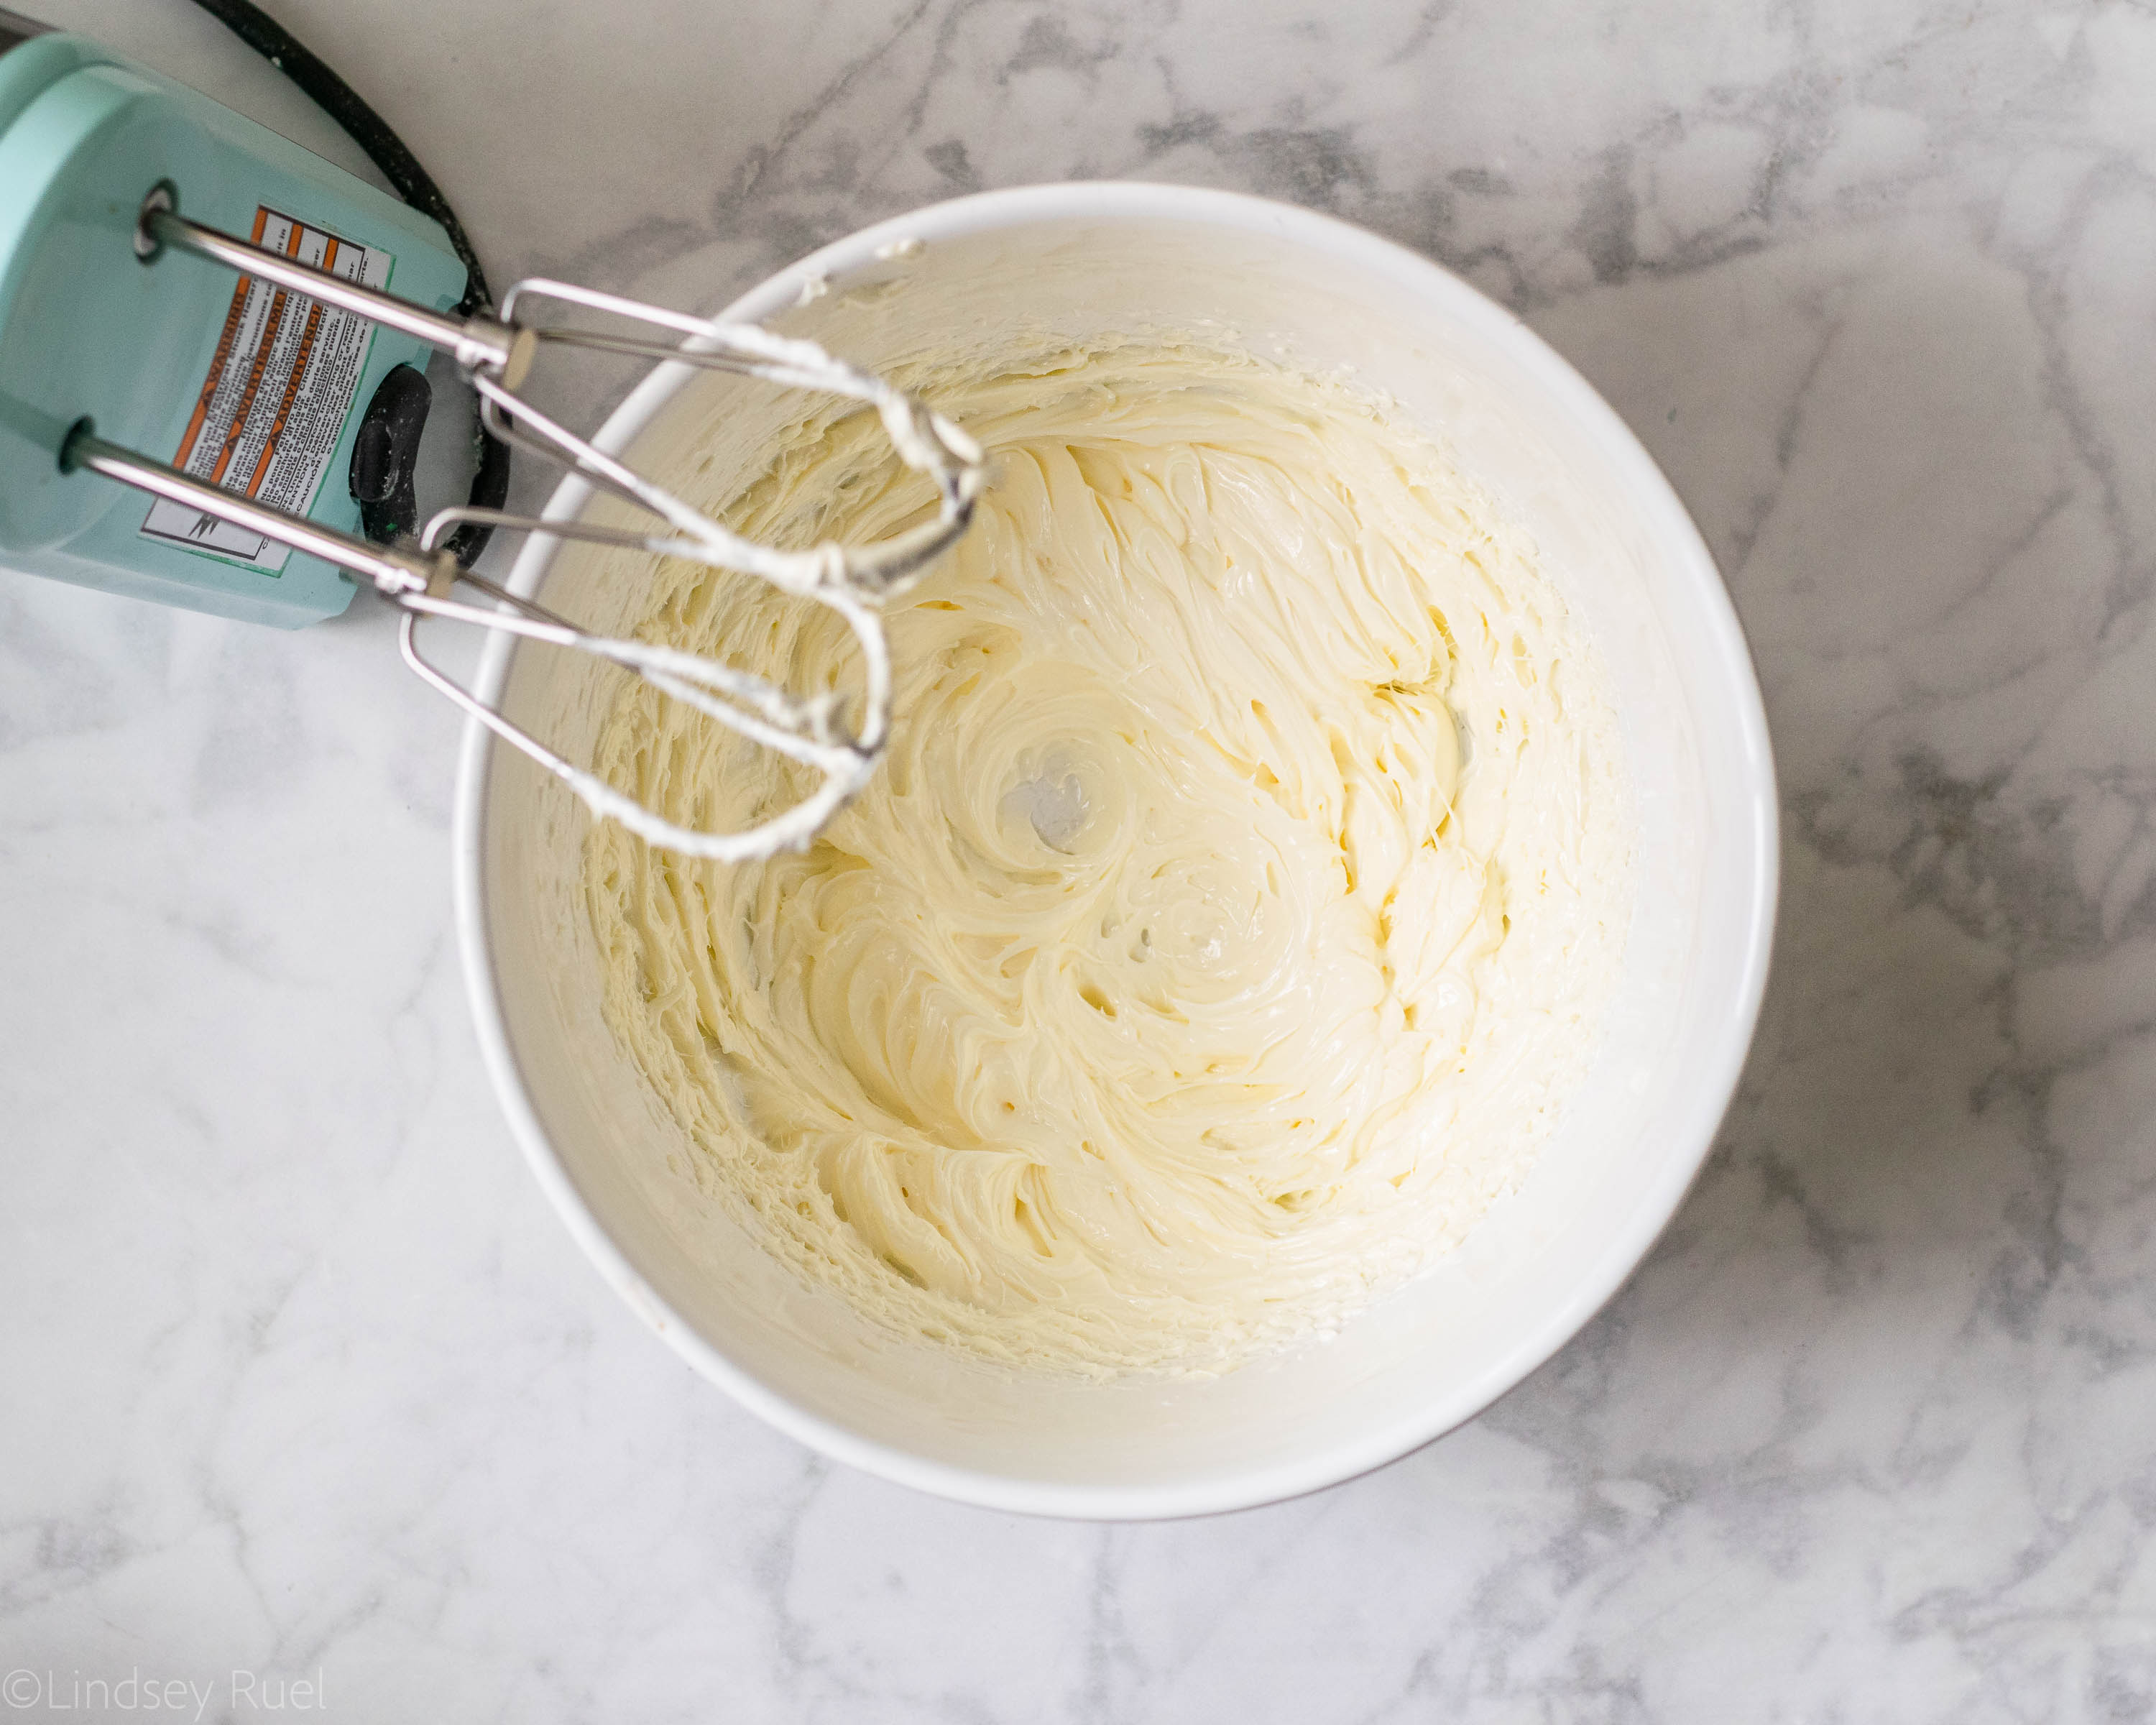
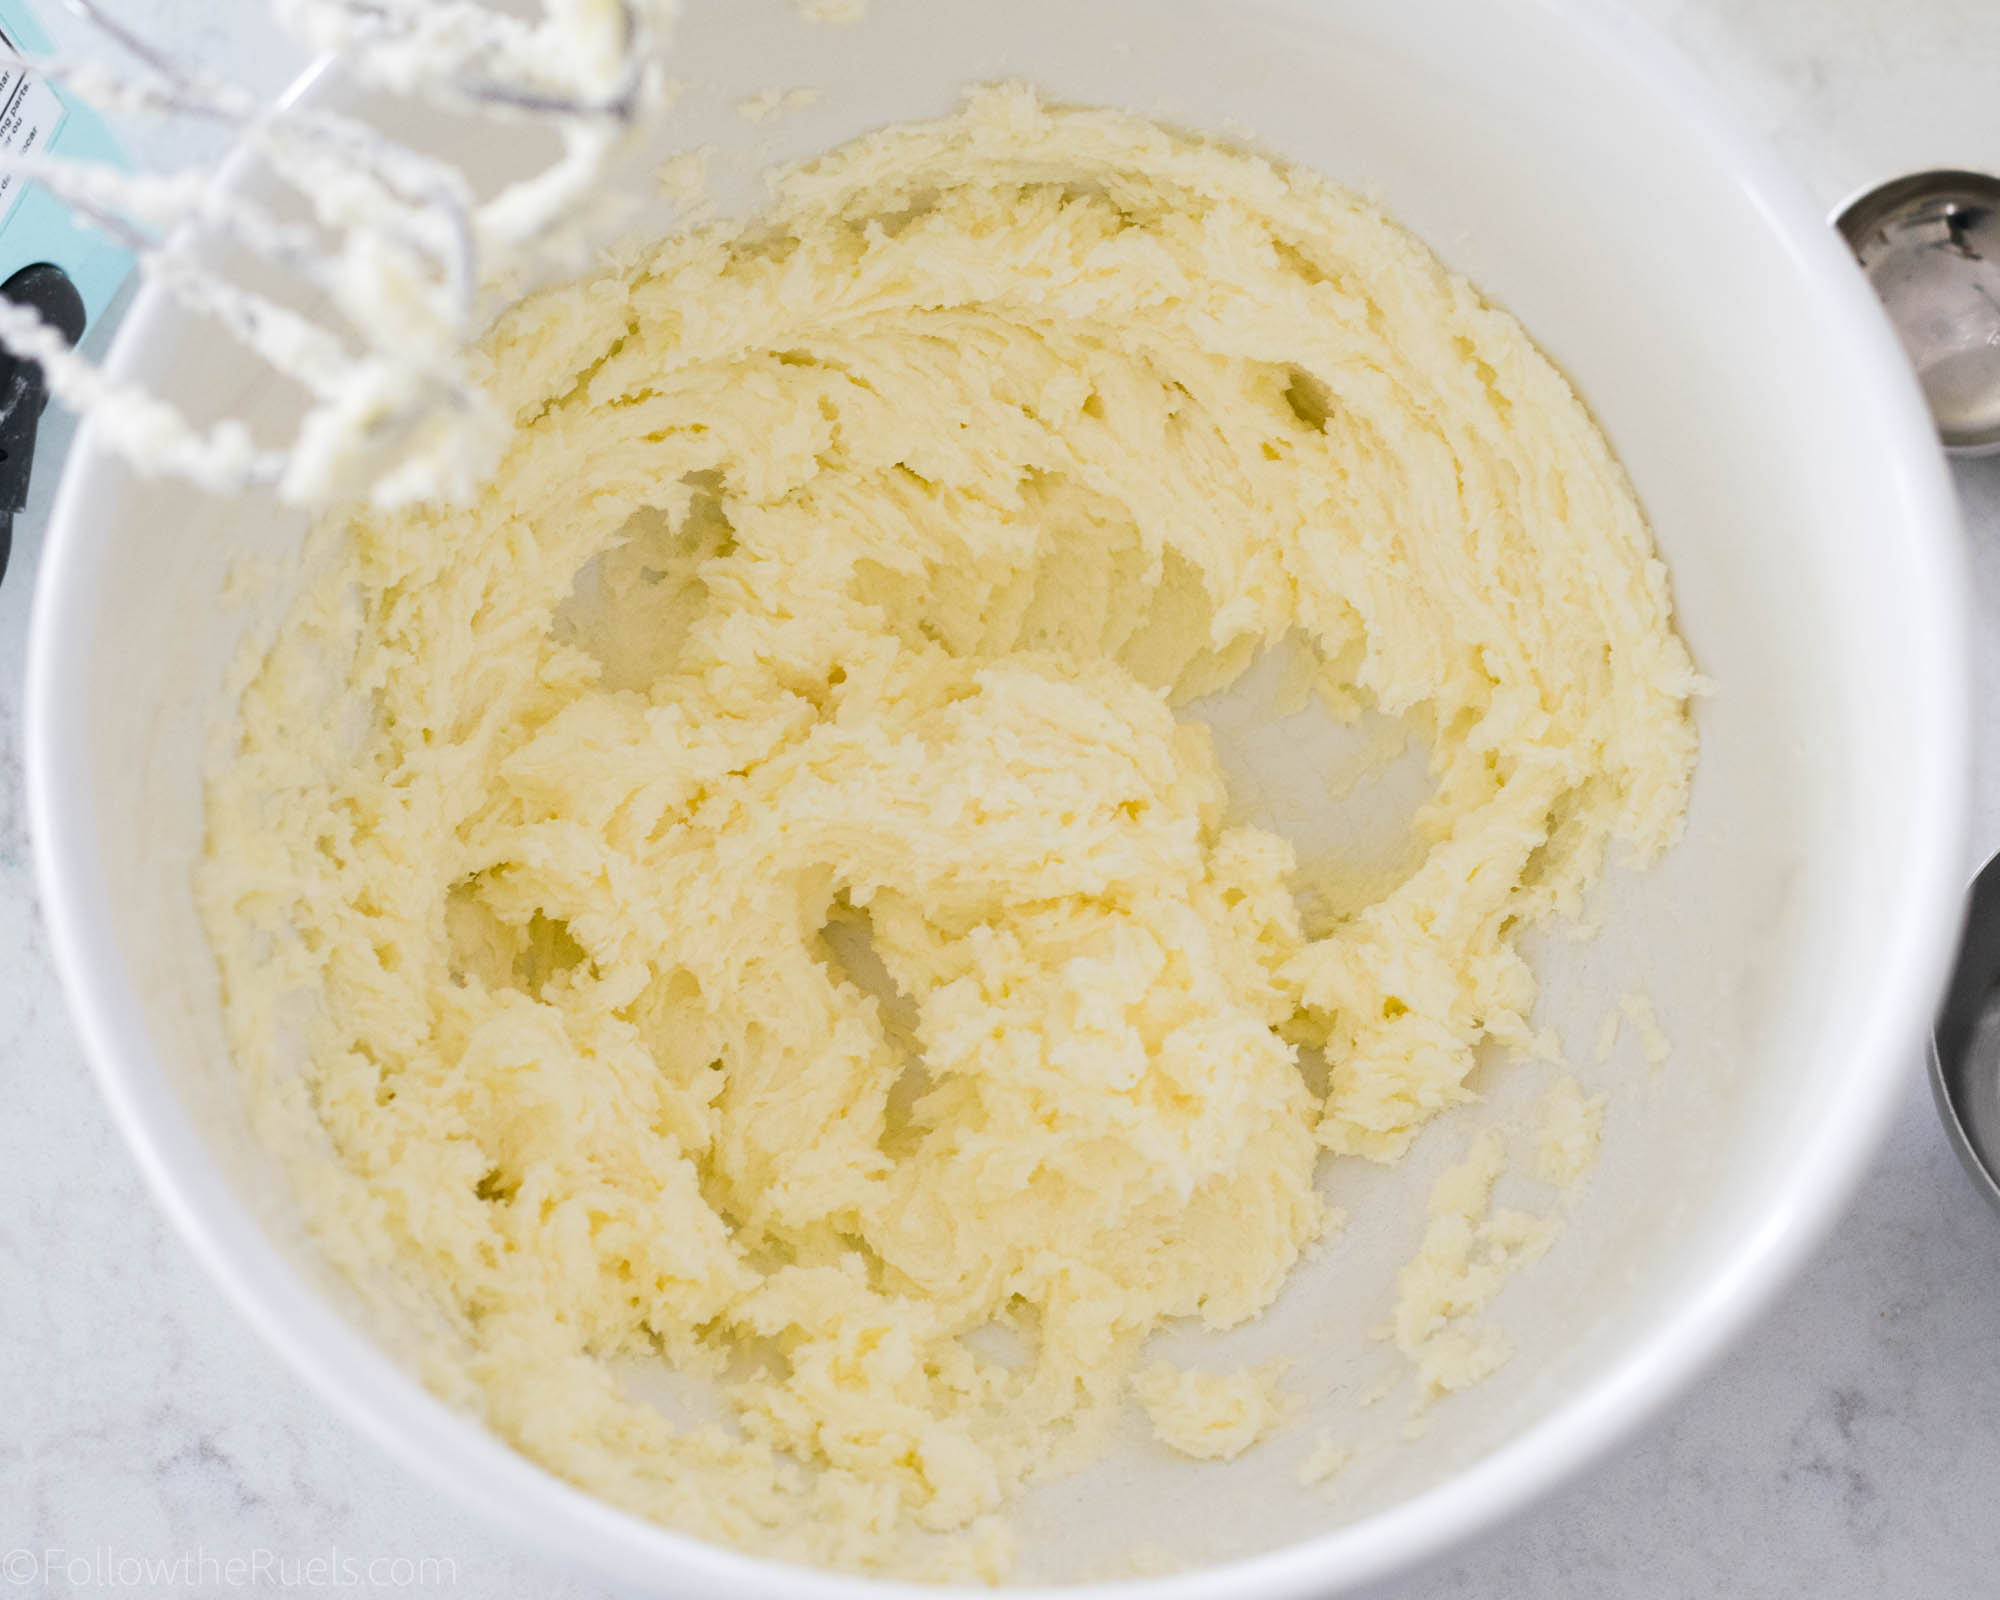
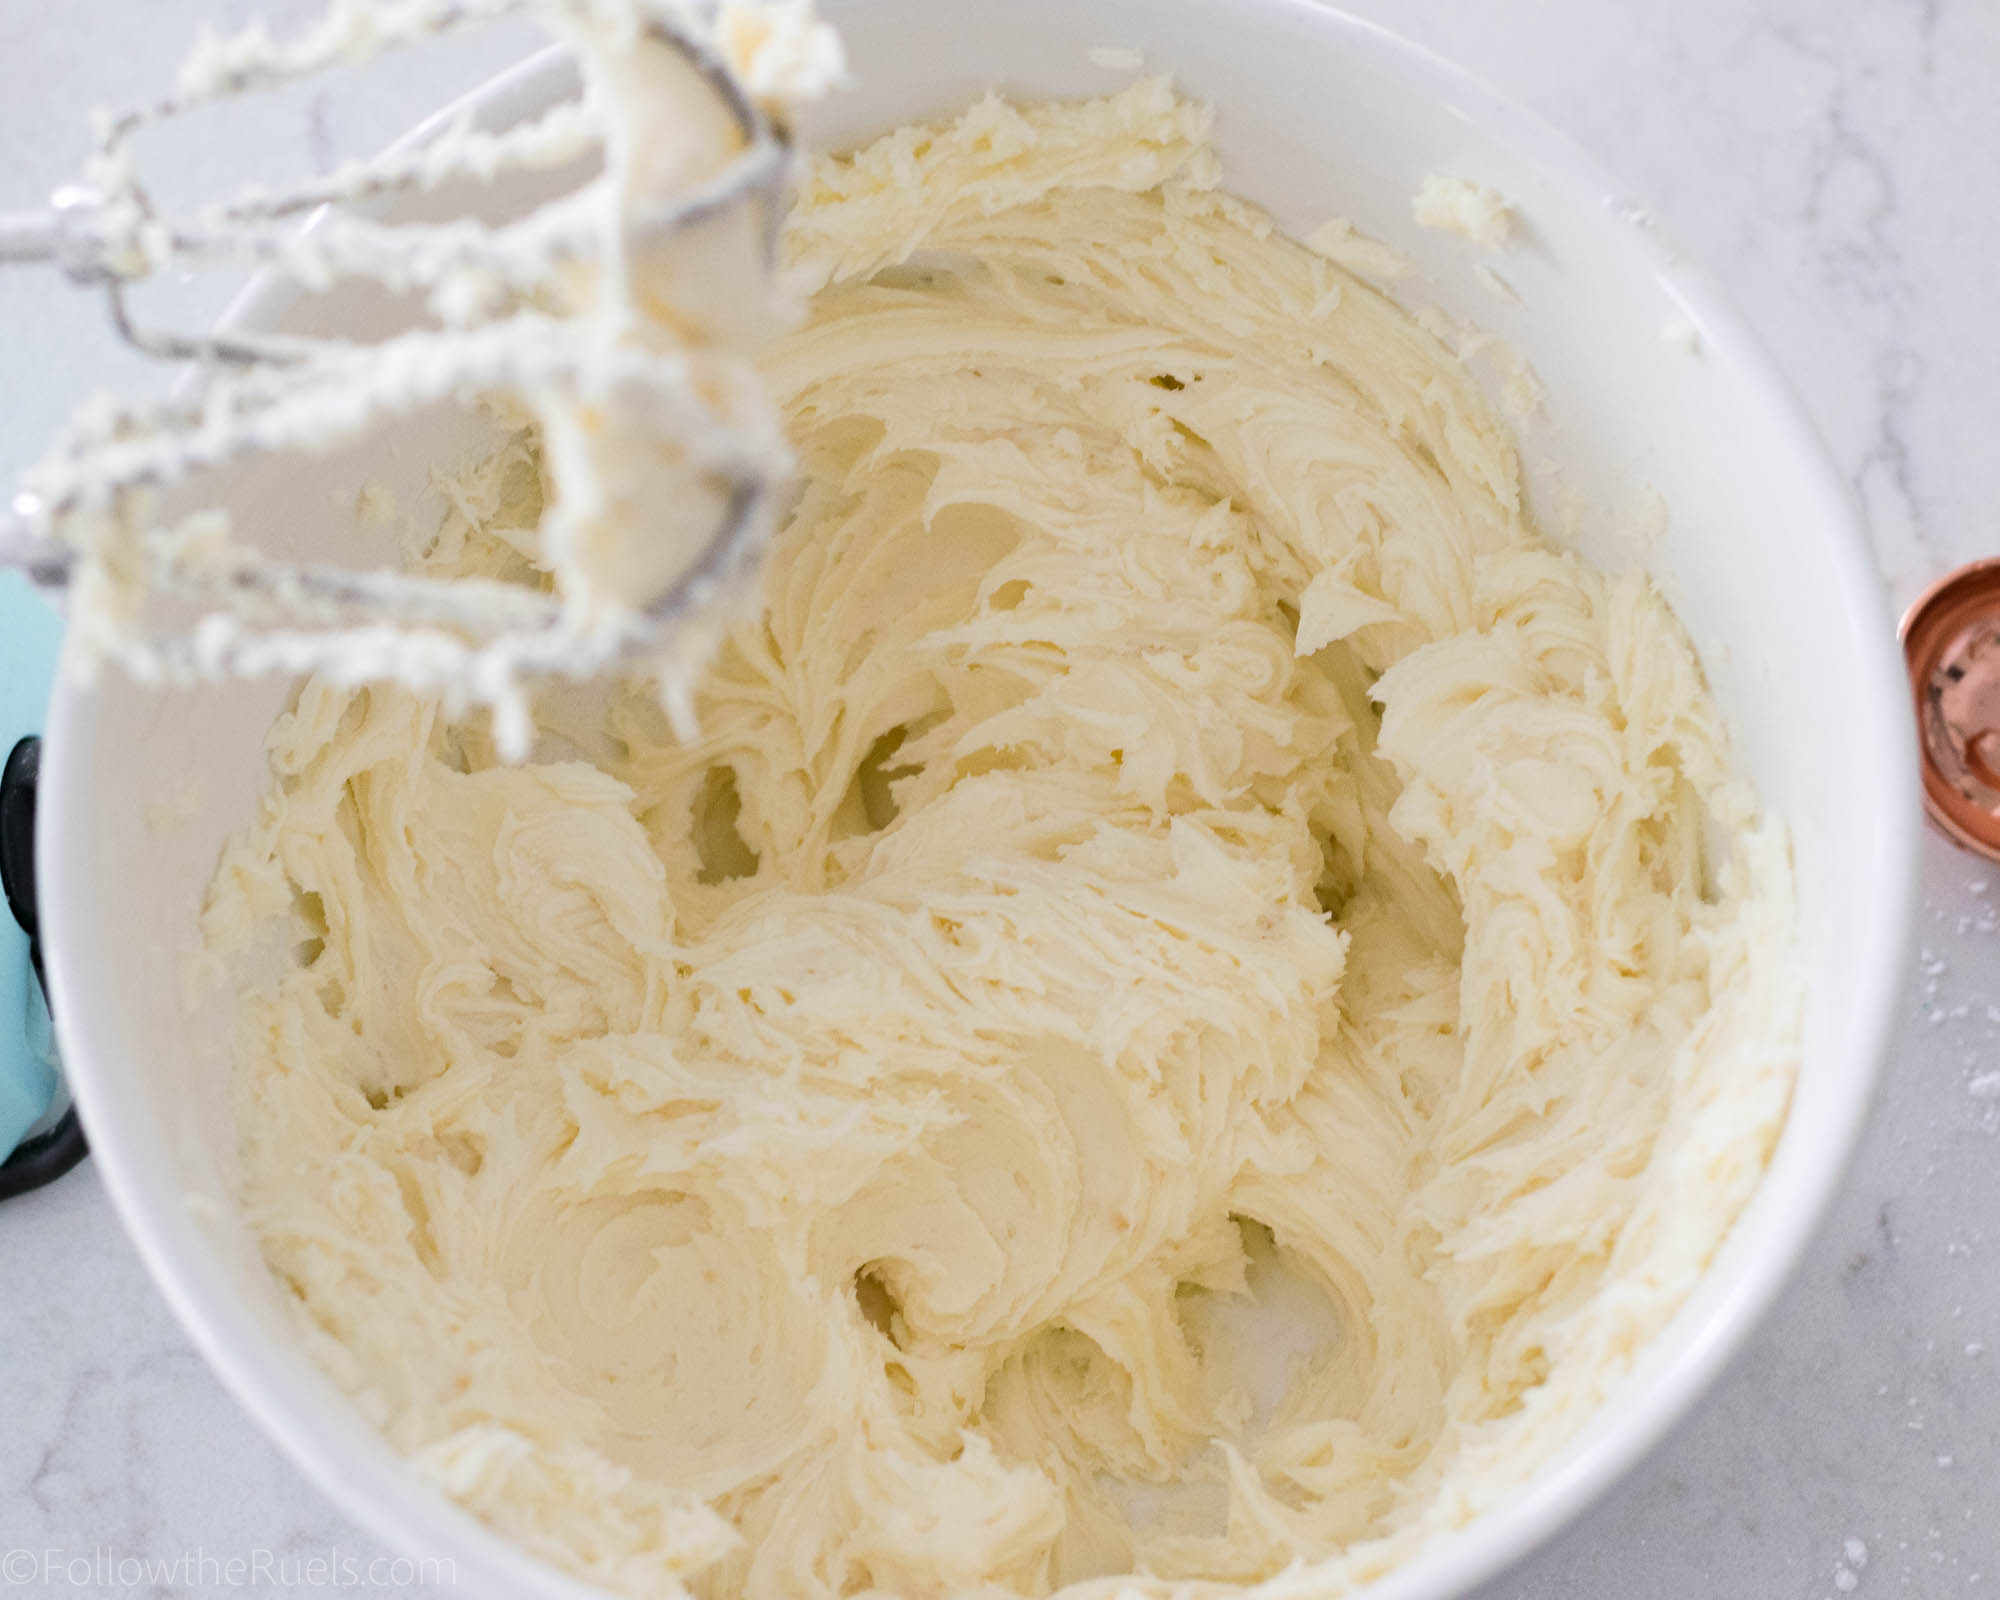
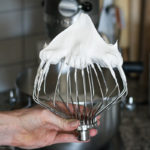
Step two is to whip the heck out of the butter. Don’t just whip the butter until it’s “light and creamy”. Whip it, whip it good.

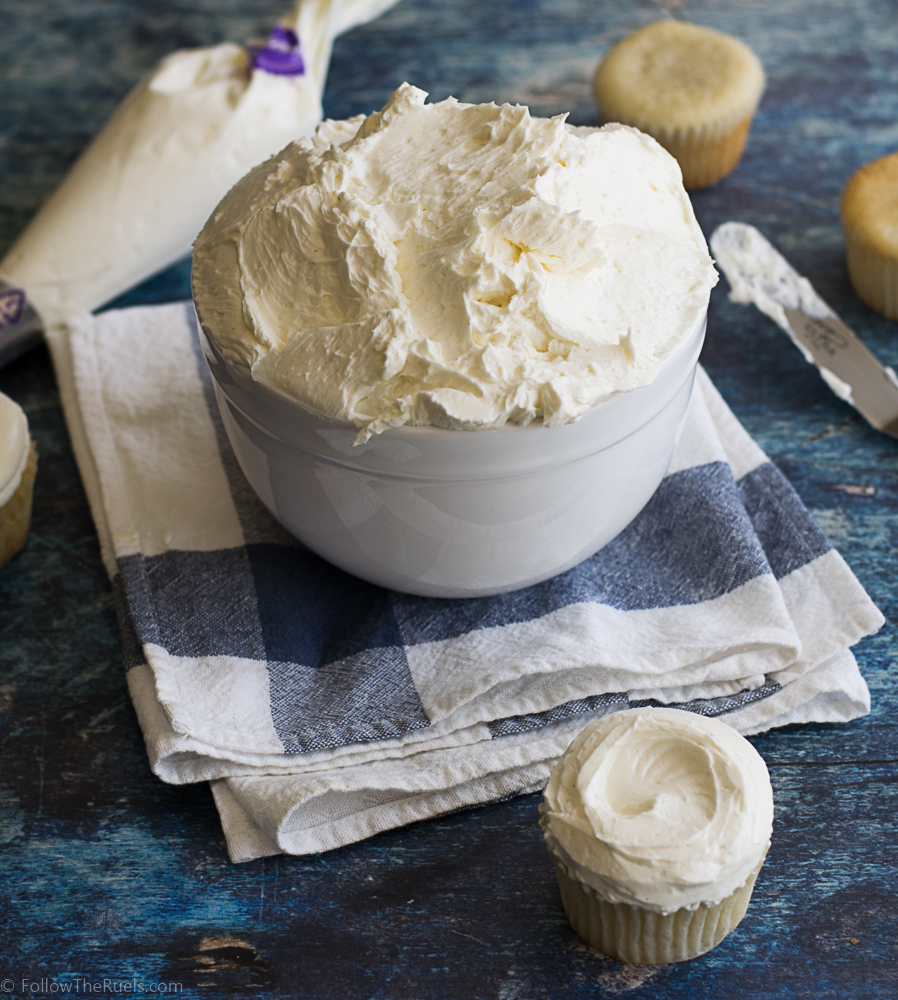
By that I mean, whip it until it turns from a yellow color until an almost ivory white color. It should look like it’s increased in volume and definitely look a lot lighter than when it started. 

This will incorporate lots of air into your frosting so that it’s nice and light and won’t taste or feel overwhelmingly buttery. 

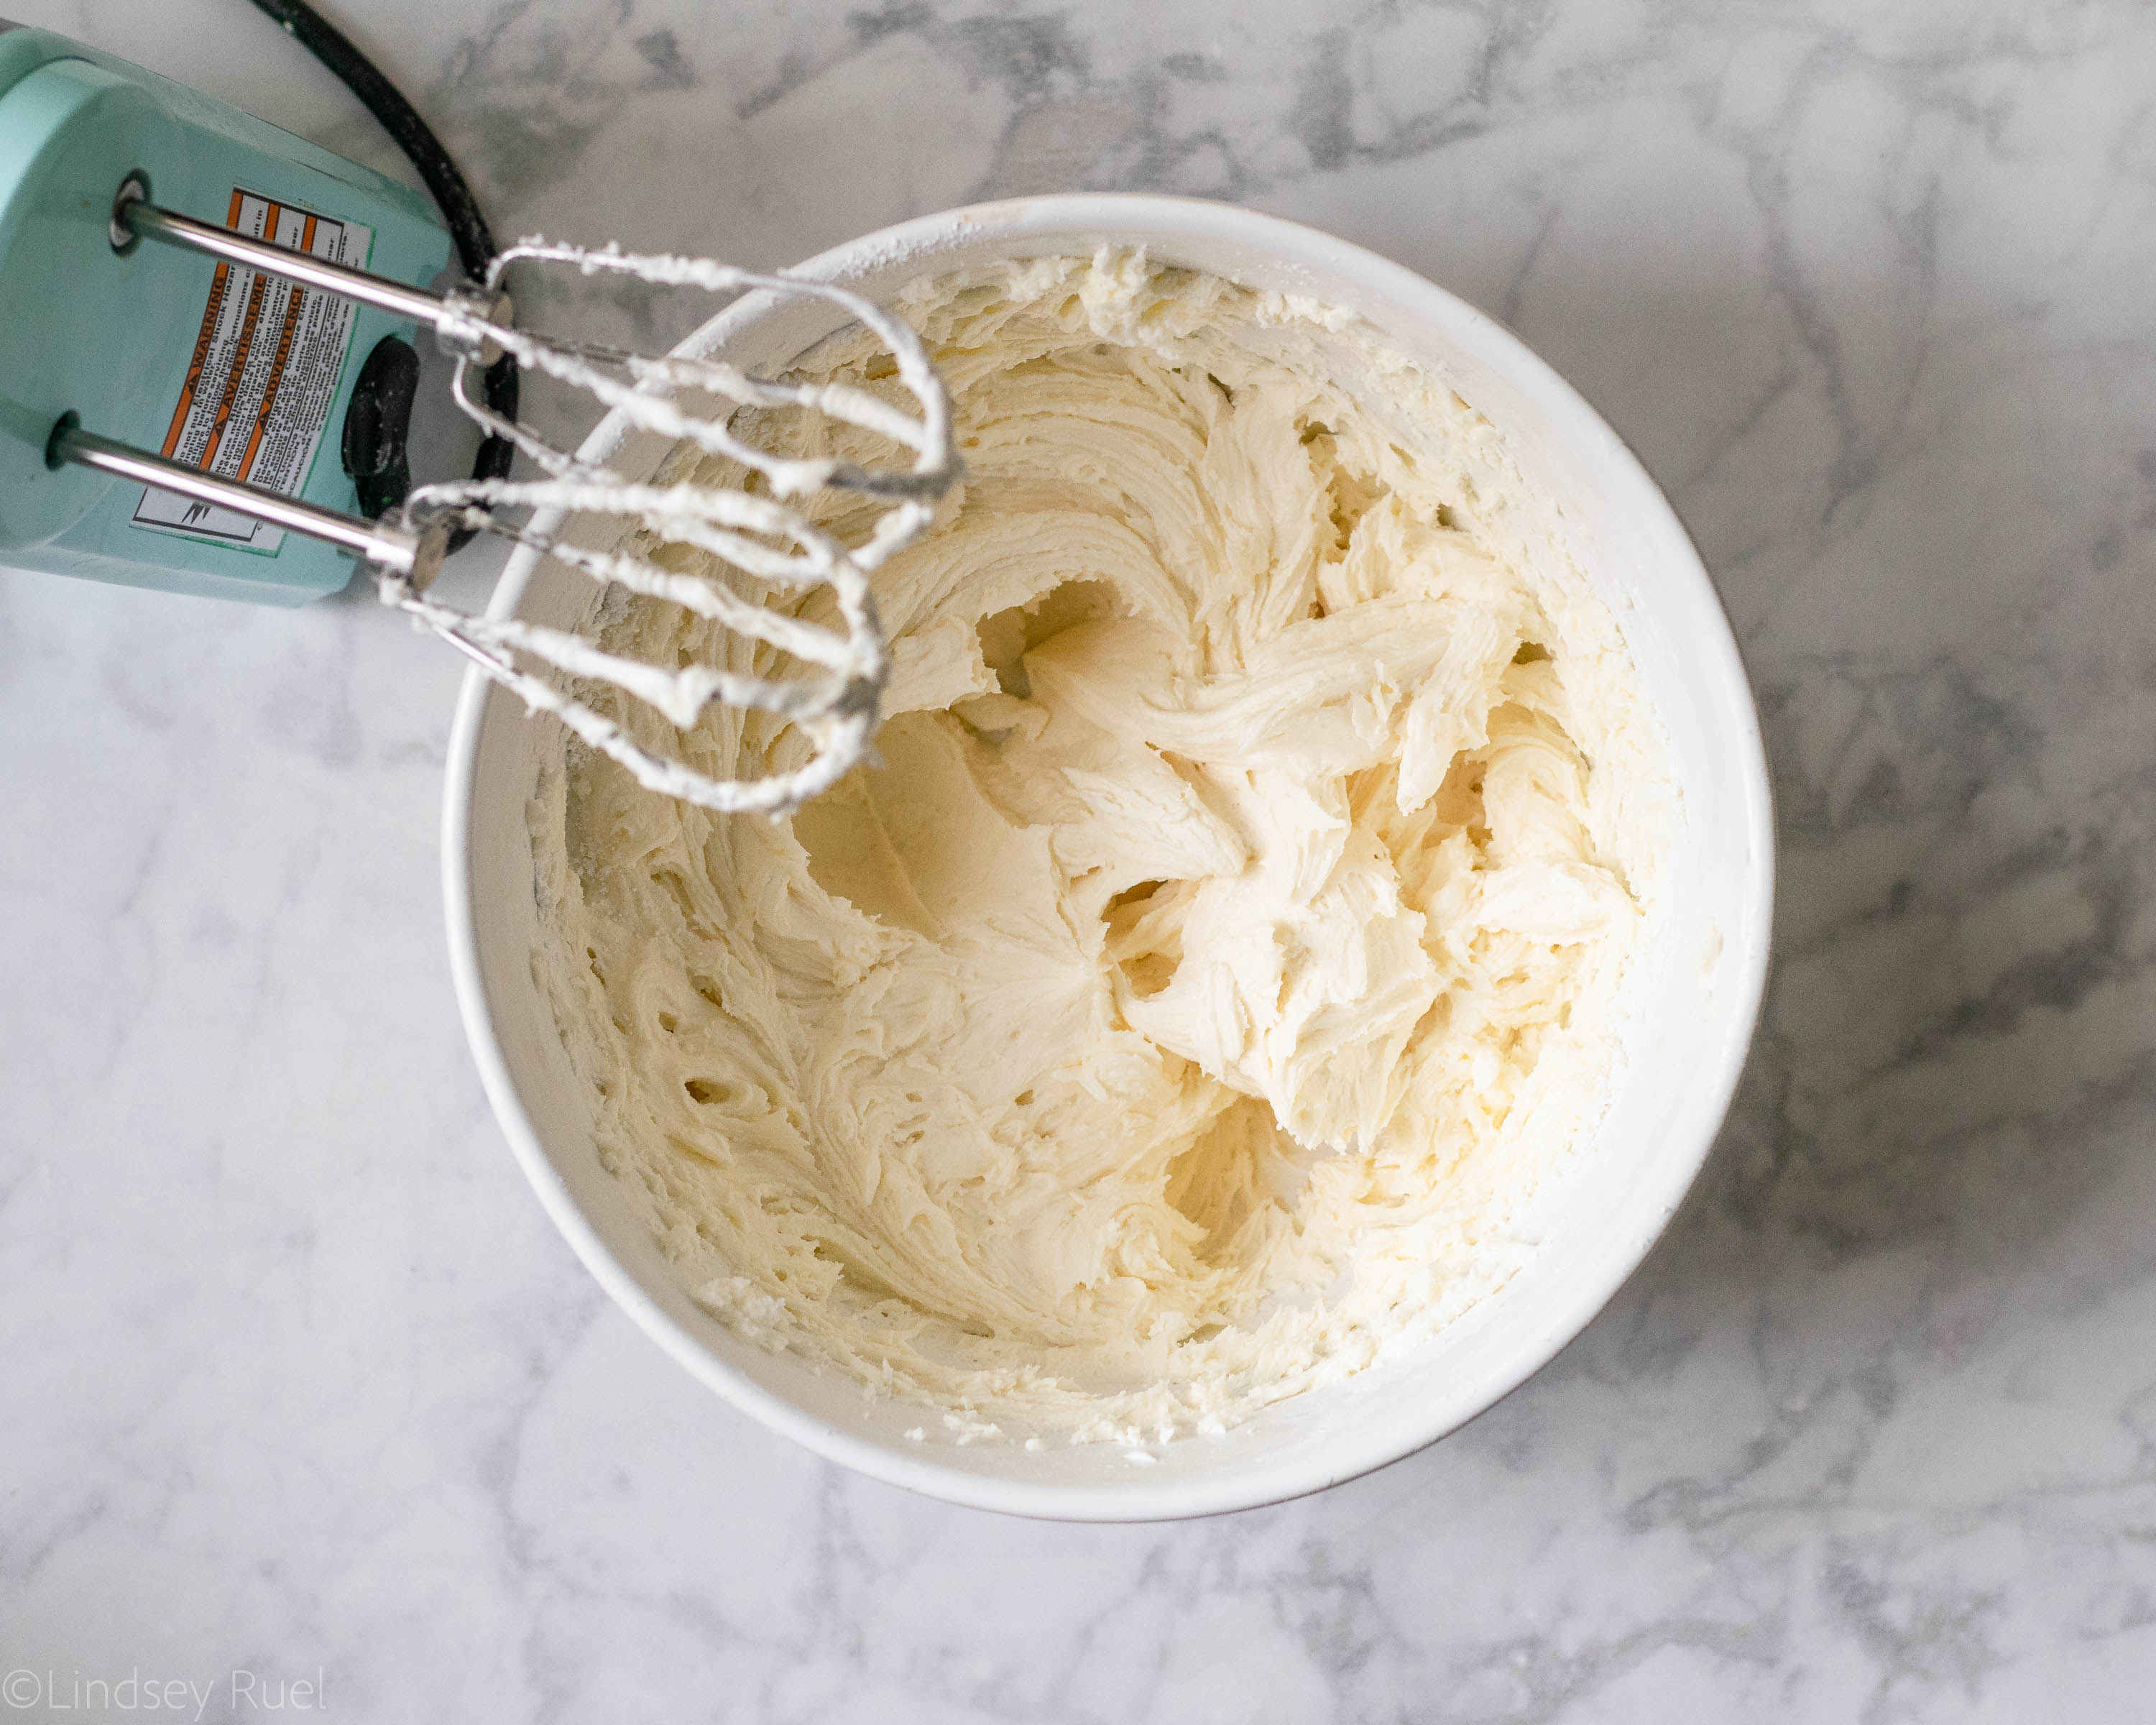
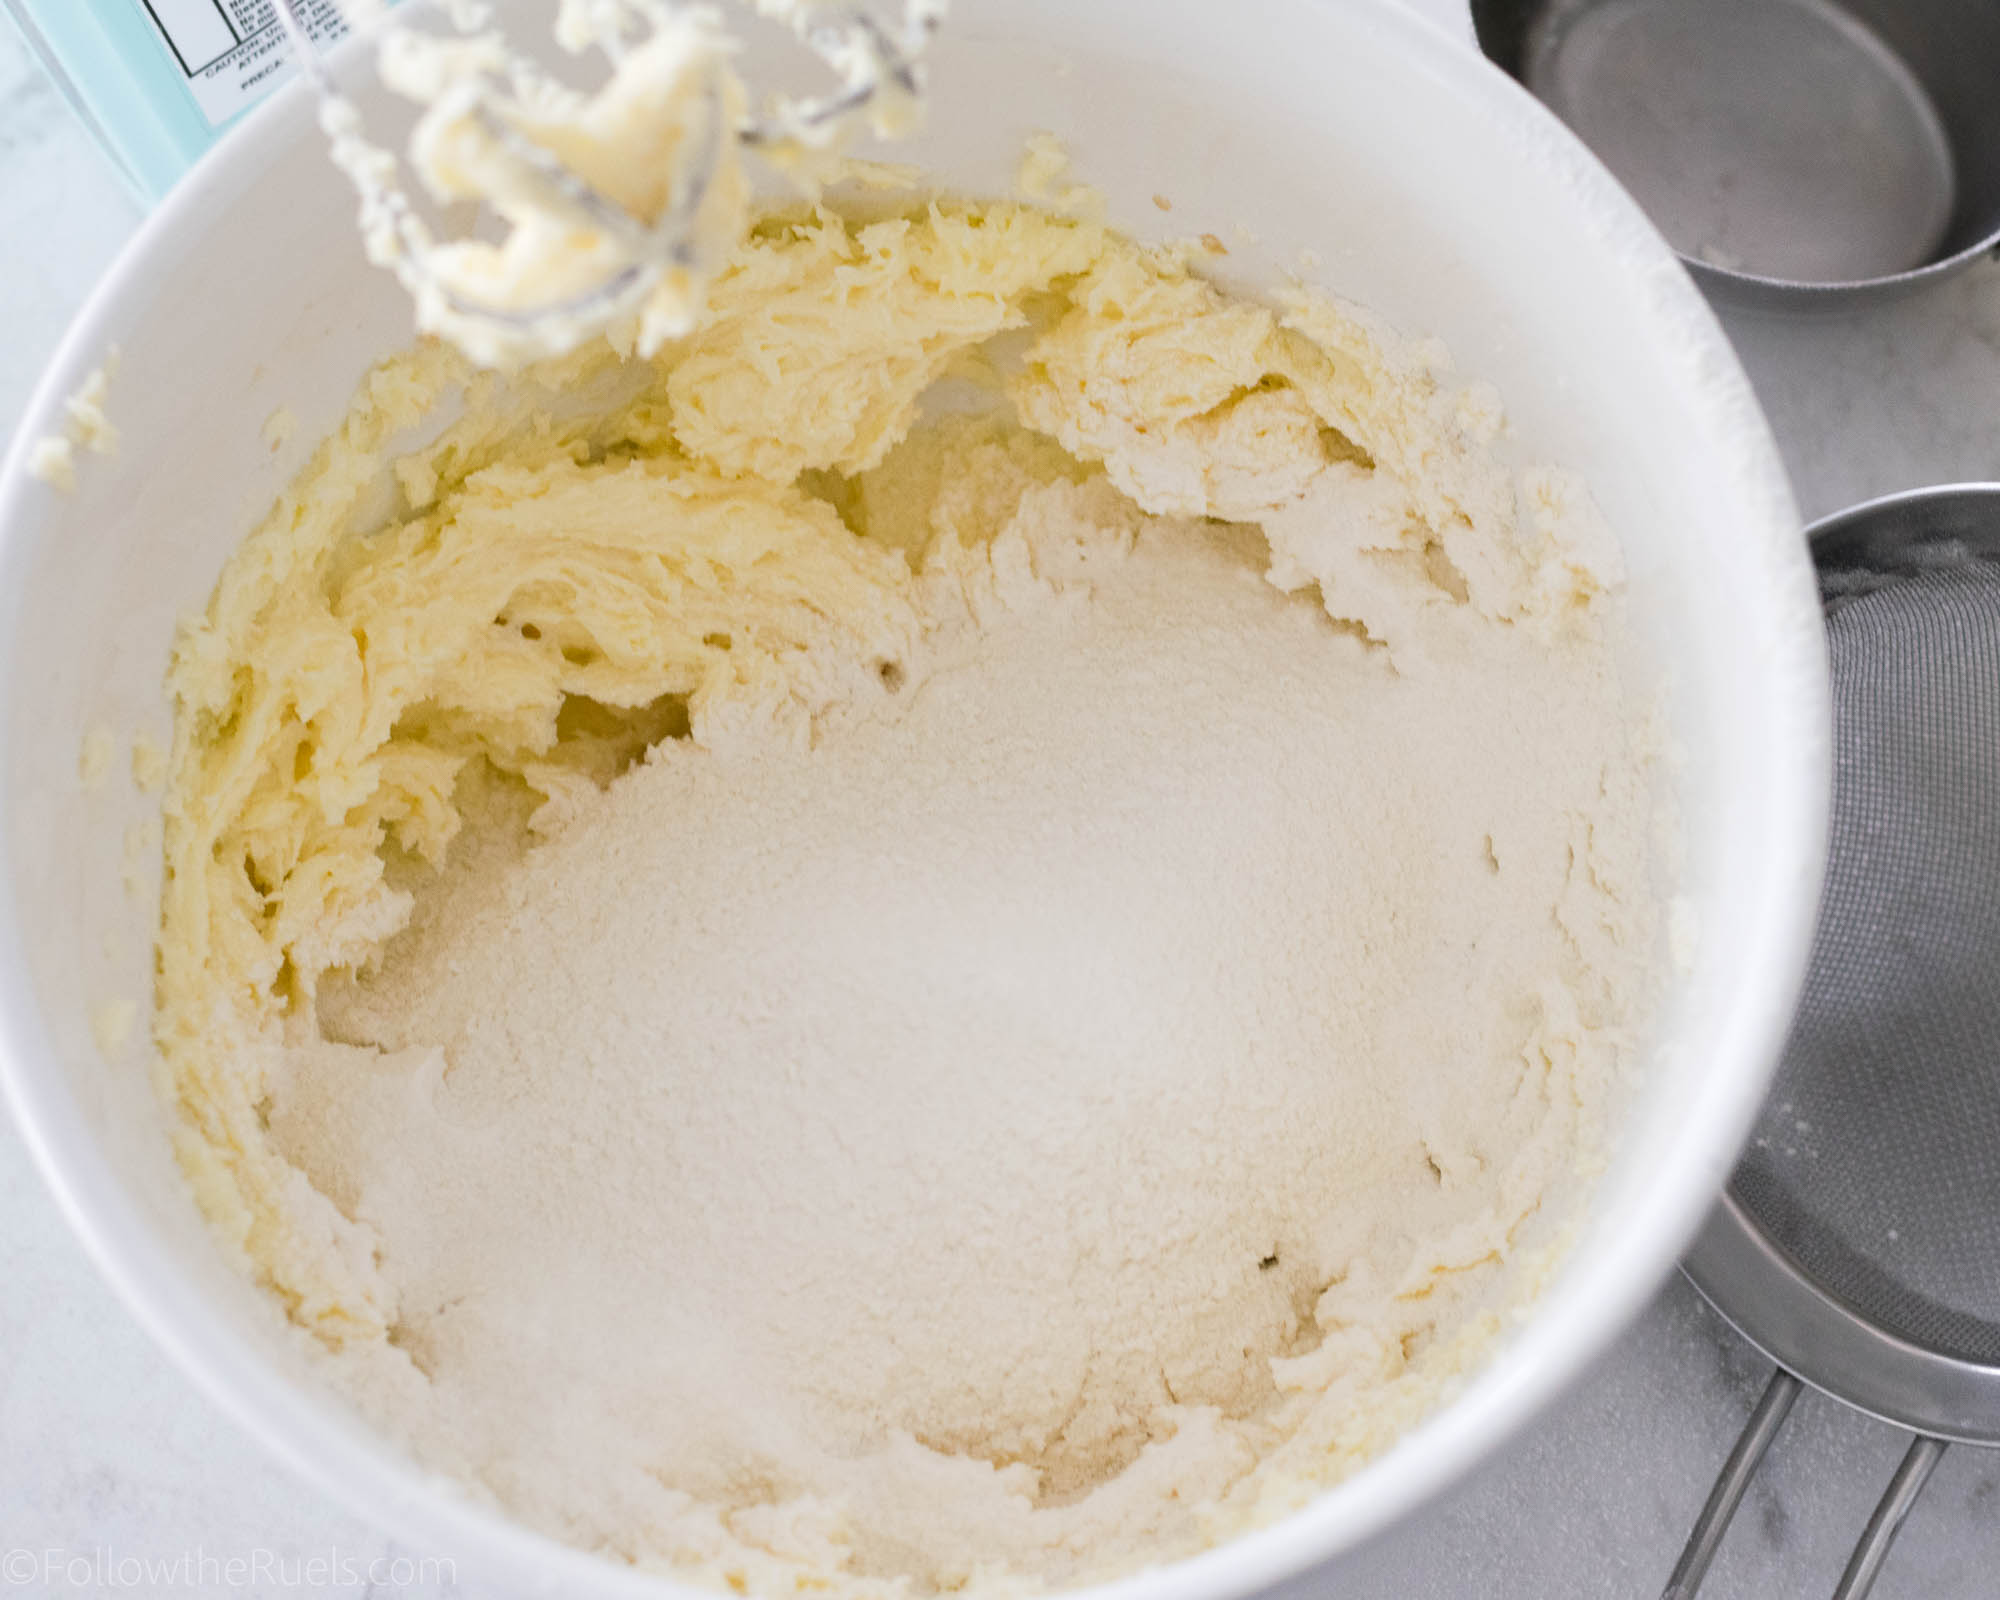
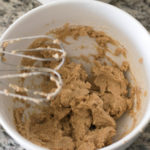
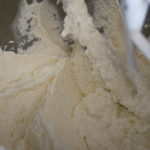
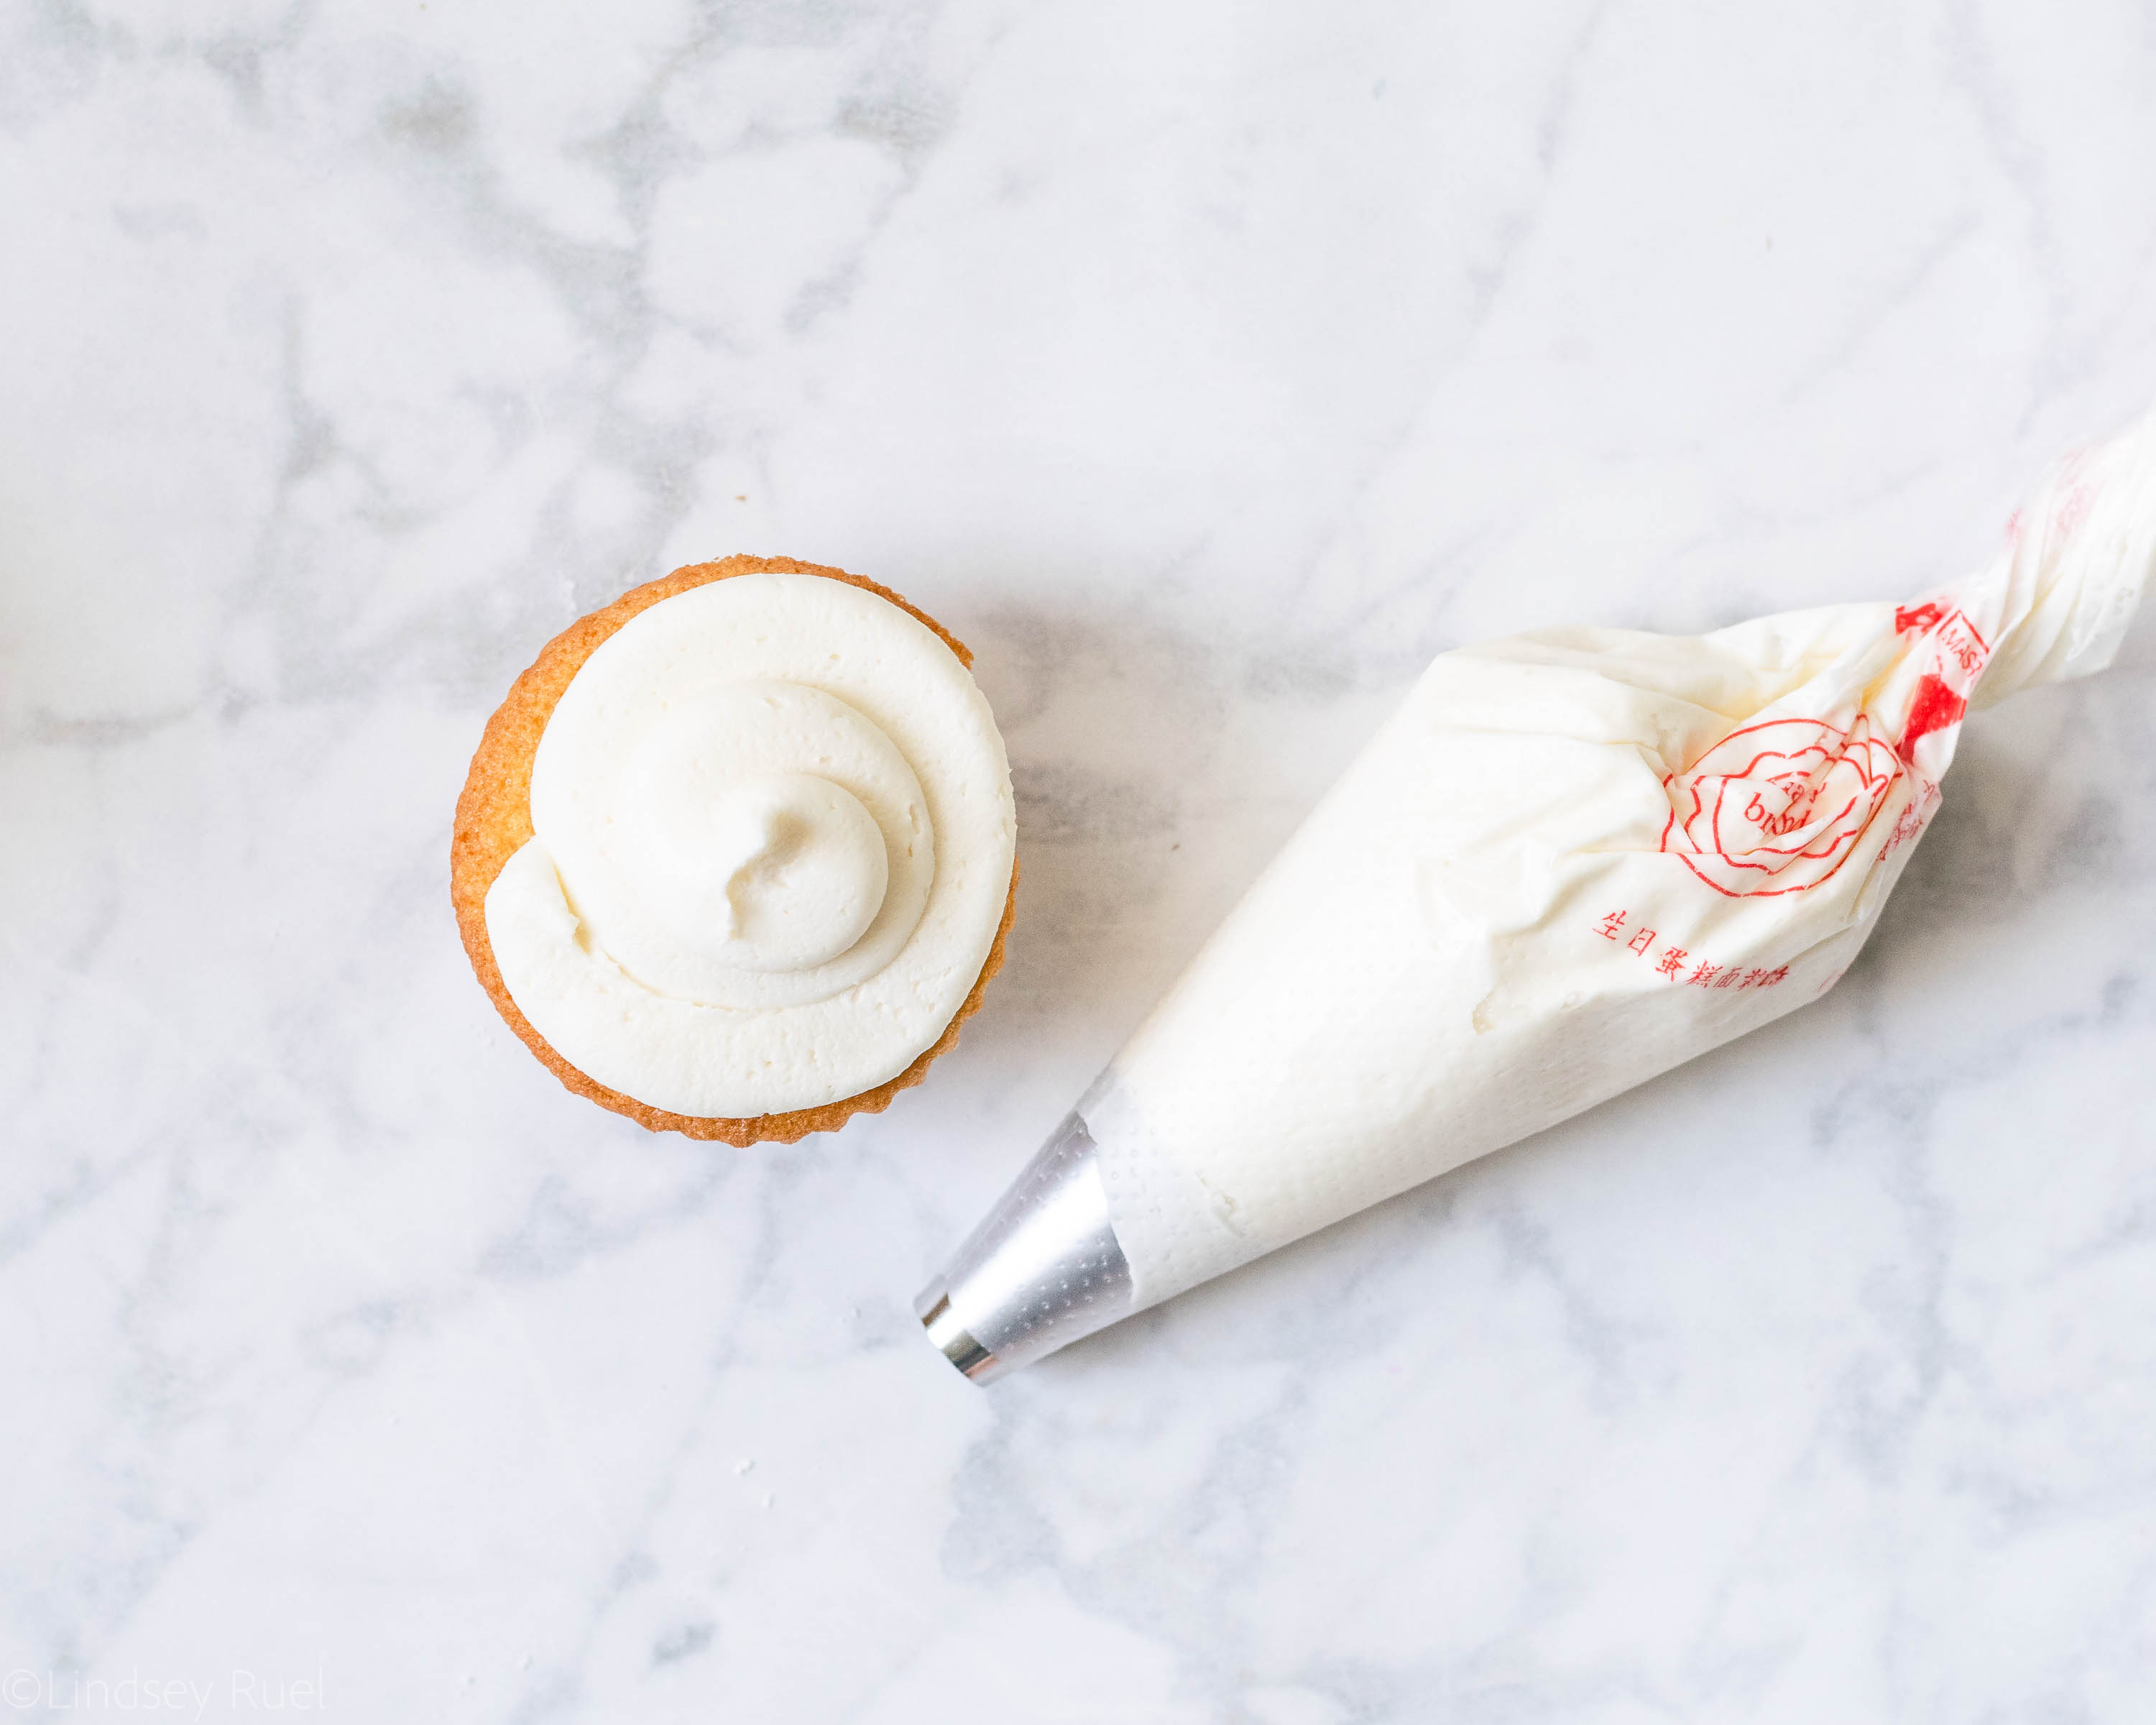
The last step is to sift the powdered sugar into the butter to ensure there are no lumps or clumps and you have the smoothest possible frosting. This eats up quite a few of those seven minutes, but it’s worth every second

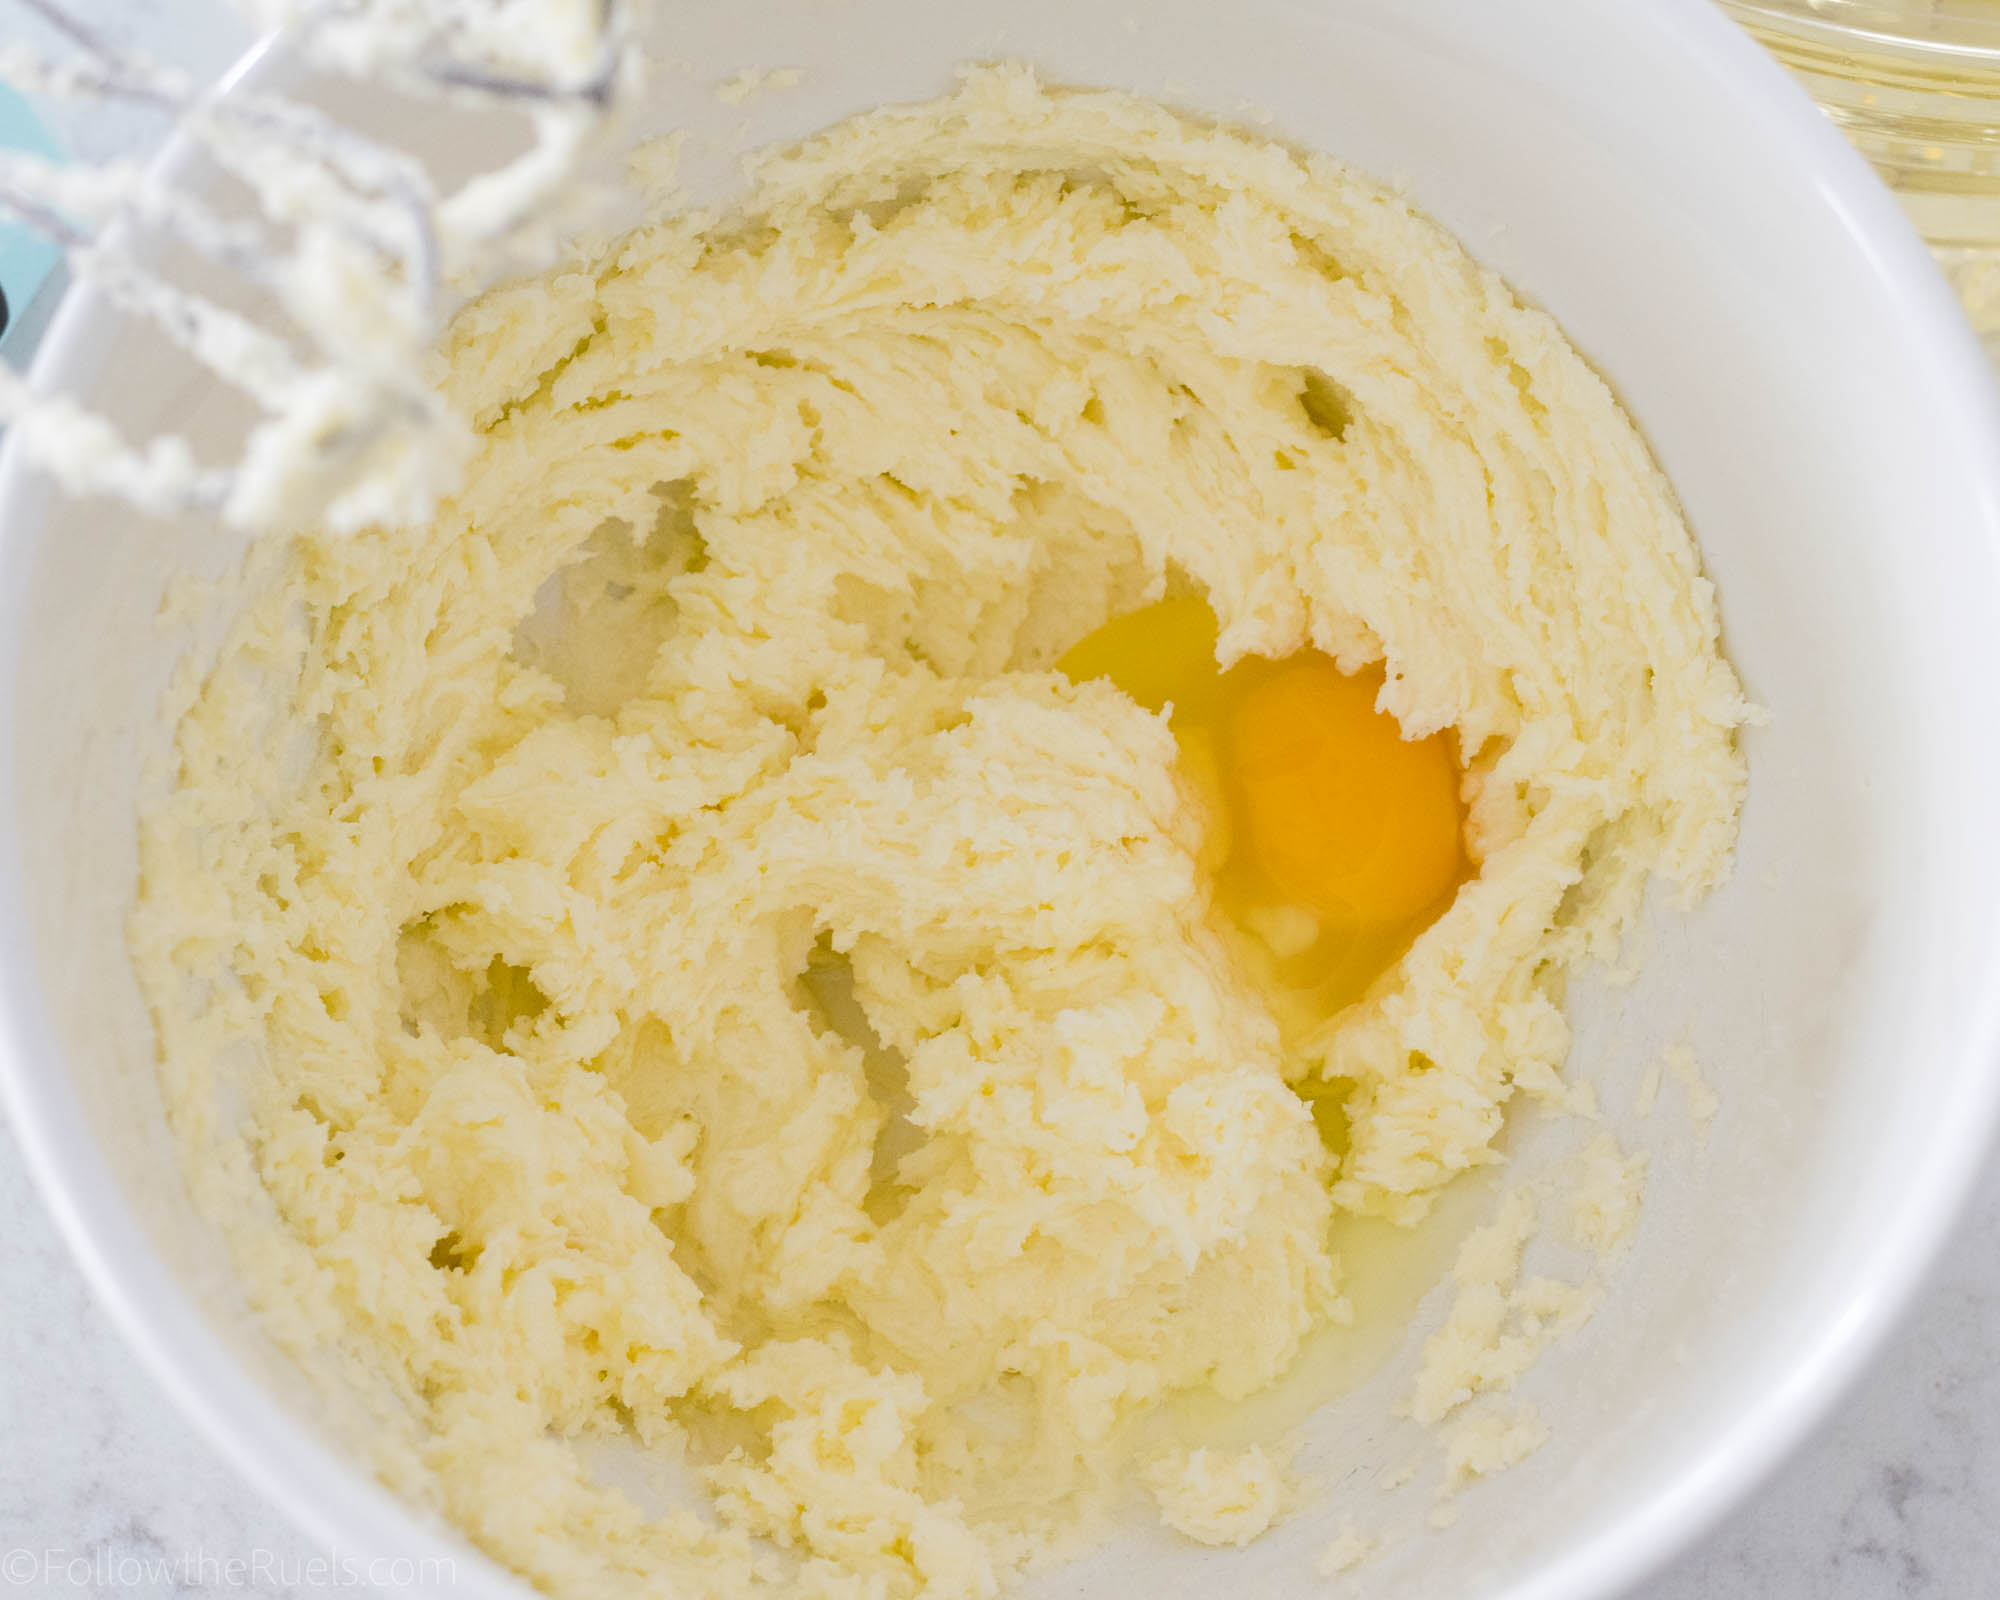
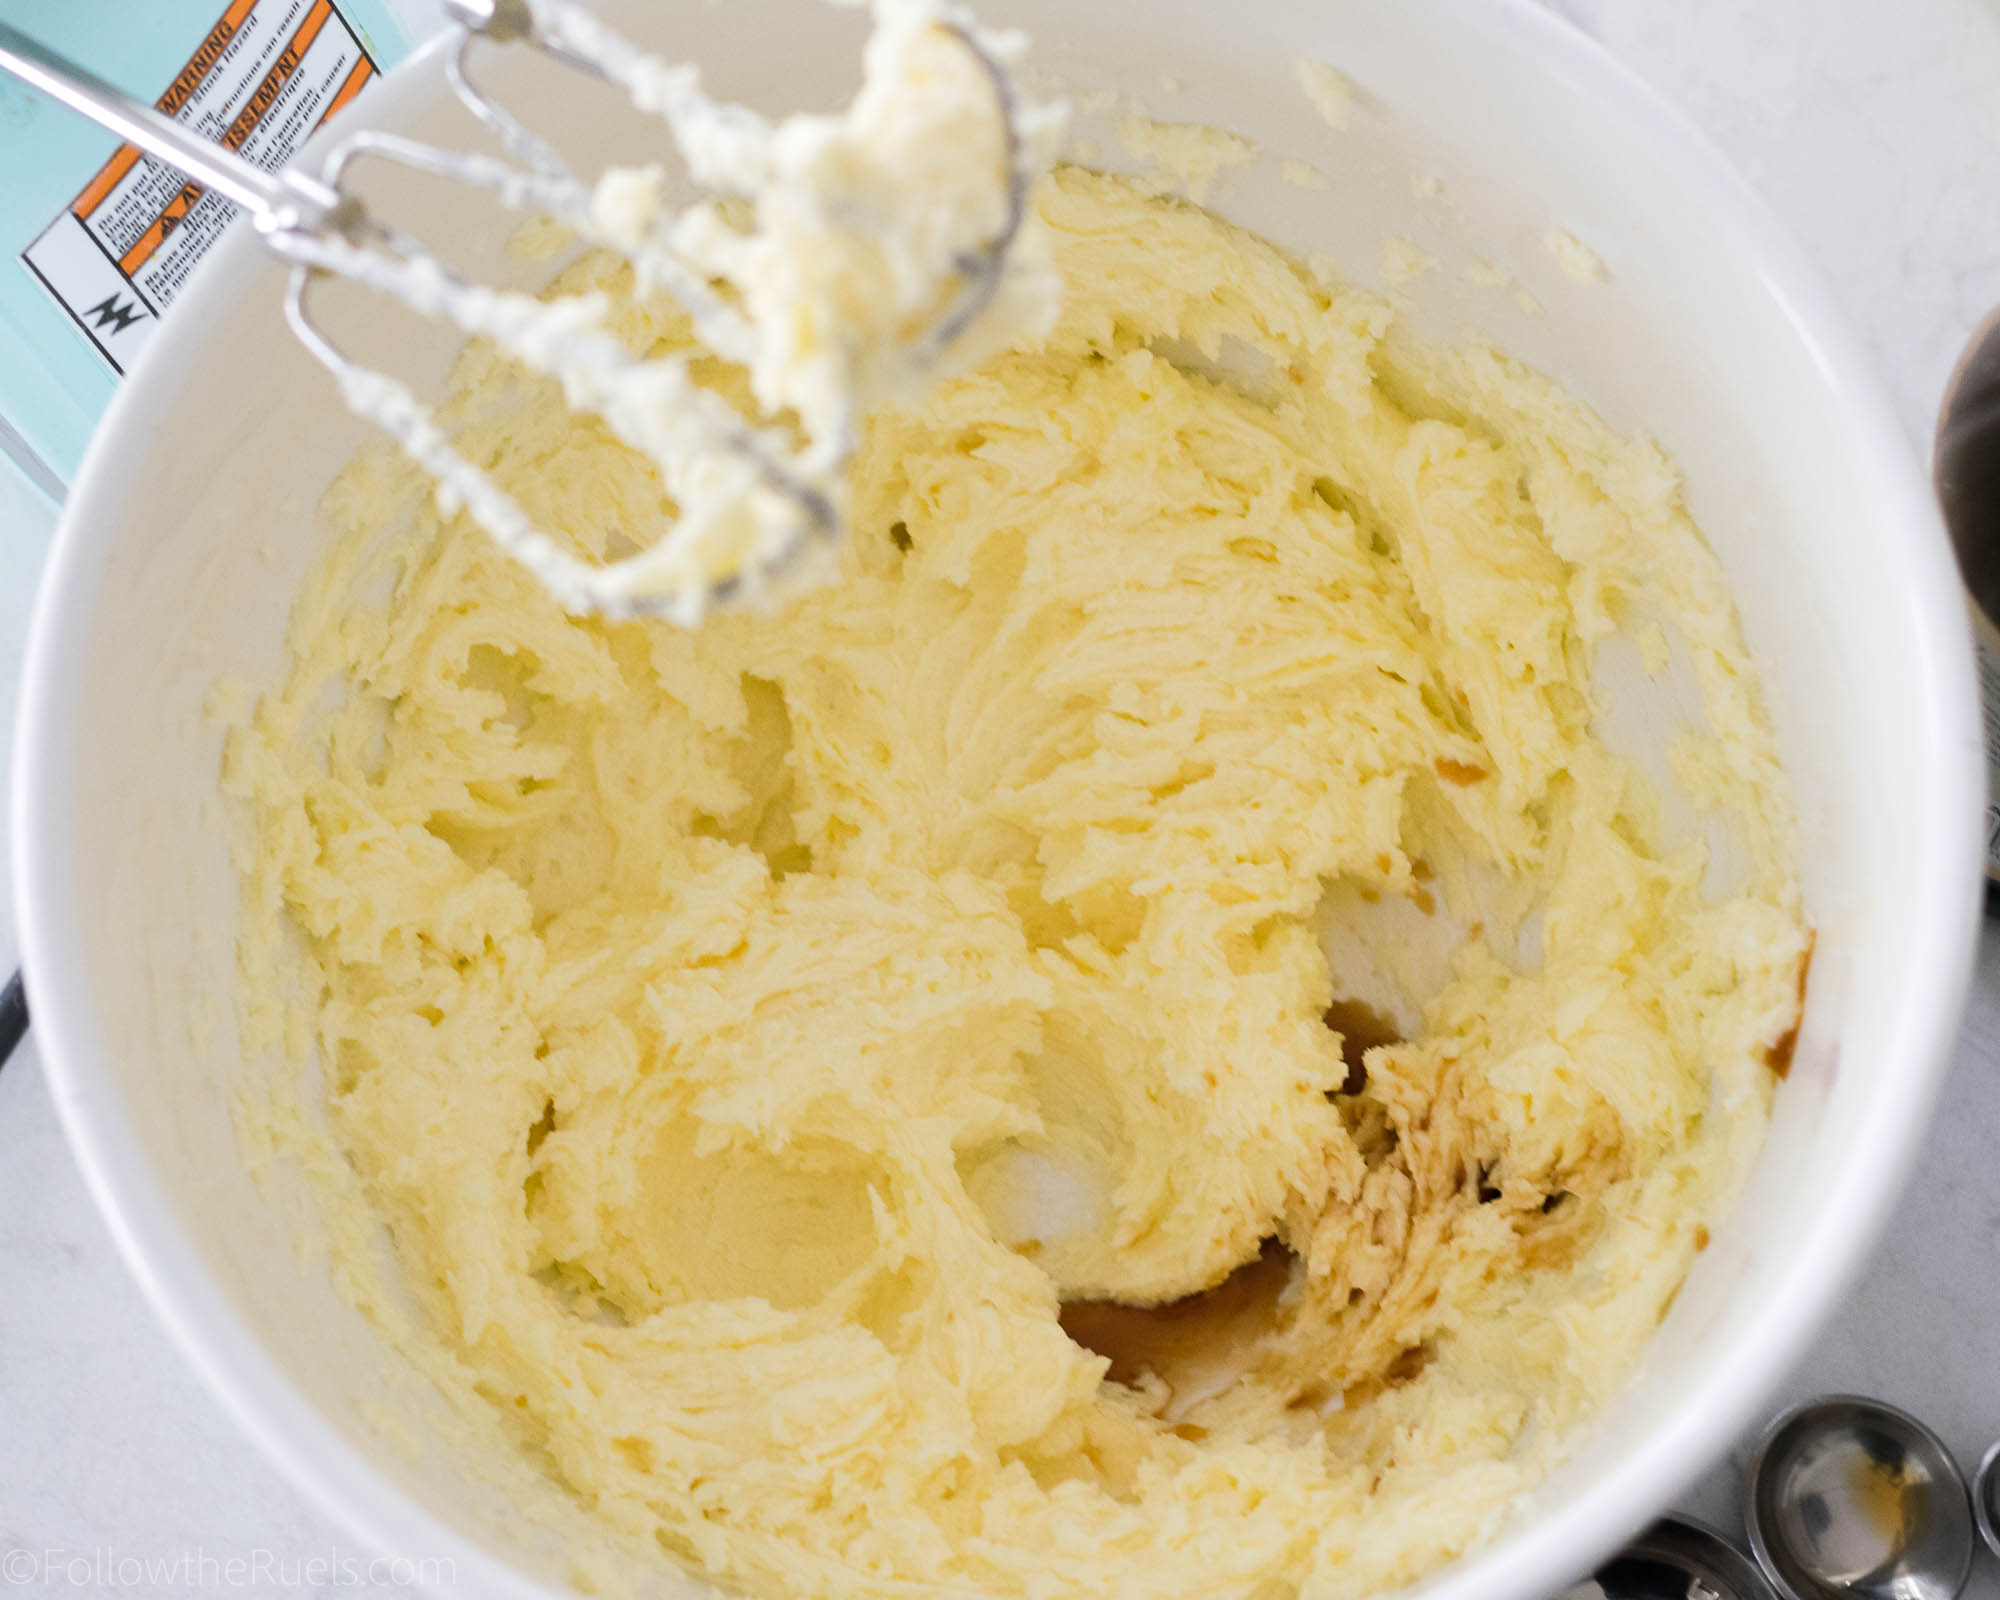
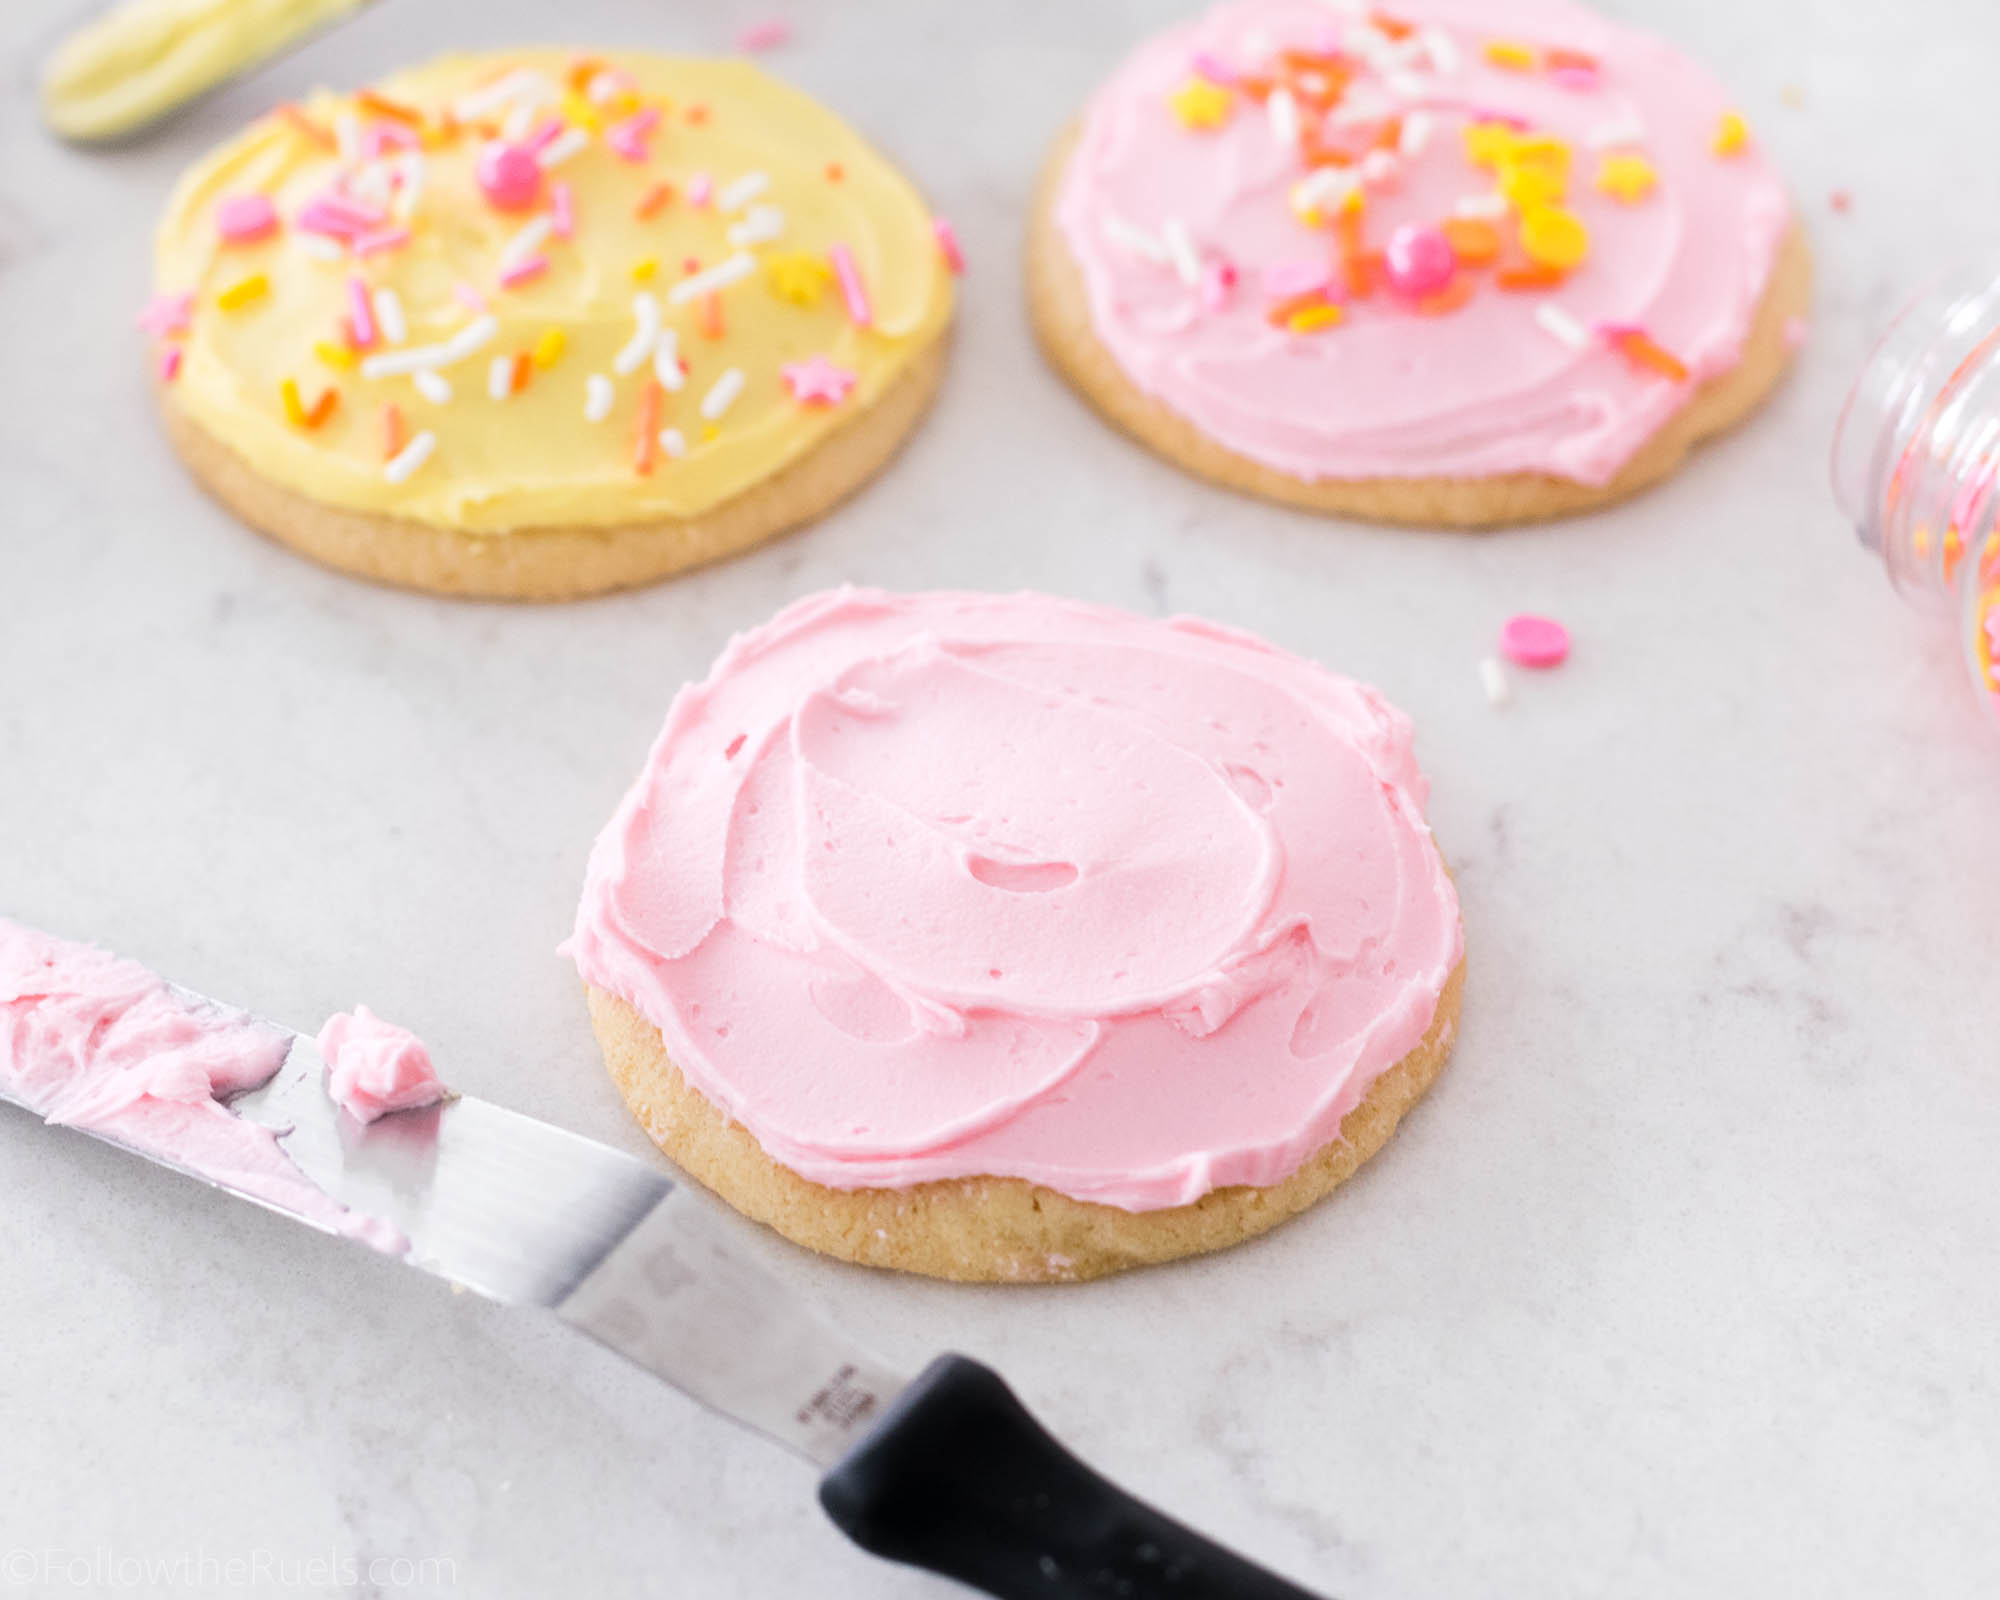
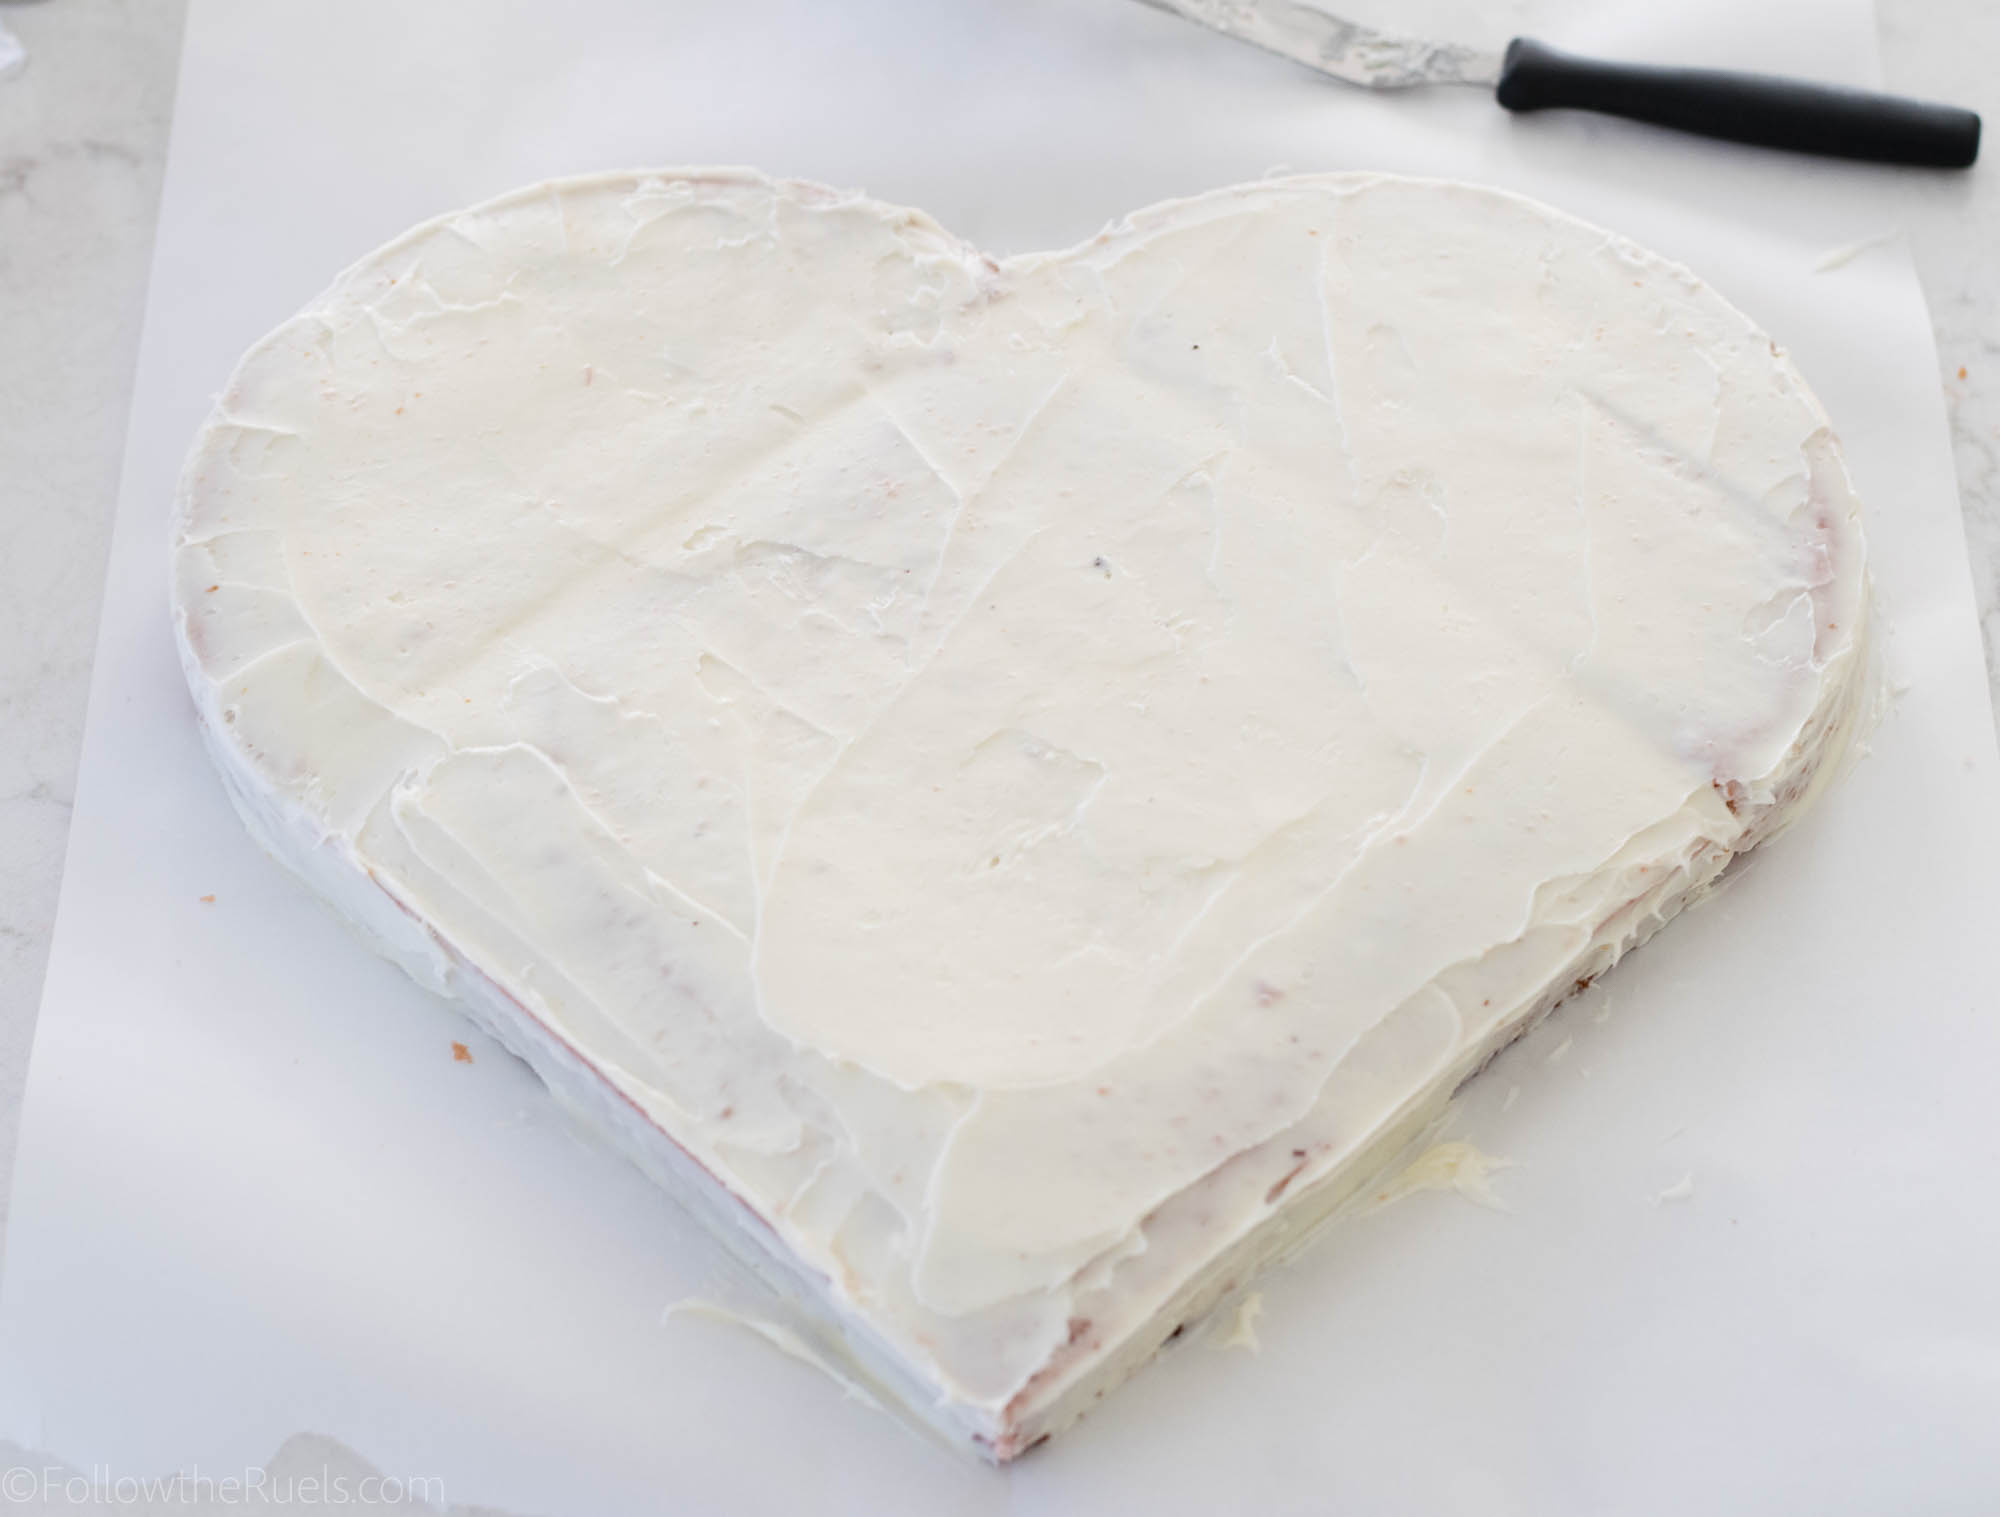
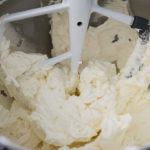
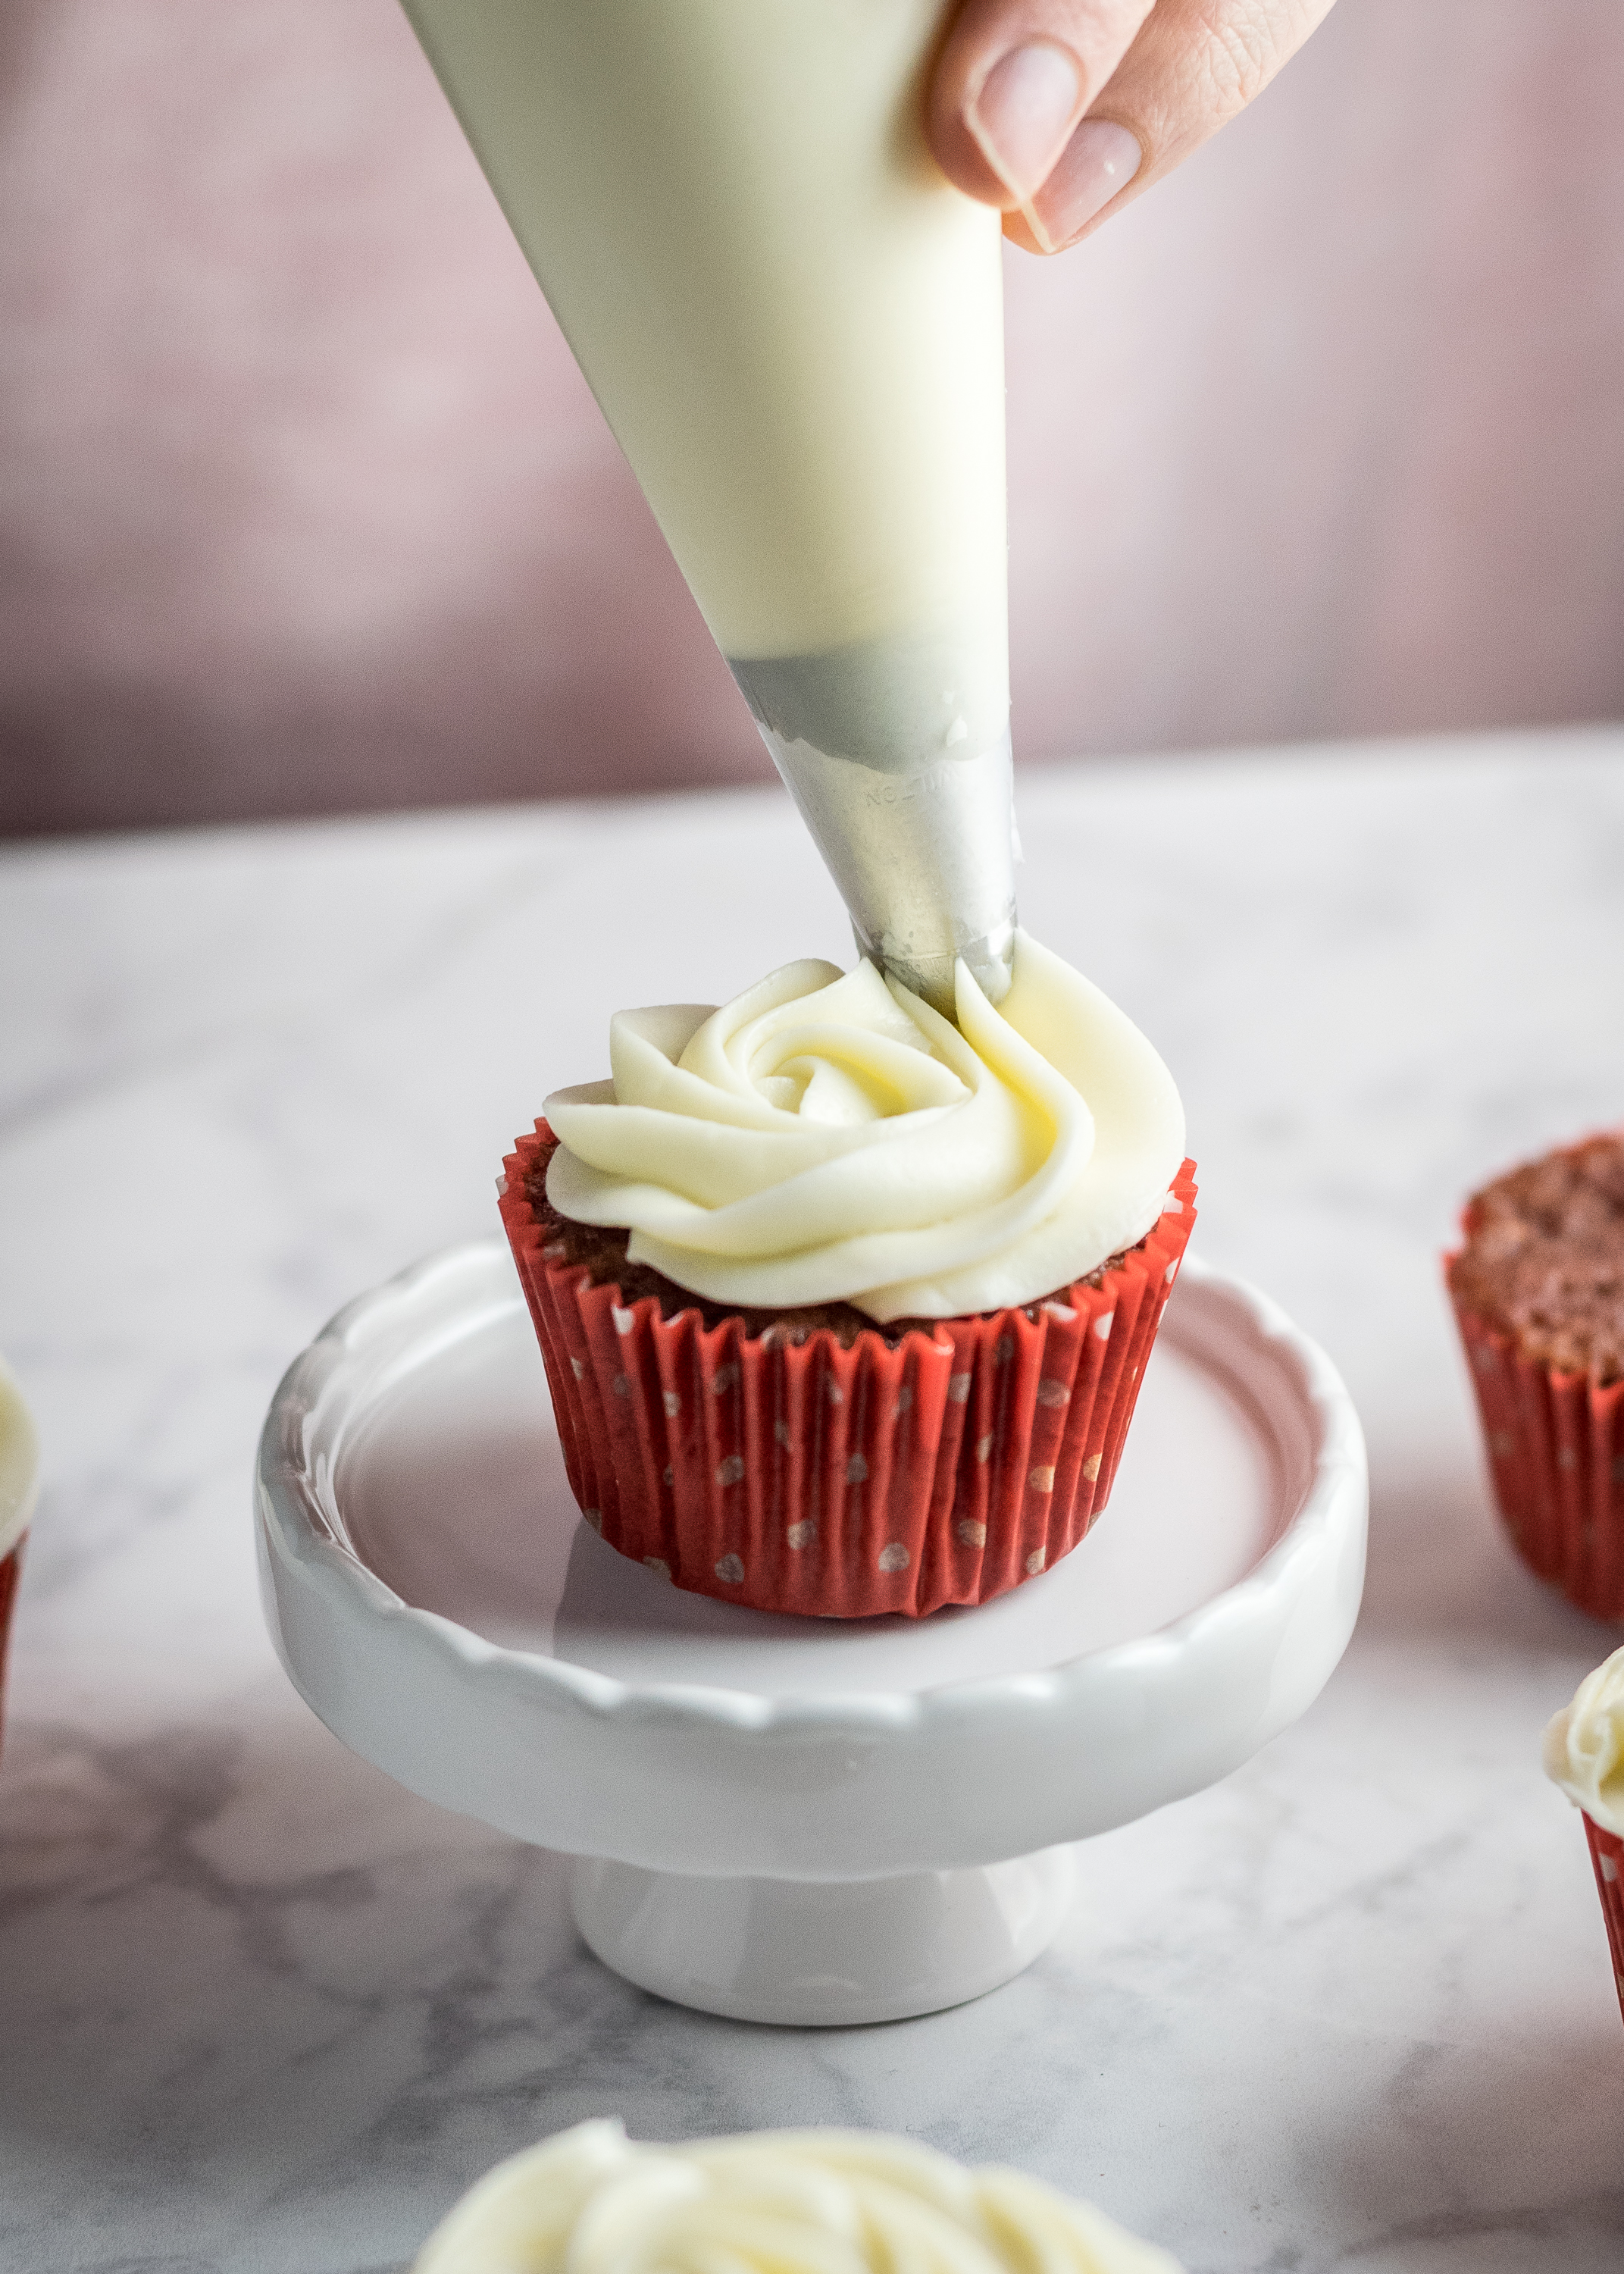
After you mix in your sugar, your frosting will probably feel and look a bit dry. Add in your flavoring and a bit of milk, about 1 tablespoon at a time until you have a frosting with a nice creamy consistency. 

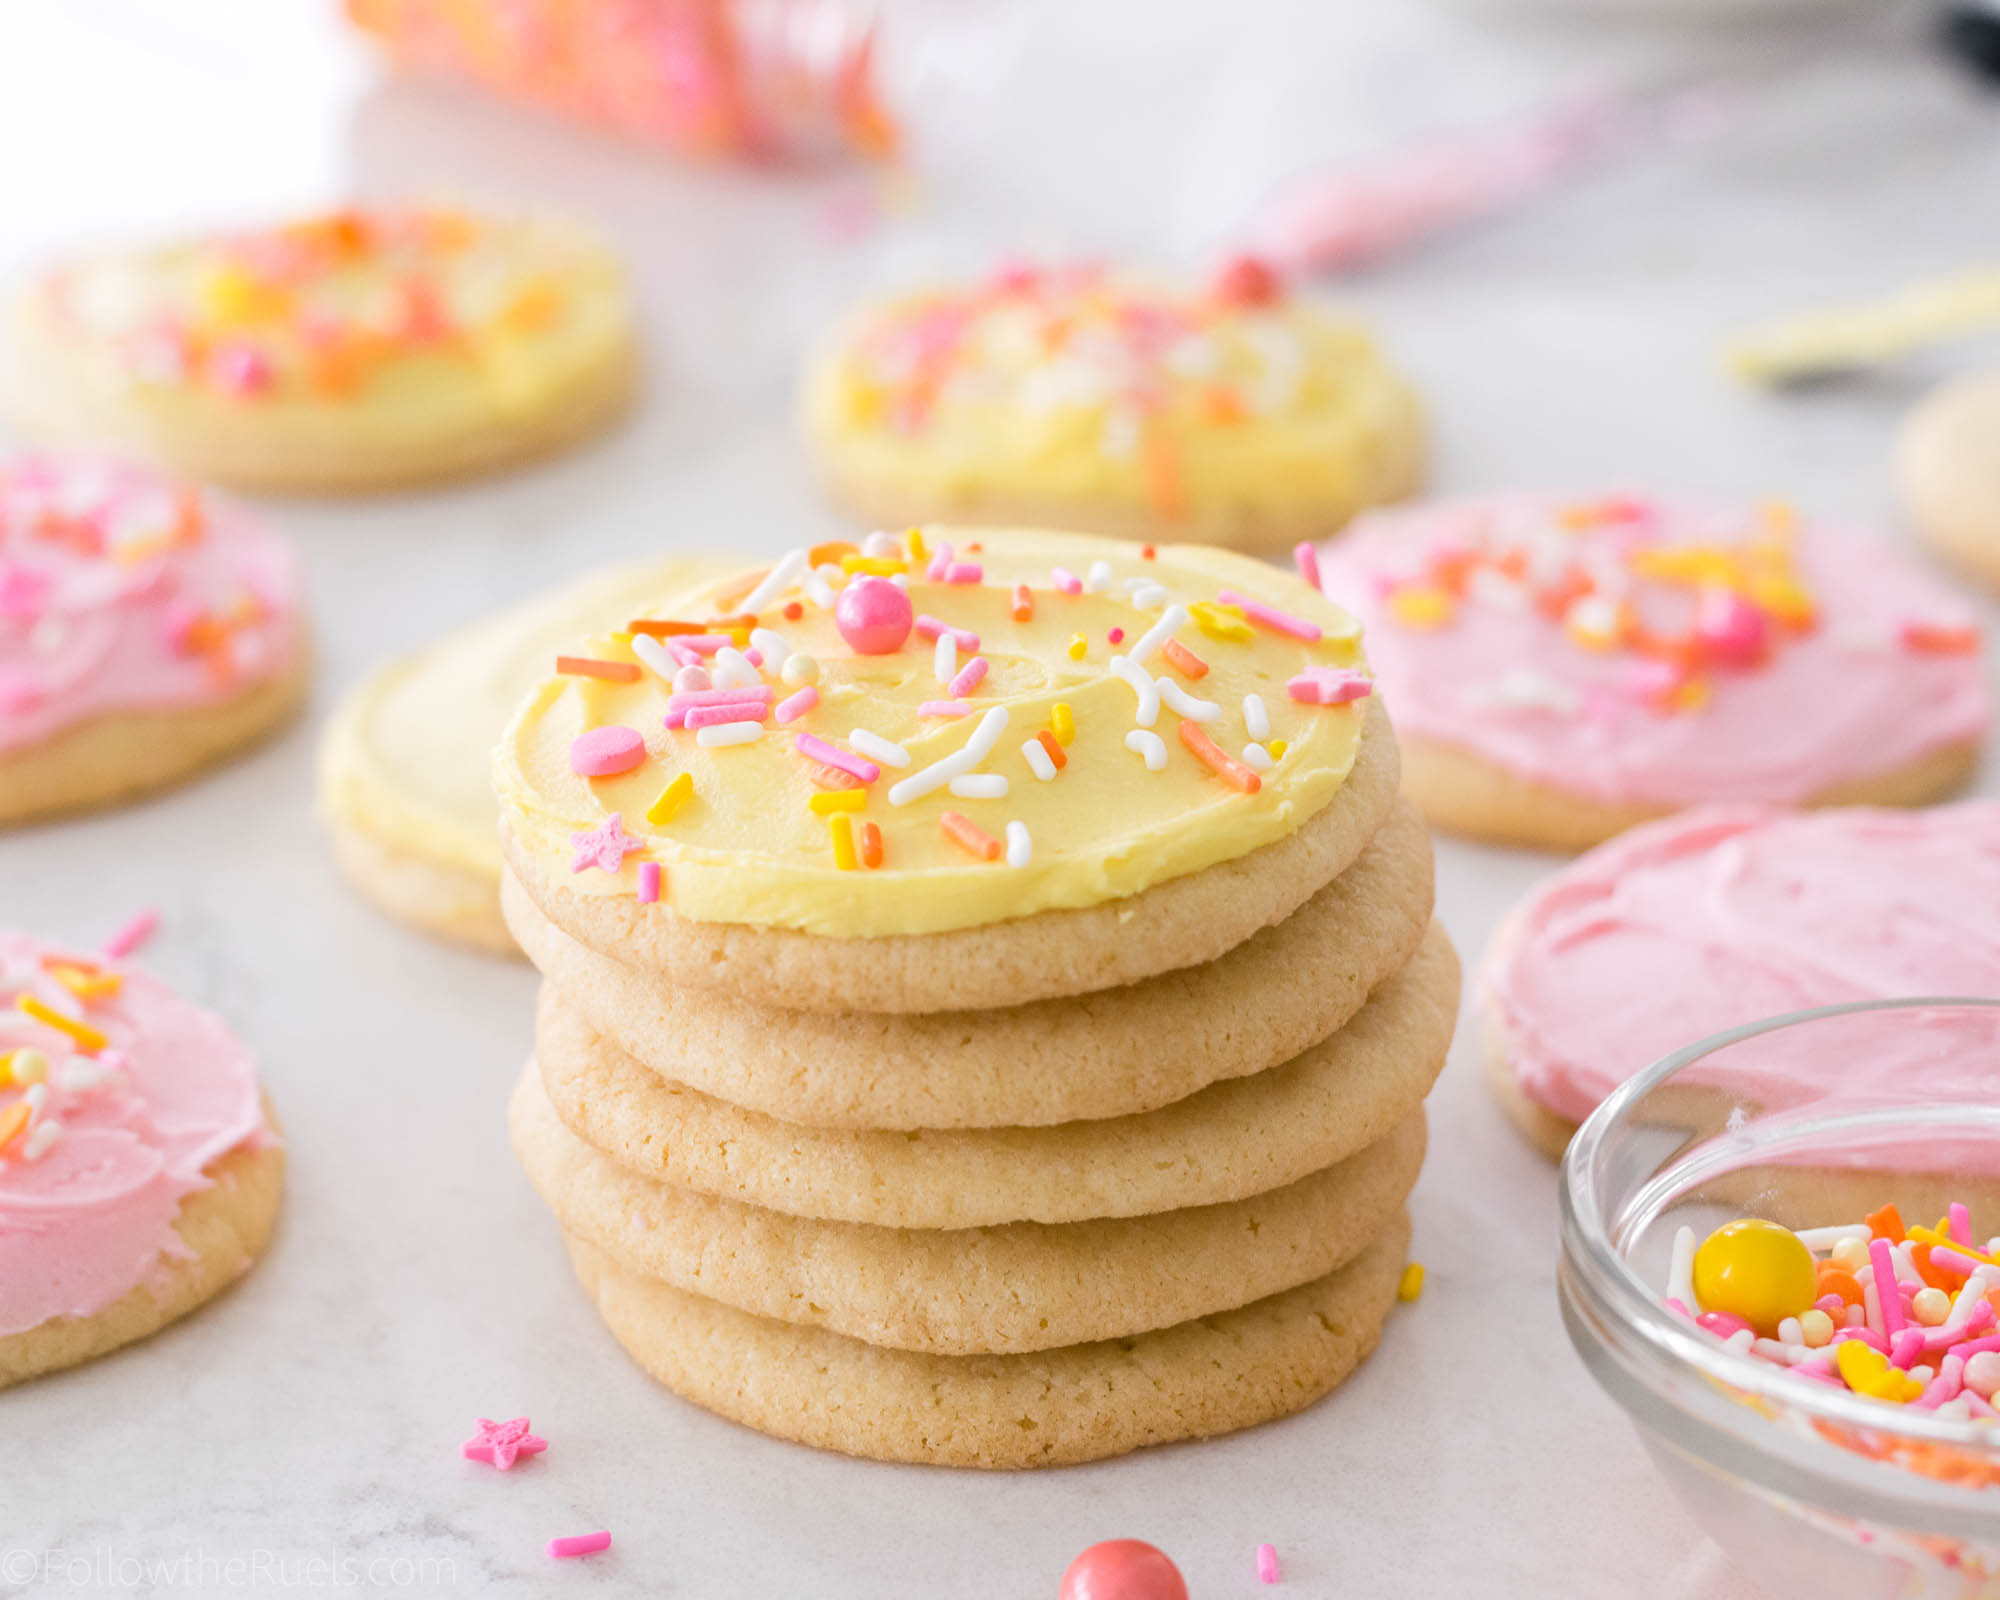
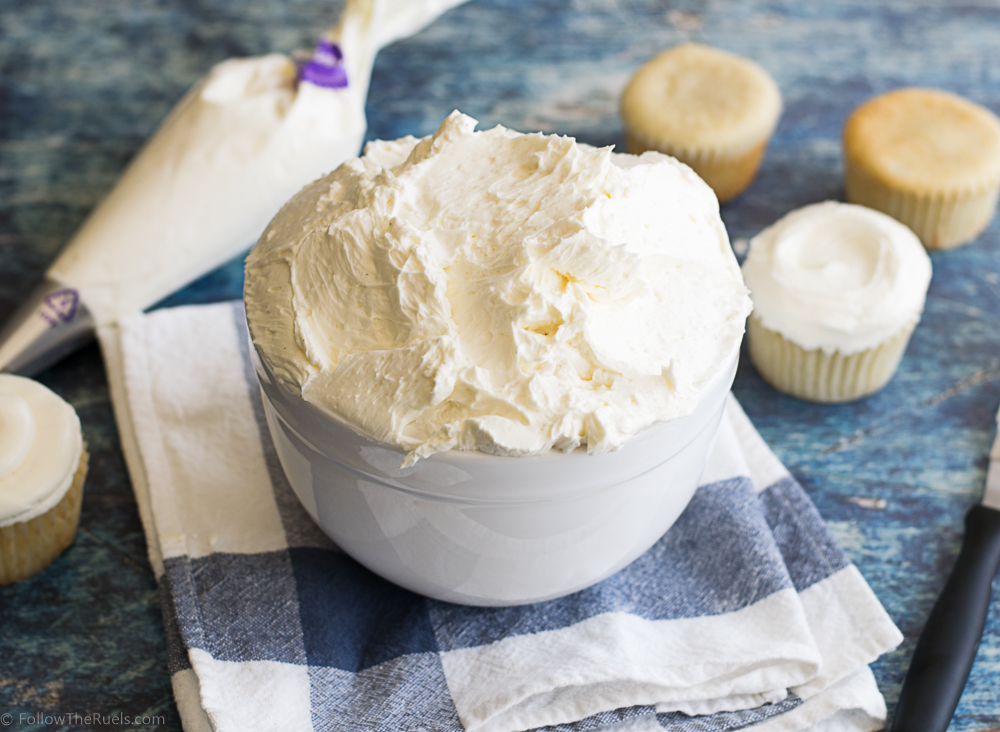
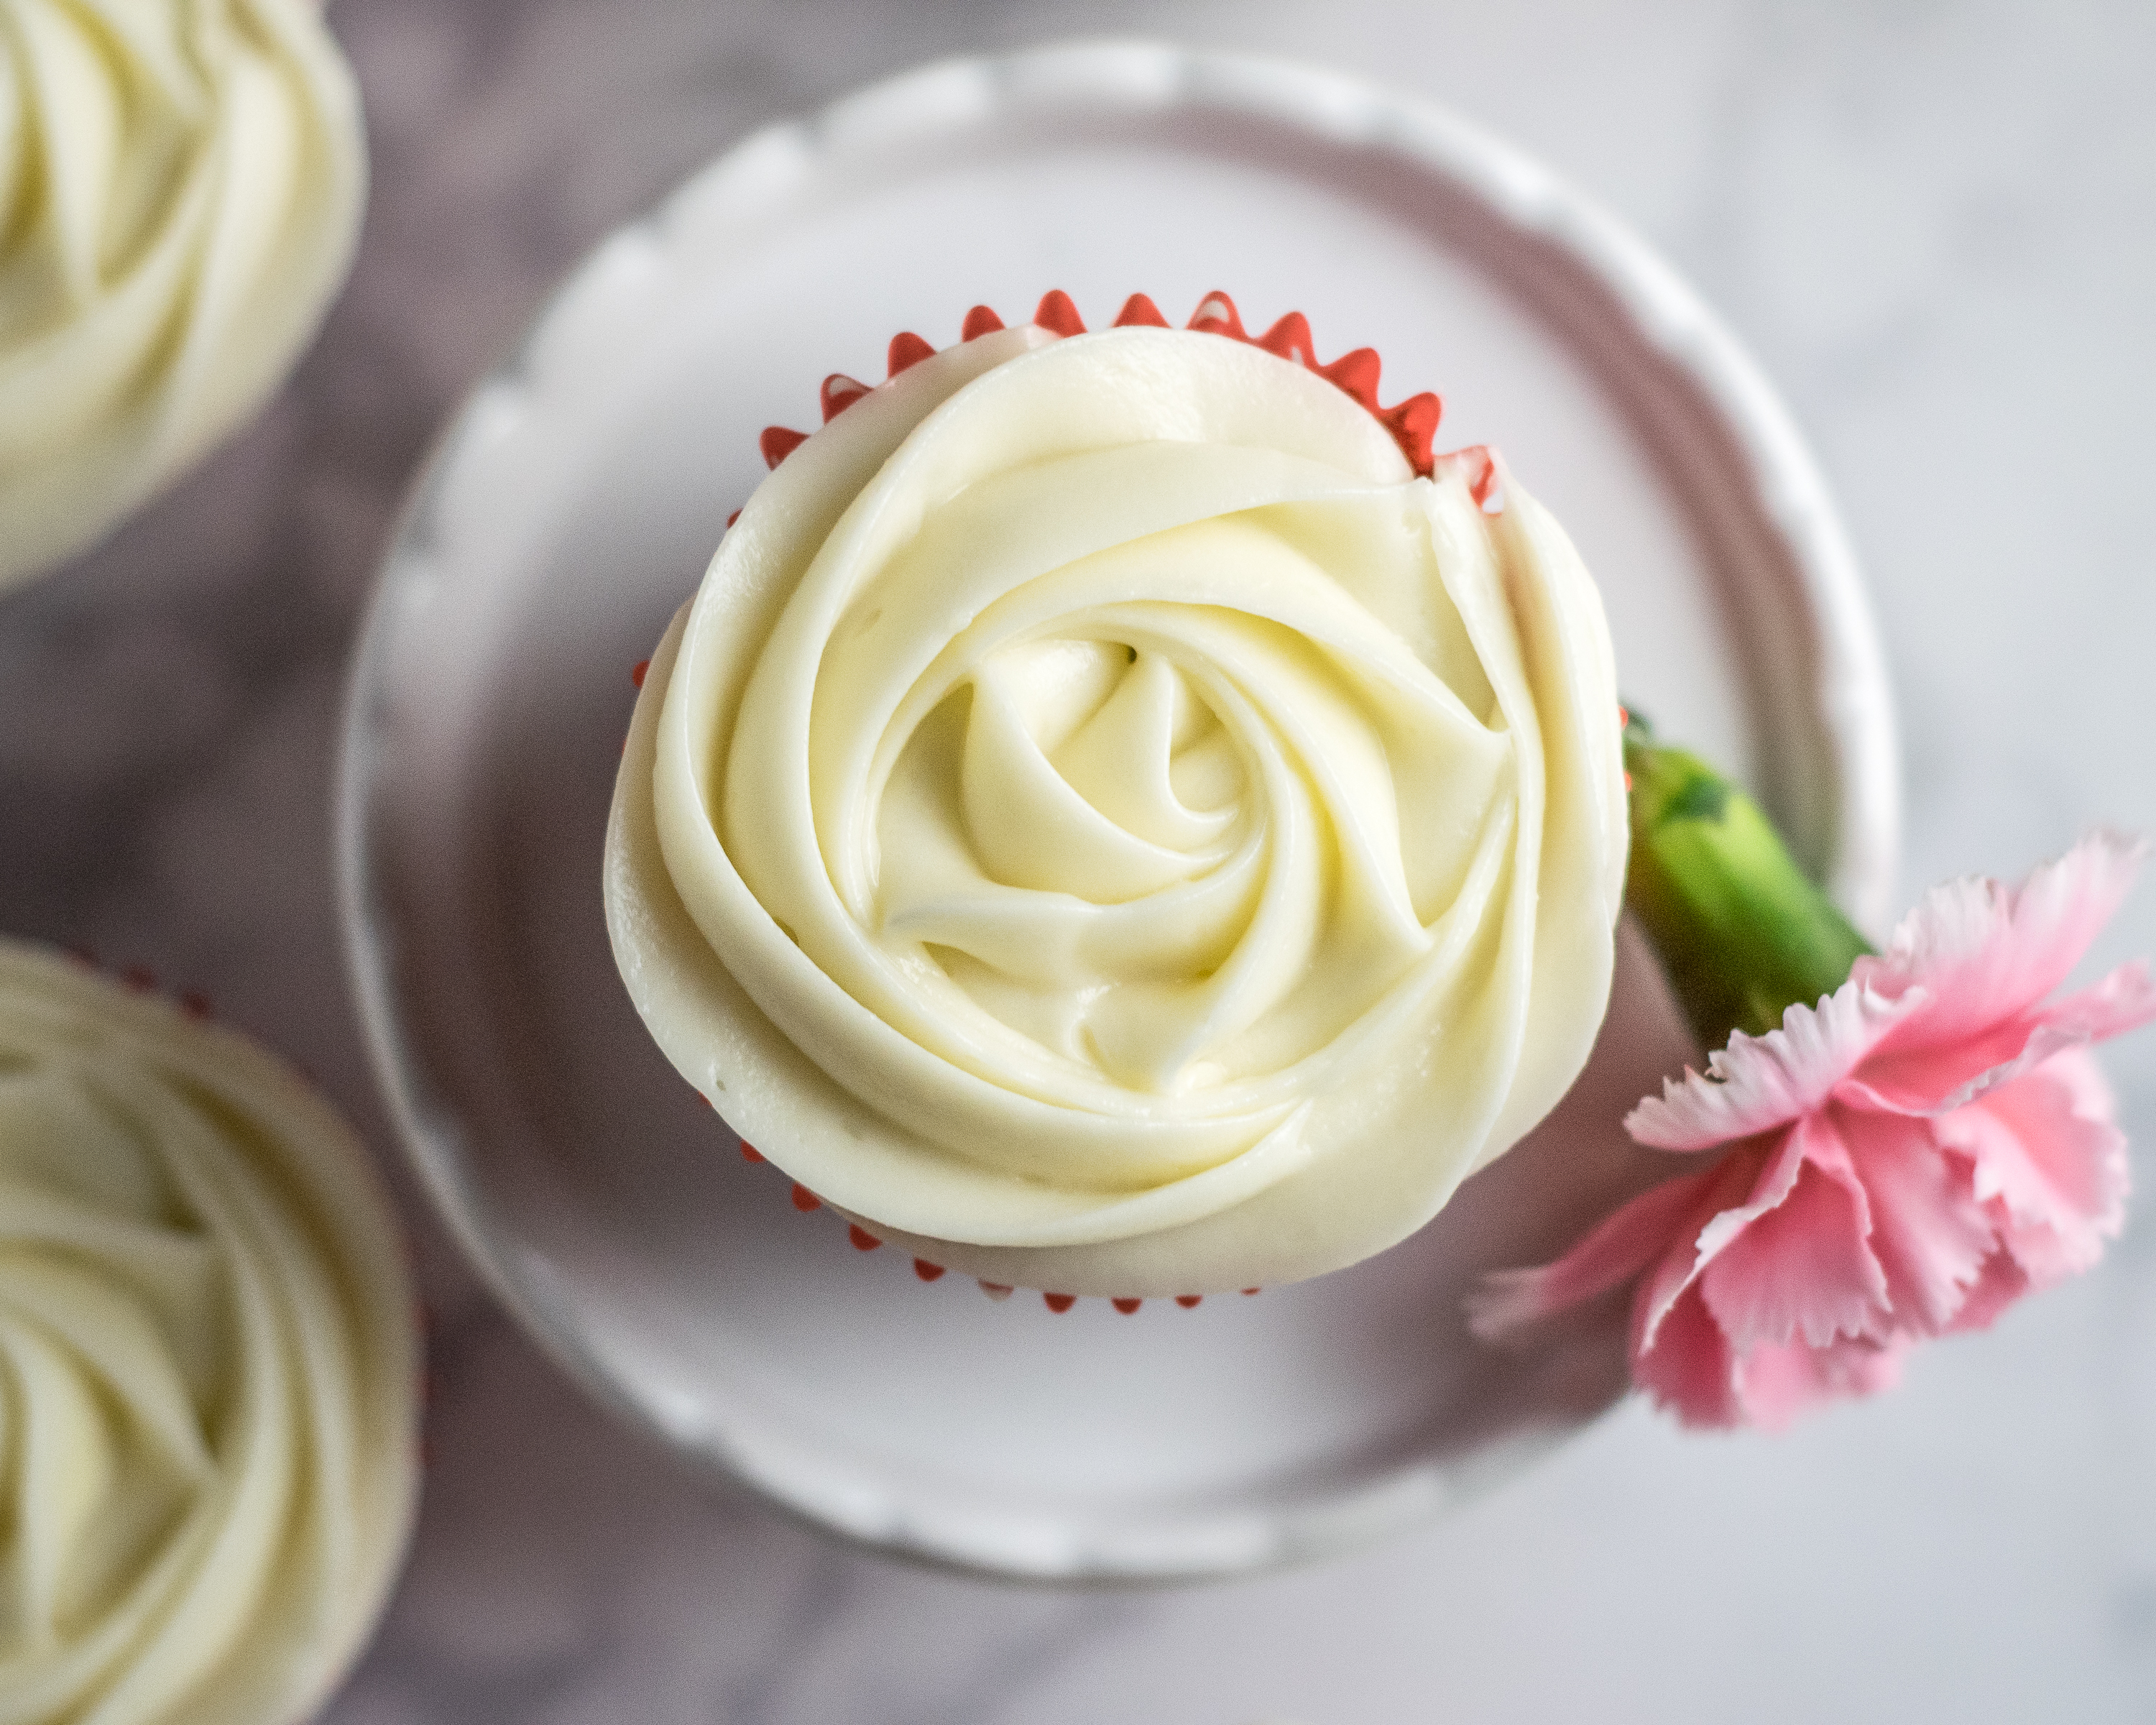
And that’s all it takes to get a simple, quick, yet delicious frosting! 

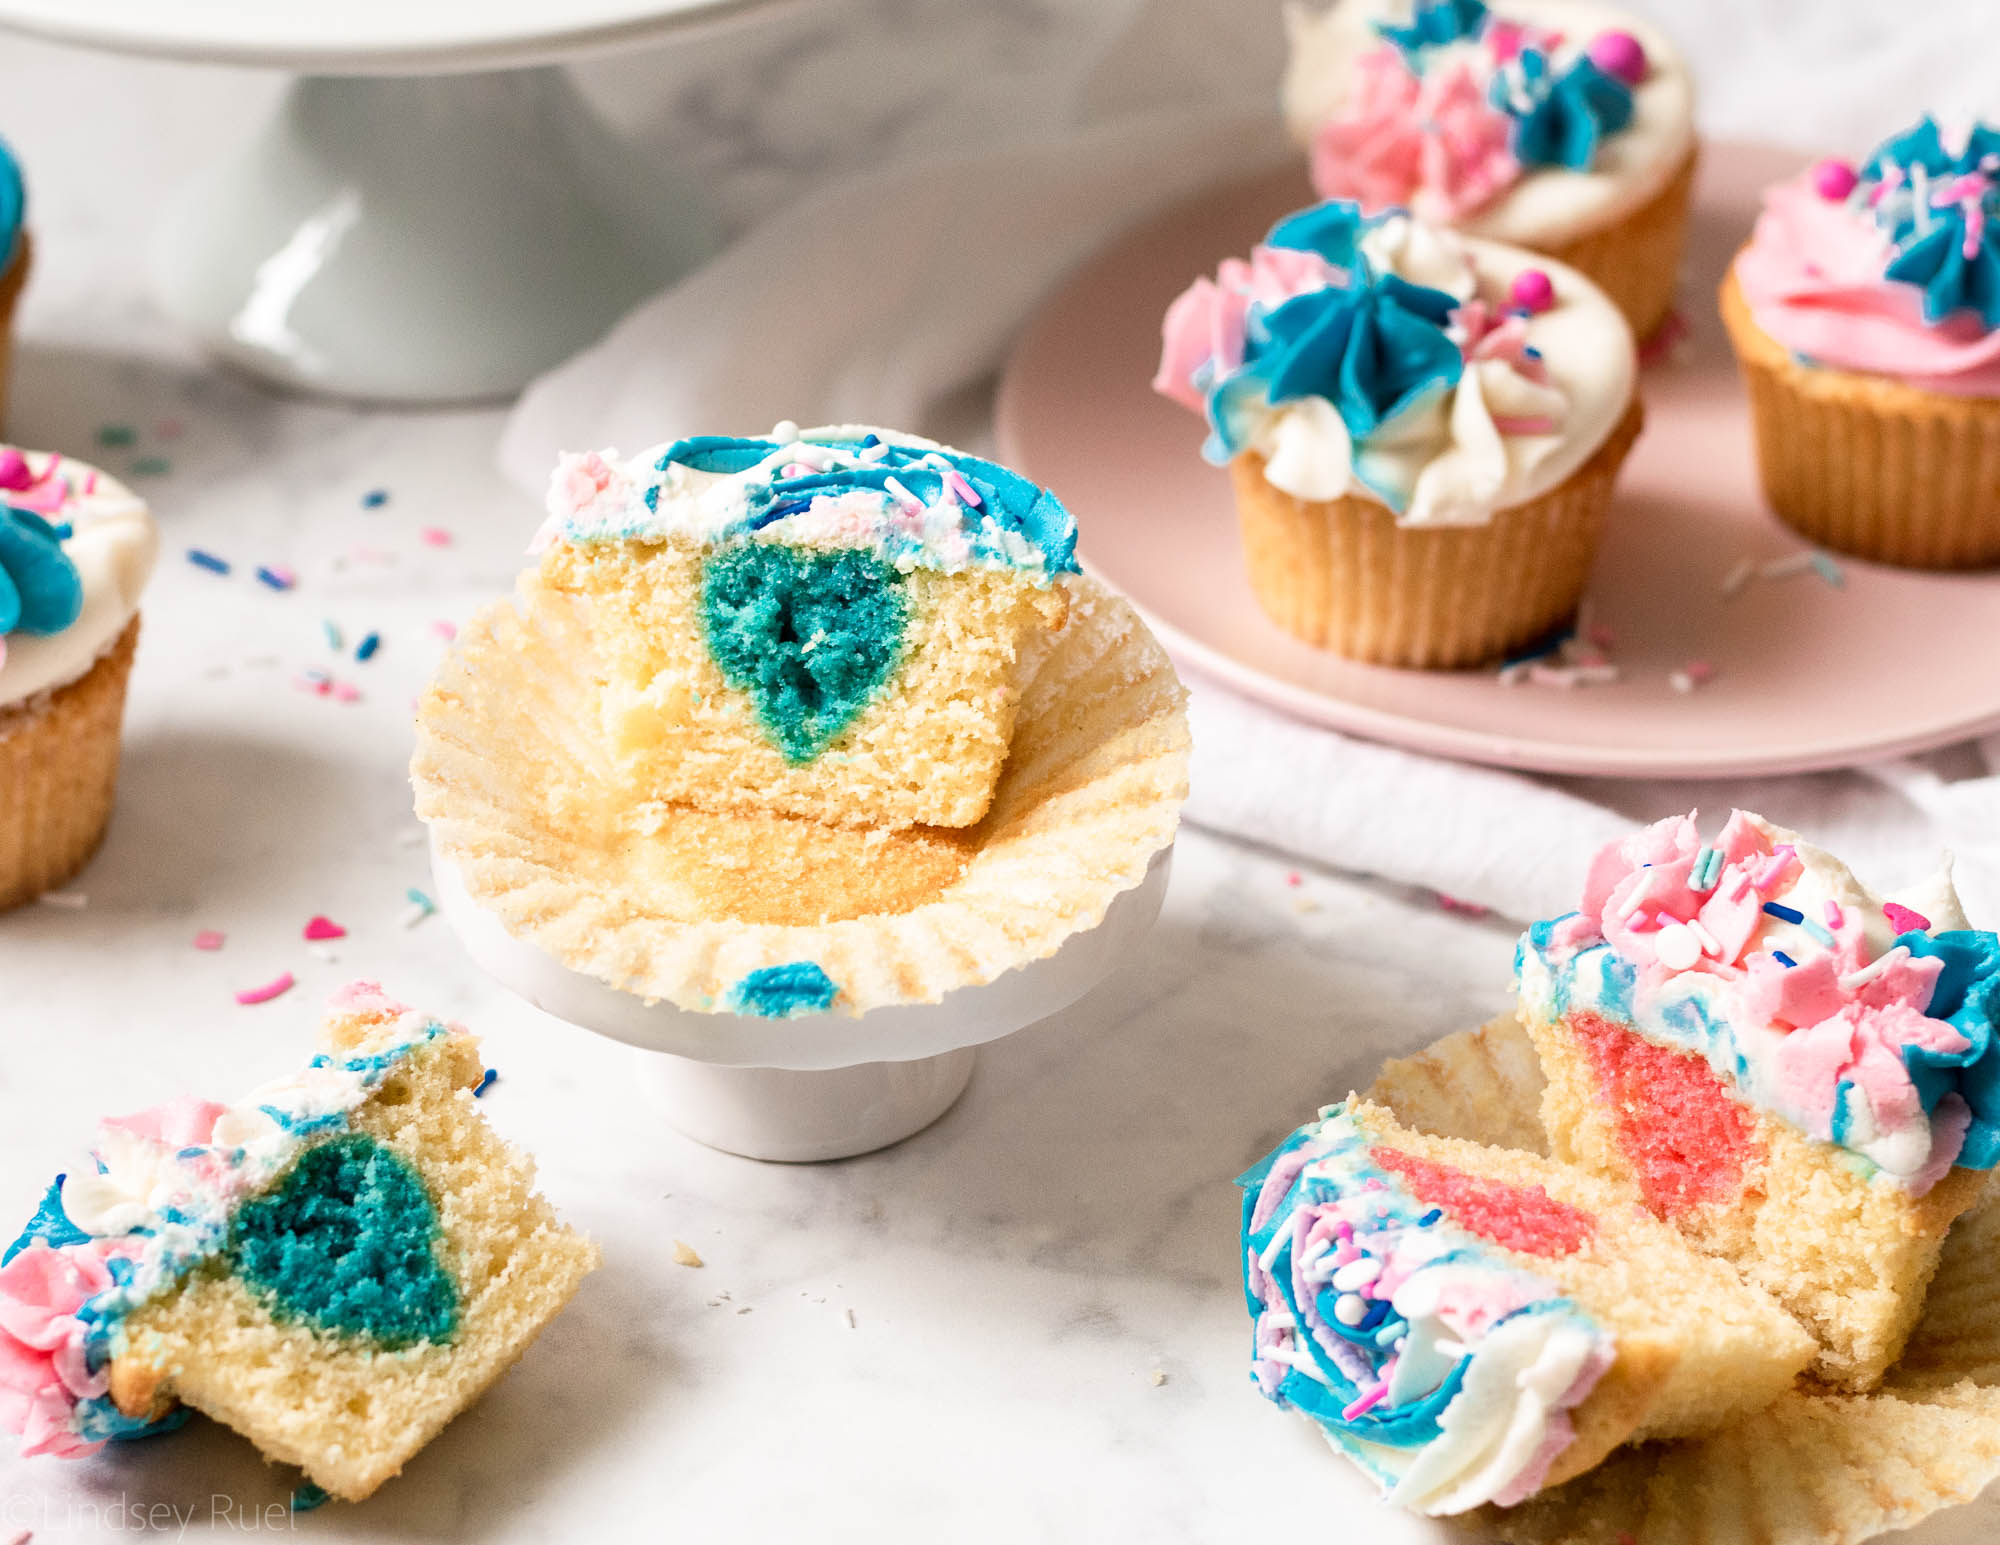
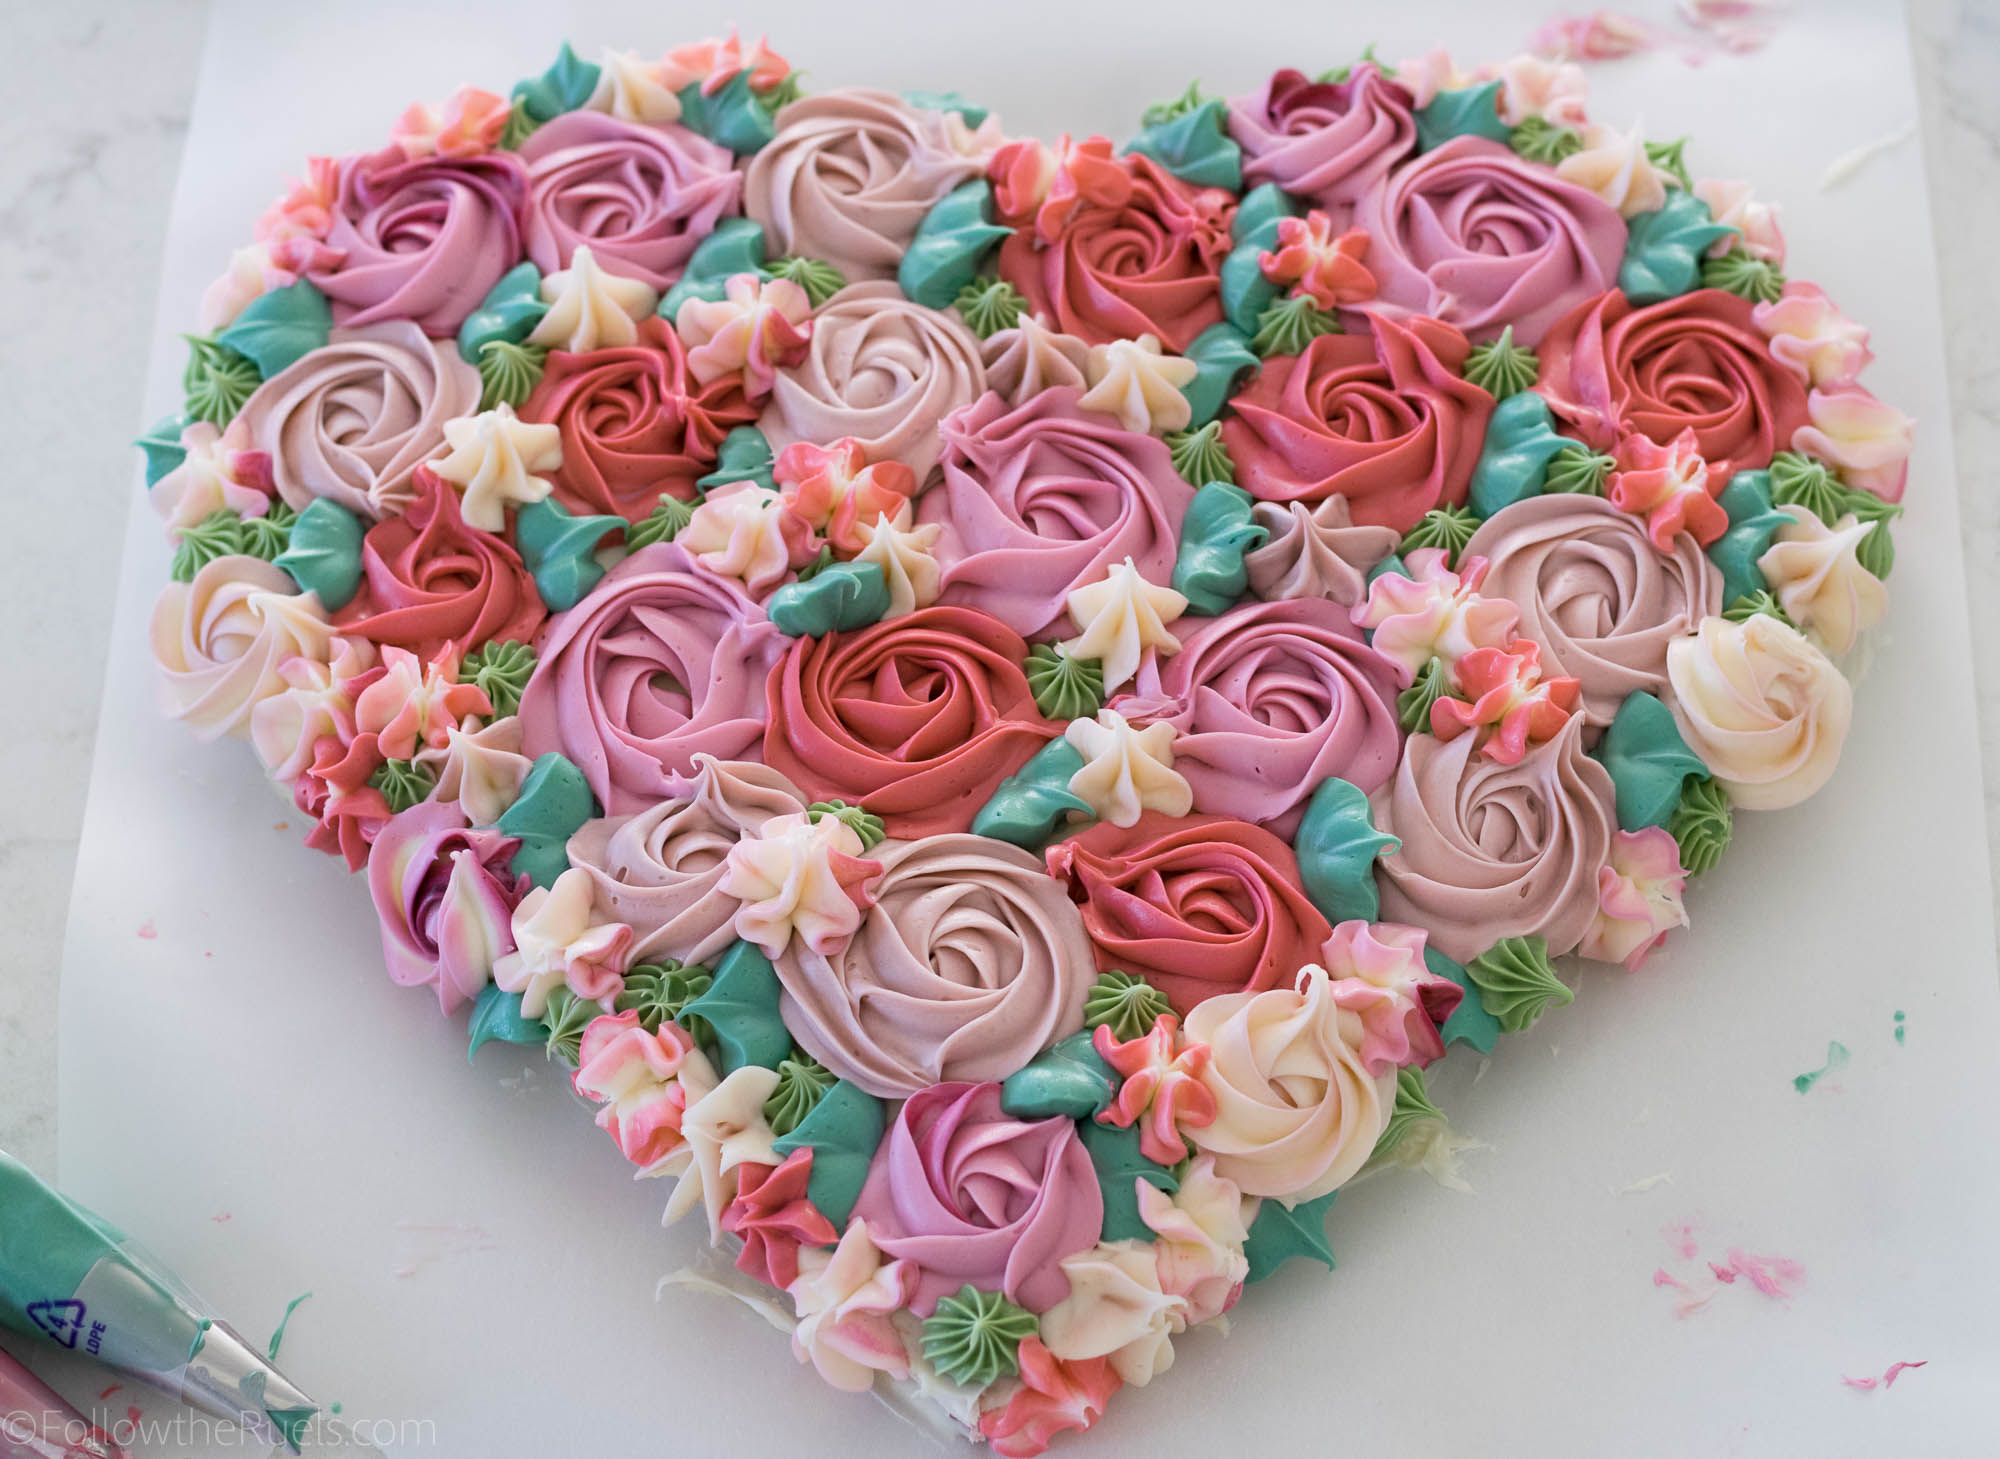
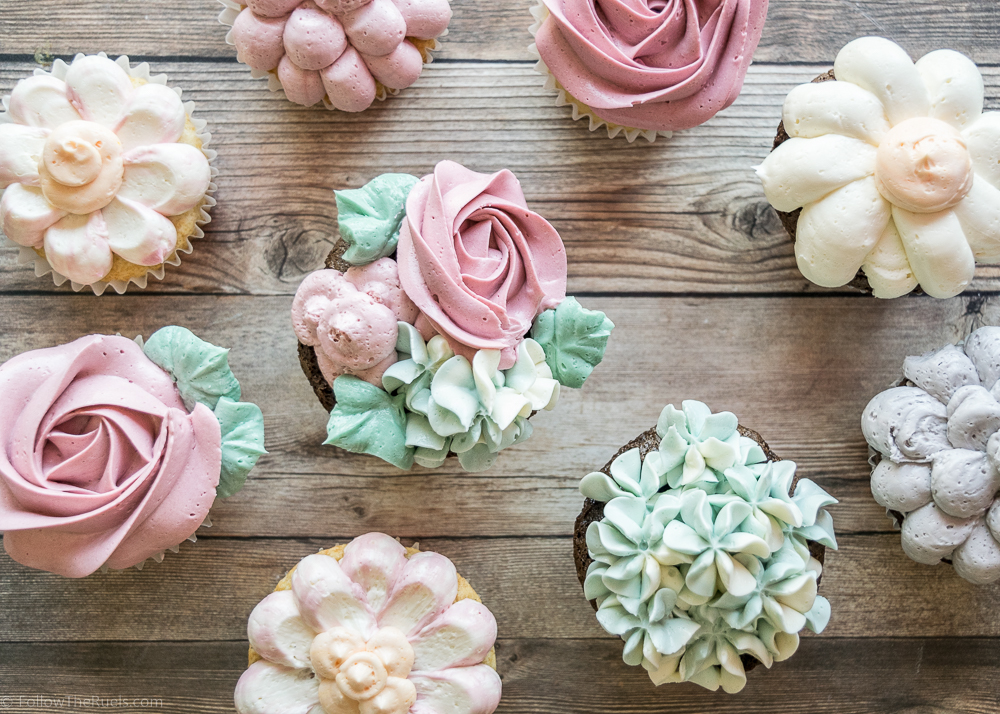
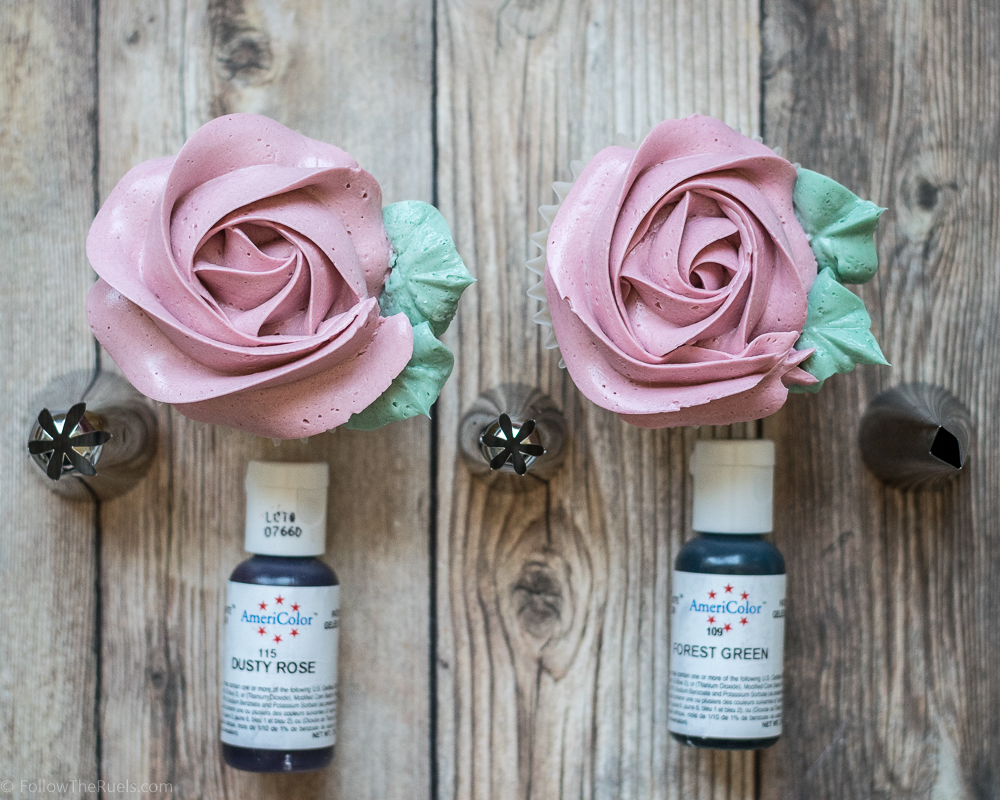
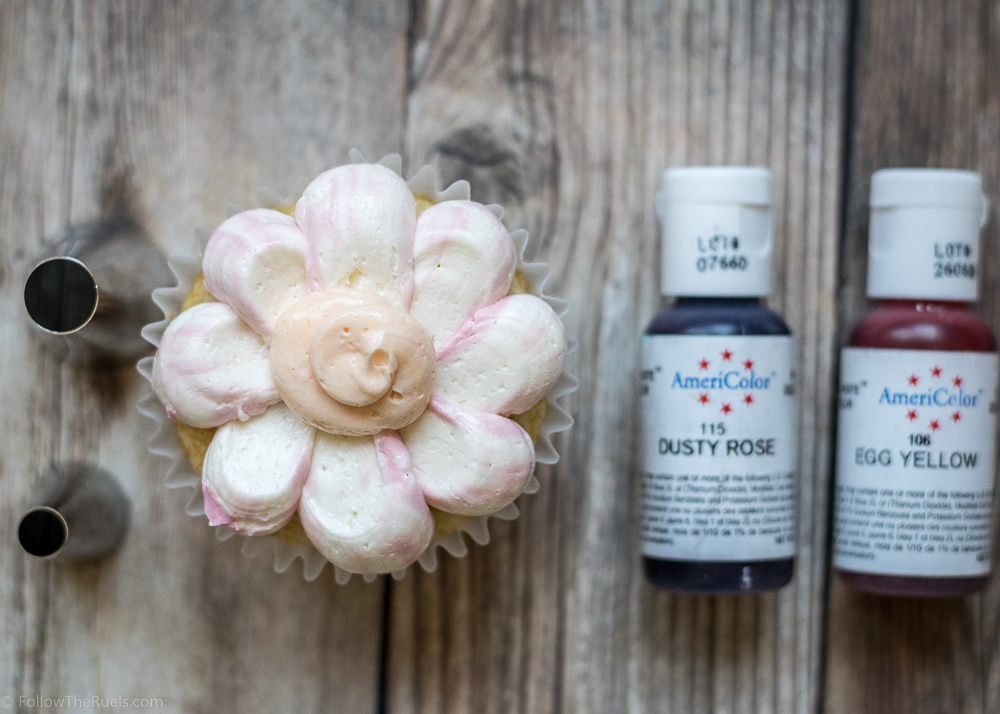
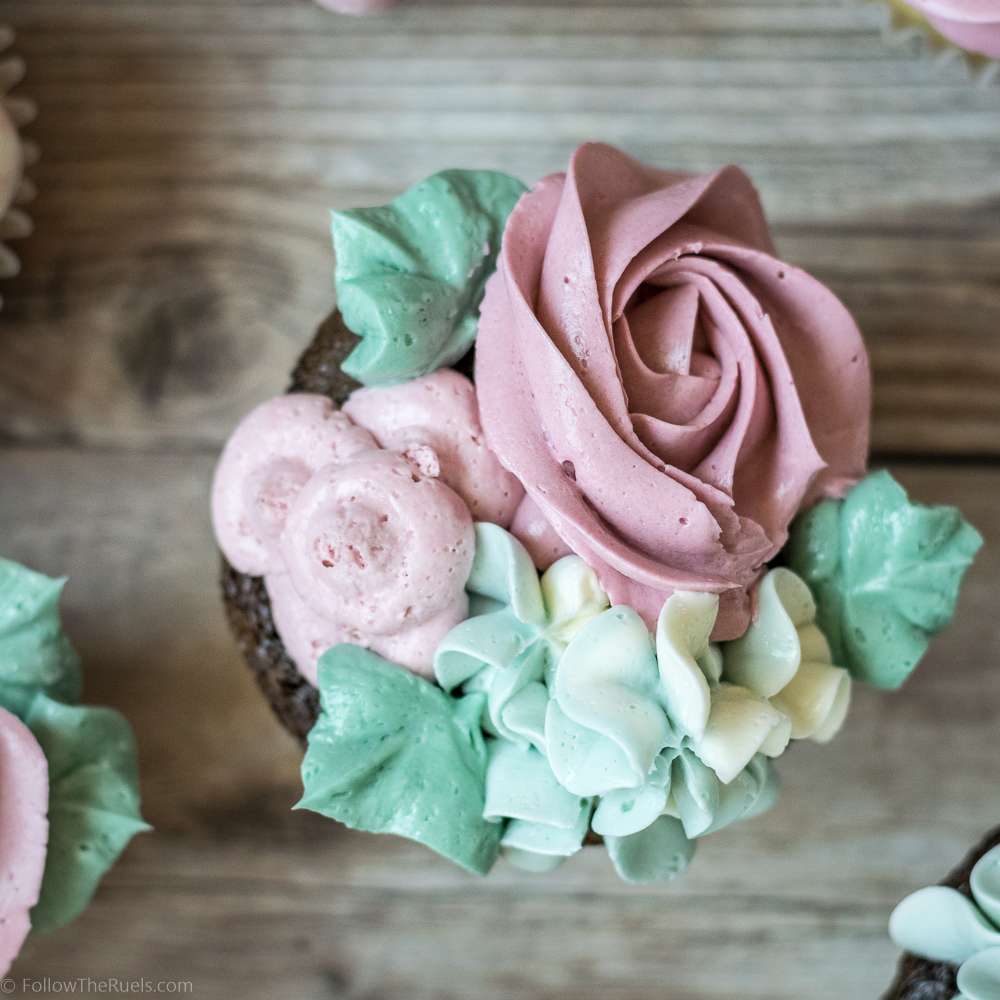
Even though Swiss meringue will always be my favorite of the buttercreams, it doesn’t always make sense to spend the time (and the egg whites) on it. Most of the cakes and cupcakes you have seen on this blog have been made with my seven-minute frosting, not Swiss meringue. 


So if you are just making some cupcakes to bring to work or for an informal event, I highly recommend this version of American buttercream.

If it’s for or special occasion, or you really want to impress your eaters, go with the Swiss version!

Recipe

[yumprint-recipe id=’193′]

/ Filed In: Cakes and Cupcakes, Cakes New, Desserts, Eat
Tagged: American buttercream, buttercream, cakes, cupcakes, frosting

Gender Reveal Cupcakes

July 17, 2018

I have another gender reveal goodie for you today!

But if you read Monday’s cookie post, then you know that I am not quite giving away any secrets just yet. You will have to come back later this week for the actual gender reveal.

In the meantime, I thought it would be fun to go through some of those old wives’ tales to “predict” the baby’s gender. We’ll see which ones are right and which ones are wrong at the end of the week.

If you don’t care about any of that, just skip down to “Recipes and Supplies” to see how to make the cupcakes. 

Wives’ Tales
  1. Sweet vs. Salty. Sweet cravings mean you are having a girl; salty cravings means you are having a boy. Verdict: Boy.
  2. Morning sickness. Extreme morning sickness (i.e vomiting) means you are having a girl; mild morning sickness means a boy. Verdict: Boy
  3. Moody vs. Mellow. If you are moodier than usual, you are having a girl; less moody and more mellow then you are having a boy. Verdict: Boy
  4. Baby’s heart rate. It’s said that if the baby’s heart rate is faster than 140 BPM then it’s a girl. Last ultrasound had it clocking in at 145. Verdict: Girl
  5. Cold feet. Colder feet means you are having a boy. Warm feet means you are carrying a girl. Verdict: Girl
  6. The Skin Test. Oilier skin that is breaking out more than usual means it’s a girl. Dry skin means it’s a boy. Verdict: Boy
  7. Chinese Gender Calendar. This fun little calendar predicts gender by finding the intersection of the lunar age of mom at the time of conception and the month of conception. My lunar age is 27 (I am liking this lunar age thing) and the baby was conceived in March. Verdict: Boy
  8. Clumsiness. If you are clumsier than normal, then you are having a girl. If you are just are sure-footed then it’s a girl. Verdict: Girl
  9. Weight Gain. Gaining weight all over means you are having a girl. If the weight seems to be just in the tummy, it’s a boy. Verdict: Boy
  10. Foot Size. Growing feet indicate a boy, while feet that stay the same size indicate a girl. Verdict: Girl. 
  11. Sleep Position. Falling asleep (naturally) on your left side means it’s a boy. On the right side means it’s a girl. Verdict: Girl
  12. Carrying High vs. Low. Carrying hight means it’s a girl; carrying low means it’s a boy. Verdict: Boy? (Not really sure where I am carrying this baby)
  13. Ramzi Method. During an early (transvaginal) ultrasound you can see which side of the uterus the baby is forming. If it’s forming on the right side, it’s a boy. On the left side, it’s a girl. Flip the results if the ultrasound is done abdominally. Verdict: Girl
  14. Mayan Gender System. The Mayan’s used mom’s age at conception and year of conception to predict gender. If both are even or both are odd, then it’s a girl. If one is even and the other is odd, then it’s a boy. My age at conception was even (although my birthday was probably the next week) and the year was even. Verdict: Girl. But if we use my lunar age, then it’s a boy. 

Boy – 7

Girl – 7

I swear I didn’t plan it to come out 50/50! If you want to throw out the Mayan method because it’s somewhat inconclusive, then the remaining 13 wive’s tales favor a boy. But barely!

There were several other wives tales that I didn’t test. Most of them involved taking urine samples or eating lots of garlic. No thank you! If you want to see a full list of these wives tales, I highly recommend this post. It’s where I initially got this idea. 

There was one “wives tale” that I did use to predict baby’s gender. Actually, I predicted this baby’s gender years ago using this method. I will wait to tell you what that one is on Friday when I reveal the actual gender. 

Alright, enough about this baby…let’s get onto the cupcakes!

Recipes and Supplies

The beauty with these cupcakes is you can make just about any cupcake flavor you’d like! 

Sure, there are some exceptions like making a strawberry cake or anything tinted one color or another. But as long as the cake is a fairly neutral color (even chocolate would work) then it should work perfectly.

One note on chocolate: if you do decide to go this route, you will want to make a small batch of vanilla just for the centers so that they can be dyed one color or another. Of course, if it’s a girl you can make strawberry or red velvet for the centers. For a boy, blue velvet would also work. 

I have several recipes that can help you out in this respect:

  • My favorite vanilla cupcake recipe
  • An easy one bowl chocolate cupcake recipe
  • Red velvet cupcake recipe that doesn’t contain any unnatural food coloring
  • Or, if you want to go the boxed cake mix route, here are some tips to make it taste amazing!

For the frosting, I’d recommend sticking with something simple so that you can tint it various colors. Here are a couple options that will work well:

  • The absolute best buttercream frosting recipe (IMO)
  • A classic cream cheese frosting (if you want to do lots of detail, CC frosting isn’t as stiff and thus doesn’t hold details as well)

To assemble the cupcakes you will need:

  • Food coloring
  • Cookie Cutter
  • Cupcake Tin
  • Cupcake Liners
  • Large Piping Bags
  • Piping Tips: #1A, 1M, and 2D (or any large round and star piping tips)
  • Sprinkles

[show_shopthepost_widget id=”3212668″]

How to Make Them

Start by making your cupcake batter. 

From the main batch of batter remove about 1 cup of batter and tint it the desired color. 

Pour the dyed batter into some sort of baking dish. It can be a small cake pan, sheet pan, or even several cupcake tins. You at least want whatever you are baking to be 1/2 inch thick. Bake the small batch of cake for 15-20 minutes, depending on size of the baking dish, or until the cake is fully baked. 

Remove the cake from the oven and let cool completely. To make cutting out the shape even easier, chill the cake for about 3o minutes. 

If the cake was baked in one flat layer, then just use a small cookie cutter in your preferred shape to cut out the centers. If you make cupcakes, slice the cupcake horizontally into 2-3 slices, then cut into shape.


To assemble the rest of the cupcake, spoon a small amount of batter into the bottom of a lined cupcake tray. It should be enough to cover the bottom. Place the cut out cake into the batter, then spoon more batter on top so that it is covered. You don’t want to overfill your cupcake tin (like I did). So try to keep it about 2/3rds of the way full. 

Bake the cupcakes for 20-25 minutes, or until the edges are slightly golden and a toothpick comes out mostly clean. 

While the cupcakes cool, make your frosting. 

You can make your favorite frosting recipe, but if you don’t have one, here’s mine! It’s a delicious Swiss Meringue Buttercream that is light, airy, and not too sweet. 

To top these cupcakes, you will want both pink and blue frosting. Remove about 2 cups of frosting from the main batch and place 1 cup in two separate bowls. Tint one blue and one pink.


To get that swirled effect in the frosting, lay out a sheet of plastic wrap on your work surface. Spread a thick layer of pink, white, and blue in a line. Then roll up the plastic wrap in a tube and twist the ends. Snip off one end and place the whole tube into a piping bag fitted with your desired piping tip. 


Place the extra frosting into separate bags fitted with different styles of tips. 

To create a fun frosting decoration, I like to pipe the multicolored frosting in a spiral on top of the cupcake. Then I use the other colors to pipe little stars or dots around one side. 

Add some extra decoration by adding some multicolored sprinkles on top. 

Have fun with the decoration. There isn’t any rhyme reason to it. I just tried to get each cupcake to be equally blue and pink. But you could also keep them stark white if you wanted!

These cupcakes are just as easy to make two of as it would be to make a full dozen (or more), so I think these would be the perfect way to announce the gender to friends and family. Everyone can have their own cupcake and when the bit in they will get to see what color’s inside!

What do you think? Totally doable, right? I think they would be a great addition to any baby shower or gender reveal party!

/ Filed In: Cakes and Cupcakes, Cakes New, Desserts, Eat
Tagged: cupcake decorating, cupcakes, frosting, gender reveal, Surprise Inside

Super Soft Sugar Cookies (Lofthouse Style)

March 9, 2018

Over the years I have had friends tell me that my sugar cookies remind them of the Lofthouse cookies that we all know and love. The main difference is that the cookies that I make when I decorate cookies are not quite as soft and pillowy (otherwise, they wouldn’t be good for decorating). 

Since I hear that so often, I have long thought that I need to try my hand at making my own super soft sugar cookies, just like Lofthouse. There are lots of copycat recipes online, but none of them felt quite right.

First of all, a lot of them contain sour cream, heavy cream, shortening, etc. All things I do not normally associate with sugar cookies. 

Second, the ingredients are right on the package! So we know exactly what goes into making those super soft sugar cookies!

Let’s take a look, shall we?

(I feel a little bit like Alton Brown, right now, so forgive me a while I nerd out…or just skip ahead.)

Ingredients

A quick Google search of “Lofthouse Cookie Ingredients” will direct you to Walmart’s website where they list the very ingredients for the cookies we are trying to mimic. 

Ingredients: Sugar, Enriched Bleached Wheat Flour (Flour, Niacin, Reduced Iron, Thiamine Mononitrate, Riboflavin, Folic Acid), Margarine (Palm Oil, Water, Soybean Oil, Salt, Mono- & Diglycerides, Annatto Extract Color, Calcium Disodium Edta [Preservative], Artificial Flavor, Vitamin A Palmitate), Eggs, Corn Starch, Contains 2% Or Less of: Water, Vegetable Oil (Palm Kernel Oil And/Or Palm Oil And/Or Partially Hydrogenated Vegetable Oil [Cottonseed And/Or Soybean Oil]), Dextrin, Soy Lecithin (Emulsifier), Natural & Artificial Flavors, Skim Milk, Confectioner’s Glaze (Lac Resin), Leavening (Baking Soda, Sodium Aluminum Sulfate, Monocalcium Phosphate), Colors (Carmine (Color), Red 3, Red 40, Blue 1, Blue 1 Lake, Blue 2, Blue2 Lake, Red 40 Lake, Yellow 5, Yellow 5 Lake, Yellow 6, Yellow 6 Lake), Carnauba Wax, Food Starch-Modified, Polysorbate 60, Sodium Propionate (Preservative). Contains Egg, Milk, Soy, Wheat. Manufactured In A Facility That Processes: Peanuts, Tree Nuts.

Ok, some of the ingredients look like things you would find in your high school chemistry textbook, but actually most of it is stuff you would probably already have at home. 

  • Sugar – well, that’s an easy one. Sort of….is it granulated sugar, caster sugar, or confectioners sugar? I am going to guess since it’s listed first (and ingredients are always listed in descending order by weight) that it is both granulated (for the cookie) and confectioners sugar (for the icing).
  • Enriched Bleached Wheat Flour (Flour, Niacin, Reduced Iron, Thiamine Mononitrate, Riboflavin, Folic Acid) – This is actually cake flour. The cake flour helps make these cookies extra soft and light!
  • Margarine (Palm Oil, Water, Soybean Oil, Salt, Mono- & Diglycerides, Annatto Extract Color, Calcium Disodium Edta [Preser vative], Artificial Flavor, Vitamin A Palmitate) – Another easy one. I bet margarine is both used in the cookie and the frosting. However, I also bet that it is used instead of butter because it’s cheaper and more shelf stable. Butter will actually yield a more tender cookie, which is exactly what we are trying to achieve.
  • Eggs – Totally self-explanatory
  • Corn Starch – Another deceiving ingredient. Is it for the cookie or the icing? Since confectioners sugar is a mix of very fine sugar mixed with cornstarch, I am going to guess this is part of the confectioner’s sugar that goes in the frosting. 
  • Water – This one is tricky. I know I add a bit of water to buttercream to help loosen it a bit, so maybe that’s what it’s for. 
  • Vegetable Oil (Palm Kernel Oil And/Or Palm Oil And/Or Partially Hydrogenated Vegetable Oil [Cottonseed And/Or Soybean Oil]) – This is another tricky one. Oil is sometimes added to cookies to make them a bit more tender. And since these cookies are definitely tender, I’ll bet it’s added to the cookie dough for that very reason.
  • Dextrin – This is a thickening agent that is probably used for the icing so that it stays on the cookie and doesn’t melt or slide off.
  • Soy Lecithin (Emulsifier) – If you read your labels carefully, you will realize that this ish is in everything! As you can tell by the parenthetical it is used as an emulsifier so that the water and fats stay together and don’t separate. Probably for the icing.
  • Natural & Artificial Flavors – While they don’t explicitly say what flavors (gotta keep some secrets), it’s almost certainly vanilla and maybe almond extract.
  • Skim Milk – The use of skim milk surprises me since I find that whole milk is certainly better for baking. But I am not exactly sure where it fits in. I’ll bet that it’s in the dough as another way to keep the cookies moist. If it were added to the frosting, it wouldn’t be shelf stable. 
  • Confectioner’s Glaze (Lac Resin) – This is a baking wax that helps certain ingredients set, like butter, margarine, or chocolate. I’ll bet this is used to help keep the frosting shelf stable.
  • Leavening (Baking Soda, Sodium Aluminum Sulfate, Monocalcium Phosphate) – We all know what baking soda is, but what about those other two items? Guess what, that’s baking powder! Sodium Aluminum Sulfate and Monocalcium Phosphate are the compounds that make baking powder. And we know, specifically, a baking powder that contains aluminum. 

And that’s about where I am going to stop because the rest of the ingredients are just the colors to help the cookies look a certain way. 

But holy cow, that is a lot of ingredients for a simple cookie, right?

And you know what I didn’t see on that list? Sour cream, heavy cream, or shortening. Actually, most of the ingredients look like the very same ingredients in my favorite sugar cookie recipe. Shocking! 

(Note the sarcasm). 

How to Make Them

Okay, now that we know what ingredients go into the cookies we can figure out how to actually make them!

Lucky for you, I’ve already done that part.  

You’re welcome.

First, cream together the butter (or margarine) and sugar making sure to get the butter super light and fluffy because the air bubbles will help to keep the cookies pillowy soft. 

Next add in the oil, milk, and egg. The oil and milk add a bit more fat and moisture to the cookies so they don’t dry out as much. 

Then add in the vanilla and almond extracts for flavor. 

The last step is to mix in the flour. I strongly encourage you to use cake flour instead of all-purpose flour because it does make a huge difference. 

Regular all-purpose flour has a higher protein content than cake flour which means that it can become a bit tougher and crunchy. That’s perfectly fine for any other cookie, but not these. You want them to be super soft! So go with the cake flour!

(If you don’t want to go out and buy cake flour, here is how you can make your own substitute)

For even more airiness, sift the flour, baking soda, and baking powder into the bowl then mix everything together until just incorporated. 


The best part about these cookies is that they require no rolling out or cutting. Just scoop out balls of dough, roll them between the palms of your hands, then press them down to flatten ever so slightly.

Bake the cookies at 325 for about 12 minutes, until they are just barely starting to brown around the edges. 

Now, resist the urge to scarf down a cookie immediately out of the oven. Actually, while they are warm, you may think they are TOO soft! They will just fall right apart. But once they cool, they will be perfectly soft and pillowy in the center, with a slight crunch around the outside. 

While you wait for them to cool, you can make your frosting. 

How to Make the Frosting

The Lofthouse cookie frosting is obviously made with lots of stabilizers and preservatives, as we can see in the list above. That is needed for those cookies since they sit on the shelf for God knows how long before we actually buy them and eat them.

Since I certainly don’t bake with dextrin and soy lecithin, and I assume you don’t either, we are just going to make a classic American buttercream to add to the top of our cookies. 

To make the frosting, beat together soft butter, powdered sugar, vanilla, and a bit of water until super creamy and fluffy. 

If it’s too dry or crumbly, add a bit more water.

If you want to add some color to your frosting, add a couple drops and mix in. 

Then spread the frosting over top of the cooled cookies and decorate however you like!

I like to top off my frosted sugar cookies with some sprinkles because that’s how you would find them in the store.

Now they are especially fun and festive. 

But more importantly, they are super soft, sweet, and delicious! Just like the Lofthouse cookies, I would find at the store.

Somehow, these taste even better because of that one secret ingredient…

…love.

Too cheesy?

I know, I rolled my eyes at myself.

The real secret ingredient, in my opinion, is the lack of additives and preservatives. There is just something about a cookie you know isn’t going to last for weeks that just tastes so wonderful!
[show_shopthepost_widget id=”3057058″]

[yumprint-recipe id=’166′]

/ Filed In: Cookies, Cookies New, Desserts, Eat
Tagged: buttercream, cookies, dessert, frosting, Lofthouse, sugar cookies

Buttercream Flower Heart Cake

February 5, 2018

If you have followed this blog or my Instagram long enough, you know that I love a good floral pattern. Most of the time you will find me adding flowers to cookies. But that doesn’t mean they aren’t perfect for cakes, too. 

Especially this Valentine’s Day cake in the shape of a heart!

The great thing about this buttercream flower heart cake is that both the flowers and the heart shape of the cake are actually pretty easy to achieve if you have the right tools on hand. 

All you need is a round cake pan, a square cake pan, and a few piping tips. You got all that, right? 😉

Tools Needed:

Well, pretty much all you need is a couple of cake pans and some piping tips. Okay, and maybe a few other things like food coloring. 

For the cakes, my recommendation is to make sure your round cake pan is equal in size to your square pan, if not smaller. I.e. if you have a 9″ square pan, use a 9″ round cake pan, too. However, if you only have a 9″ square pan and a 8″ round pan, you can cut the edges of the square cake to make an 8″ cake (which is what I did). Does that make sense?

To make the various shades of pink and green I mixed together some of my Americolor gel food coloring:

  • Lightest pink color is a mixture of taupe and light pink
  • Medium shade of pink is just a couple drops of maroon
  • Darkest shade of pink is watermelon and coral red
  • Light green is avocado
  • Dark green is forest green

To create the flower and leaf shapes, I used the following piping tips:

  • For the roses I used a #2D and #1M piping tips
  • The dark green leaf was created with #366 tip
  • For the light green blobs I used a #32 tip

Most of these piping tips come in this piping tip set. 

How to Make It:

Start by baking a round cake and a square cake in the flavor of your choice.  You can even use your favorite boxed mix if you like! Level the cakes so that they are both flat and both the same height. 

Cut the round cake in half so that you have two equal pieces. 

Place the to half rounds along two of the edges of your square cake to form a heart shape. How easy was that!?

Cover the entire cake in a layer of plain frosting so that all the pieces of the heart are stuck together. This layer of frosting doesn’t need to be pretty because it will get covered up. 

Divide the rest of the icing up in to several smaller batches and colors them in various shades. 

To decorate the cake, start by making the large roses to fill in most of the empty space of the cake. Then go in and fill in some of the holes with the leaves. 

Add more flowers and leaves until you can no longer see any of the cake underneath. 

You could totally make this! And I didn’t even tell you the best part. 

To make this cake you don’t even have to make anything from scratch. You could make your favorite boxed cake mix and even used the canned frosting. While I would highly recommend making your own frosting (this is my favorite buttercream recipe and this is my favorite cream cheese frosting recipe), I know not everyone has the time or desire to make frosting from scratch.

Plus, there is something so nostalgic about store-bought cake mix and frosting out of a can, right?

Now you have no excuse but to make this for your sweetheart, your kids, your mom, your dog, yourself. Whoever your Valentine happens to be!


/ Filed In: Cakes and Cupcakes, Cakes New, Eat
Tagged: buttercream, cake, cake decorating, frosting, hearts, Valentine's day

Sugar-Free Sugar Cookies

October 24, 2017

If there is one thing you can find in abundance on this blog, it’s sweets. And I don’t discriminate, I like sweets of all kinds – cookies, cupcakes, cakes, brownies, ice cream. But I do like balancing my sweet tooth with a healthy diet (most of the time). Sometimes I can have the best of both worlds and have my sweets but also be healthy. 

Case in point: sugar-free sugar cookies. 

Now, I know what you are thinking. How can you make a sugar cookie without sugar? While there may not be any refined sugar in these cookies, there are some all natural sweeteners (agave syrup and Stevia) in these cookies that give them their classic sweetness without the sugar rush.

In addition, the cookies are made with some whole wheat pastry flour which really amps up the healthy factor. Almost making these cookies guilt free. Almost. 


 These sugar-free sugar cookies already have the sugar-free thing and whole wheat flour going for them, but, in addition, they also use half as much butter as my classic sugar cookie. Thanks to the moisture provided by the agave syrup, you only need a half a cup of butter to make a full batch of cookies.

To make the cookies, I start by mixing together the butter, agave, and stevia. Then I add the egg and vanilla. After that, I mix in the whole wheat pastry flour. 

You could also use plain all-purpose flour or normal whole wheat flour. Just be warned that by using 100% normal whole wheat flour you will end up with a distinct whole wheat taste. If that doesn’t bother you then go for it! If it does, I recommend finding some whole wheat pastry flour or white whole wheat flour or mix in half all-purpose and half whole wheat to still get the whole wheat benefit. 

One great thing about this dough is that it can be rolled out immediately if you are short on time. But I prefer to wrap my dough in plastic wrap and to let it chill for about an hour before rolling it out. This not only helps the flour soak up some of the moisture, but it makes it a lot easier to roll and cut out.    


Normally when I roll out my dough, I just roll it out right on my pastry board with a little bit of flour. But because this dough is a little on the dry side (whole wheat flour tends to do that) I want to use as little flour as possible. To roll out my dough without it sticking to anything, I roll it between two sheets of parchment paper and a tiny sprinkling of flour. Of course, I could do this with my normal sugar cookies, but I am just too lazy.

Then I cut out my cookies as normal and pop them in the oven to bake. 

These cookies are perfect for decorating because they keep their shape really well, but are also really light and fluffy thanks to the agave syrup. For decorating these cookies, in keeping with the sugar-free theme, I made a batch of this sugar-free buttercream frosting. I did attempt to make sugar-free royal icing…but I am pretty sure that is impossible. You just need some sugar to make the icing work.

Full disclosure, though, the sprinkles are 100% sugar. I struggled to find any sugar-free sprinkles and decided in the end that cookies with 99% less sugar than a normal frosted sugar cookie is pretty dang good. Of course, if you are looking to eliminate all the refined sugar, you can just skip the sprinkles. Or make your own.

These cookies will be perfect for Halloween, Thanksgiving, Christmas, you name it. You can frost them with sugar-free frosting, or use my favorite royal icing (which is basically pure sugar) if you are just looking to cut out a little bit of sugar. 

I am so happy to have this recipe in my back pocket now. Next time I make cookies for my friends’ kids (or myself) I will certainly use this recipe to cut out some sugar and make my cookies a bit more healthy!
[show_shopthepost_widget id=”2866133″]

[yumprint-recipe id=’139′]

/ Filed In: Cookie Decorating 101, Cookies, Cookies New, Desserts, Eat
Tagged: Christmas cookie, cookies, dessert, frosting, healthy dessert, sugar cookies, sugar free, whole wheat

The Best Buttercream Frosting Recipe

September 8, 2017

It may surprise you to hear that I am not much of a frosting person. Whenever I eat cake, I typically eat around the frosting, leaving a huge heap of it on my plate. 

But of course, there are always exceptions. The exception is this buttercream. Every time I make it I get so many compliments on how light, airy, and not-too-sweet it is. People are used to that dense, buttery, sickeningly sweet buttercream so this one is basically like a breath of fresh air. 


There are actually three main types of buttercream frosting (that I am aware of): American, Italian, and Swiss. The American version is what we are used to. It is basically just butter and sugar mix together. American buttercream is totally fine in moderation and is really good if you need to make some intricate designs on your cake or cupcake. But when it piled on top of said cake or cupcake, it’s just too much. 

Italian meringue buttercream incorporates meringue (fluffy egg whites), which makes it super light and airy. To make Italian meringue, you heat up sugar and water until it boils, then pour it into to a stand mixer bowl that is whipping up the egg whites. The only reason I don’t like this version is that making Italian meringue dirties up one extra pan and you have to make sure the sugar get’s to the perfect temperature or you risk ruining your meringue.

I prefer the Swiss meringue buttercream because it has all the benefits of the Italian version but with a lot less hassle. Instead of heating up water and sugar, you actually heat up the egg whites with the sugar and whisk them over a double boiler until the sugar has dissolved. Then you whip up the egg whites until you have stiff peaks. I do this all in the bowl of my stand mixer so that I only have one bowl to clean up in the end. 


Once the meringue has cooled, you add in your butter. Now this is where I have gotten a little thrown off in the past, and I know other people struggle with this too. So many times I think I have ruined my buttercream because it looks super lumpy and gross, like the picture on the left. But, that’s just a step in the process to getting it nice and smooth. 

When you slowly add the butter  to the egg whites, it’s almost like trying to mix together oil and water. They just don’t want to go together without a little coaxing. So after just a little mixing it will appear that the frosting has separated. Just keep mixing and you will get a creamy, smooth buttercream frosting!

The best part about this frosting is that it goes with anything! You can add other flavors to it, but the plain vanilla can top off any cake flavor. 

It’s also sturdy enough to pipe any details, like flowers, leaves, ruffles, etc. If you have seen any of my cakes or cupcakes that have some design on them, this is the frosting I use. 

Its also the only buttercream frosting that I don’t scrape off my cake because it’s just too good to let go to waste!

[yumprint-recipe id=’129′] 

/ Filed In: Cakes and Cupcakes, Cakes New, Desserts, Eat
Tagged: butter, buttercream, cake, cupcakes, egg whites, frosting, Swiss meringue, vanilla

How to Make Floral Inspired Cupcakes

April 21, 2017

Decorating cakes and cupcakes has been my latest obsession. I have been jumping on every opportunity to make cupcakes for friends just to practice and hone my skills. 

I’ve actually found that for the most part, decorating cupcakes (I won’t speak to cakes since I haven’t had as much experience with them) is MUCH easier than decorating cookies. It requires a lot less time. And you have license to be a little more abstract with your decoration, particularly flowers. 

Of course, you could make some super realistic looking flowers or decorations that I am sure would challenge my previous theory, but for now, this girl is perfectly happy sticking to some fun and easy ways to decorate cupcakes! 

Which is why I thought I should show you my 5 favorite cupcake decorations! They are all “floral inspired”. I don’t want to call them flowers, because like I said below, you may have to really use your imagination to consider them flowers. But when paired all together, they look like a beautiful bouquet!

This is kind of a tiered flower with two layers of petals and dot in the middle. For this flower I used a big round tip, like a 2A. For bigger petals use a 1A, smaller use a 12. 

These hydrangea inspired cupcakes are my favorite because they are just so easy! Using a 2D tip, you just dot the top of the cupcake in these pretty little flowers. They piping tip does all the work for you!

And because hydrangeas are typically multicolored, I like to add multiple colors of icing into one piping bag so that every flower has a little of each color. I recommend sticking with 2 colors, and not doing any more than three unless you are going for a specific look. 

This rose decoration is one that I make a lot, even when I am not going for a floral inspired cupcake. It’s just such a beautiful cupcake decoration. But when you add a couple leaves, boom! it’s a rose!

For these cupcakes, use a 1B or 2B (any closed star tip) and make spiral on top of the cupcake. The 1B will give you a more open rose, like the one on the left. The 2B or smaller tip will give you a tighter rose, like the one on the right. 

For the leaves, use a 366 or any large leaf tip. Leaves are really easy to make. You just press the tip into the side of the flower, squeeze a blob of icing out of the tip while gradually moving the tip away from the cupcake. Then stop squeezing and swiftly pull the tip away creating a little tip.

This daisy looking cupcake is very similar to the cupcake at the very top except there is only one layer of petals. I also used a bigger round tip, a 1A, to create the fatter petals and a 12 tip to make the yellow center. But again, any big round tip will work!

To create the multicolored petals, I wiped a little bit of pink icing on one side of a piping bag, then filled the bag with the white icing. That way, just a bit of pink would streak the petals as the were piped out of the bag. 

Now this is my favorite cupcake. It combined the flowers that are on each of the cupcakes into one bouquet! I like to start with the rose, since it’s the biggest, then surround with hydrangeas, dots, and leaves. With these, you can really do anything you want! Be creative! 

See, you can totally make these. Just use your favorite cupcake recipe (here’s one!) and your favorite buttercream recipe (I’ll be sharing mine soon!) and get to decorating! 

To see a list of all the tools and ingredients I used for these cupcakes, see below (Note: this post contains affiliate links, which means every time you follow the link and purchase something, I get a small commission which I’ll probably use to buy more butter, sugar, and piping bags)


[show_shopthepost_widget id=”2636651″]

/ Filed In: Cakes and Cupcakes, Cakes New, Eat
Tagged: buttercream, cake, cake decorating, cupcake decorating, cupcakes, decorating, frosting

The Best Cream Cheese Frosting

January 23, 2017

You may be surprised to know that I am not a huge fan of frosting. Whenever I get a slice of cake, I will typically avoid the frosting completely, or only eat a bit of it. It’s probably why I prefer naked cakes over any other kind of cake. That and they are so much easier to frost!

There is one exception to the rule, however, and that is cream cheese frosting. I love cream cheese frosting! It’s most likely because it’s not super butter or overly sweets. It’s just the right amount of creaminess, tartness, and sweetness. 

I made this particular batch of cream cheese frosting to go along with some red velvet cupcakes, which I will share with you soon! But since I use my favorite cream cheese frosting recipe in a couple other recipes I will be sharing soon, I thought I would kick things off with this one!


If you have never made cream cheese frosting before, it is super simple. All I do is beat together the cream cheese, butter, sugar, and vanilla until light and fluffy. That’s it! Unlike Swiss- or Italian-meringue buttercream, there is no labor intensive step of whipping up a finicky meringue or boiling sugar. Just dump it all into a bowl and mix!

Because I was just making cupcakes, I halved my normal recipe to have just enough frosting for 12 cupcakes (and a little extra for tasting). If I were making a 2 layer cake, I would make a full recipe. And for a 3-4 layer cake, I would have done one and 1/2 to two times the full recipe. Fortunately, this is a very easy recipe to halve or double!

This frosting is not only perfect for red velvet cupcakes, it would also be great on your classic chocolate cupcake for an unexpected twist. It’s also great on carrot cake, hummingbird cake, strawberry cake…really just about anything! Or if you are like me, you can just eat it straight out of the bowl. No cake needed!

[amd-yrecipe-recipe:120]

PIN NOW, MAKE LATER

/ Filed In: Cakes and Cupcakes, Cakes New, Desserts, Eat
Tagged: cake, cream cheese, cupcakes, frosting, icing

Follow

Hey There!

Hey there, I'm Lindsey. I'm a number cruncher by day and a home cook and baker by night. While I love to eat healthy and find fresh and healthy alternatives for my favorite foods, I will never turn down dessert! Life is all about moderation, right?

Recipes

  • All Recipes
  • Breakfast
  • Appetizers
  • Salads
  • Main Dishes
  • Side Dishes
  • Desserts
  • Drinks

Favorite Finds

[show_lookbook_widget id=”388783″]

Theme by 17th Avenue · Powered by WordPress & Genesis