• Home
  • Eat
    • Breakfast
    • Appetizers
    • Main Dishes
      • Chicken
      • Beef
      • Seafood
      • Healthy Dishes
      • Paleo Dishes
      • Salads
    • Desserts
      • Decorated Cookies
      • Cookies
      • Bars and Brownies
      • Cakes and Cupcakes
  • Shop
    • Cookie Decorating Supplies
    • Bakeware
    • Cookware
    • Kitchen Gadgets
    • House
  • About
    • Contact
    • Bucket List
  • Cookie Decorating 101

Follow the Ruels

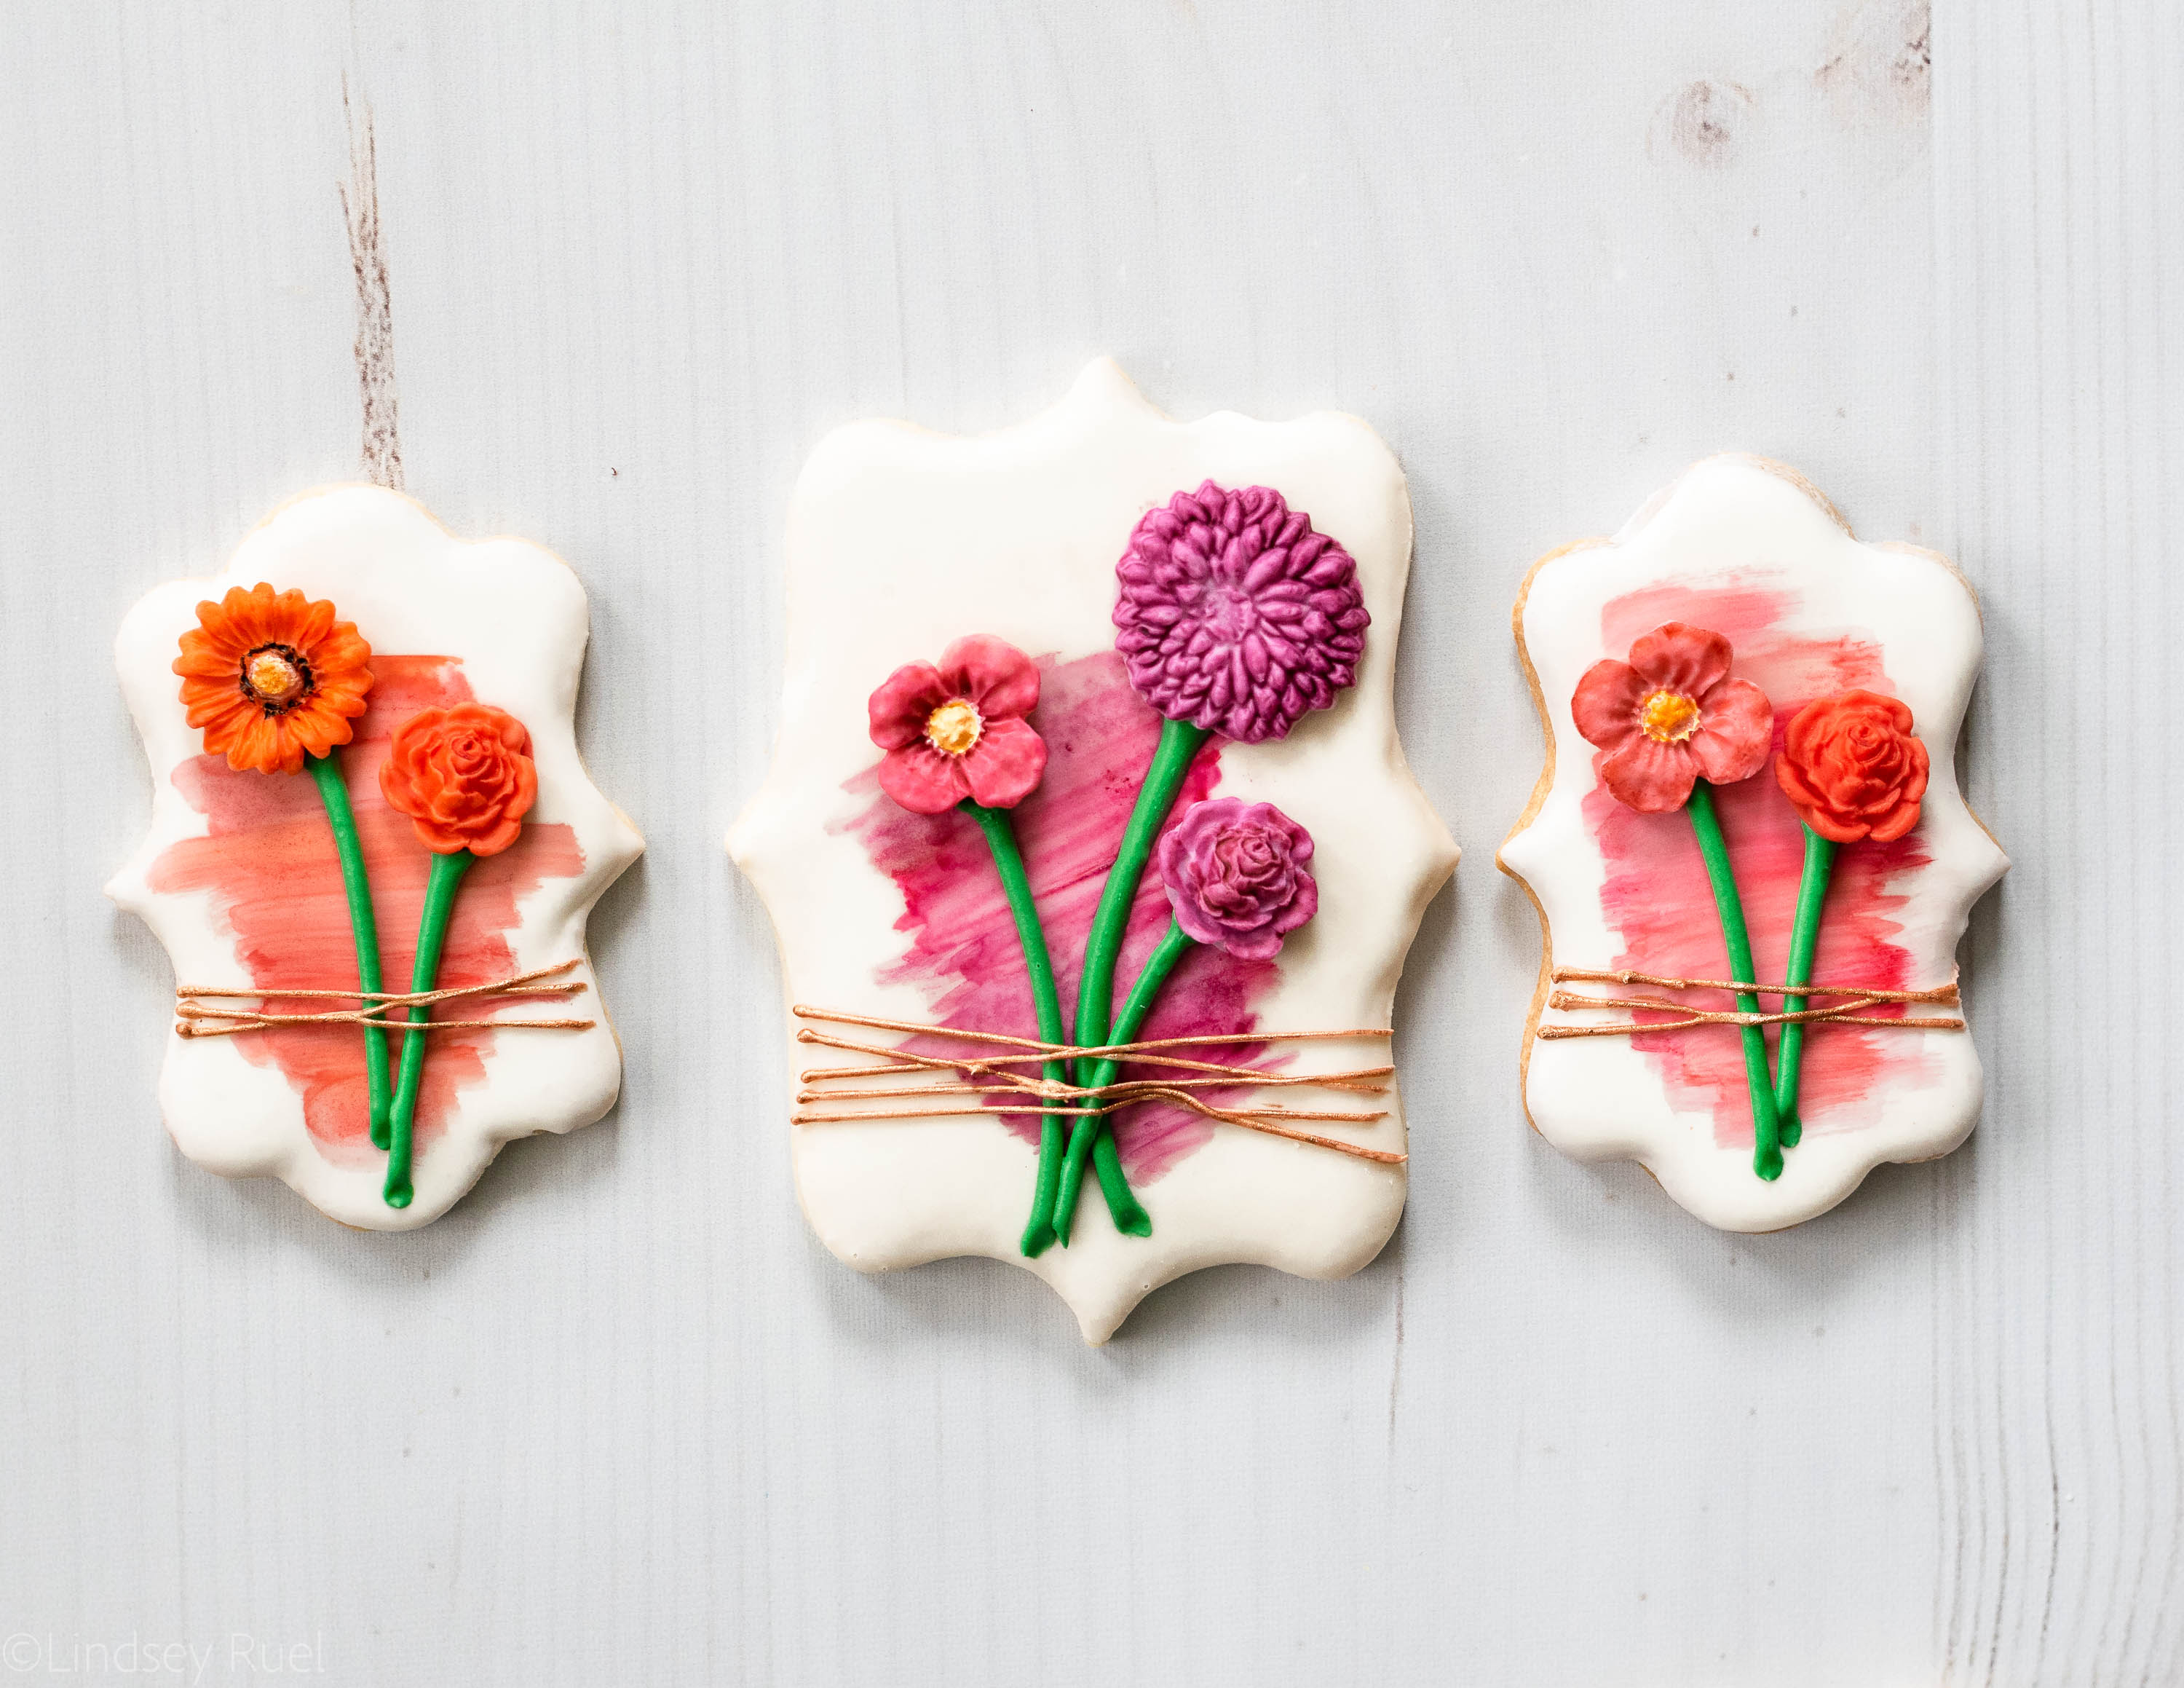
Fondant Flower Stem Cookies

August 20, 2018

There are lots of things that inspire me and my cookie decorations, but I tend to find lots of inspiration from cake decorators! They are just so talented and are working with a very similar medium (and limitations), which make adapting certain cake designs to cookies pretty easy.

These particular cookies were inspired by a cake an Australian cake designer who goes by @donttellcharles. His cake was very simple. A little bit of a painted effect topped with two beautiful ranunculuses, tied to the cake with a bit of twine. I mean, it’s just gorgeous! 

Which is why I had to make something similar in cookie form. And while they aren’t quite the same – they don’t have fresh flowers on them – I did try to recreate the flowers using clay and fondant molds. 

Tools and Recipes
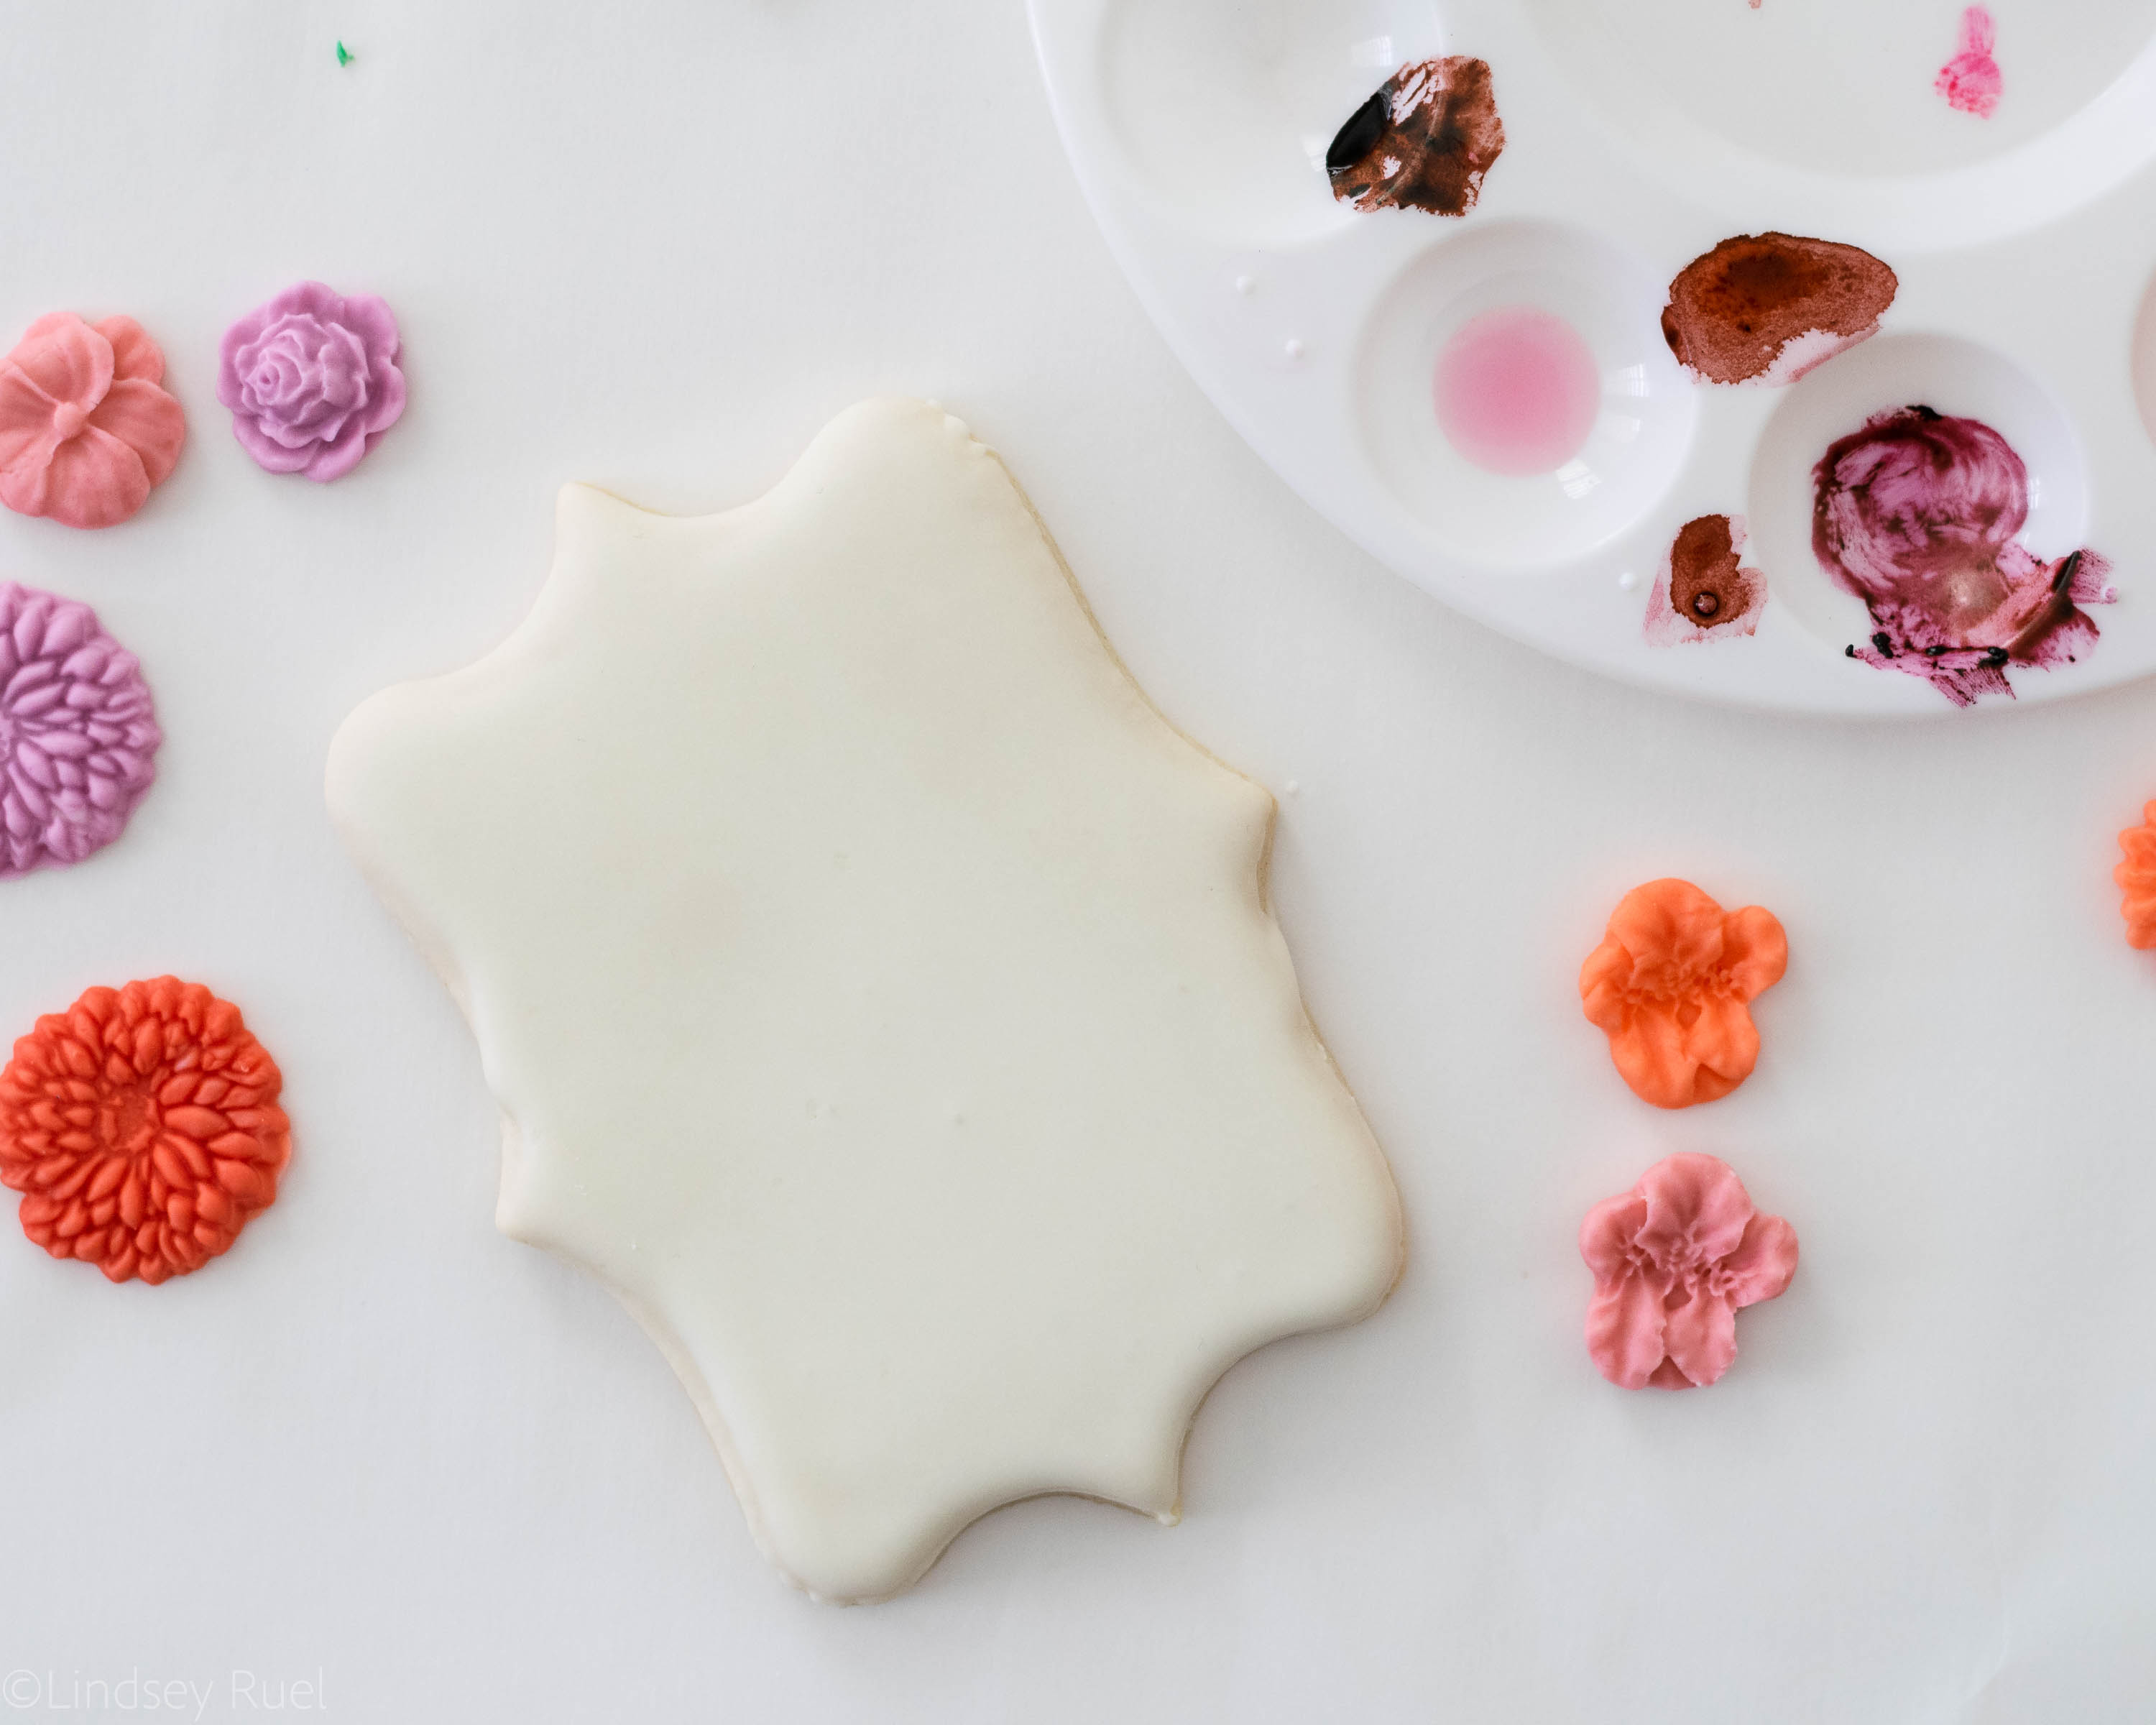
For these cookies you will need sugar cookies cut into some sort of basic shape, like a rectangle or plaque. 

You will also need royal icing:

  • White or plain flood consistency icing
  • Green stiff consistency icing
  • Brown stiff consistency icing

To make the flowers you will need:

  • Fondant
  • Gel food coloring
  • Fondant or clay molds (I included some of my favorites below)

This was my first time using a fondant mold and it could not have been easier! Fondant is so similar to clay and is easy to shape using just about anything. I found one mold at the local craft store in the clay modeling aisle and I bought another one online that is specifically designed for fondant. Both worked the exact same way.

For the rest of the decorating, it would be helpful to have:

  • Clear alcohol (such as everclear or vodka)
  • Paint brushes
  • Piping bags
  • Piping tips in a #9 for the stems and #1 for the twine

[show_shopthepost_widget id=”3248381″]

How to Make Them

First, color your fondant in whatever shades you’d like. Then press small amounts of fondant into the cavity of your mold. 

Make sure to really press and pack the fondant into all the groves.

The fondant doesn’t need to be dry or hardened before you can press the newly formed fondant flower out of the mold. But I would recommend letting them harden a bit before attaching them to the cookie.
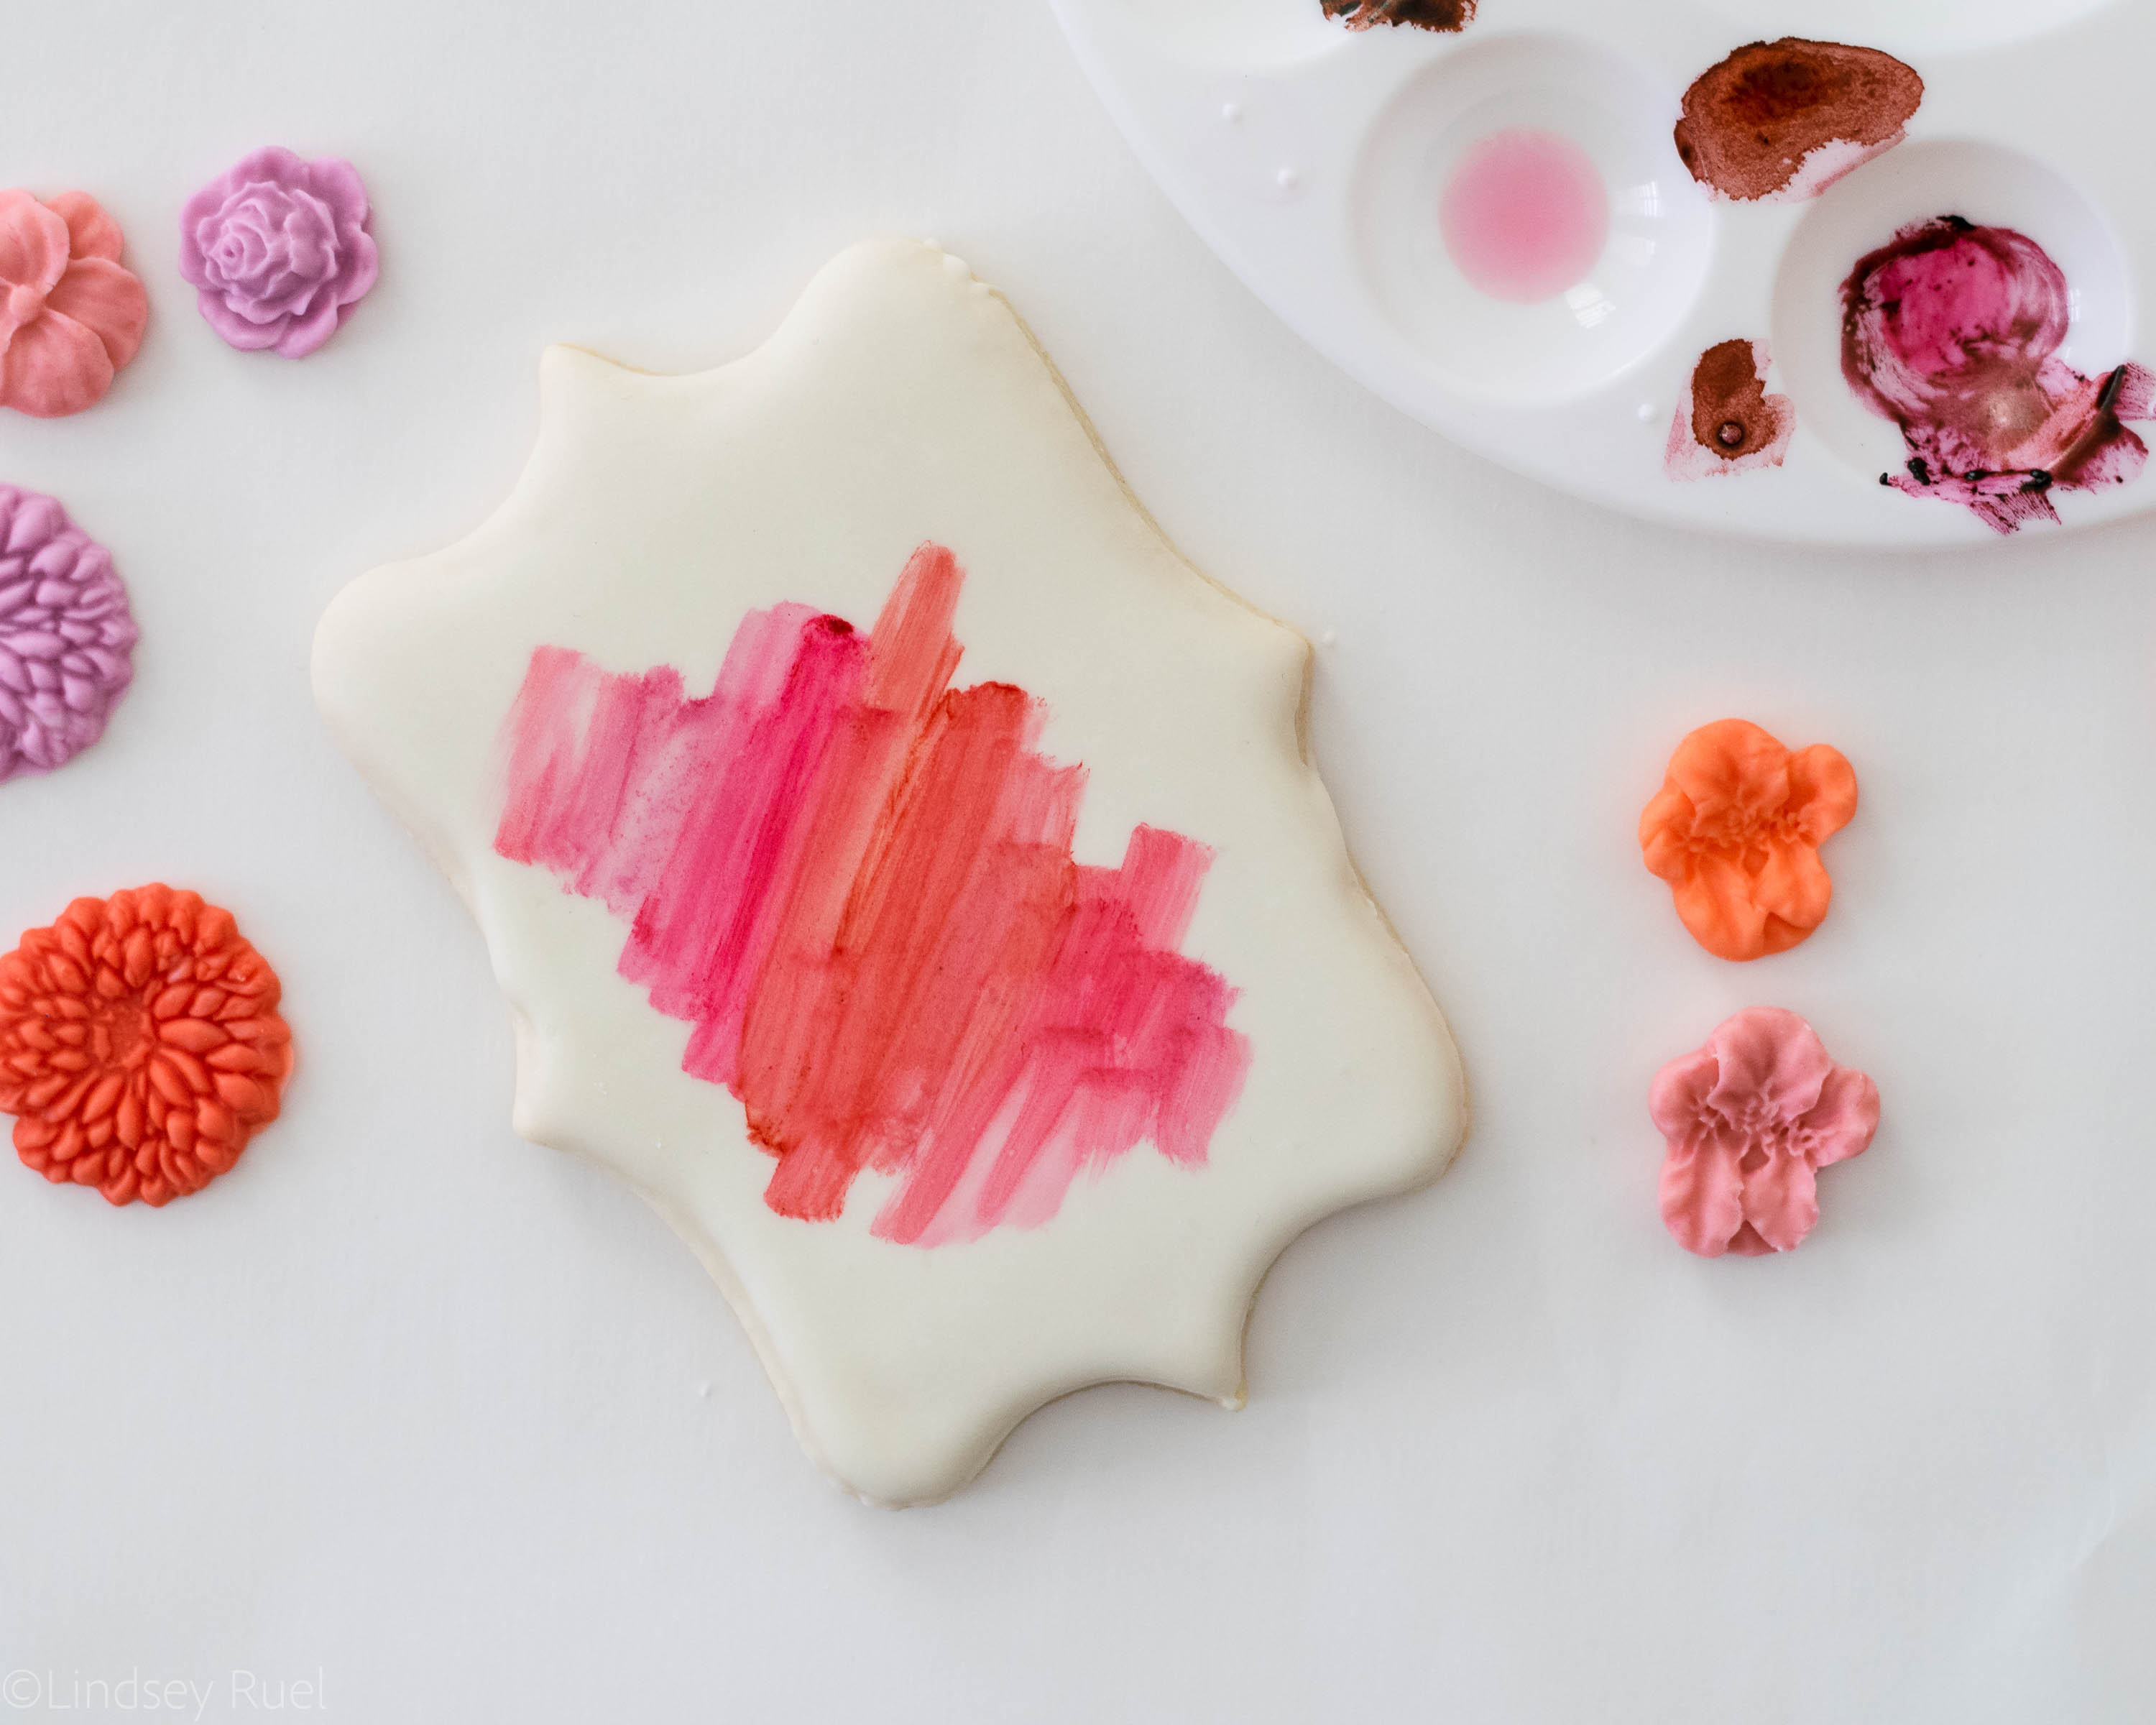
Once you are ready to assemble. Abstractly paint a few complimentary shades of diluted gel food coloring onto the iced cookie. 
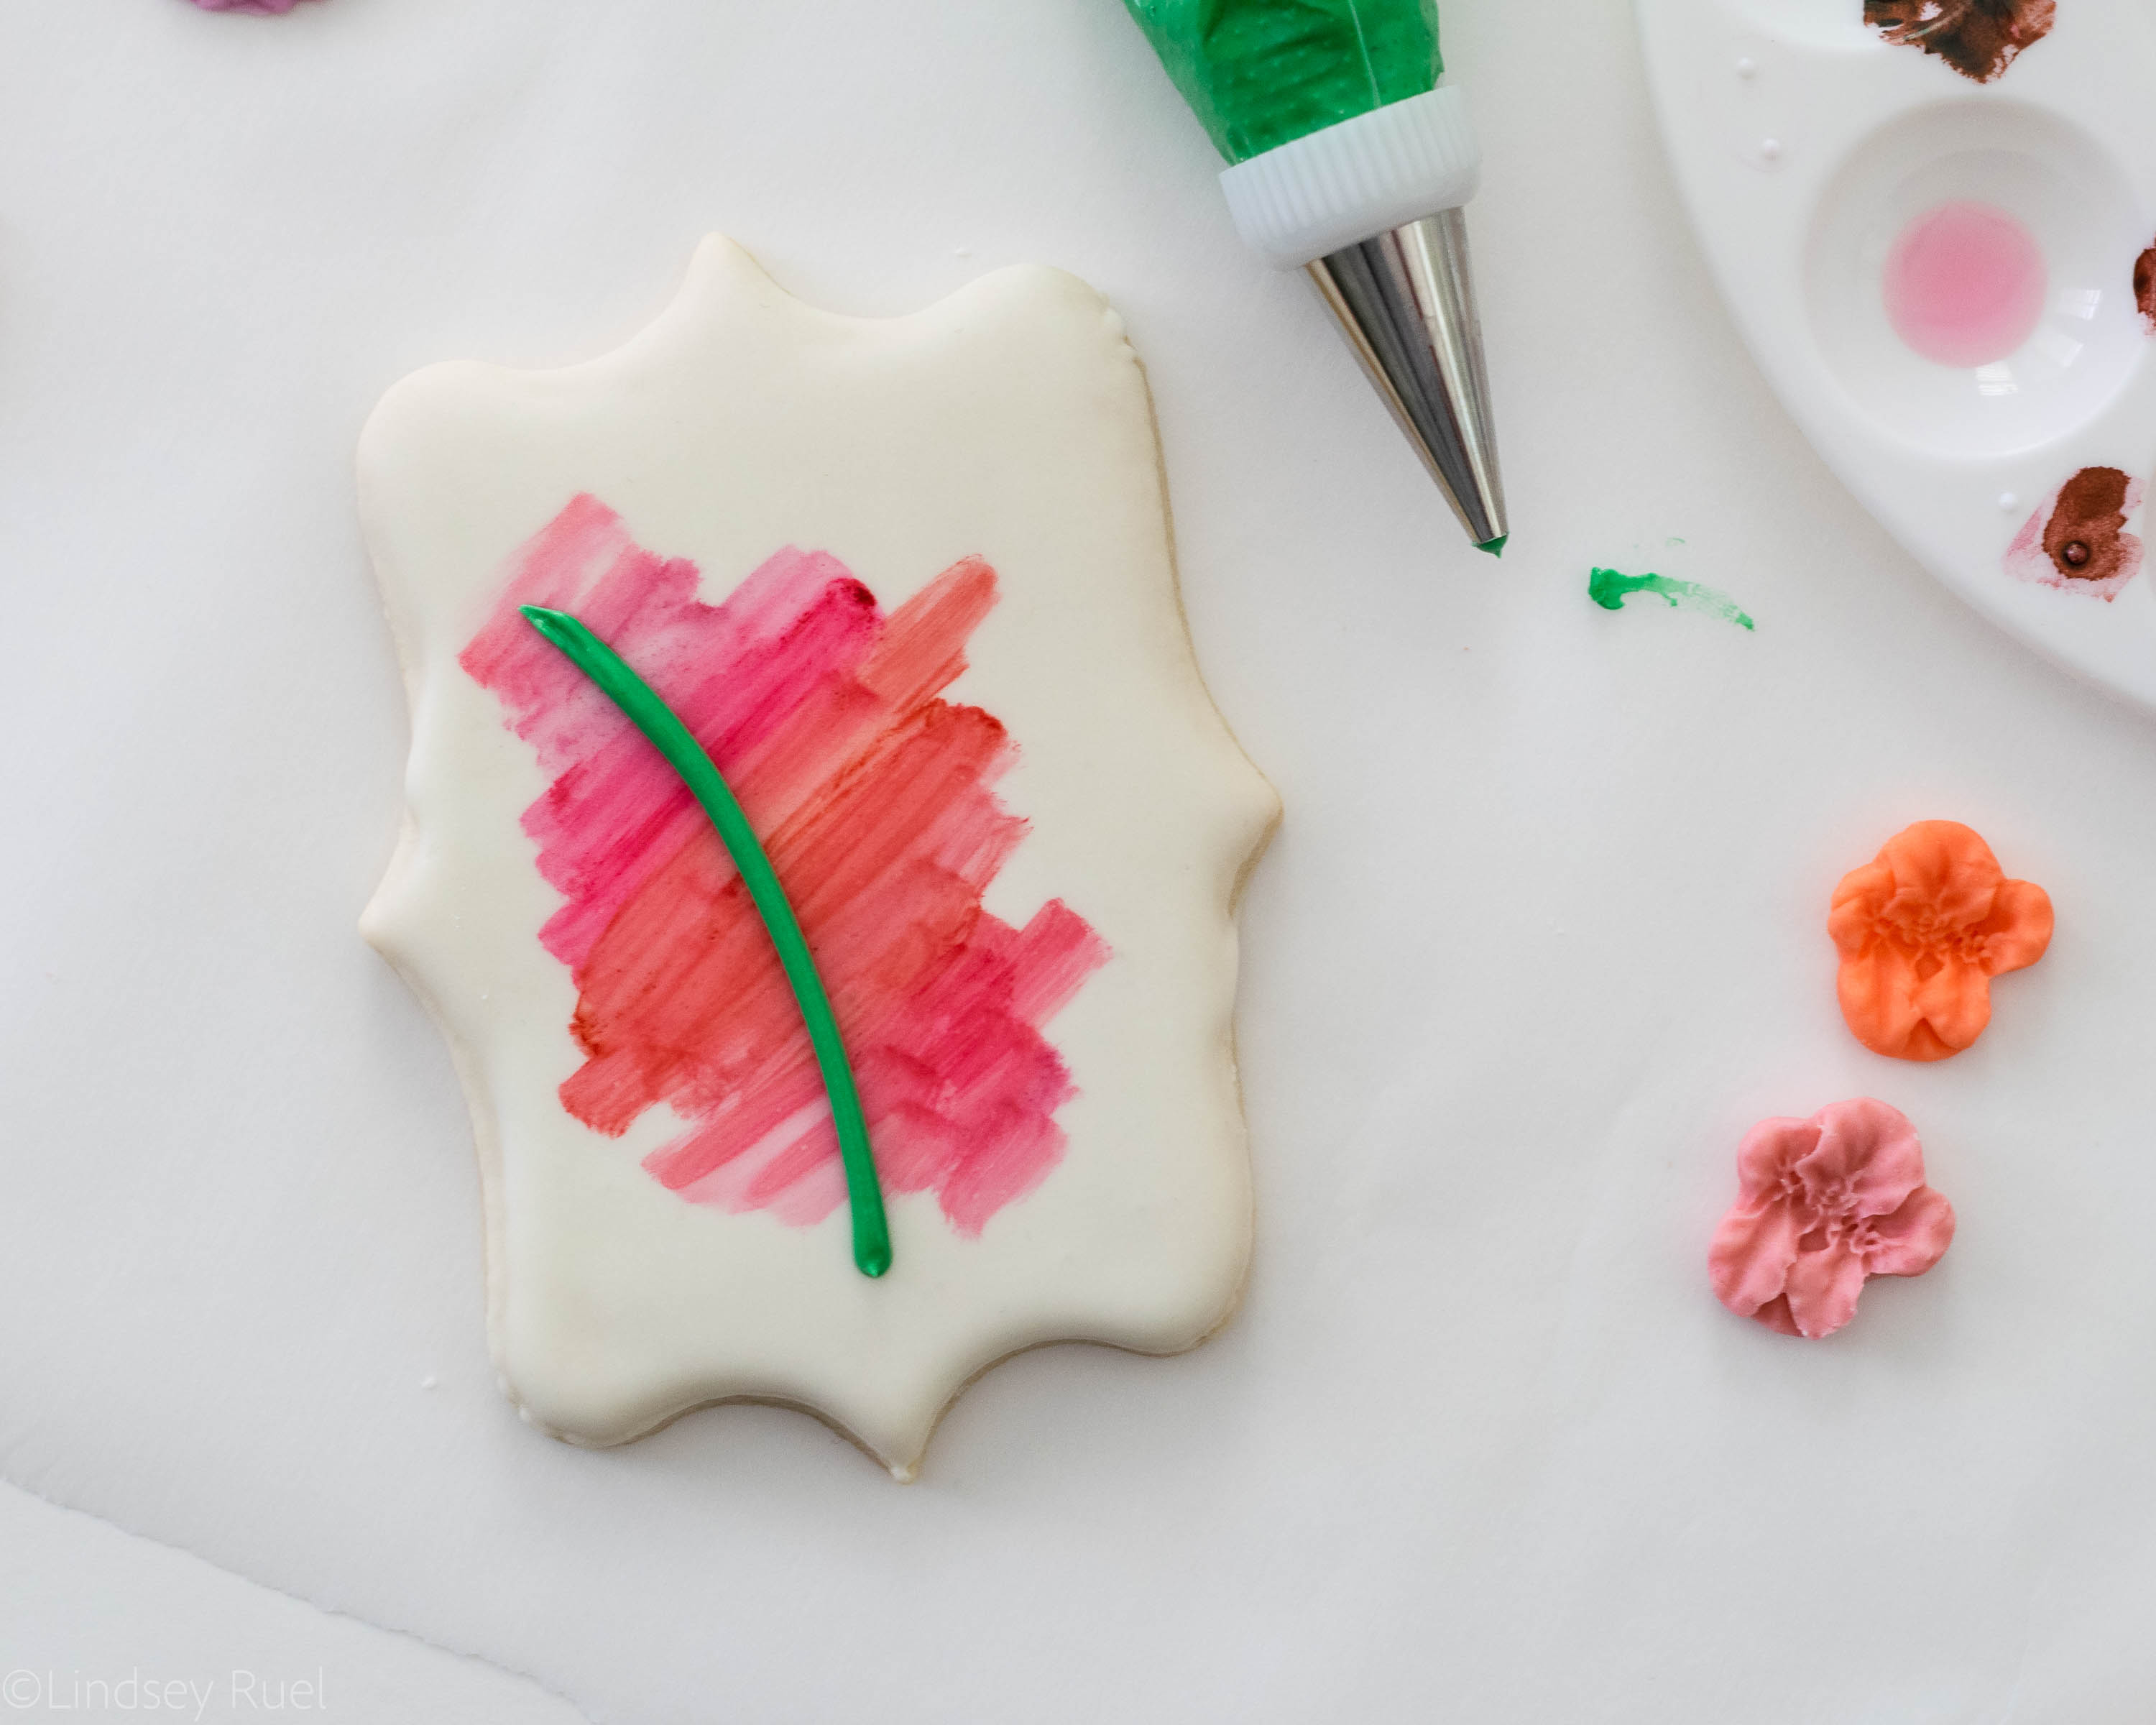
Pipe the stems of the flowers where you would like them with the green stiff consistency icing. 
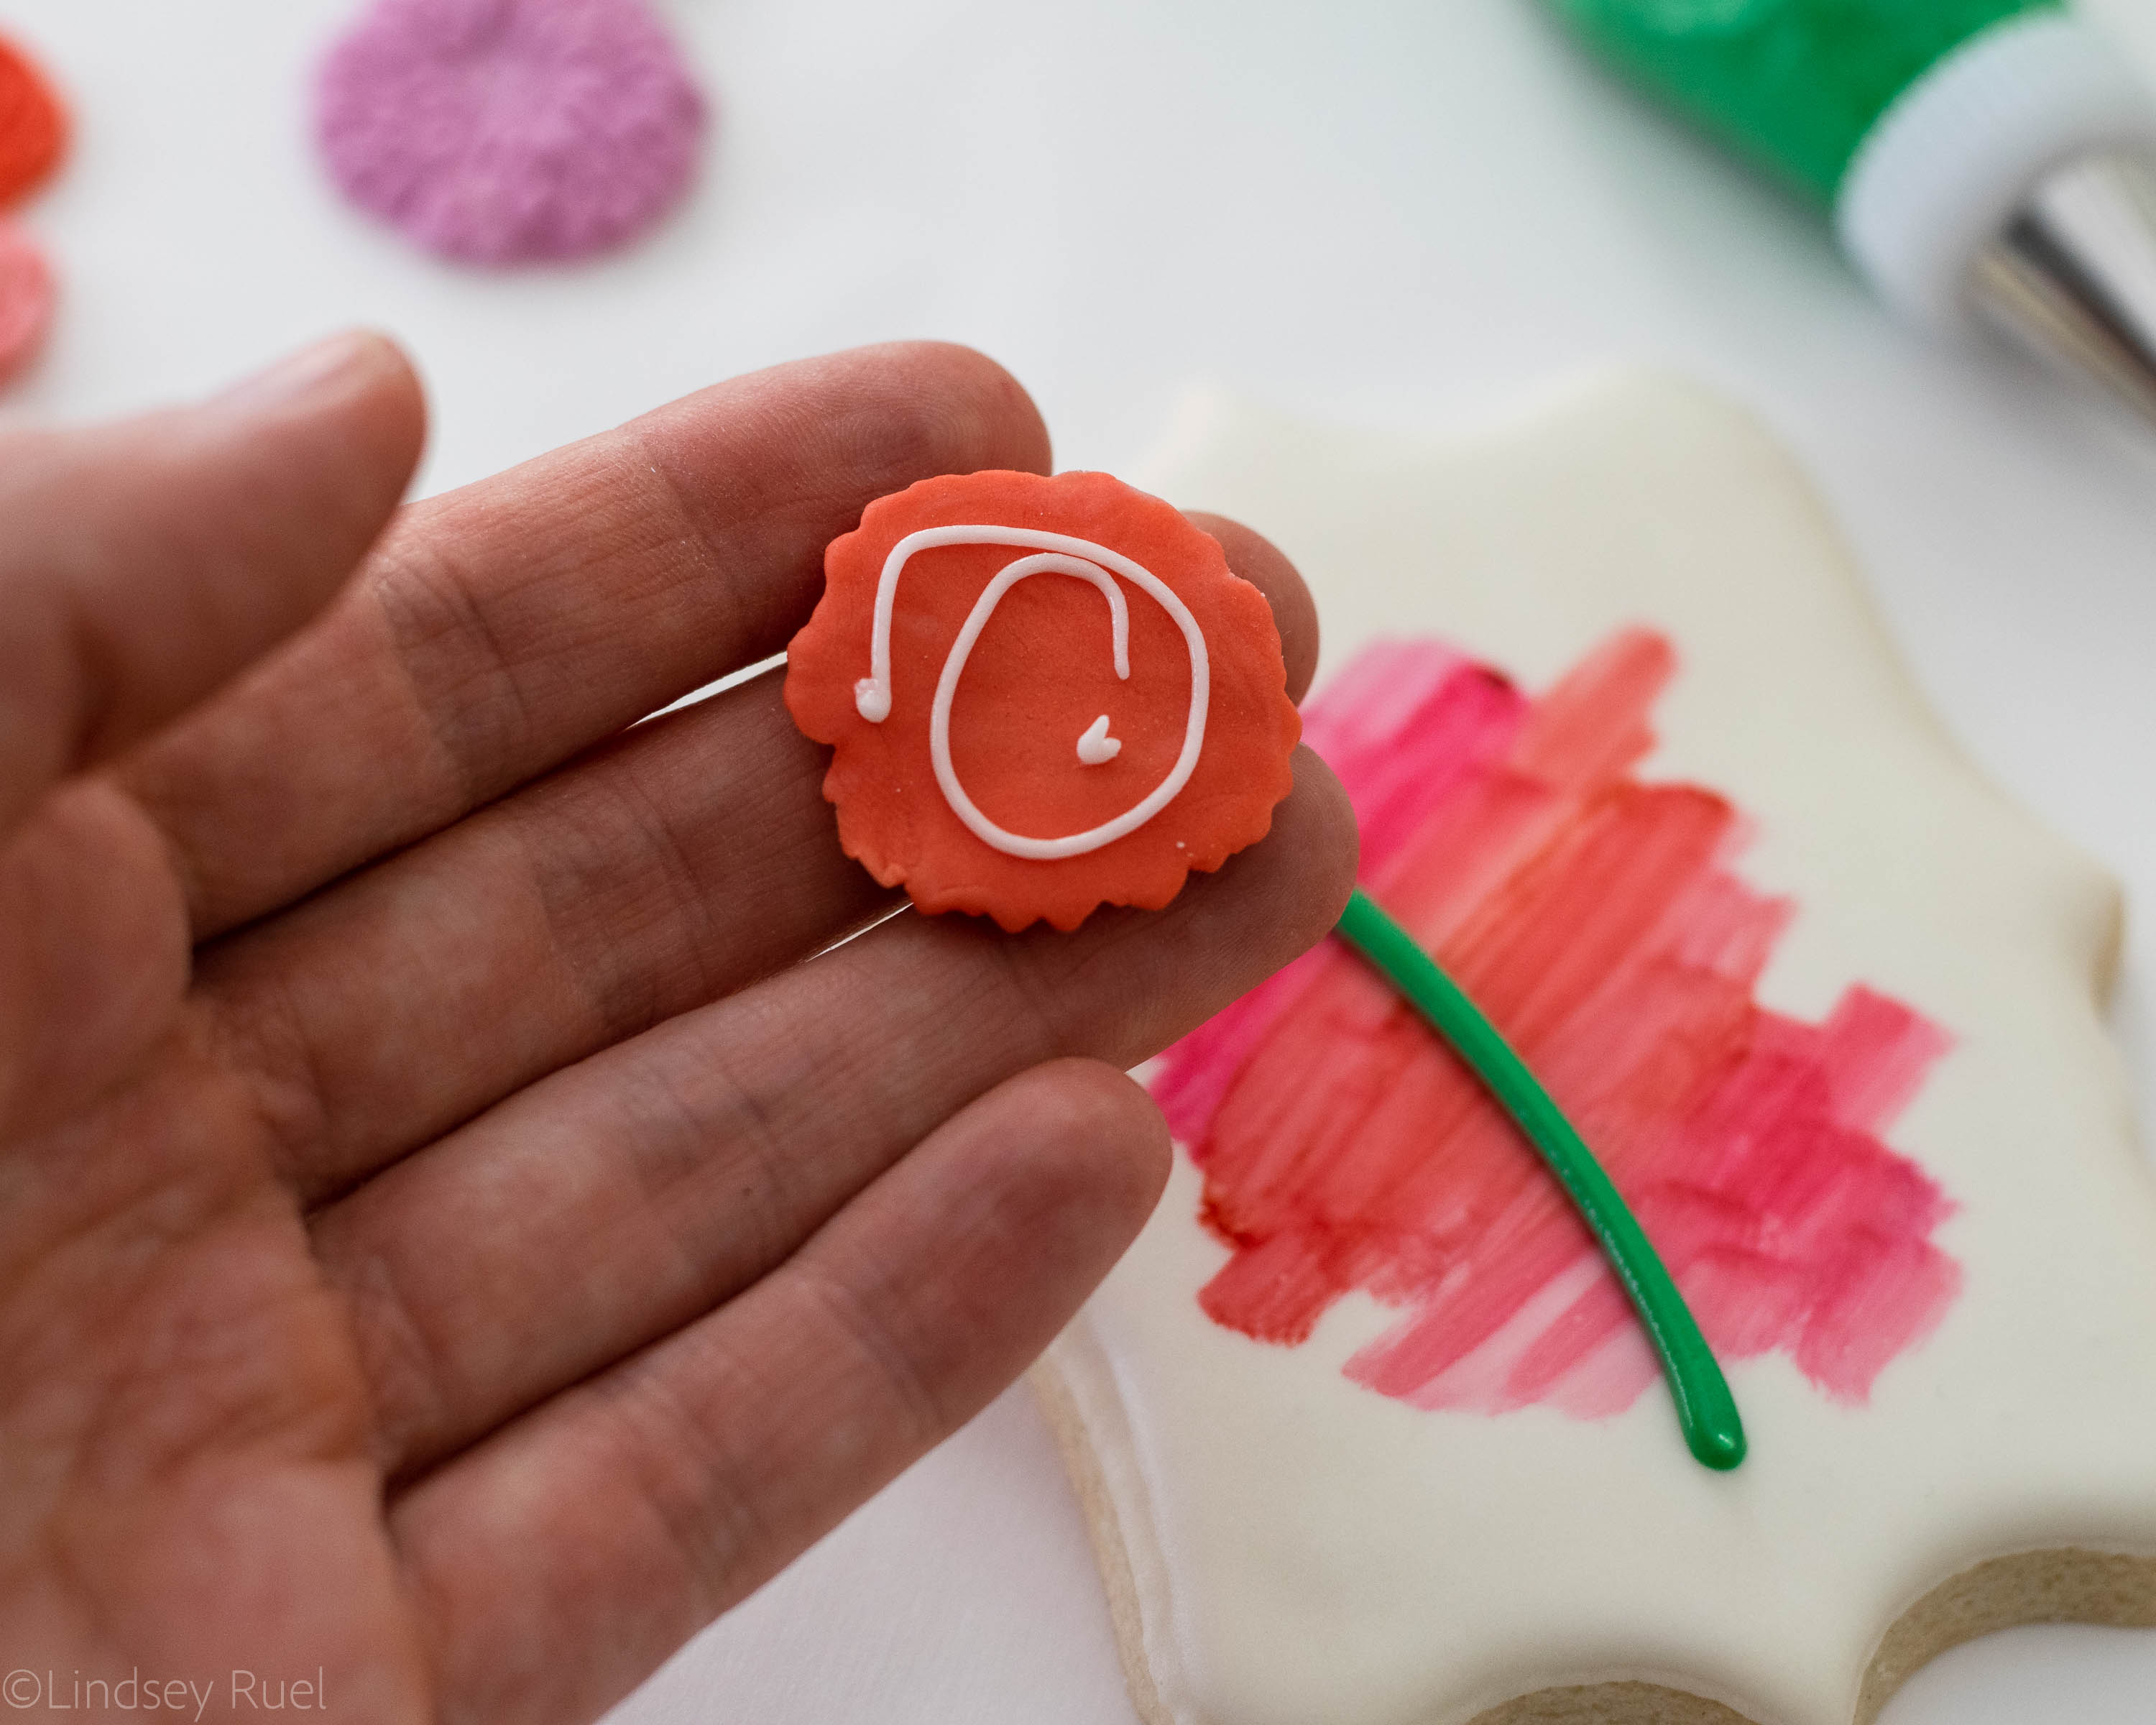
Then glue the flower onto the top of the stem with a little bit of extra icing. 


Create more dimension in the flower by painting it with gel food coloring diluted with a bit of alcohol until you have something resembling a watercolor paint. 
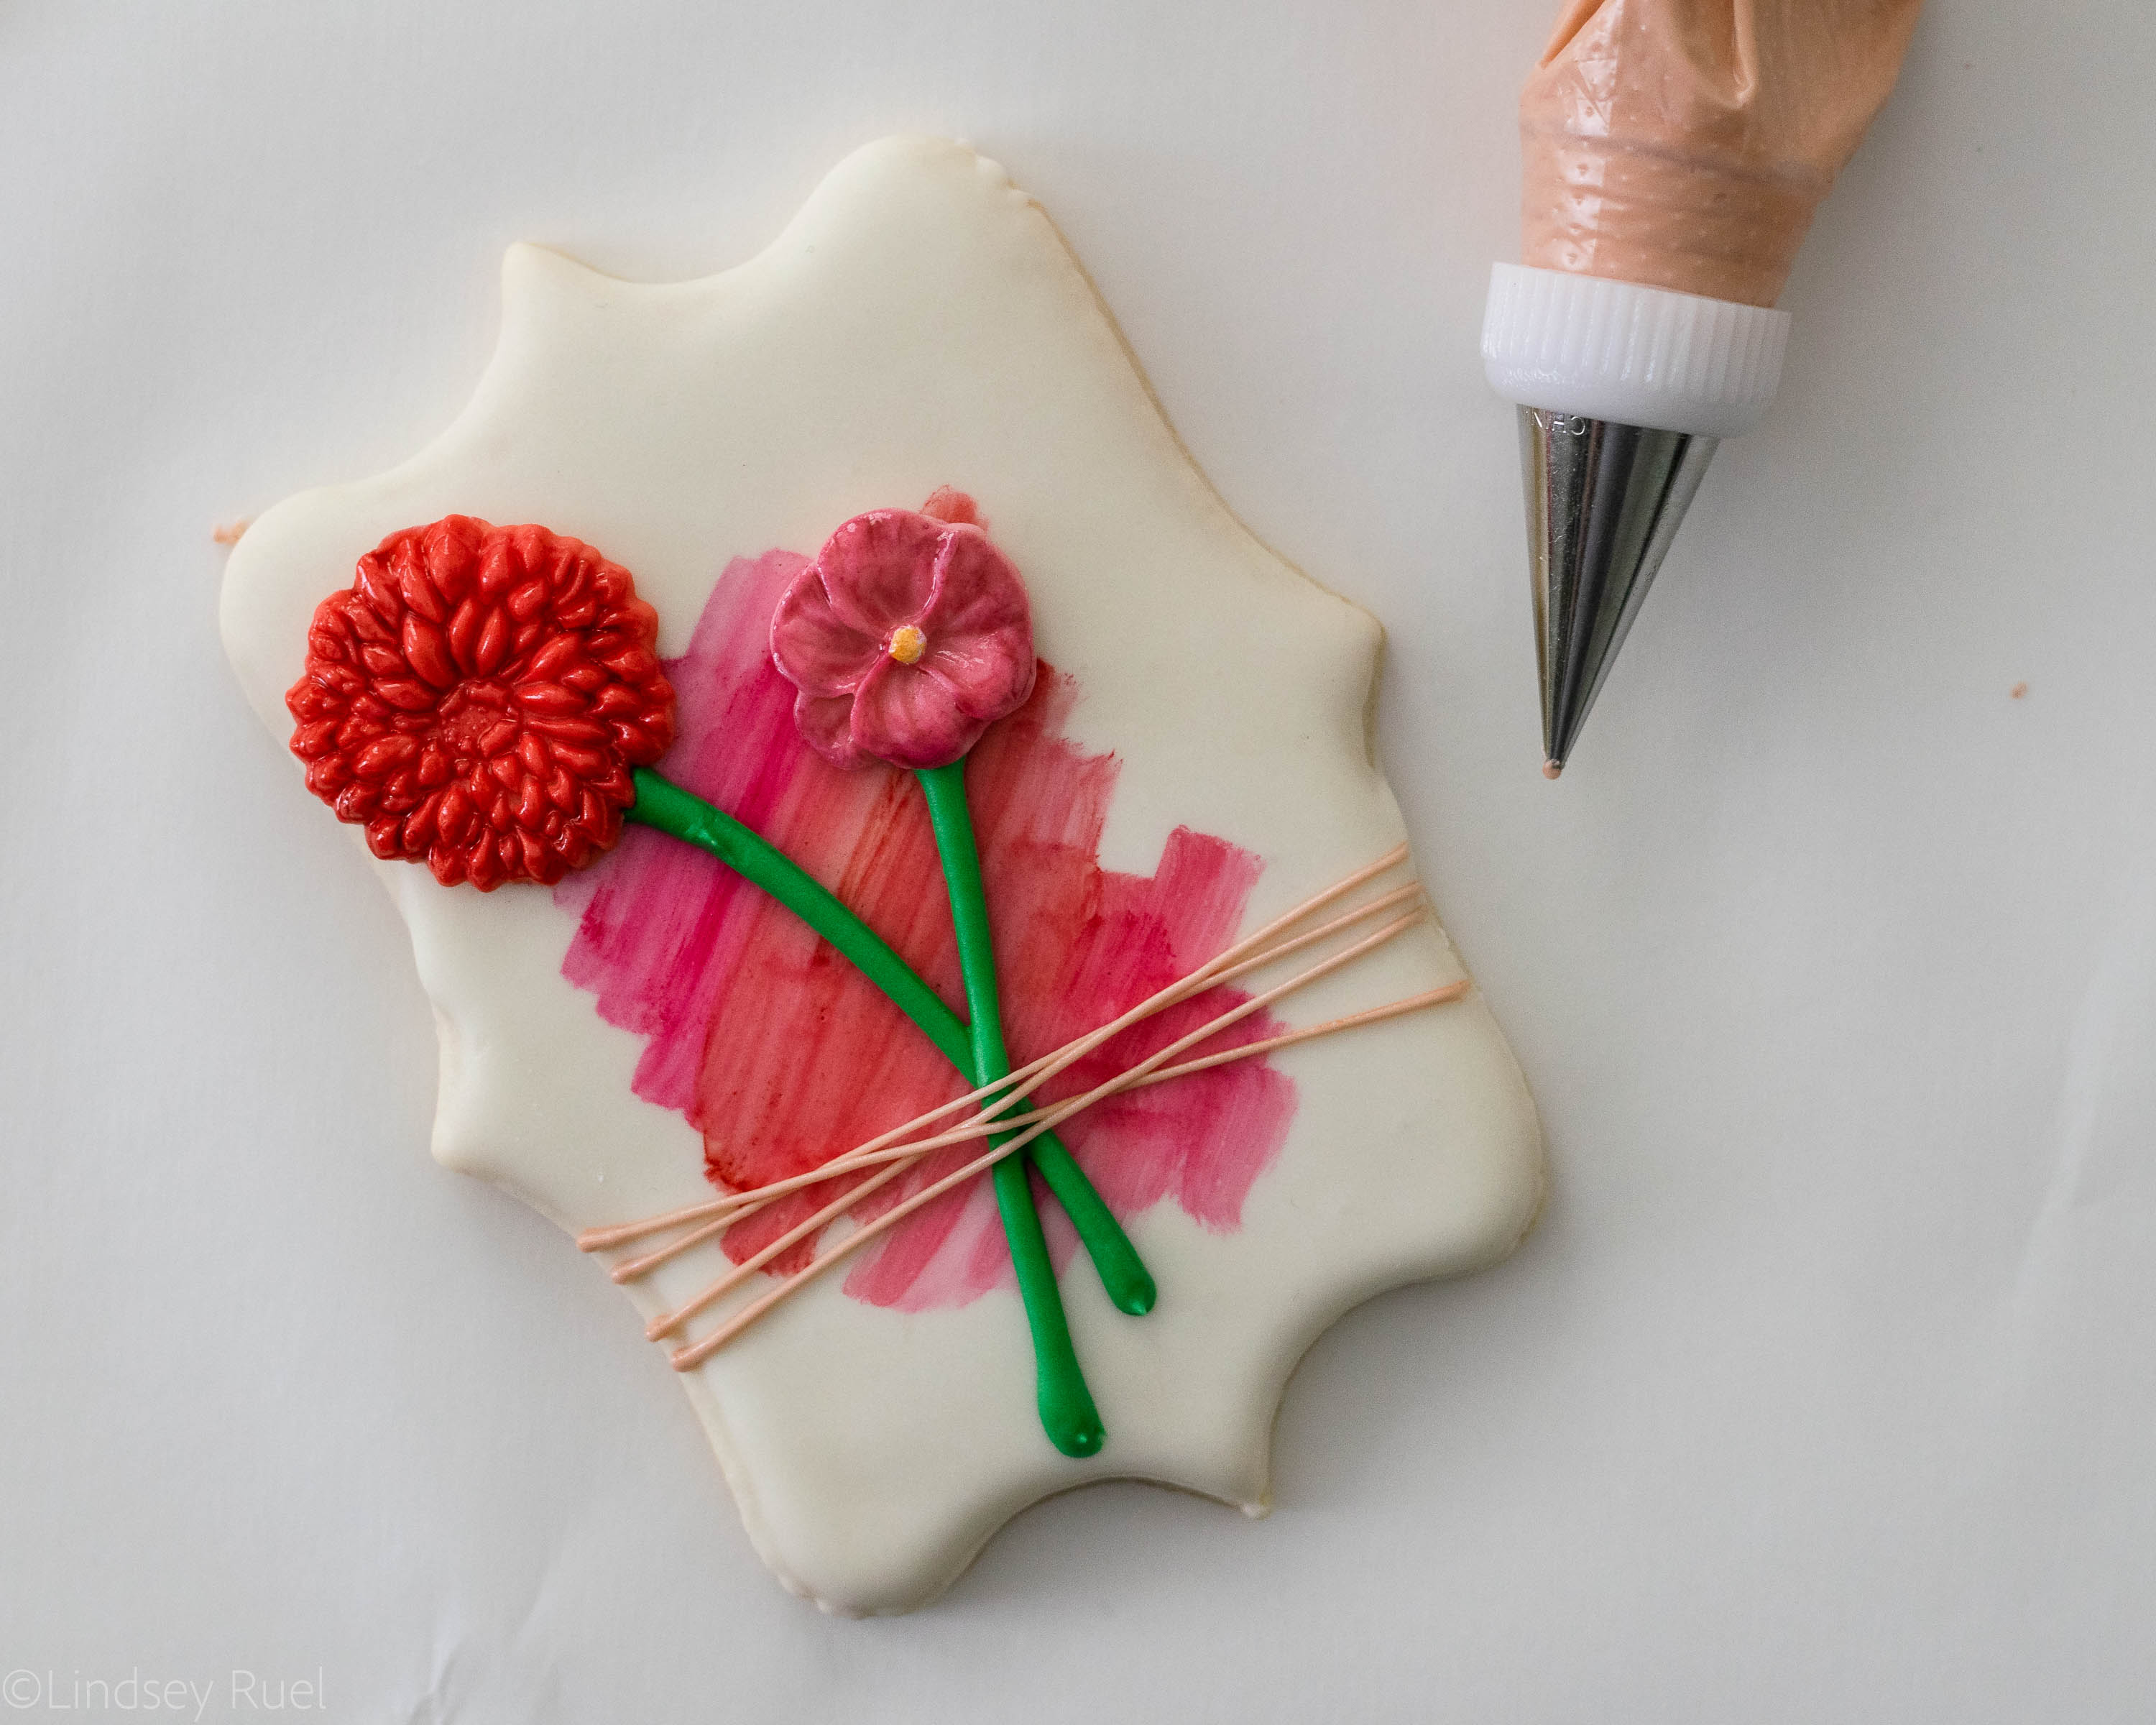
Finally, pipe the twine across the stems of the flowers. 
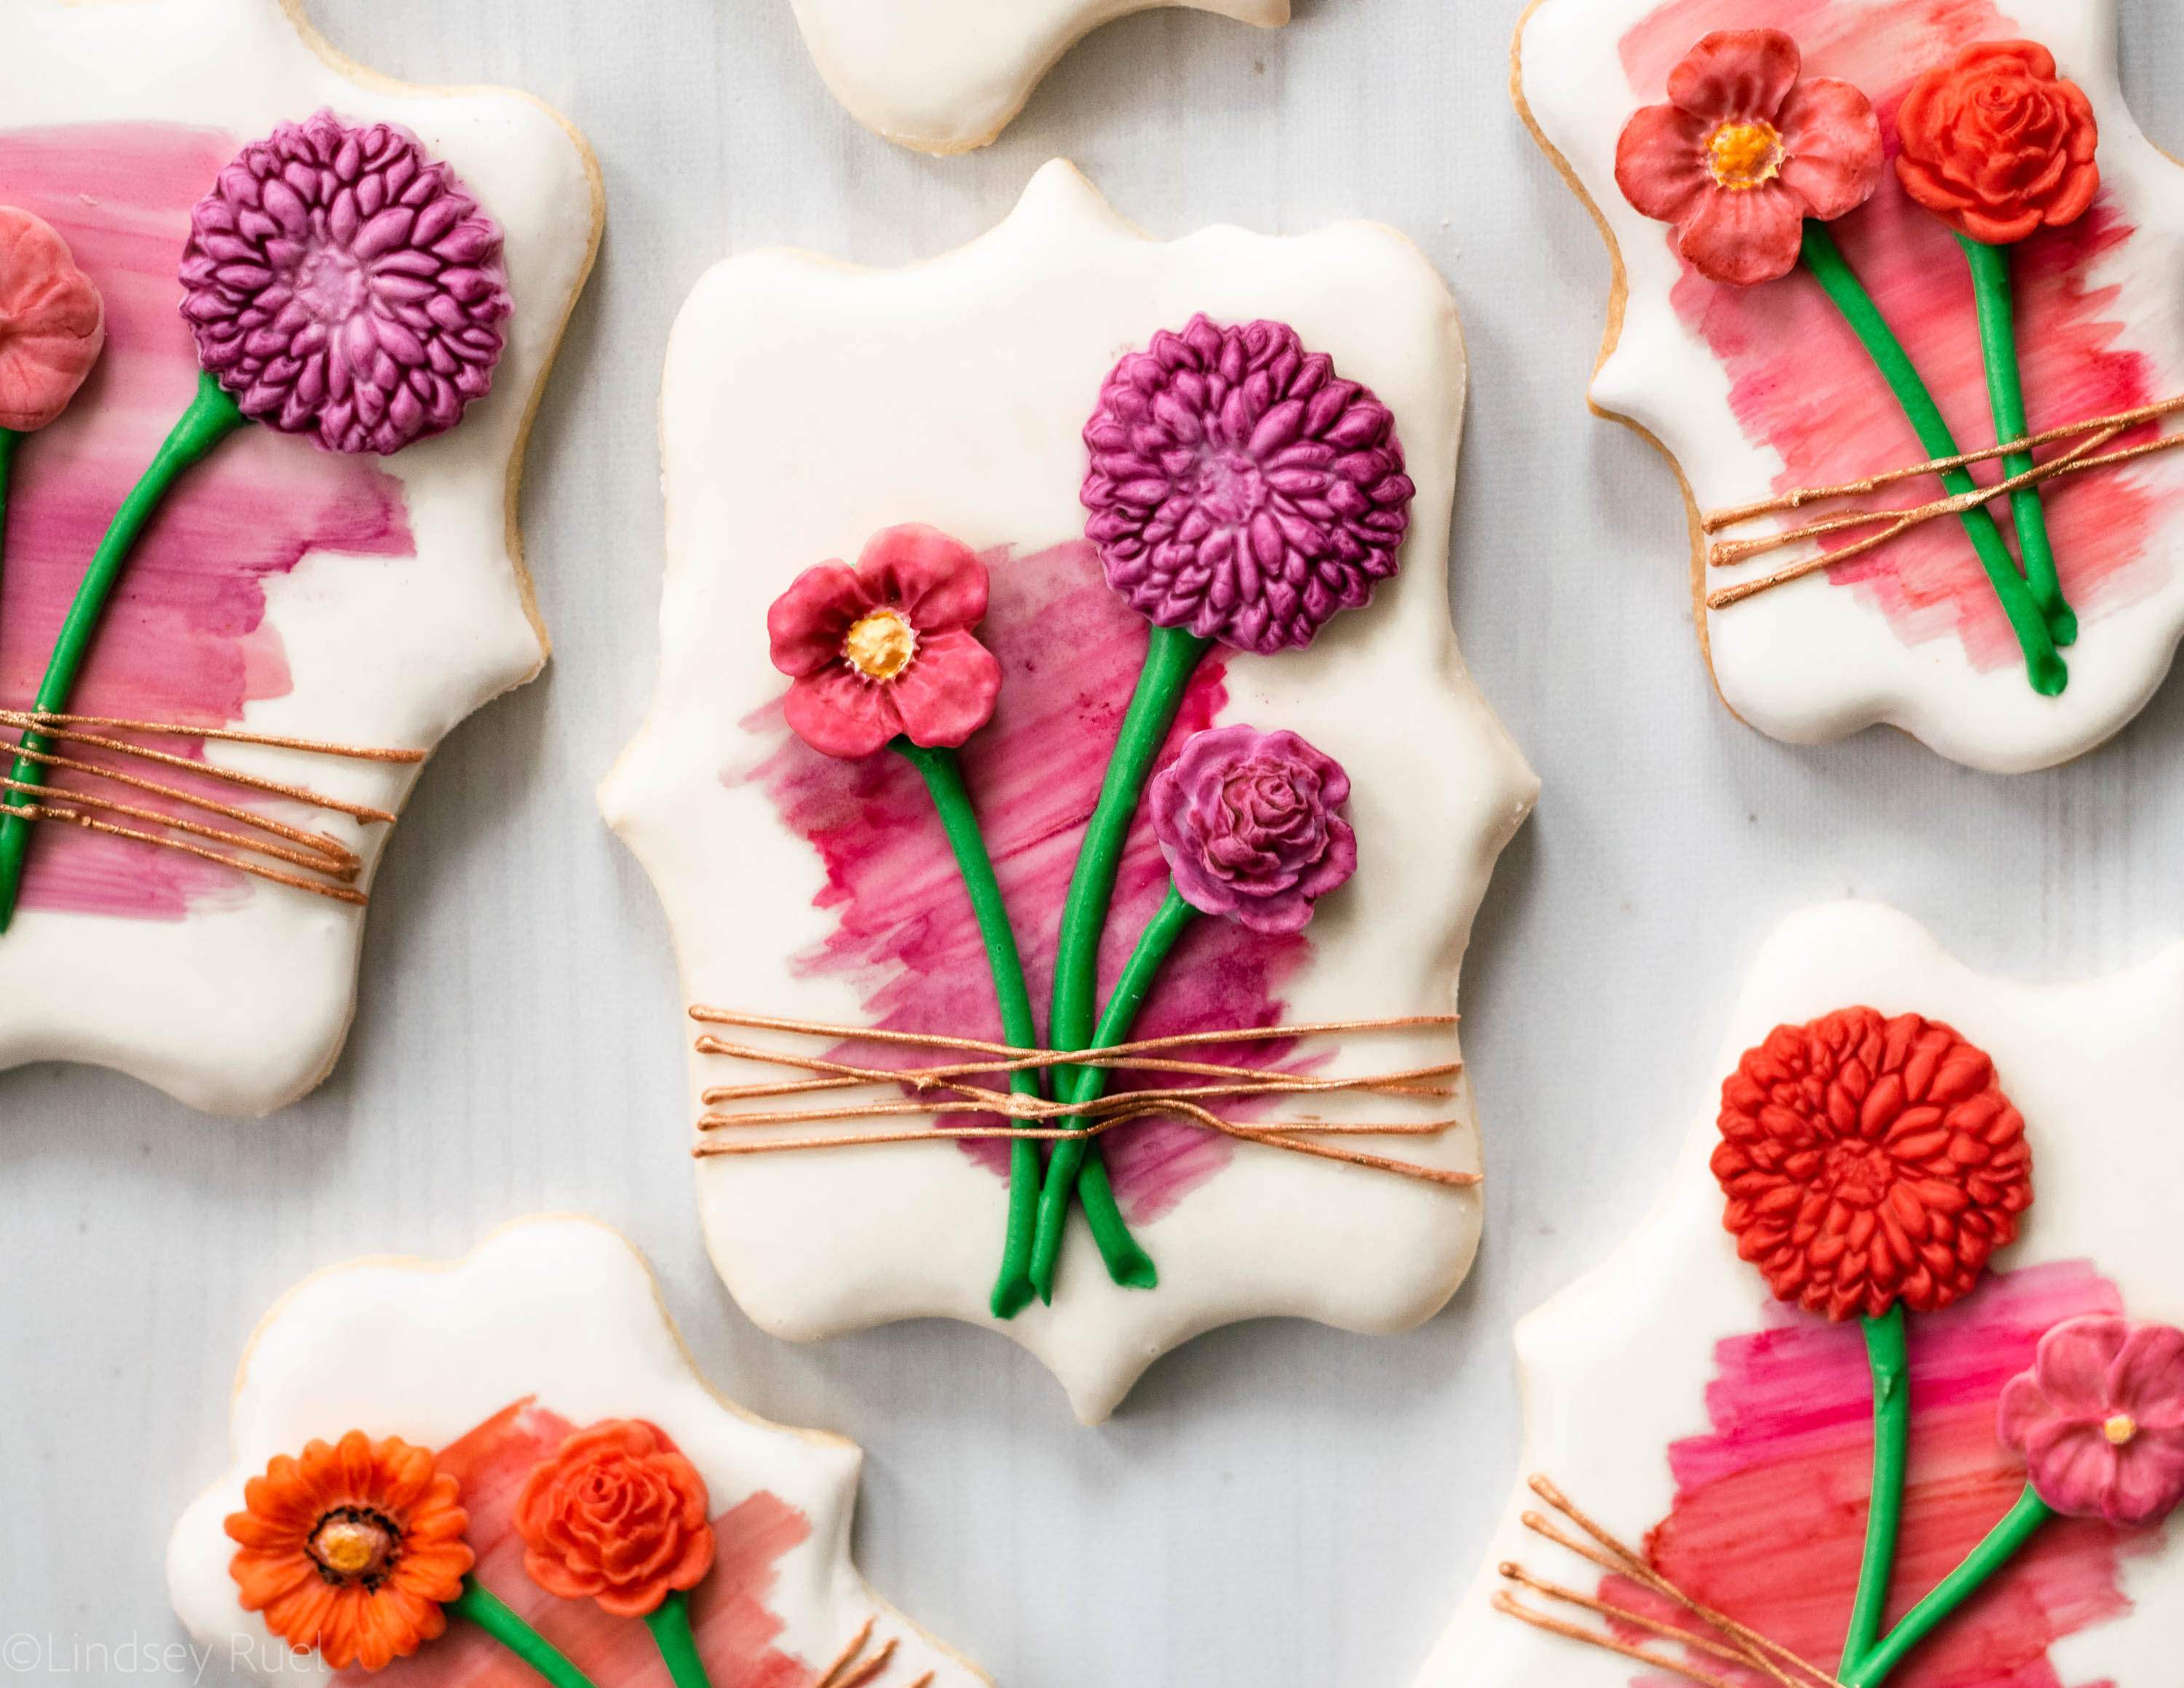
And voila! A beautiful bunch of fondant flower stems that look like that are tied to the cookie! So cute, right?
 

/ Filed In: Cookie Decorating 101, Cookies New, Decorated Cookies, Desserts, Eat
Tagged: cookie decorating, flowers, fondant, fondant flowers, fondant molds, painted cookies

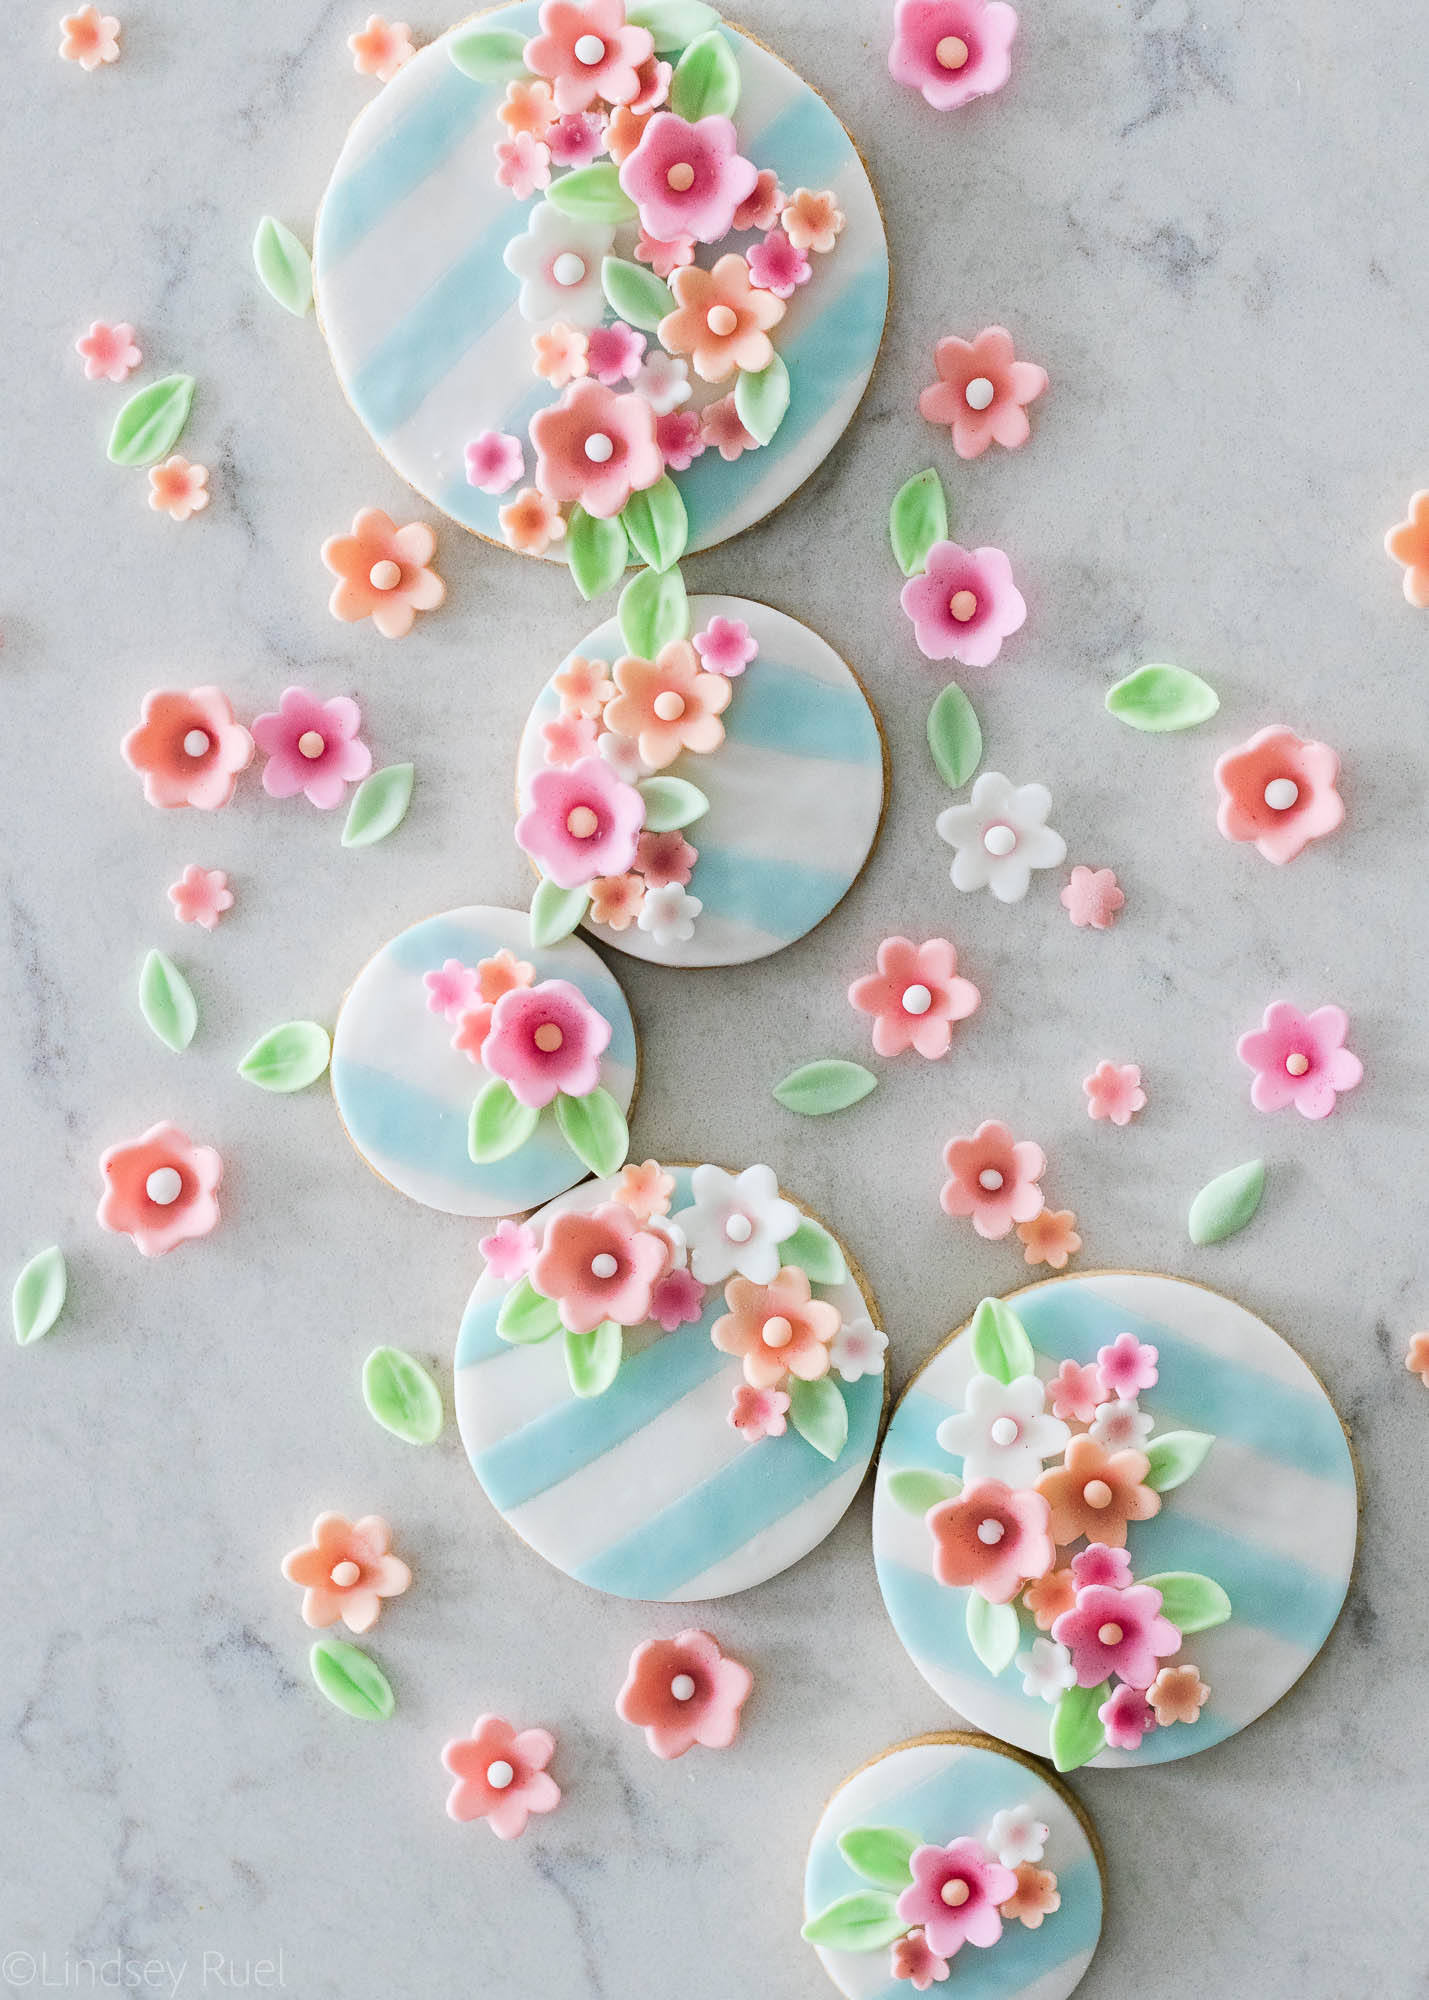
Fondant Flower Sugar Cookies

June 29, 2018

Disclaimer: Wilton provided me with their new decorating kits and other supplies in exchange for a blog post about their new products. However, all thoughts and opinions in this post are my own.

Fondant isn’t just for wedding cakes anymore!

Well, you guys know that already. I have been using fondant on cookies for a while now (exhibit 1, 2, 3). But these cookies take fondant to a whole new level, IMO, thanks to the Wilton Fondant Shapes and Cutout Kit. 

I was so inspired by the photo on the front of the box that I was dying to make a similar cake. But, sometimes I need to know my strengths (and weaknesses), and I knew I could execute a similar look on a cookie. 

The cookies were a lot of fun to create, and actually kind of therapeutic. Working with fondant is a lot like working with modeling clay. It can be very forgiving and if you mess up, you can just roll it up and try again. These cookies are definitely something that just about anyone can recreate with the right tools!

How to Make Them

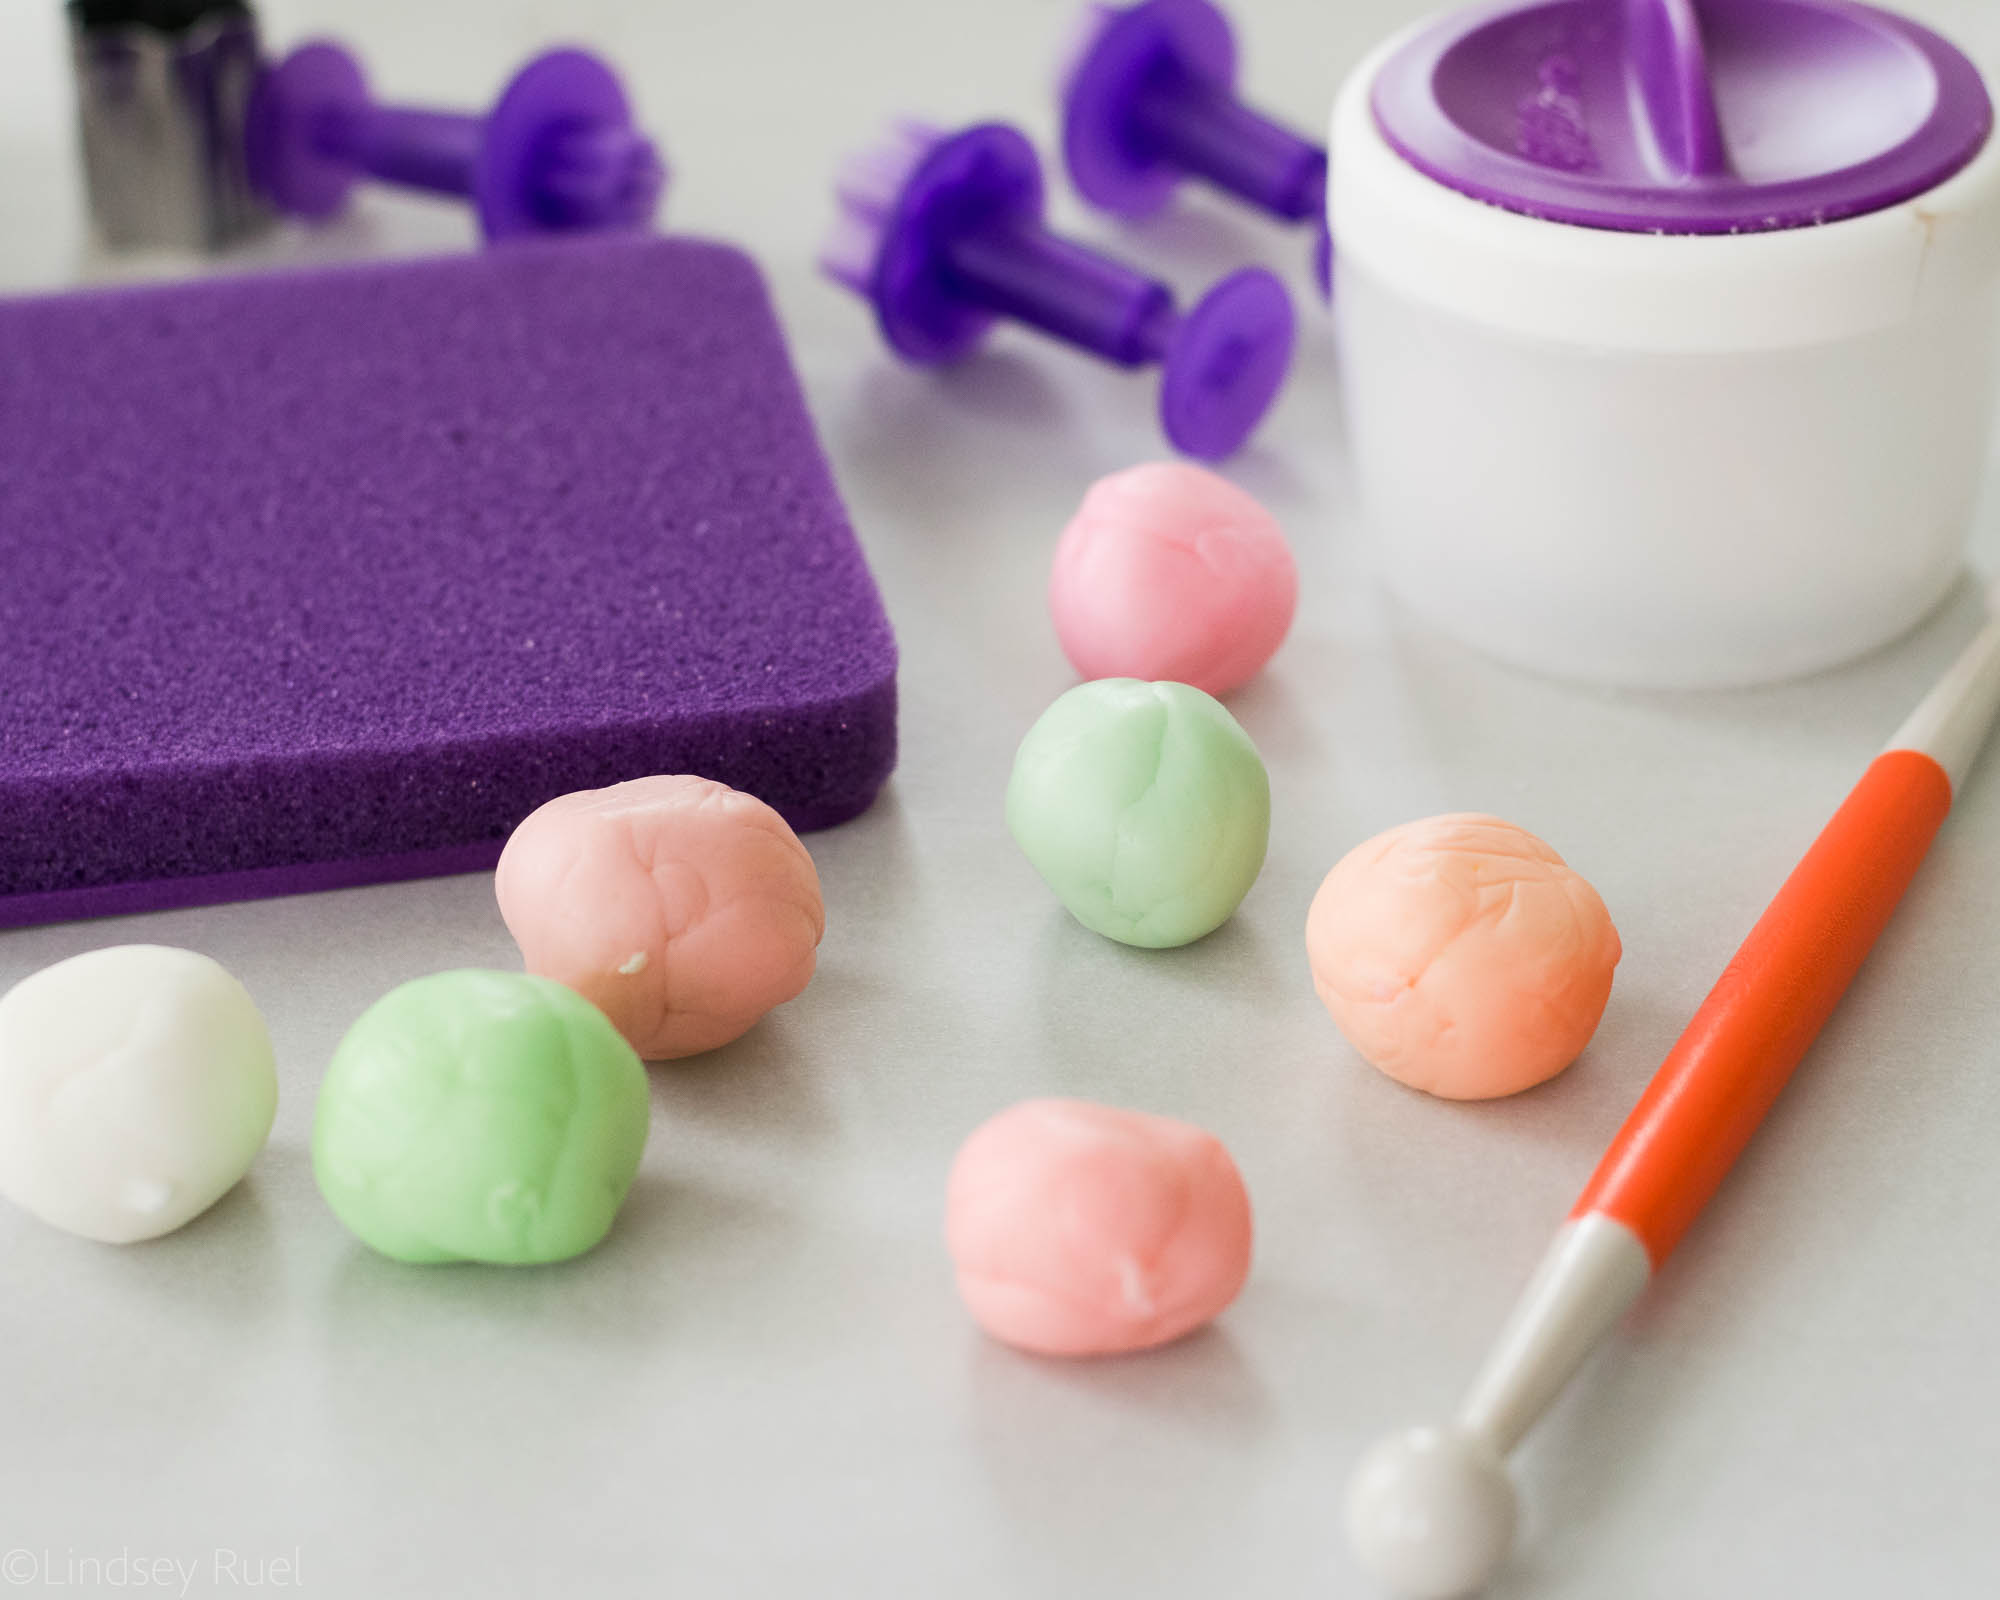
Start by dying fondant in the desired shades of colors. A little fondant goes a long way, so you may only need a gumball (or smaller) -sized ball of fondant per color. 

To dye the fondant, dab a tiny amount of gel food coloring onto the fondant. Then using your hands, stretch and knead the fondant until the color is evenly incorporated. If the color is too light, add additional food coloring.

Tip: Use food-safe gloves to prevent getting food coloring all over your skin. 

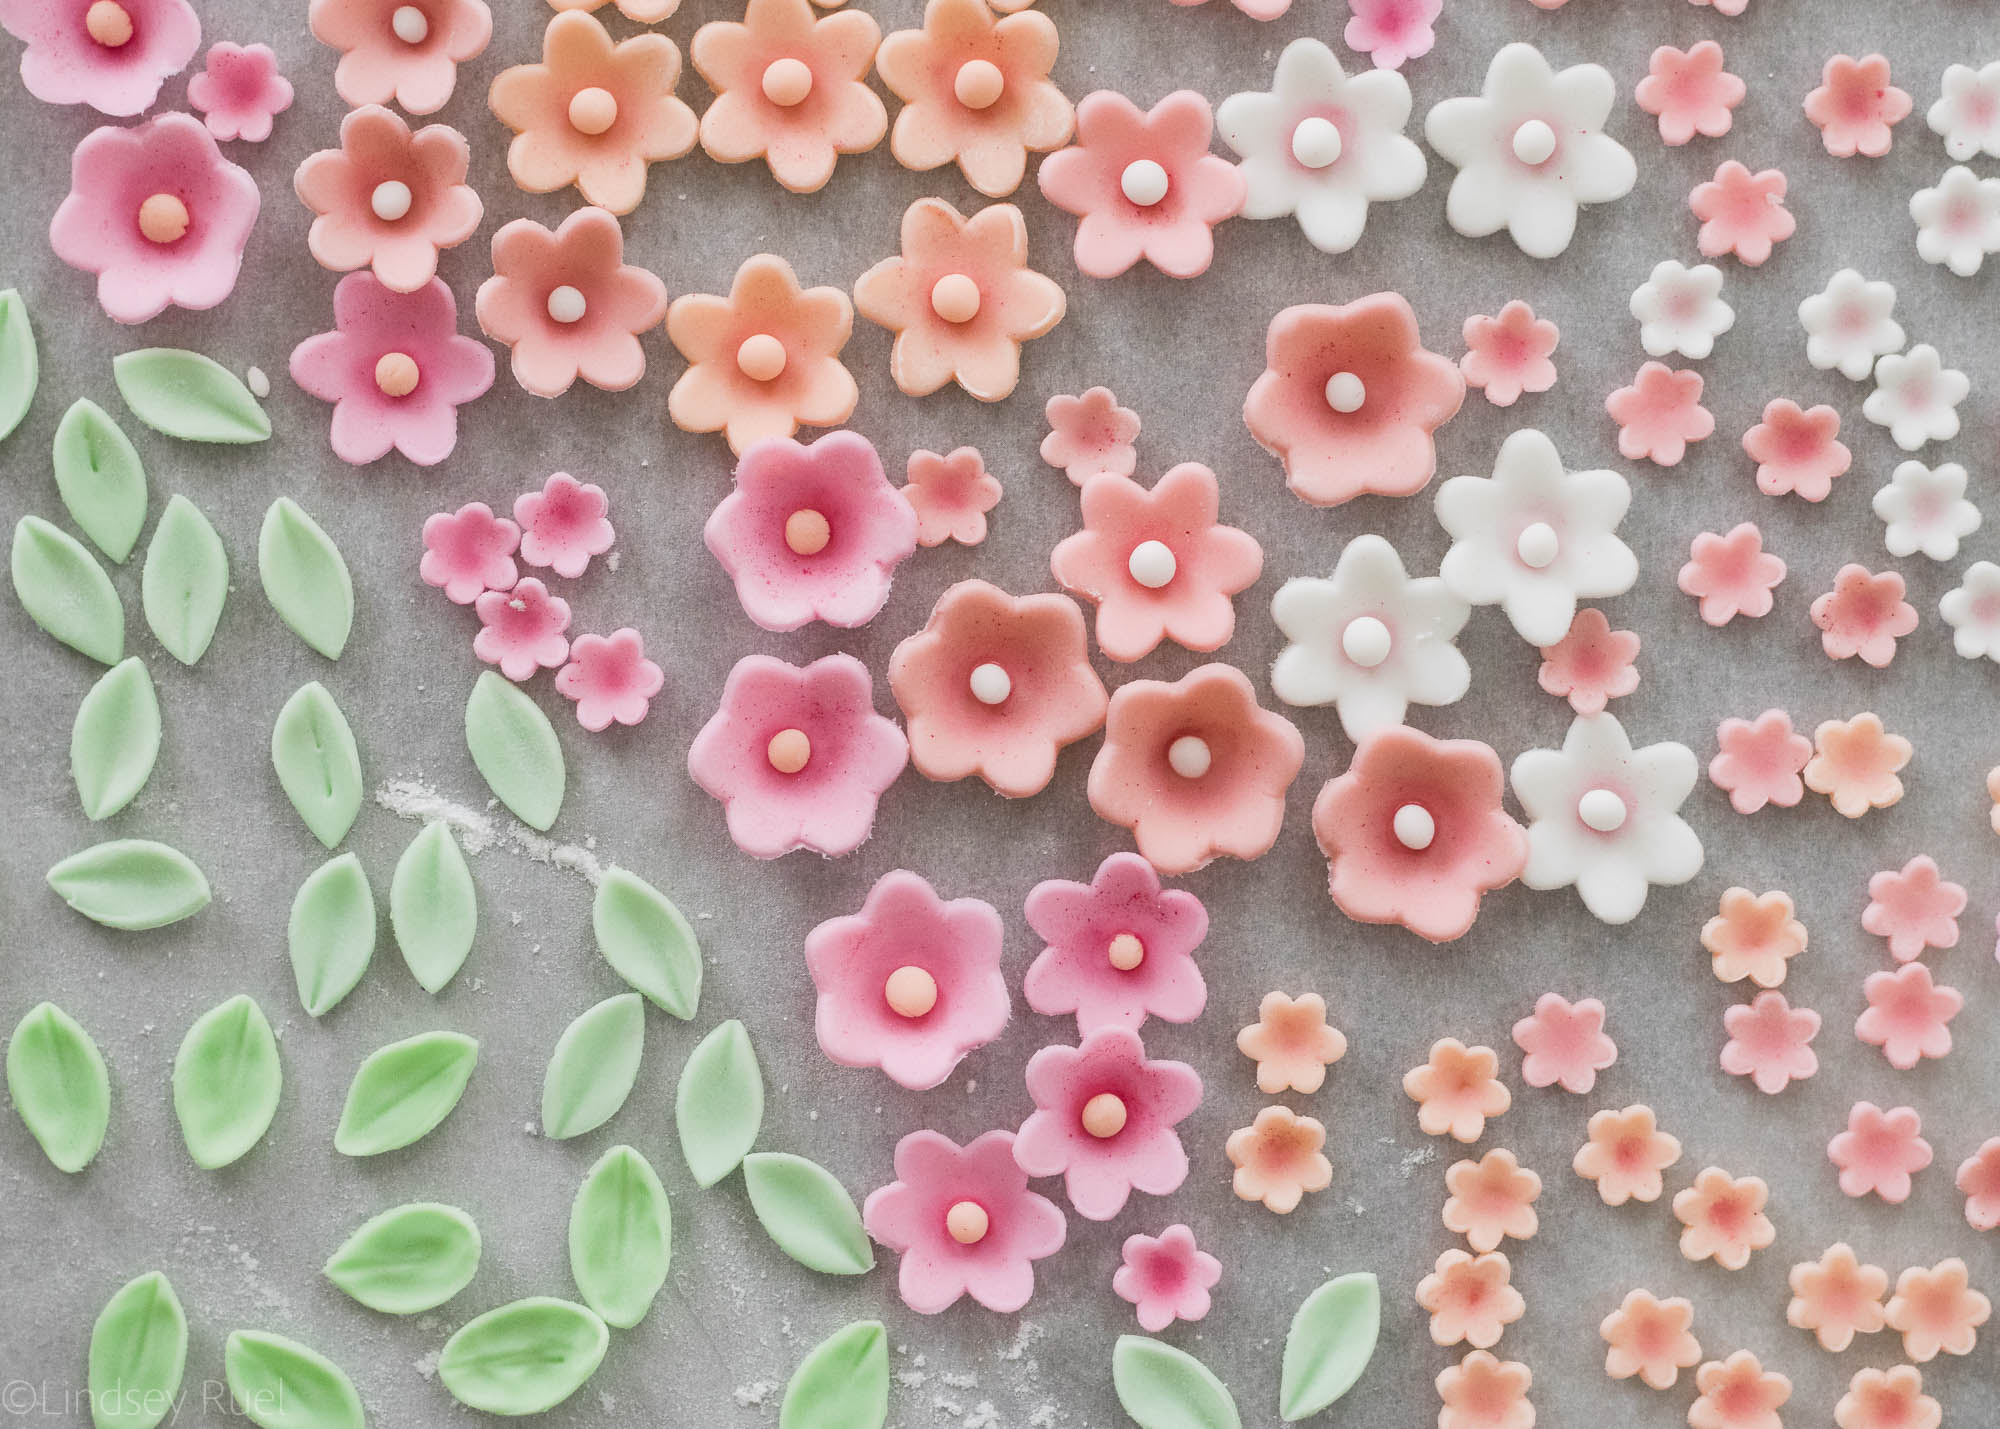
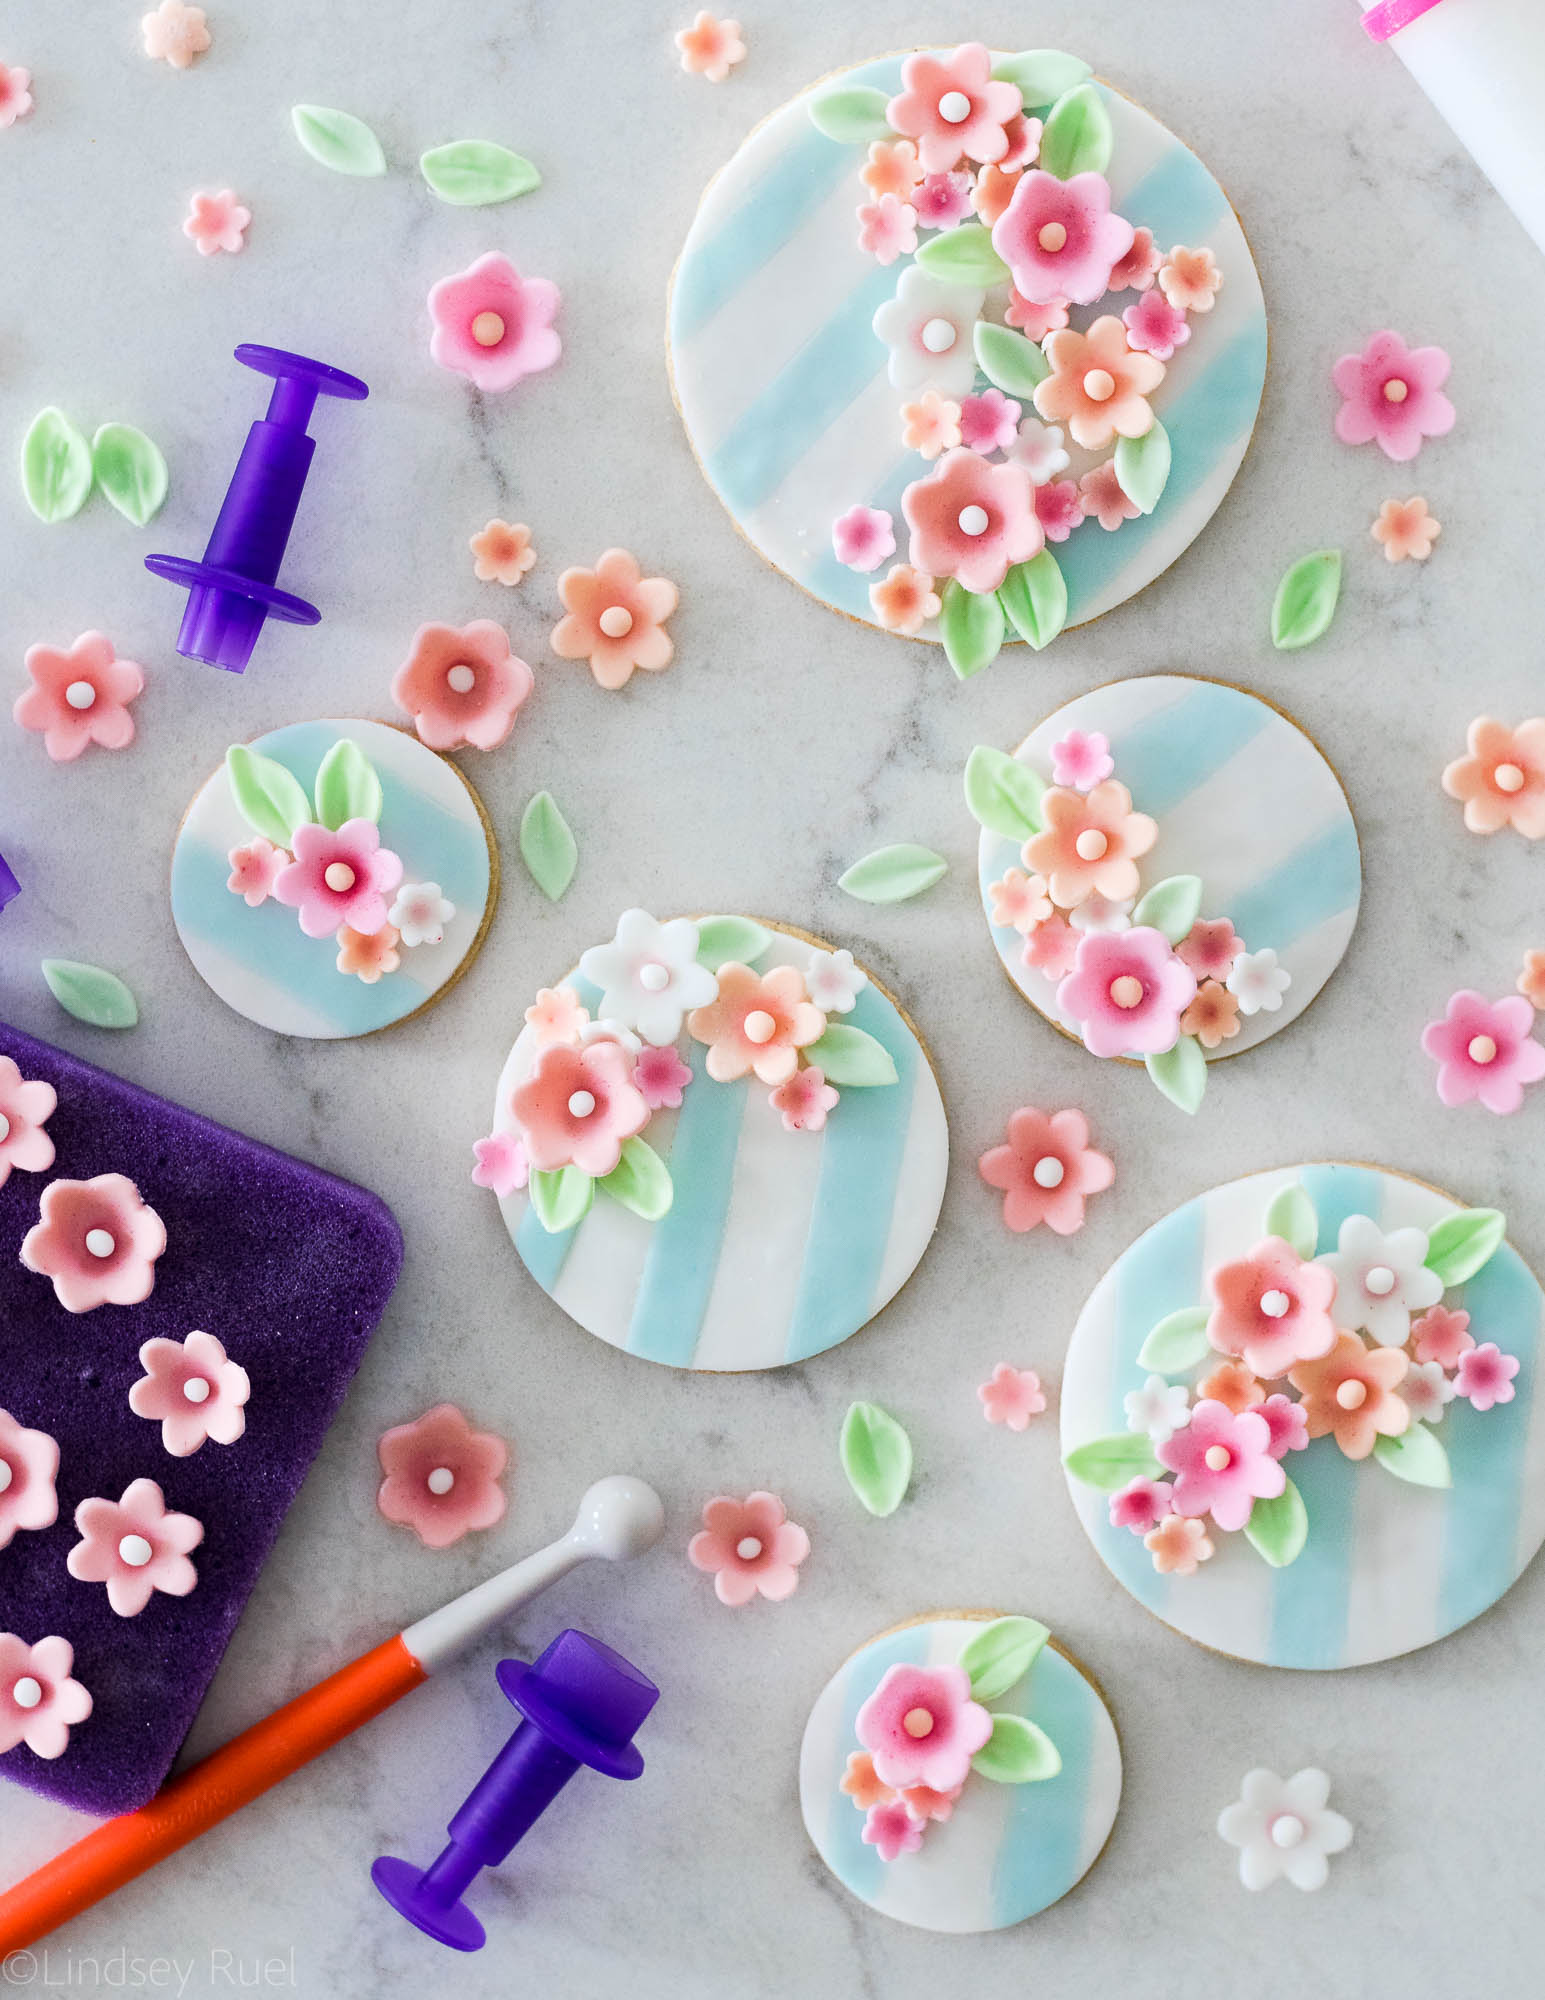
Roll out the fondant with the fondant roller and the thinnest of the roller bands. Punch out various sized flowers and leaves. 


Place the cut-out flowers onto the foam and press down using the ball tool to create a more dimensional flower. 

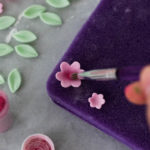
To add some more dimension and color, brush some pink luster dust in the center of the flower. Add a little ball of the same or different color fondant to the center of the flower. Attach with a dab of water. 


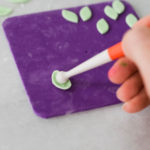
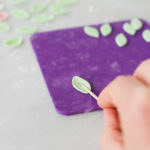
To add a little more detail to the leaves, use the smaller end of the ball tool to roll around the edges. Use a toothpick to add a little line down the center. 

Allow to dry and harden while you work on the next step.


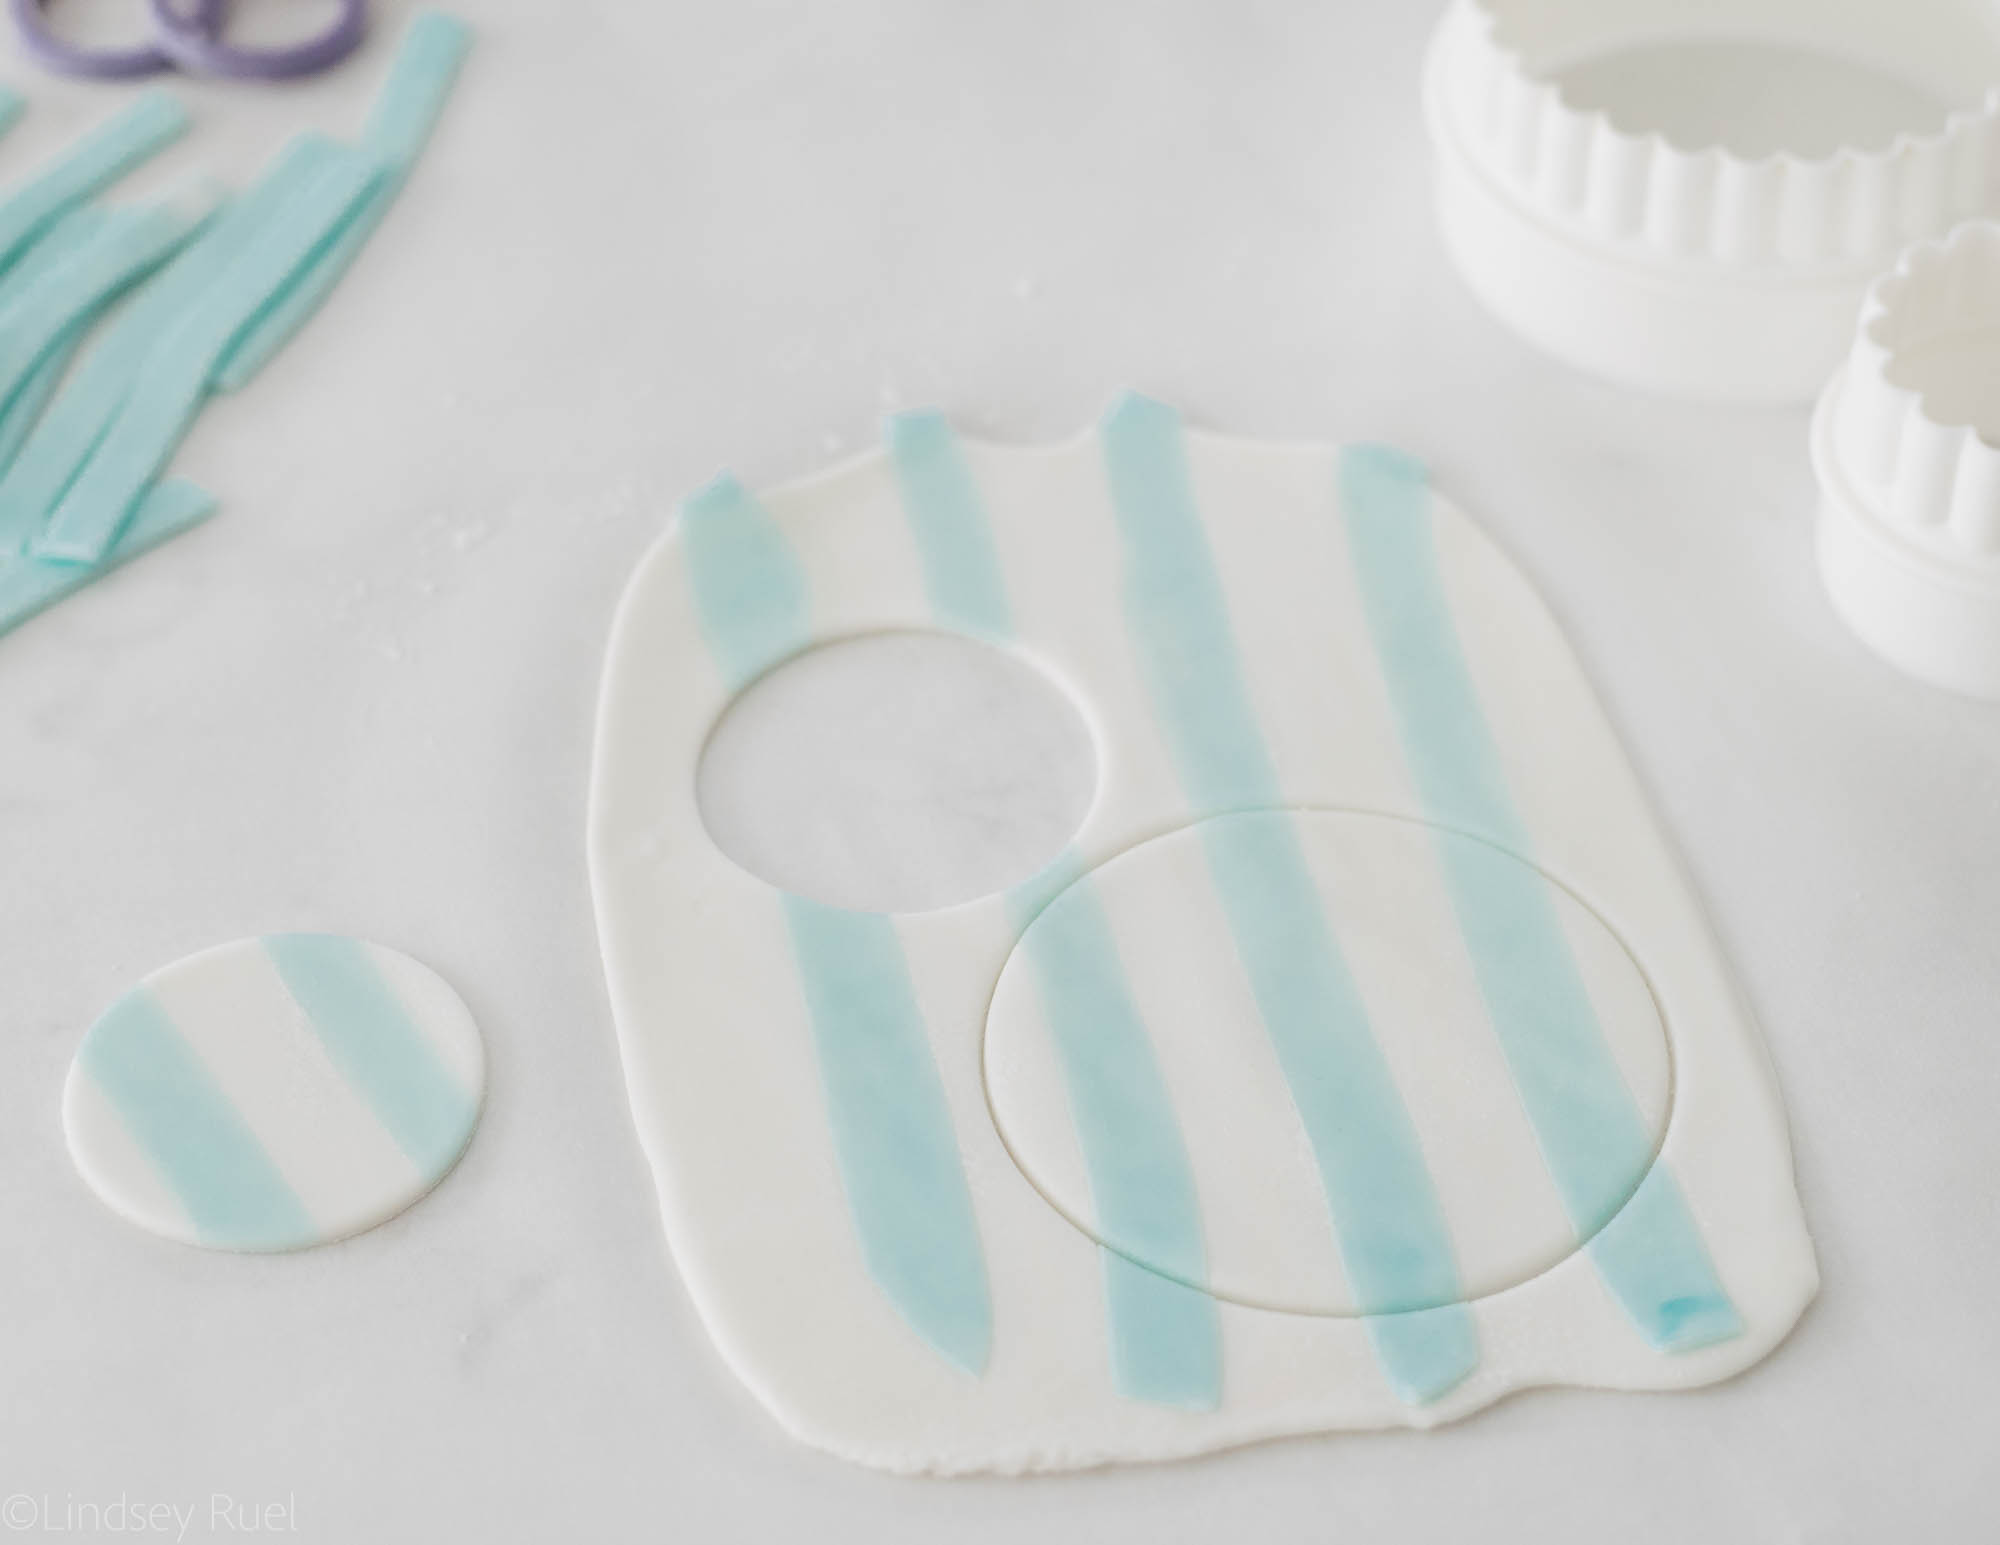
To create the striped fondant, dye a small ball of fondant a light blue (or your color of choice). Roll out the blue fondant using the fondant roller, then cut into equal sized strips. 

Roll out the plain white fondant and attach the strips of colored fondant with a little bit of water. 

Place a piece of parchment on top of the fondant and roll out the fondant with the fondant roller and widest fondant roller guide. 

Cut out the fondant using the same sized cookie cutter as the cookies the fondant will be placed on. 

Tip: Work in small batches because once your roll out the striped fondant, you will not be able to re-roll it and maintain the stripes. 


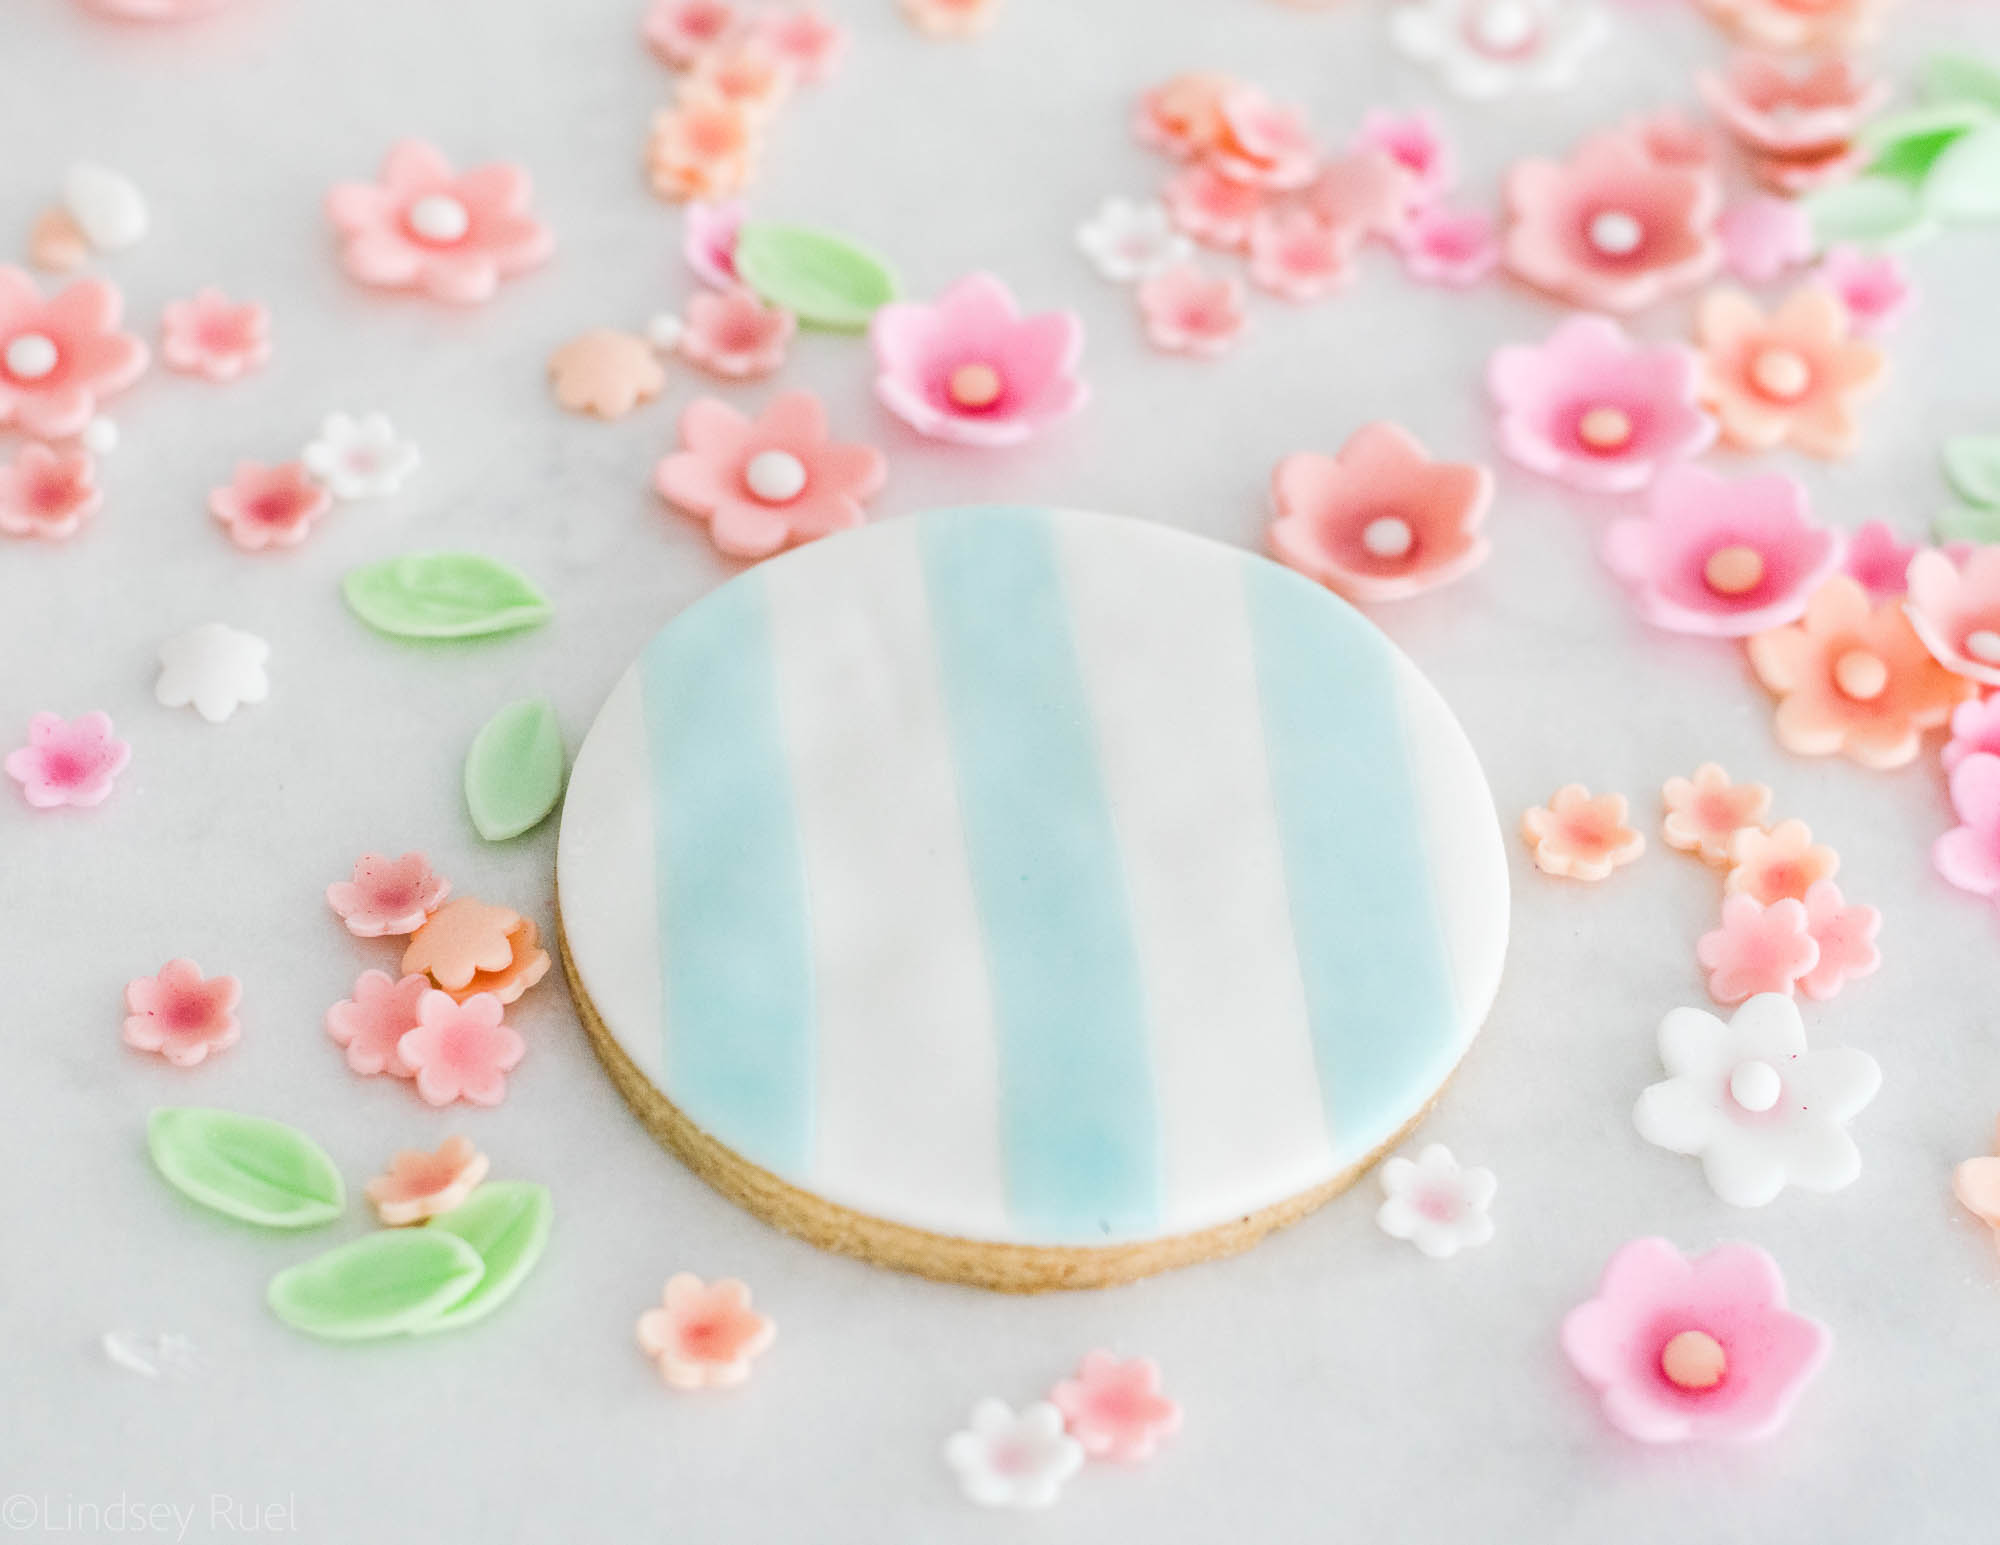
Attach the fondant to the cookie by brushing a little bit of water onto the back of the fondant then sticking it to the cookie. Use your finger to smooth out the top and edges of the fondant. 

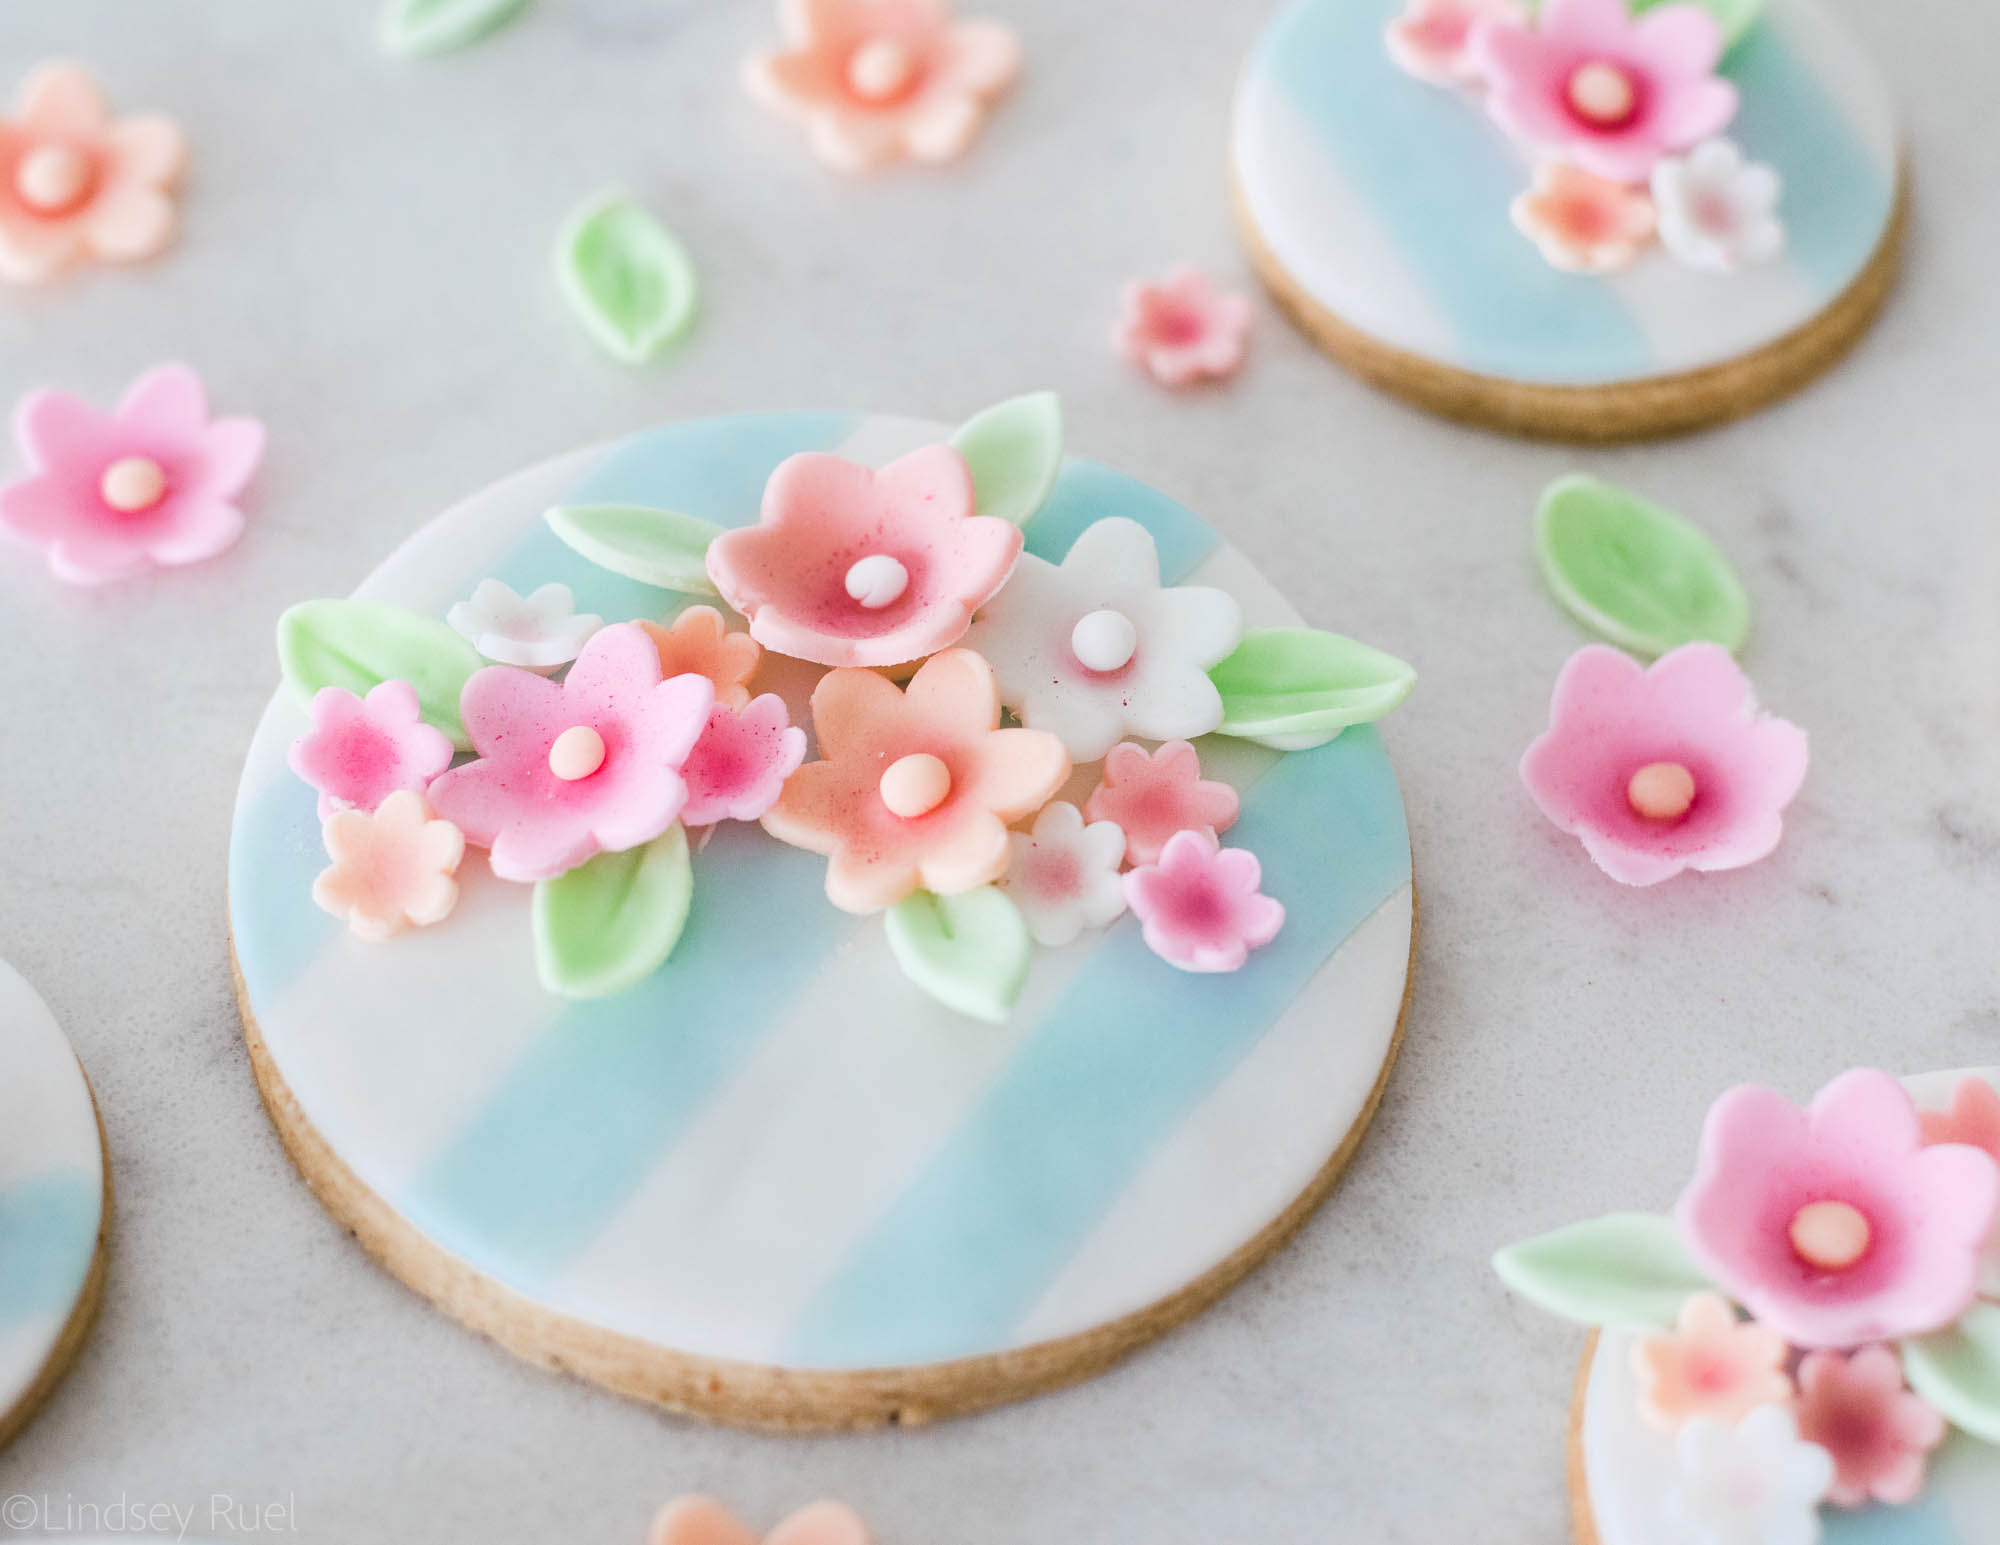
There is not a lot of rhyme or reason for placing the flowers on the cookie. I like to start by adding the biggest flowers first, then adding smaller flowers around it. 

I also like to make sure that the arrangement is asymmetrical. So if there is one large center flower with two small flowers on one side, I won’t add two flowers to the other. I will make sure the two sides are not balanced which will make it look a bit more natural. 


“Glue” the flowers onto the cookies with a bit of stiff consistency royal icing. 

Layer the flowers and leaves until you are happy with the arrangement. Allow the royal icing to dry for about 15-20 minutes before stacking or packaging. 

Tools and Recipes

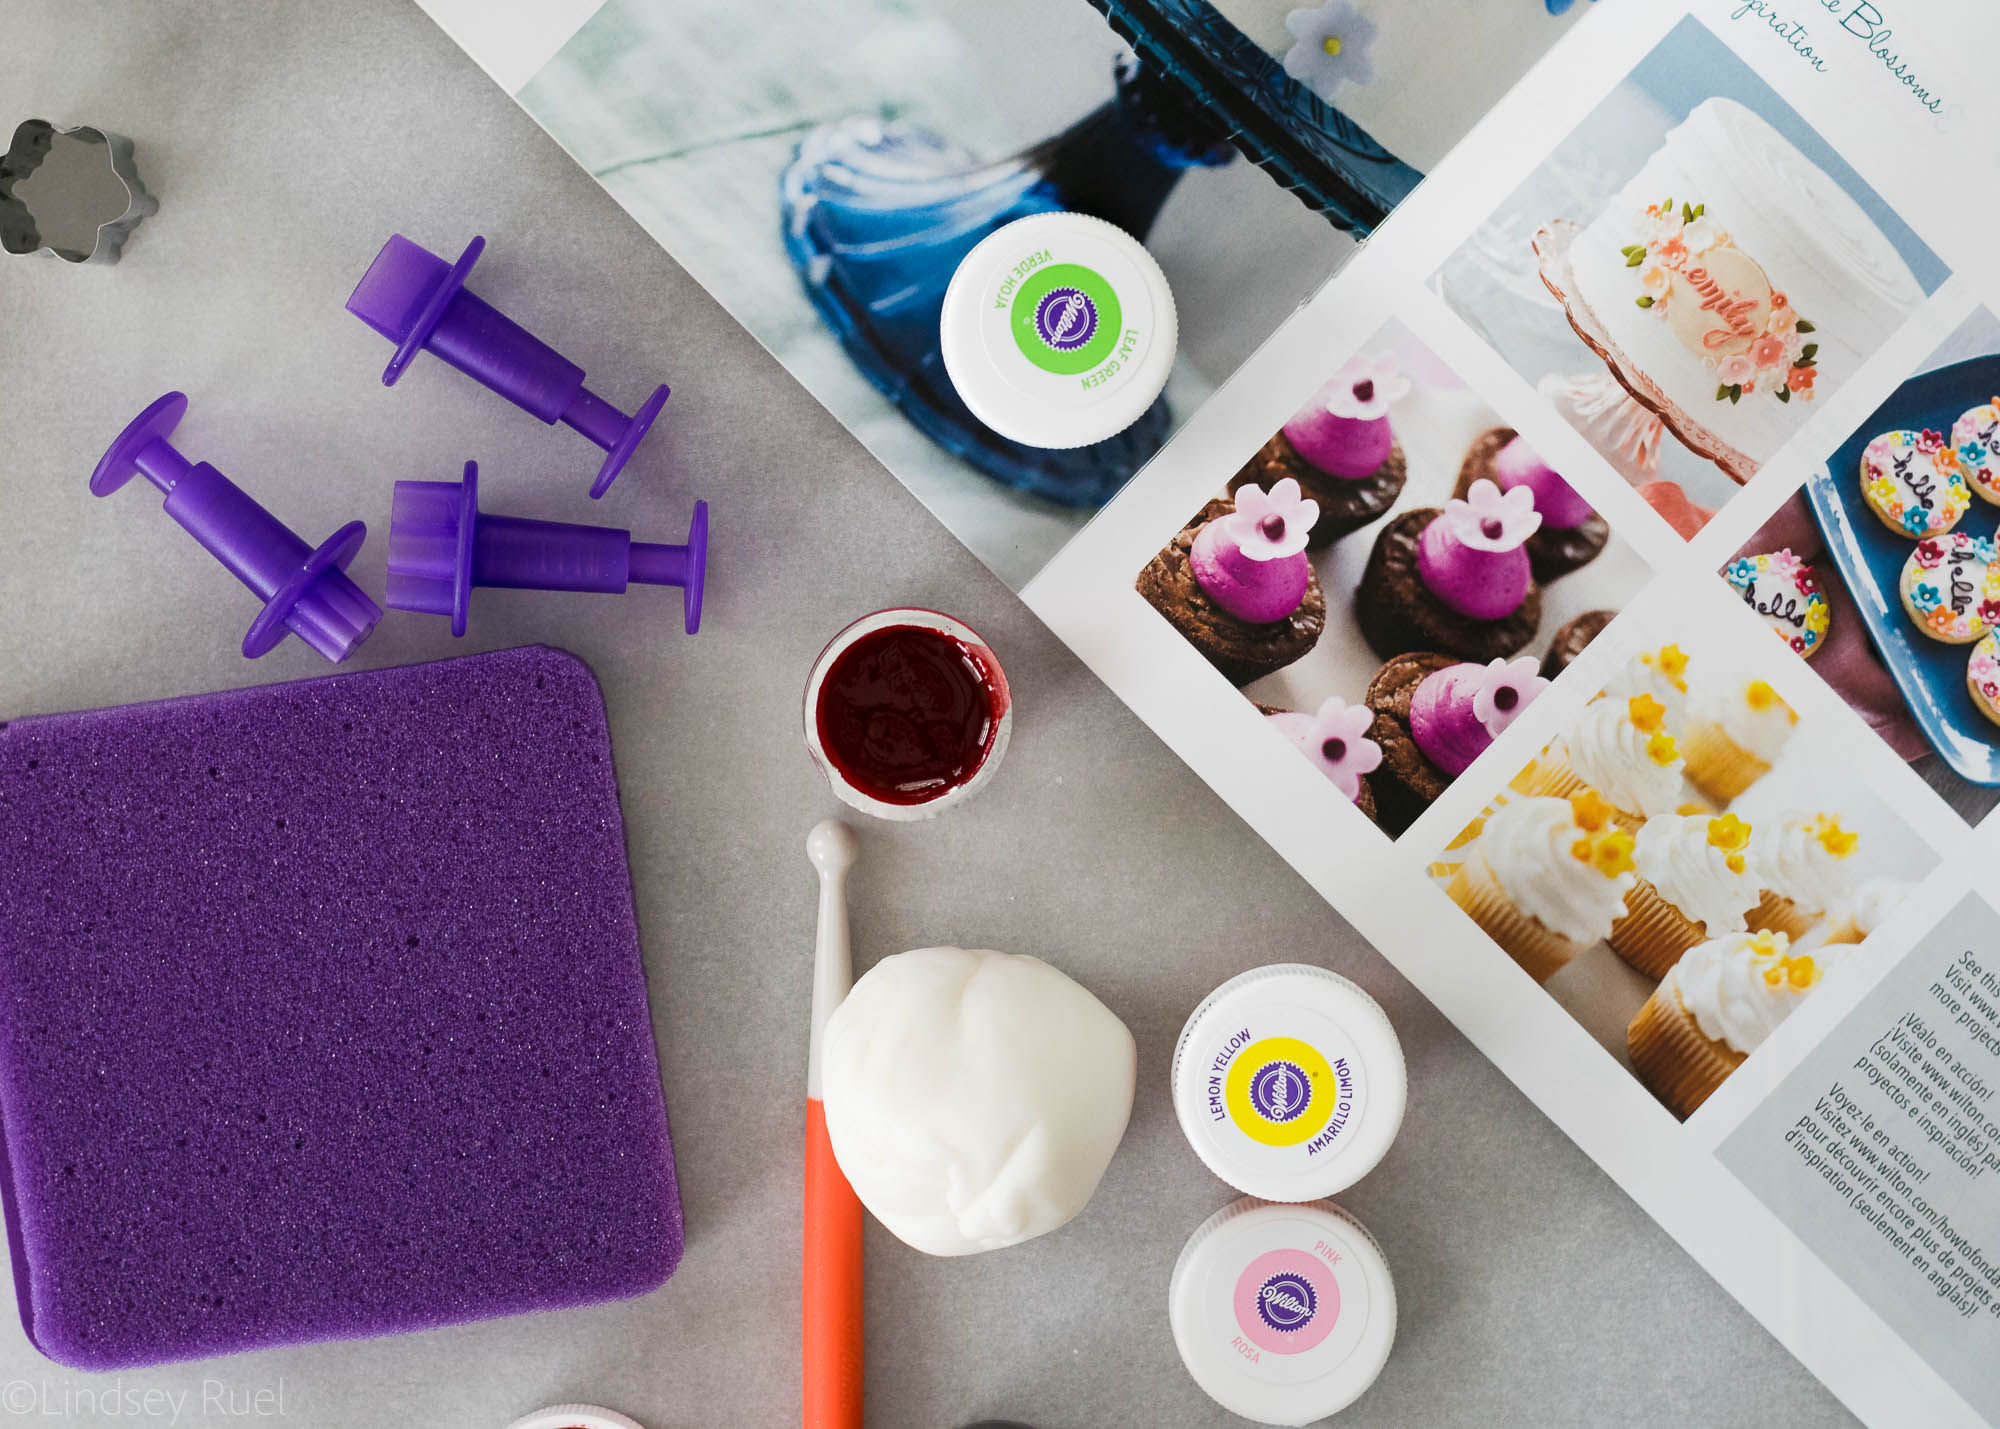
As I mentioned above, almost all of the tools I used came from the How to Decorate with Fondant Shapes and Cut-Outs including the fondant cutters, the fondant roller, the ball tool, and the foam.

I also used Wilton fondant in white and their gel food coloring, both of which I already had on hand but they had provided me with extras. 

For the exact colors of the flowers and leaves, I used very small amounts of the following colors:

  • Pink + Red
  • Pink + Brown
  • Pink + Orange + Brown
  • Orange + Pink
  • Leaf Green + Blue
  • Leaf Green + Brown

Then, of course, I left one ball of fondant just plain white. In all of the cases, the first color listed was the main color, then I added a tiny amount of the second color just to add a different tint. It’s a little bit of trial and error. 

The cookies themselves were made with a version of my favorite sugar cookie recipe. I am still working on perfecting the flavor, but my basic cookie is always a winner. Or you could try the lavender-vanilla recipe (scroll to the bottom of the post for the recipe) for a nice floral twist. 


/ Filed In: Cookie Decorating 101, Cookies New, Decorated Cookies, Desserts, Eat
Tagged: decorated cookies, floral, flowers, fondant, patel, Spring, stripes, sugar cookies, Summer, Wilton

Mexican Embroidery Cookies

April 27, 2018

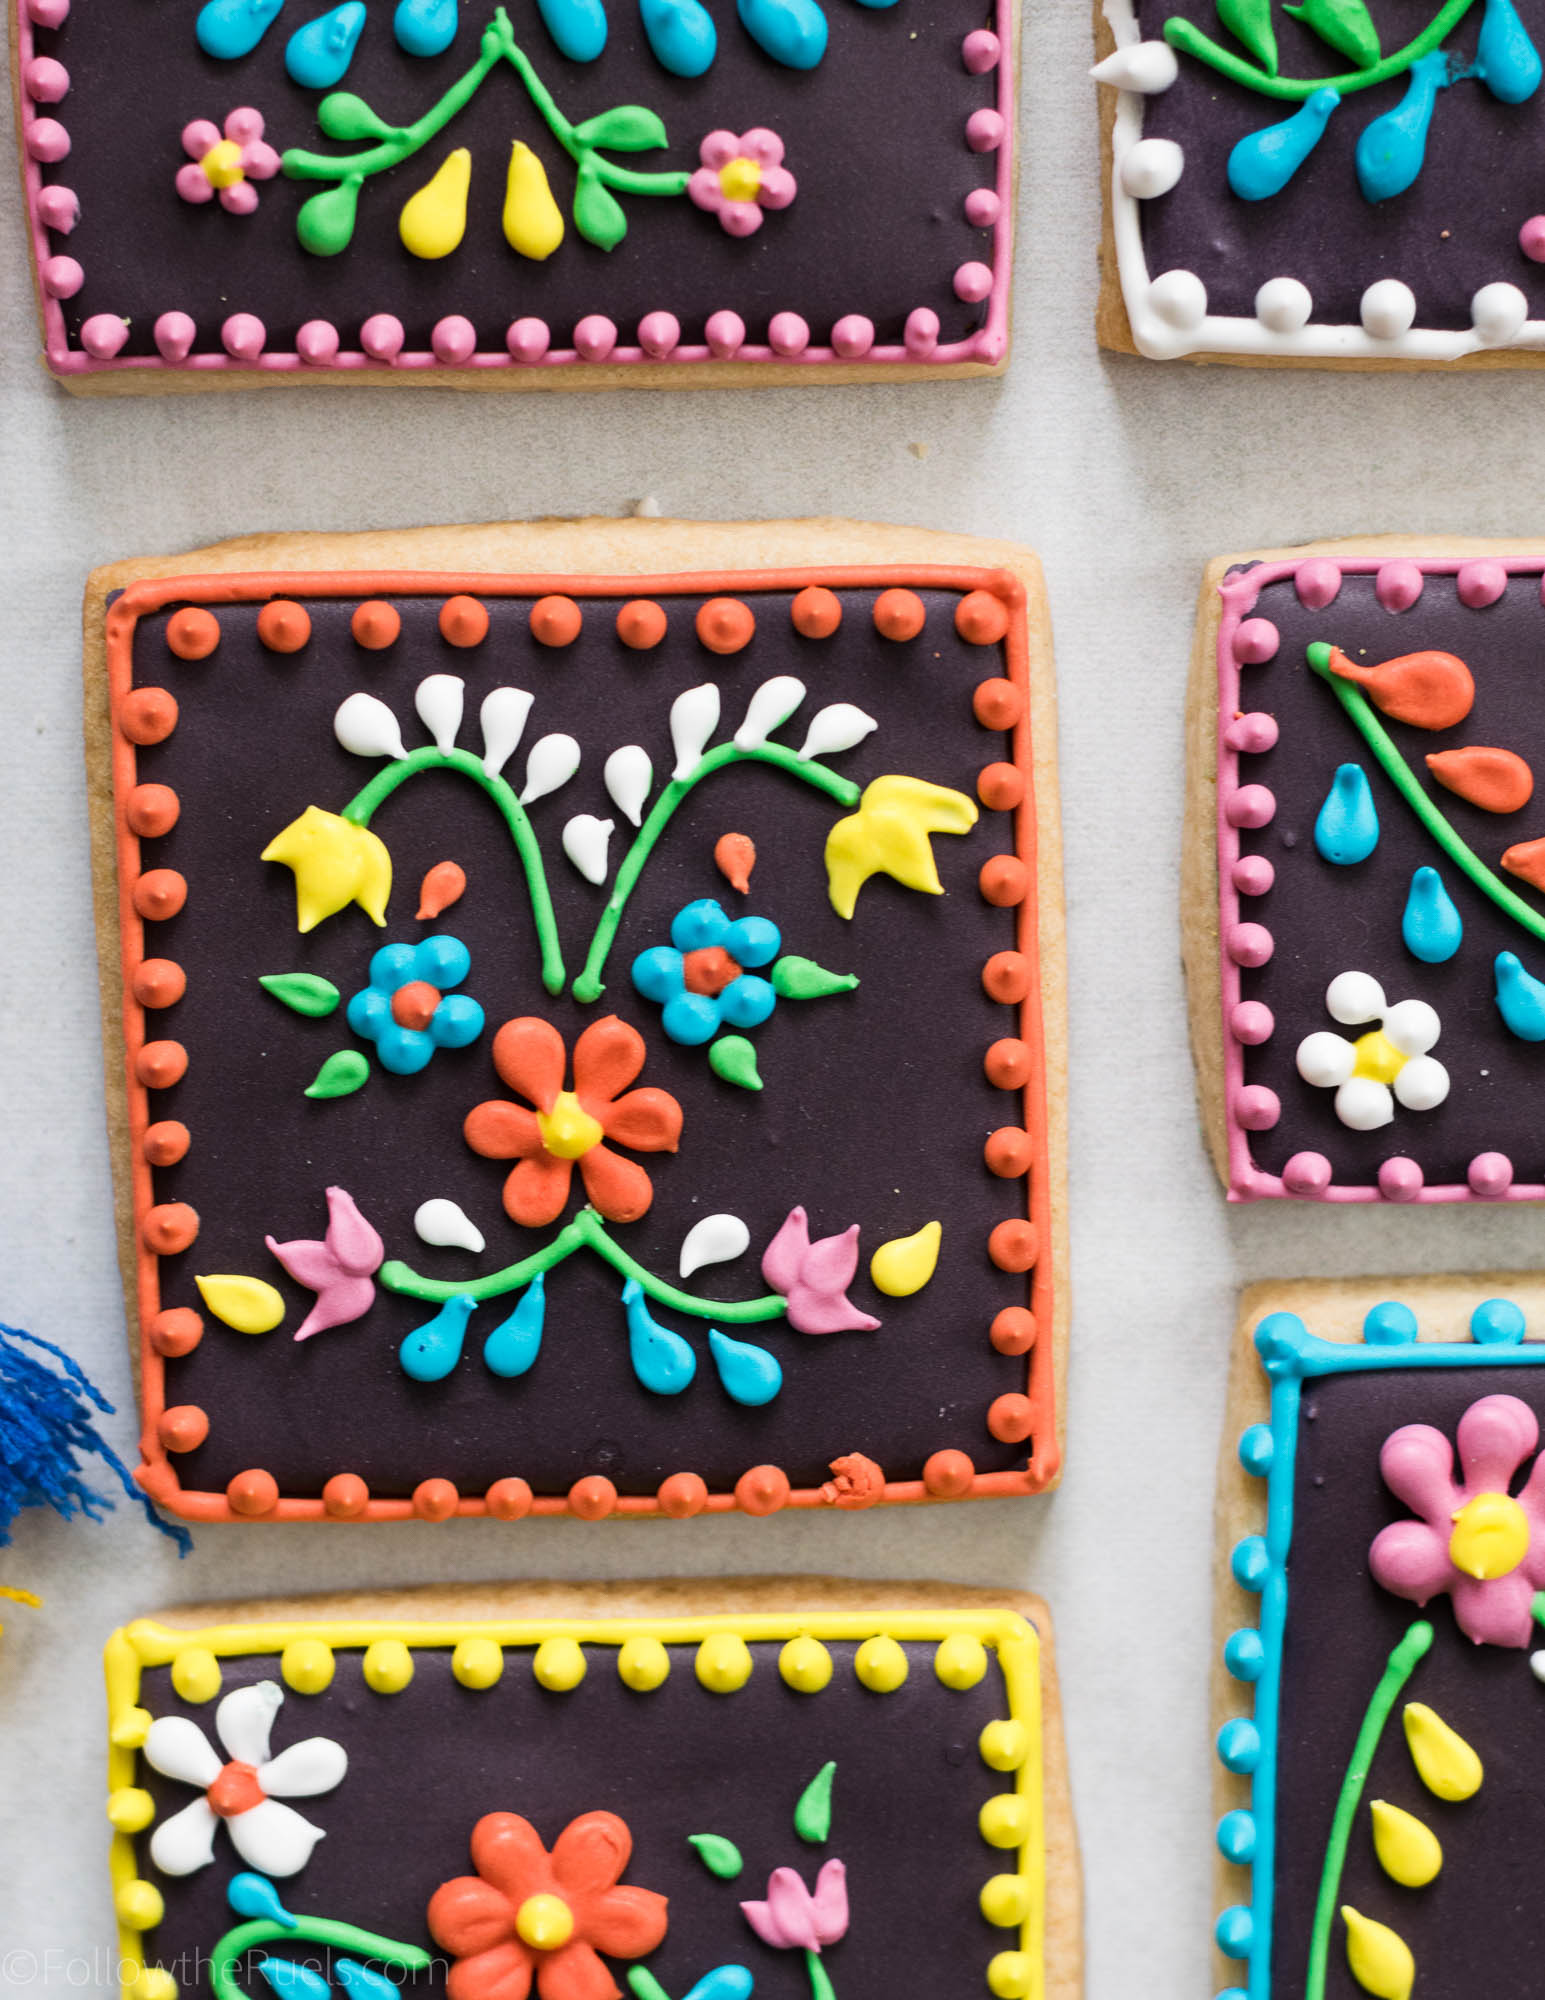
I can’t lie to you. These are not my favorite cookies. 

I had such high hopes for them! Mexican embroidery is so beautiful and colorful, and I don’t feel that these cookies really do the art form justice. 

However, after posting the photo on Instagram, there was actually a pretty positive response to these cookies (maybe ya’ll just felt bad form me) and I thought that I should post the video anyways. At the very least, I hope that is will inspire you to create your own Mexican embroidery cookies that are MUCH better than the ones I made. 

How to Make Them

Making these cookies is relatively easy with the right icing and the right technique.

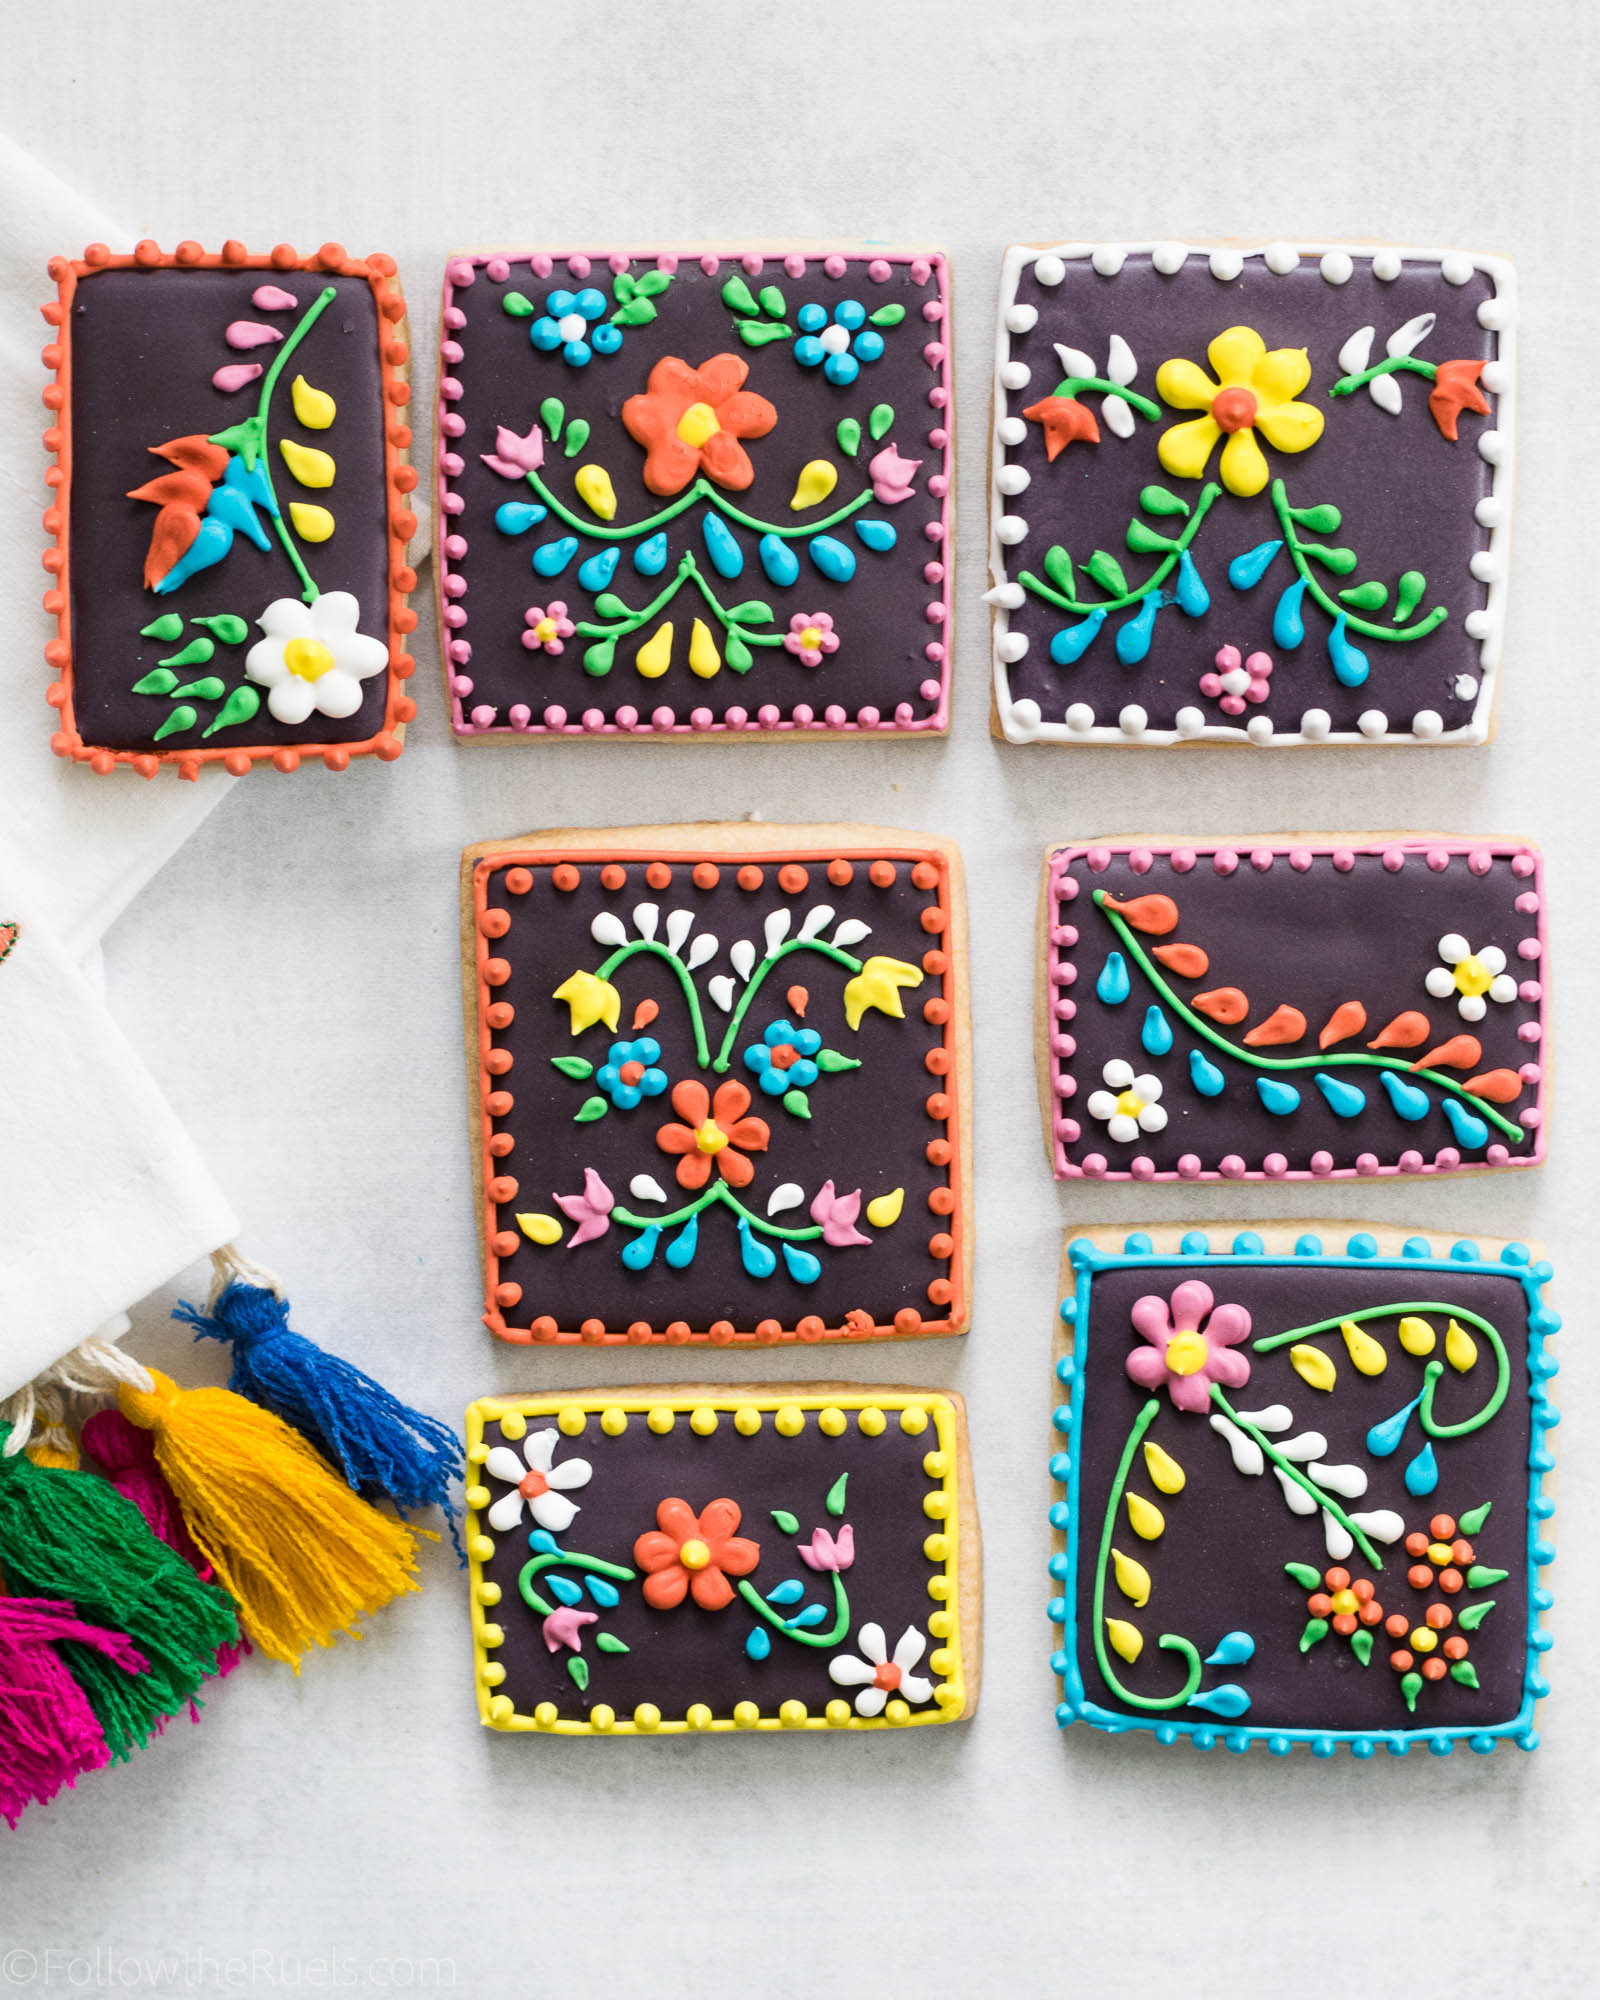
The dark purple bottom layer of icing is flood consistency icing, then all of the decorative additions are piping consistency icing. Piping consistency is just a tad thicker and holds some shape, but isn’t super thick. 

To make things even easier, most of the cookies are made using a teardrop shape. Once you perfect the teardrop, then you are in business to make these cookies. Start by piping a dot of icing, then releasing the pressure on the piping bag and dragging the piping tip in one direction to form the point. 

The rest of the elements are either plain lines or dots. So simple, right?
Recipes and Supplies

As usual, I counted on my sugar cookie recipe and royal icing recipe for these cookies. I think adding some fun flavors into these cookies would make them extra festive, like lime zest or even chili powder. 

For the supplies, I relied on my trusting round piping tips to make sure I got perfect dots and teardrops. I used a combination of #1, #2, and #3 round tips….mainly because I didn’t have enough of one or the other for all of my colors. You could use just one size or you could forgo piping tips all together and just cut a small hole in your piping bags. 

I think it’s the colors that really make these cookies pop. While normally I pick out the more muted and subtle shades in my food coloring set, for these I opted for the brightest colors I could find. Electric yellow, electric blue, fushia, tulip red, and leaf green round out the cast of bright colors for these Mexican embroidery cookies. 

[show_shopthepost_widget id=”3116488″]

Now you are equipped with everything you need to show me how these Mexican embroidery cookies should be done!

/ Filed In: Cookies New, Decorated Cookies, Desserts
Tagged: cinco de mayo, cookies, flowers, mexican embroidery, piping tips

Mason Jar Bouquet Cookies

April 13, 2018

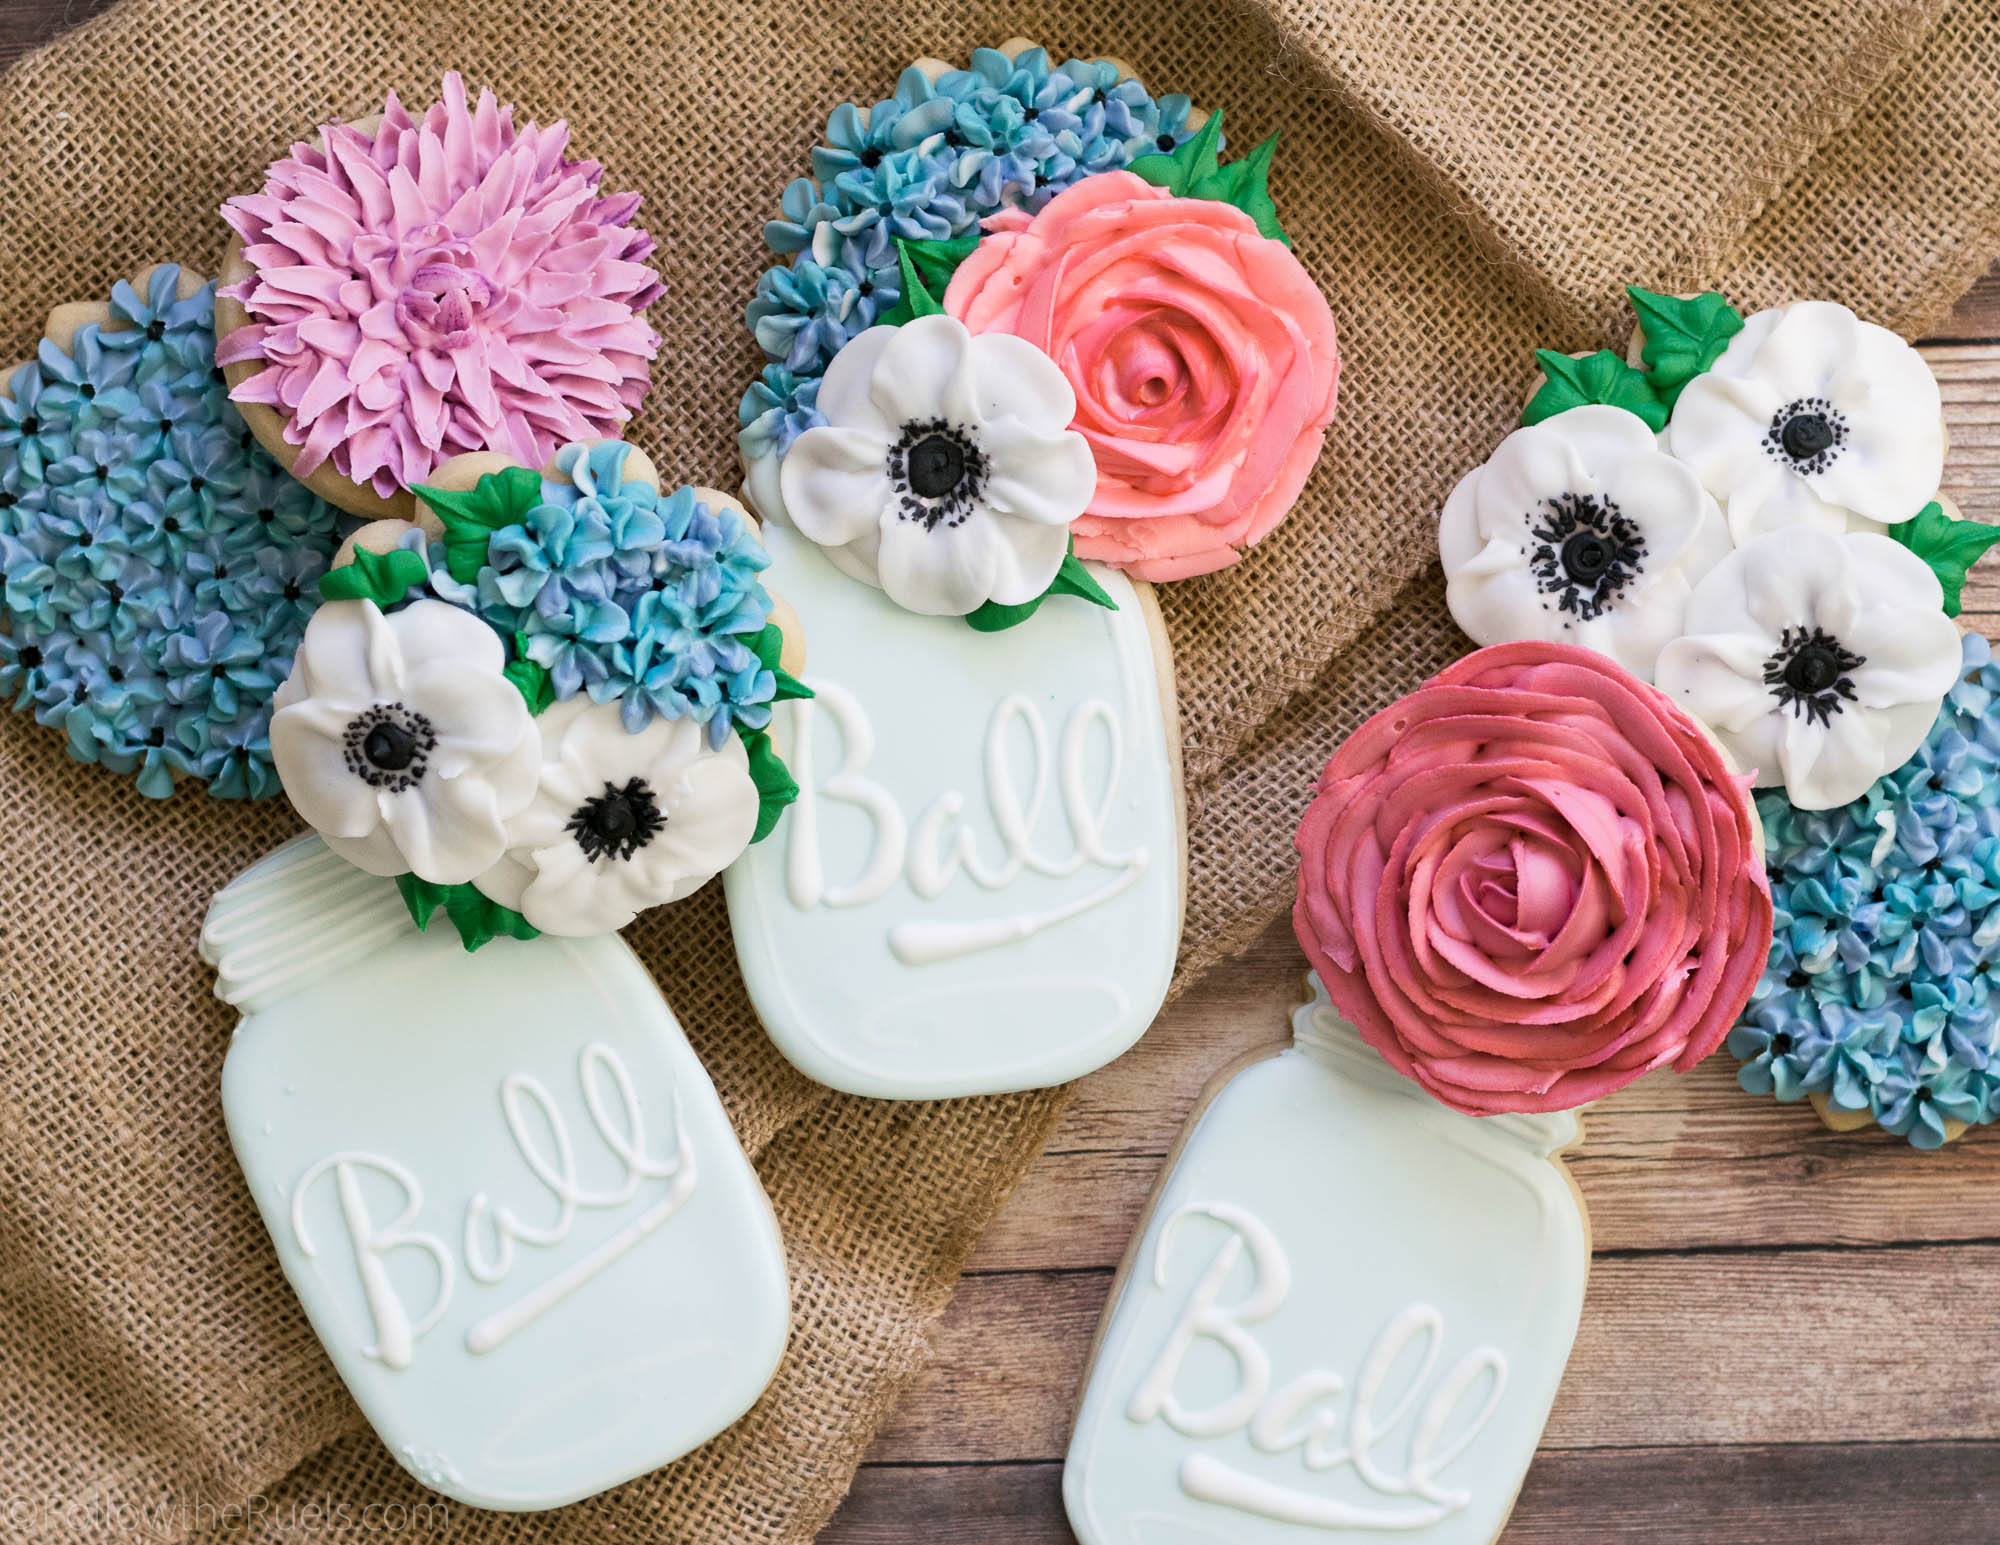
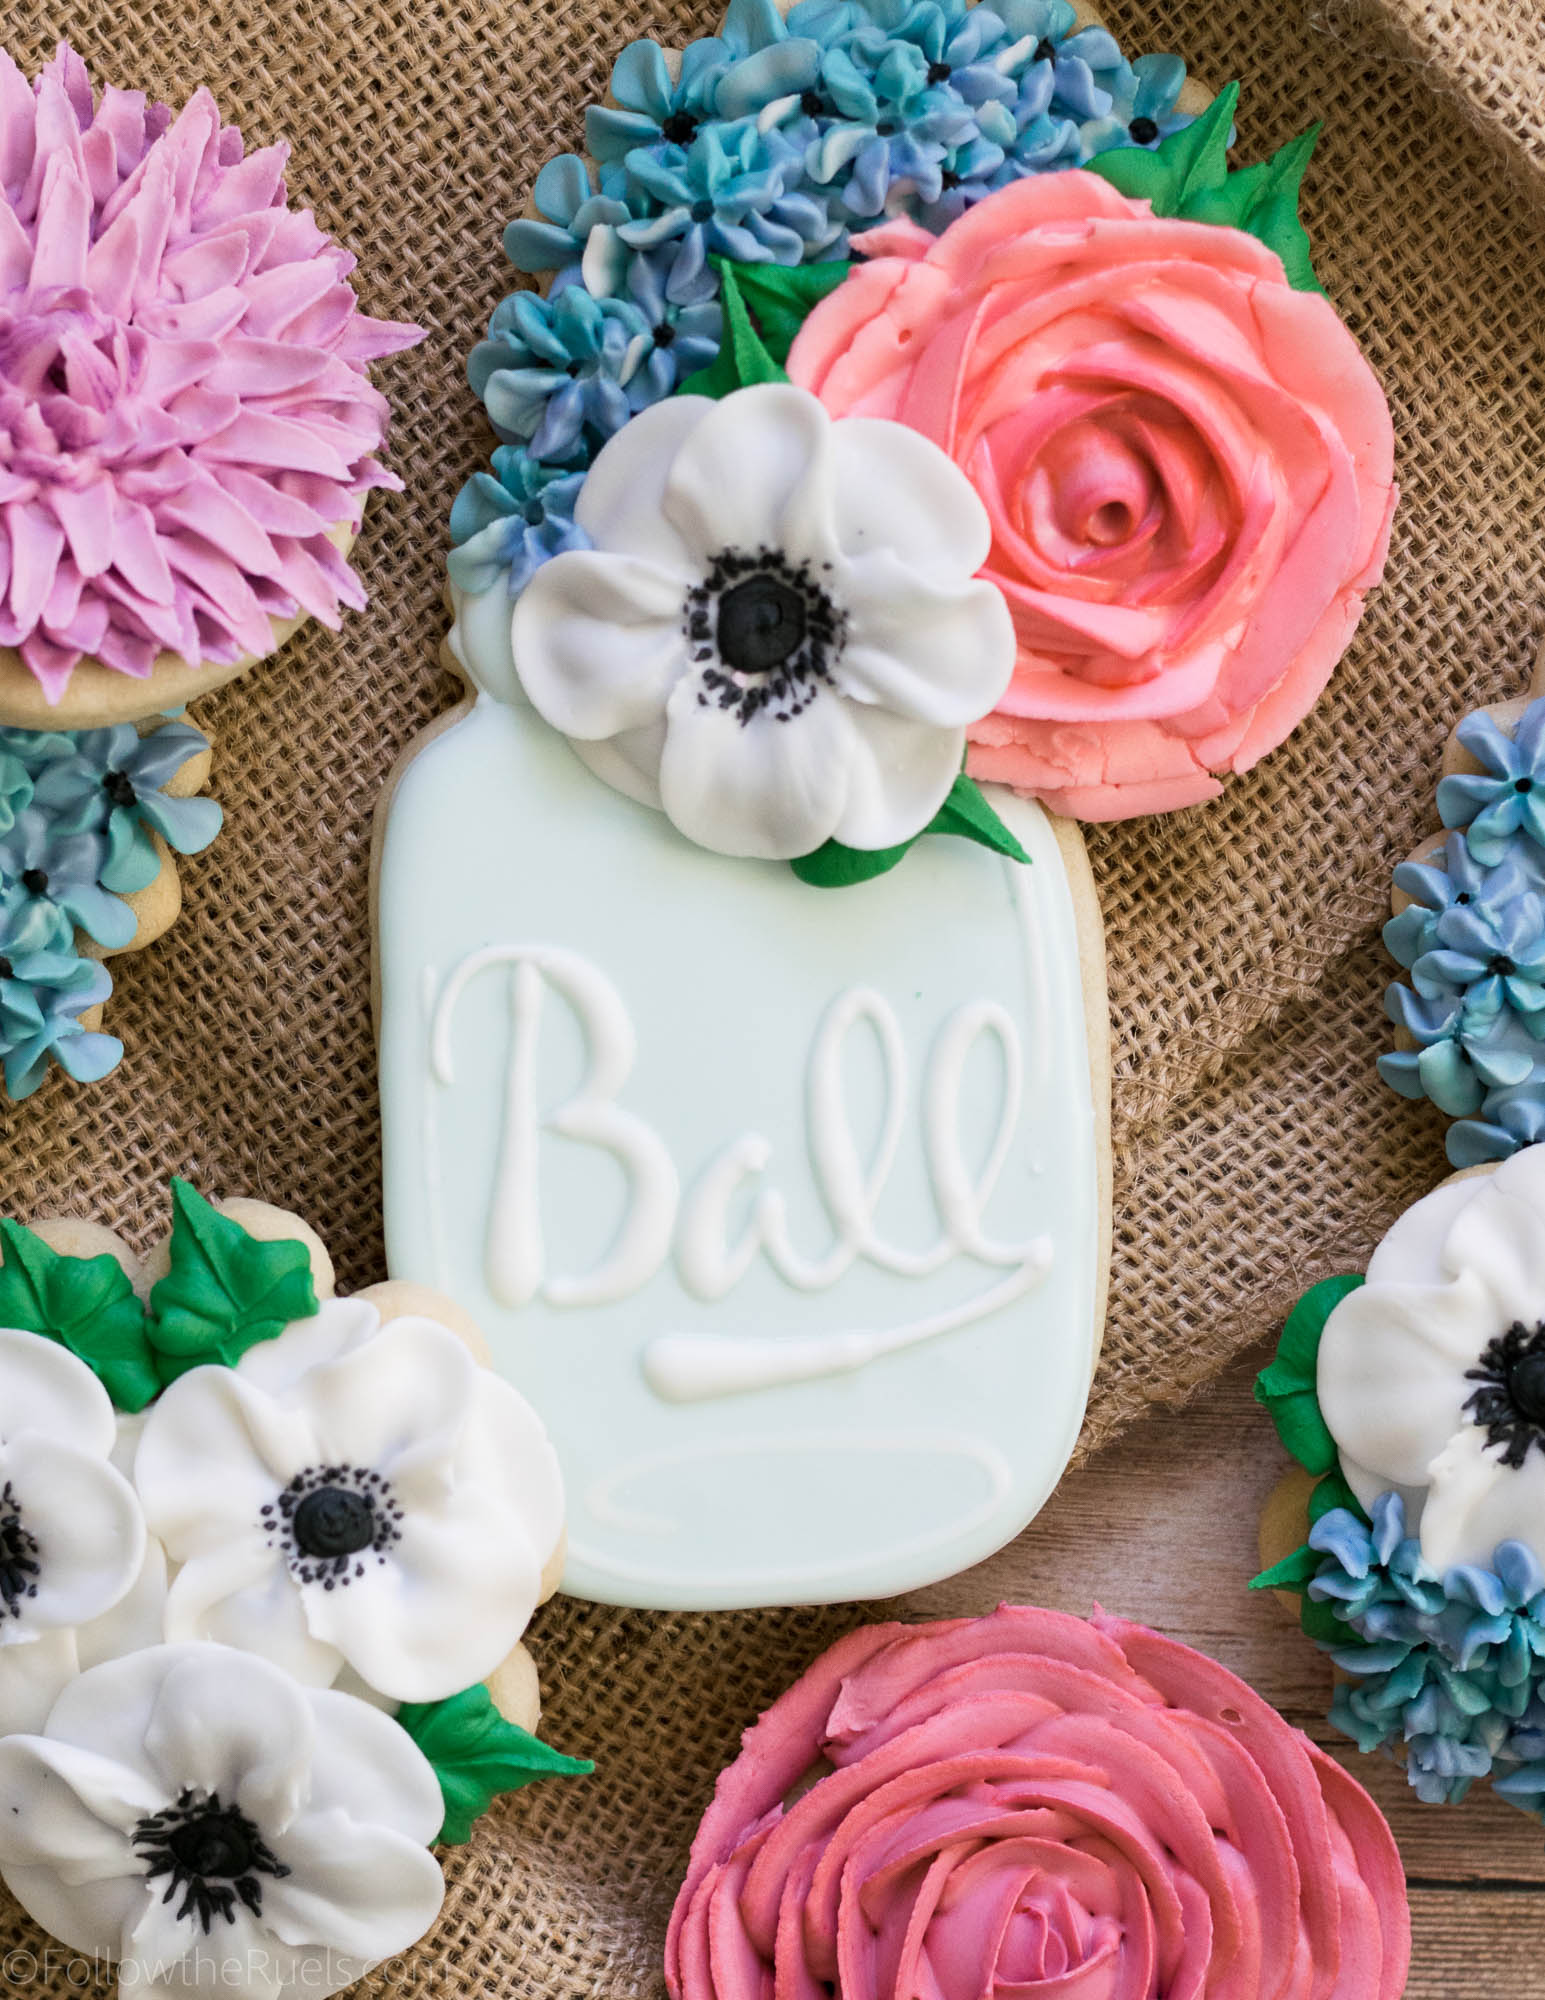
What can I say about these cookies except that I love them so much!

I love mason jars, I love flowers (especially royal icing flowers, as you know), and anemones are one of my absolute favorites. In fact, I really wanted mason jars and anemones as my wedding! Sadly, anemones weren’t in season in October and my mom thought that mason jars and burlap were too “rustic”. Pshh…she clearly didn’t spend enough time on Pinterest in 2013.

So now I am living out my wedding flower dreams through these cookies (5 years later…don’t worry about it).

One thing I will say about these cookies before we dive in is that there is SOOO much icing on these things. It’s a little out of control. Unless you LOVE icing, it will be too much for you and you may want to scrape it off before you take a bite. Instead, you can make any of these cookies with buttercream instead which is a bit more palatable in large quantities. But I would keep the mason jar cookies iced in royal icing so you get a nice smooth surface.

How to Make Them

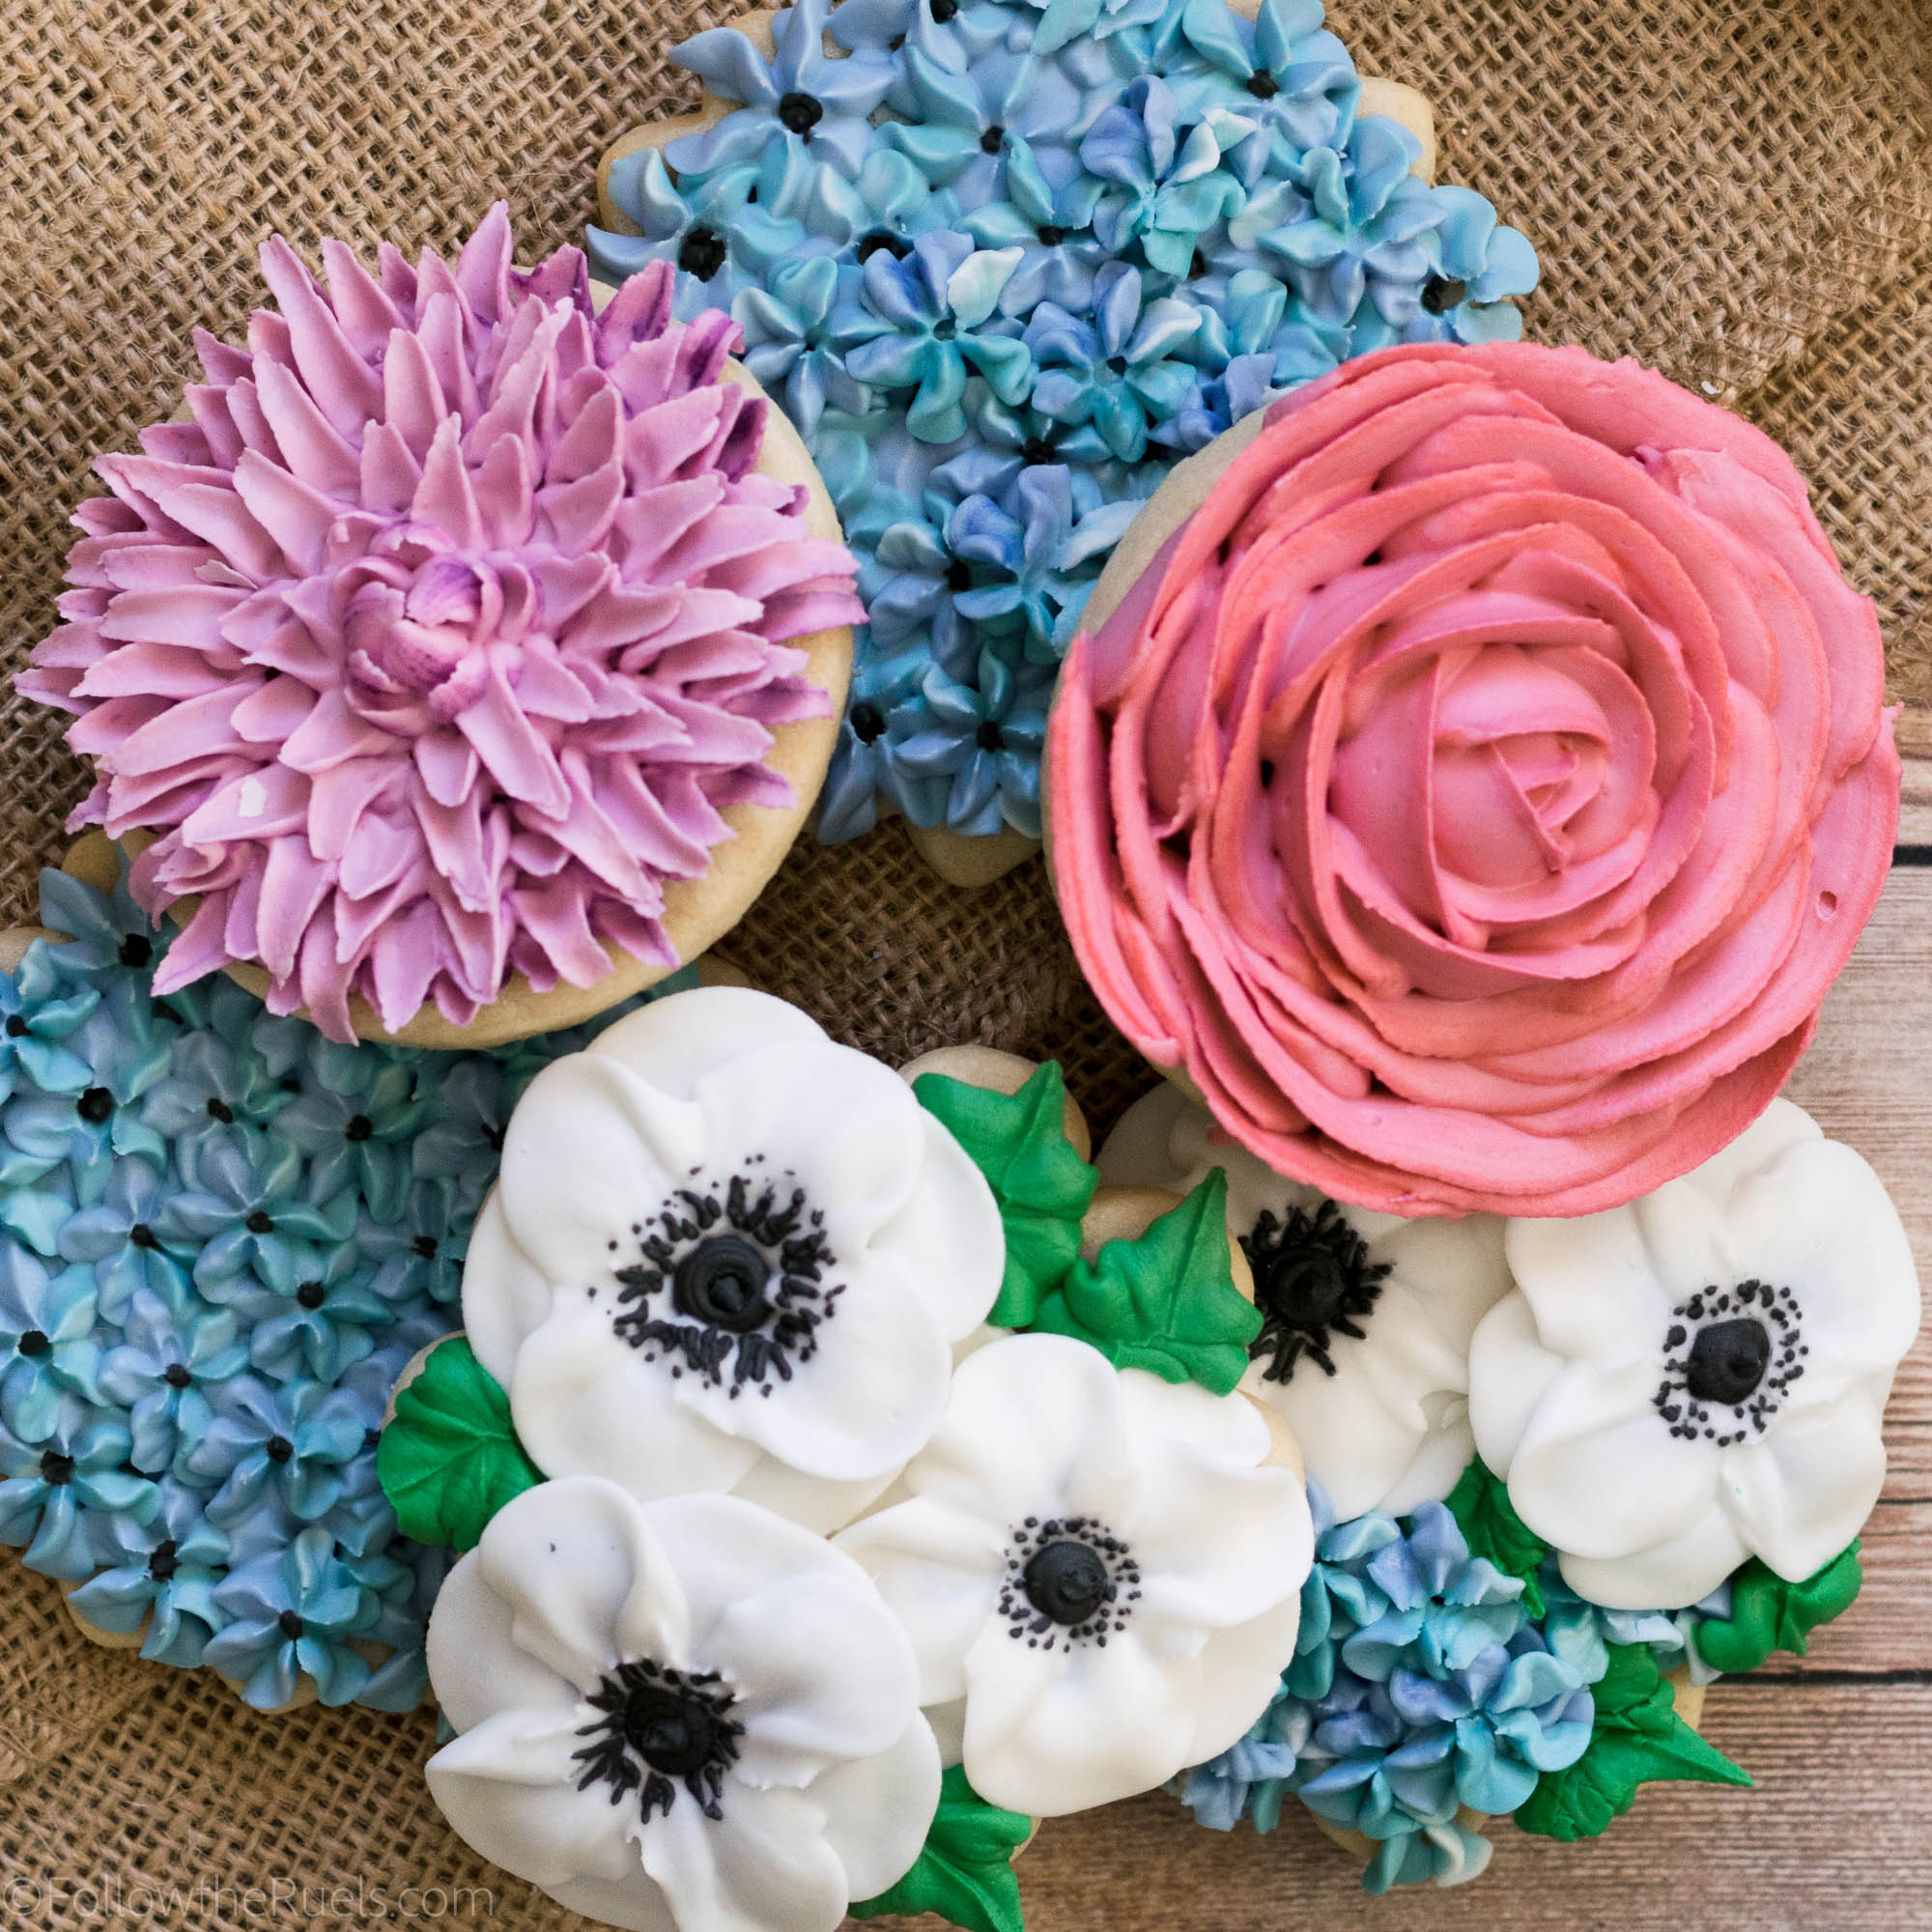
I had never made the anemone flowers before this video. Sure, I have some experience with piping other flowers, but I wanted to share that with you because you will probably get the hang of it after a few tries. I found that it was easier to keep them on the smaller side. Don’t try to make them too big. 

Another thing I have learned over the years from making flowers and watching others make flowers is that you want to use various shades of color in the same flower. No flower is just one flat color. It’s easy to mix the colors together by wrapping them up in plastic wrap. Plus, it keeps your piping bags clean so you can reuse them!

Tools and Recipes

I used a few different piping tips to create these flowers, even one I had never used before, the #150 flat petal tip. I found that this one was better at piping the anemone petals than the standard #104 petal tip. However, if you only have the standard petal tips at home, that will work just fine!

Piping Tips and Food Coloring:

Anemone:

Petals – #150 flat petal tip. Layered plain icing with a very light violet center.

Filament – #1 round tip. A mix of eggplant and black food coloring.

Center – #3 round tip. Same color as filament.

Hydrangea:

Flowers – #131 drop flower dip. Layered together plain, Wedgewood blue, and violet (mixed with a little Wedgewood blue) icings.

Rose:

Large cookie – #125 petal tip. Brushed watermelon food coloring directly onto the plastic wrap, and then spooned icing dyed with watermelon and purple on top.

Smaller rose in bouquet – #104 petal tip. Brushed watermelon food coloring directly onto the plastic wrap, and then spooned icing dyed with watermelon on top.

Leaves: #352 tip. Forest and leaf green mixed together.

Other tools:

[show_shopthepost_widget id=”3099734″] 

Recipes:

It should come as no surprise that I made my one and only royal icing recipe and sugar cookie recipe for these. Duh! You knew that was coming. However, one thing I will mention about the icing is that for the flowers you want it to be super duper thick. It should form a stiff peak when you lift a spoon up from the surface. You want each petal to be distinct and not melt into one another. If you accidentally mix in too much water, just add a bit more powdered sugar to thicken it up.

For the mason jars, though, you will want to use your regular ol’ flood consistency icing. 

/ Filed In: Cookies New, Decorated Cookies, Desserts, Eat
Tagged: anemone, cookies, decorated cookies, flowers, hydrangea, icing flowers, mason jar, roses, Spring

Floral and Moss Easter Bunny Cookies

March 26, 2018

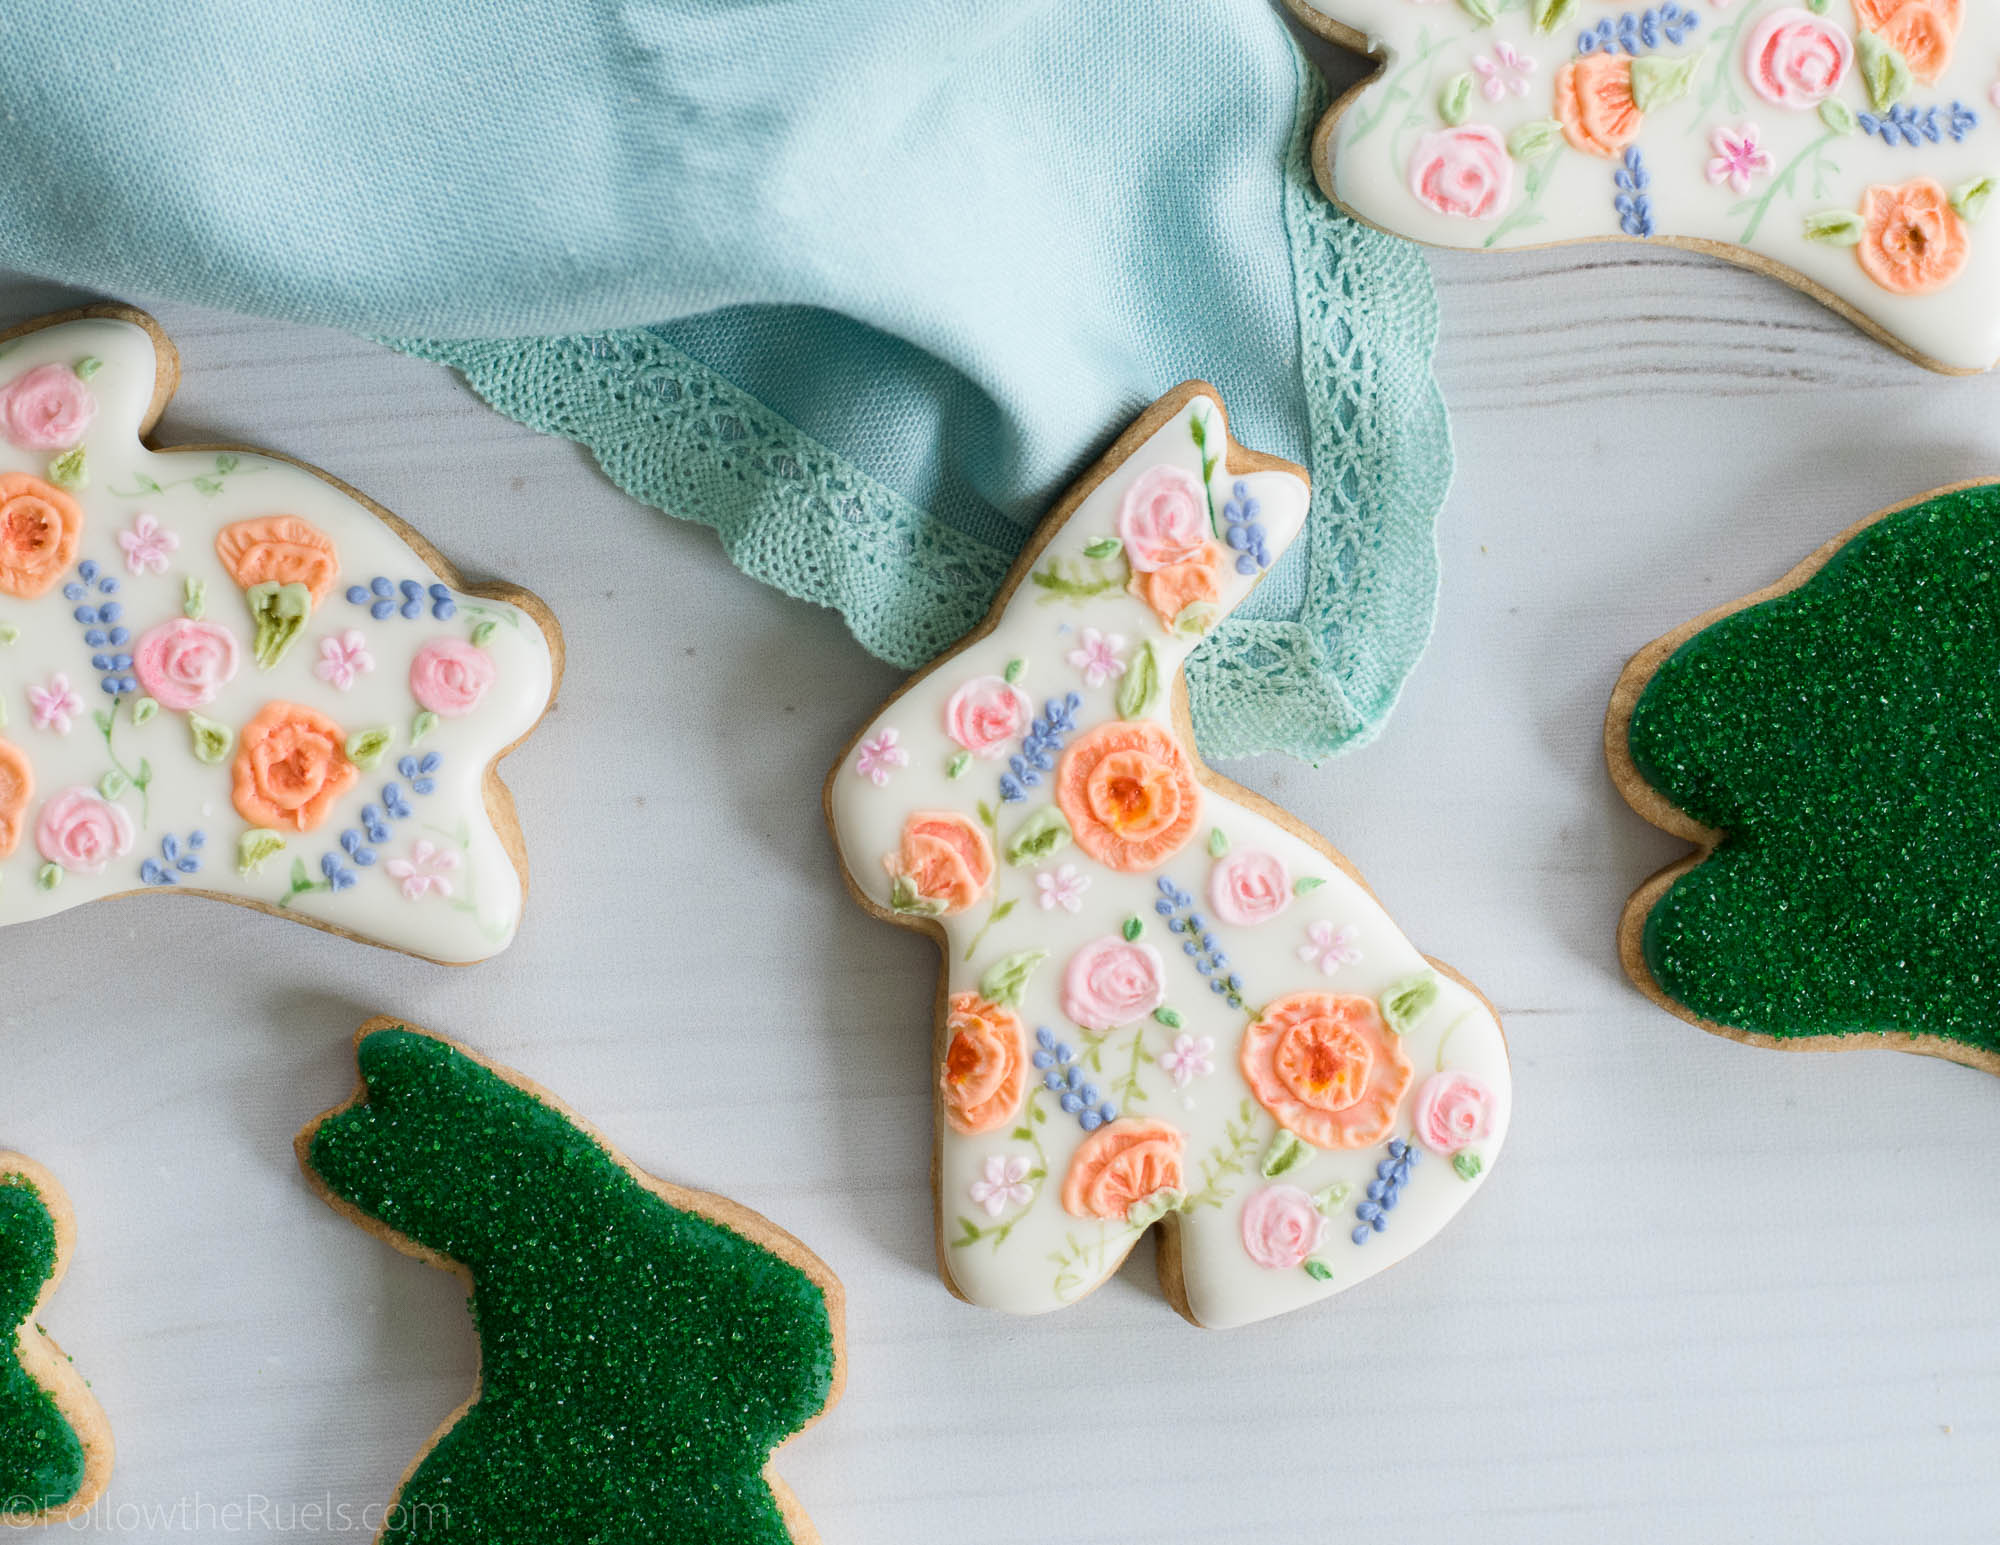
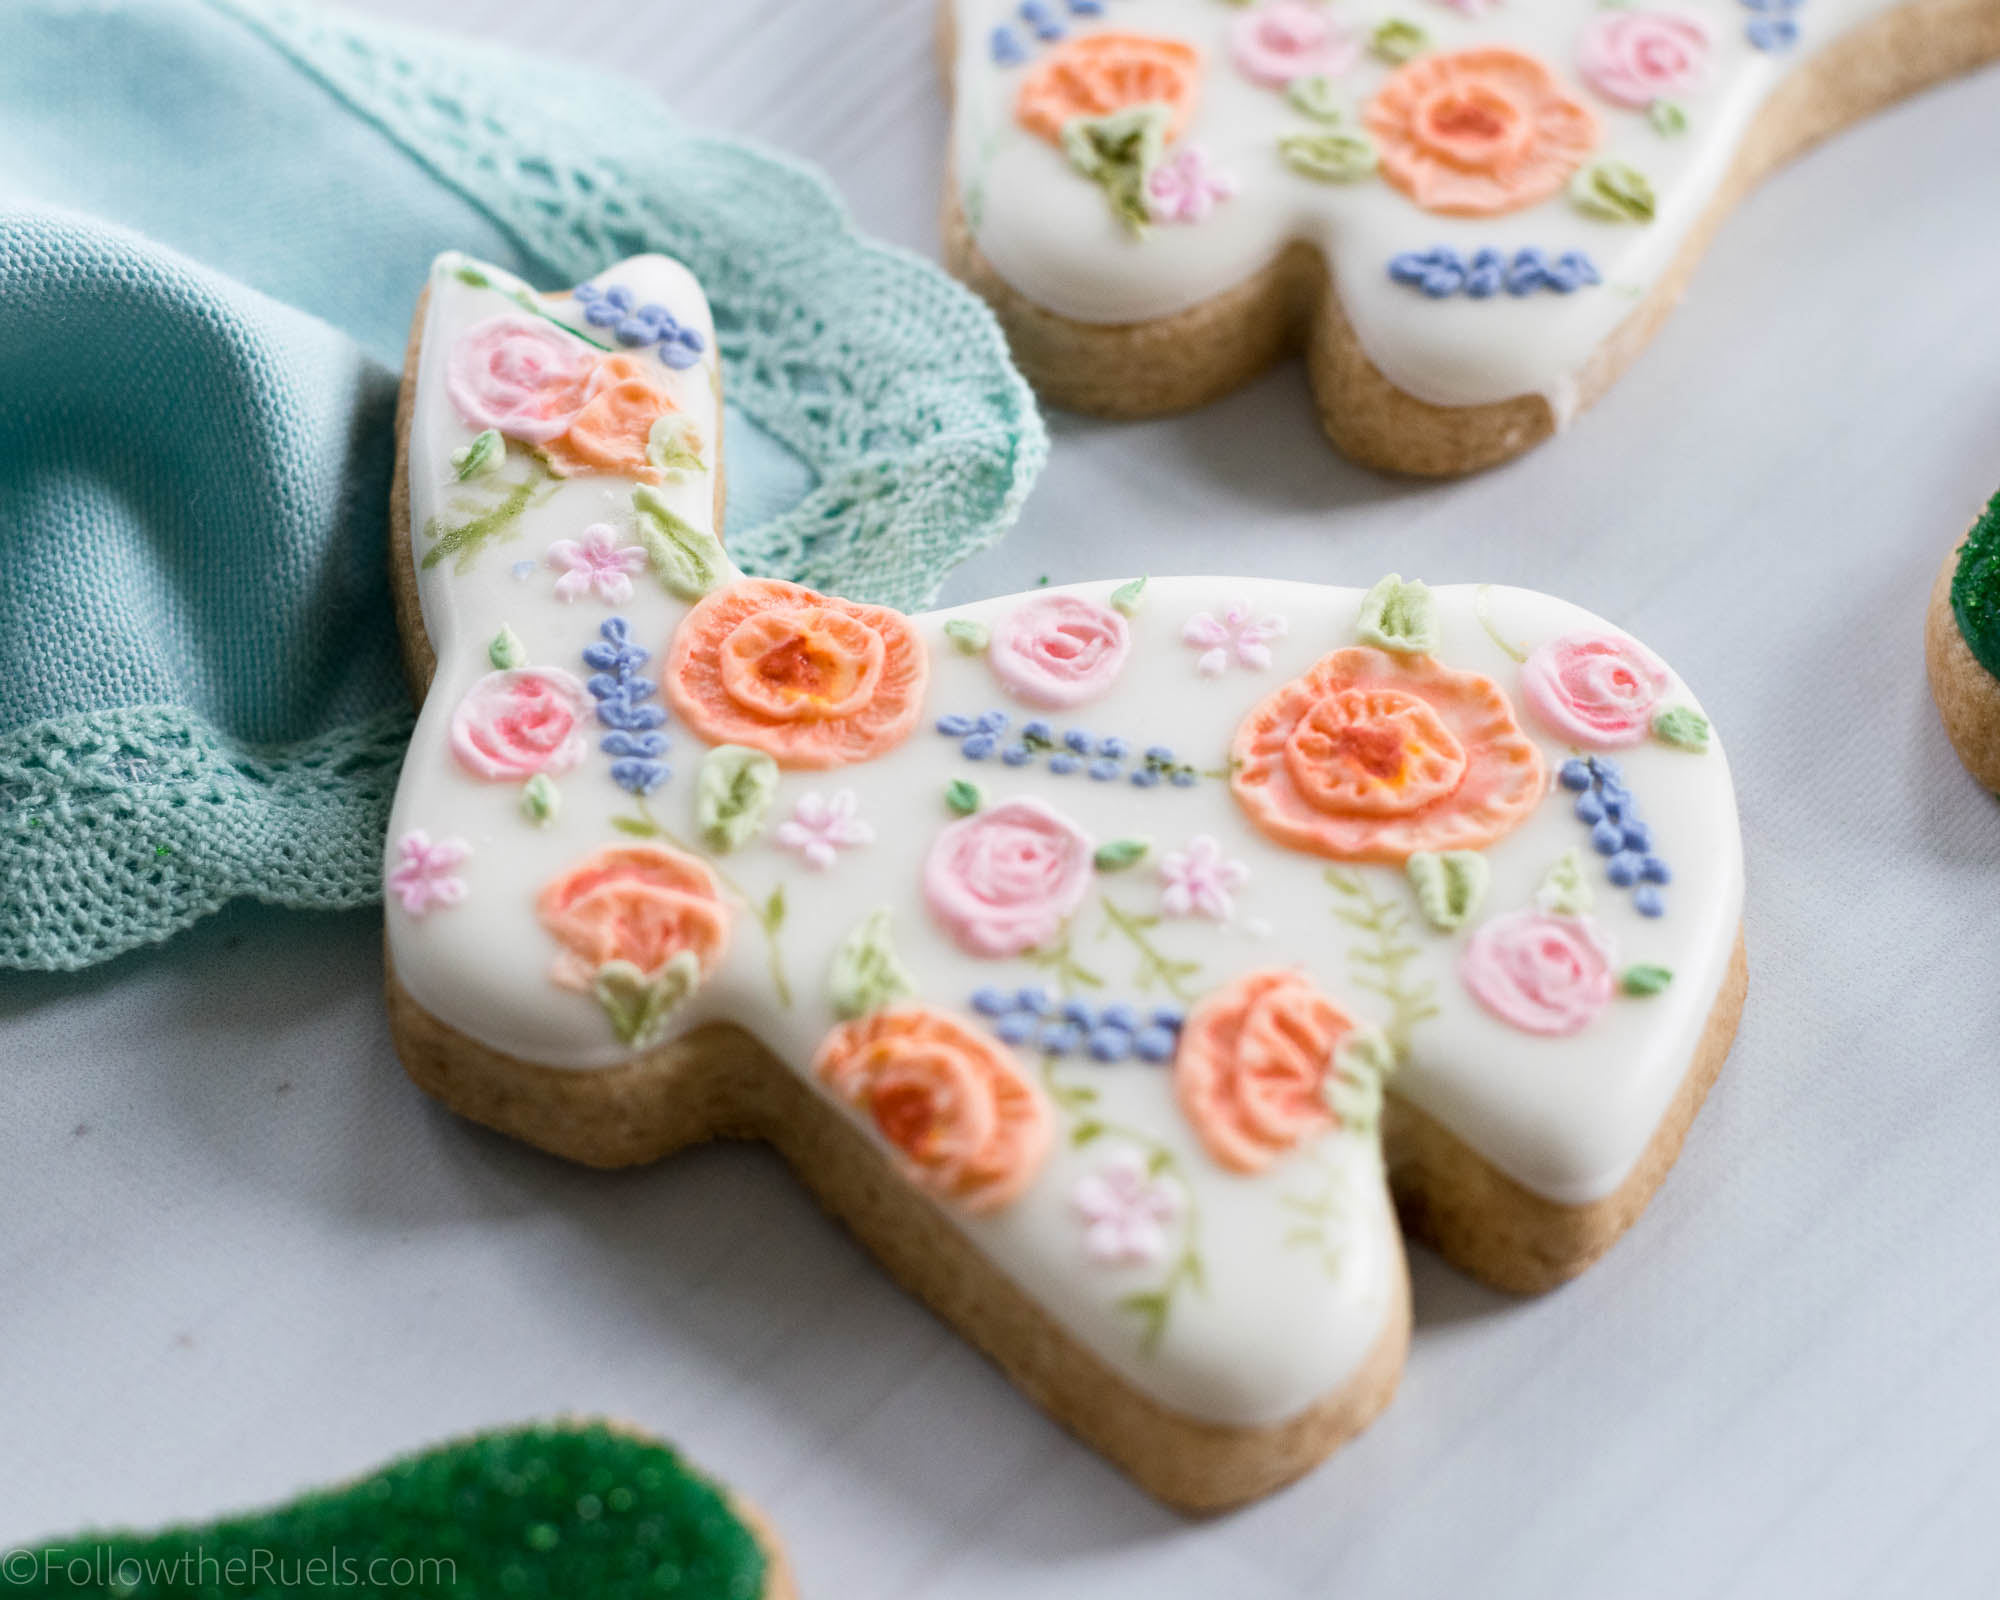
If you know anything about me, you probably know that I love a good floral cookie. It’s kind of my go-to (because it’s actually easier than it looks). Whichever way I can put a flower on a cookie, I have tried. Well, I thought I tried, until now. 

Meet the new floral decorating technique….

Actually, I have no idea what to call it, any ideas? 

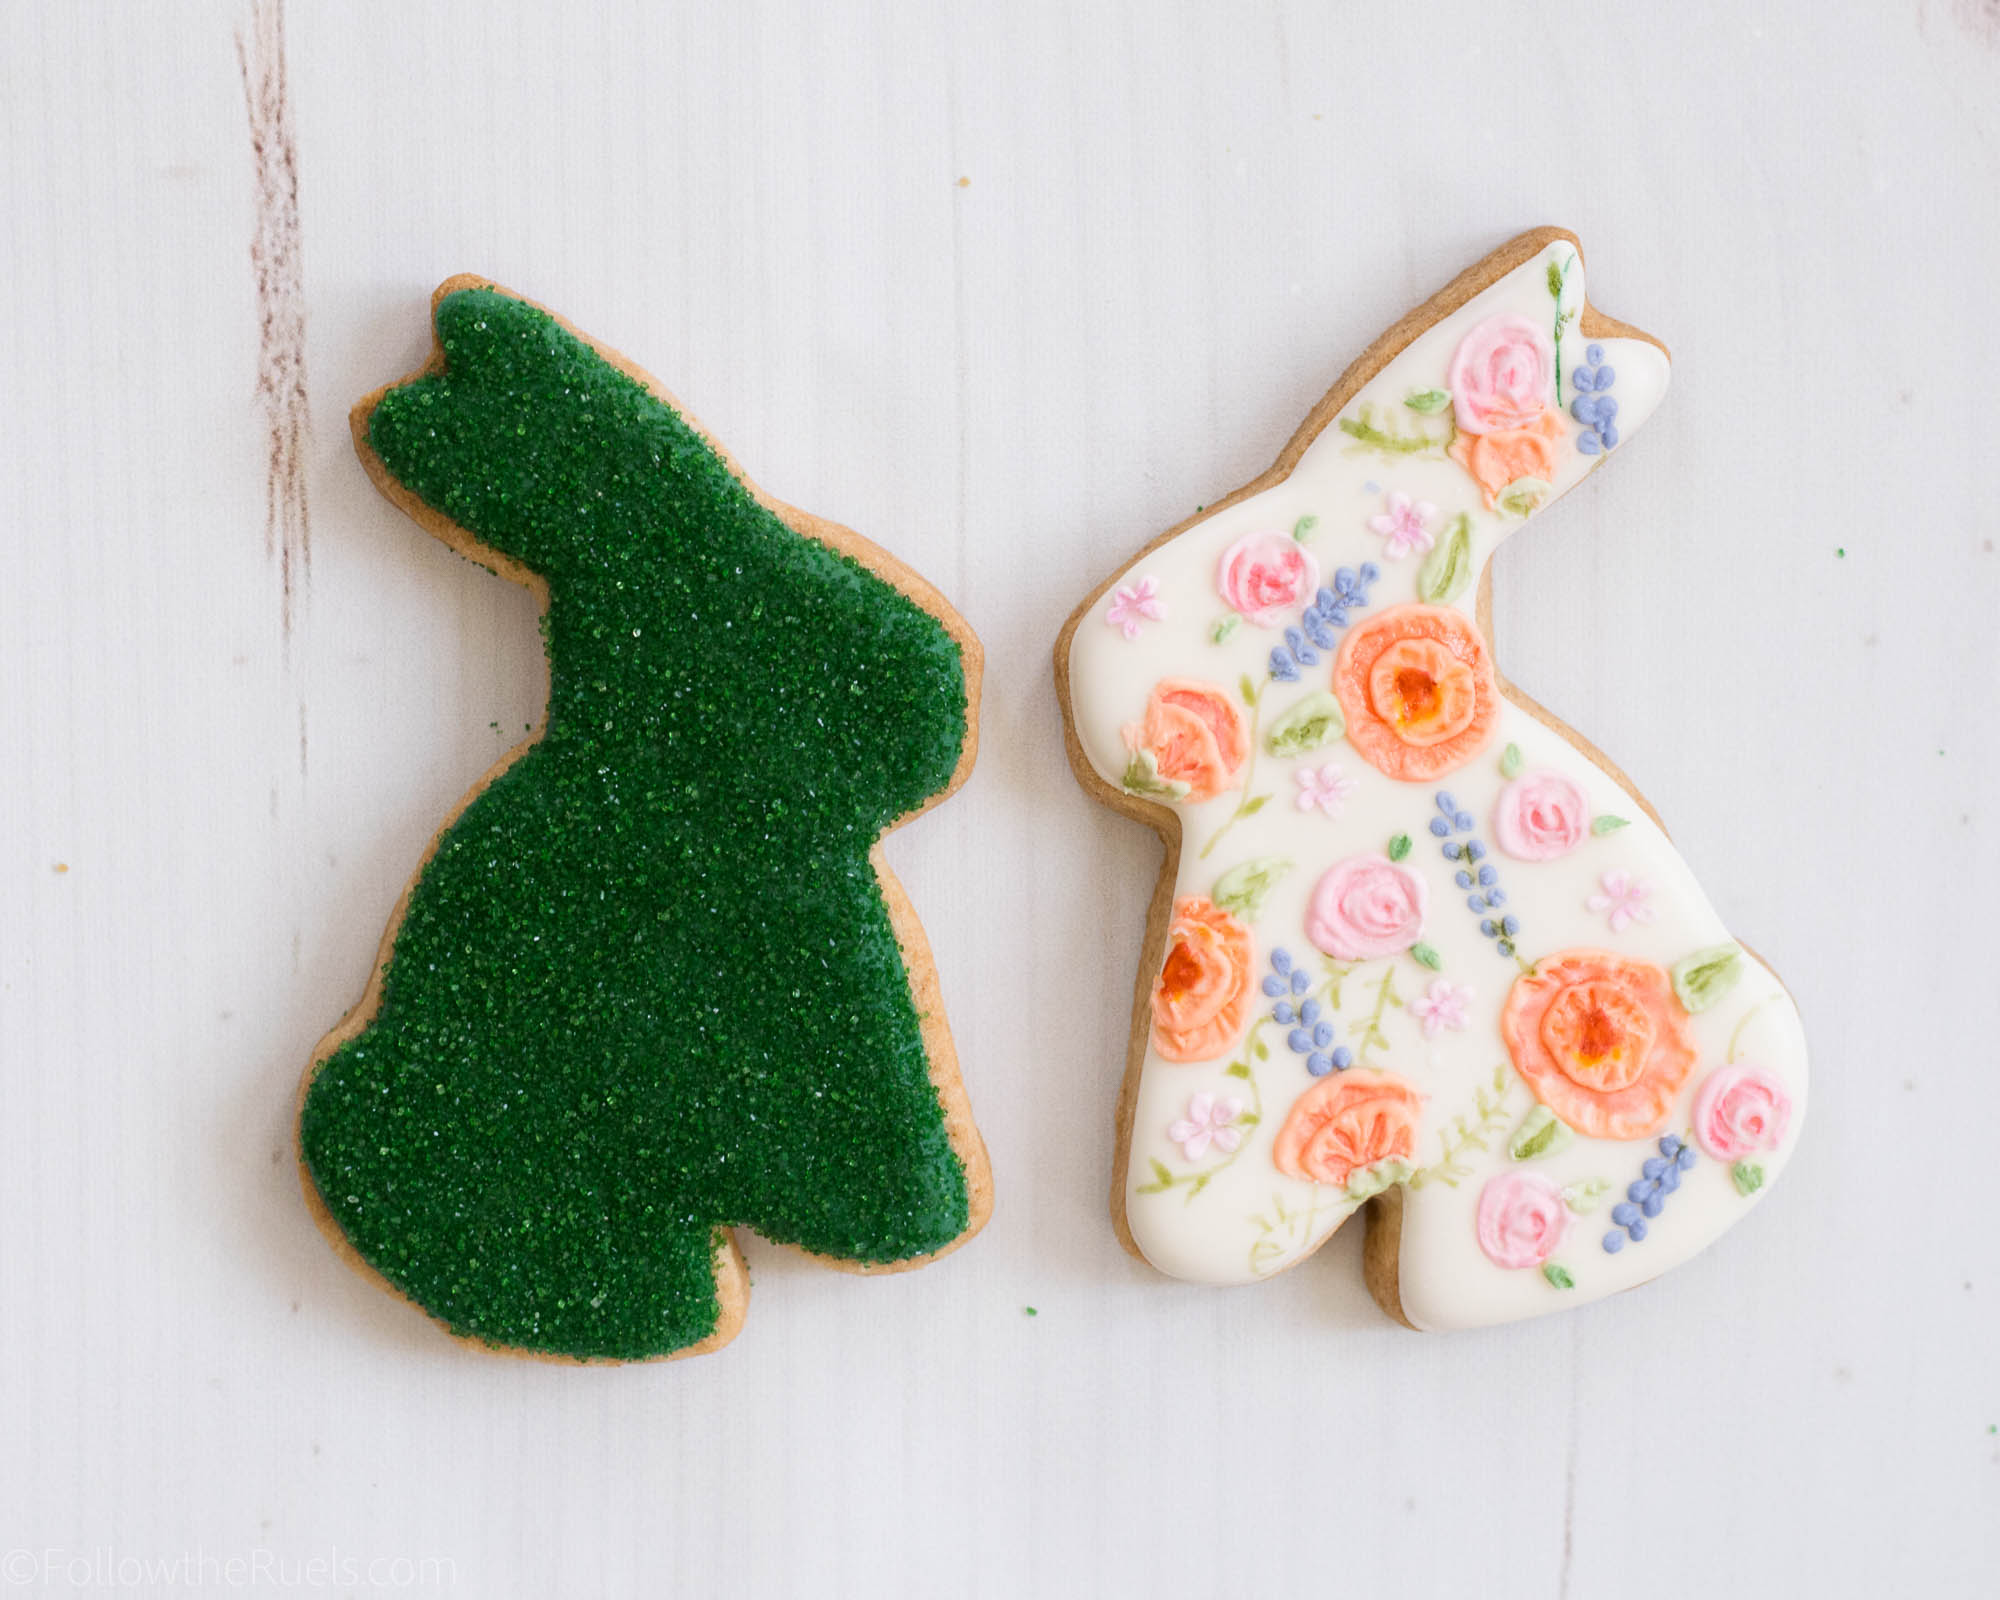
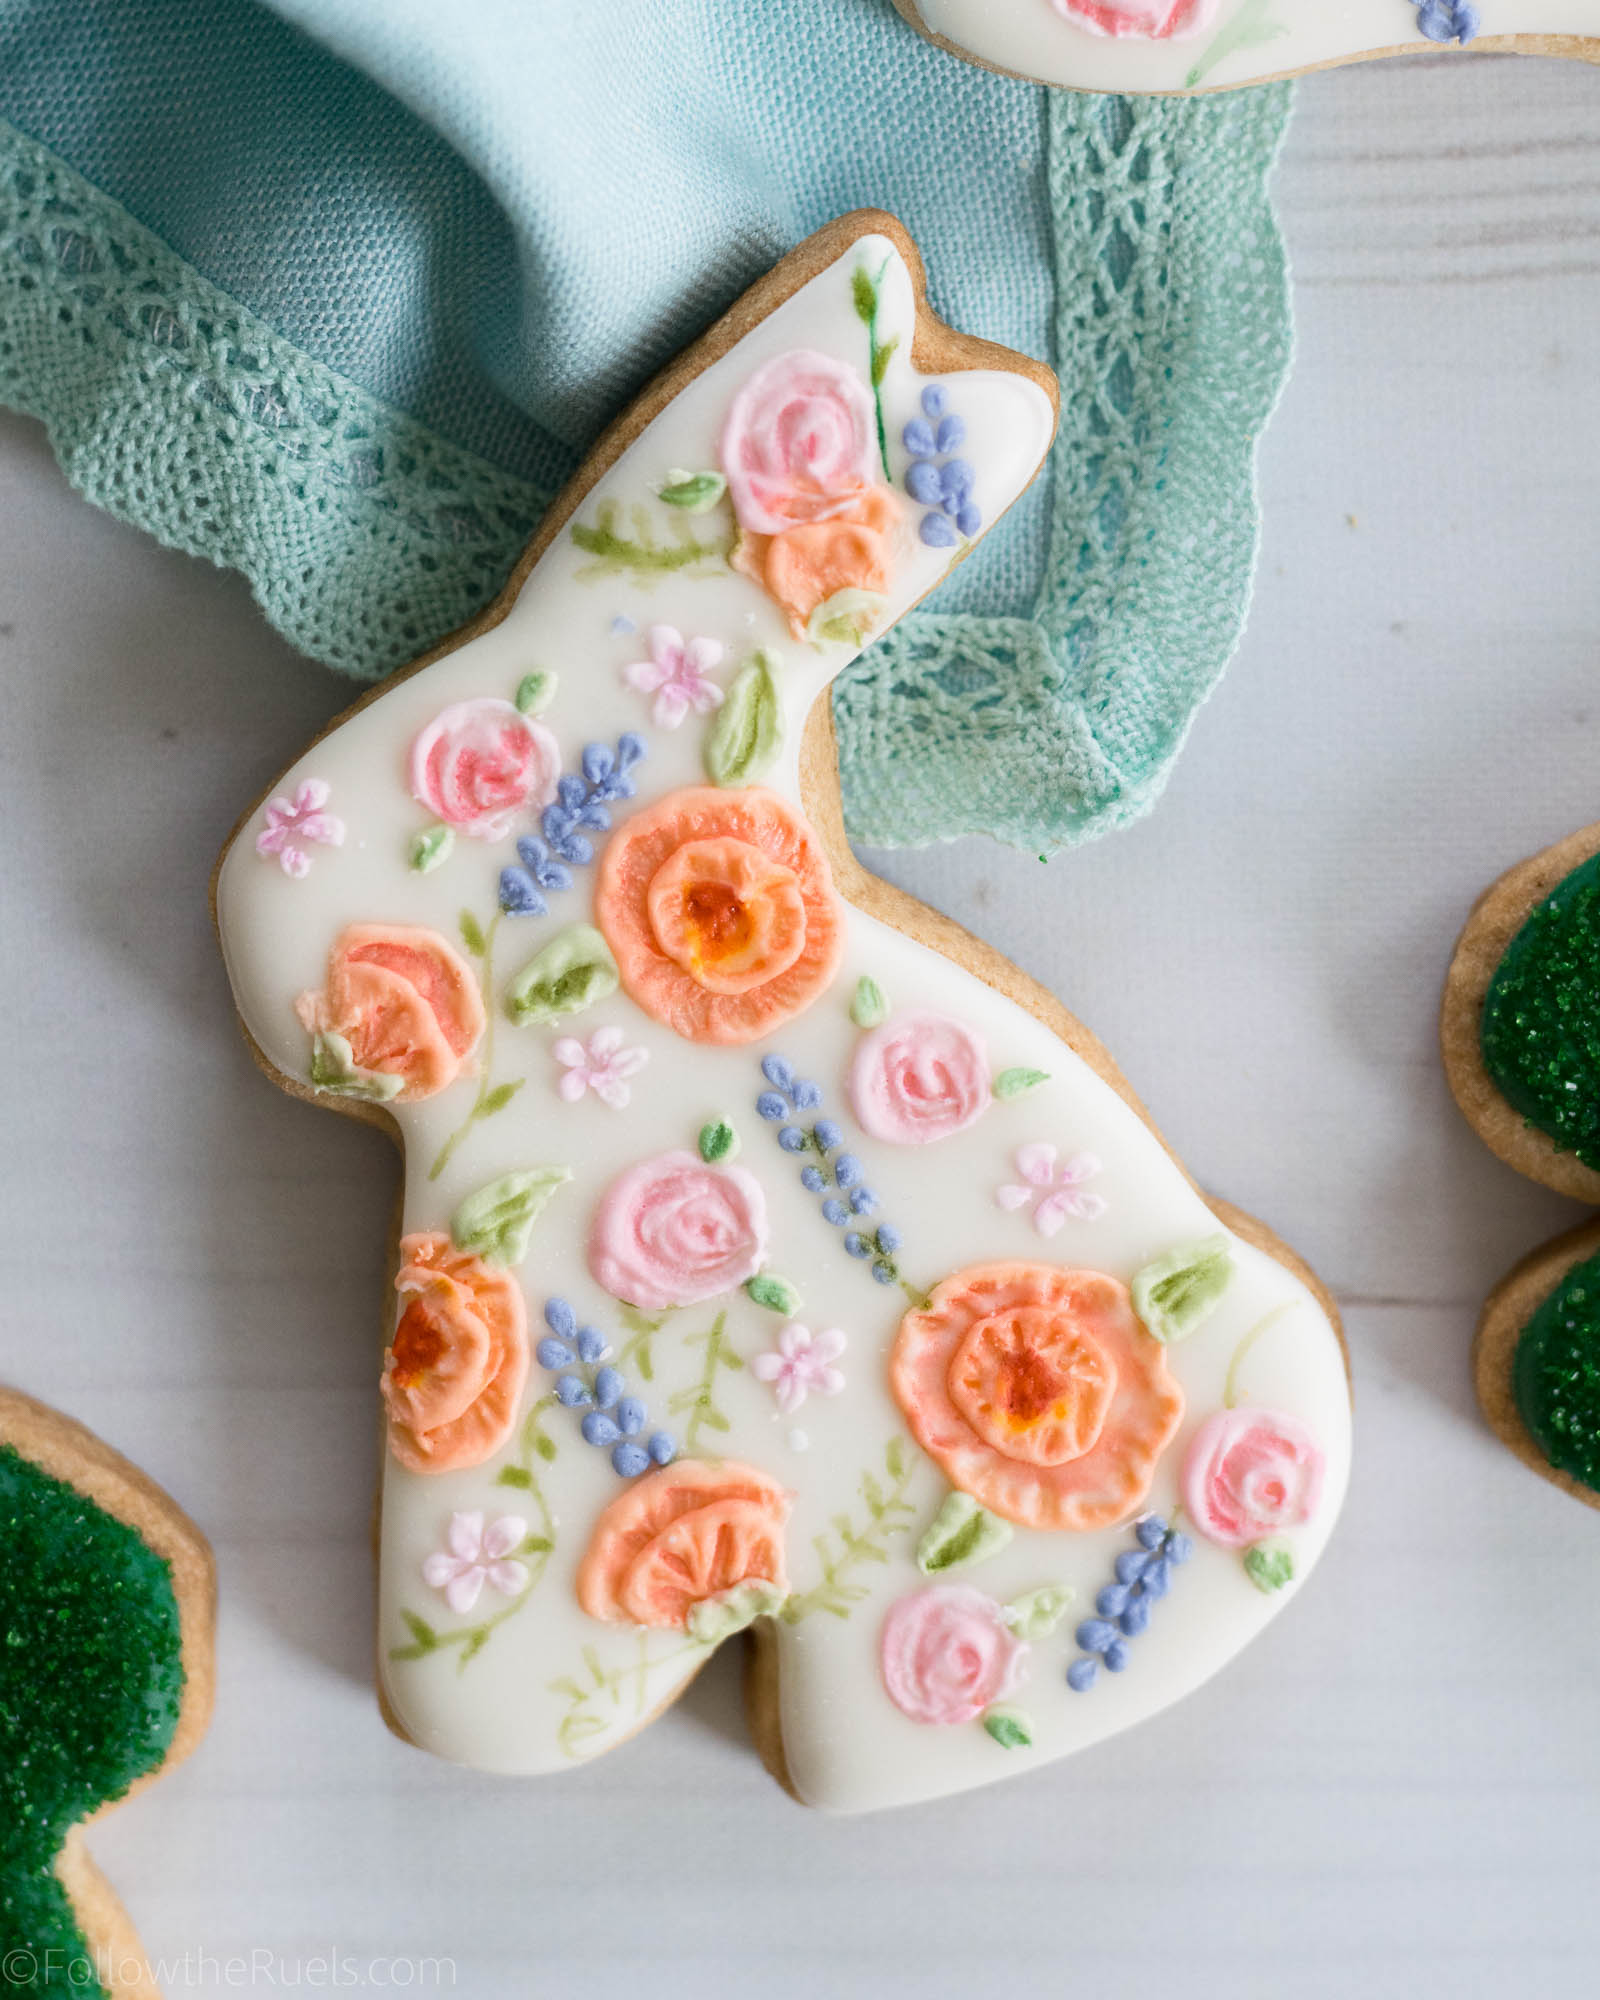
Some people will call this technique brush embroidery. And I suppose that’s probably how I should classify it. But I think of this technique more as painting with icing (as opposed to my usual watercolor mix). Whatever we call it, I certainly think they are pretty, don’t you?

Oh, and you can’t forget about the little moss covered bunnies. Now those are easy! And just as cute, don’t you think?

How to Make Them

What I love about these floral Easter bunny cookies is that they have dimension. That is something that you just can’t get with painting! 

My husband’s favorite is the moss Easter bunny cookie. Even though it’s simple, it still is adorable, and I think it goes perfectly with the floral design as sort of a little garden Easter bunny cookie set.

Why I love the moss Easter bunny so much is because it’s easy! While I love making the floral pattern, it is time-consuming, so it’s nice to have some simple cookies to balance them out. 

But this little guy still has my heart!

Recipes and Products Used

As usual, these sugar cookies are my favorite sugar cookies which means they are just flavored with vanilla and almond extract. But I think Easter is the perfect time to break out some other cookie flavors! Even just adding some different extracts like lemon, lavender, pistachio, or coconut. Or, you can flavor them with some of your favorite berries, like strawberry or raspberry. Just check out my Summer cookie collection. 

For the royal icing, I added a touch of almond extract, which is something I rarely do. But I really liked it. Another go-to in the Spring and Summer is adding some lemon juice or lemon extract. It really makes the flavors pop!

[show_shopthepost_widget id=”3077493″] 

/ Filed In: Cookies New, Decorated Cookies, Desserts, Eat
Tagged: bunny, cookies, Easter, Easter Bunnies, floral, flowers, Spring, sprinkles. sugar, sugar cookies

Holiday Wreath Cookies using Piping Tips

December 12, 2017

It may not surprise you to find you that I have been doing lots of holiday baking since Black Friday. Honestly, I wish I could be doing more. I had so many fun decorated cookies in mind for the holidays, but I don’t have time to do them all. 

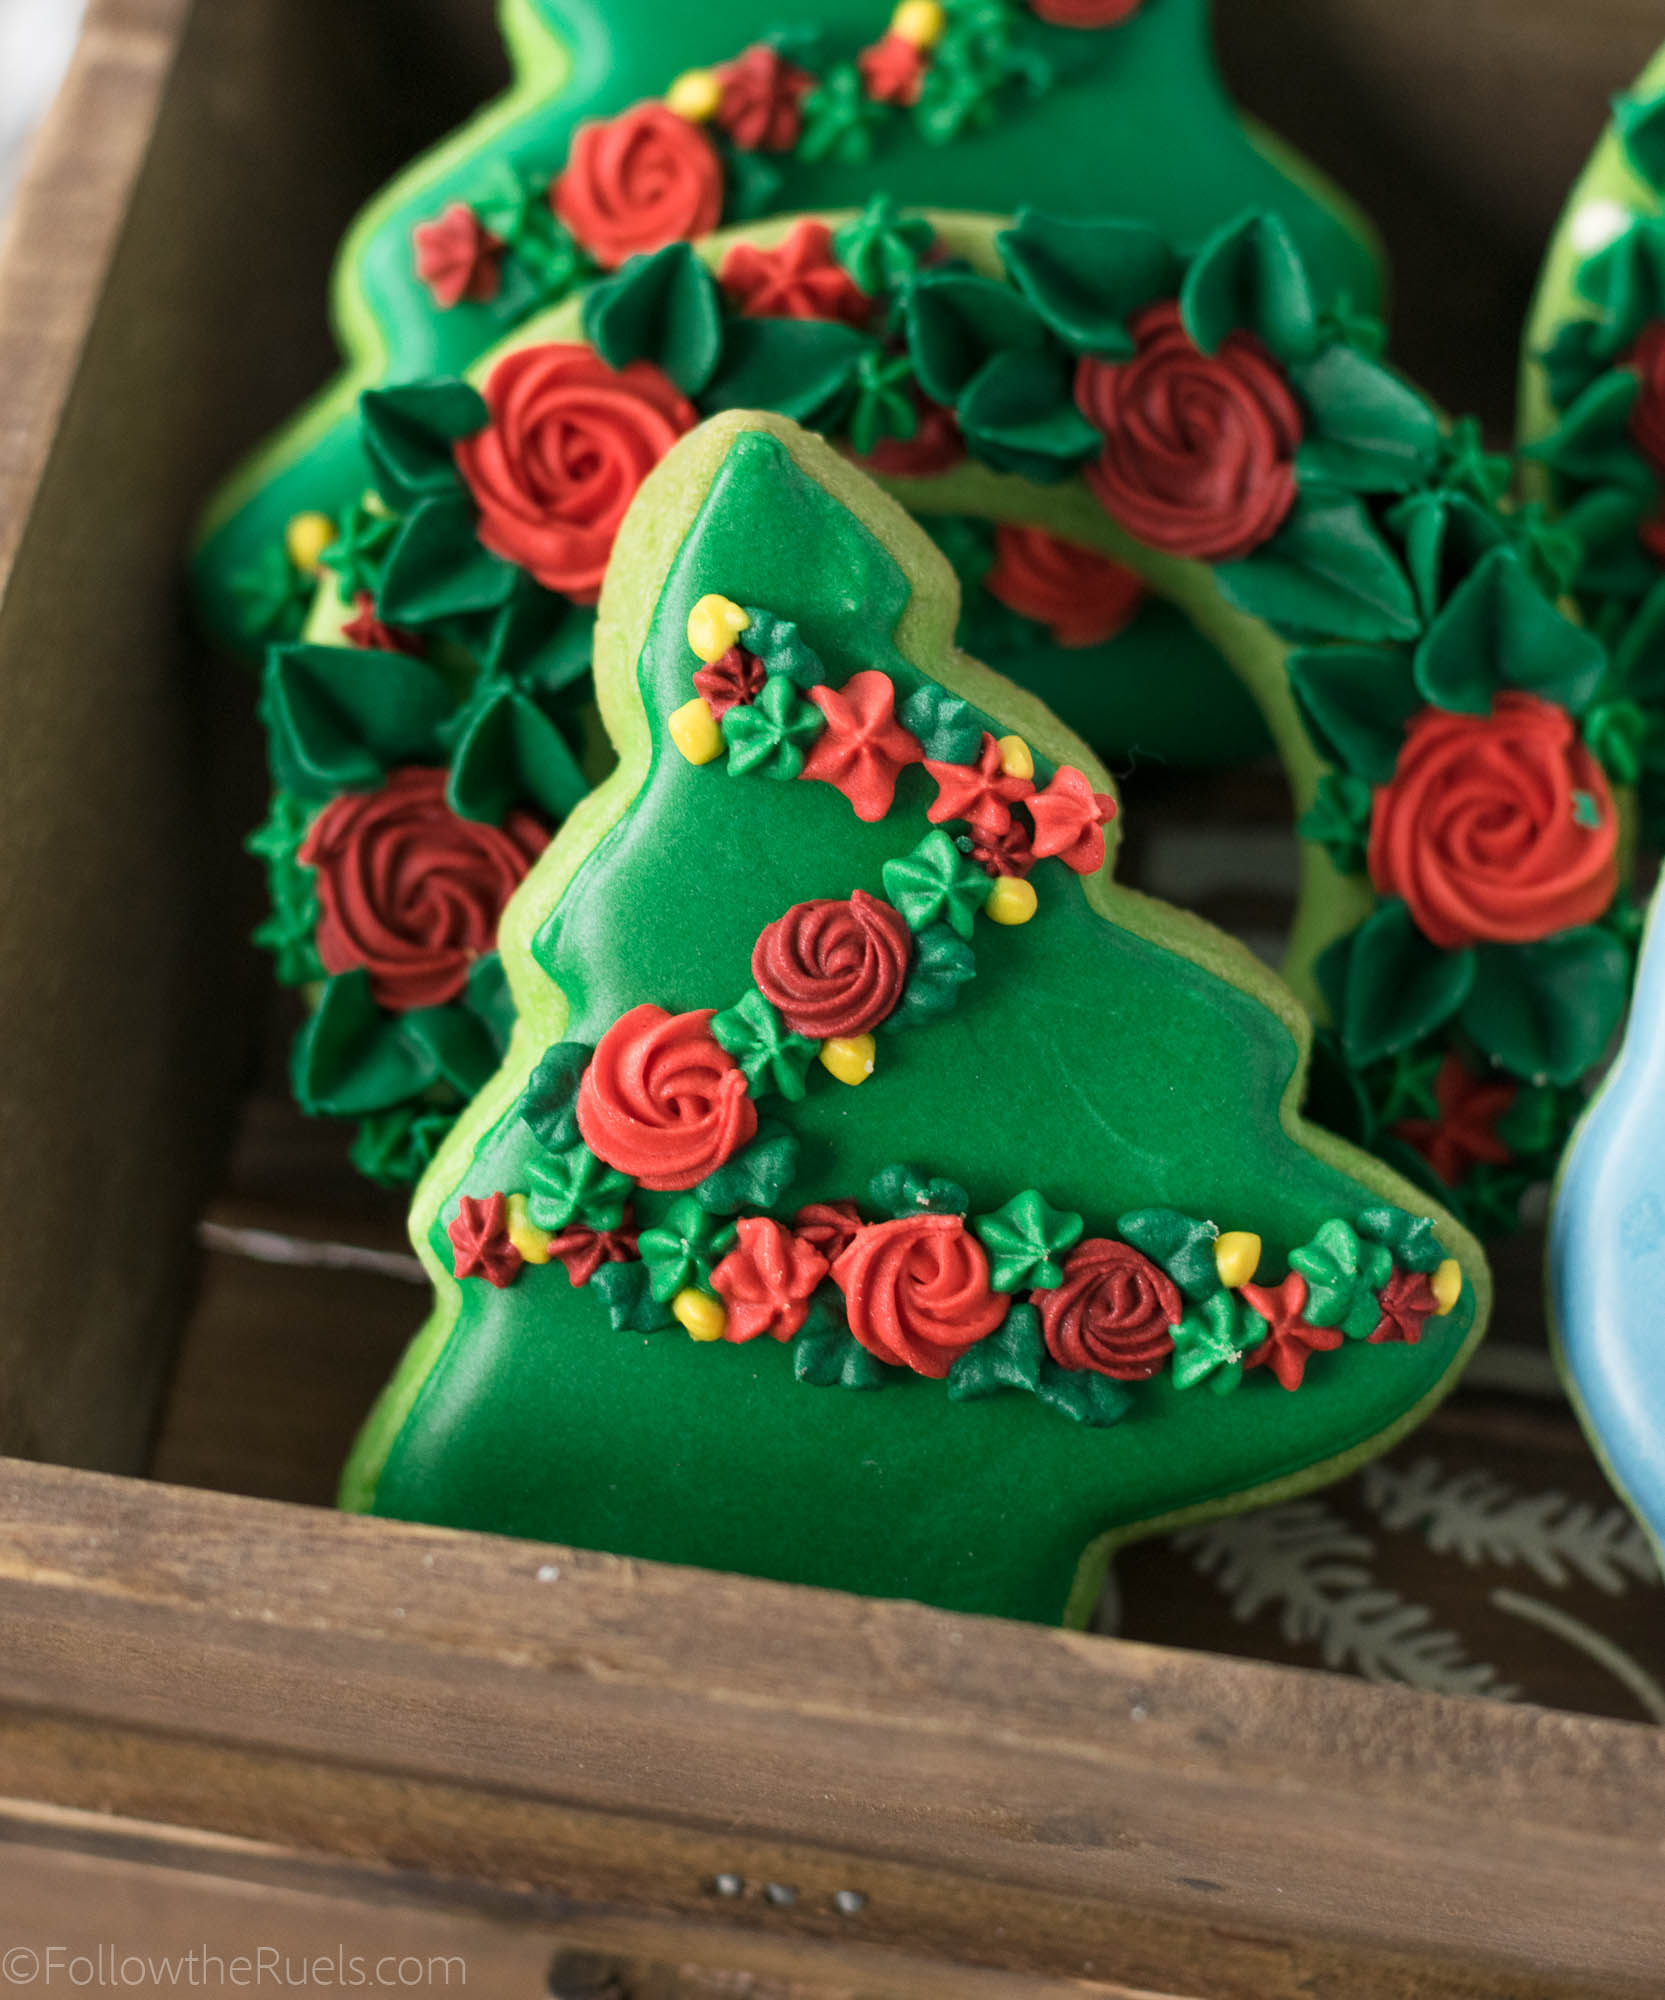
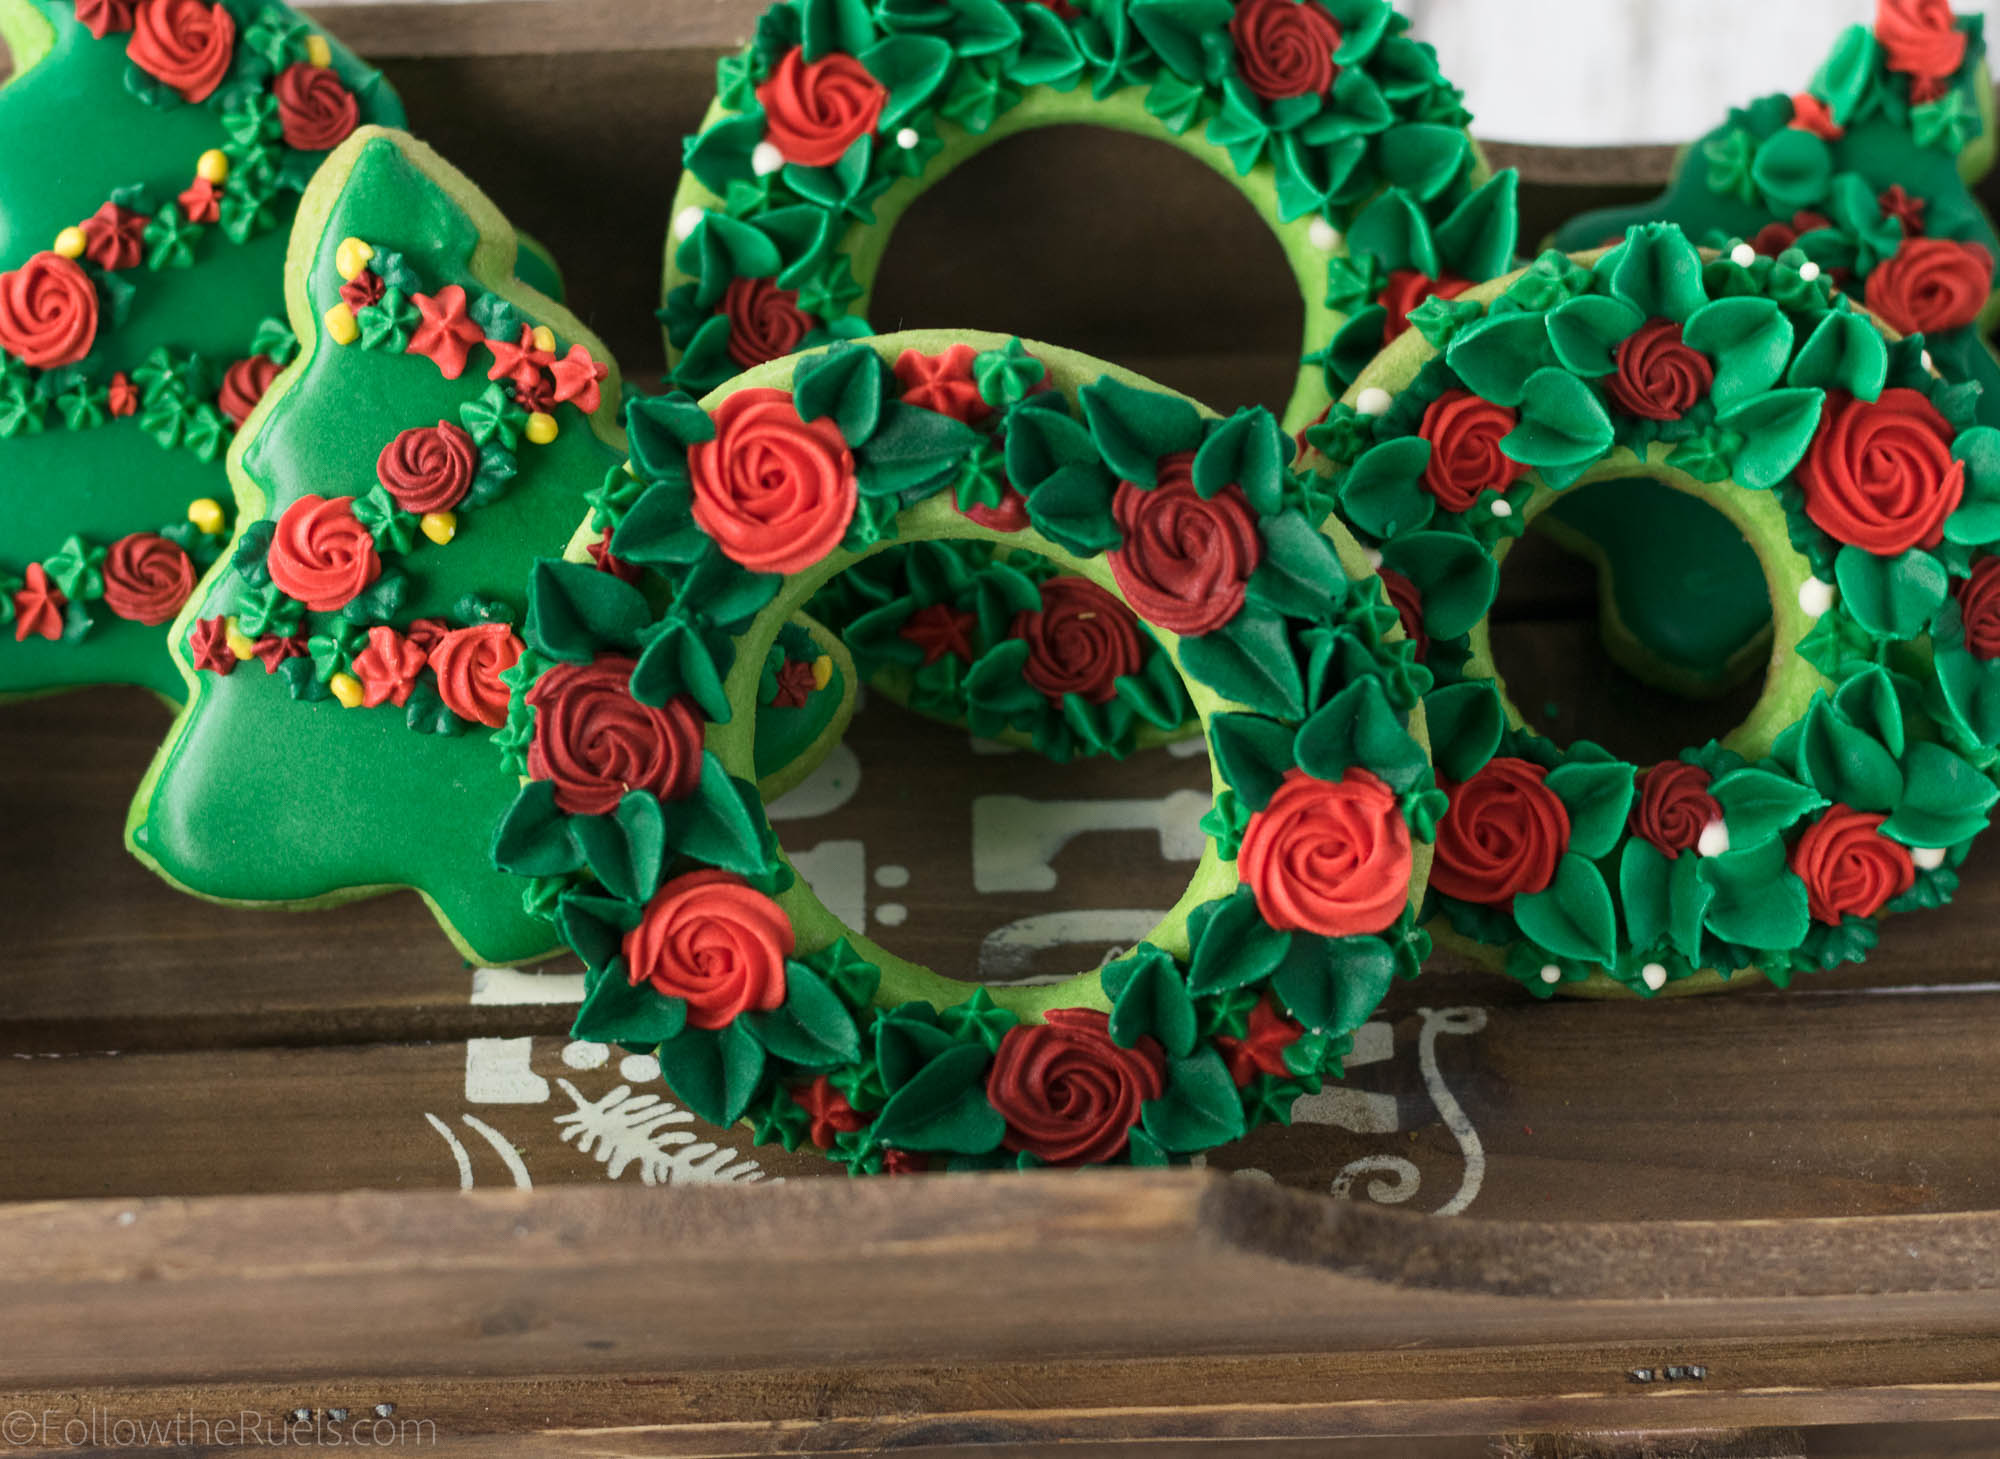
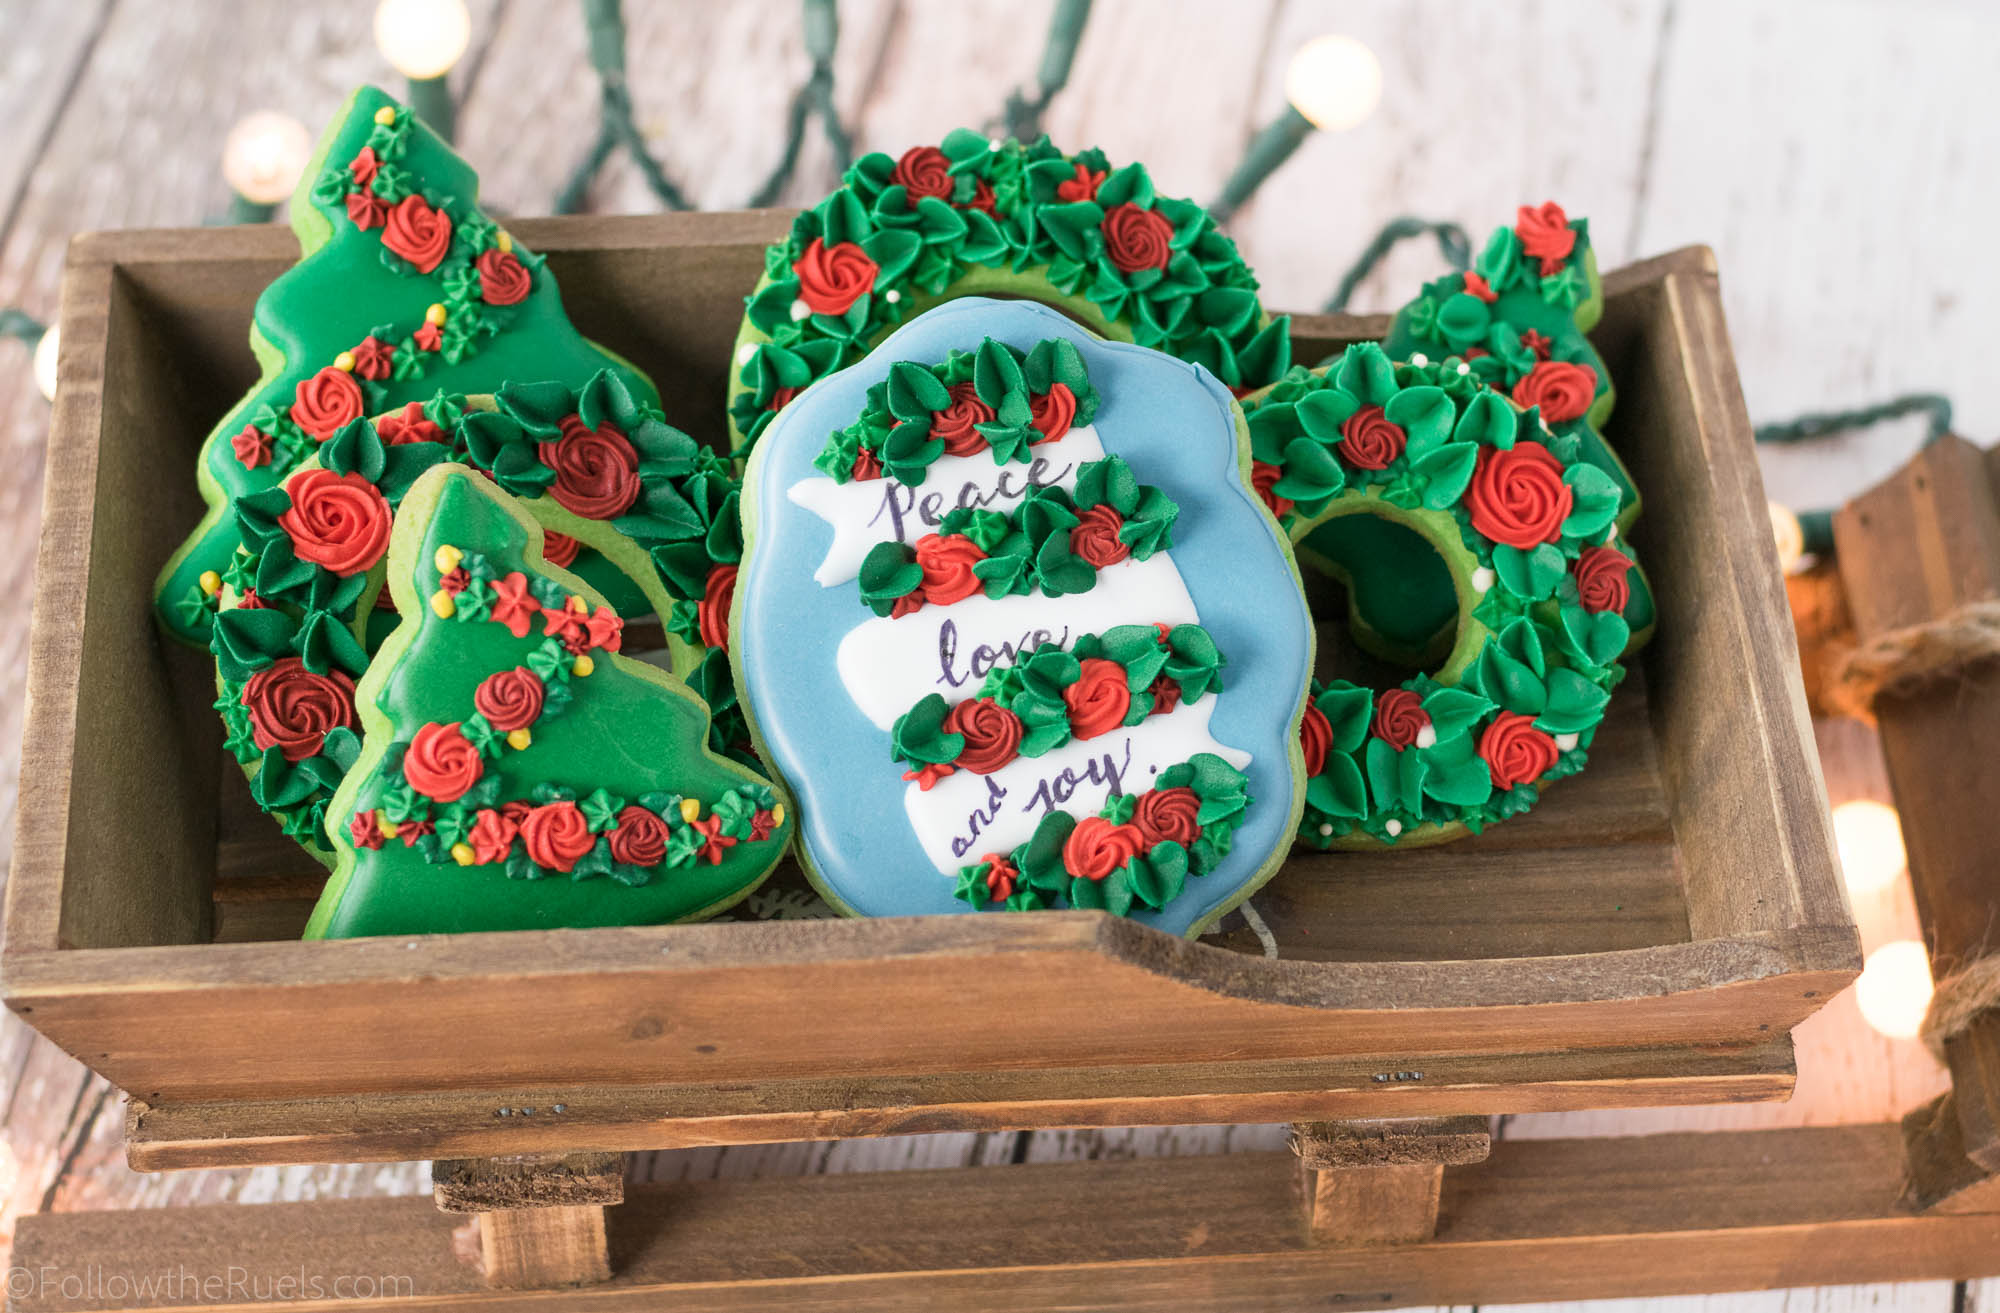
Despite that, I did find time to make some holiday wreath cookies using my favorite piped flower techniques. Really, they are no different than these floral letters I made for Fall or for Mother’s Day. I love making cookies like this using piping tips because they look very elegant and detailed, but you and I know that they are actually pretty easy!

I used the same techniques to add a flower garland to a Christmas tree and to add flowers around a royal icing banner. Piping tips are so versatile and make the cookies look professional.

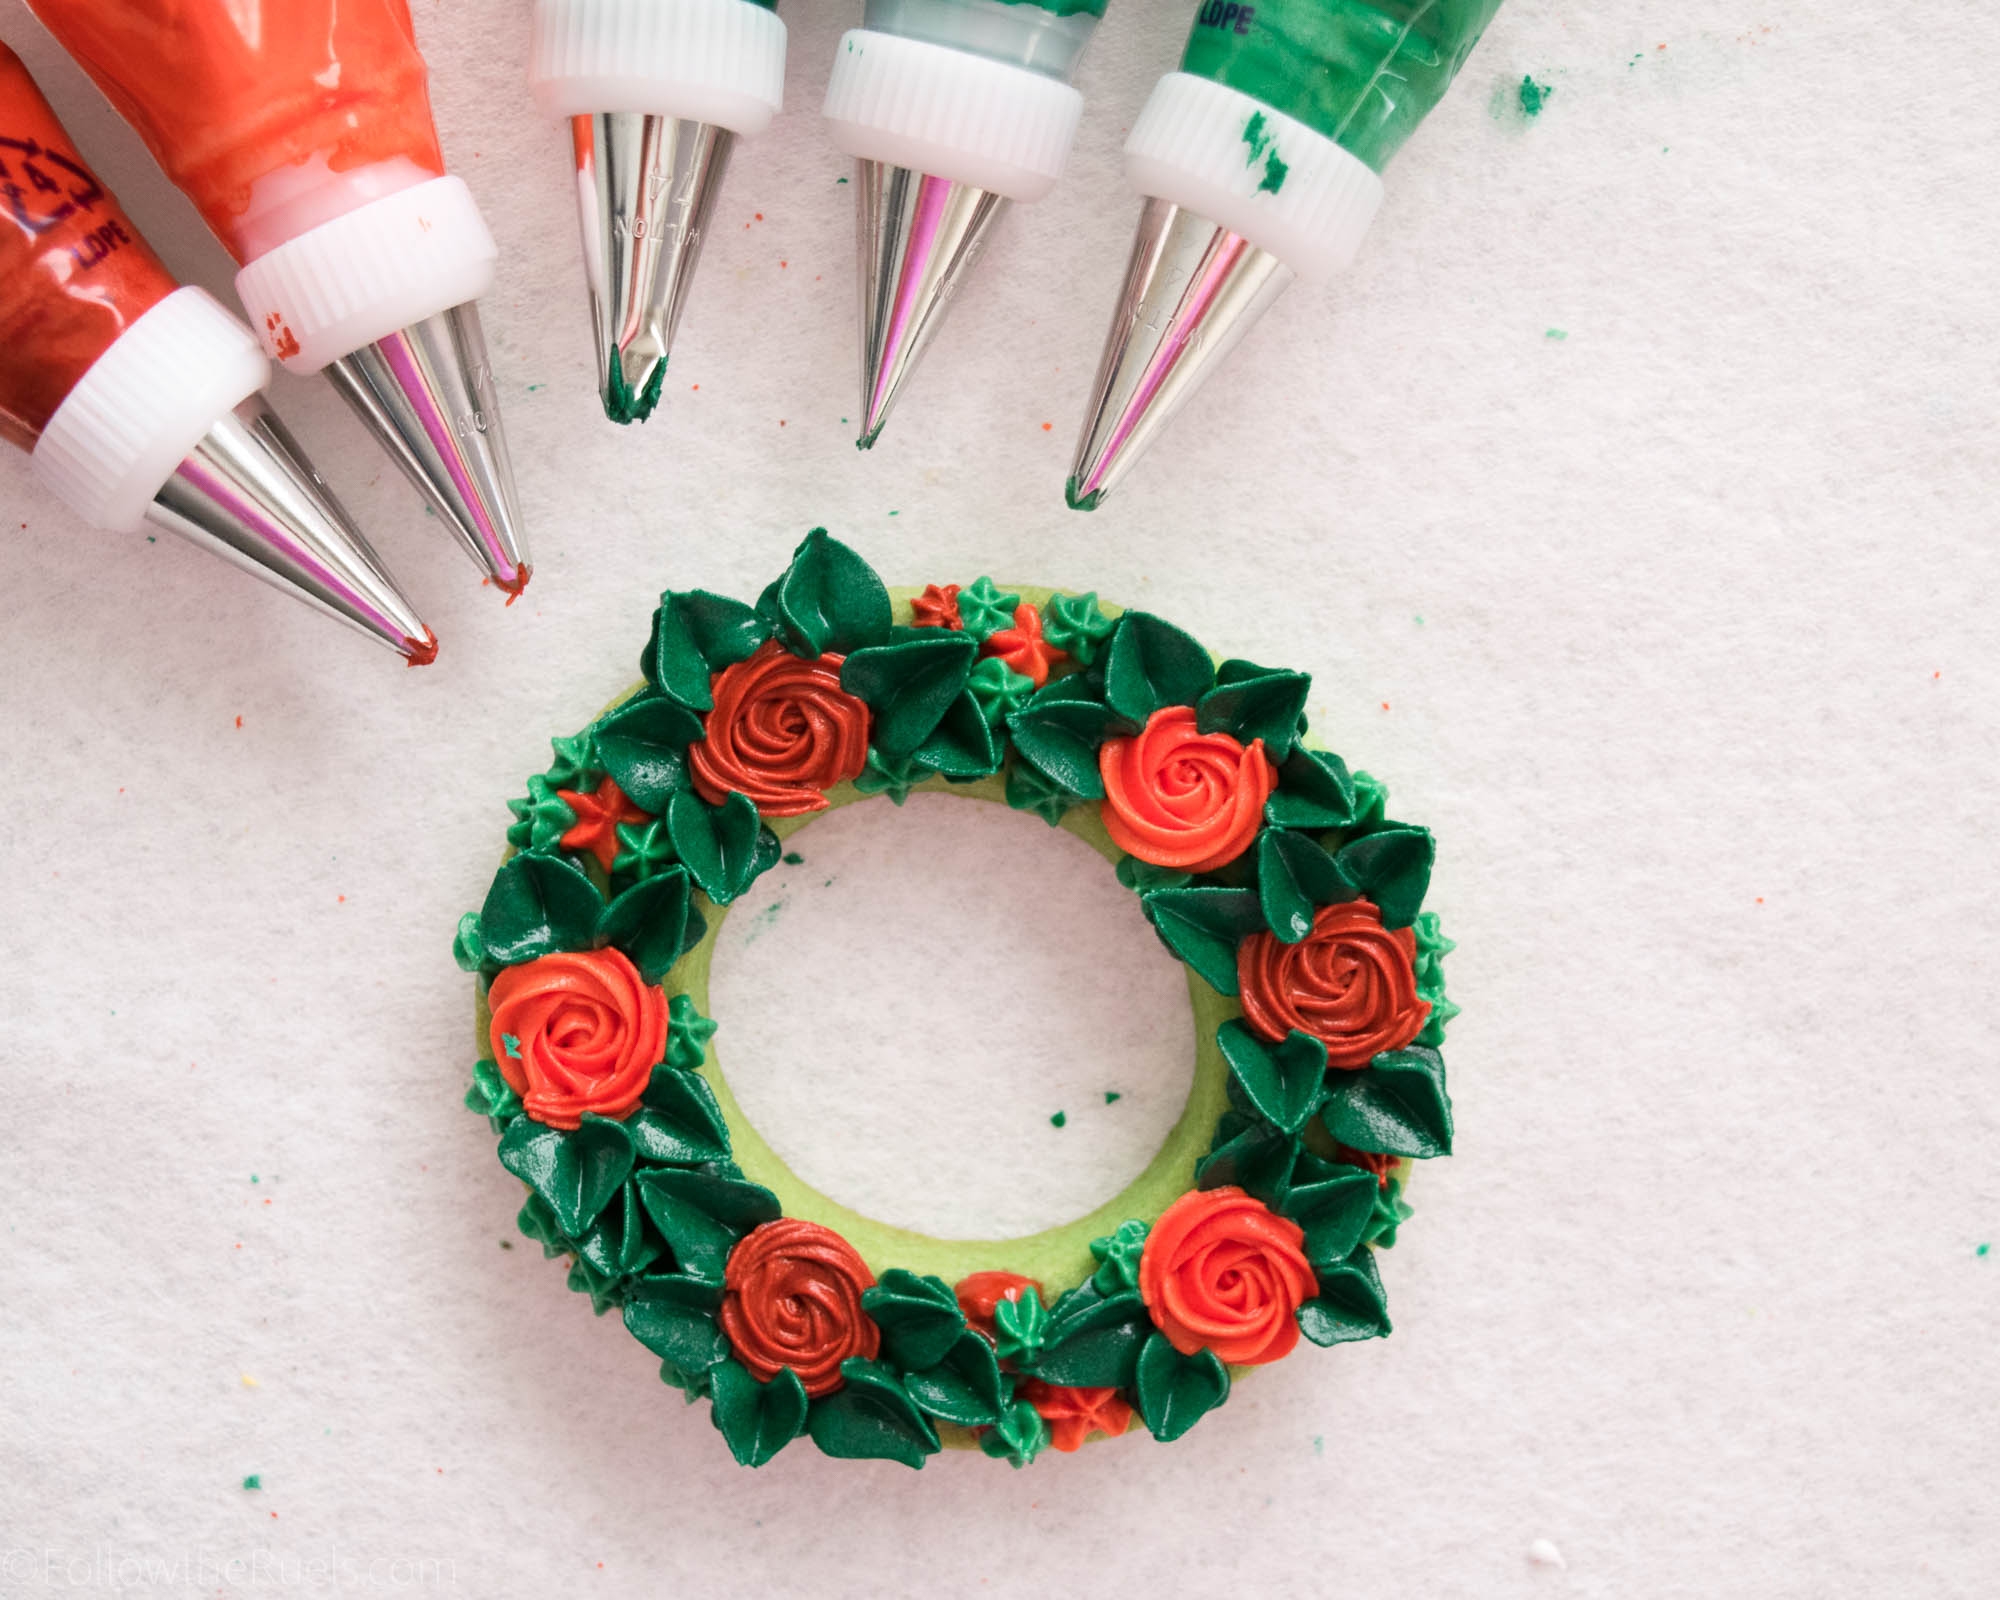
The piping tips I used for these cookies were:

  • #14 and #24 to make roses, 
  • #74 to make the large leaves, 
  • #379 to make the small leaves, and
  • #16 to make the green star-shaped filler

For some of the cookies, I added some dots just for a bit more color and texture, but I didn’t even bother with a piping tip for those, as a zip-top bag or piping bag does the job.

There are so many fun things to do with piping tips and they are one of my favorite tools to use to decorate cookies. As you can see, they are actually pretty easy to use if you use the right consistency of icing. 

Anytime I use piping tips, I use a stiff consistency icing. That means the icing is very thick. When I mix up my icing, typically I add some water to thin it down. For stiff consistency icing, I barely add water because I want the icing to form a stiff peak when I lift the spoon up from the surface. 

That ensures that all those little details from the piping tip stay put and don’t settle into a blob of icing.

And if you are wondering why my cookies are green, it’s because I made my pistachio sugar cookie recipe from my Ultimate Christmas Cookie guide. But really, you could tint any cookie dough green or leave them plain. 

Tools used:
[show_shopthepost_widget id=”2951522″]


/ Filed In: Cookies New, Decorated Cookies, Eat
Tagged: Christmas, cookies, flowers, holiday, piping tips, royal icing, wreath

Pretty Bicycle Cookies

August 7, 2017

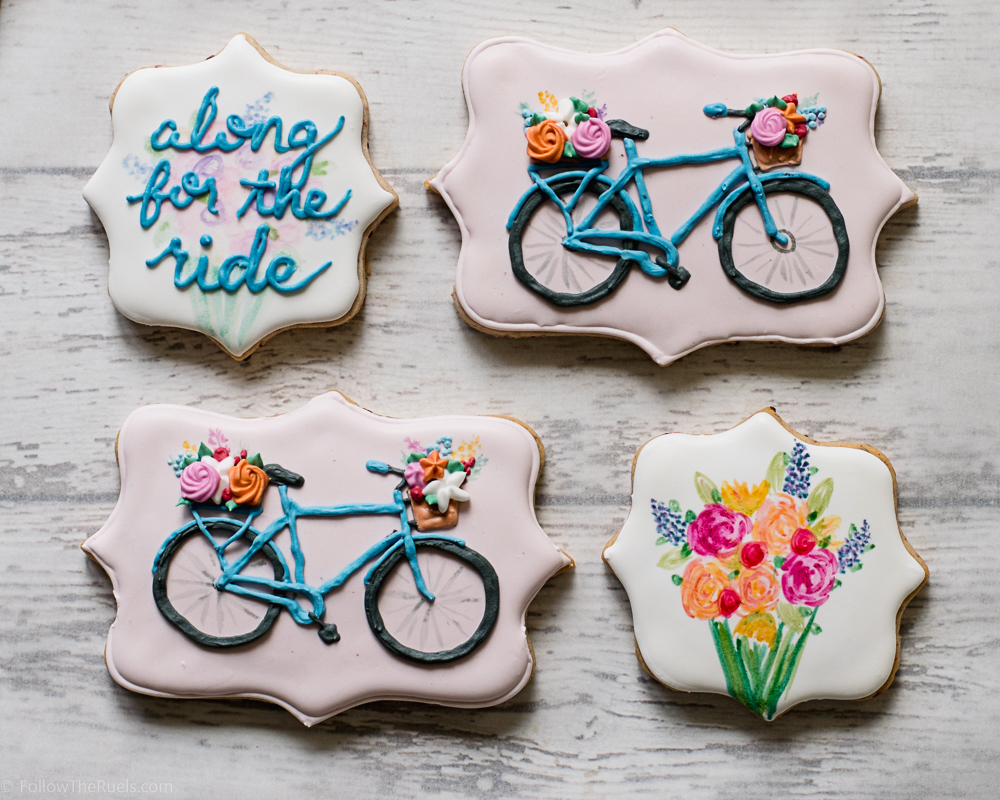
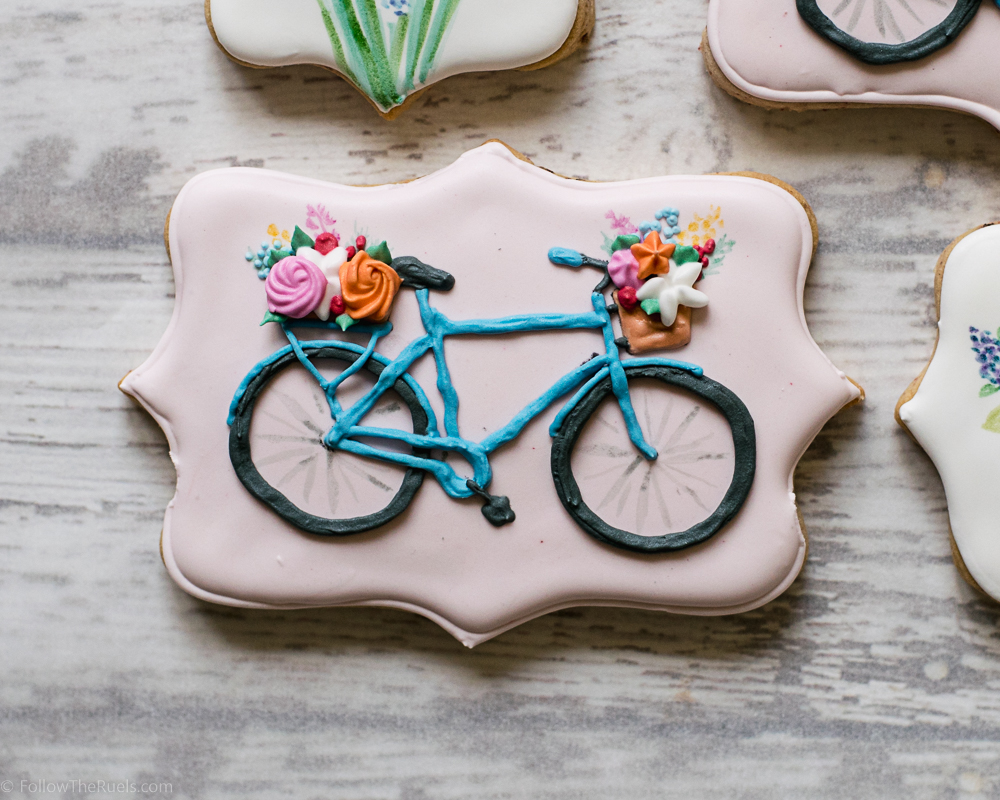
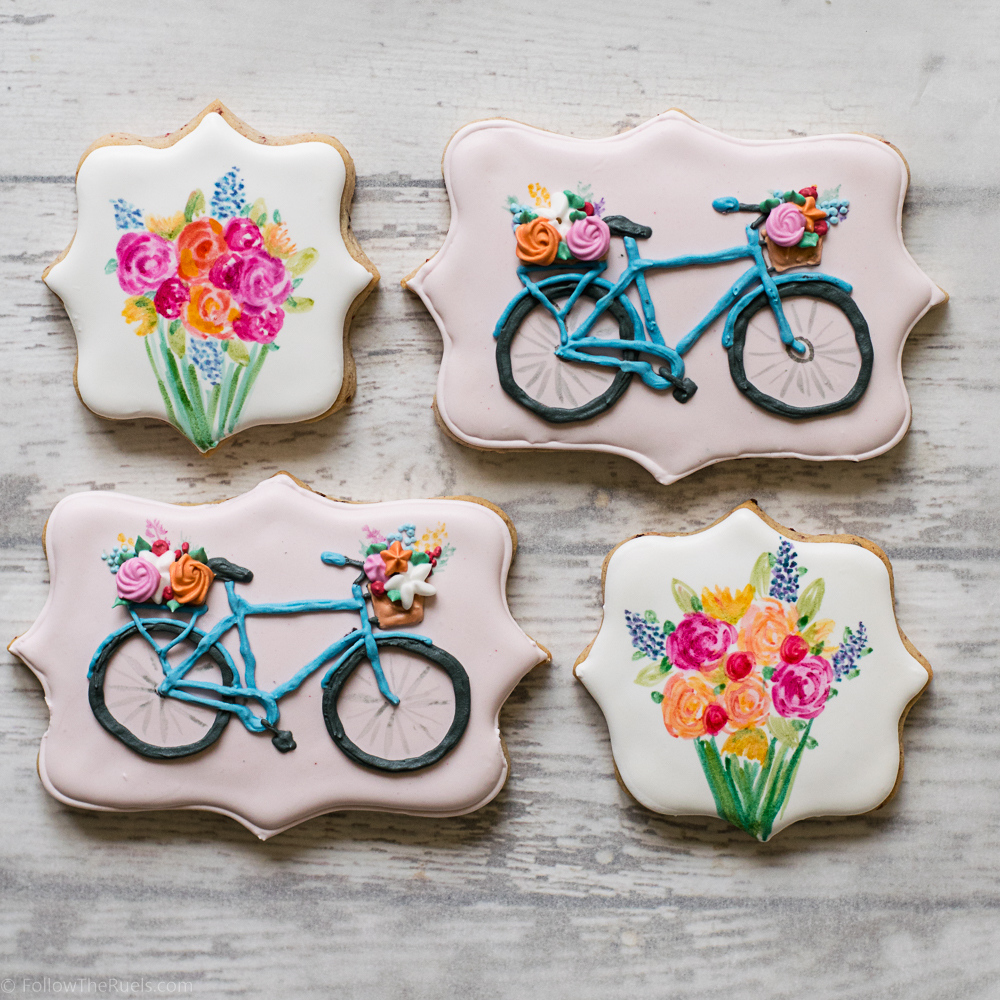
This past Sunday I spent a couple hours making cookies for a friend of ours who is moving to start her next adventure in life. I wanted to send her off with some cookies and these pretty bicycles with baskets of flowers somehow popped into my mind. Do they have anything to do with her move or where she is going? Nope. I just thought they were pretty. 

How can anyone turn down these pretty bicycles in cookie form? It makes me what to immediately go buy a blue bicycle even though the last time I rode a bike I nearly broke my leg. Clearly the person who coined the phrase “it’s just like riding a bike” had never met me. 

I digress…

You may be thinking that piping an entire bicycle with royal icing is extremely hard. While not the easiest thing to pipe, it’s actually just about as easy as tracing!

As I demonstrated in this post, you can easily trace just about any image onto dried royal icing with tissue paper and an edible ink pen. They trace over your image with royal icing. Easy peasy lemon squeezy!

For the flowers in the bike’s baskets, I painted some background leaves and flowers with gel food coloring that I diluted with some clear extract, like almond extract (sometimes I use vodka). Then I piped over them with some other flowers using my favorite piping tips. 

Here are all the recipes and supplies I used to make the cookies:

  • Royal Icing Recipe (I made 1 batch for about a dozen cookies)
  • Raspberry Lemonade Sugar Cookie recipe from my Summer Cookie Pack (or you can use my Sugar Cookie recipe)

Piping Tips:

  • #2 (small circle) tip for the wheels and body of the bike
  • #1 (small circle) for the pedal and handles of the bike
  • #14 flower tip for the pink rose
  • #24 flower tip for the peach rose
  • #225 flower tip for the white flower
  • #349 leaf tip for the leaves

Other Supplies:

  • Edible ink pen
  • Piping bags
  • Food safe brushes
  • Food coloring
  • Plaque Cookie Cutters

I hope you enjoy these cookies and maybe you will even make them for yourself or a friend! 

 
[show_shopthepost_widget id=”2775305″]

/ Filed In: Cookies New, Decorated Cookies
Tagged: bicycles, cookies, decorated cookies, flowers, royal icing, Spring, Summer

Red White and Blue Water Color Gingham Cookies

June 9, 2017

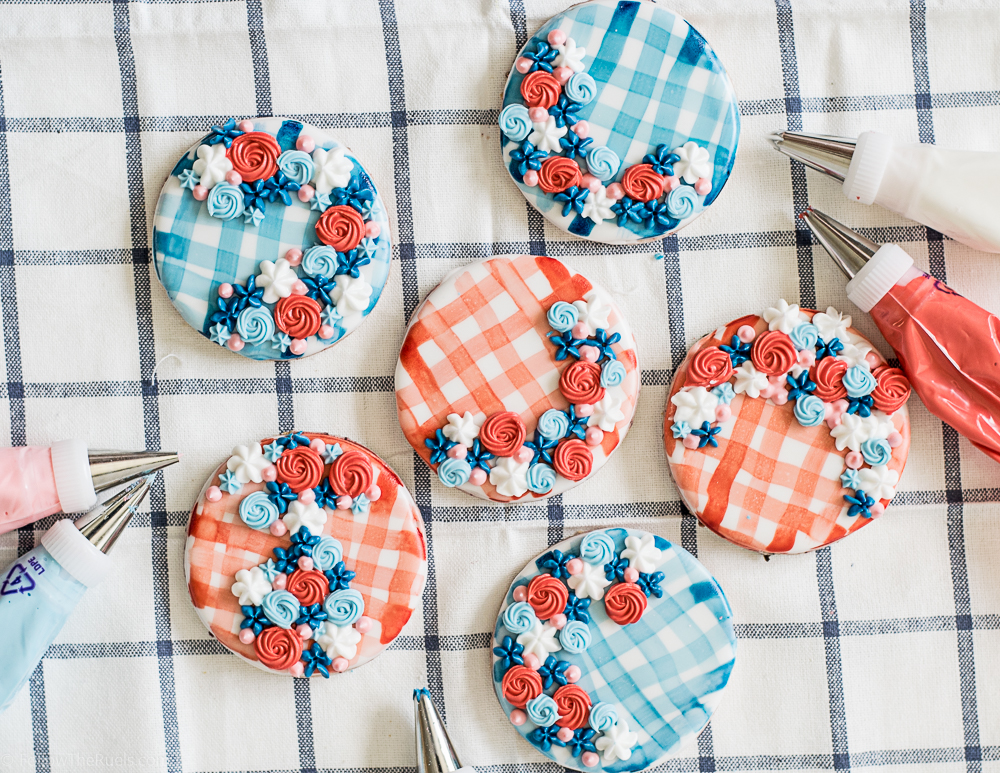
If you have stopped by my Instagram feed (@followtheruels) lately and seen any of the cookies that I have posted in the past couple months, you know that there are two things I am obsessed with: water color and royal icing flowers. Adding a little floral touch to cookies is such an easy way to make a plain ol’ cookie look super fancy.

It’s the same for the water color effect. Painting cookies is also a very easy thing you can do to decorate cookies, especially if you don’t like piping. 

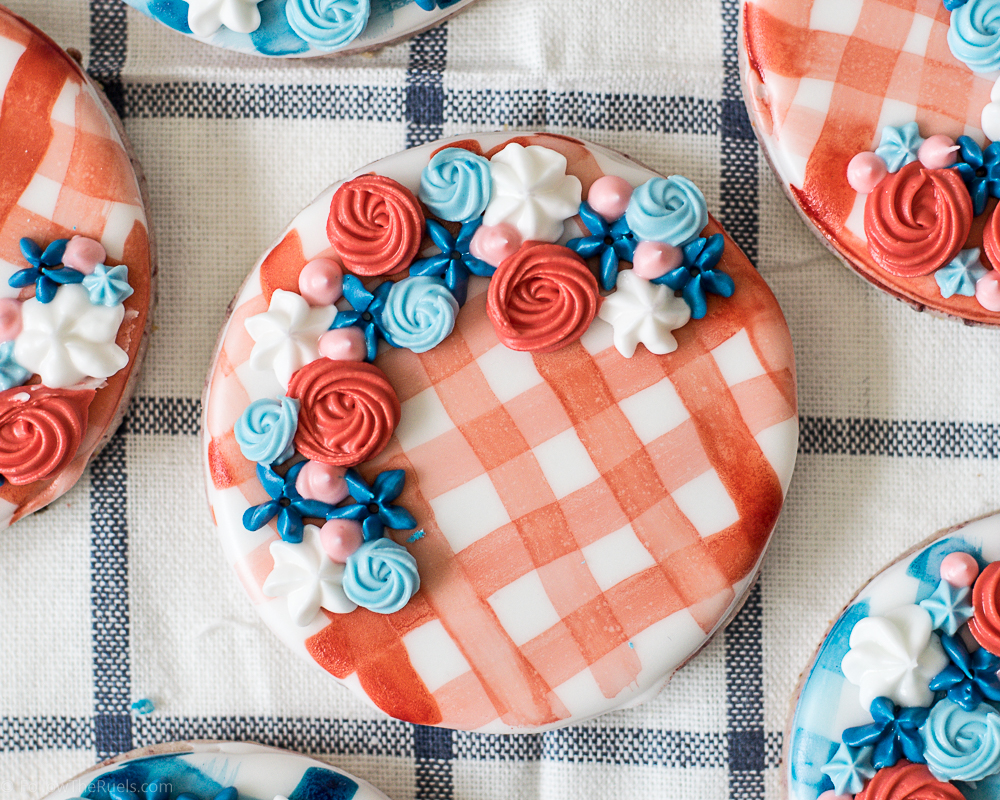
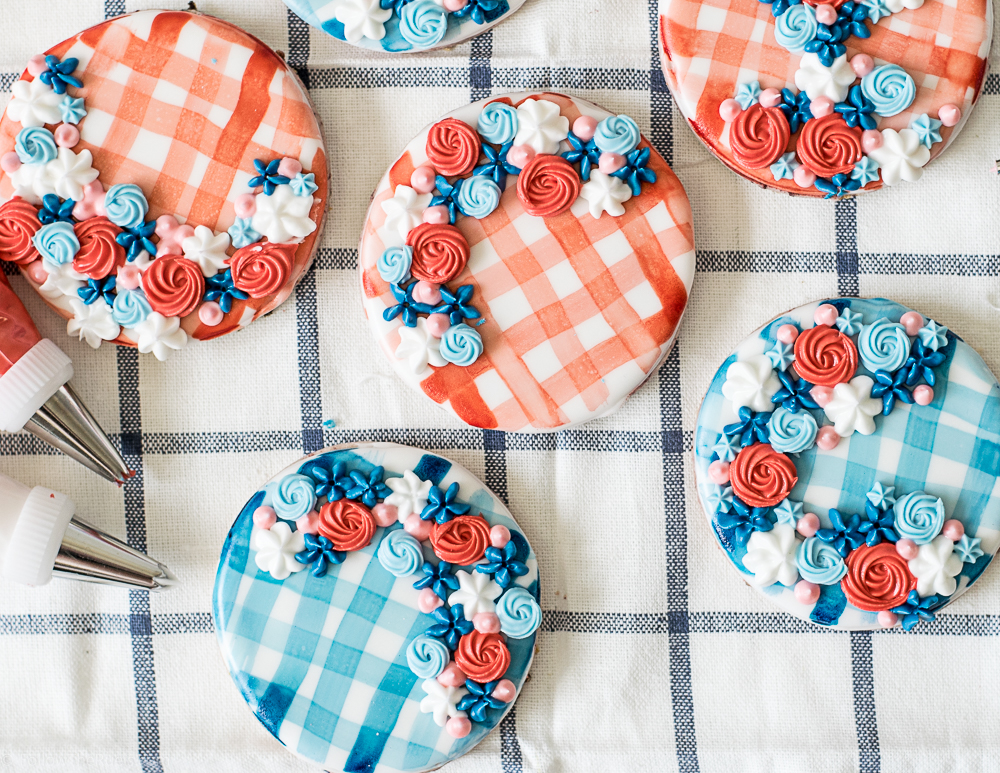
So that’s what I did, I combined my love of gingham (I wear a lot of gingham) with my two current favorite cookie decorating techniques to make these water color gingham cookies that are PERFECT for 4th of July!


Here are all the recipes and tools that I used:

  • Royal Icing Recipe
  • Sugar Cookie Recipe (I actually used a special flavor of sugar cookie that I will be sharing very soon!)
  • Food Coloring 
  • Almond Extract
  • Paint Brushes
  • Paint Tray
  • White Drop Flowers – #107 tip
  • Red Rosettes – #18 tip
  • Blue Drop Flowers – #225 tip
  • Light Blue Rosettes – #16 tip
  • Pink Dots – #5 tip

So festive and patriotic, aren’t they? I love them even with all of their flaws and wonky lines. It makes them look a bit more homemade and rustic. 

You could of course use some guides to make sure your lines are straight. But sometimes the character is in the imperfection, am I right?

 
[show_shopthepost_widget id=”2702796″]

/ Filed In: Cookies New, Decorated Cookies, Eat
Tagged: 4th of July, cookies, decorated cookies, flowers, gingham, royal icing, Summer, watercolor

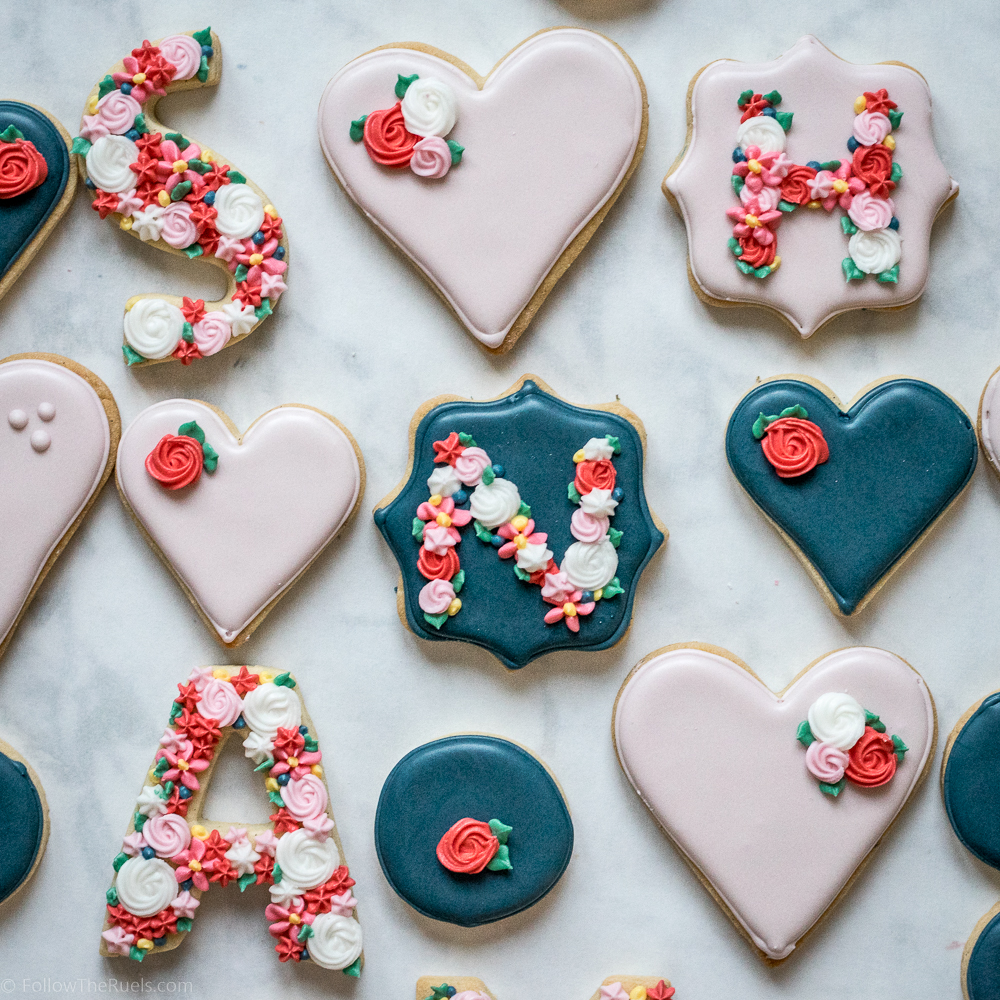
Floral Monogram Mother’s Day Cookies

May 10, 2017

If you know me, then you know that I can’t let a holiday, no matter how big or small, pass without making some cookies (all my friends are probably nodding their head in agreement right about now). I definitely take advantage of all my friends’ sweet tooths (Sweet teeth? What is the plural of sweet tooth?) by making cookies and forcing them upon them every chance I get. 

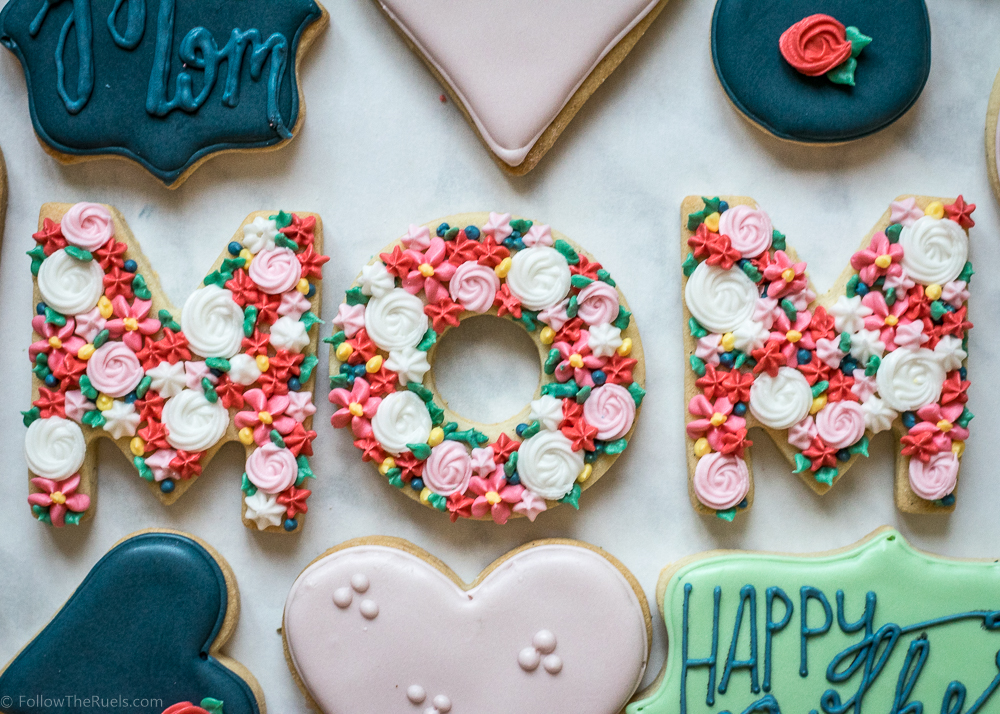
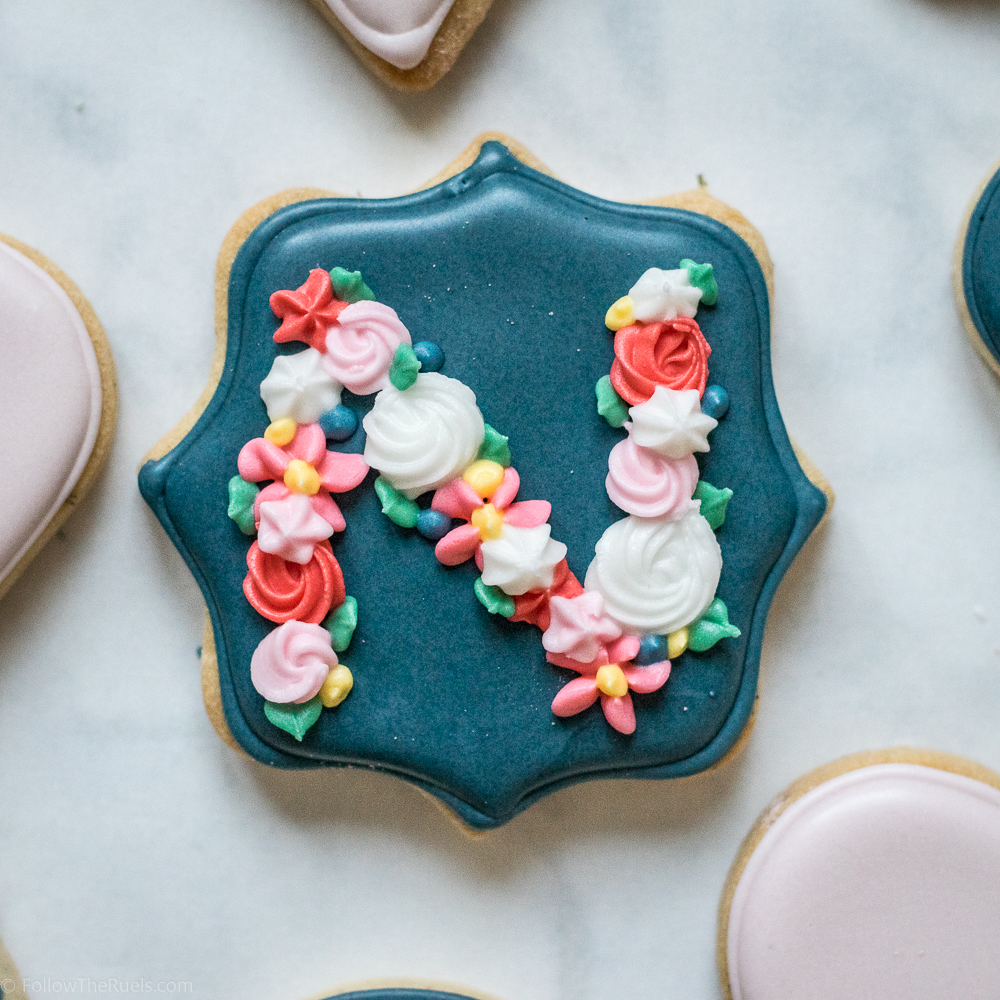
These cookies are no exception. After making these cookies for a friends bridal shower, I couldn’t wait to try this floral monogram design again. I knew it would be perfect for Mother’s Day. And even better, I know lots of deserving mom’s out there who definitely a couple cookies to help them celebrate. 


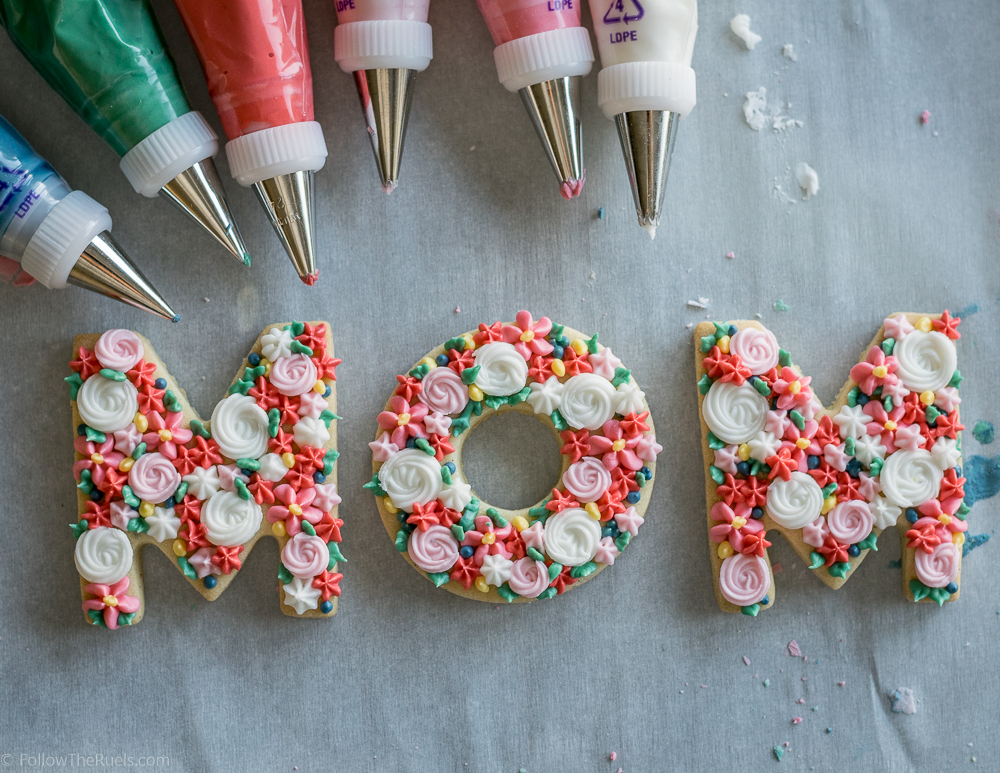
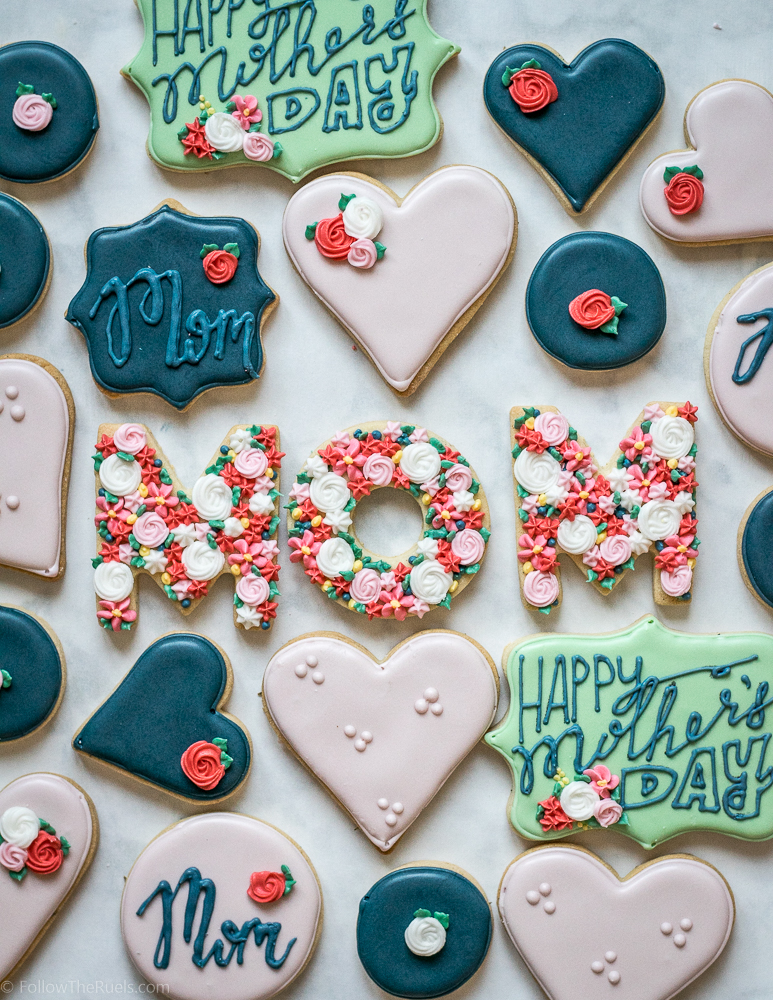
For my mom, I made individual letters that spelled out mom and covered them in flowers. But for my friends who are not my mom I made them each individual initial cookies. 

How cute are they? And not just good for Mother’s Day, but they would be great cookies for a bridal shower, baby shower, birthday, wedding….you name it! I am obsessed. 

[Friends, expect to get cookies like these for every birthday from now until the end of time. Thanks.]

The best part is that these cookies are actually quite easy if you have the right piping tips! Just layer on flowers until you have a full letter. 


I like to start with my bigger flowers, like rosettes. I place the rosettes randomly around the cookie leaving space for other flowers. 


Then I go in with my smaller flowers, like drop flowers, and fill in some more space. 

There is obviously some space left, so I go back in and fill them in with some more dots of icing and then fill it in with the leaves. 

Really, there is no technique…just fill up the space!

To go with the monograms, I made some simple little hearts and circle cookies with a single flower and a couple leaves. (Oh, and see those mint “Happy Mother’s Day” plaque cookies? I will show you how I made those on Friday!!)

I am clearly obsessed with these cookies, as you can tell. I think I just like doing the floral designs because they are really impressive without actually being that hard to achieve. 

But that’s just a secret between you and me. If my mom asks, I slaved over these cookies for days just for her. K, thanks! 😉

Recipes Used:

  • 2 batches of my Royal Icing for 40 cookies in flood consistency (the base layer) and stiff consistency (the flowers).
  • 2 1/2 batched of my Sugar Cookie recipe 

Items Used:

  • White Rose – #18 piping tip
  • Light Pink Rose – #16 piping tip
  • Redish Pink Drop Flower/Rose – #225 piping tip
  • Medium Pink Drop flower – #14 piping tip
  • Leaves – #349 piping tip
  • Dots – #2 piping tip
  • Piping Bags
  • Scribe Tool
  • Gel Food Coloring in light pink, watermelon, and forest green

 
[show_shopthepost_widget id=”2668939″]


/ Filed In: Cookies New, Decorated Cookies, Eat
Tagged: cookie decorating, floral, flowers, Mother's Day, piping tips, royal icing, sugar cookies

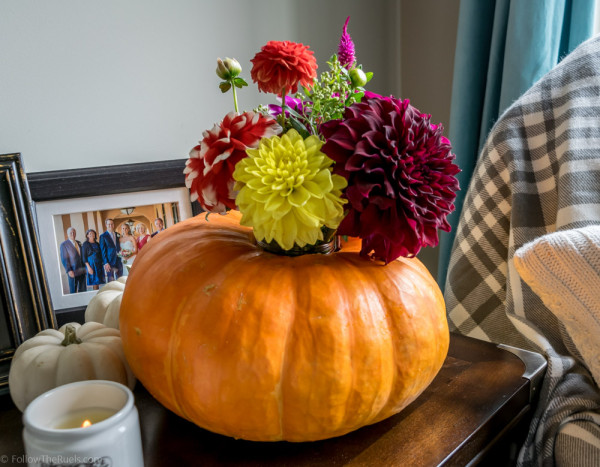
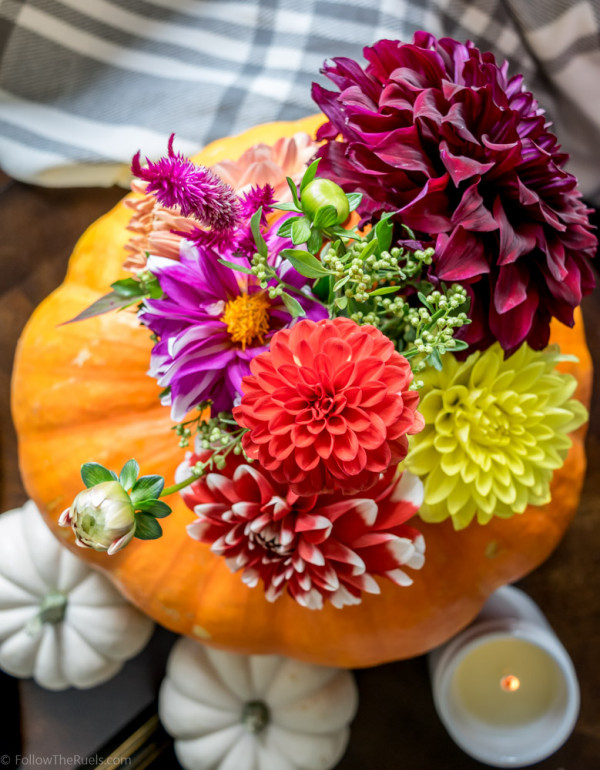
Pumpkin Vase

September 30, 2015

Pumpkin Vase-12

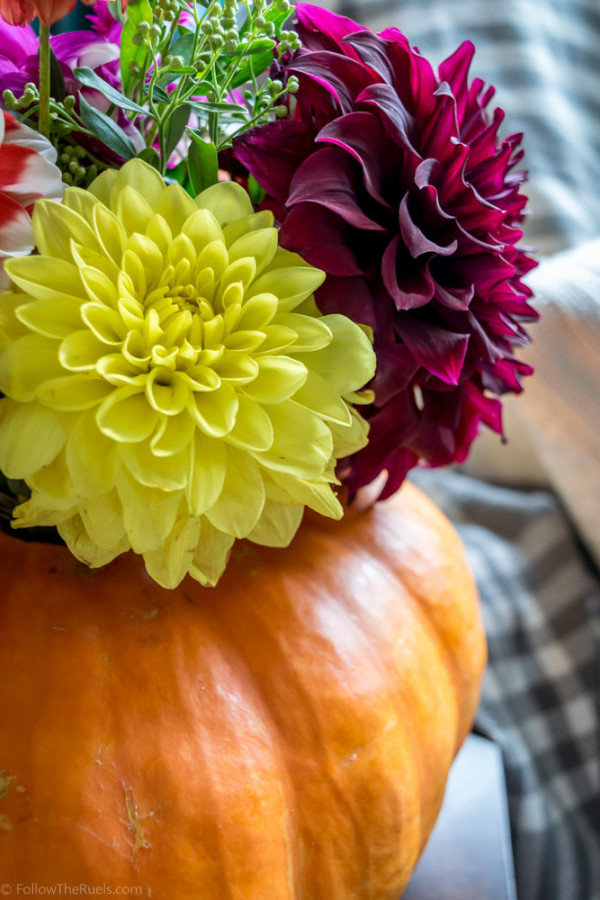
Do you love carving pumpkins, but a jack-o-lantern doesn’t really fit your home aesthetic? Or are you looking for a beautiful centerpiece for your Thanksgiving dinner or Fall gathering? Well I’ve got you covered! Enter, the pumpkin vase! So much easier than a jack-o-lantern and even more beautiful. 

I picked up a beautiful bouquet of flowers from a flower stand in Uptown (if you follow me on Snapchat, you have probably seen it). The bouquet was full of deep purples, oranges, reds, and yellows. It was gorgeous and the perfect shades for Fall. I thought that to make it even more perfect for the season, it should go inside of a pumpkin. 

Pumpkin Vase-2

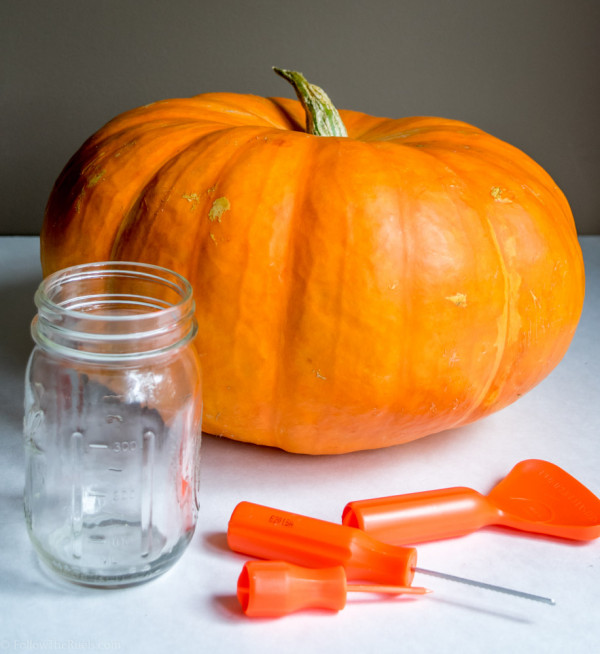
I found a pumpkin at the supermarket that would be tall enough to fit a jar and then picked up a $5 pumpkin carving kit. A toothpick, serrated kitchen knife, and a spoon could also do the trick.

Pumpkin 10

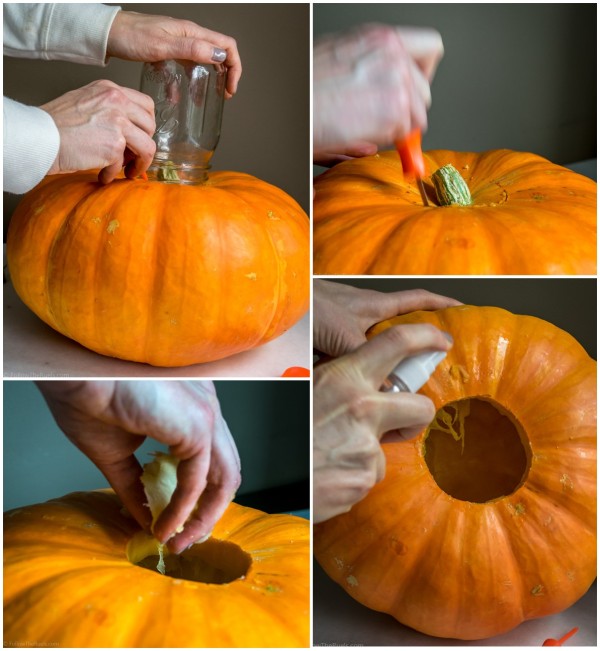
I scored the top of the pumpkin in the shape of the jar, then used the knife to cut out the whole. I scraped out all the insides, just like I would a jack-o-lantern, then to keep it fresher longer, I sprayed the inside with mixtures of water and white vinegar (1:1).

Pumpkin Vase-8

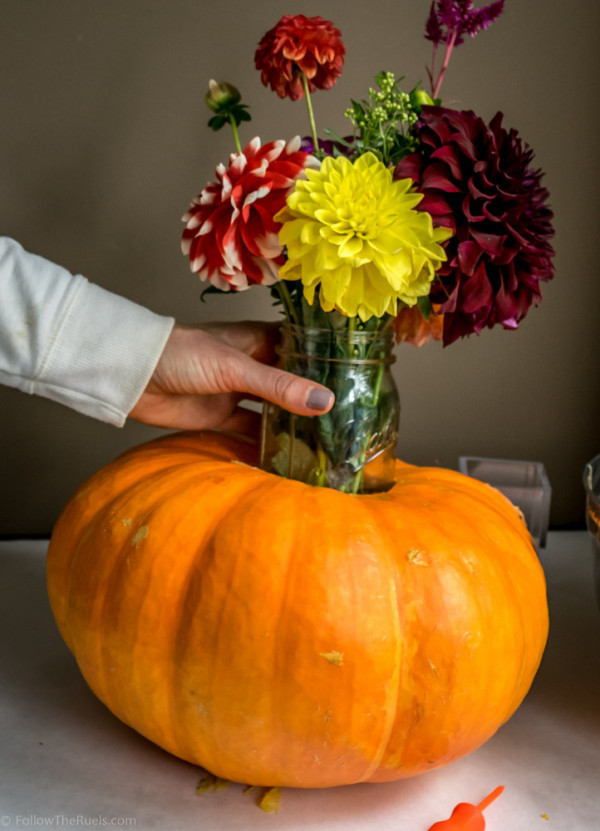
I then arranged the flowers how I wanted them in the jar, and placed the jar inside. It was really that easy. The whole project took less than an episode of ‘How to Get Away with Murder’, including frequent stops because I couldn’t take my eyes off the scene. [Side note: if you have Netflix and haven’t seen HTGAWM, you really should watch it! The whole first season is on Netflix and it is so easy to binge on, if that’s your thing.]

Pumpkin Vase-9

So pretty, right? It was such a nice decoration to have to get me in the season for Fall. And the perfect project for a really gloomy Saturday. 
Pumpkin Vase-11

If I were hosting a Thanksgiving dinner, I would definitely make this as a centerpiece. And you could carve out smaller pumpkin vases in mini pumpkins and stick a single flower in them. That would be so stinking cute!!

Would you try this project?


/ Filed In: Make
Tagged: Fall, flowers, home, pumpkin

Follow

Hey There!

Hey there, I'm Lindsey. I'm a number cruncher by day and a home cook and baker by night. While I love to eat healthy and find fresh and healthy alternatives for my favorite foods, I will never turn down dessert! Life is all about moderation, right?
Recipes

  • All Recipes
  • Breakfast
  • Appetizers
  • Salads
  • Main Dishes
  • Side Dishes
  • Desserts
  • Drinks

Favorite Finds

[show_lookbook_widget id=”388783″]

Theme by 17th Avenue · Powered by WordPress & Genesis