• Home
  • Eat
    • Breakfast
    • Appetizers
    • Main Dishes
      • Chicken
      • Beef
      • Seafood
      • Healthy Dishes
      • Paleo Dishes
      • Salads
    • Desserts
      • Decorated Cookies
      • Cookies
      • Bars and Brownies
      • Cakes and Cupcakes
  • Shop
    • Cookie Decorating Supplies
    • Bakeware
    • Cookware
    • Kitchen Gadgets
    • House
  • About
    • Contact
    • Bucket List
  • Cookie Decorating 101

Follow the Ruels

Easy Coloring Book Cookies for Easter

March 30, 2018

If you are looking for a fun activity to make with the kiddos over the Easter weekend, I’ve got you covered! Check out these super easy and oh-so-cute coloring book cookies in some favorite Easter shapes. These cookies were both a lot of fun for me to make and to color. 

Why yes, I did color these in myself. I didn’t have any kids to test these out on, and I don’t think it would have gone over well if I had asked strangers to borrow theirs. Don’t worry, these particular cookies are off to Texas and will hopefully make it in time for Easter. 

How to Make Them
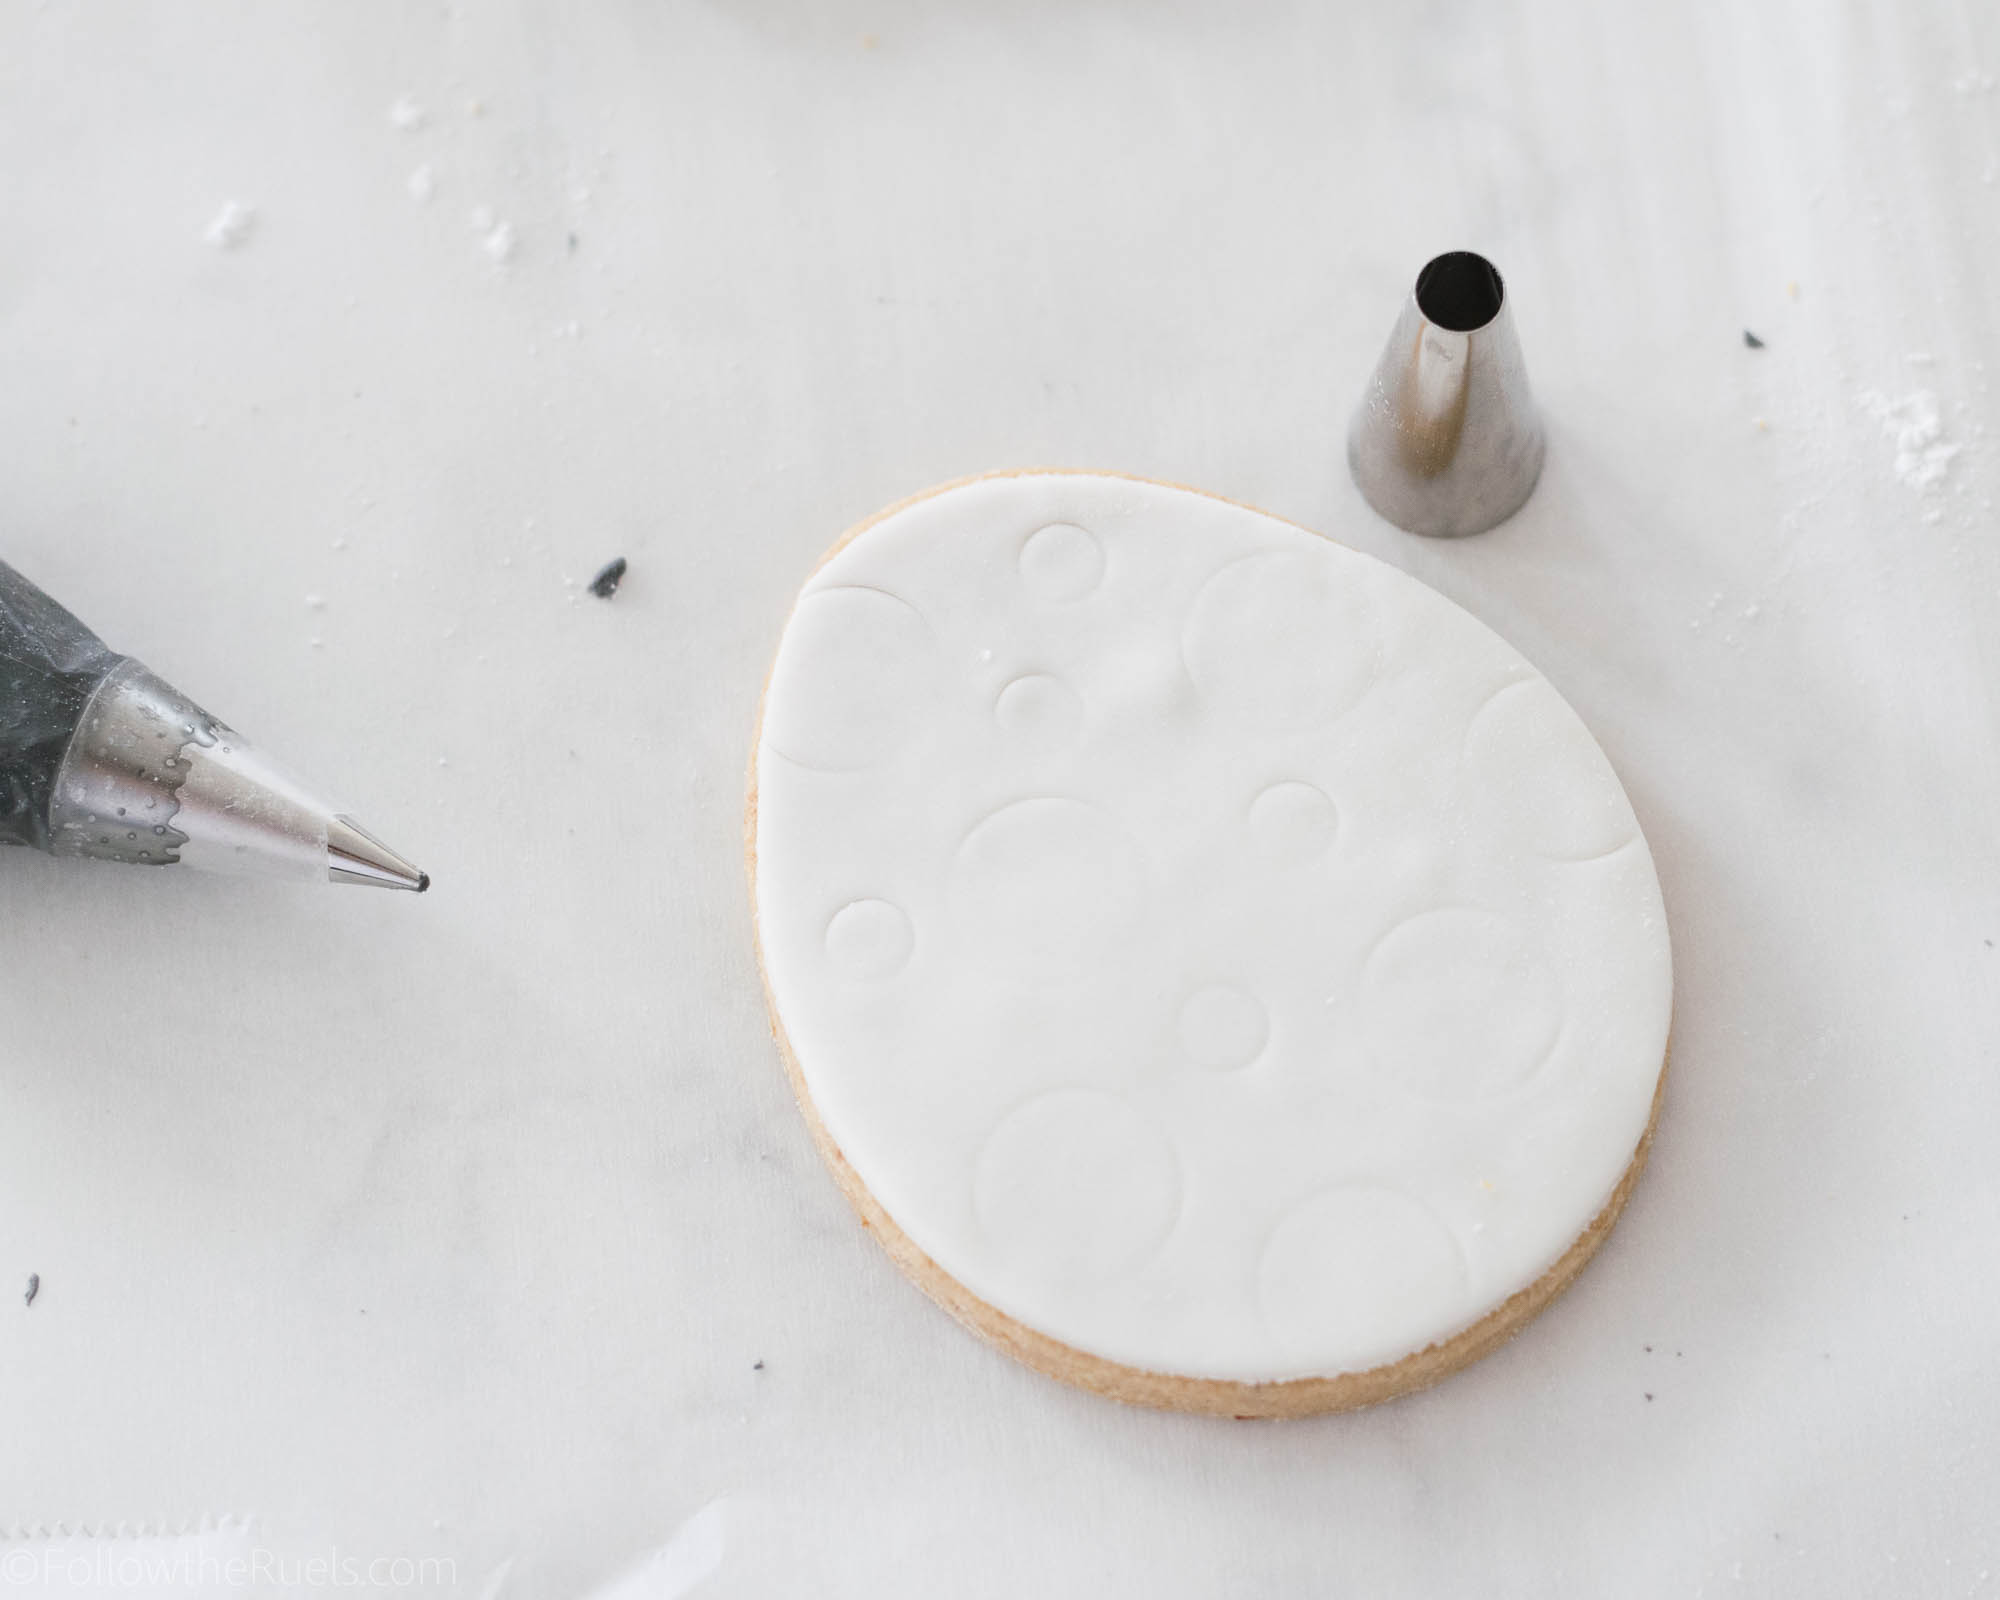
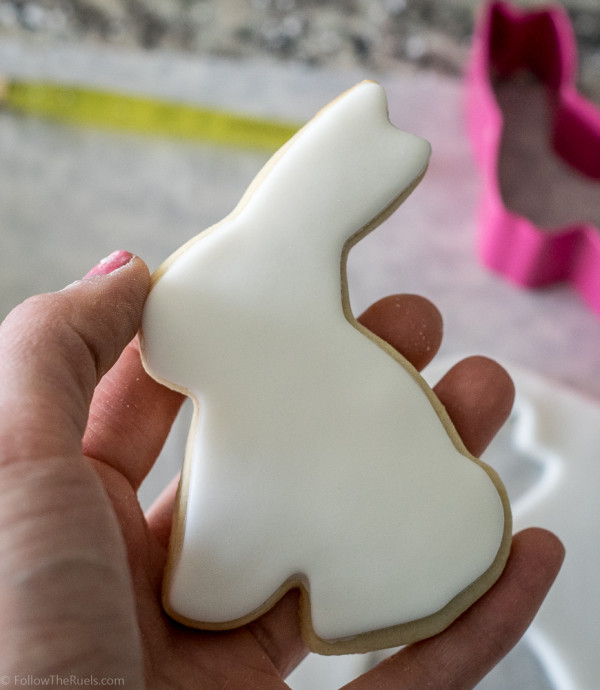
The first thing to making these cookies is to cover them with white icing or fondant. I used fondant because fondant is a little bit more forgiving when it comes to painting on cookies. For instance, if you add too much watercolor to dried royal icing, the icing will degrade and make a crater in the cookie. With the fondant, it will just get a little gummy, but will eventually dry as normal.

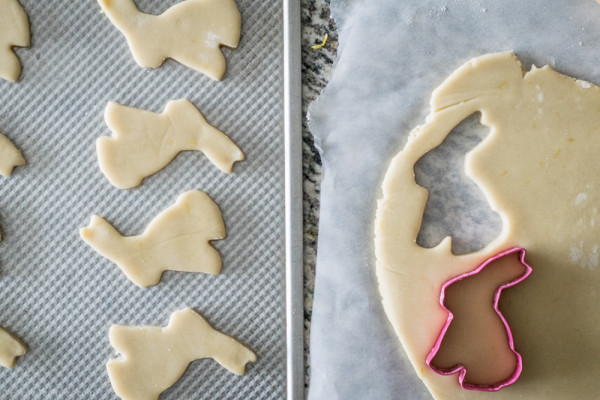
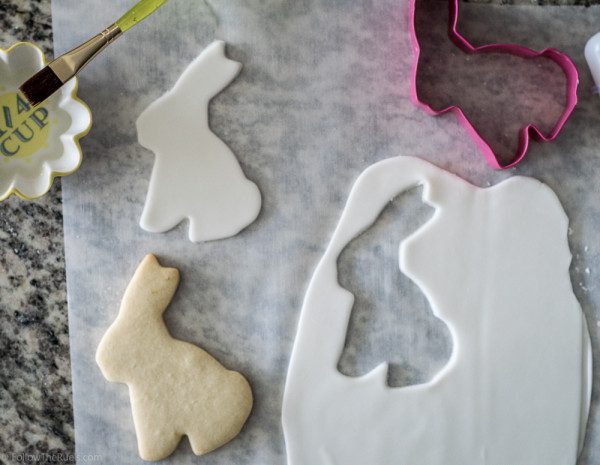
To cover the cookie with fondant, all you do is roll out the fondant with a fondant roller or rolling pin, cut out the cookie with the same cookie cutter used to cut out the cookie, brush some water on the back, and stick it to the cookie. Viola! 

The best part, you don’t have to wait for the cookie to dry. Also, the fondant is still a bit malleable for several minutes, so you can imprint shapes or images onto it to trace later! 

Okay, I know not everyone is a fondant fan, so if I still haven’t convinced you and you would prefer to ice the cookies, I recommend this post that details how to achieve the perfect iced cookies. 

If you are team fondant, this post gives much better instruction on how to attach the fondant to the cookie.
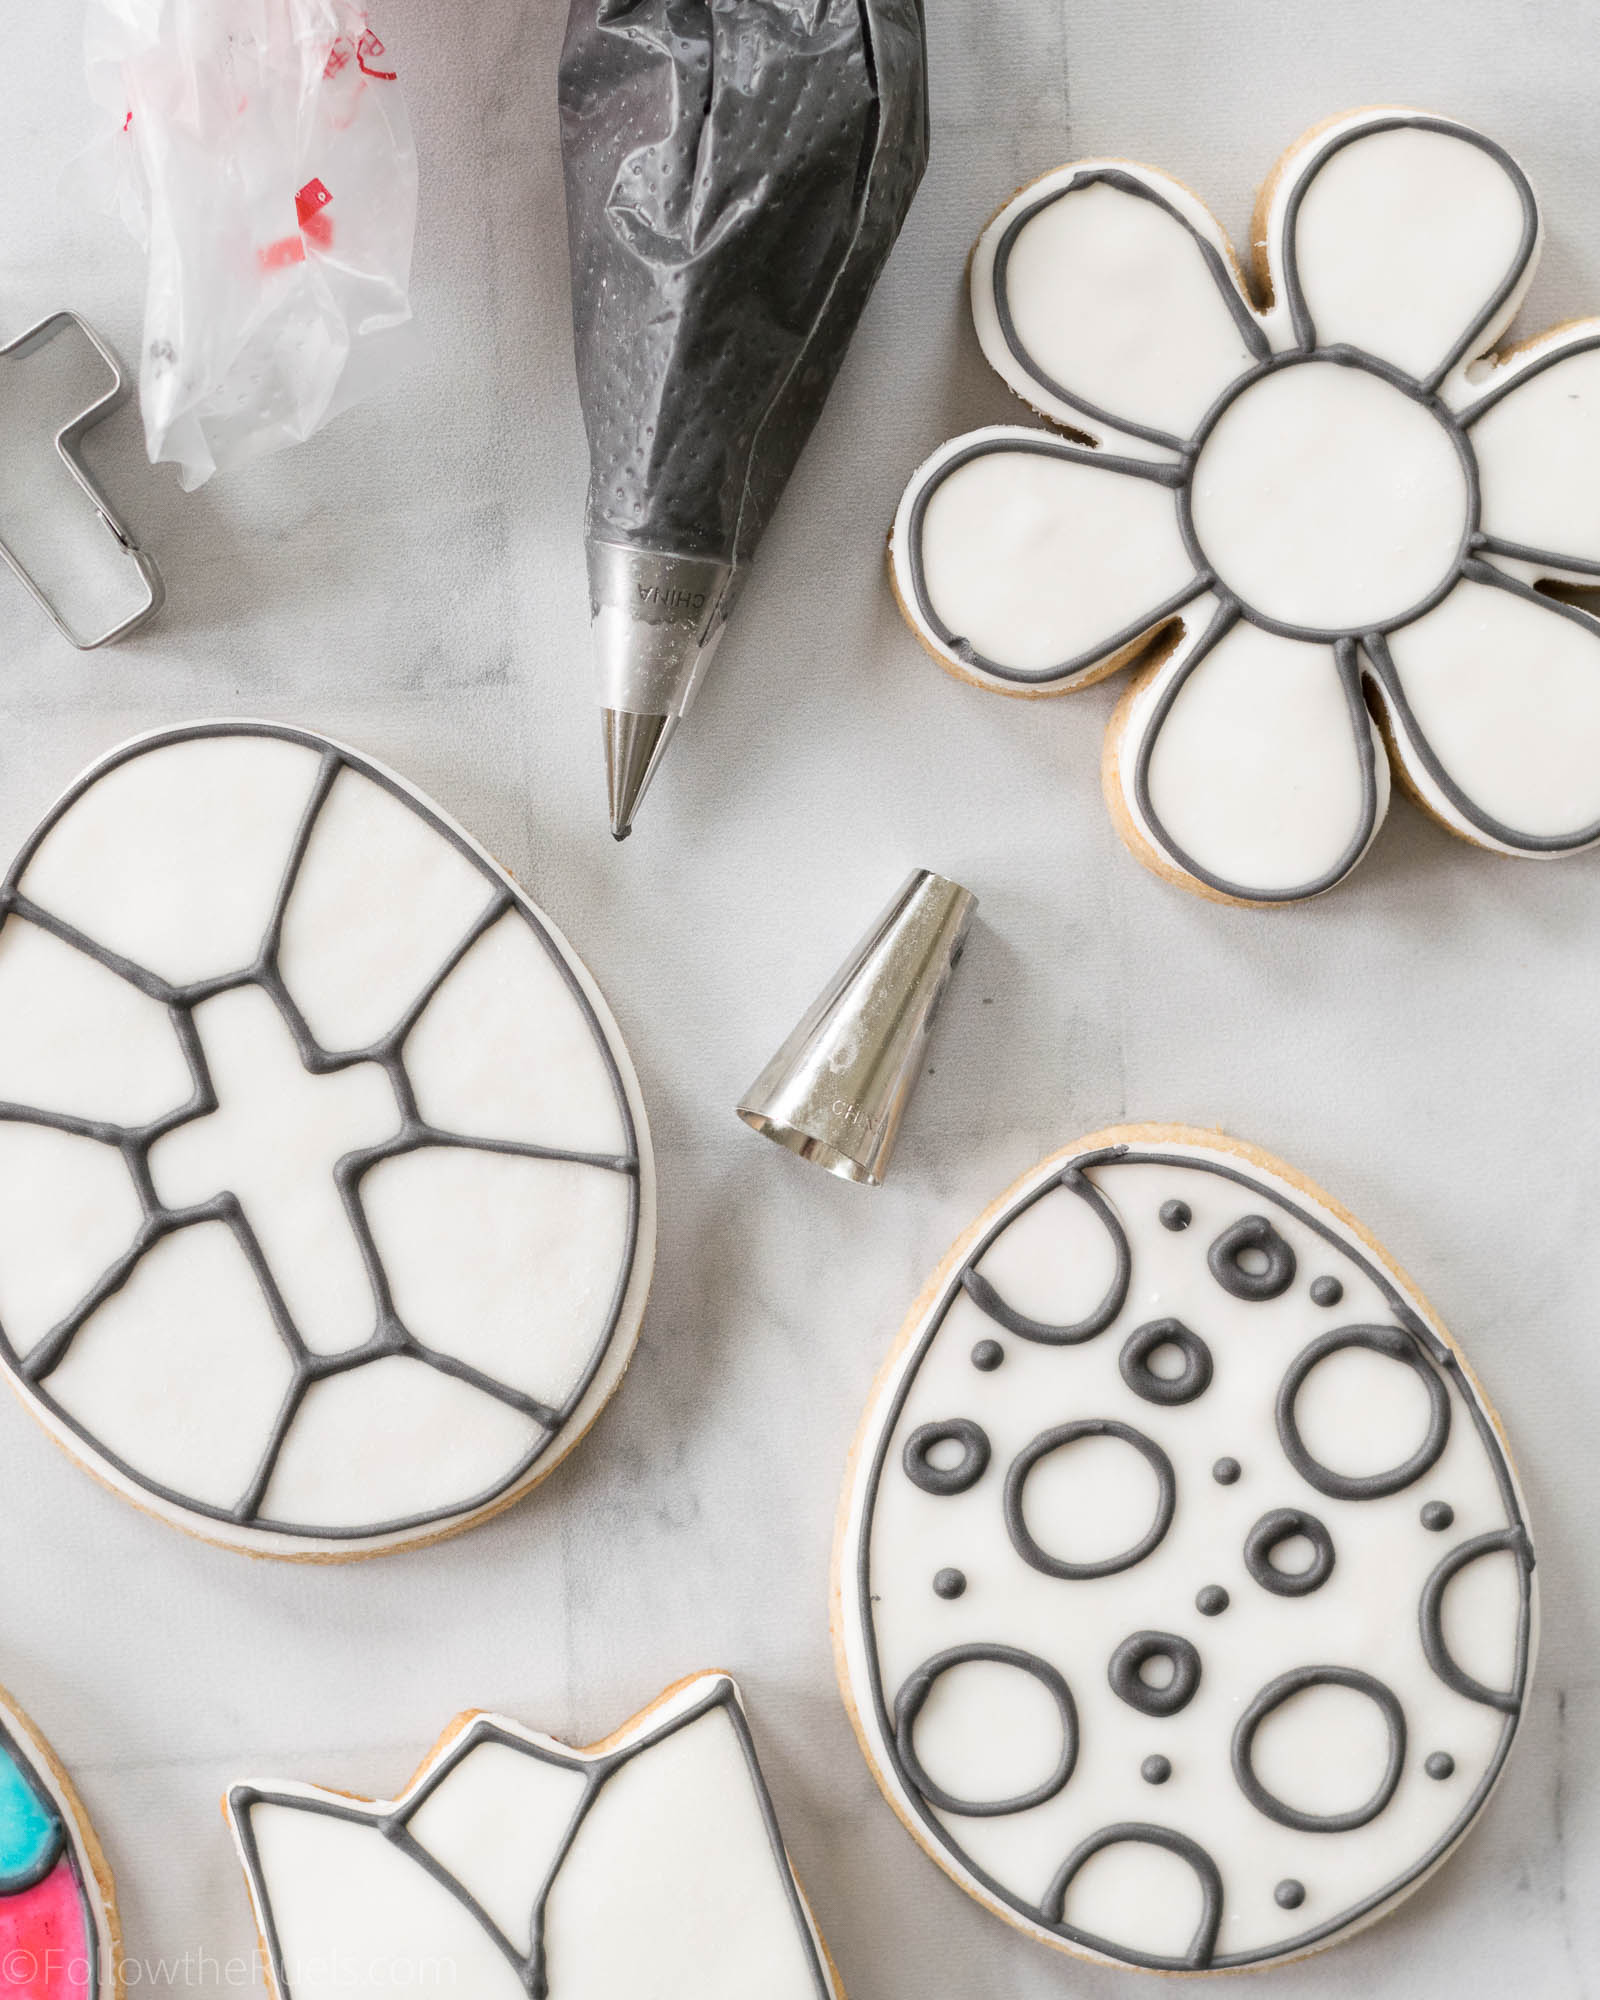
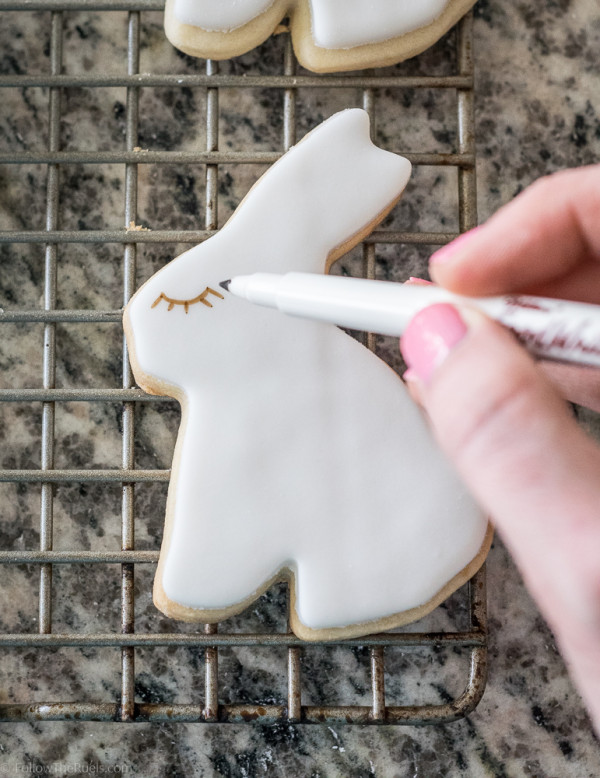
Once the cookies are iced or covered in fondant, outline the cookie with black piping consistency icing and create the image or shapes you desire. Depending on the age of the kids you are making these for, you may want to tailor your images to be more or less detailed. 

The great thing about using icing for this part, as opposed to drawing it with a black food marker, is that you have created barriers so that the kiddos are forced to stay within the lines. 
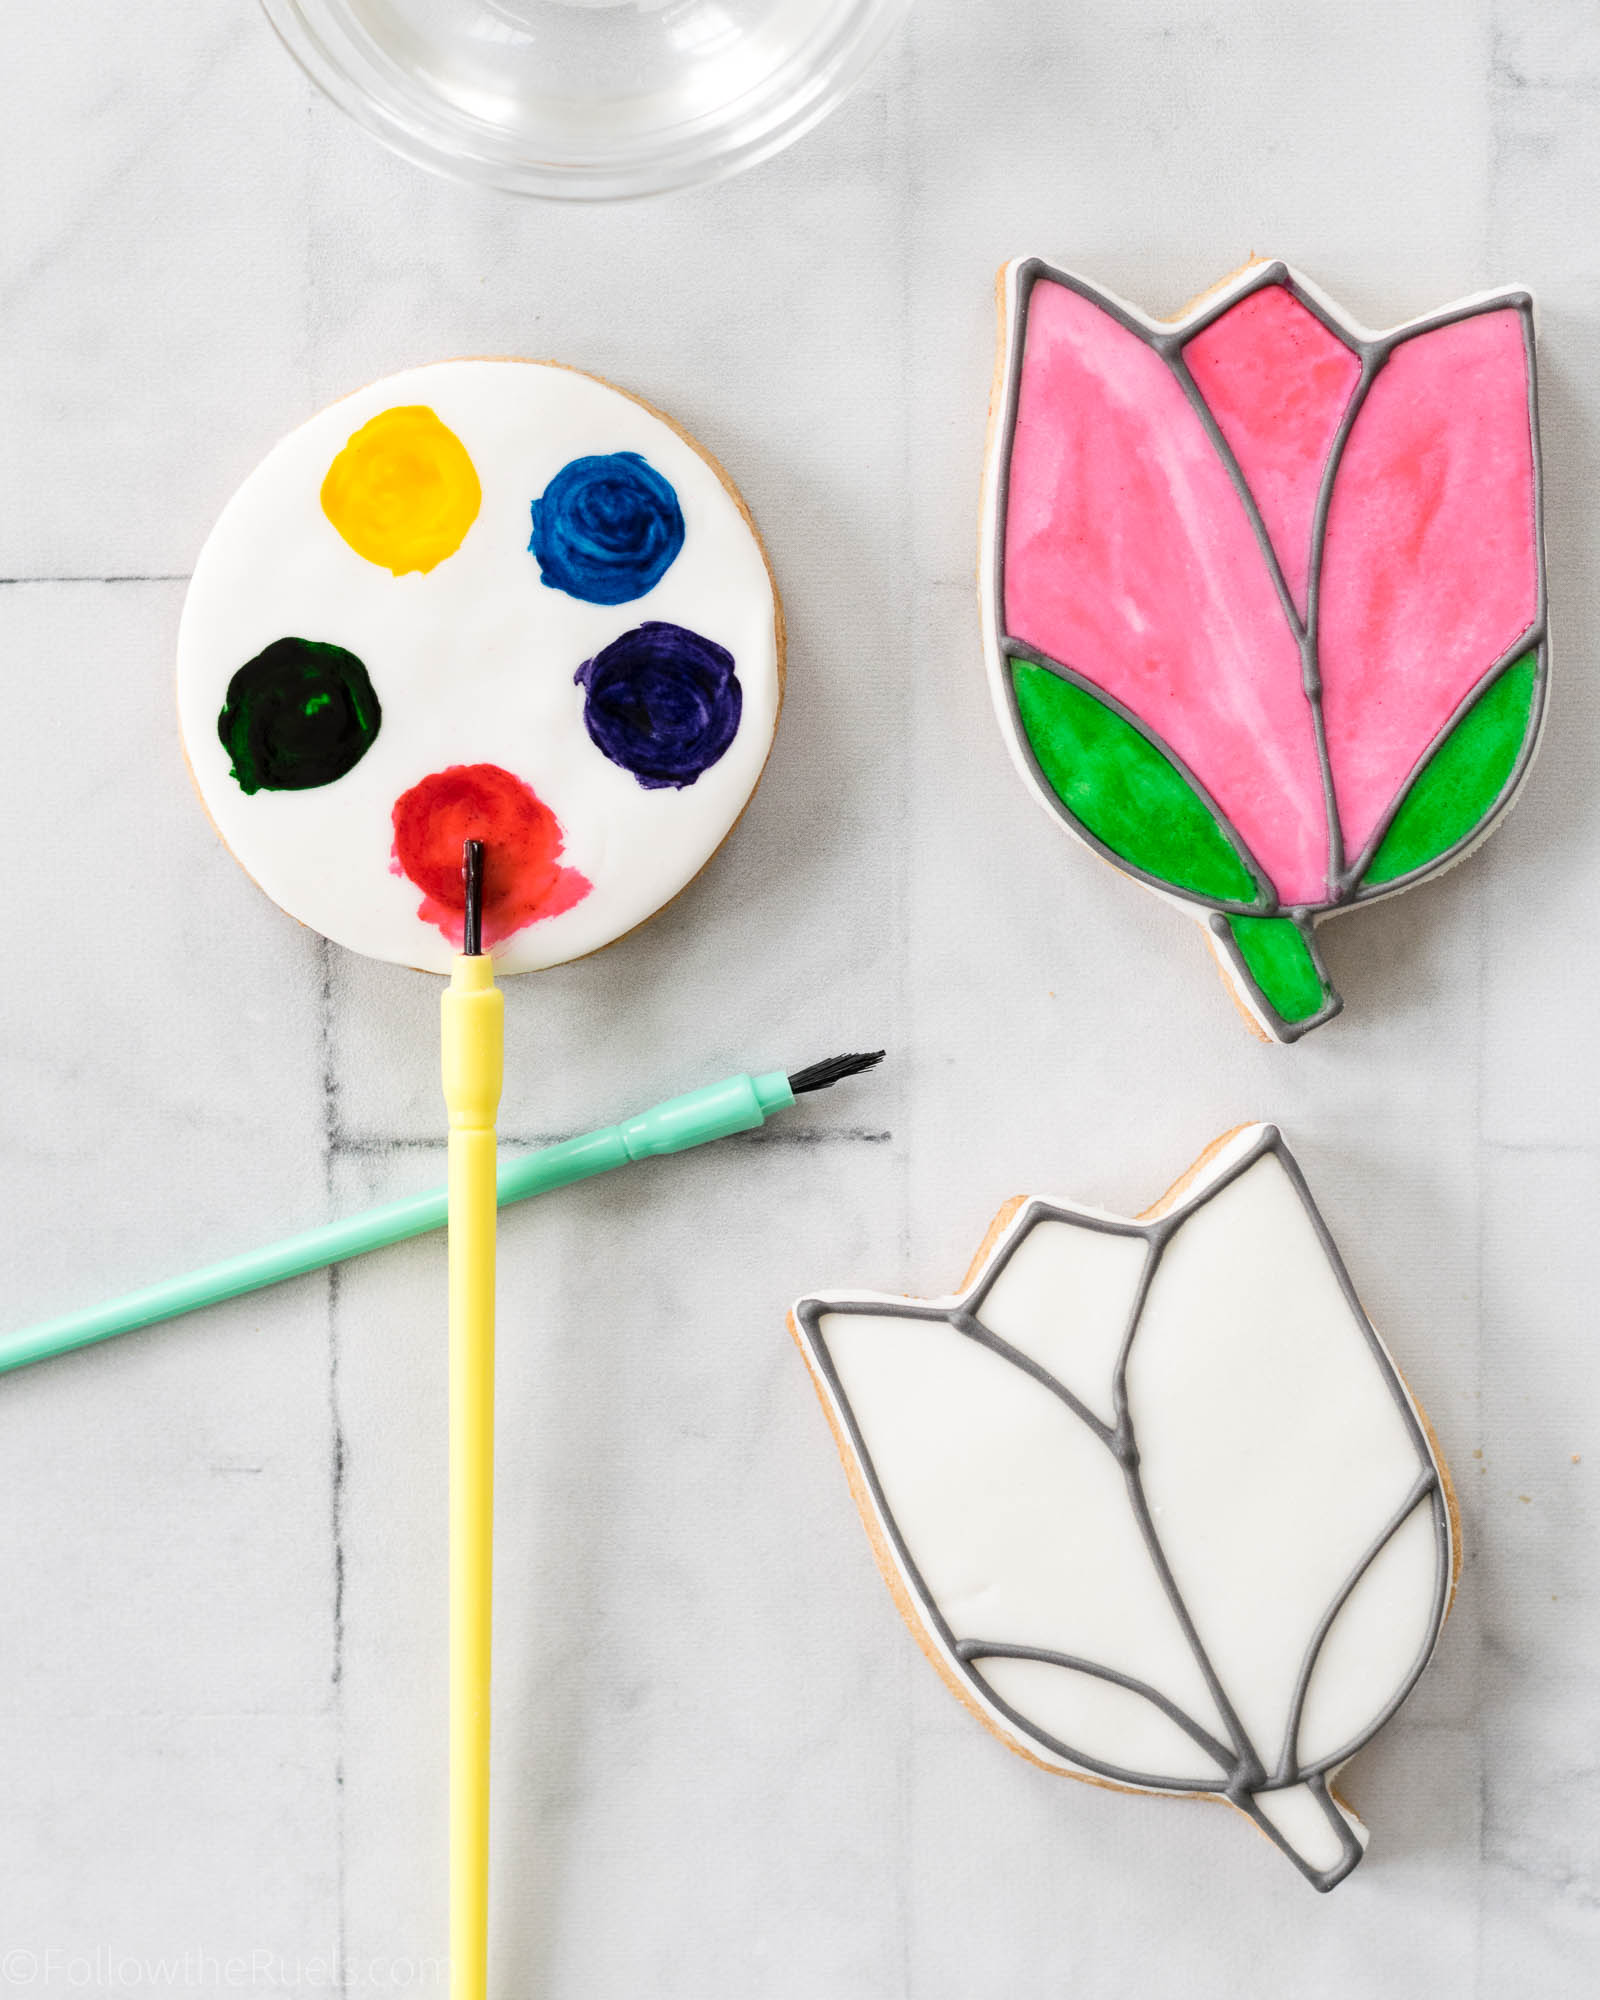
Finally, you will also want to create a little paint pallet for the kids to use. To make the pallet, I brushed drops of gel food coloring on a round cookie, then spread them out with a paint brush*. If you are transporting these cookies in any way, you will want to wait for the food coloring to dry before moving. They will still be a little tacky, but they should be dry in about 20 minutes. 
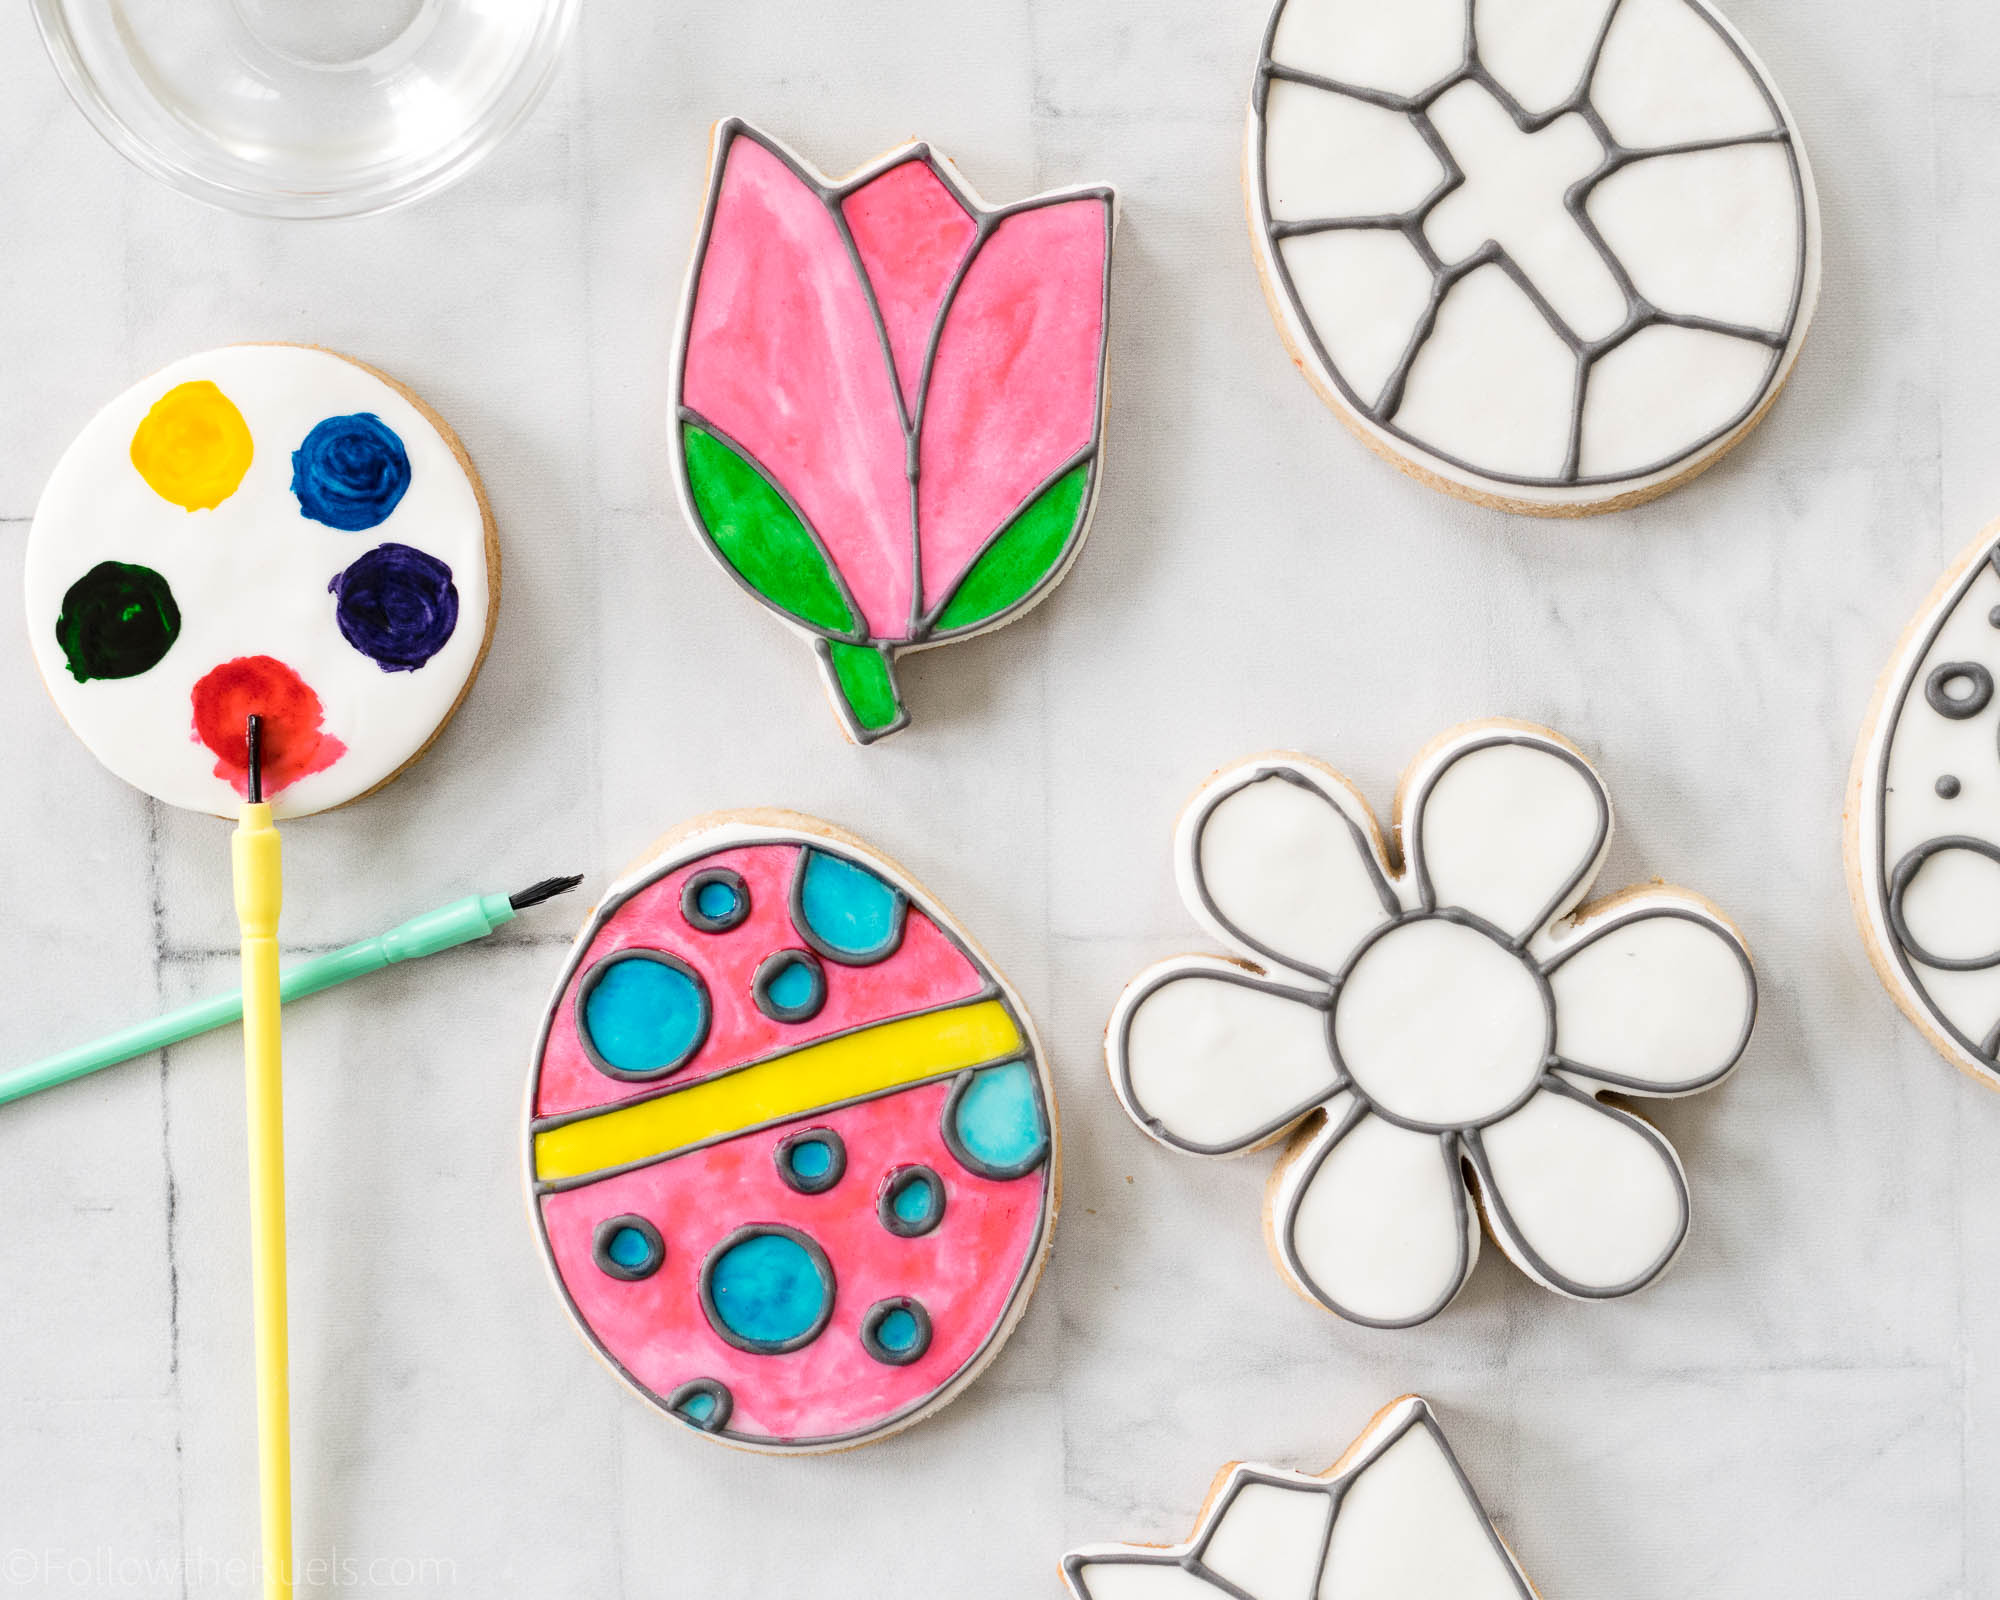
Finally, to paint these cookies, pour a small amount of clear extract (like almond) or clear alcohol (like vodka) (don’t worry, the alcohol evaporates after it is painted so the kids will not actually be ingesting it!) into a bowl and let the kids dip the paint brush into the extract, then brush into the color of their choosing. Then they can paint away!

If I were a kid, I would have lots of fun with the activity. Heck, I’m an adult and I had fun making these cookies!

Instructions

If you would like to print out instructions for your kids or other parents, feel free to copy the text below. 

  • Pour a small amount of clear extract or clear alcohol (don’t worry, the alcohol will evaporate before the kids eat it!) into a small bowl.
  • Wet the brush in the extract then brush over the color on the color pallet.
  • Paint over the cookie as desired.
  • If you run out of color, mix a little food coloring with the clear extract to make more.
  • Have fun!
Recipes and Tools 

I switched it up a bit with these cookies and decided to make a cross between my sugar-free whole wheat sugar cookies and my strawberry honey sugar cookies from my Summer collection. Essentially, I made the strawberry honey cookies, substituted agave for half of the sugar, and added in whole wheat flour. They were delish! And I think kids and parents alike will like these because they are tasty and they have less sugar than your average sugar cookie. 

But if you don’t want to buy my Summer cookie collection recipes (I get it), the basic sugar-free cookie is still amazing! Or you can keep it old school and make my favorite sugar cookies. Don’t be afraid to mix it up a bit and add any flavors you like. I think lemon zest or lemon extract would be great for Spring!

You will also want to make a batch of royal icing for the black outlines. You only need a small amount, so I would recommend only making about half a batch (and you will still have some left over).

*Only use paint brushes that have been used on food. Never use paint brushes that have actually come into contact with paint. Its okay to use normal craft brushes, but Wilton makes a set especially for food. I have included them below!

[show_shopthepost_widget id=”3081503″] 
/ Filed In: Cookies New, Decorated Cookies, Desserts, Eat
Tagged: Coloring, cookies, DIY, Easter, kid friendly, painting

Embossed Marbled Sugar Cookies

March 28, 2018

There comes a time when even I get a little tired of decorating cookies. And that time comes after decorating (1,2,3,4,5,6) six different sets of Easter-ish cookies. I just needed a little break from all that icing. 

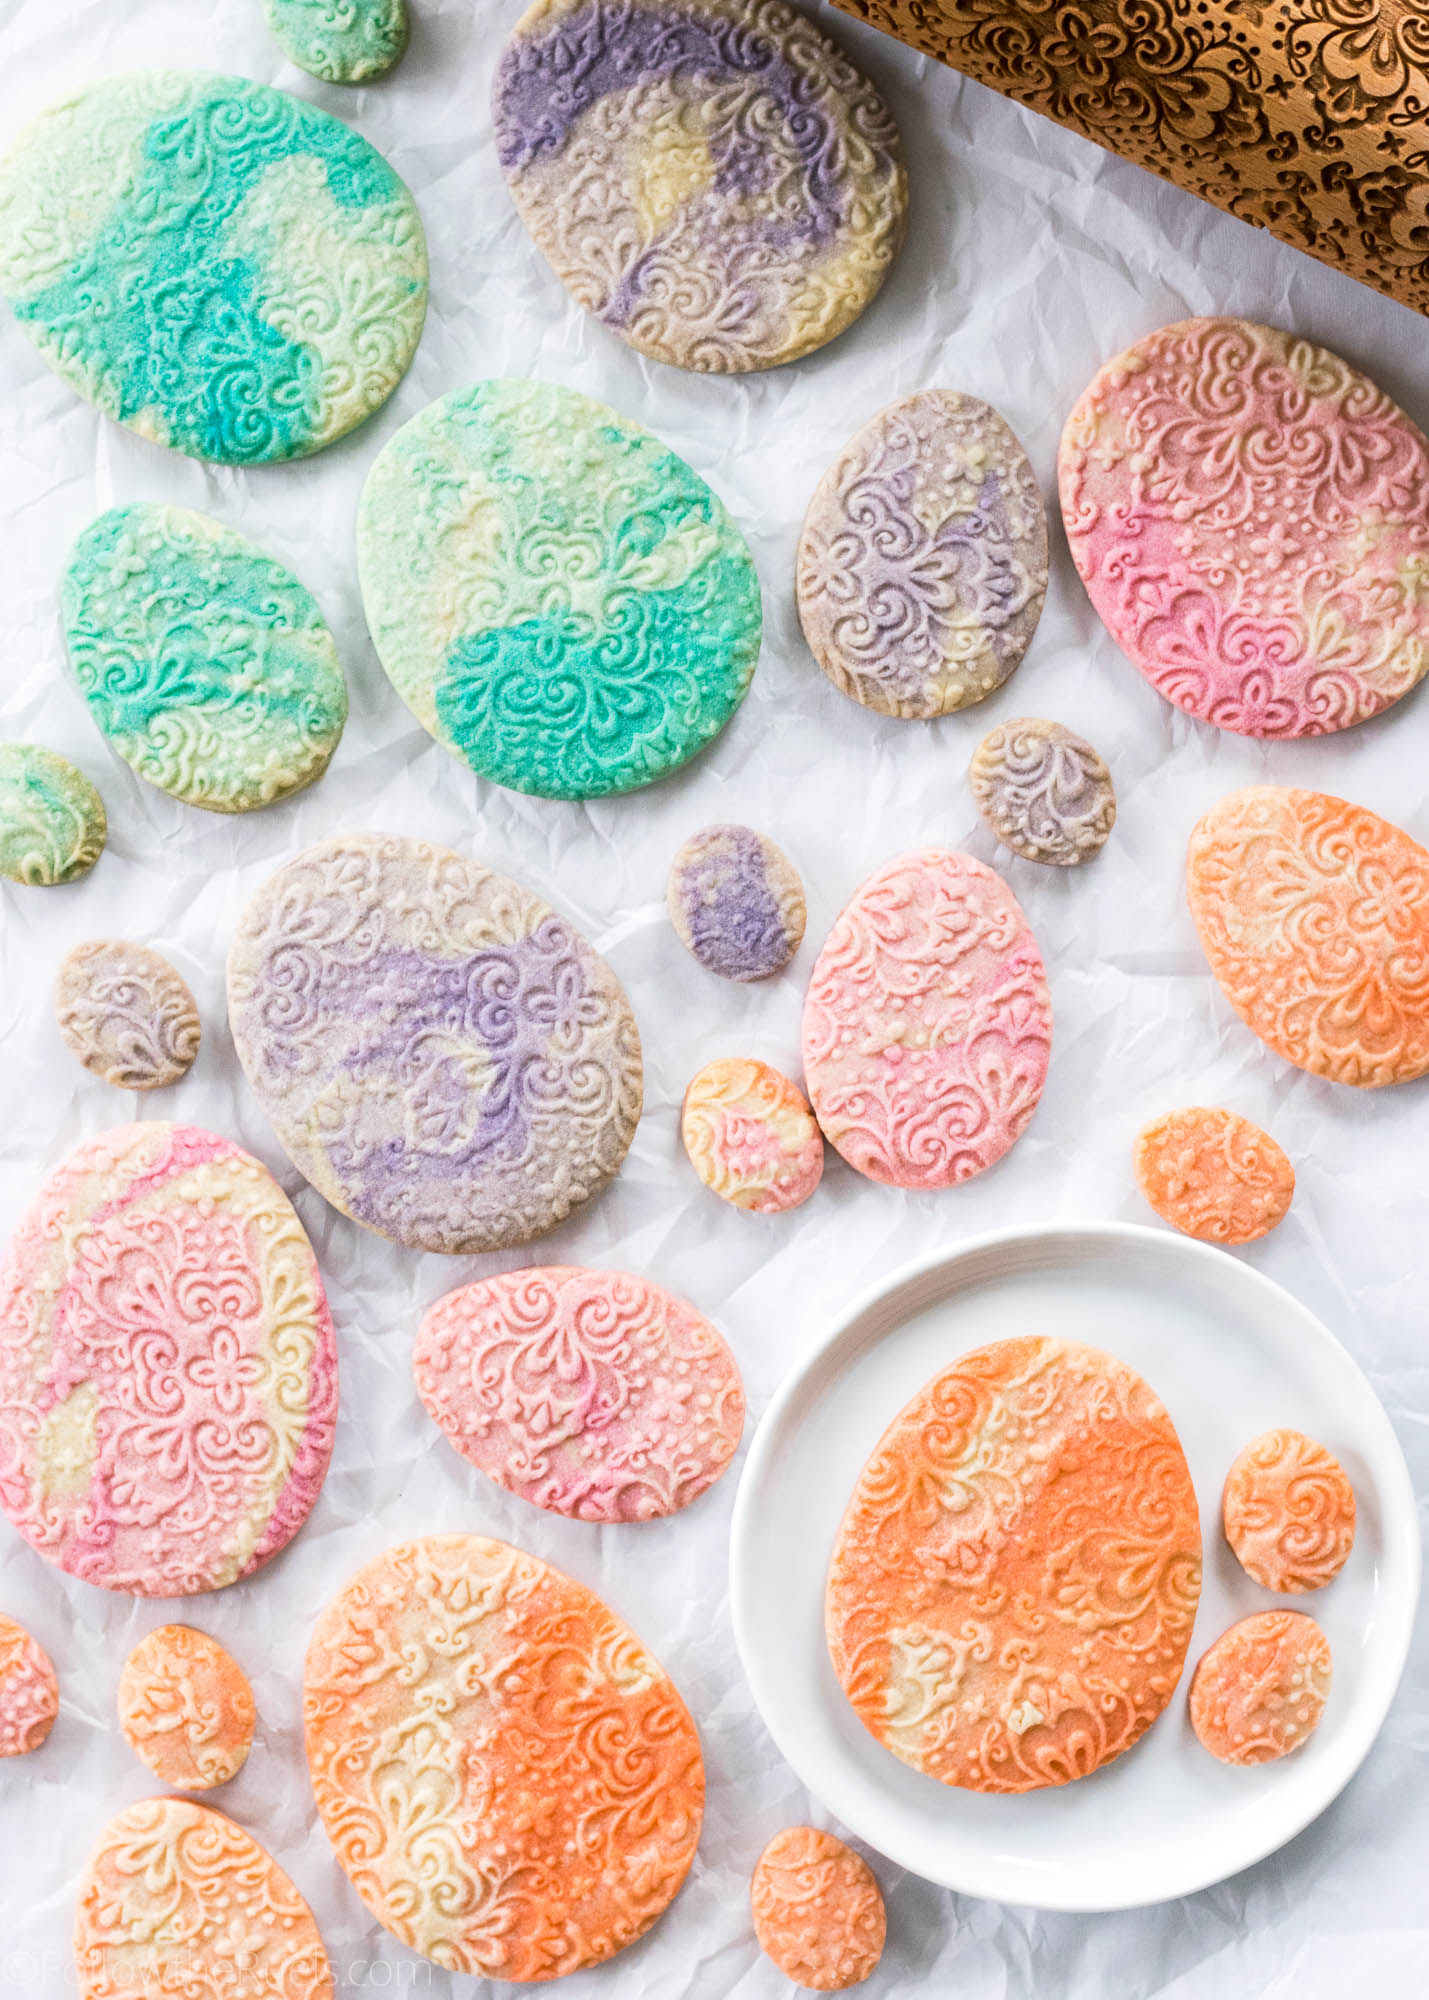
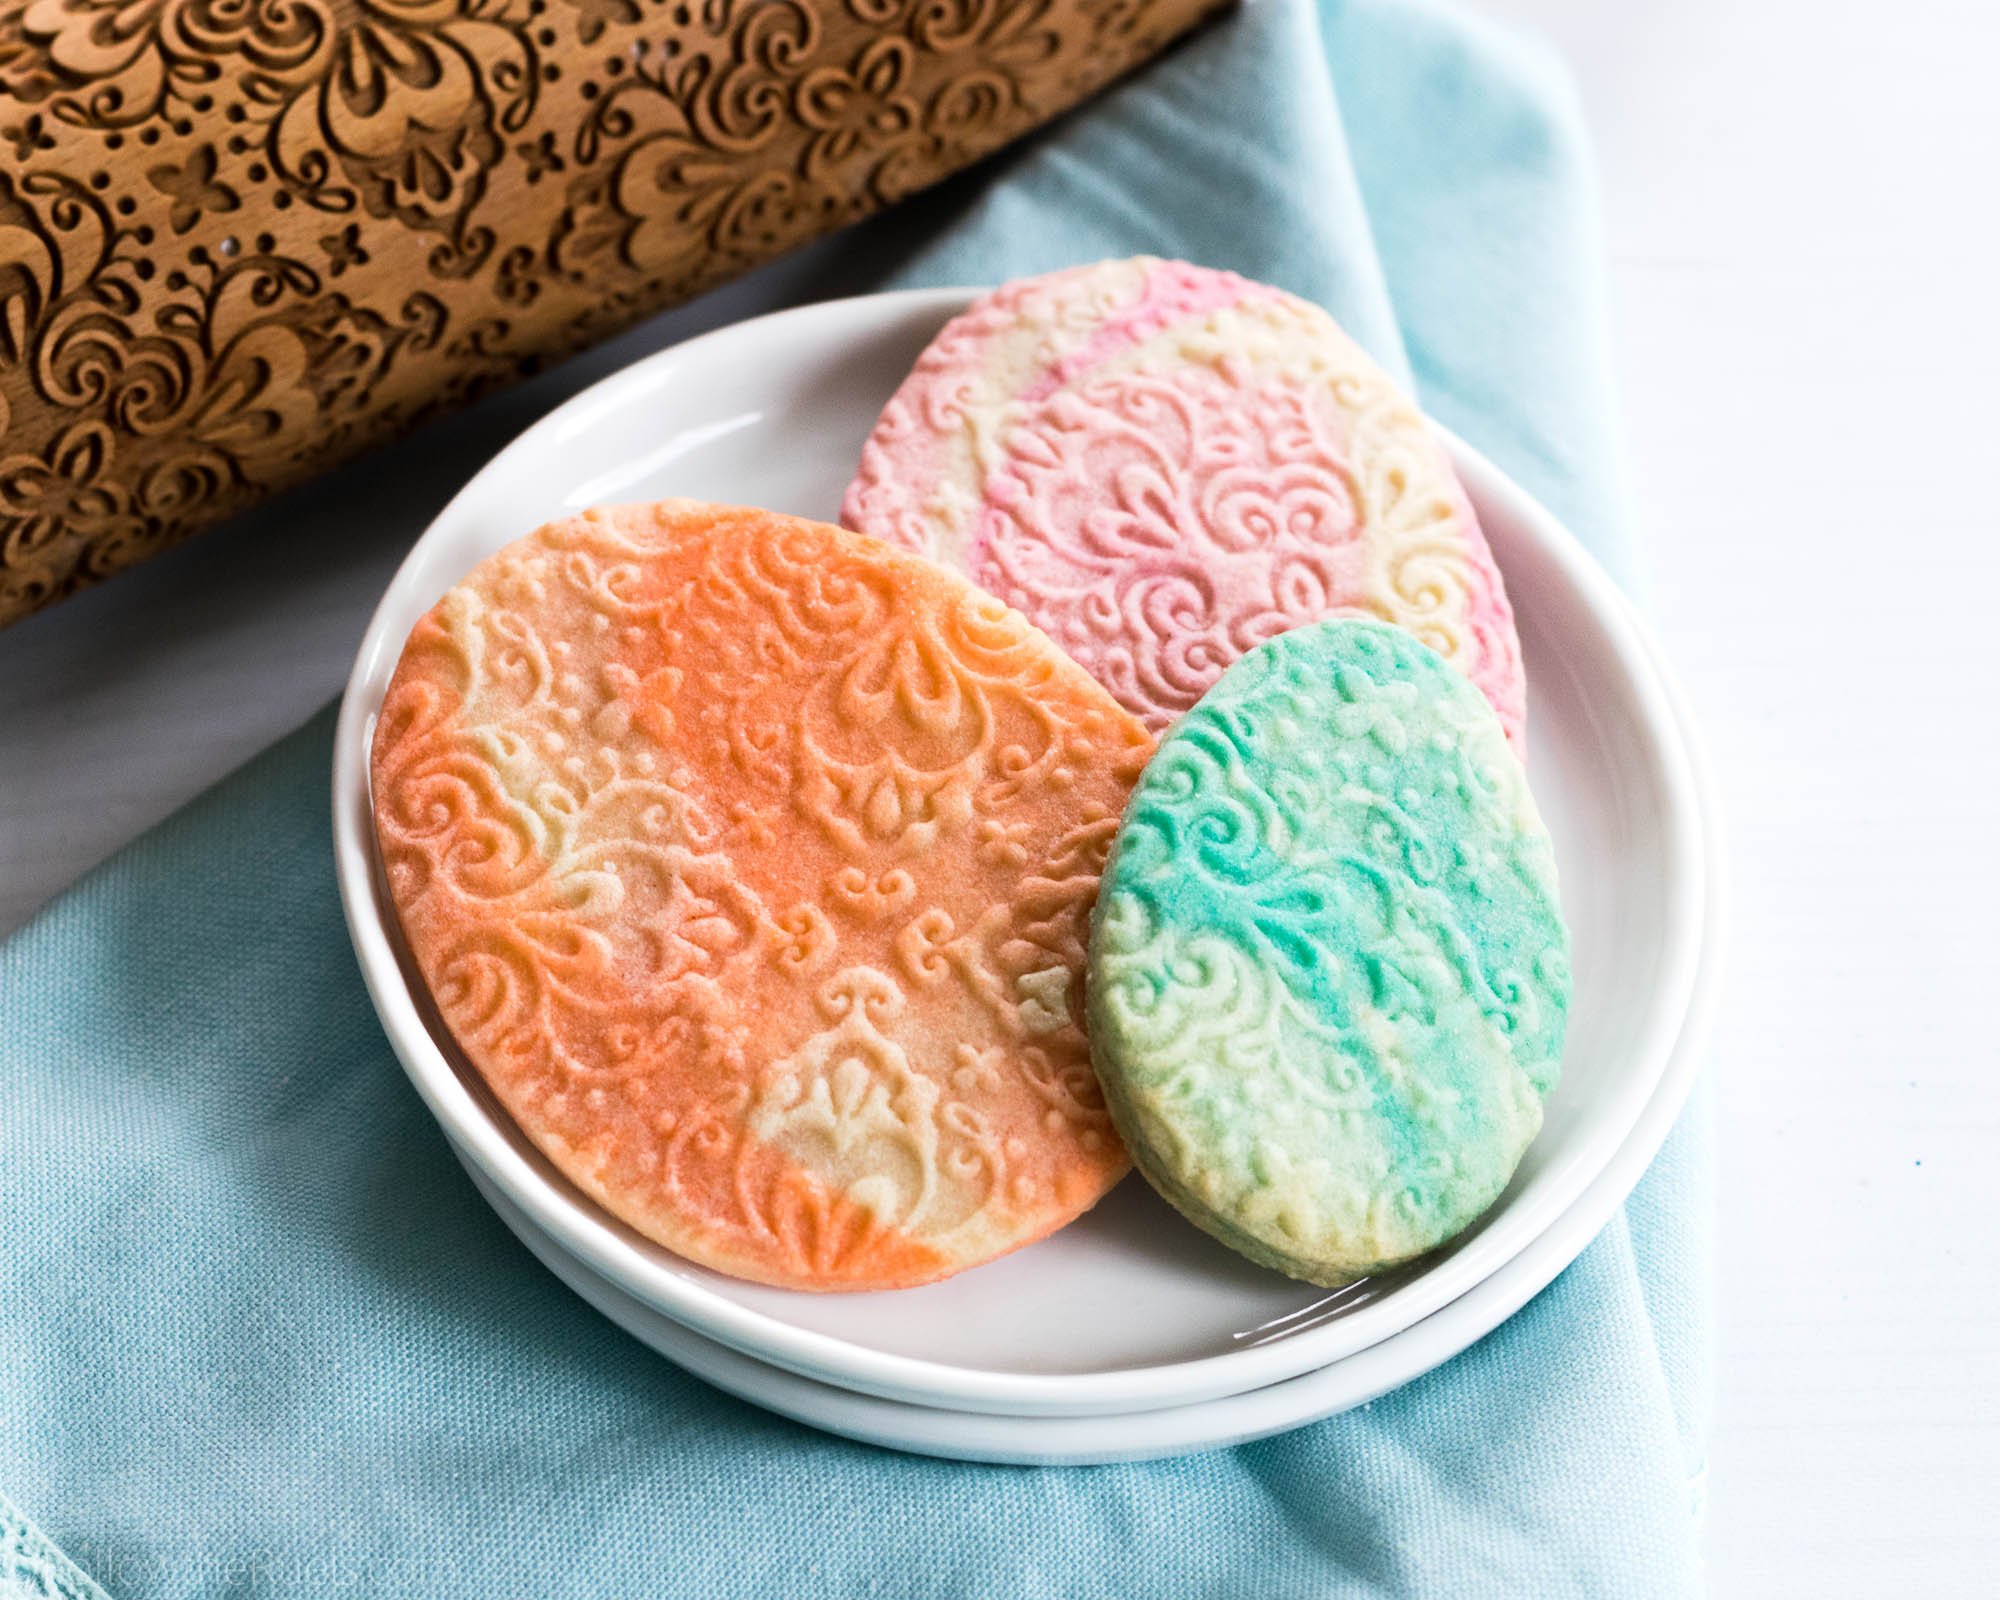
Thankfully, you don’t need icing to make a pretty cookie. In the case of the embossed marbled sugar cookies you just need an engraved rolling pin and some food coloring!

How to Make Them

These are so easy, guys, and a great baking project for the kiddos! 

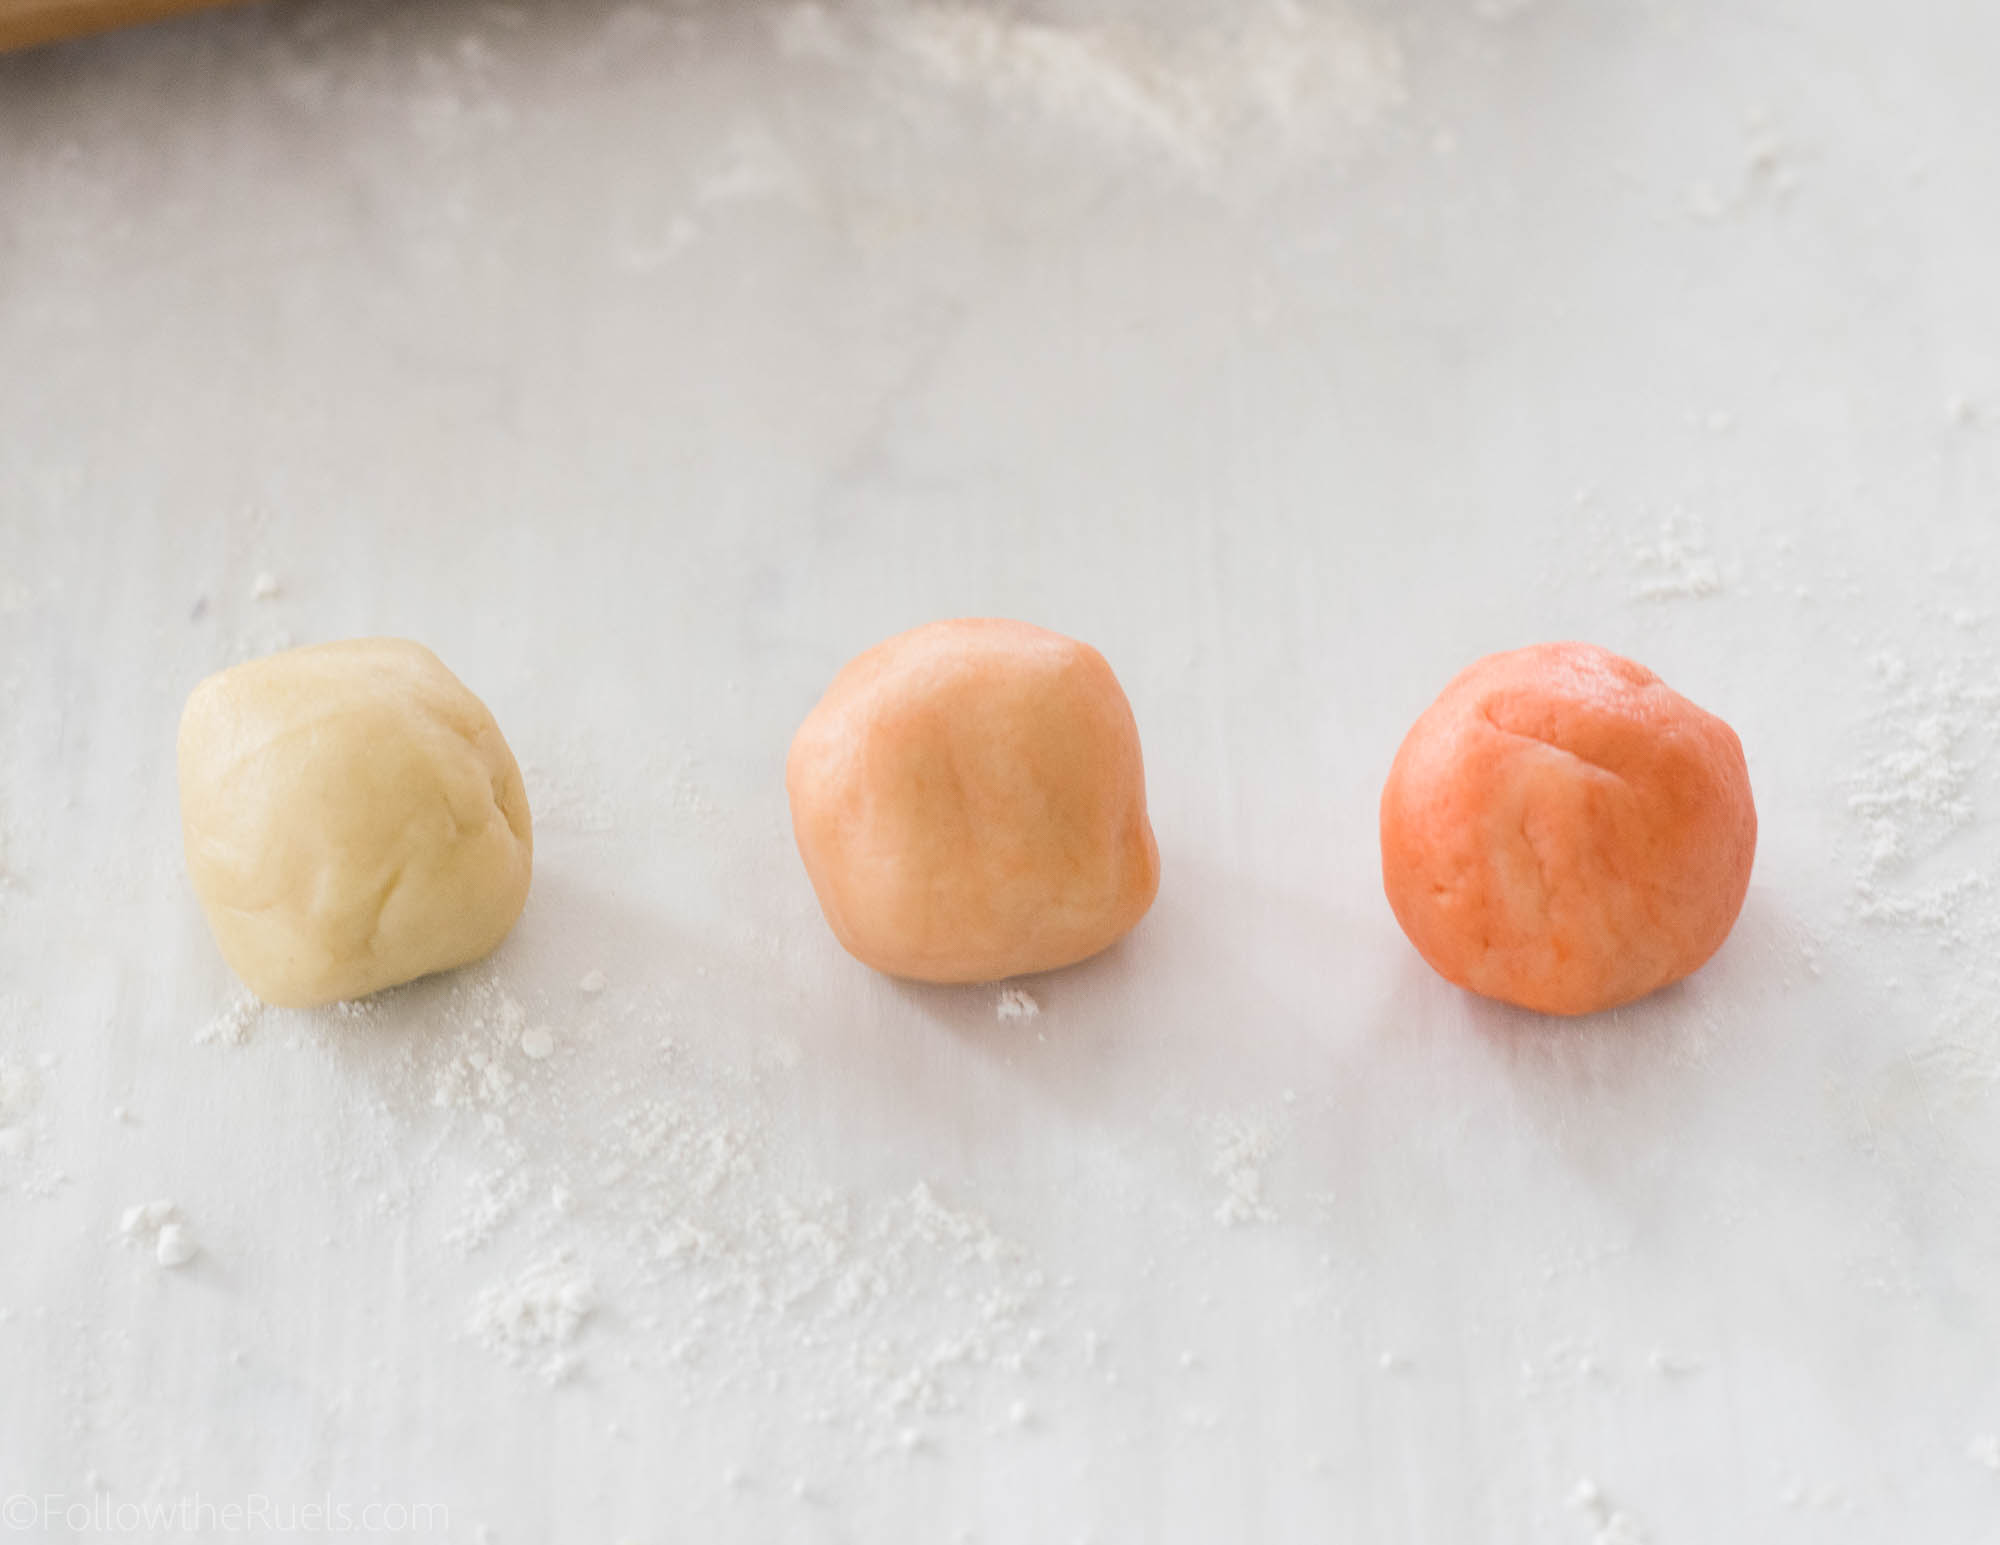
Start by separating your dough out into thirds. Dye one of the thirds a dark shade of your favorite color, dye one a light shade, and leave one totally plain. 

In my case, I added about 2 drops of gel food coloring to my darker ball, and a tiny drop to the light ball. I worked the dough between my fingers until the food coloring was completely mixed in.

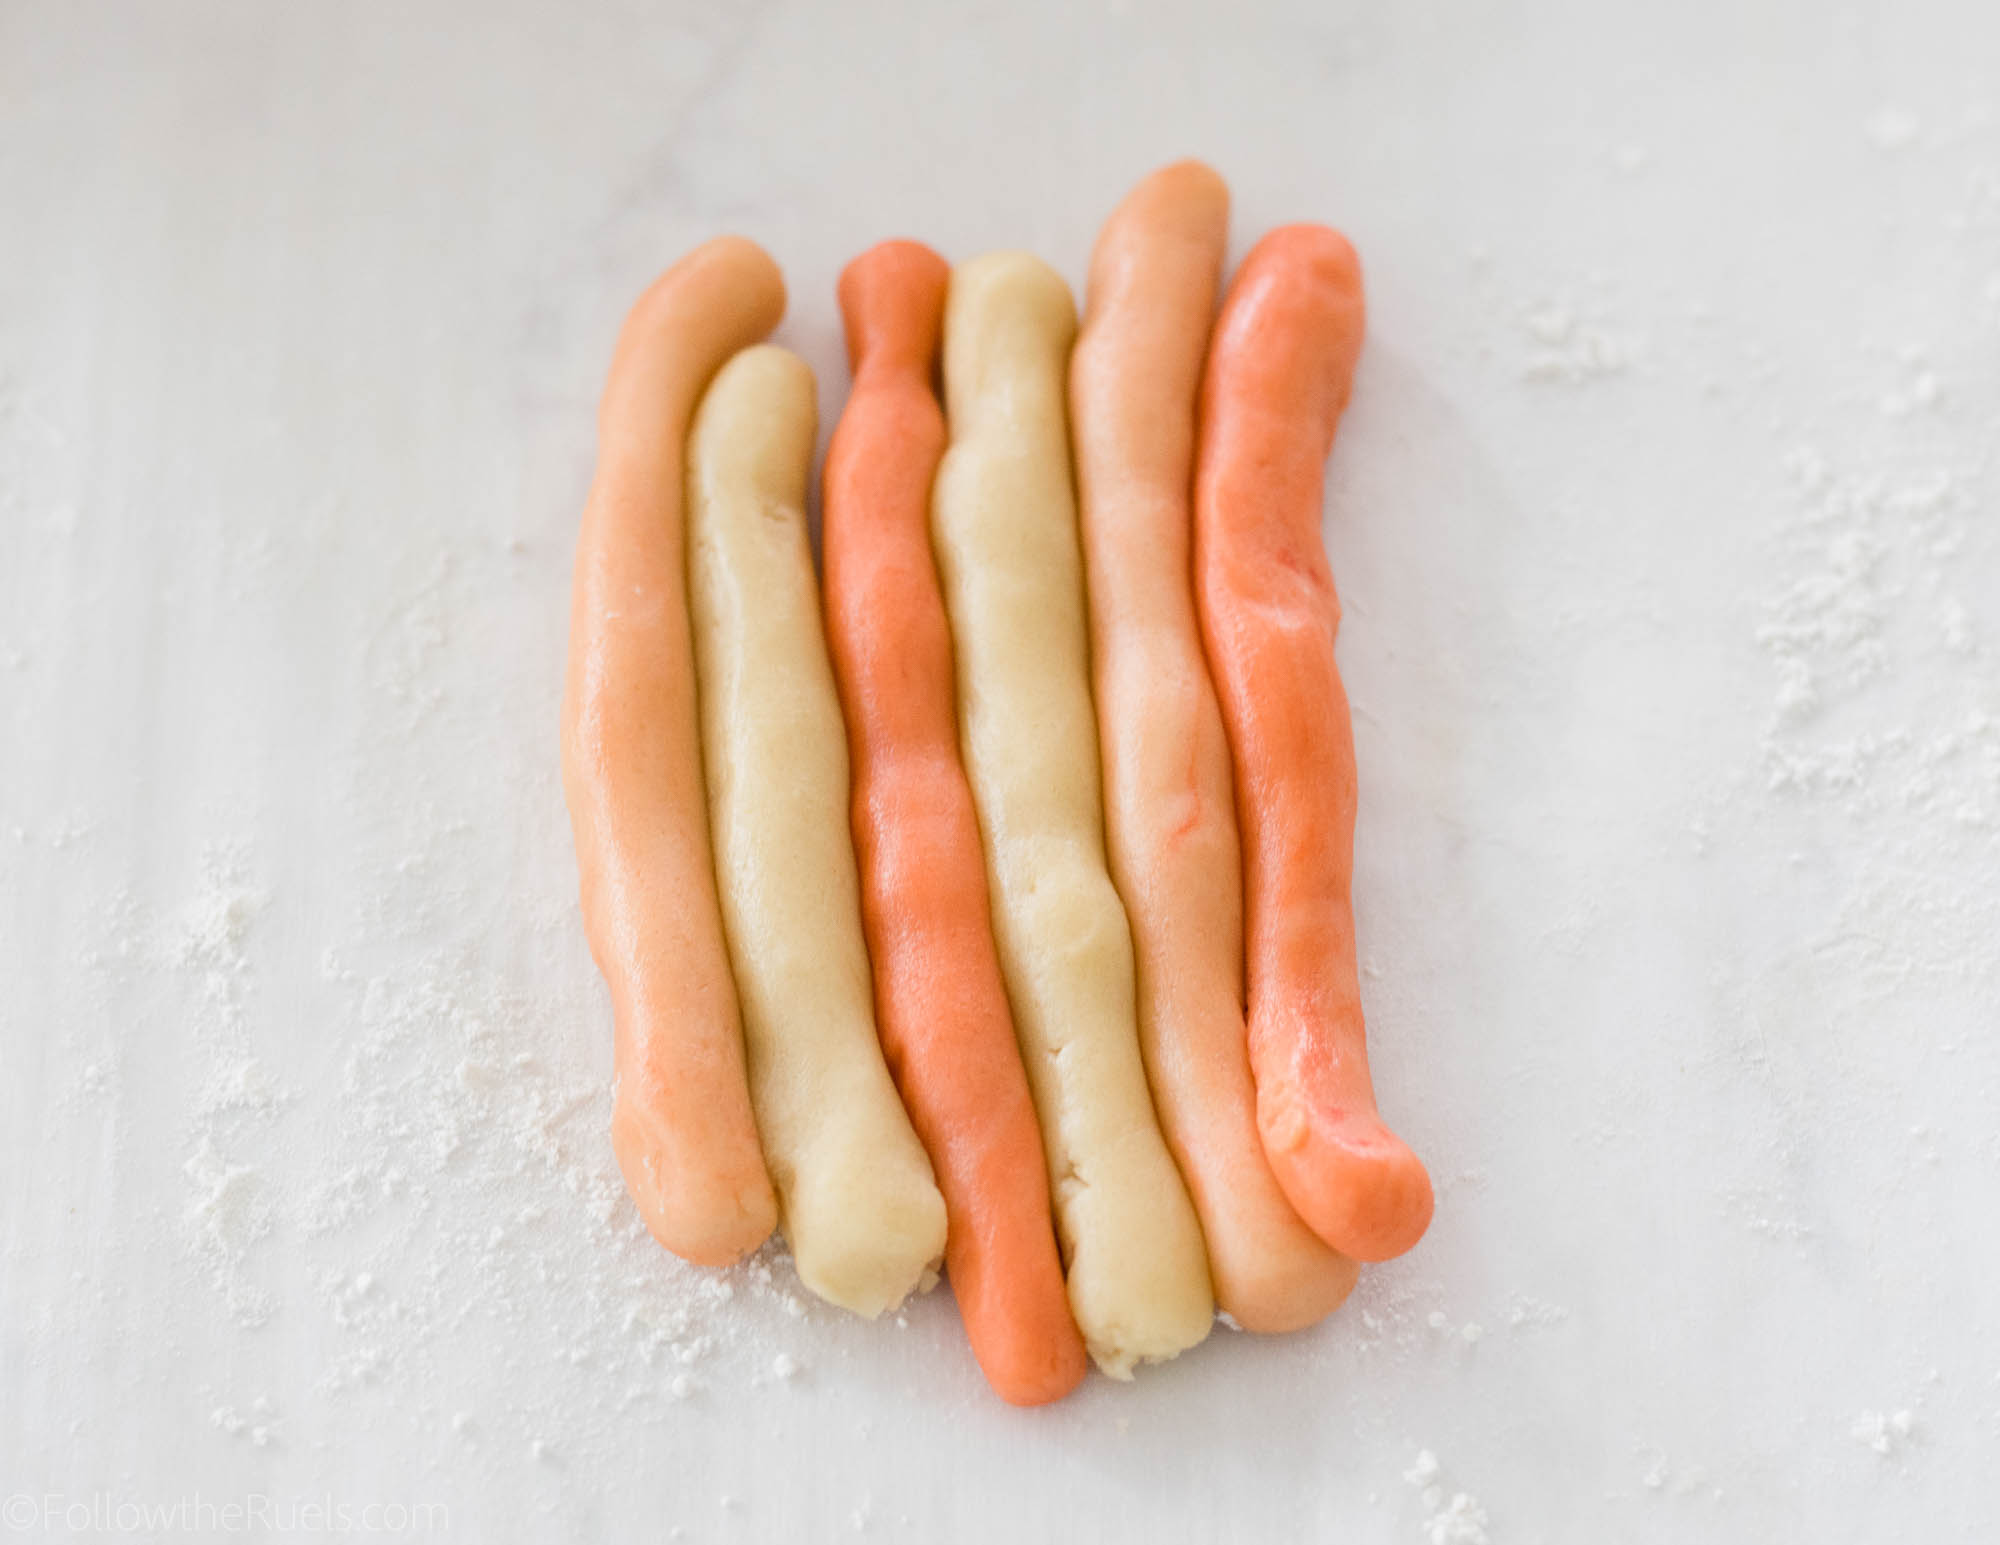
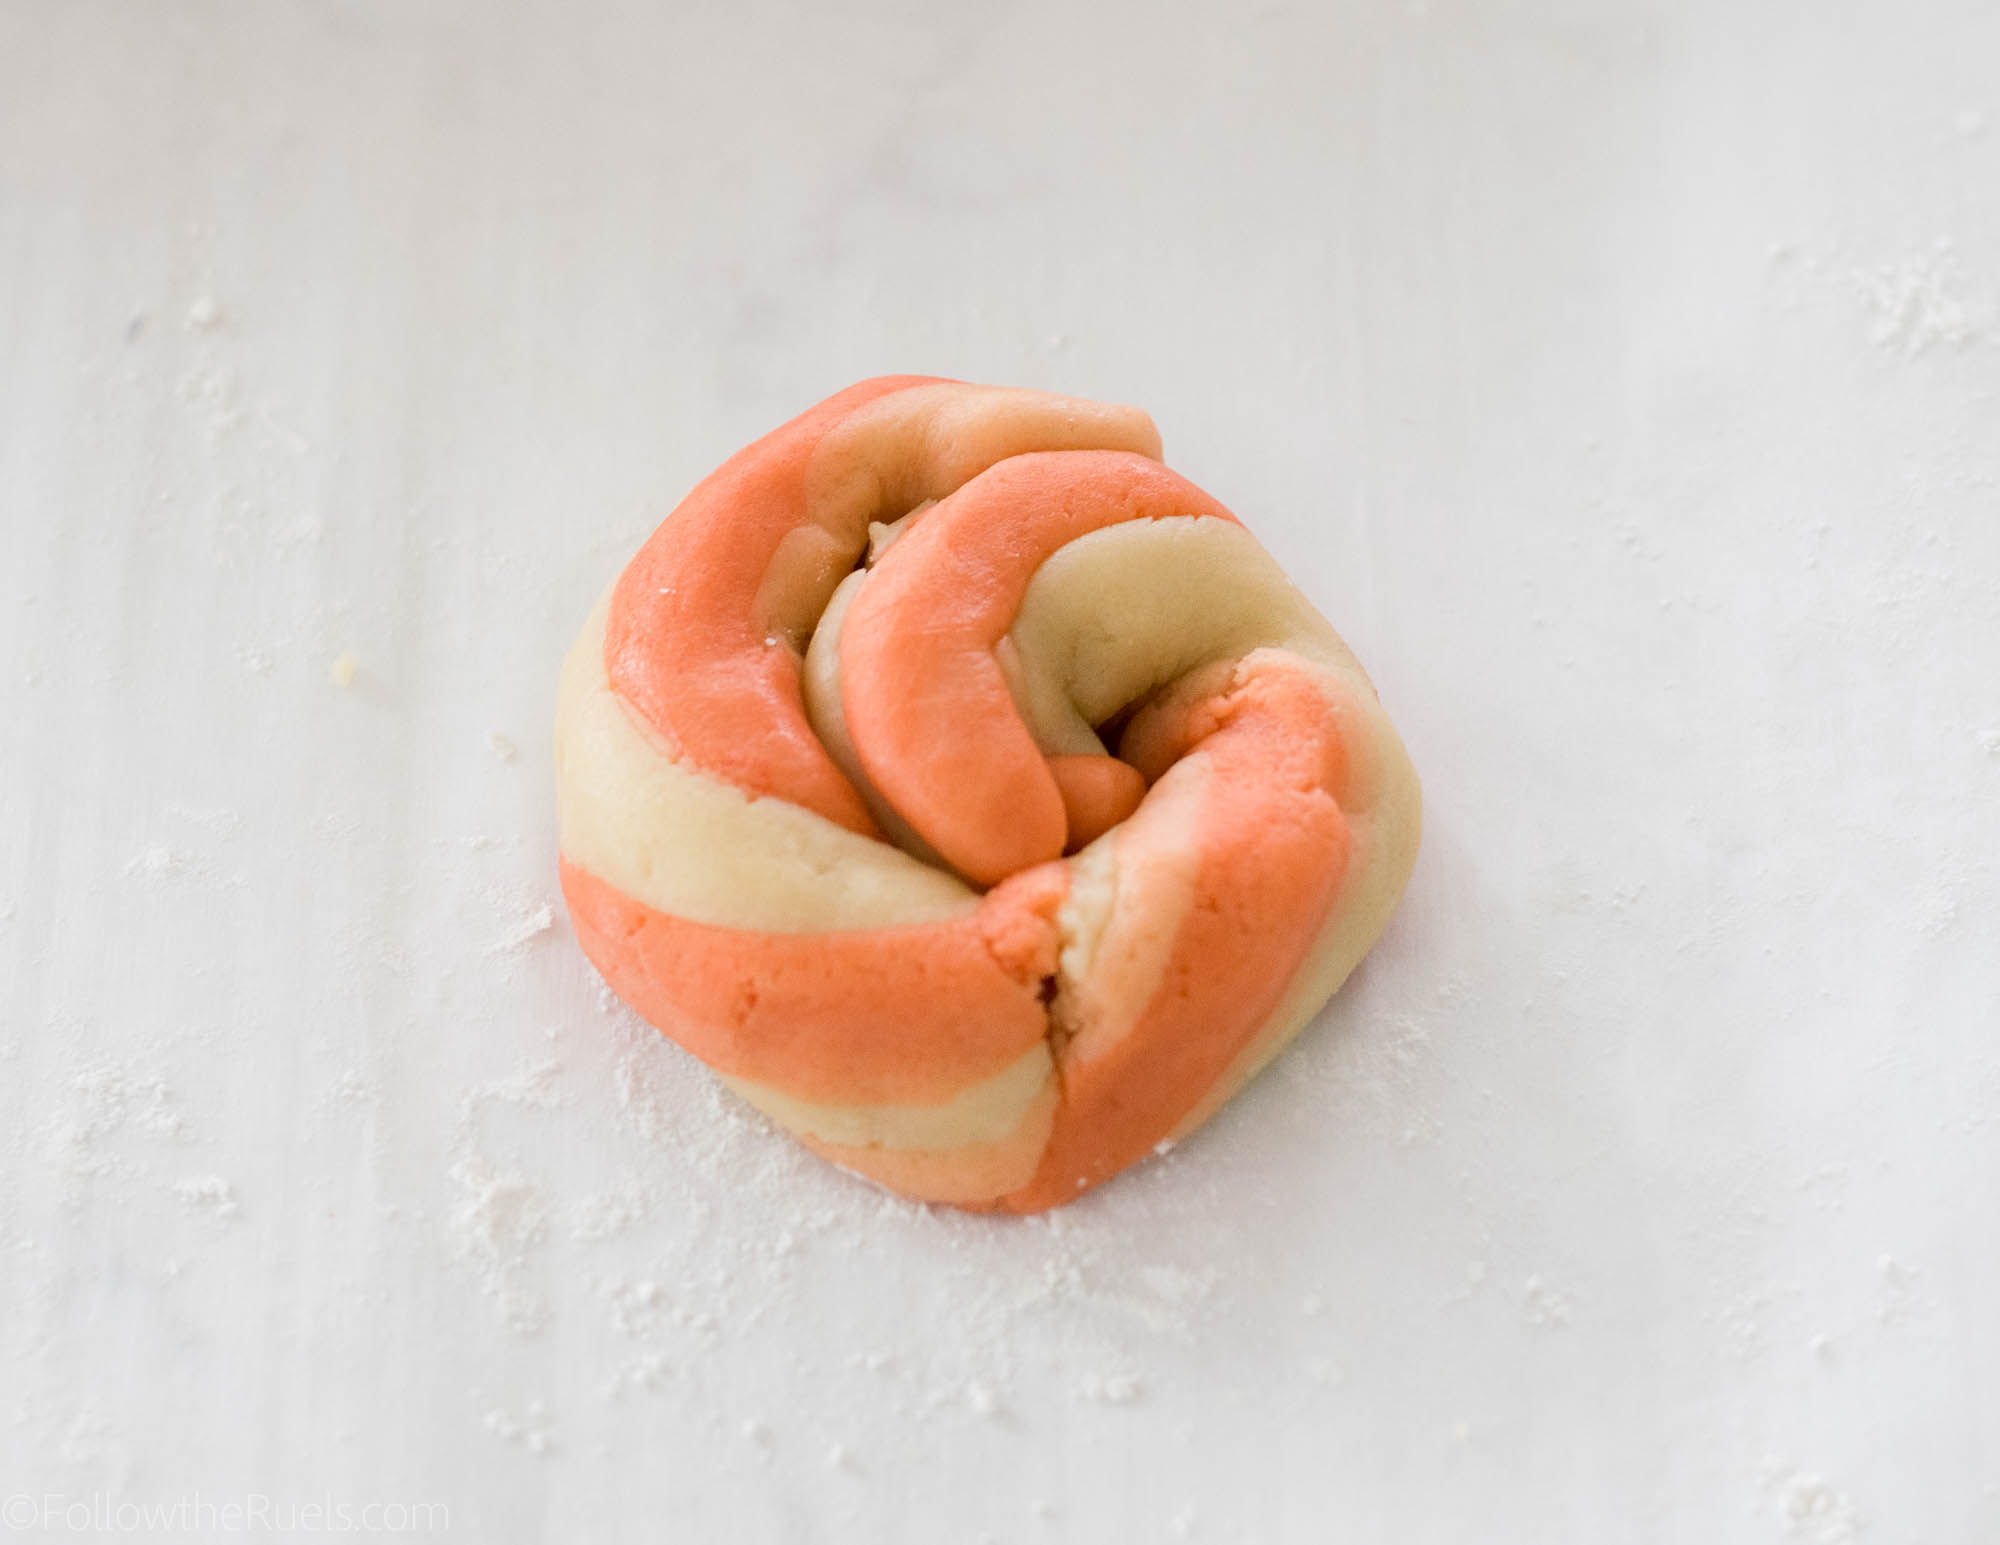
Roll the balls into strips and lay all the strips next to each other. Then fold the strips in to form one big cookie dough sausage. I am pretty sure that’s a technical term. Don’t look it up.

Give the cookie dough a twist and a turn to marble all the colors together. 


Then roll the dough out with a normal rolling pin before rolling over it with the engraved rolling pin.

Now, I have come up with a super awesome trick that will ensure that you get a good roll every time!

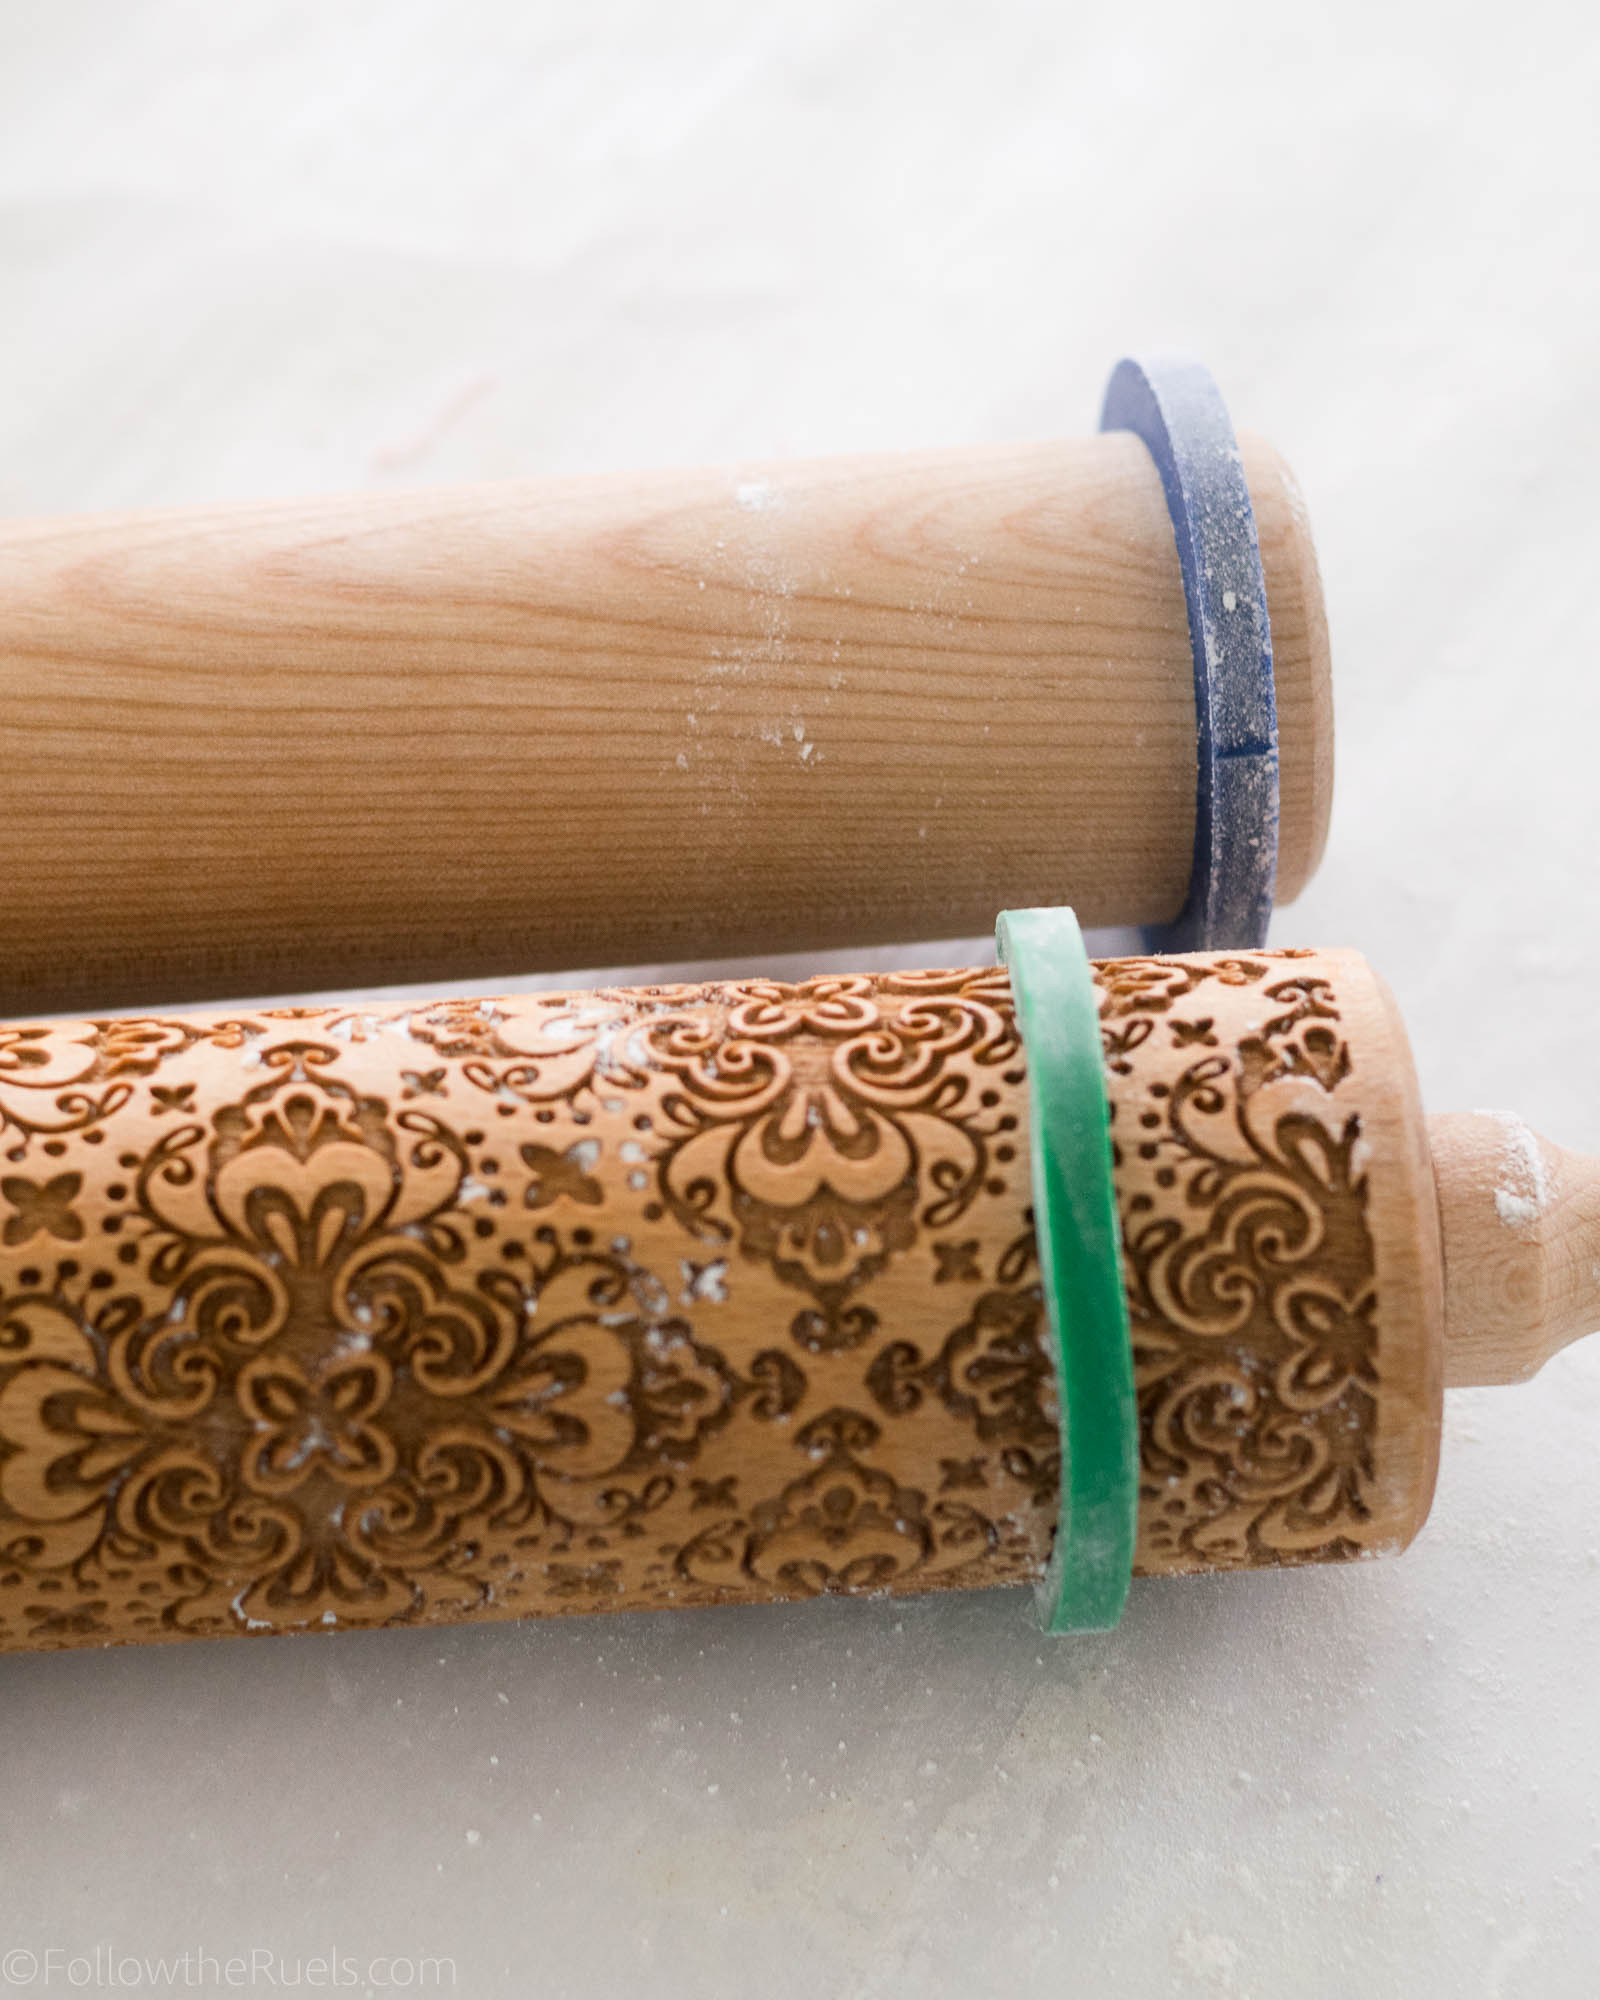
Add rolling pin bands (if you have them) to both your normal rolling pin and your engraved rolling pin. Add the thickest band you have to the normal pin, and the next thickest to the engraved pin.

This will ensure that you put just the right amount of pressure on the cookie dough to get a perfectly embossed cookie.

Before I figured out this trick my cookies were coming out very unevenly and I wasn’t putting enough pressure on the cookie dough with the engraved rolling pin so the pattern wasn’t coming out well.

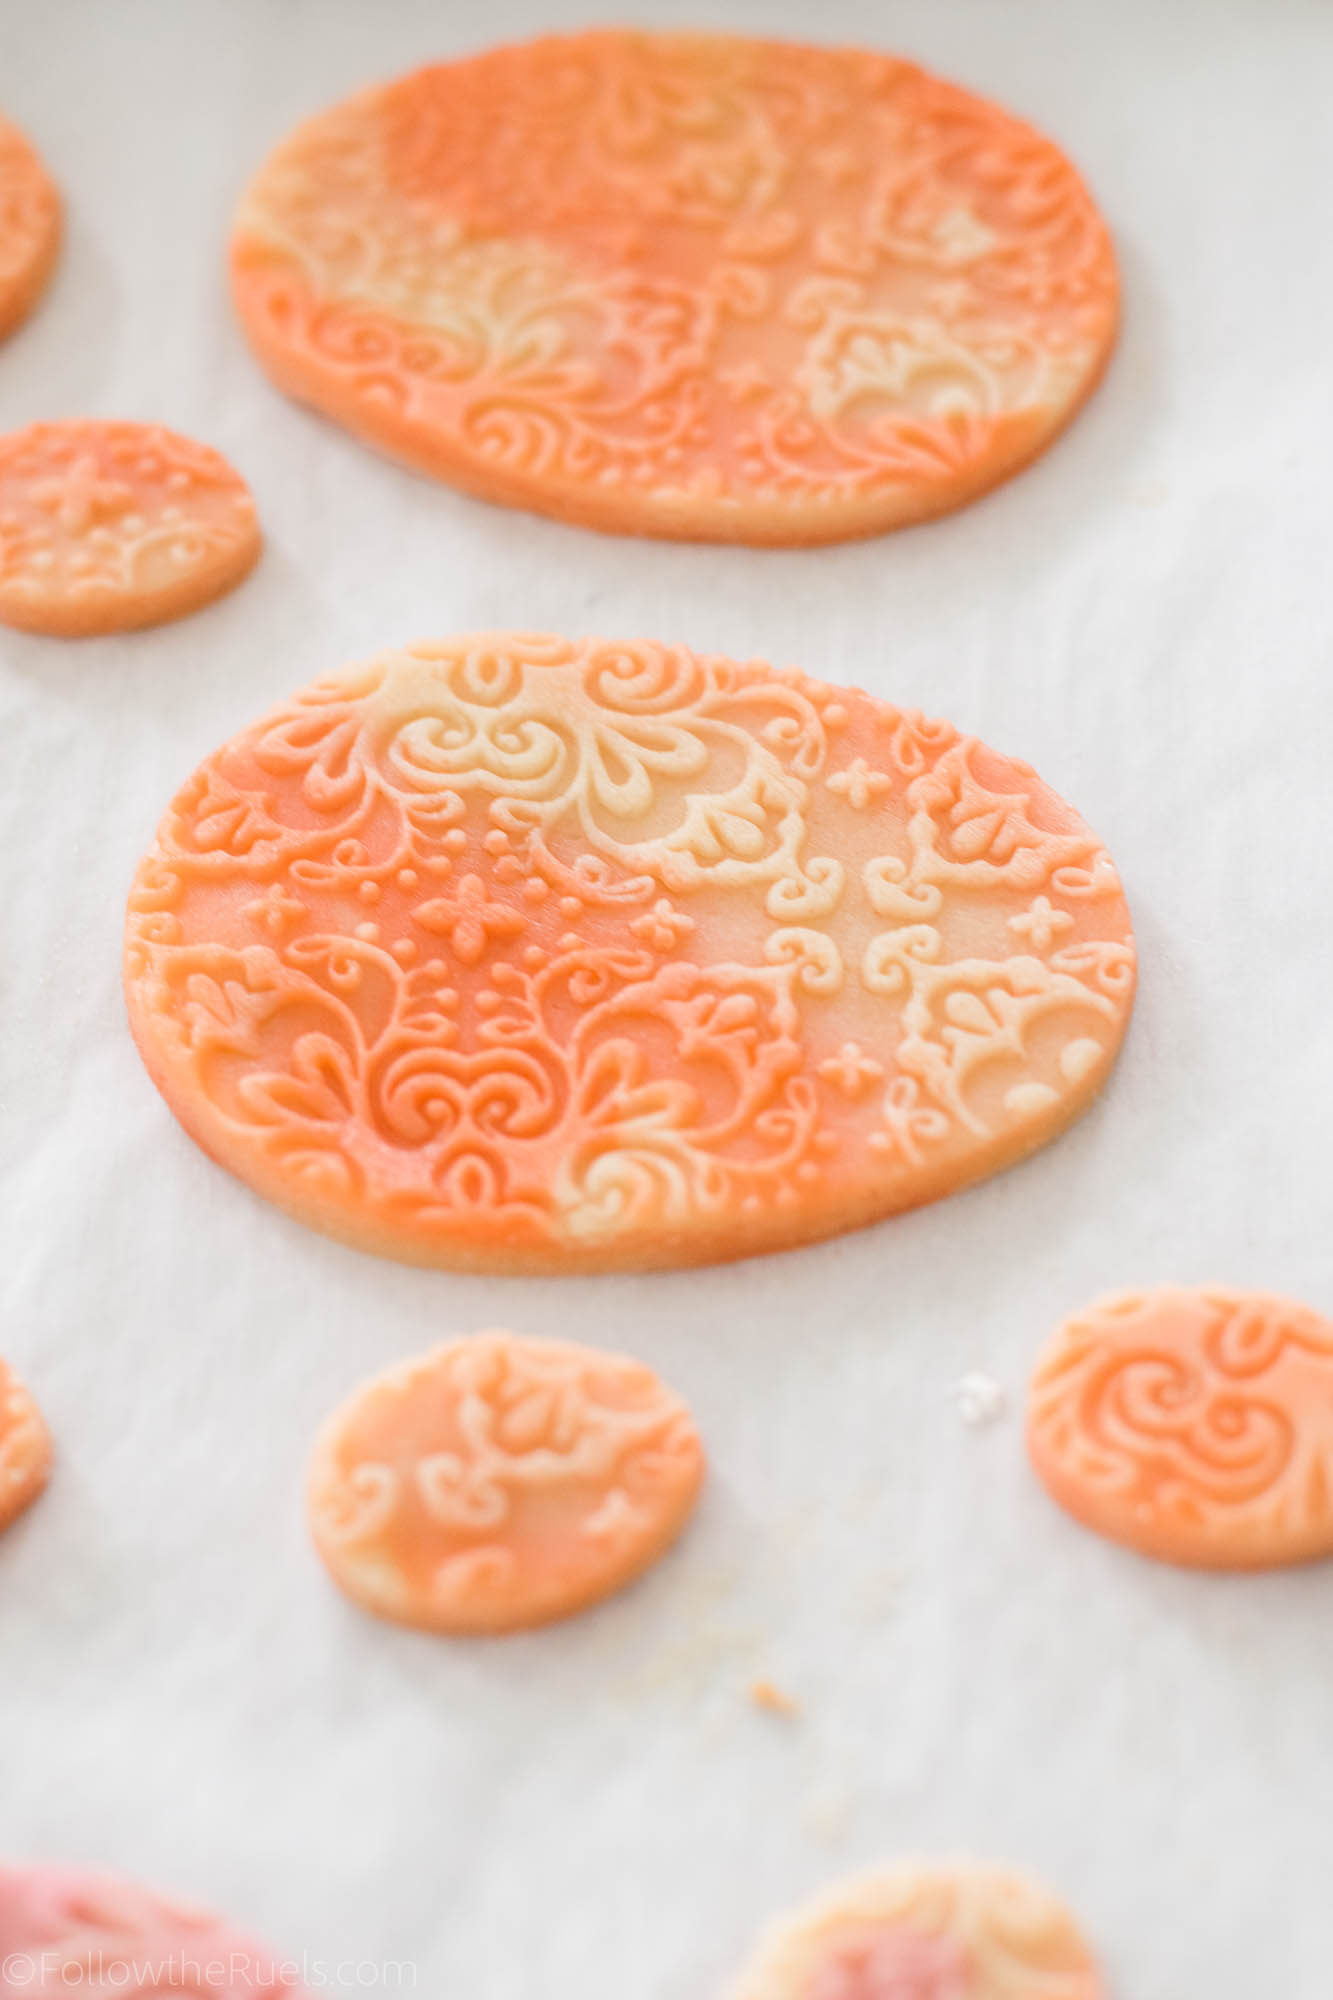
You definitely want to be able to see all the details of the rolling pin because the cookie will flatten a bit in the oven.

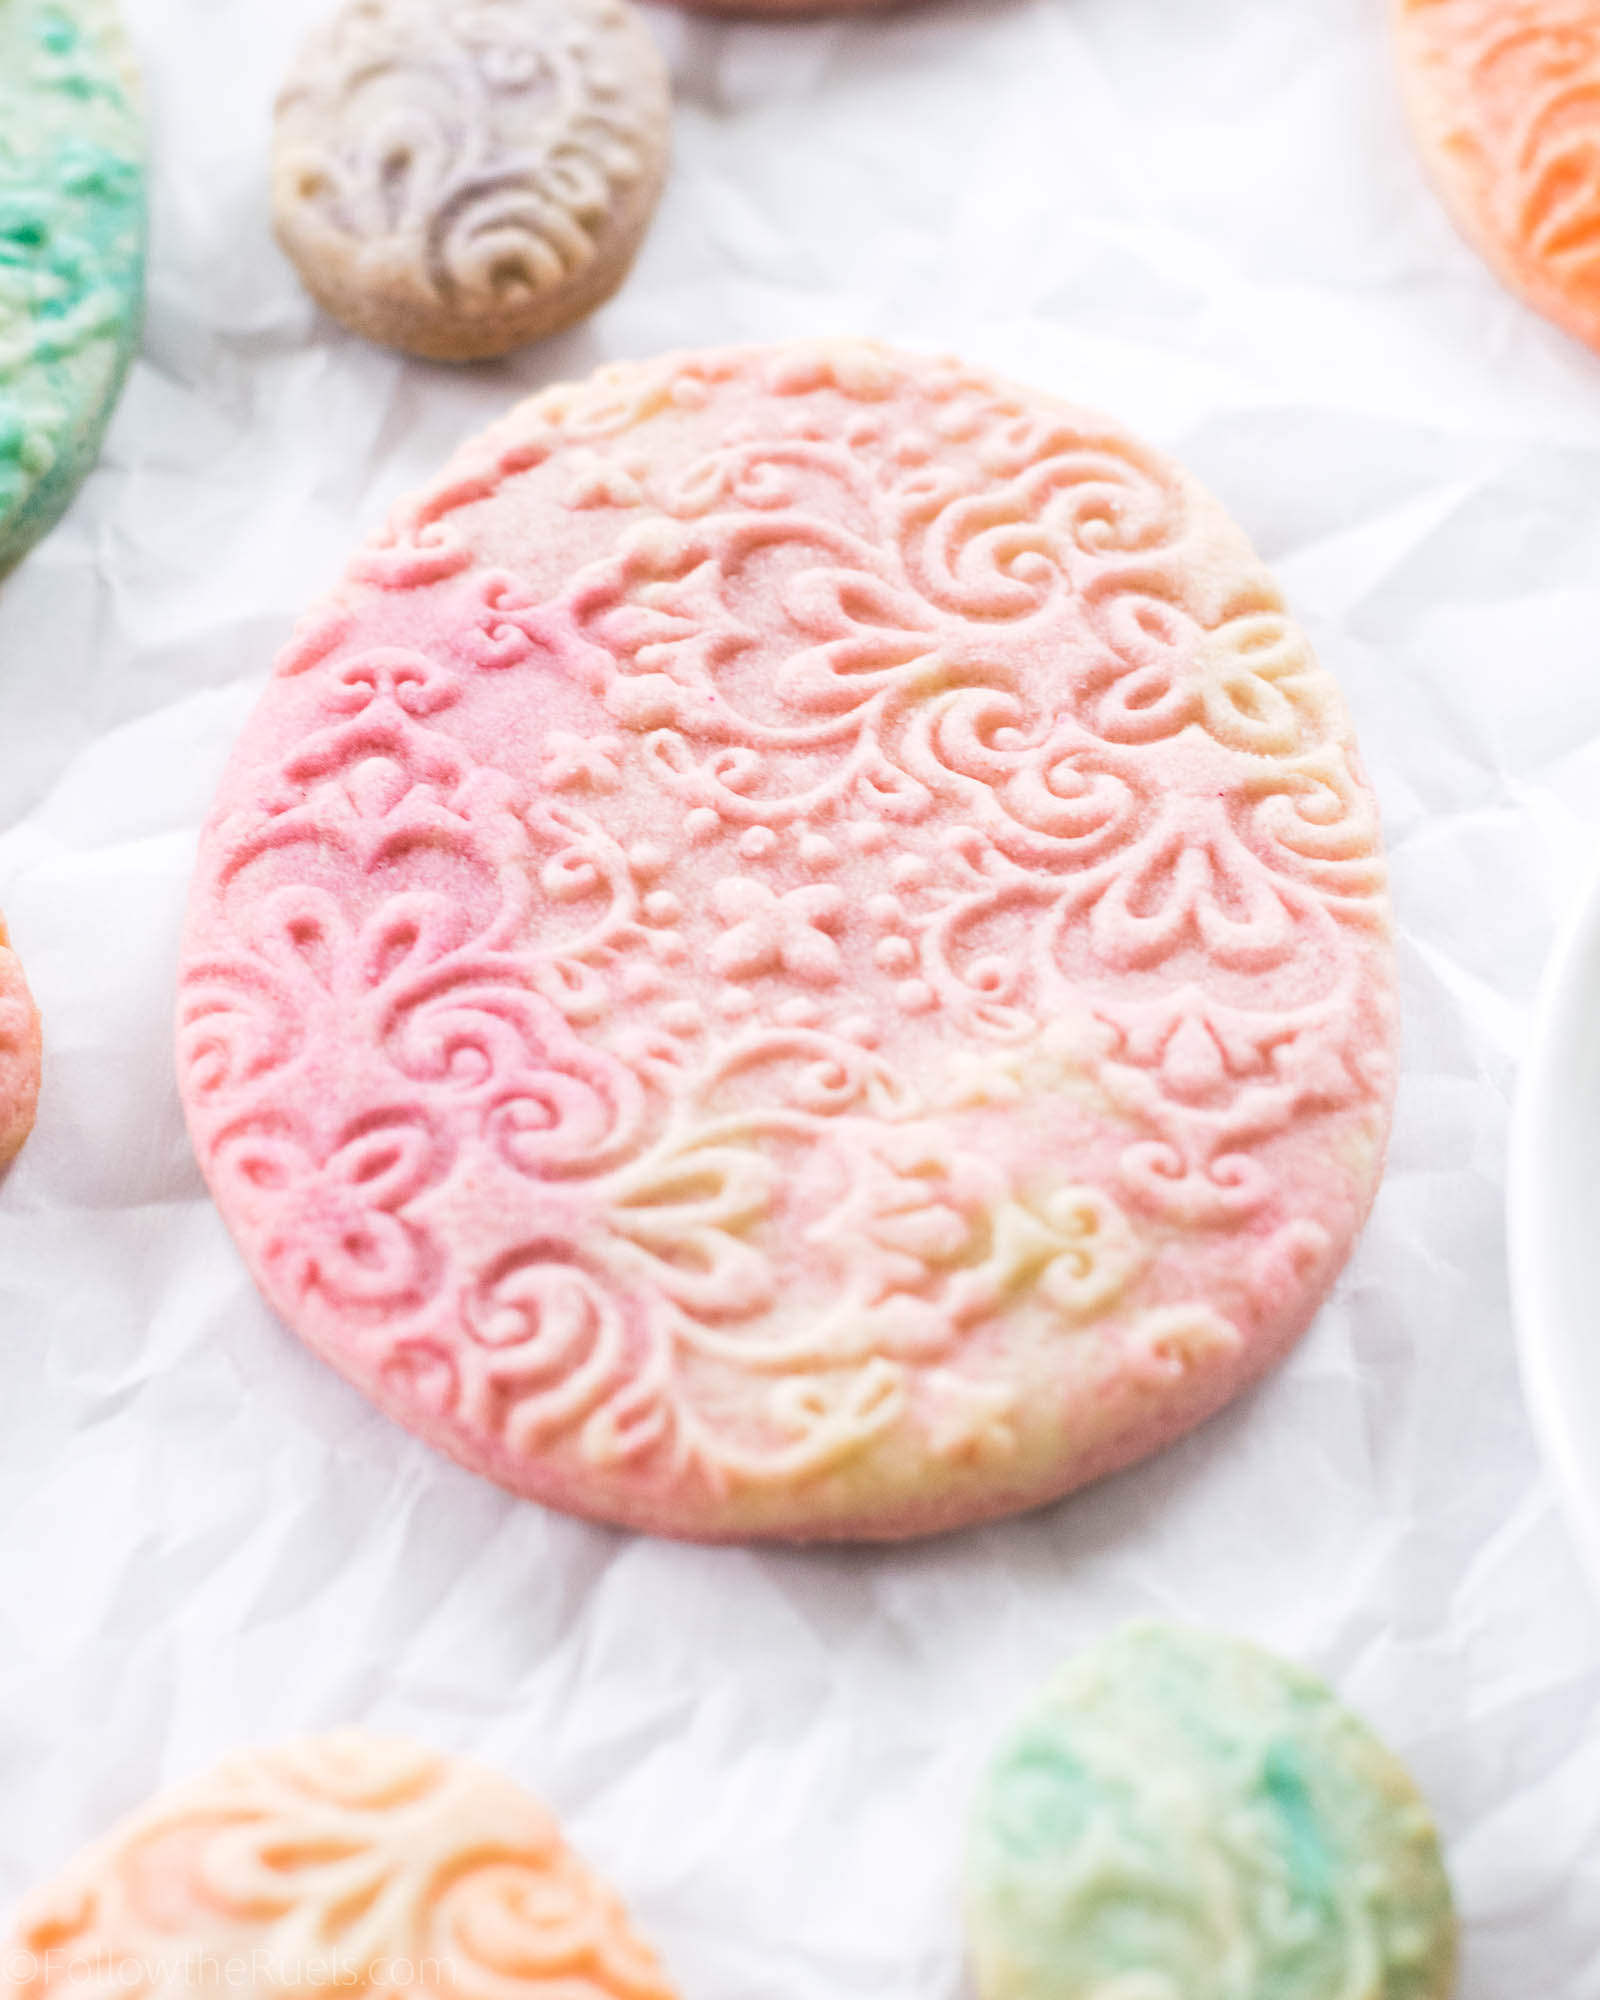
But if you roll it well, you will have beautiful embossed marbled sugar cookies that are perfect for Easter or any time of year. Just change the shape of your cookie cutter and you have yourself a pretty birthday cookie, 4th of July cookie, Christmas cookie….the possibilities are endless.

I just really like these for Easter. The marbled effect of the dough makes them sort of look like eggs that have been dyed the old-fashioned way. And the embossing makes them look very elegant and refined. 

Recommended Tools

[show_shopthepost_widget id=”3079756″]
 

Recipe

[yumprint-recipe id=’168′]

/ Filed In: Cookies New, Decorated Cookies, Desserts, Eat
Tagged: Easter, embossed, kid friendly, marble, pastels, sugar cookies

Floral and Moss Easter Bunny Cookies

March 26, 2018

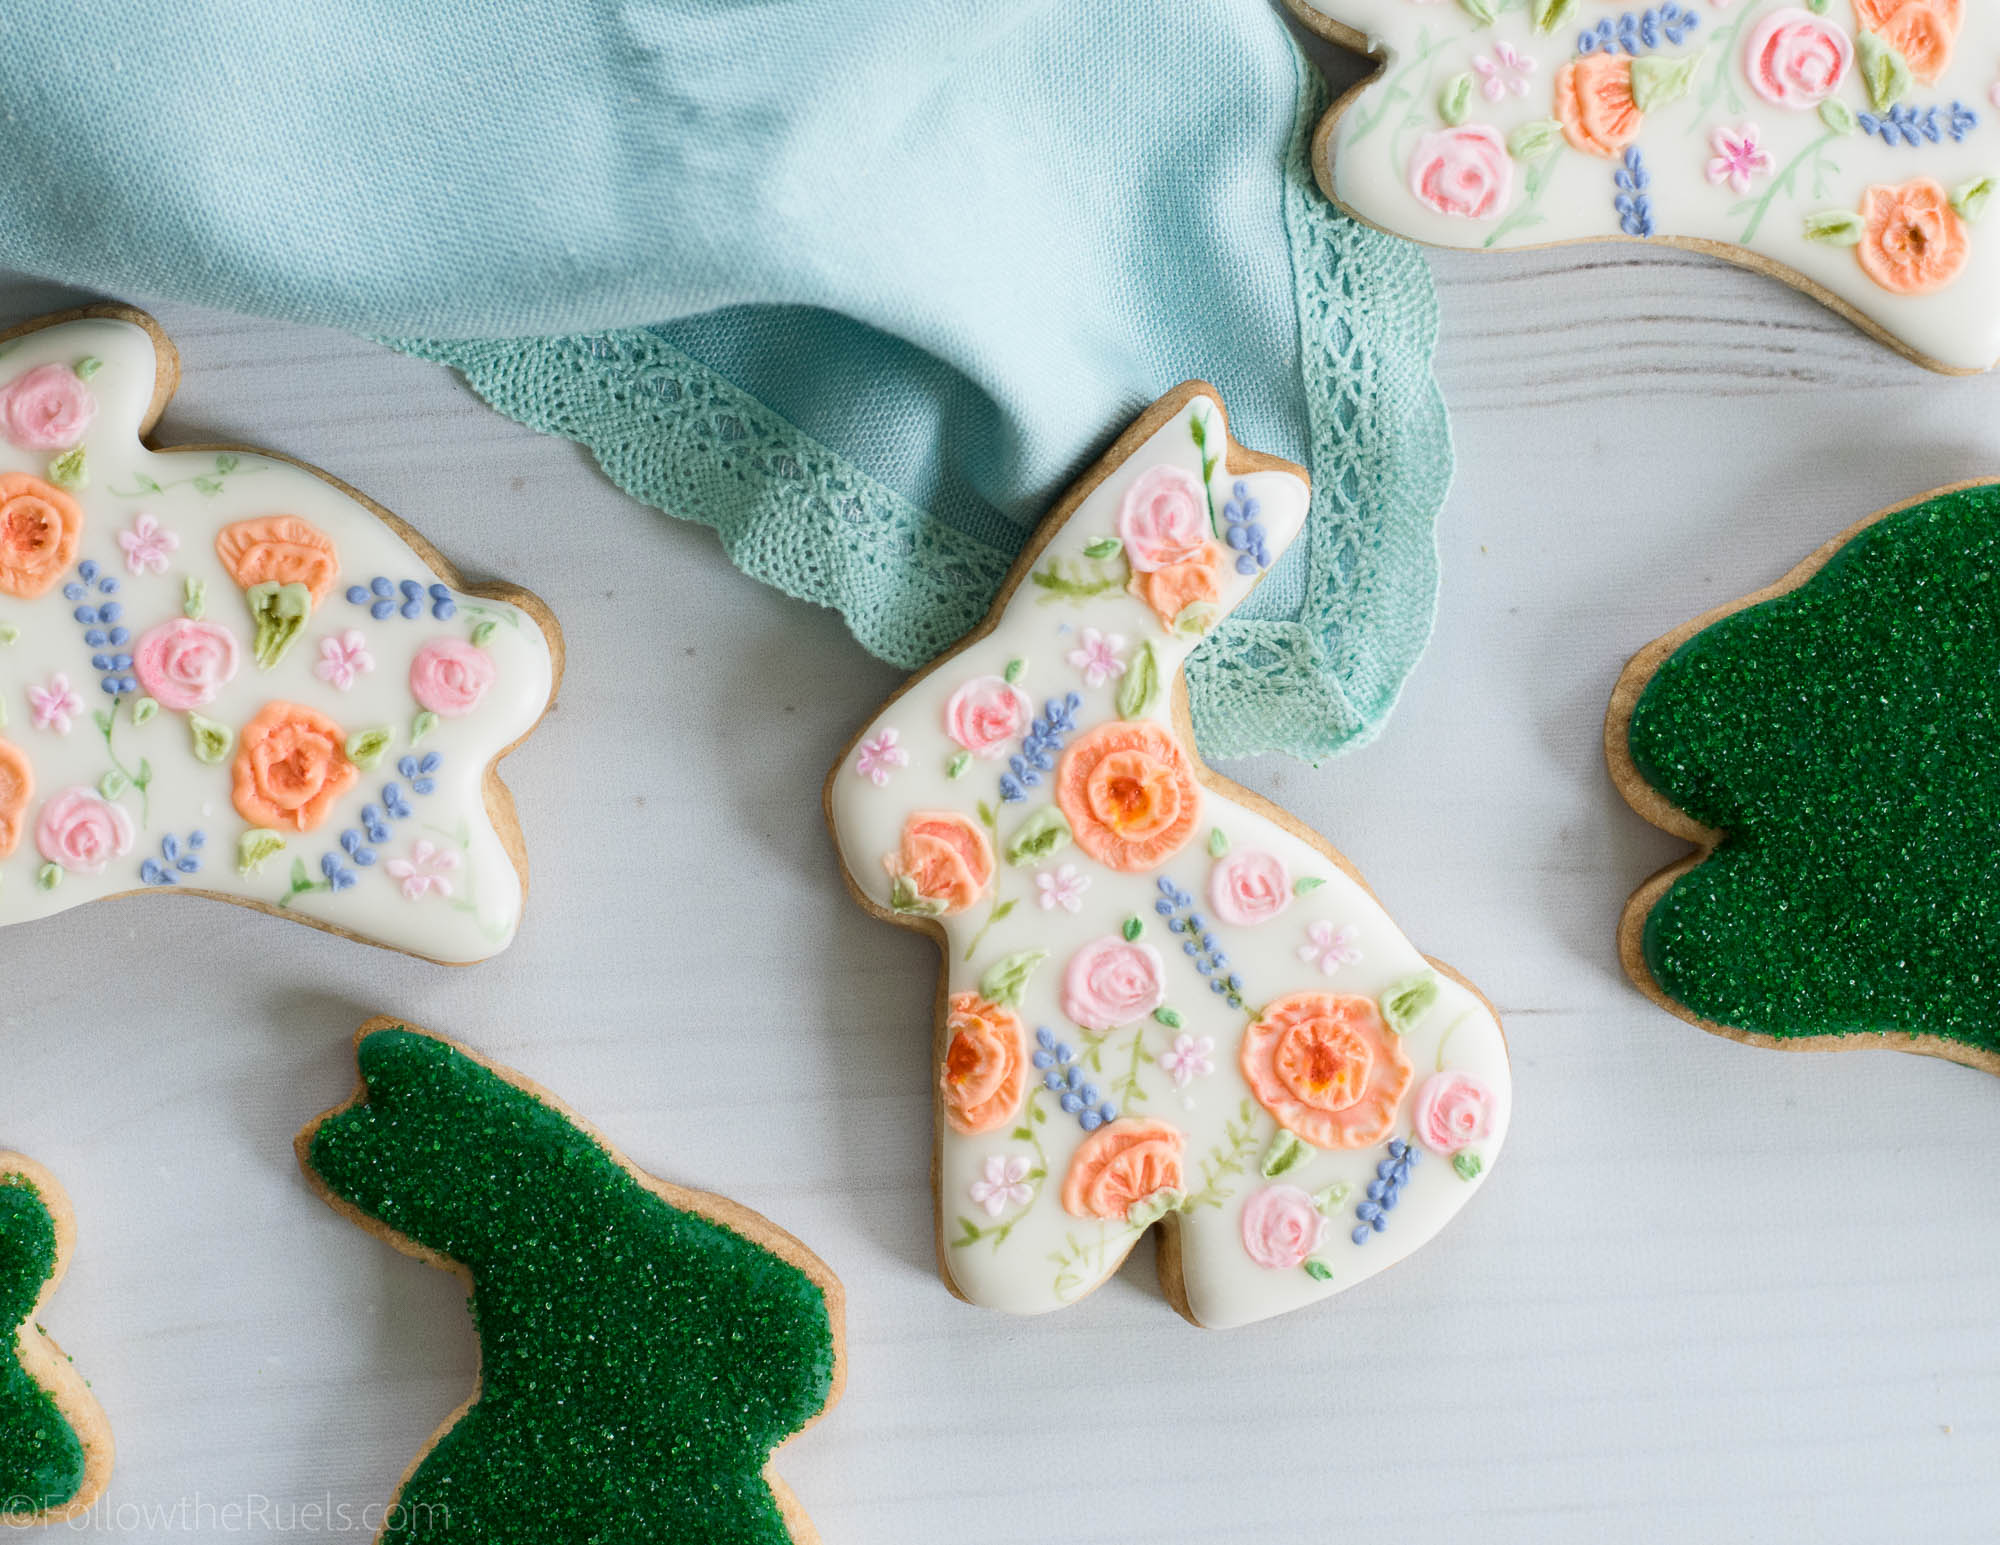
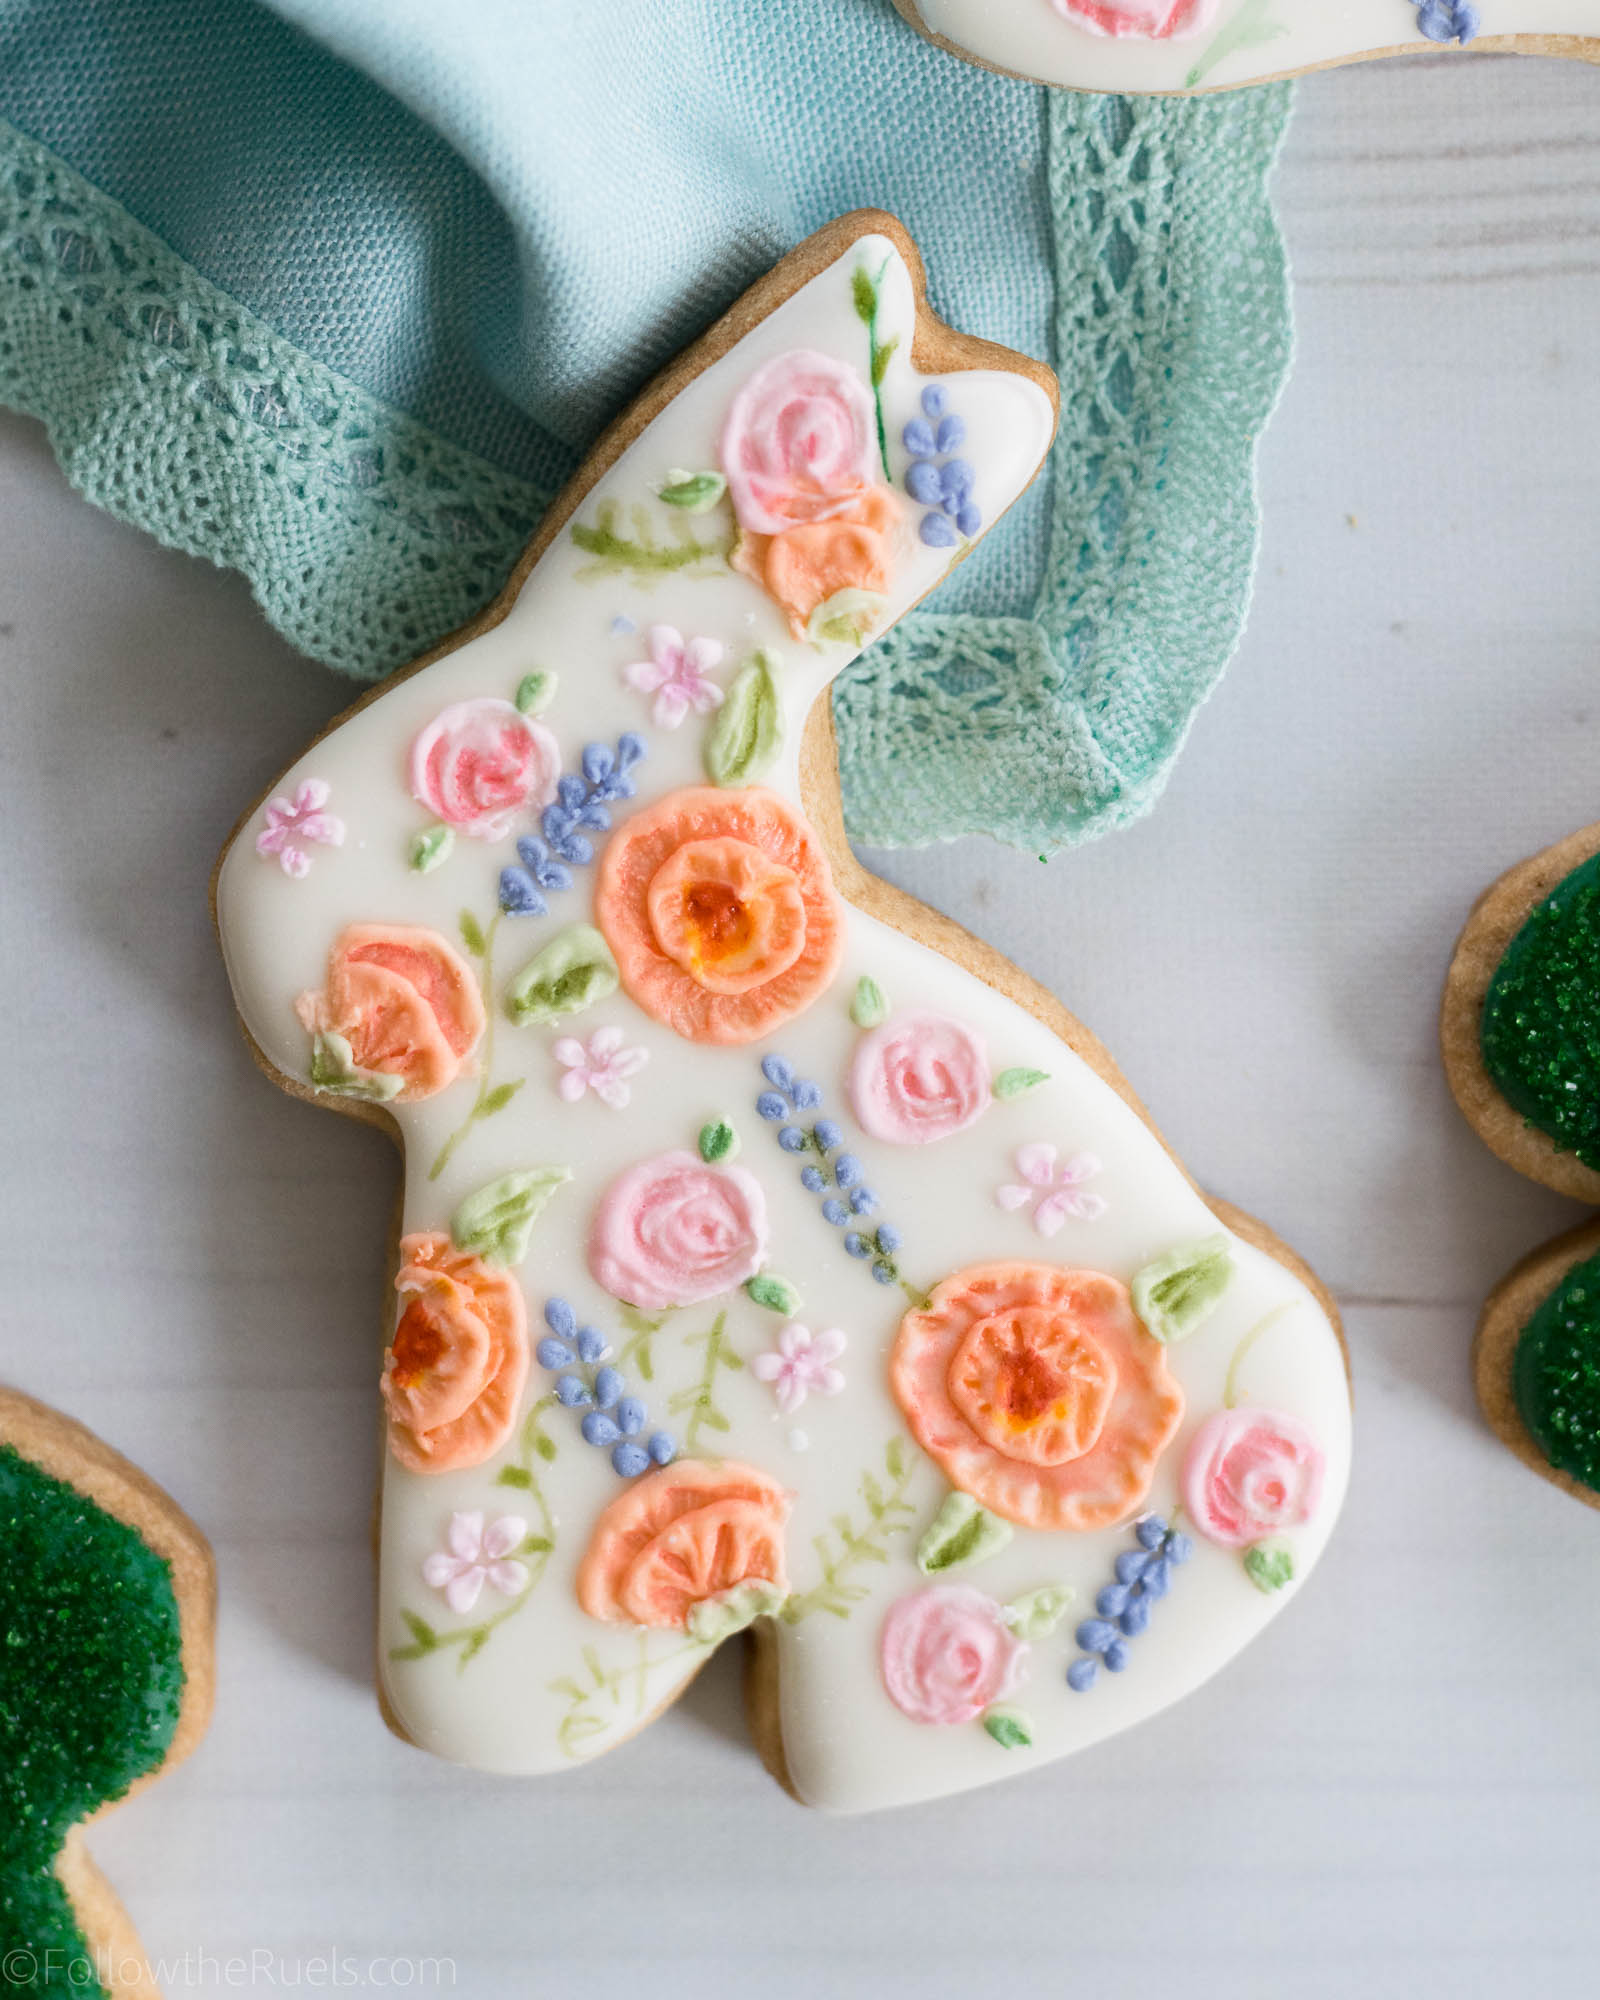
If you know anything about me, you probably know that I love a good floral cookie. It’s kind of my go-to (because it’s actually easier than it looks). Whichever way I can put a flower on a cookie, I have tried. Well, I thought I tried, until now. 

Meet the new floral decorating technique….

Actually, I have no idea what to call it, any ideas? 

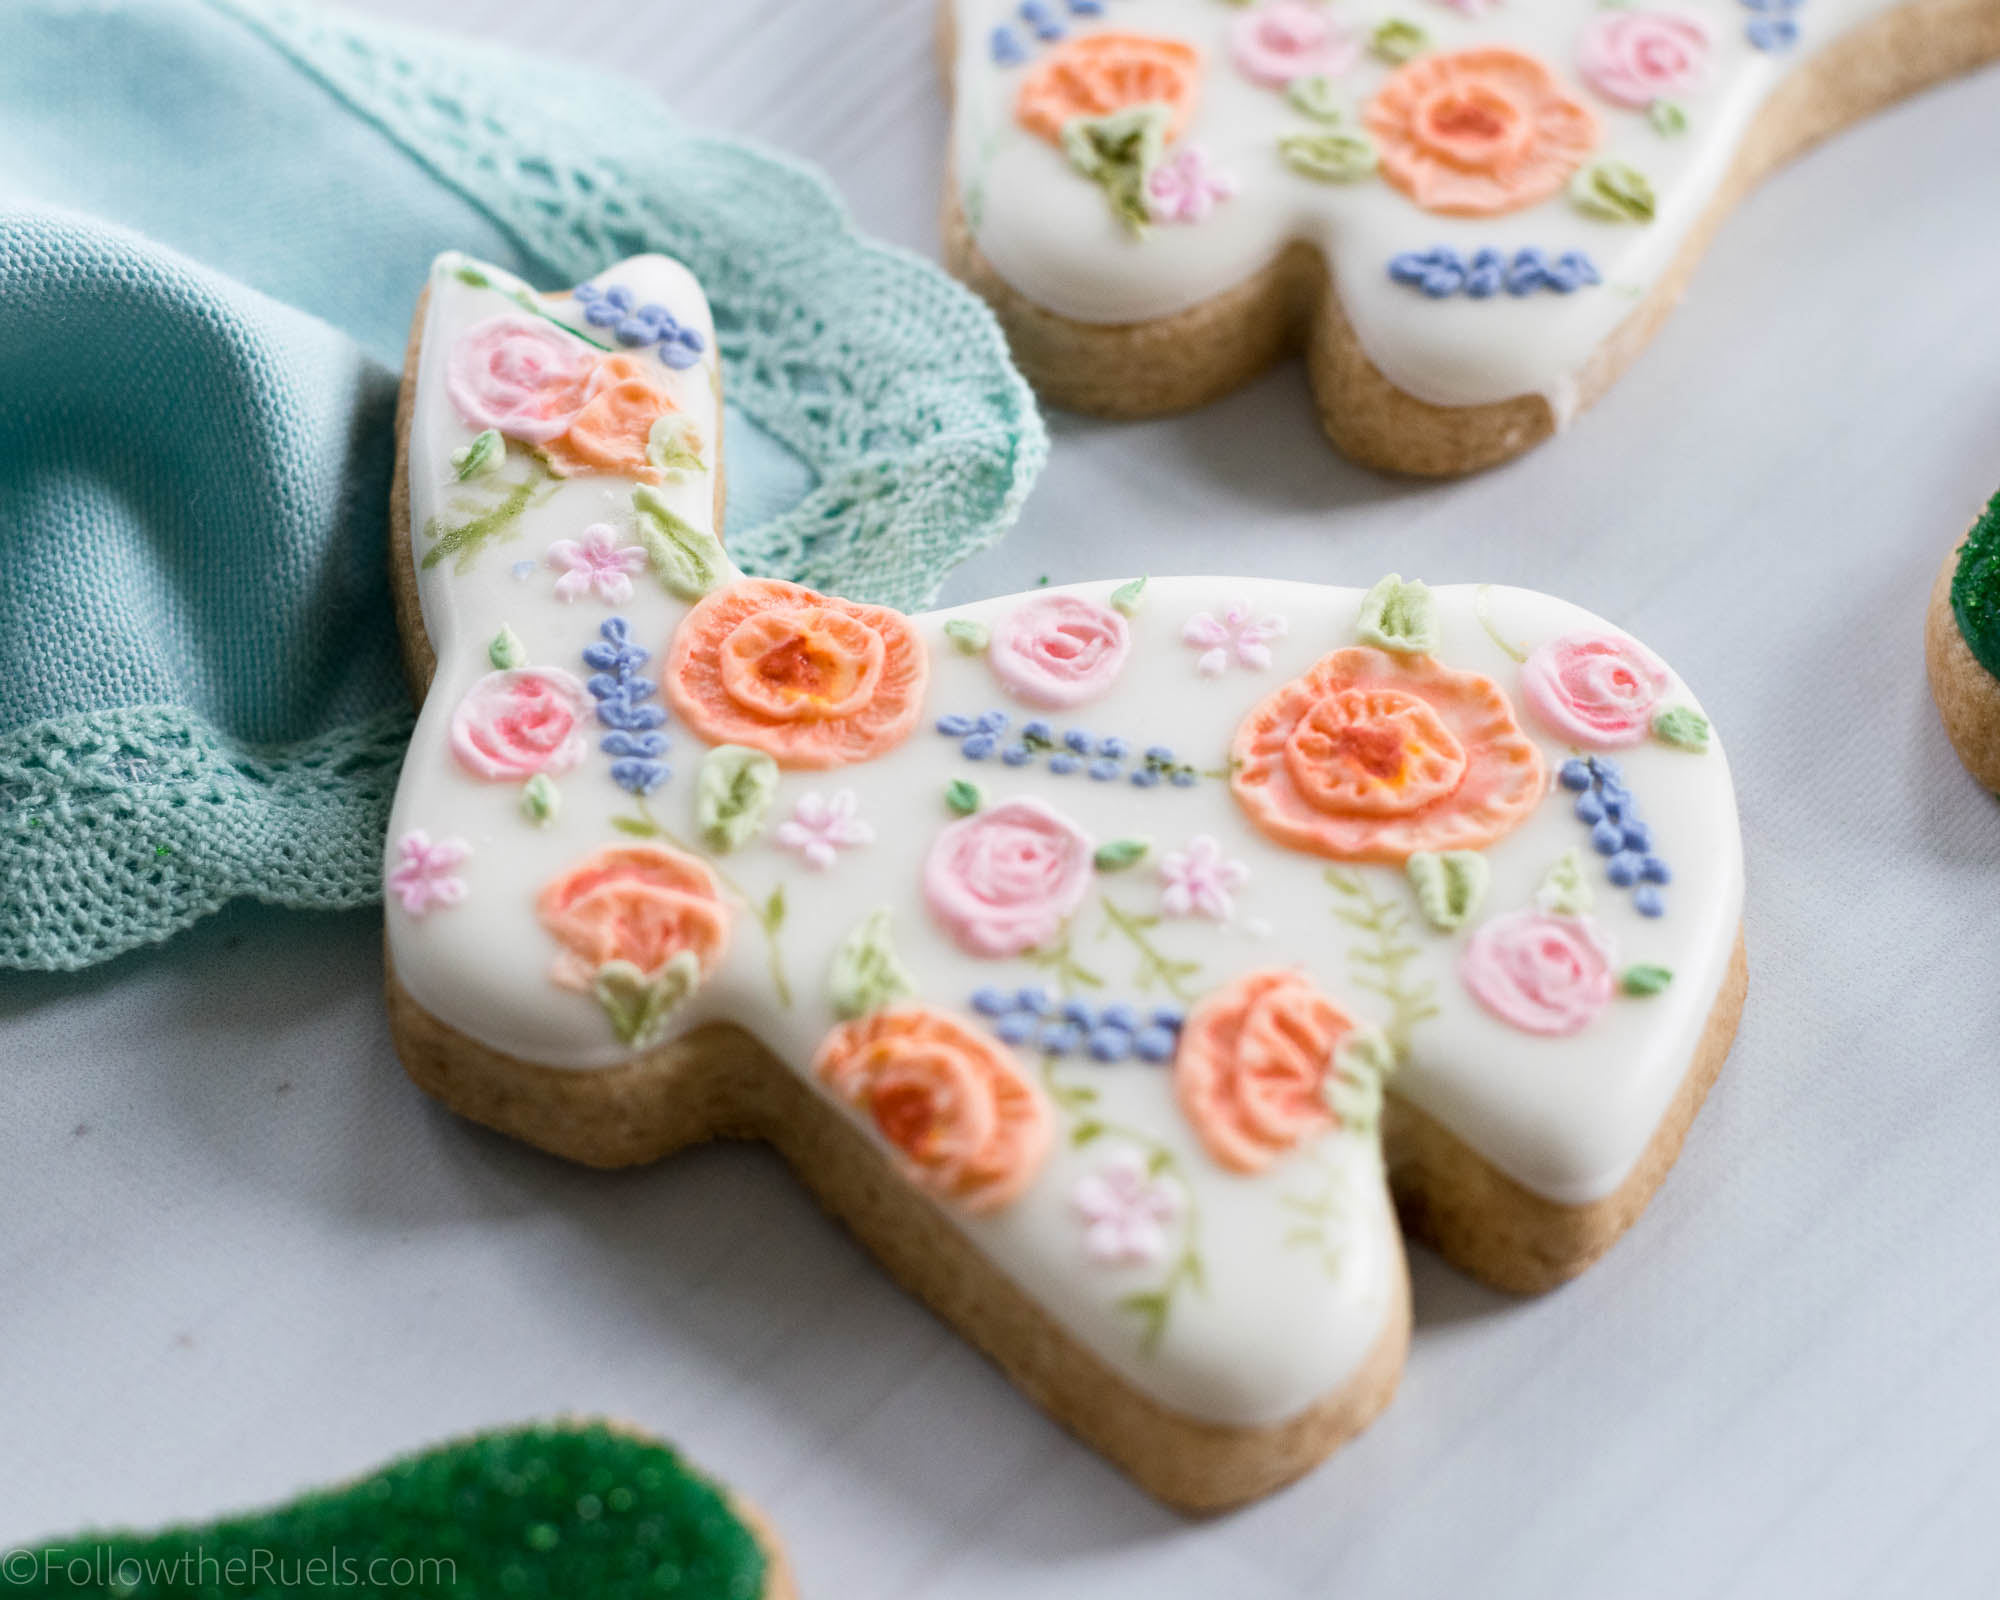
Some people will call this technique brush embroidery. And I suppose that’s probably how I should classify it. But I think of this technique more as painting with icing (as opposed to my usual watercolor mix). Whatever we call it, I certainly think they are pretty, don’t you?

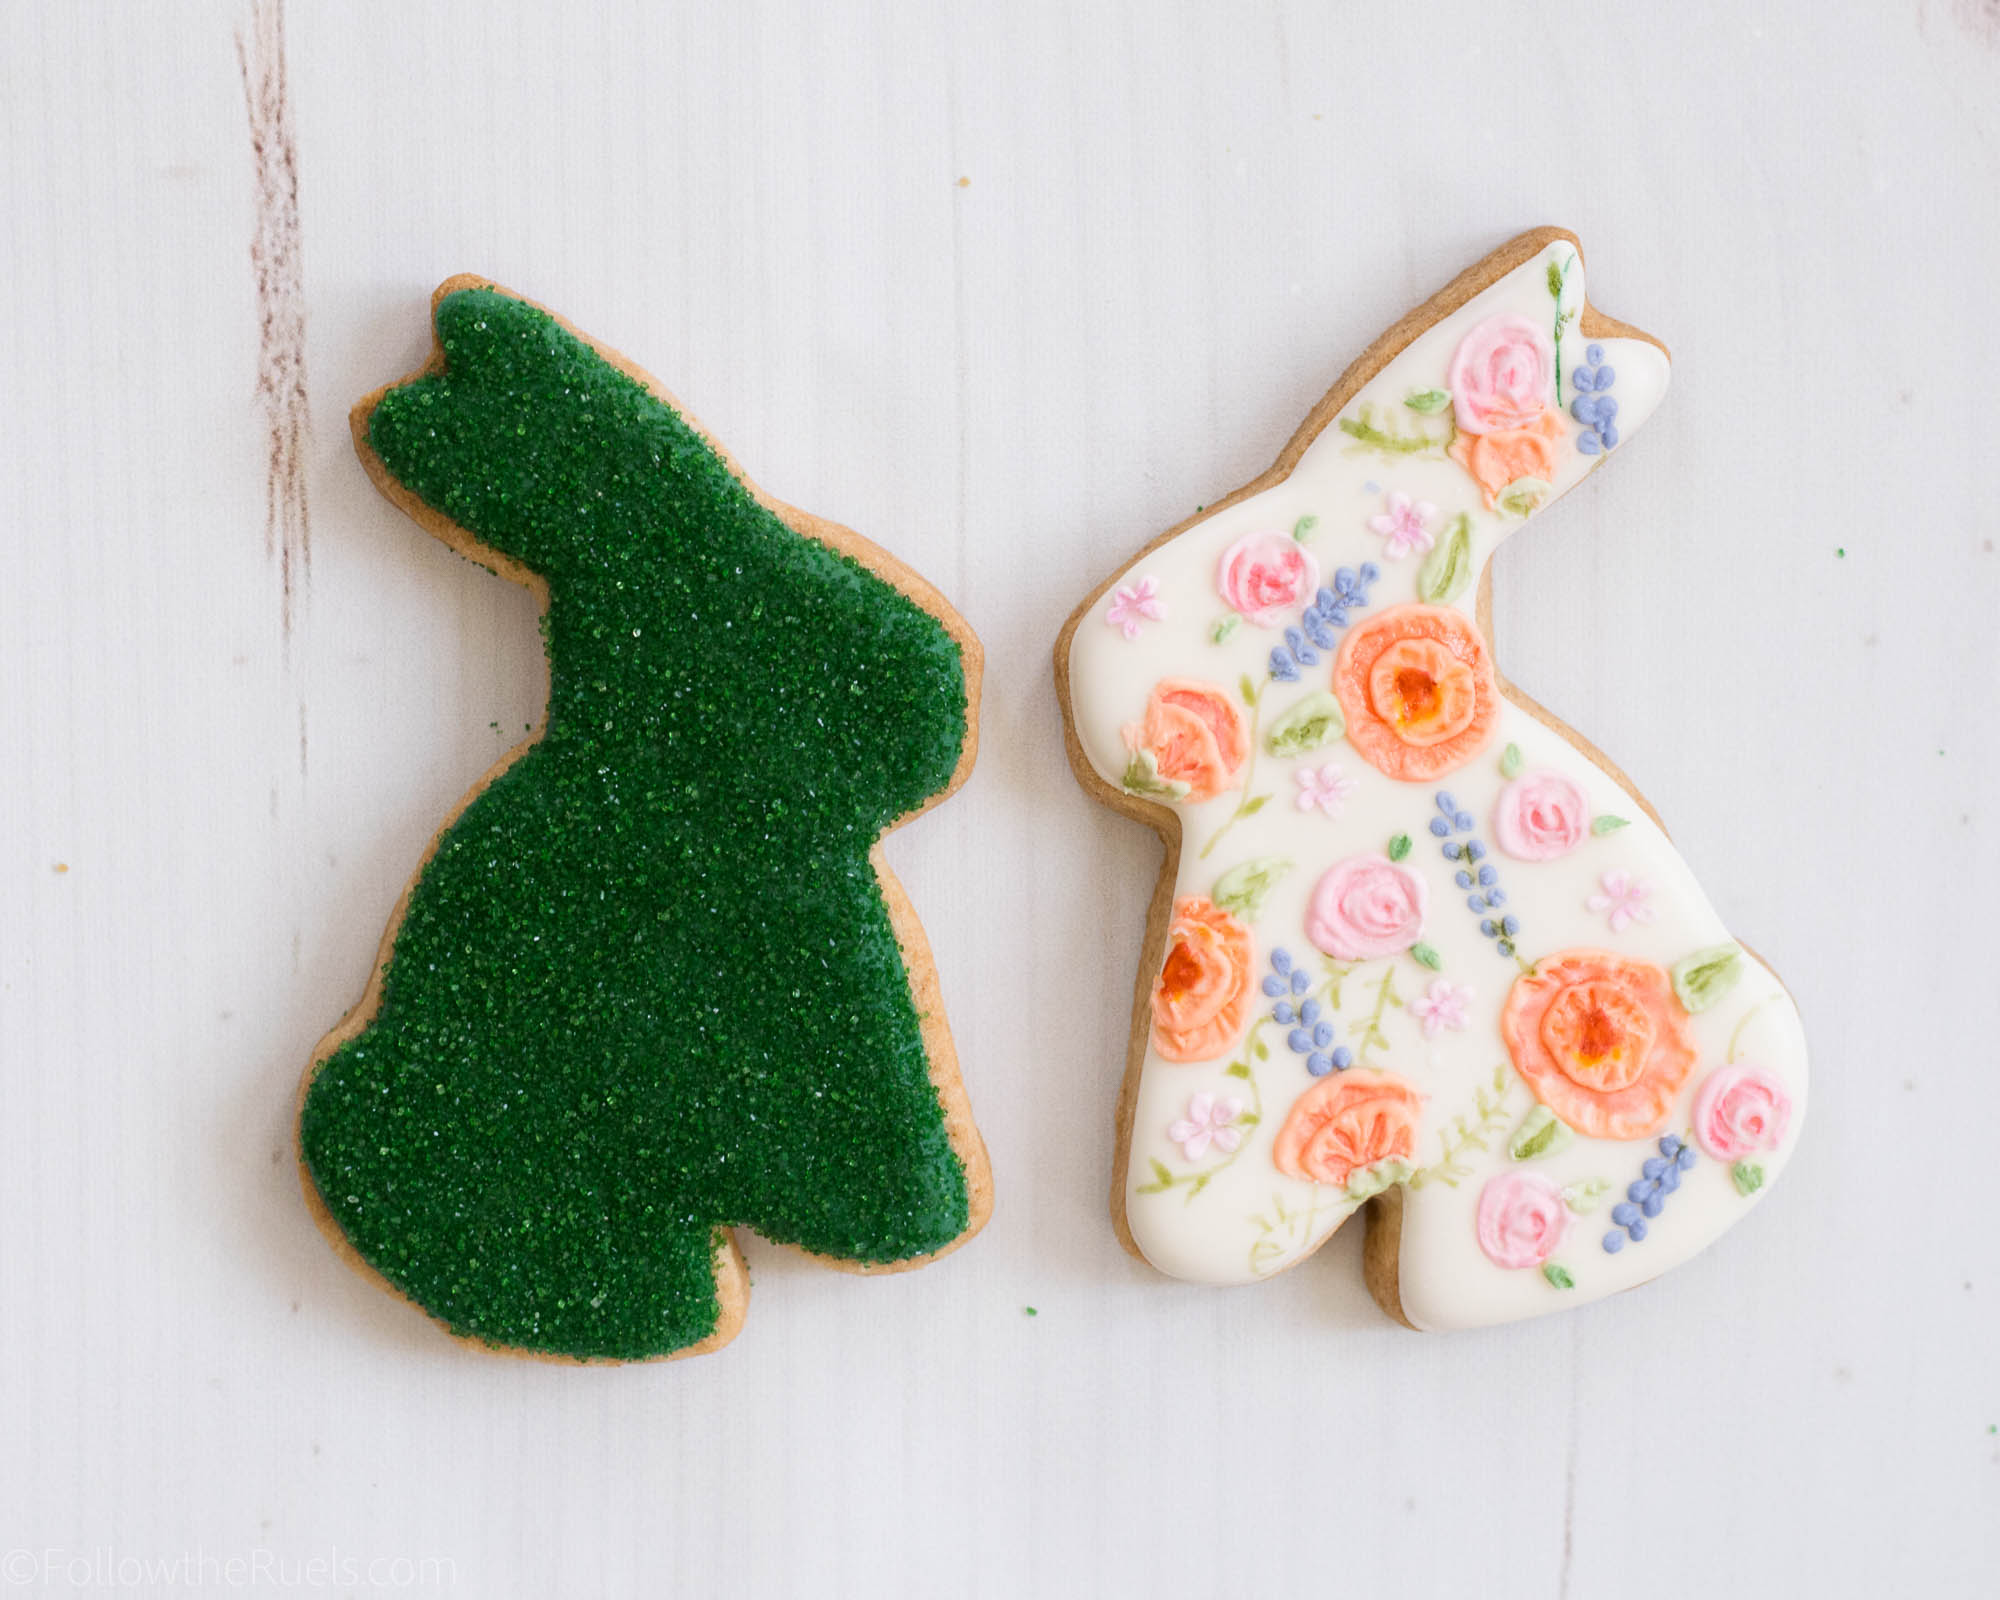
Oh, and you can’t forget about the little moss covered bunnies. Now those are easy! And just as cute, don’t you think?

How to Make Them

What I love about these floral Easter bunny cookies is that they have dimension. That is something that you just can’t get with painting! 

My husband’s favorite is the moss Easter bunny cookie. Even though it’s simple, it still is adorable, and I think it goes perfectly with the floral design as sort of a little garden Easter bunny cookie set.

Why I love the moss Easter bunny so much is because it’s easy! While I love making the floral pattern, it is time-consuming, so it’s nice to have some simple cookies to balance them out. 

But this little guy still has my heart!

Recipes and Products Used

As usual, these sugar cookies are my favorite sugar cookies which means they are just flavored with vanilla and almond extract. But I think Easter is the perfect time to break out some other cookie flavors! Even just adding some different extracts like lemon, lavender, pistachio, or coconut. Or, you can flavor them with some of your favorite berries, like strawberry or raspberry. Just check out my Summer cookie collection. 

For the royal icing, I added a touch of almond extract, which is something I rarely do. But I really liked it. Another go-to in the Spring and Summer is adding some lemon juice or lemon extract. It really makes the flavors pop!

[show_shopthepost_widget id=”3077493″] 
/ Filed In: Cookies New, Decorated Cookies, Desserts, Eat
Tagged: bunny, cookies, Easter, Easter Bunnies, floral, flowers, Spring, sprinkles. sugar, sugar cookies

Flower Crown Easter Bunny Cookies

March 22, 2018

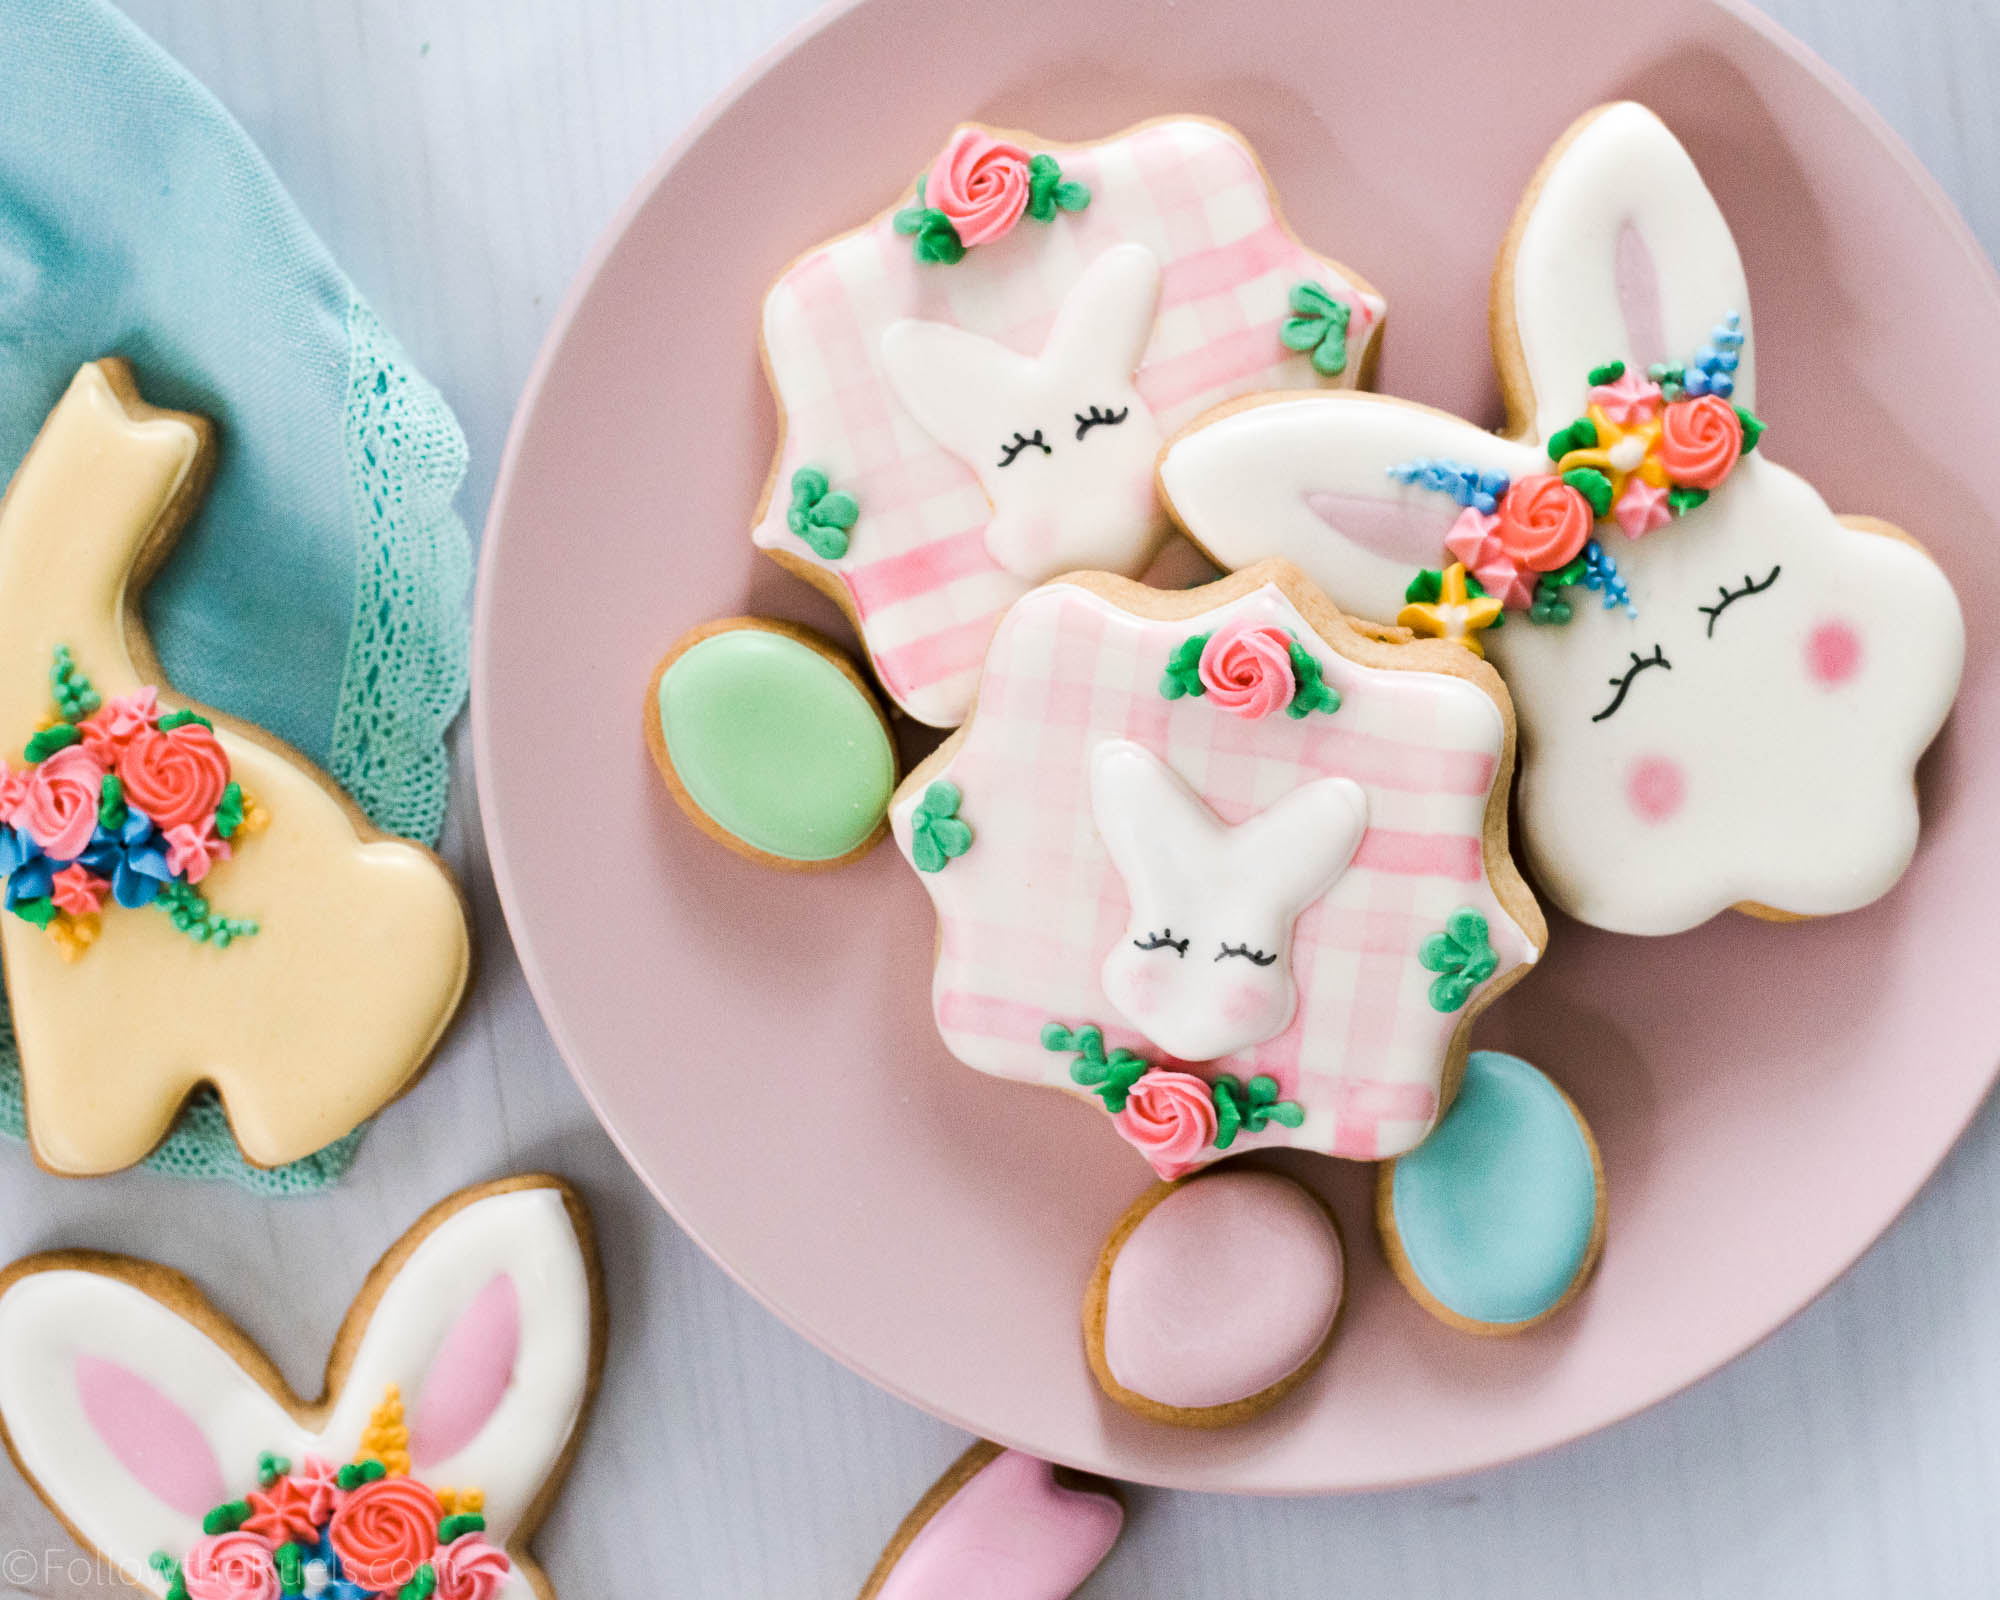
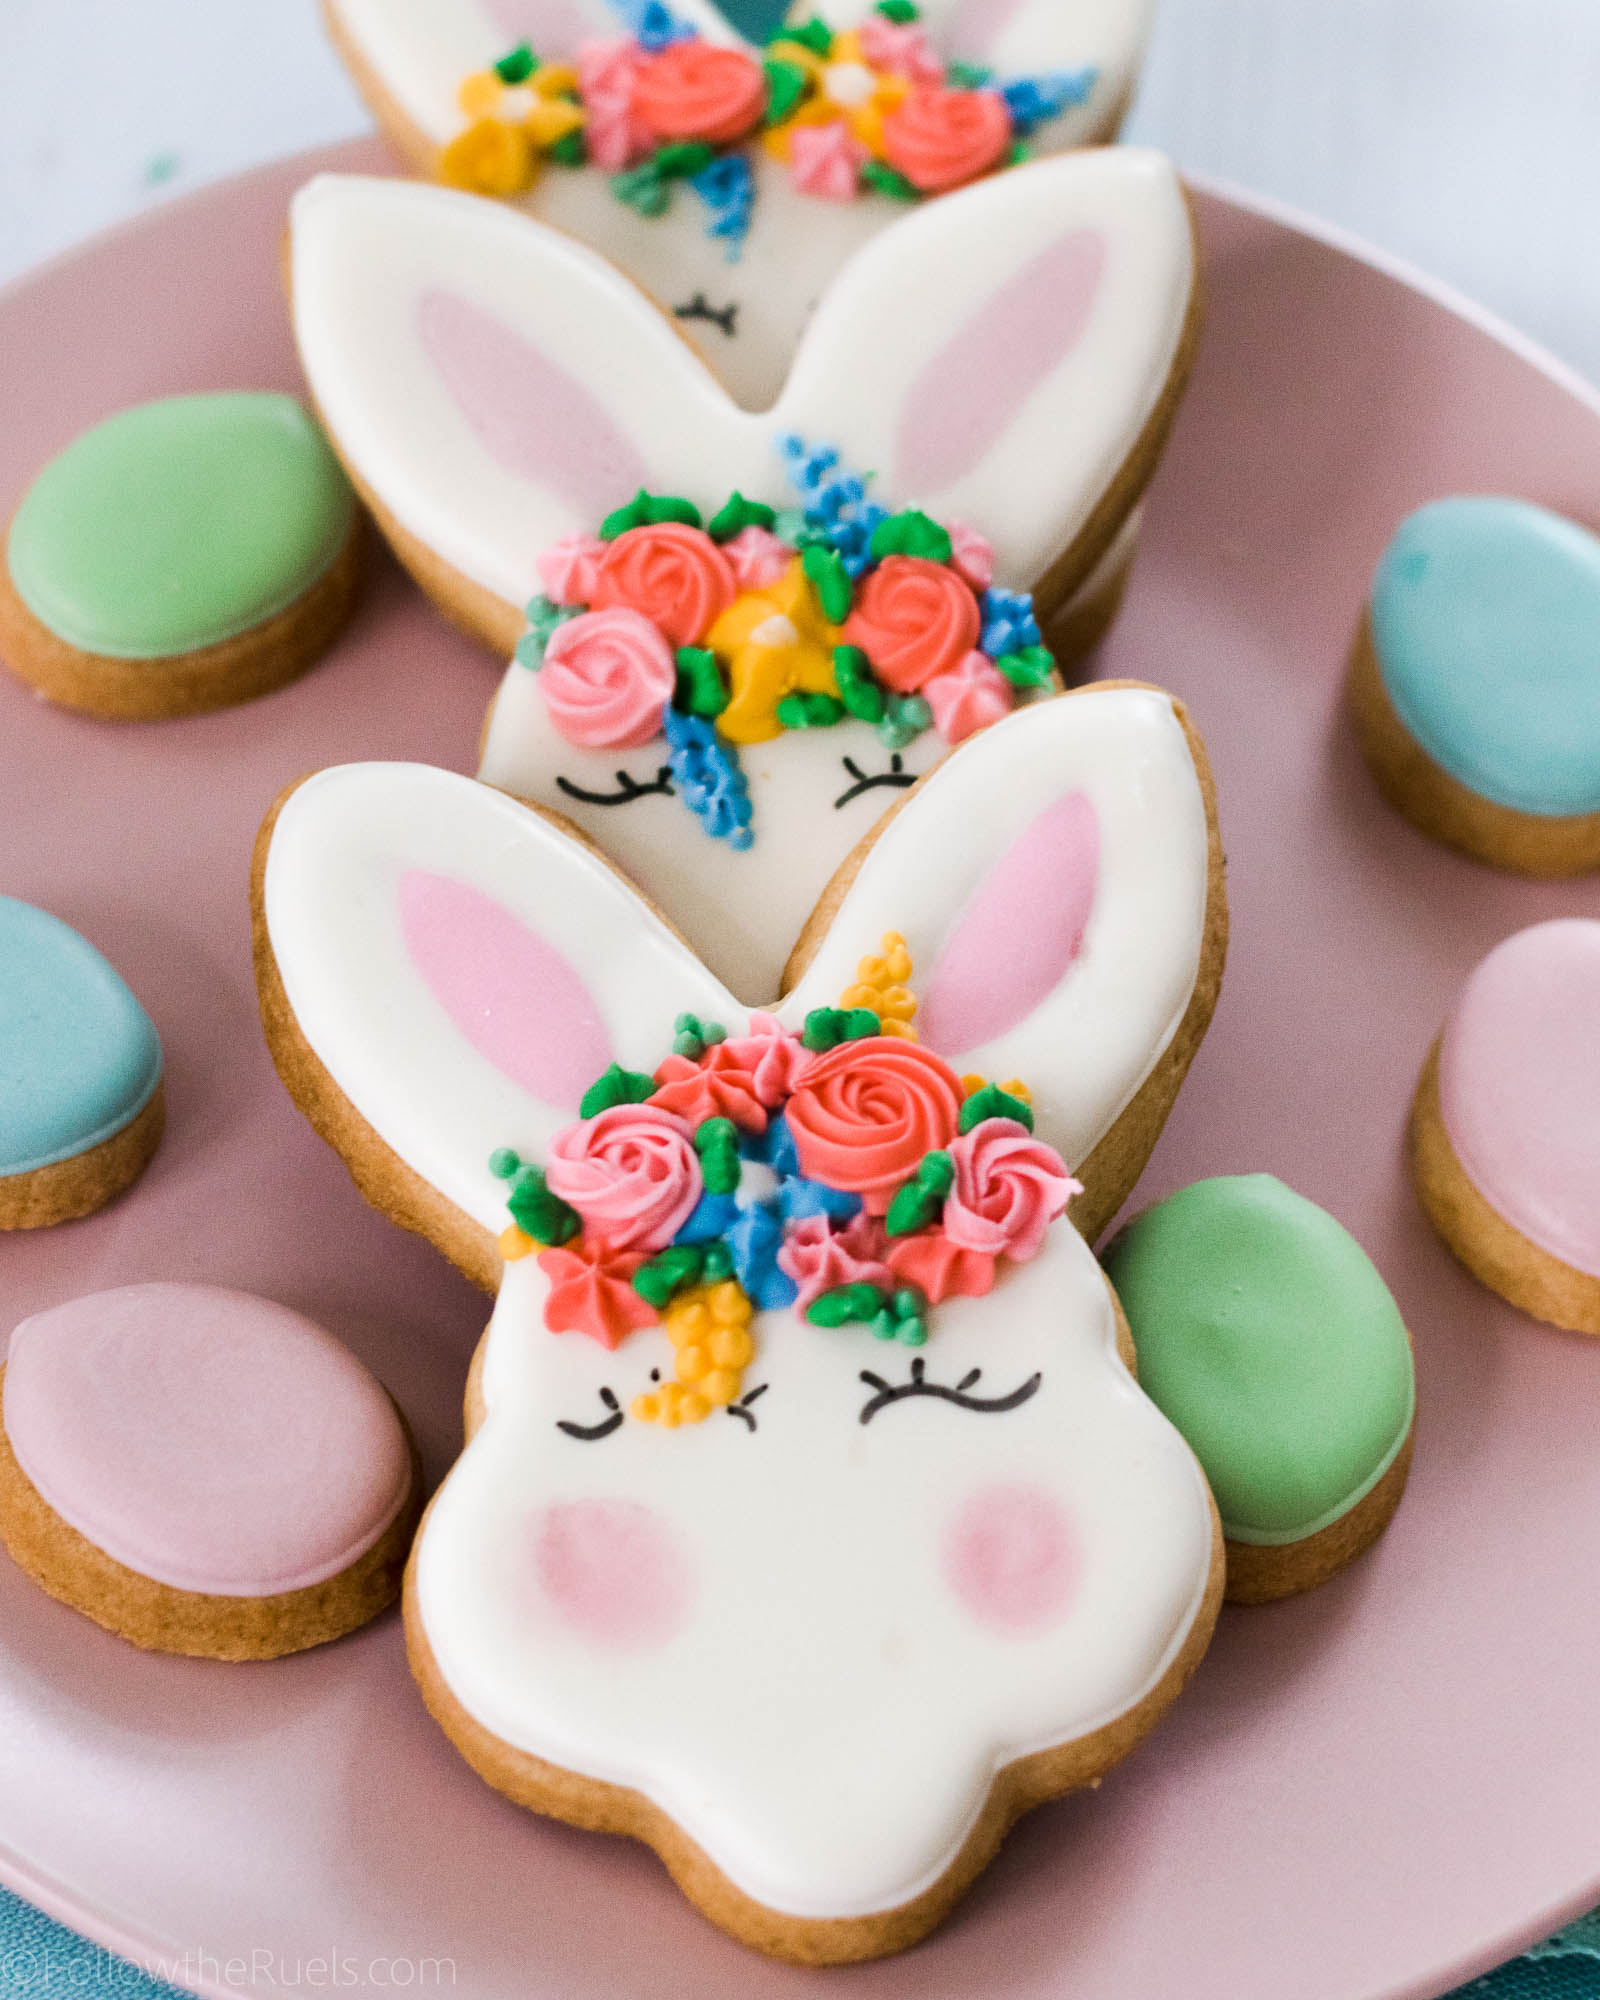
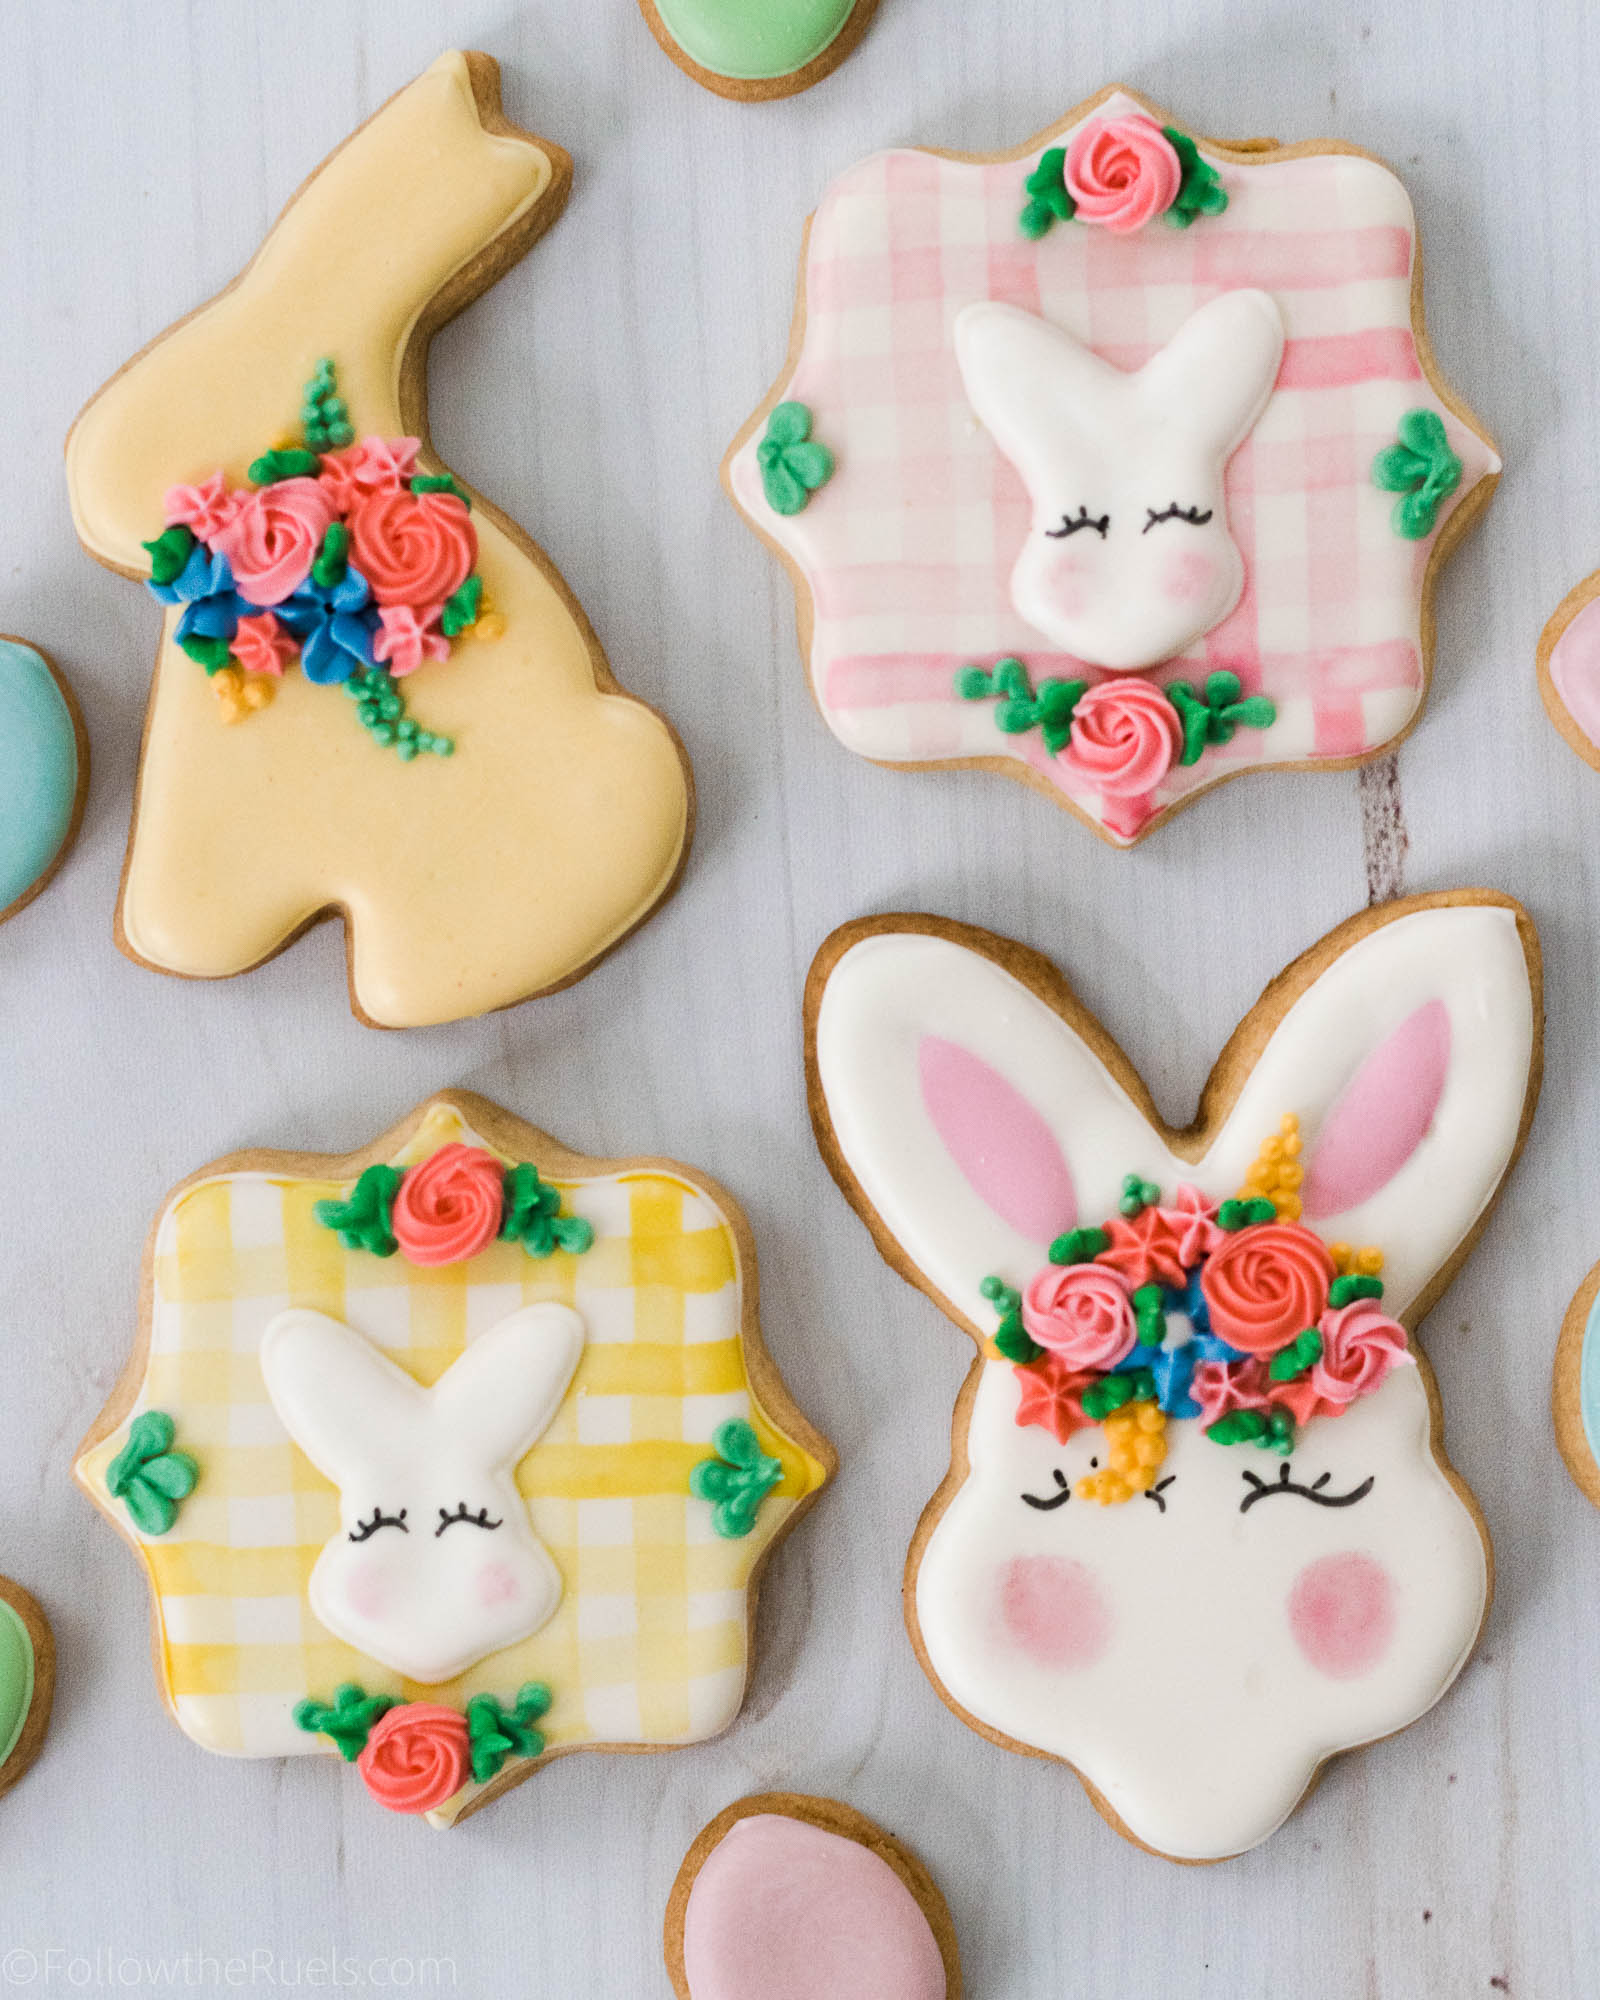
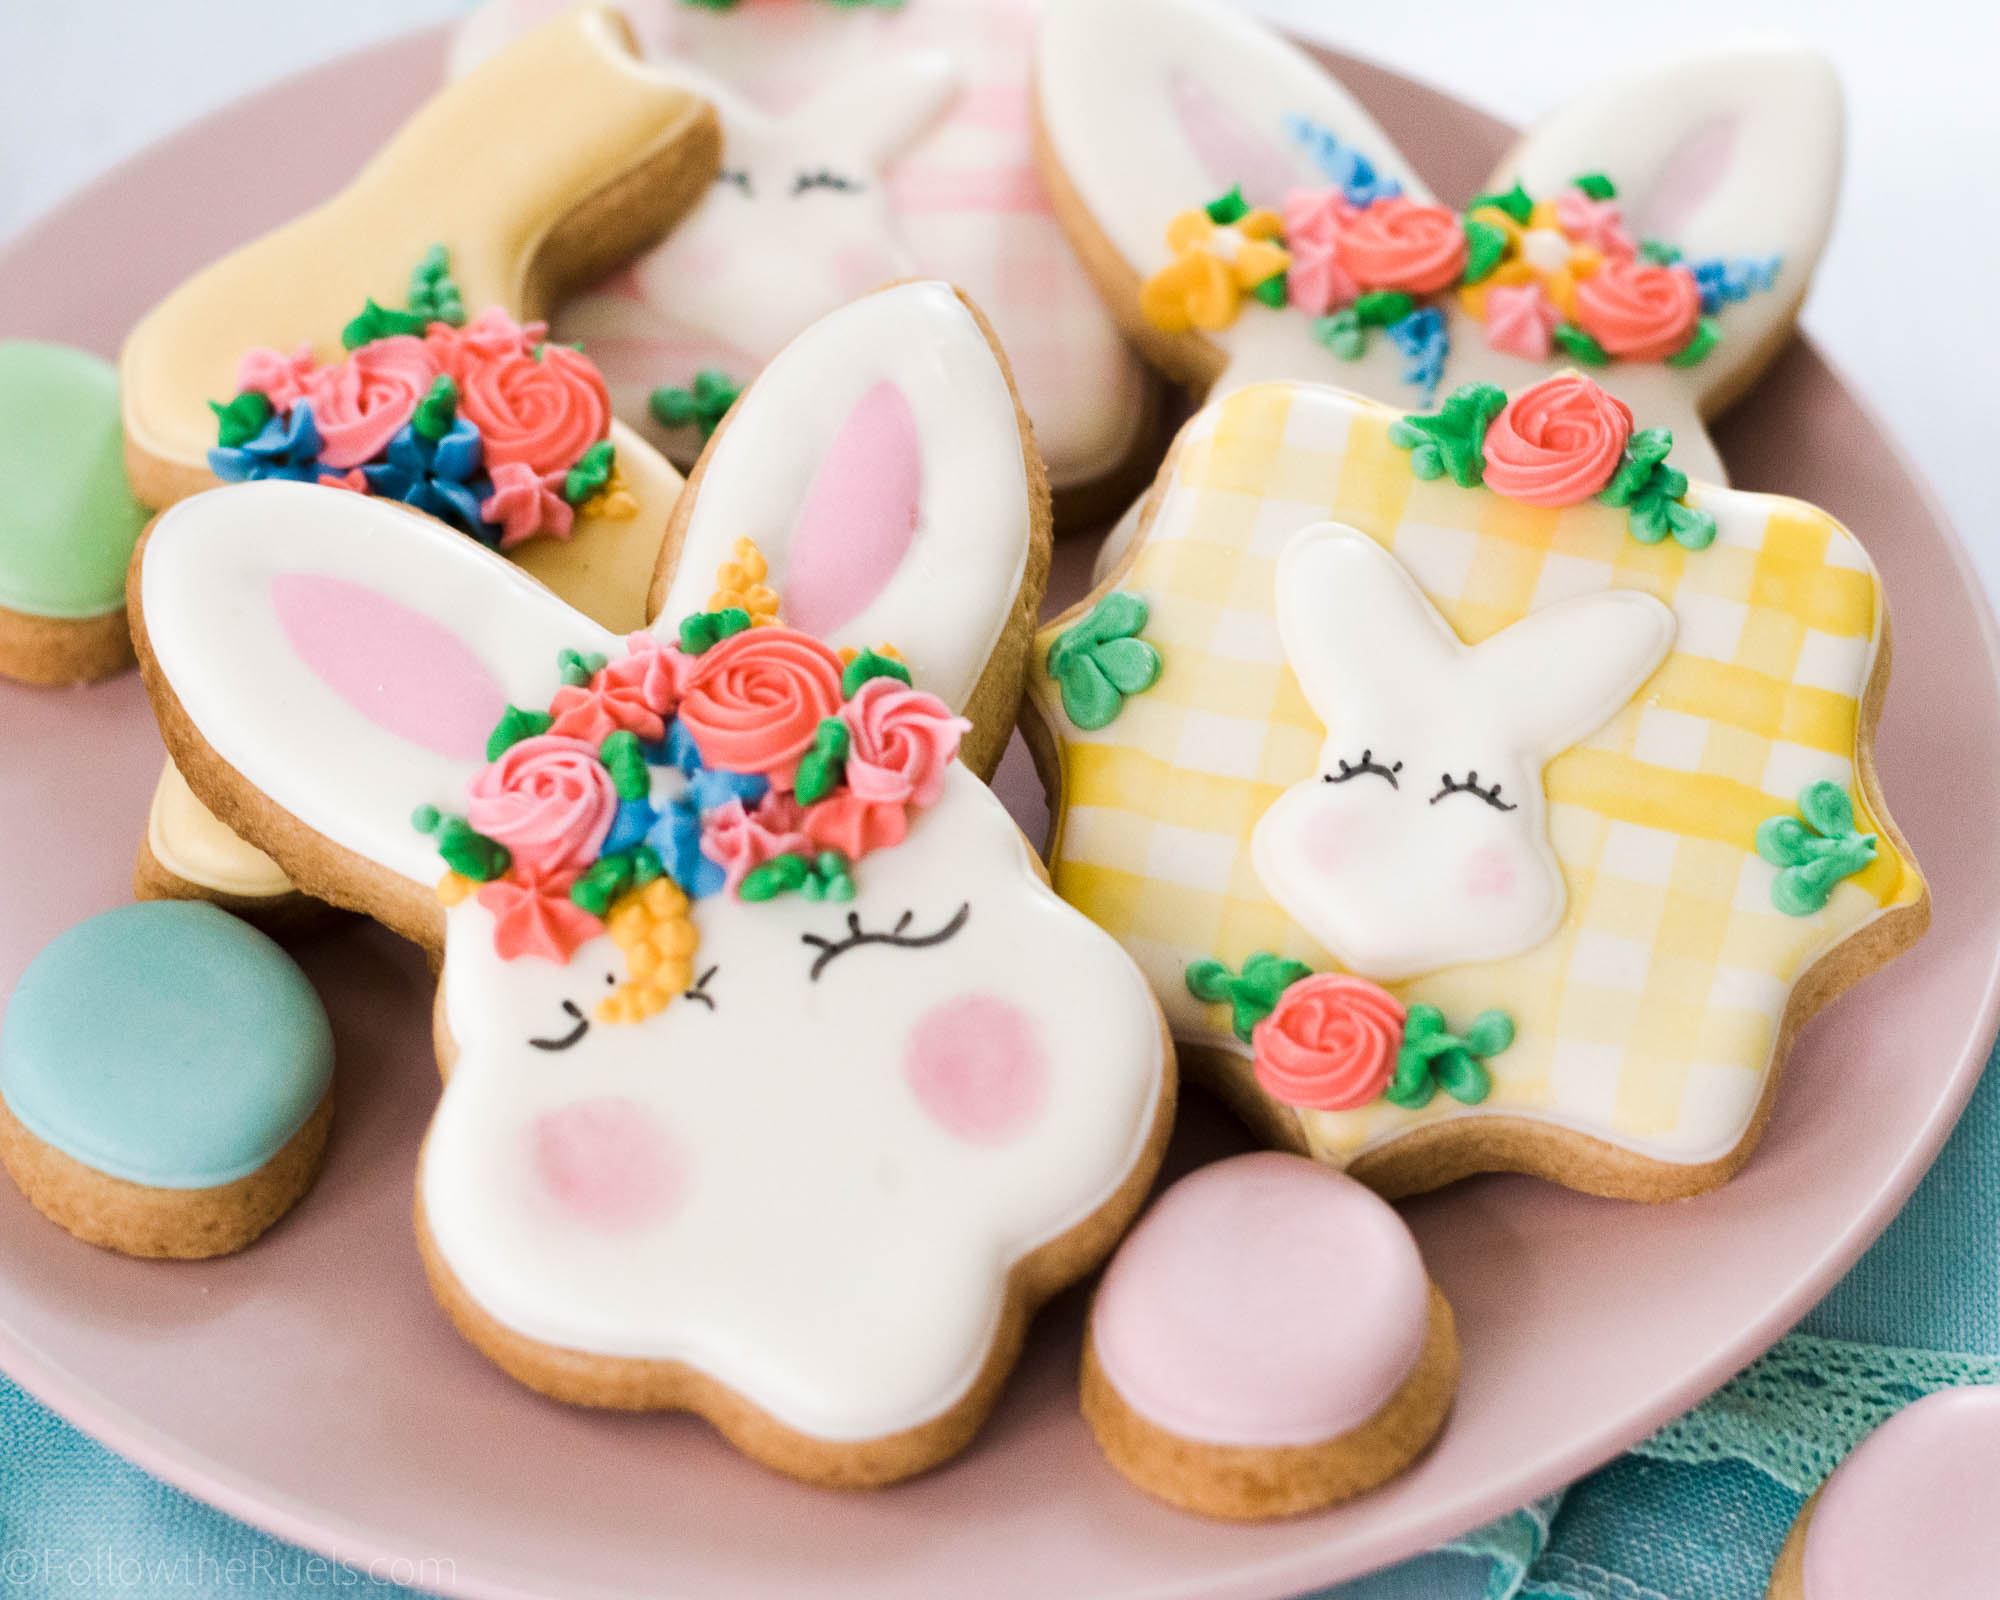
These cookies are up there with my all-time favorites! They have all of my favorite things: gingham, royal icing flowers, and cute little animals!

I actually created the flower crown Easter bunny cookies for a brand new cookie decorating class I do through Skillpop in Charlotte. People had been asking me to do a class devoted to piping tips, so I delivered! And since Easter is right around the corner, I decided to do something Easter themed! And you know I love a good flower crown!

But since most of you aren’t able to make it to my cookie decorating classes, I wanted to show you how I made them so that you can make them, too!

How to Make Them

As all the students in my piping tip class would tell you, creating the flowers was the easiest part of decorating their flower crown Easter bunny cookies! While they add a lot of detail and seem very intricate, they are actually very simple to create.

The trick is having the right consistency of icing and having the right piping tips!

If you go back to my royal icing post and watch the video you will see me add water to the icing to thin it down. Now, stiff consistency icing is the consistency of the icing before I added any of the water! It forms a peak when you lift a spoon up from the surface and it has very little movement.  That is the consistency you want when you use piping tips.

As for the piping tips themselves, I tend to stick to my tried and true favorites for creating any flower design:

  • The blue drop flower is a Wilton #224 tip
  • The dark pink flowers are made with a #14 open star tip
  • The light pink flowers are made with a #24 closed star tip
  • The leaves are made with a #349 tip
  • The dots are made with a #2 round tip

A lot of my piping tips are from this piping tip set that I bought years ago and still use to this day. But I have supplemented by buying individual piping tips from Michael’s, Amazon, or directly from Wilton. 

The gingham print is also so easy to make but makes the cookies look that much more unique!

All you do is dilute gel food coloring with a bit of clear alcohol or clear extract (like almond), and then paint lines. I find that I paint straighter lines when I move horizontally from left to right. I also recommend letting the paint dry for about a minute before painting the perpendicular lines on top. That ensures that you will actually paint on top of the first line instead of brushing the color off.

Easy peasy!

I hope you try out these cookies for Easter! I know your friends and family will love them! 

If you do make these flower crown Easter bunny cookies or the gingham print cookies, please take a photo and tag me on Instagram. I love seeing what you create!

Products and Recipes

[show_shopthepost_widget id=”3072684″] 
For these cookies, I used my favorite sugar cookie recipe, but if I make them again I will probably make my strawberry honey sugar cookies from my Summer cookie recipe collection. They are oh so good and they are pink, which just seems appropriate!

And of course, I used my royal icing recipe for both flood and stiff consistency.

/ Filed In: Cookies New, Decorated Cookies, Desserts, Eat
Tagged: cookies, Easter, Easter Bunny, flower crown, gingham, royal icing, royal icing flowers, Spring

Embossed Fondant Cookies for Easter

March 21, 2018

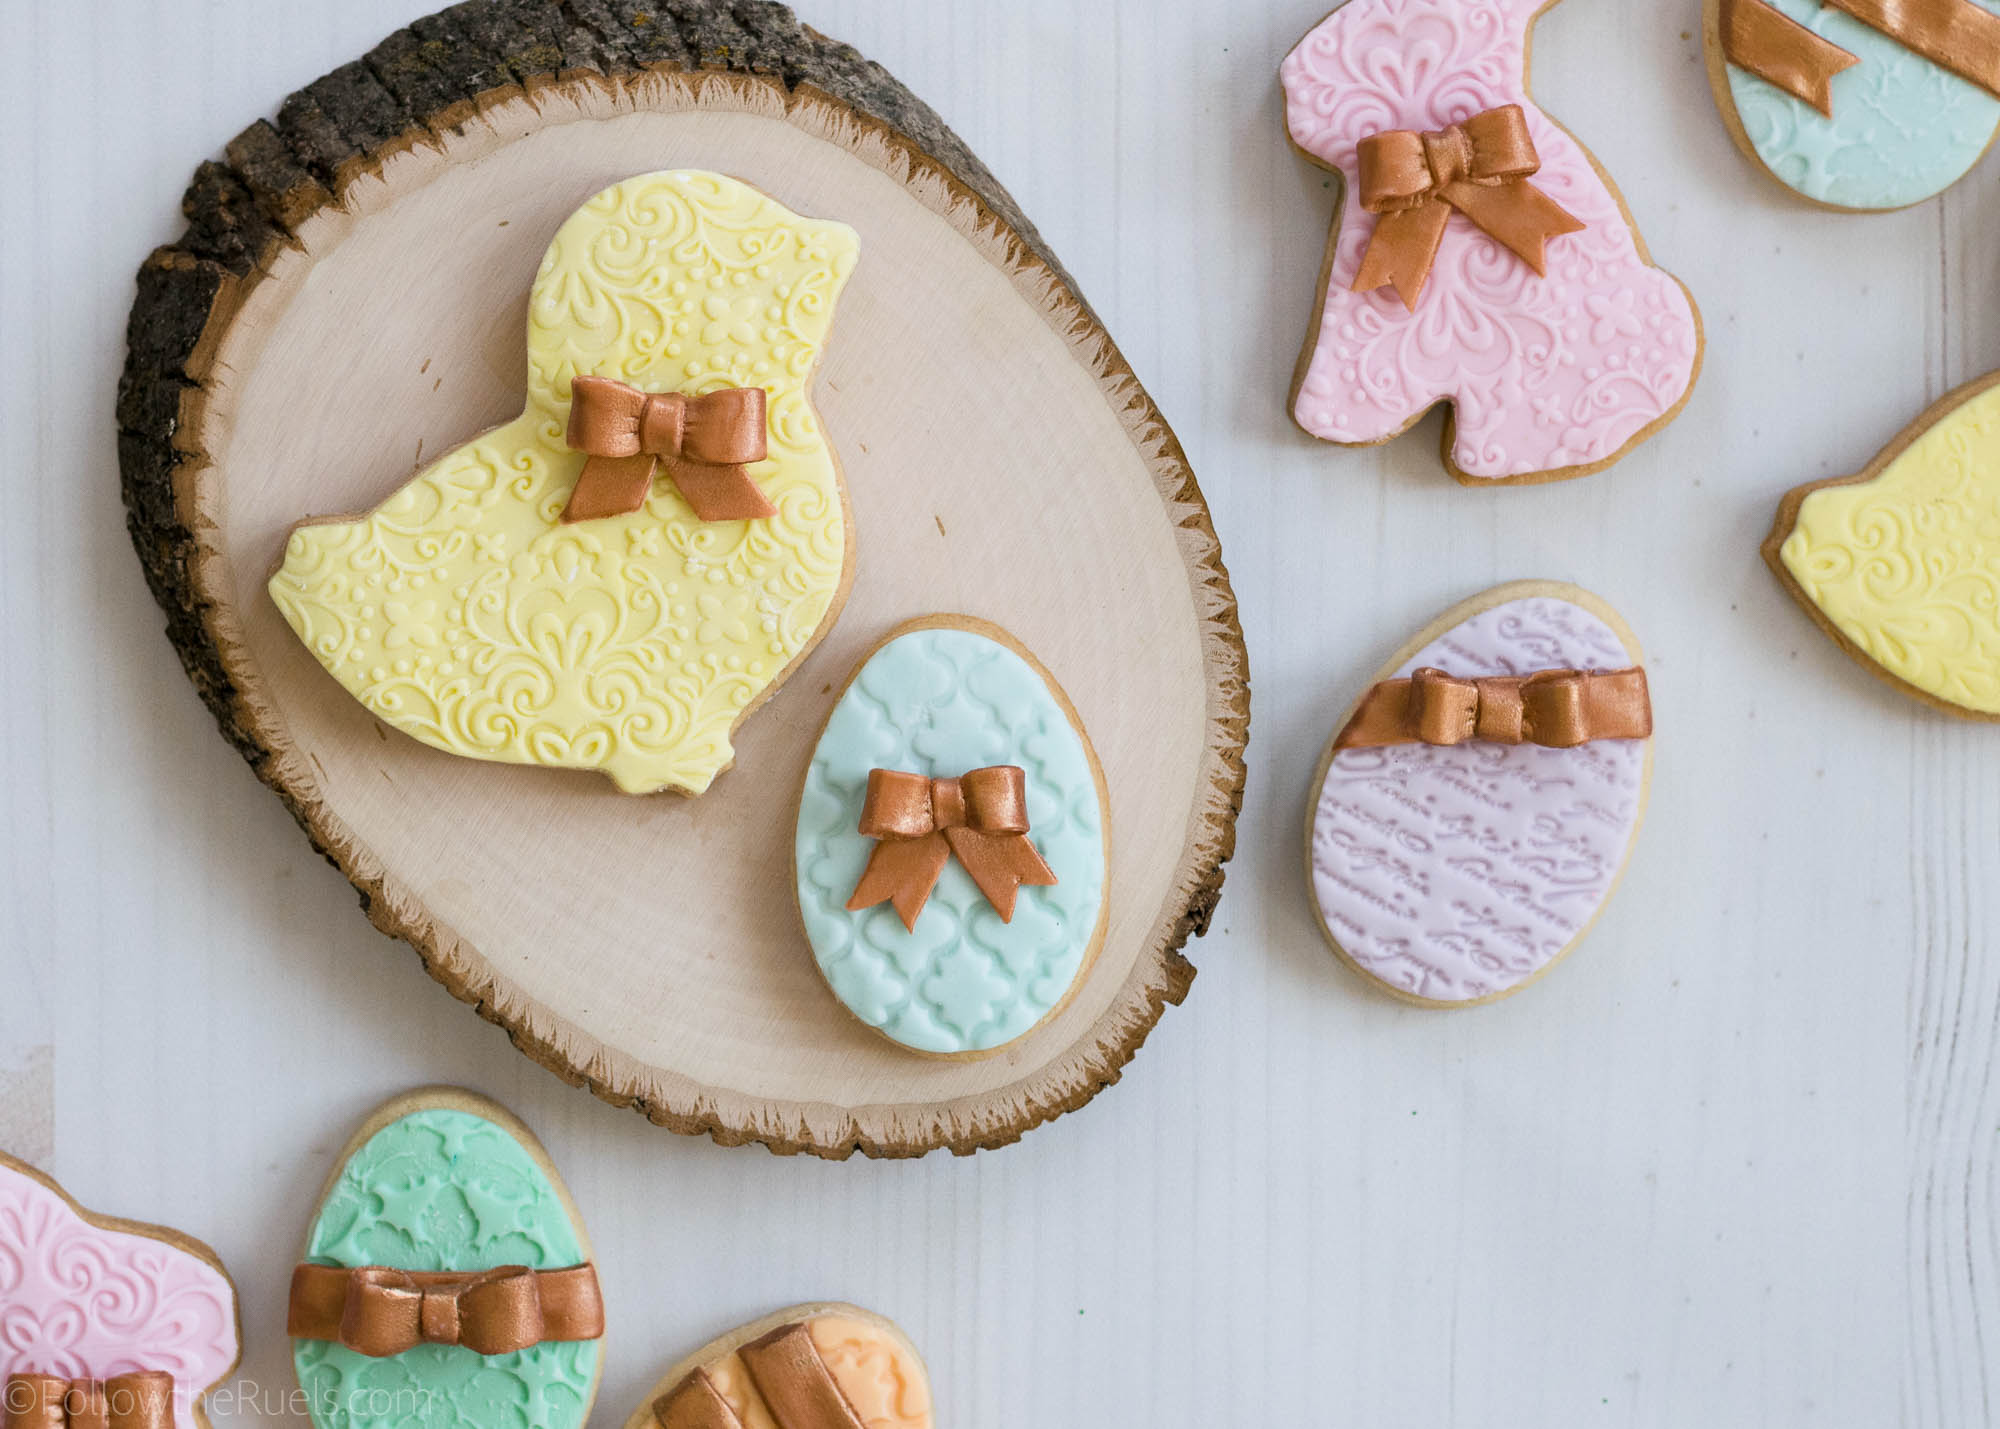
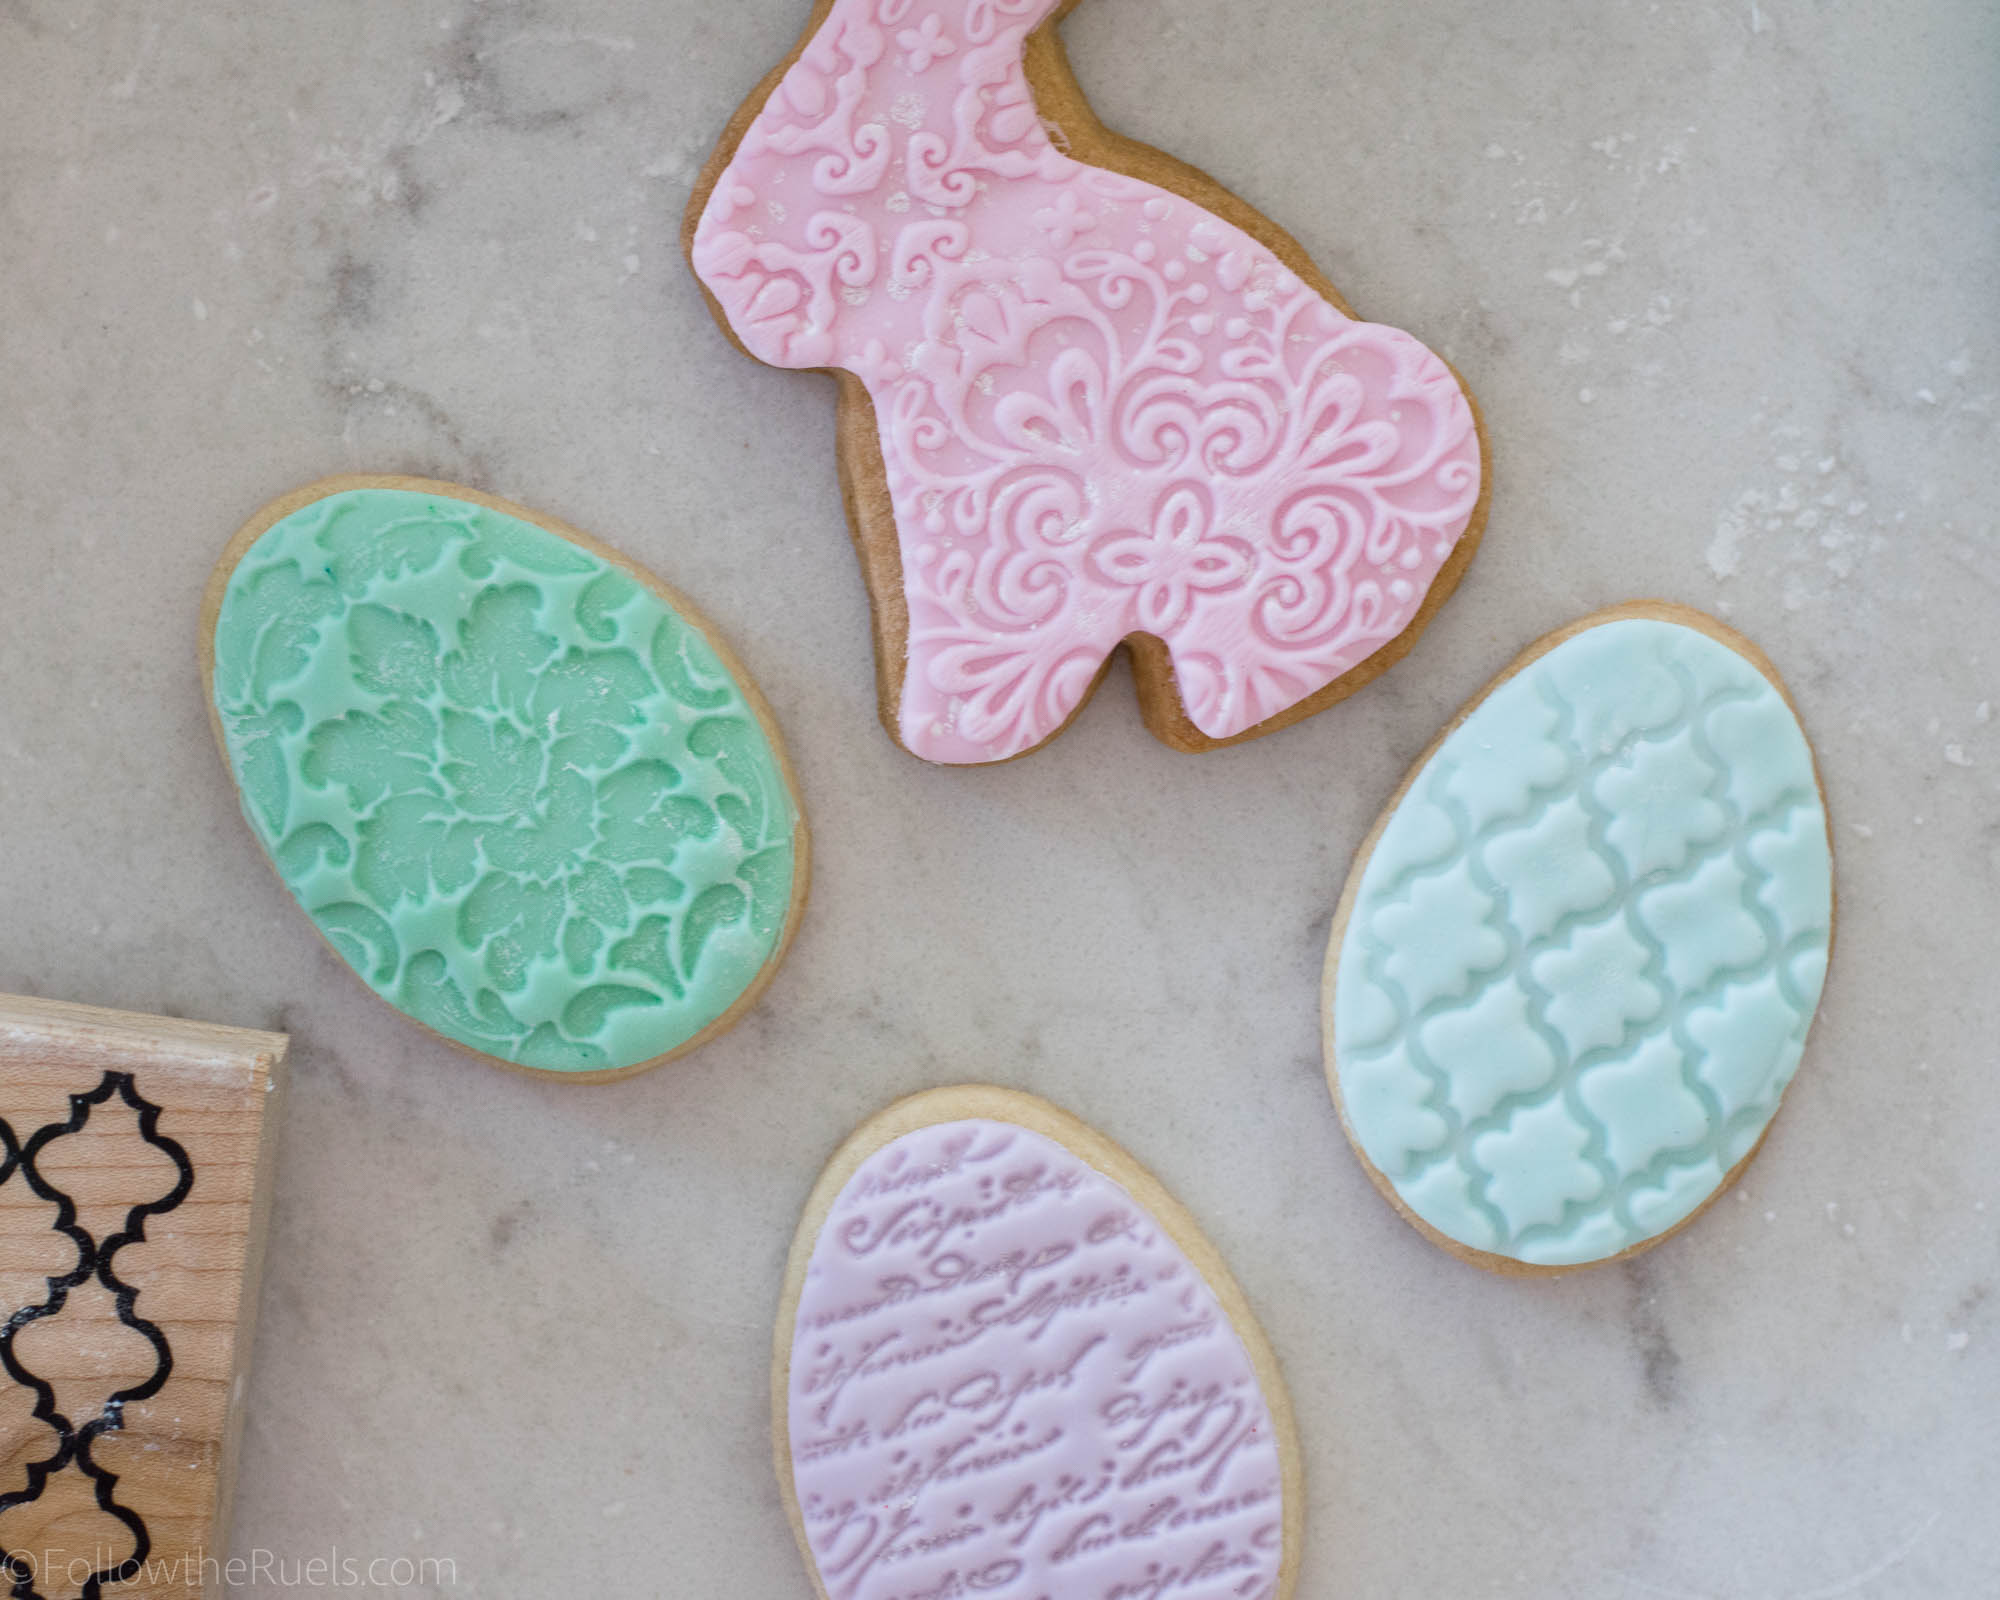
I can’t tell you how much I love these cookies! Don’t they look so pretty and perfect, almost like they were stamped?

Oh yeah, it’s because they were! 

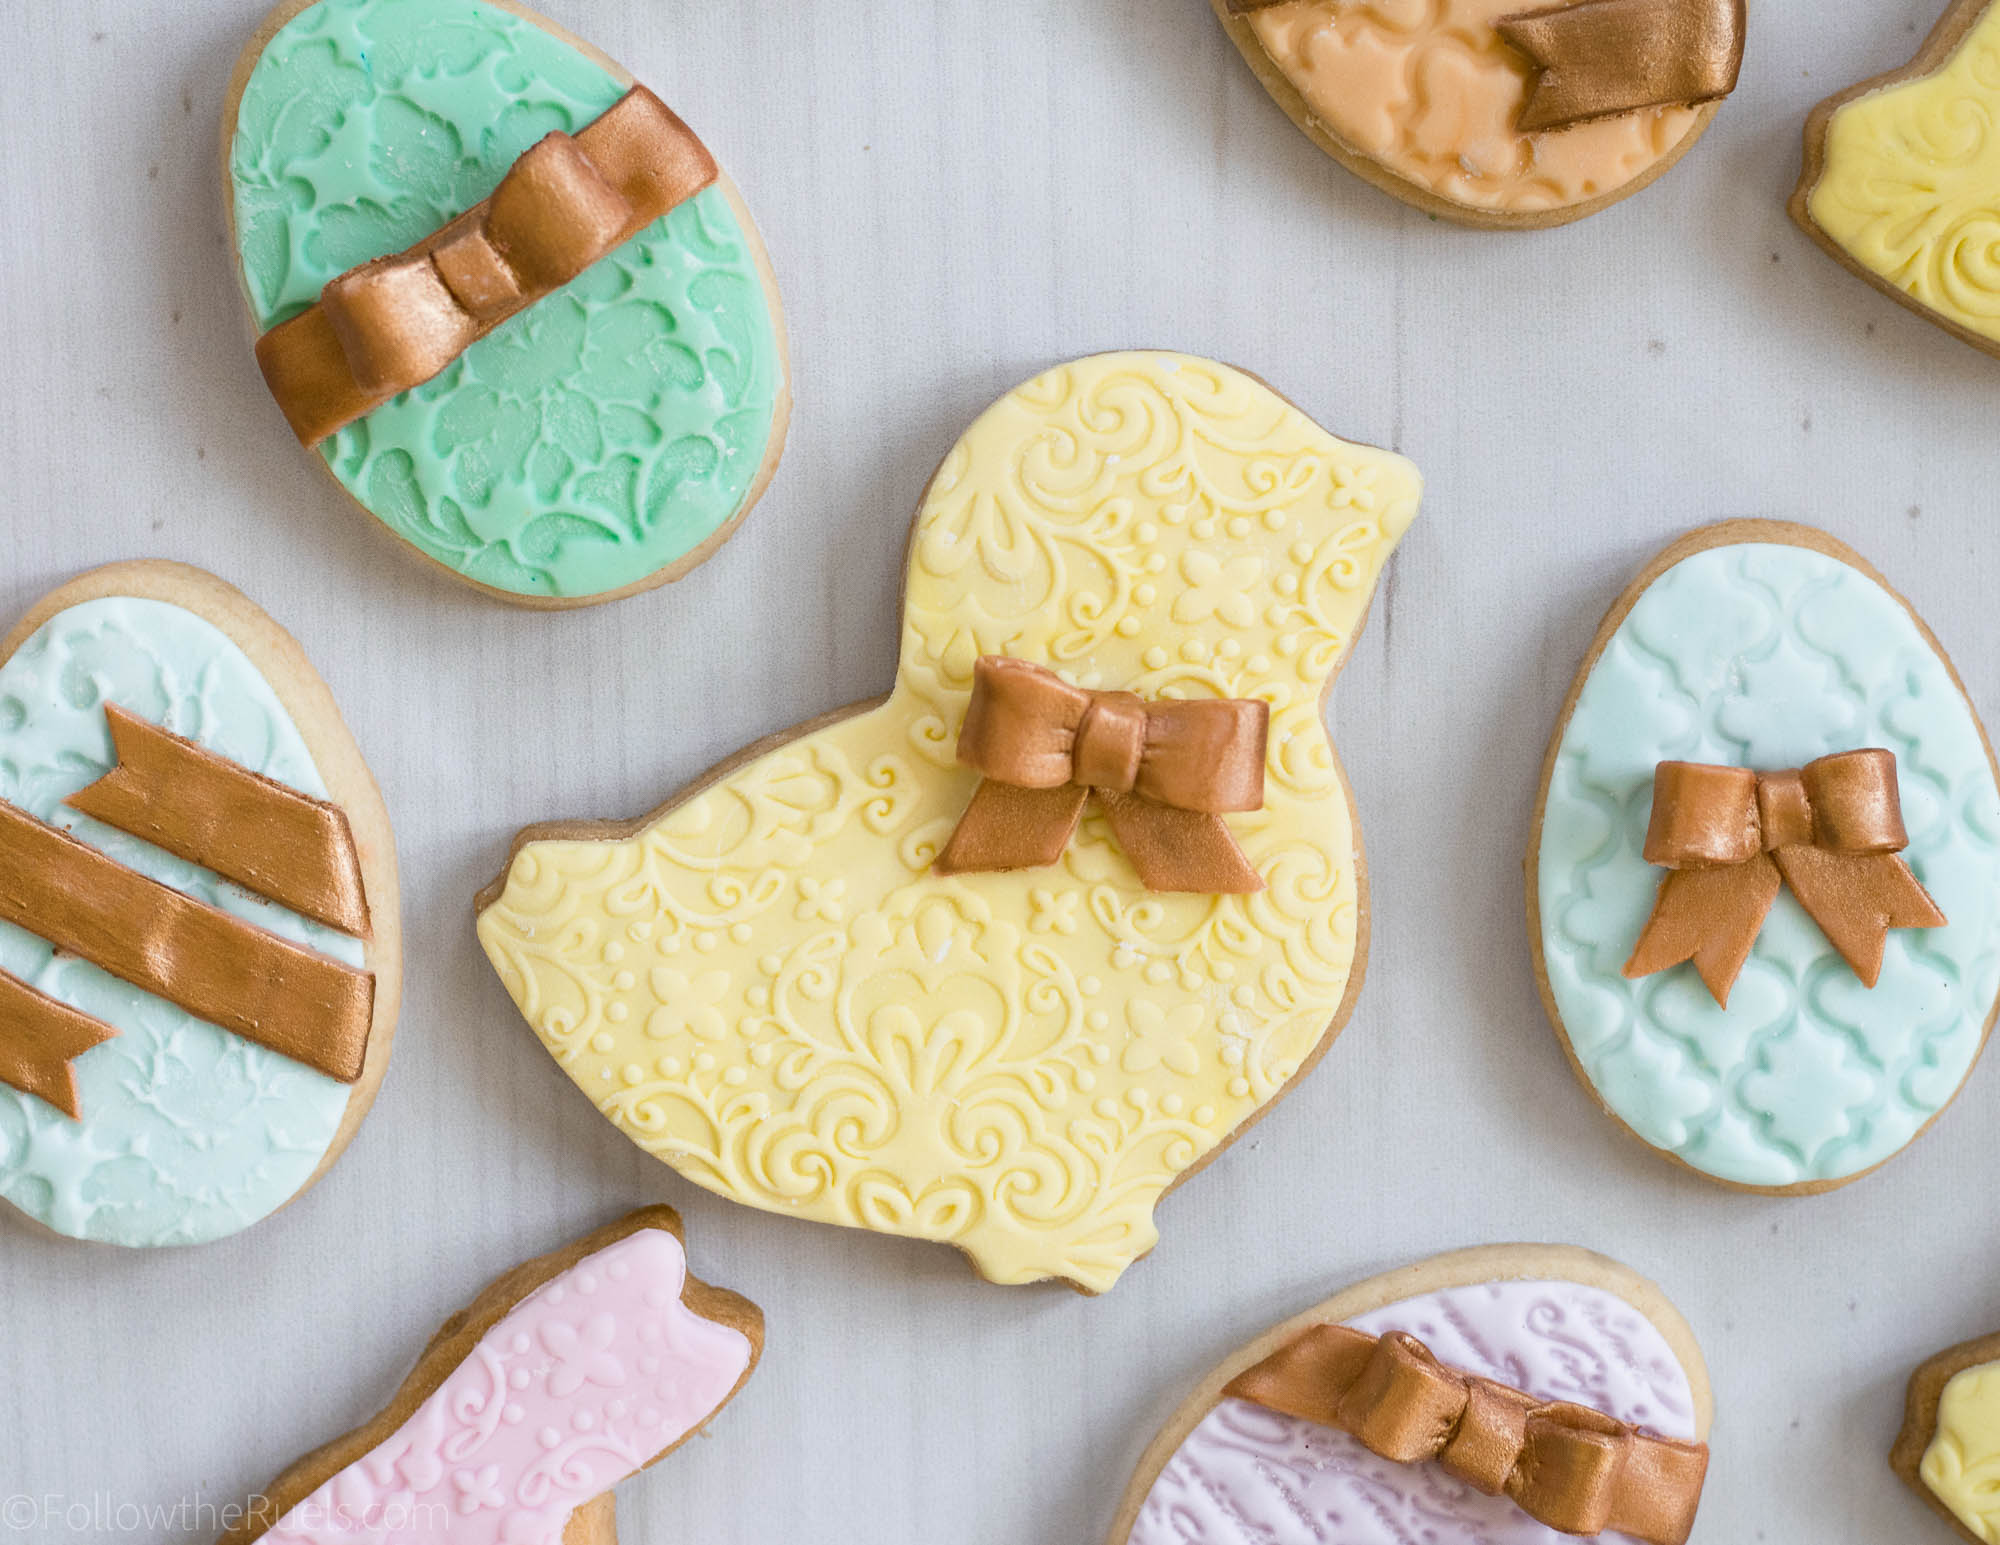
These embossed fondant cookies are actually just cookies covered in a layer of fondant that has been stamped or rolled with an embossed/engraved rolling pin. Embossing fondant is just about as easy as rolling out cookie dough. Anyone can do it!

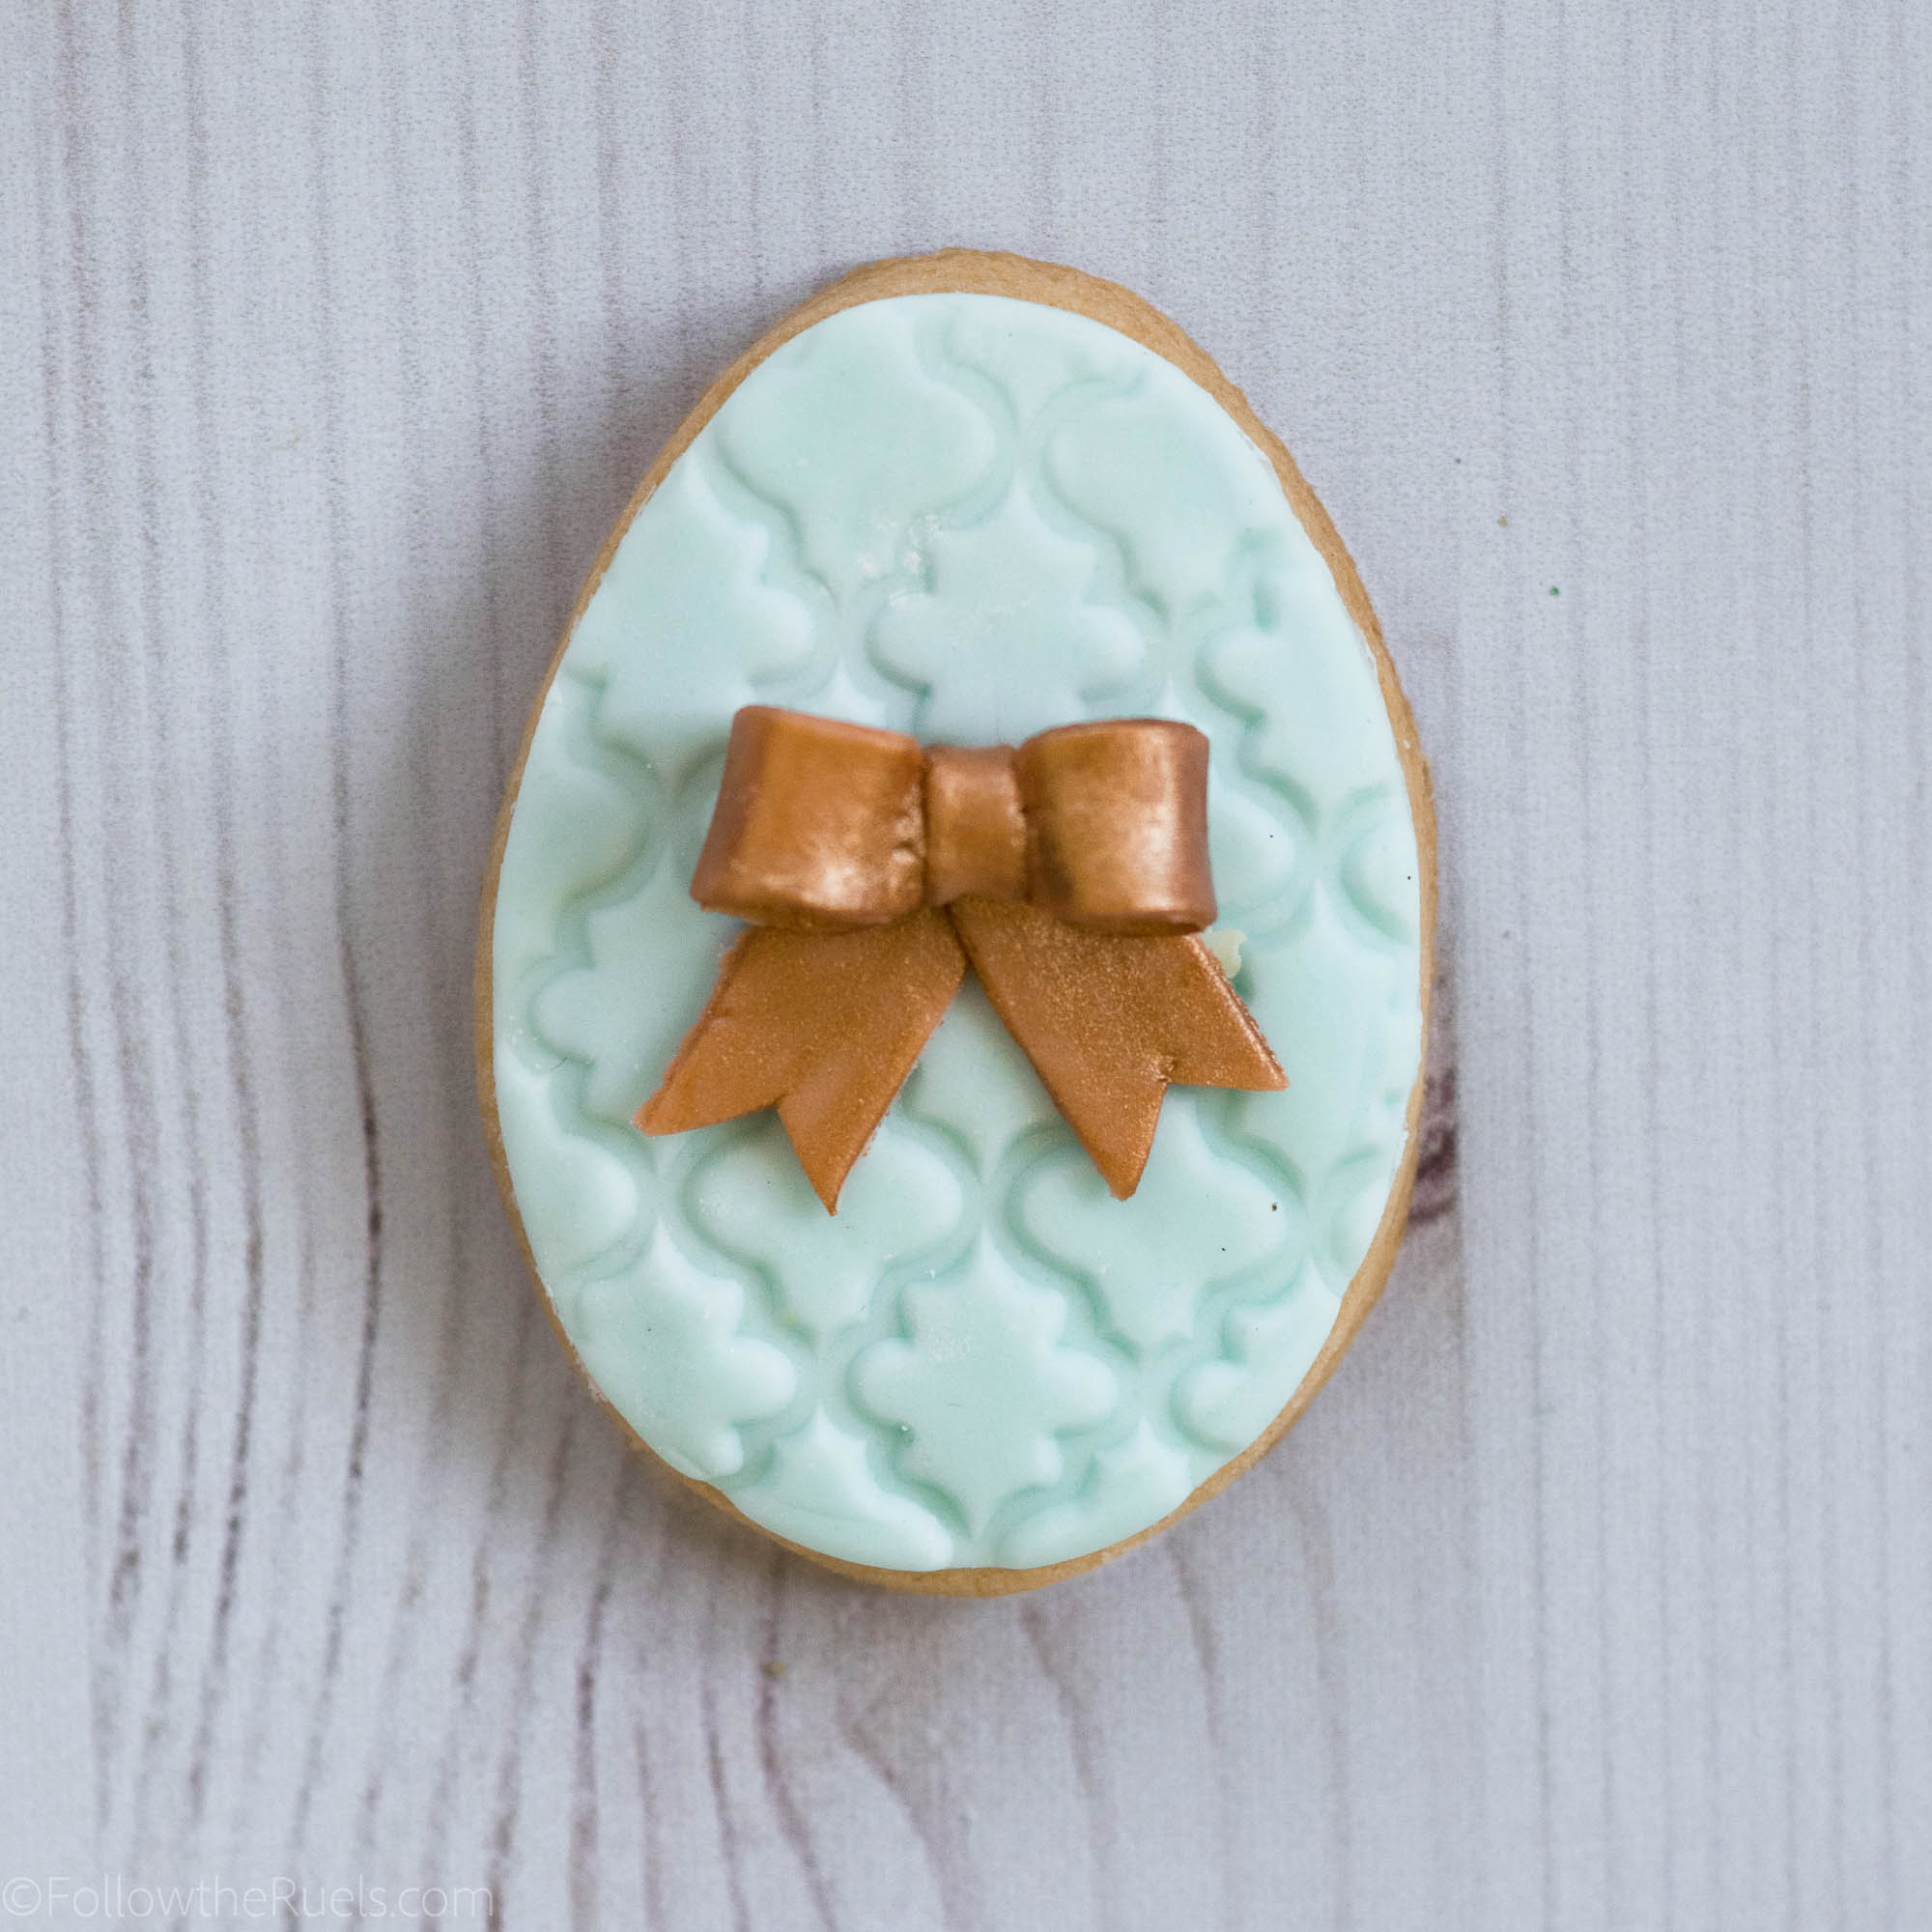
The gold bows on the other hand, well those were a bit trickier…I’ll get to that later. 

How to Make Them


Start by coloring your fondant whatever color you would like. Just add a dot of food coloring and need the fondant until it’s evenly colored.


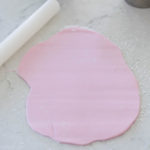
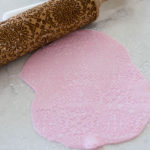
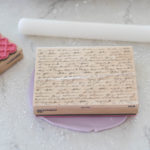
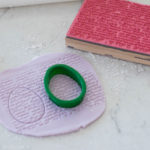
Roll the fondant out into a flat sheet that’s about 1/8th of an inch thick. Then roll over it with either an embossed or engraved rolling pin, 


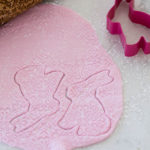
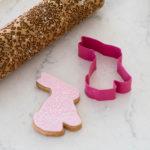
Then cut out the fondant using the same cookie cutter that you used to cut out your cookie and affix it to the cookie by brushing some water onto the back of the fondant. 


You can also use a regular old stamp! However, I recommend only using stamps that have never been inked and have been thoroughly cleaned. 

And that’s all it takes to make these really cute embossed fondant cookies!

Now if you want to add a little extra flair to your fondant covered cookies you can add these adorable little fondant bows that, while not as easy as tying a regular bow, are actually pretty simple to make!

I think they add a nice little touch to the embossed fondant and makes these cookies stand out even more!

What do you think? Ready to wow your family and friends with these adorable Easter cookies? 

Products and Recipes

[show_shopthepost_widget id=”3067918″] 
Of course, I always recommend my favorite Sugar Cookie Recipe, but I would say this time it is especially important to use a cookie dough that doesn’t lose it’s shape when baked. When you cut out your fondant you want it to pretty much cover the cookie completely, and the easiest way to do that is to have a cookie that is pretty much the same size and shape as the cookie cutter.

/ Filed In: Cookie Decorating 101, Cookies New, Decorated Cookies, Desserts, Eat
Tagged: cookies, Easter, embossed fondant, fondant, sugar cookie

Asparagus Prosciutto Tart

April 24, 2017

When asparagus is on sale at Trader Joe’s right before Easter you stock up and figure out what to do with it later. Oh, that’s not what you do? I guess it’s just me. I figured I could do a lot with asparagus, from adding it to an omelet or frittata to roasting it and serving along side some chicken or beef. I knew I would use it, I just didn’t quite now how. 

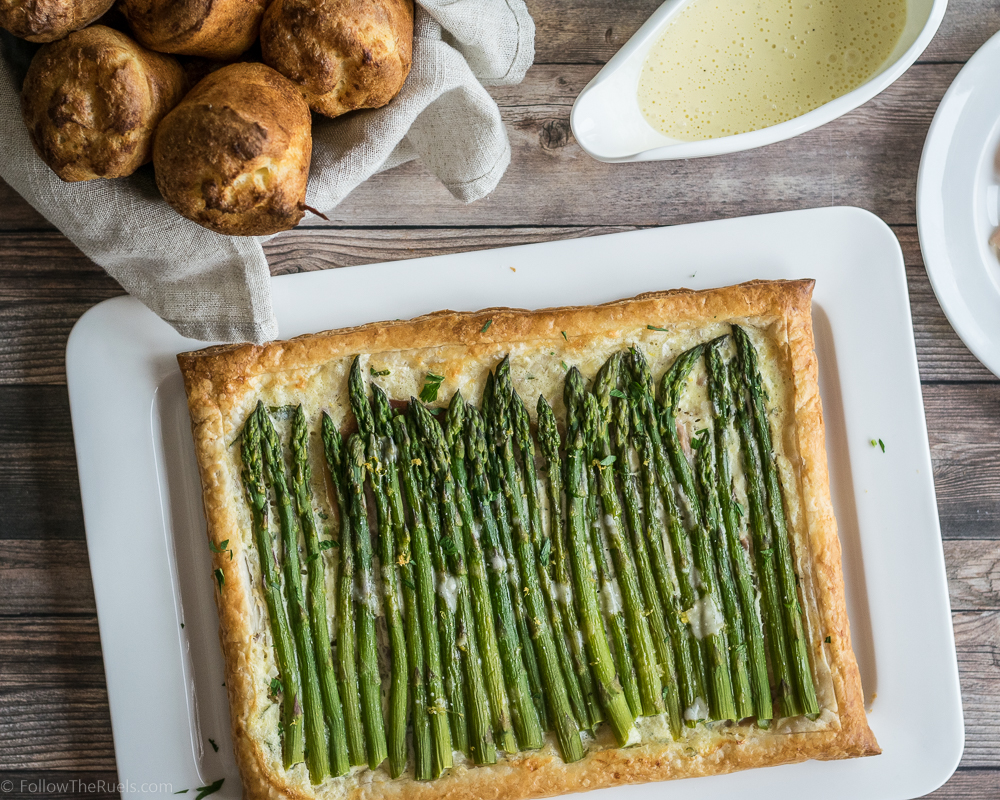
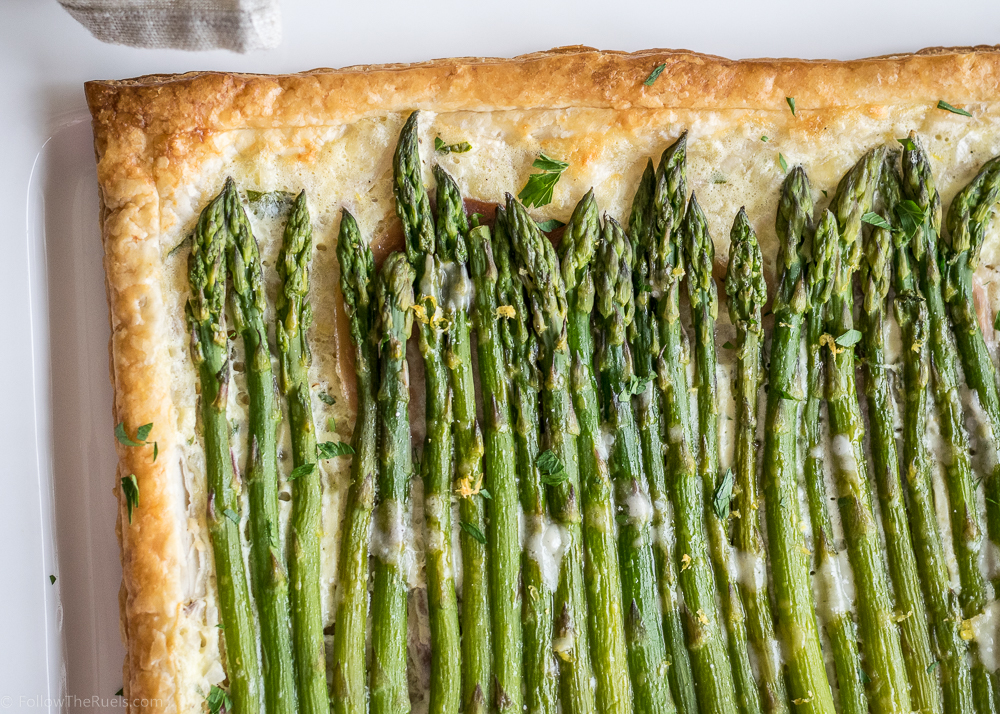
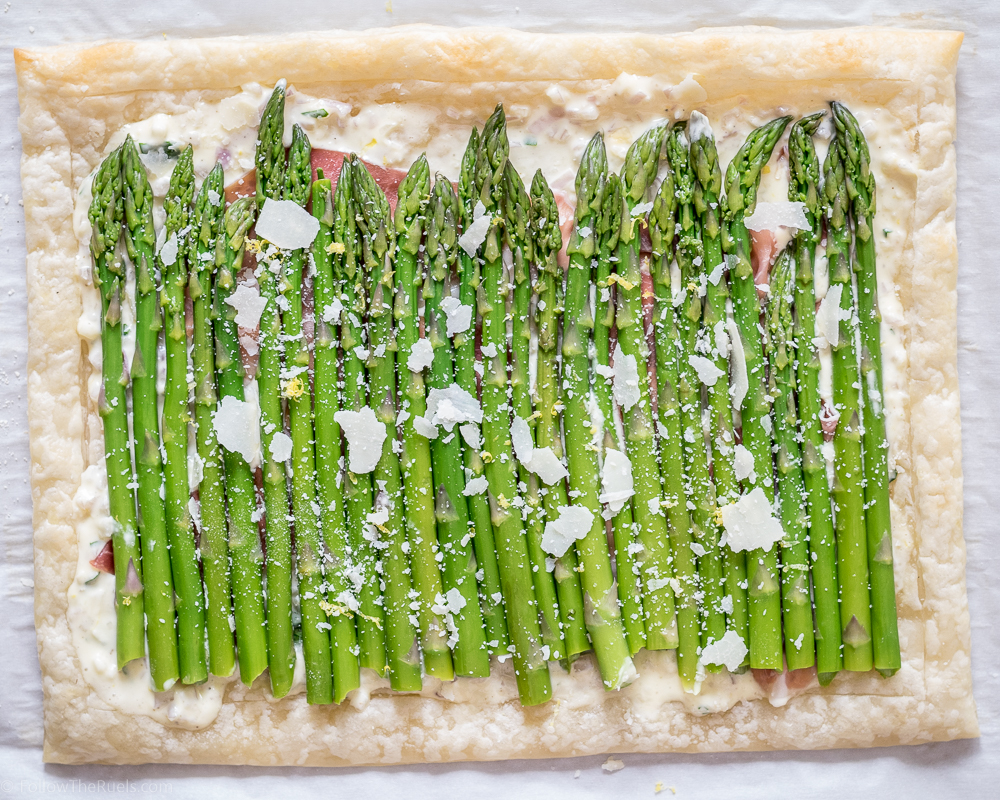
After a quick inventory check of fridge and freezer, I realized I had everything I needed to make a savory asparagus prosciutto tart. The perfect Spring brunch dish!


Start by blanching the asparagus by dumping the trimmed asparagus in boiling water for a few minutes then transferring to an ice bath. The asparagus will turn bright green and be slightly tender. 

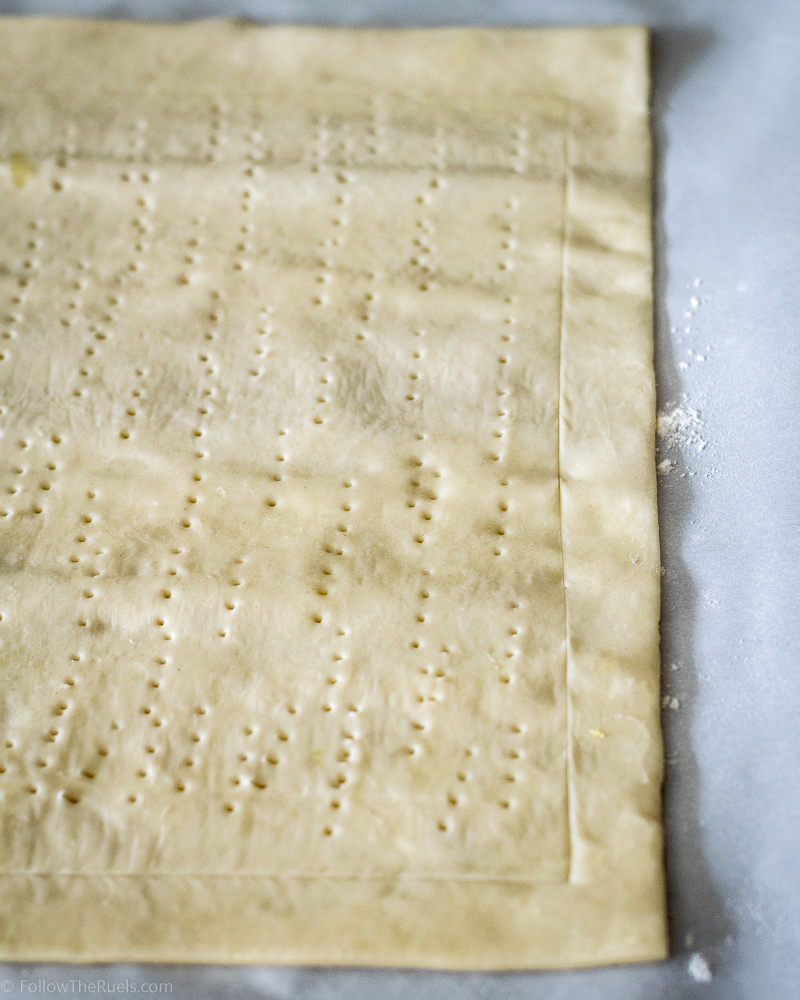
Prepare the puff pastry by creating a 1/2 inch border and poking holes with the tines of a fork in the center then bake until it’s slightly golden.


While the puff pastry is puffing up in the oven, make the filling. Mix together marscarpone cheese, sour cream, and egg, shallot, lemon zest, parsley, and Parmesan cheese. 

Take the puff pastry out of the oven and if you see that your puff pastry has been stubborn and puffed up even where you poked holes, press it down with the back of a spoon. Spread the marscarpone mixture into the cavity that you created, leaving the border untouched. 

On top, add a thin layer of prosciutto. If you really like prosciutto, knock yourself out and add more than one thin layer. Top that with the asparagus and even more Parmesan, because this thing needs more cheese. 

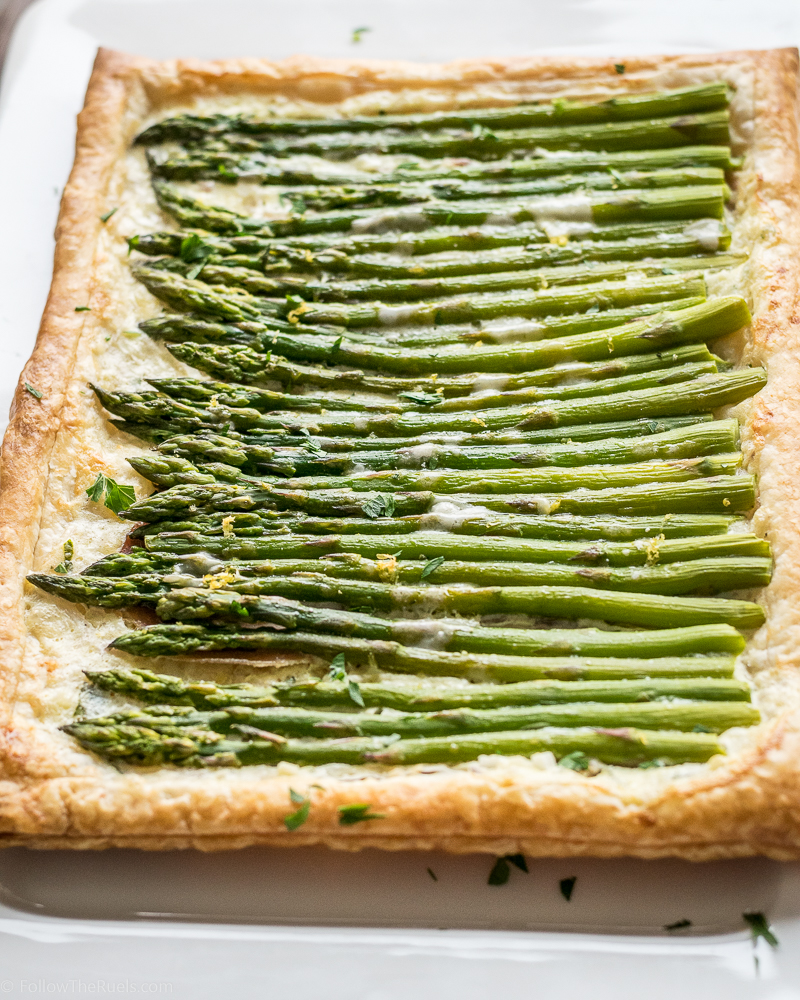
Once the puff pastry is nice and golden brown and the asparagus is tender and slightly roasted, it is done! 

I topped mine with a little bit more lemon zest and parsley. And if you read last weeks post, you know I also topped this with some creamy hollandaise sauce! The perfect condiment to go with asparagus!

If you are an asparagus lover like me, then you will find absolutely no fault with this asparagus prosciutto tart. It was absolutely delicious and the perfect brunch for Easter! It would also be great for Mother’s Day! 
[amd-yrecipe-recipe:152]

/ Filed In: Breakfast, Eat, Other Savories New
Tagged: asparagus, brunch, Easter, marscarpone, Mother's Day, prosciutto, puff pastry, tart

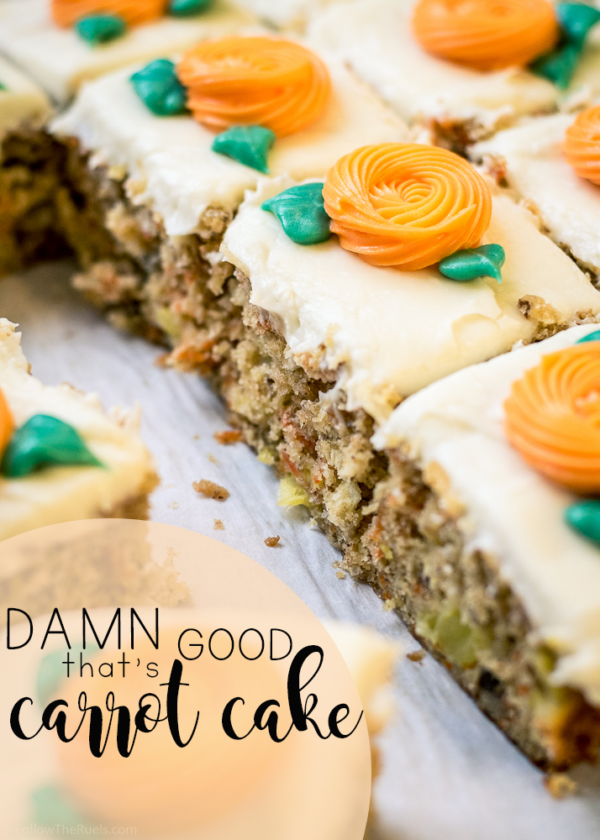
Damn That’s Good Carrot Cake

April 14, 2017

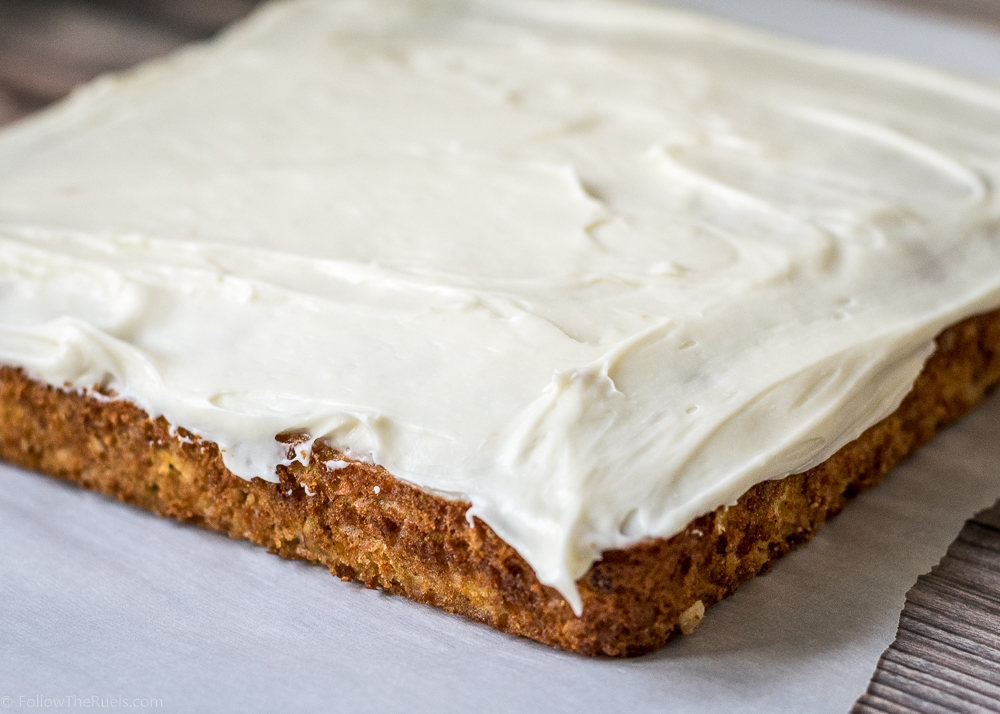
The title of this post is a direct quote from a coworker who tasted this carrot cake and uttered “Damn, that’s good carrot cake!”. This carrot cake even received a standing ovation from my boss. (Can you consider it a standing ovation if it’s just one person standing? sure, let’s go with it. It helps my story.)

Yesterday morning I dropped the cake off in our break room then ran downstairs to grab a coffee. By the time I had returned to the office, my boss had grabbed a piece of cake. As I was sitting down she yelled from her office, “Lindsey, did you make this carrot cake?” After I said yes, she proceeded to stand and slow clap. I mean, I have made some good stuff before, but nothing that has received a slow clap! (She went on use about a dozen different synonyms for moist and told me this was the best thing I had ever made.)

So between the standing ovation/slow clap and the “Damn, that’s good carrot cake” comment, I’d say this is, well, one damn good carrot cake! 

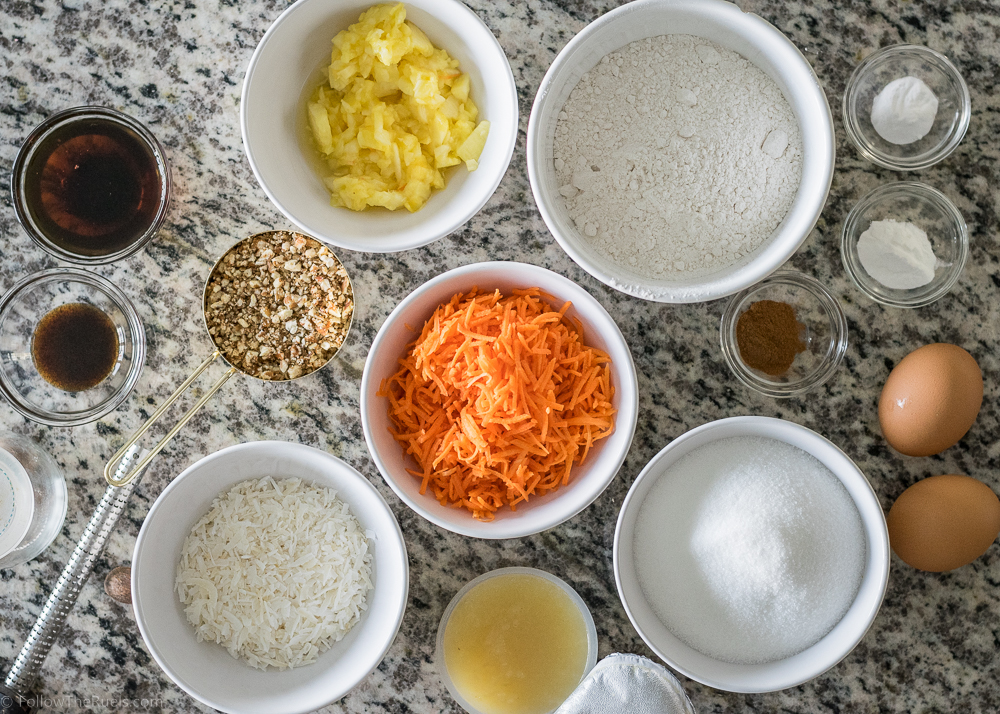
The ingredients in this aren’t a whole lot different than any other carrot cake, except for a not-so-secret ingredients: apple sauce, maple syrup, and nutmeg. All three are super subtle. You probably won’t even be able to tell that they are there, but they make a huge difference. 

The apple sauce helps make the cake super moist without adding any fat. The maple syrup adds another layer of sweetness that helps balance out all the flavors. And the nutmeg plays off the cinnamon to bring out the flavors of the pecans, coconut, and pineapple. 

While it may look like a hot mess of ingredients (this is definitely the most ingredients I have ever added to a cake), it’s really simple to make!


First mix together all the dry ingredients in a small-ish bowl. Just something big enough to hold all the flour. Then, in a larger bowl, whisk together all the wet ingredients. Dump the dry into the wet and whisk until you have a batter. 

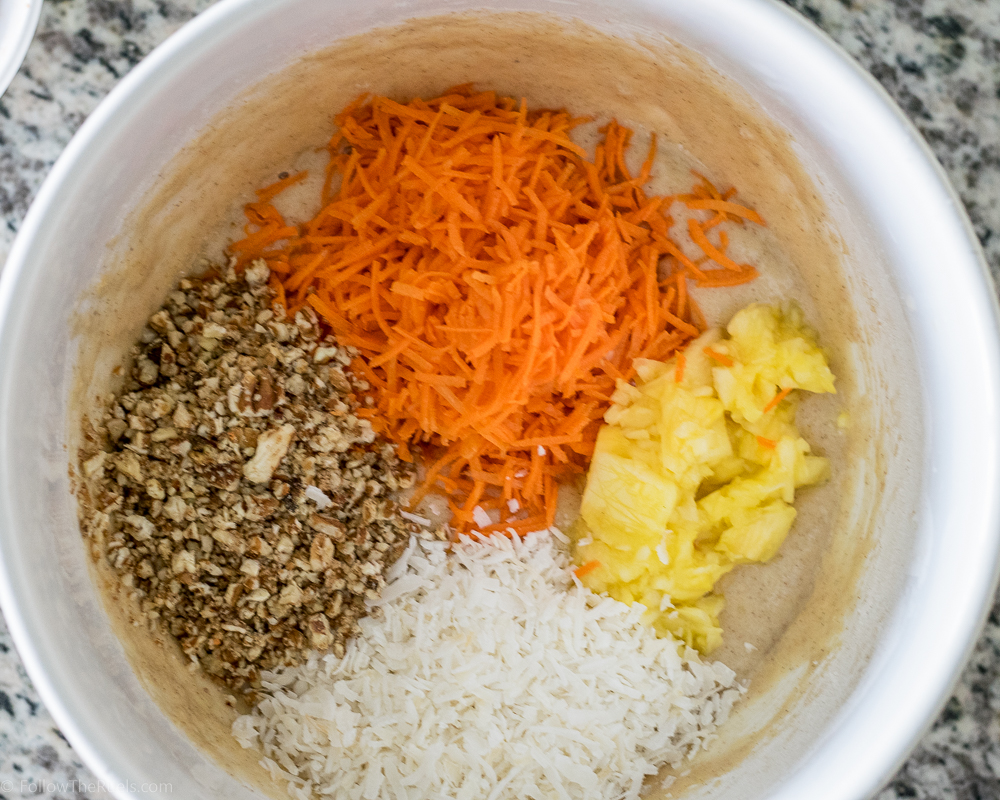
Now it’s time for the party to start! Add the carrots, pineapple, pecans, and coconut to the batter and fold in until everything is nicely incorporated throughout the batter. 

Just a side note: I prefer to have my nuts pretty finely ground whenever I add them to baked goods. I do not like biting into a huge chunk of pecan when I eat my cake. So I recommend tossing them into your food processor and grinding them down into something that resembles a coarse meal. It’s okay if there are some bigger pieces. 

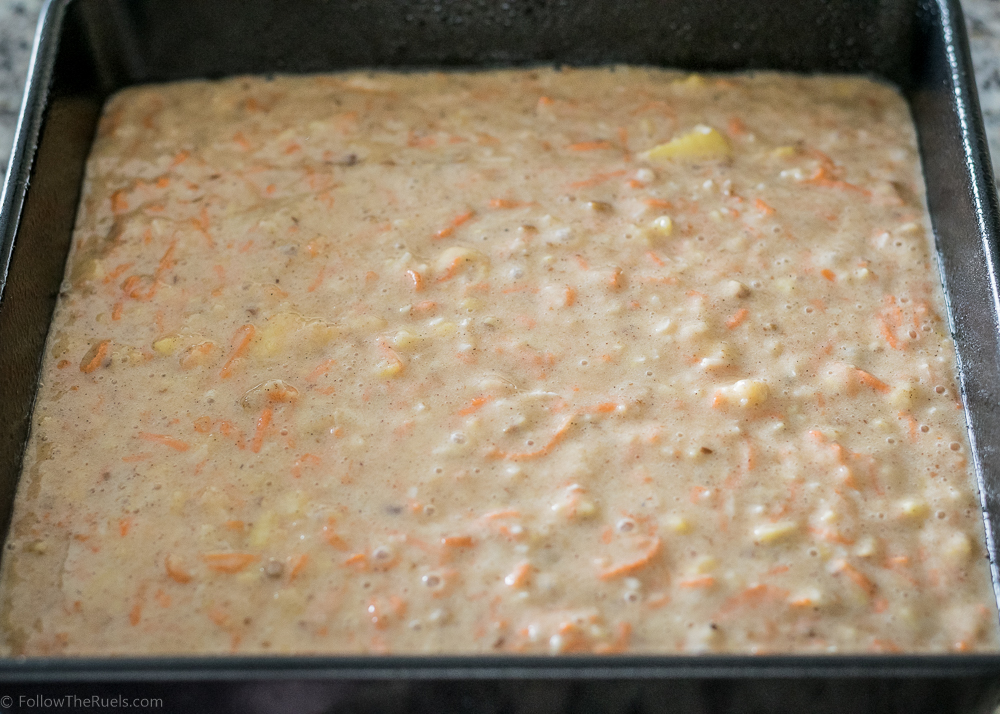
Now just add it to your pan and bake for about 35 minutes. 

I baked mine in a square pan because I wanted it to be more like a sheet cake. But you could also split this into two 8-inch round pans if you wanted to make a layer cake. 

After it has baked and cooled, you can frost this bad boy with some of my all time favorite cream cheese frosting. Cream cheese frosting it just amazing on carrot cake. Everything that was healthy about the carrot cake before, can be thrown out the window once you add the frosting. And that’s why they work so well together. 


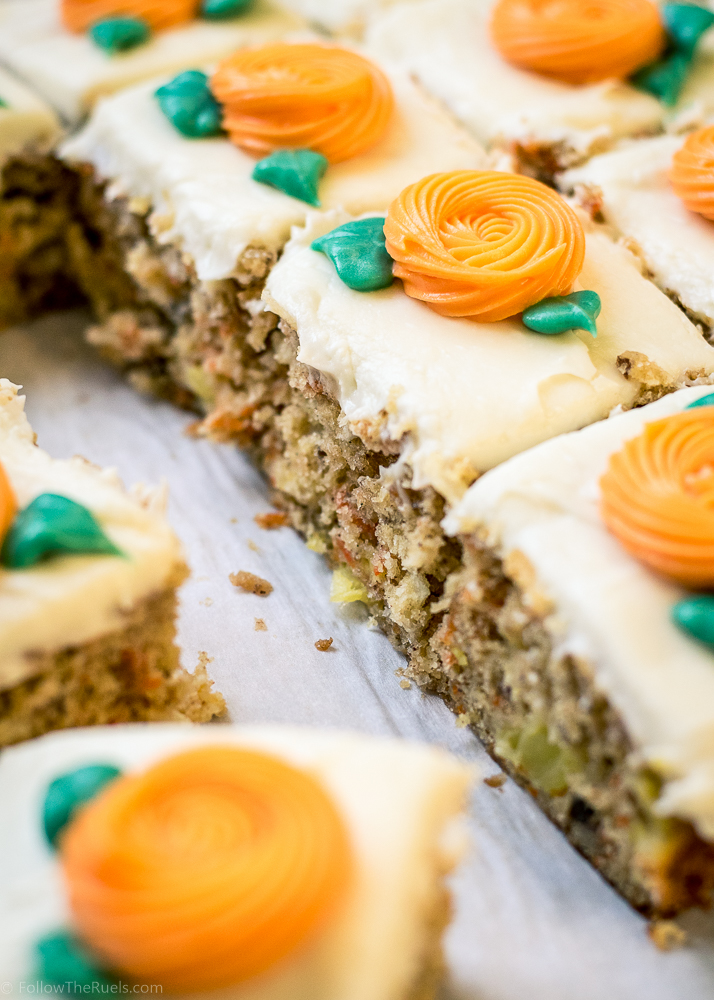
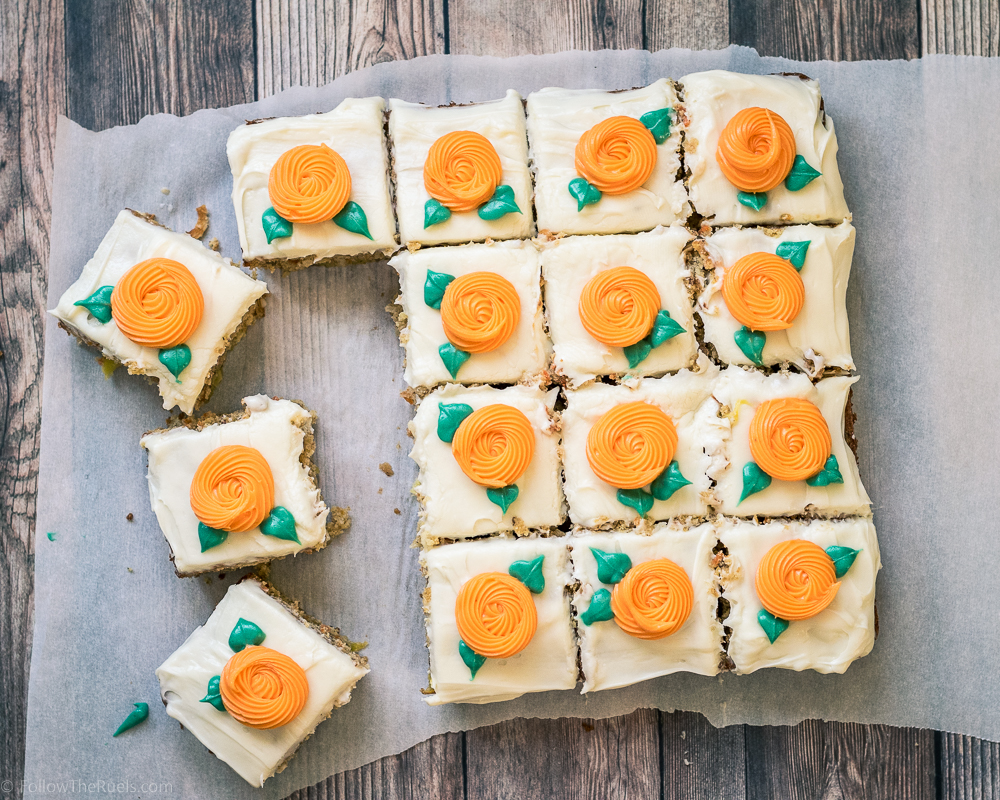
It you want to add some rosettes like I did, separate out about 1/2+ icing into two separate bowls. Color most of it (about 1/2 cup) orange, and the rest of it (about 2 tbsp) green. For the rosettes I used a #21 piping tip, but you can also use a small closed star piping tip as well. For the leaves I used a #352. 

Mark out 16 slices of cake. In the center of each piece, pipe a small rosette by making a small spiral with the #21 tip. On the side of each one, pipe two leaves. Easy peasy, right? πŸ˜‰ You got this!

But with or without the decoration, this cake is sure to win you over some fans. I was definitely surprised by the reaction I received for this humble little carrot cake. According to some people, it is now the best thing that I make!

[amd-yrecipe-recipe:150]

PIN NOW, MAKE LATER

The best carrot cake you will ever make!

/ Filed In: Cakes and Cupcakes, Cakes New, Desserts, Eat
Tagged: cake, cake decorating, carrot cake, cream cheese frosting, Easter, Spring

15 Amazing Easter Desserts

April 7, 2017

Hi, my name is Lindsey and I’m addicted to baking. How do I know? (Have you read the blog? That should be all the proof you need.) Well, I promised myself I wouldn’t do any baking this coming weekend after a tornado of flour and sugar went through my kitchen last weekend. But here I am, a week away from Easter wanting to make all of these fun desserts! As I sit here I’m strategizing how I can fit in a carrot cake, macarons, cookies, and petit fours all before Easter. I clearly have issues, folks.

(Although I would also argue that I’m just looking out for my emotional wellbeing per this article)

Since I will hopefully no baking (…well, maybe a little baking?….like one cookie?…I cant just make one cookie….how about 12 cookies….) I thought I would share with you all the things I wish I was making this weekend. Maybe both of us will be inspired by the 15 amazing Easter desserts!

No Bake Chocolate Oreo Bunny Garden Dessert from Oh Sweet Basil

Easy Easter Oreo Bark by Suburban Simplicity

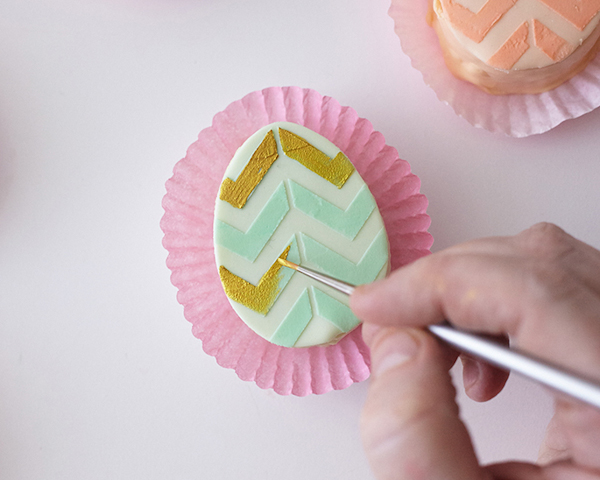
Mini Easter Egg Cakes by the Cake Blog

Italian Easter Bread by Bake with Christina

Easy Easter Bunny Cookies by yours truly

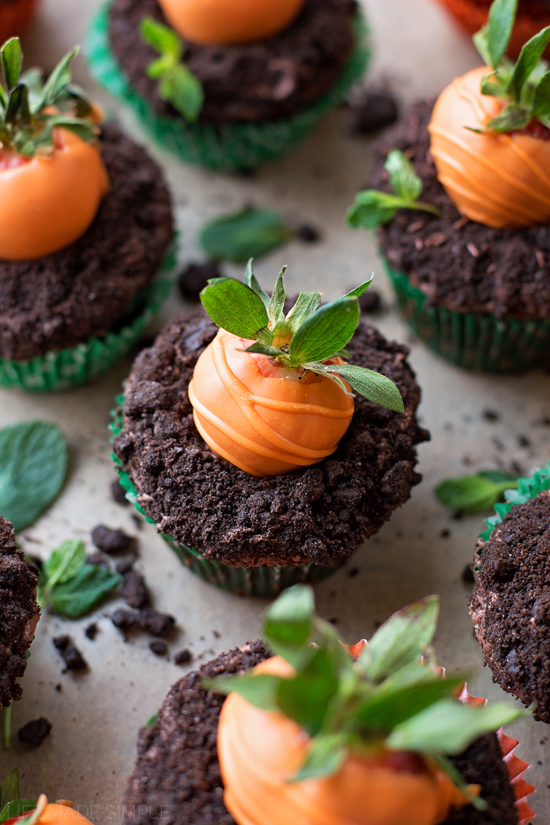
Carrot Patch Cupcakes by Life Made Simple

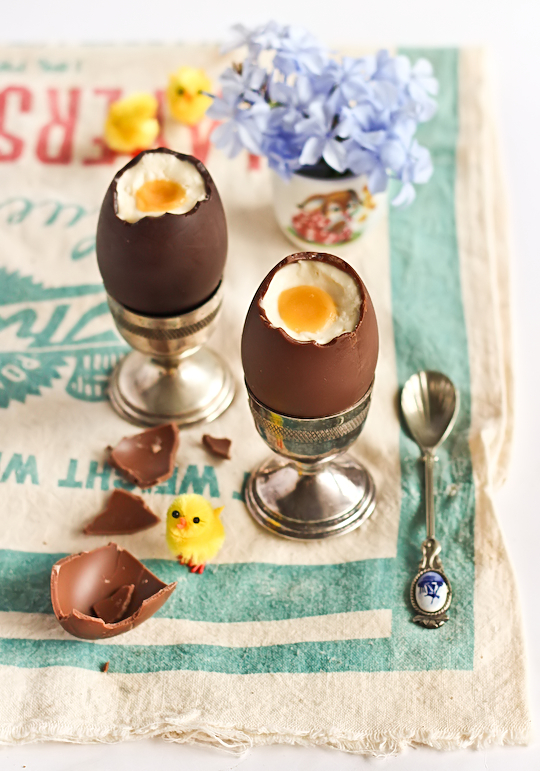
Cheesecake Filled Chocolate Easter Eggs by Raspberri Cupcakes

Eyelet Lace Easter Cookies by this girl

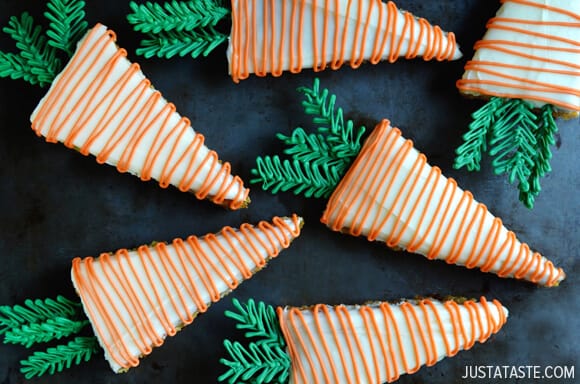
Pineapple Carrots Cakes by Just a Taste

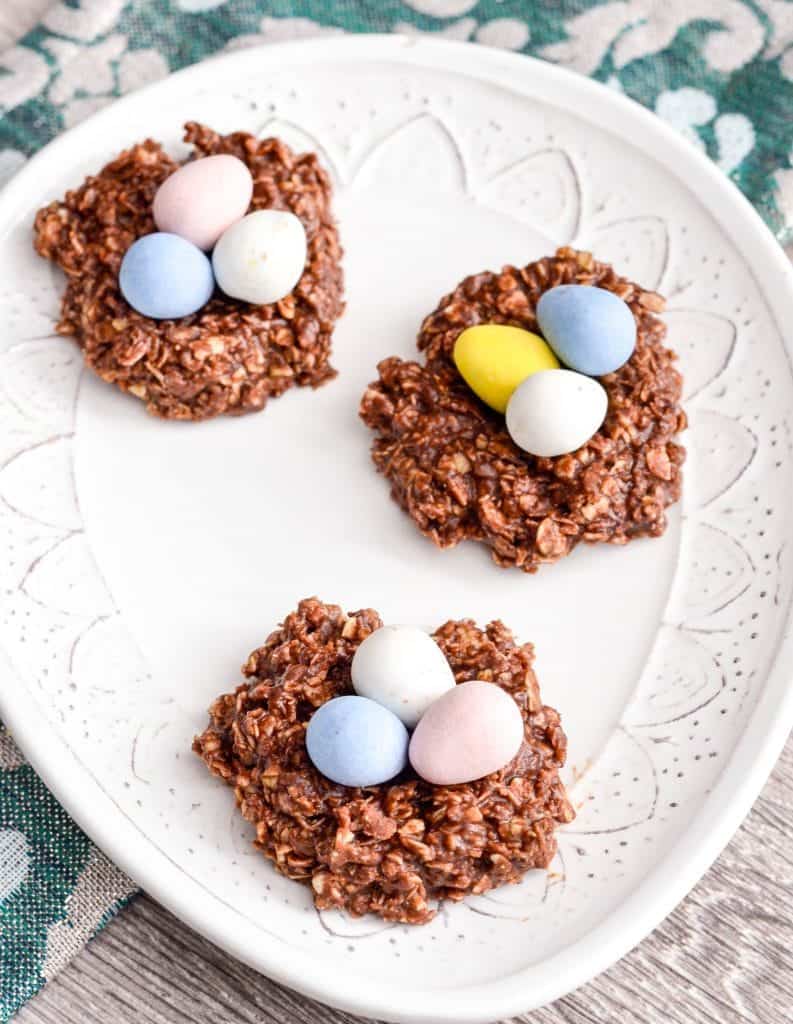
Healthy No-Bake Chocolate Peanut Butter Nests by Joy Food Sunshine

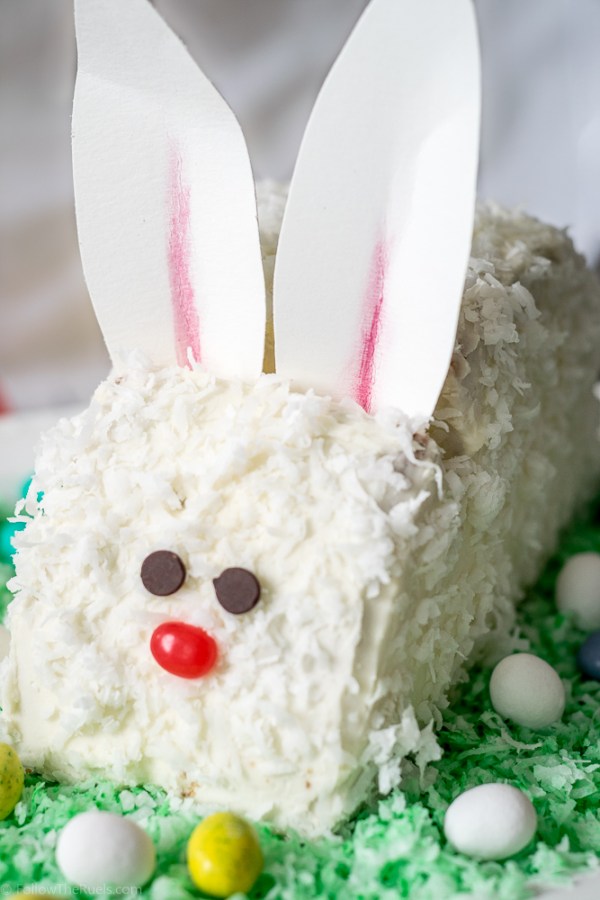
Surprise Inside Easter Bunny Cake by me

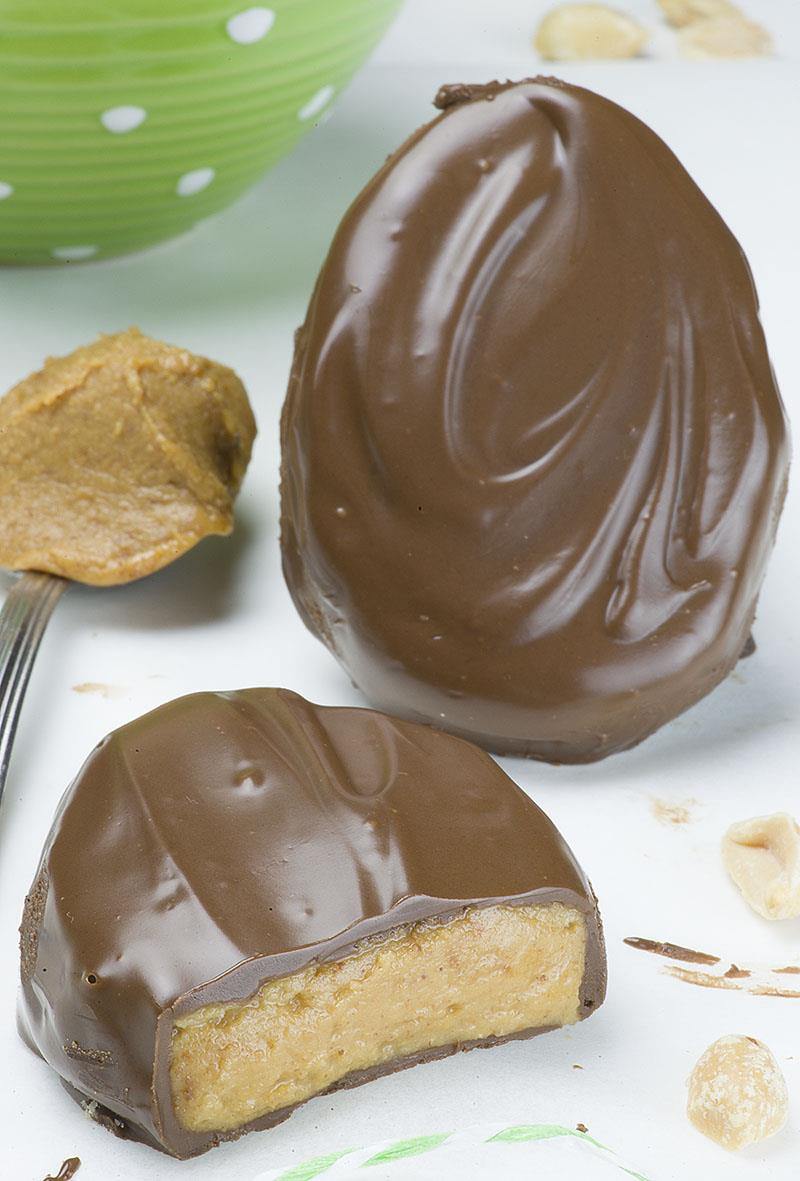
Homemade Reese’s Eggs by OMG Chocolate Desserts

Bunny Pay Thumbprint Cookies by the Bearfoot Baker

Bunny Booty Pretzels by A Soccer Mom Blog

Easter Egg Hunt Cookies by Moms and Munchinks

That solves it. I will definitely be making one of these Easter desserts this weekend. Like those adorable little bunny butt pretzels that require no actual baking. I found a loop hole! 

So, who else want to join bakers anonymous with me? I’ll bring some (homemade) donuts to the next meeting. πŸ˜‰

/ Filed In: Desserts, Eat
Tagged: bunnies, cake, chocolate, cookies, dessert, Easter, marshmallow

Eyelet Lace Easter Egg Cookies

March 31, 2017

Quick post today, guys! But it’s a good one, I promise because it has a video! Aren’t those so much better than the ones where I just drone on and one? Probably.

I made these cookies after my cookie decorating class this past weekend. Since this was an intermediate class, one of the techniques that I taught was this eyelet lace effect. I love it uses some pretty basic piping techniques, but it looks much more complicated. 

Just see for yourself!

Unfortunately I didn’t catch the part where I added the flowers. But I have shown you guys that effect in another video, so hopefully you can put the two together!

If you want to make some bunnies to go with your eggs, they are super easy! Just outline and fill the cookies. Once they are crusted over (about 20 minutes) add three small dots scattered around the cookie. Then go in and add some flowers! Easy peasy lemon squeasy! (Ok, I know yall are rolling your eyes at me, but I literally taught these same cookies to a bunch of people who little to know cookie decorating experiences, and their cookies turned out awesome! It’s amazing what a couple piping tips can do!)

Here are some of the things I used to make these cookies:

  • toothpick or scribe tool
  • piping tips #1, #16, #18, #24, #224, #349
  • flood consistency icing in white and the colors of your choice
  • piping consistency icing in white
  • stiff consistency icing in various colors for flowers and leaves

If you try these cookies, I would love to see what you create! 

As always, I used my favorite sugar cookie recipe, with a little lemon zest added, and royal icing recipe. 

Have a hoppy Easter!

PRODUCTS USED: 
[show_shopthepost_widget id=”2566372″]

/ Filed In: Cookies New, Decorated Cookies, Eat
Tagged: bunnies, cookies, Easter, Easter Eggs, royal icing, sugar cookies

Easter Egg Popcorn Balls

March 20, 2017

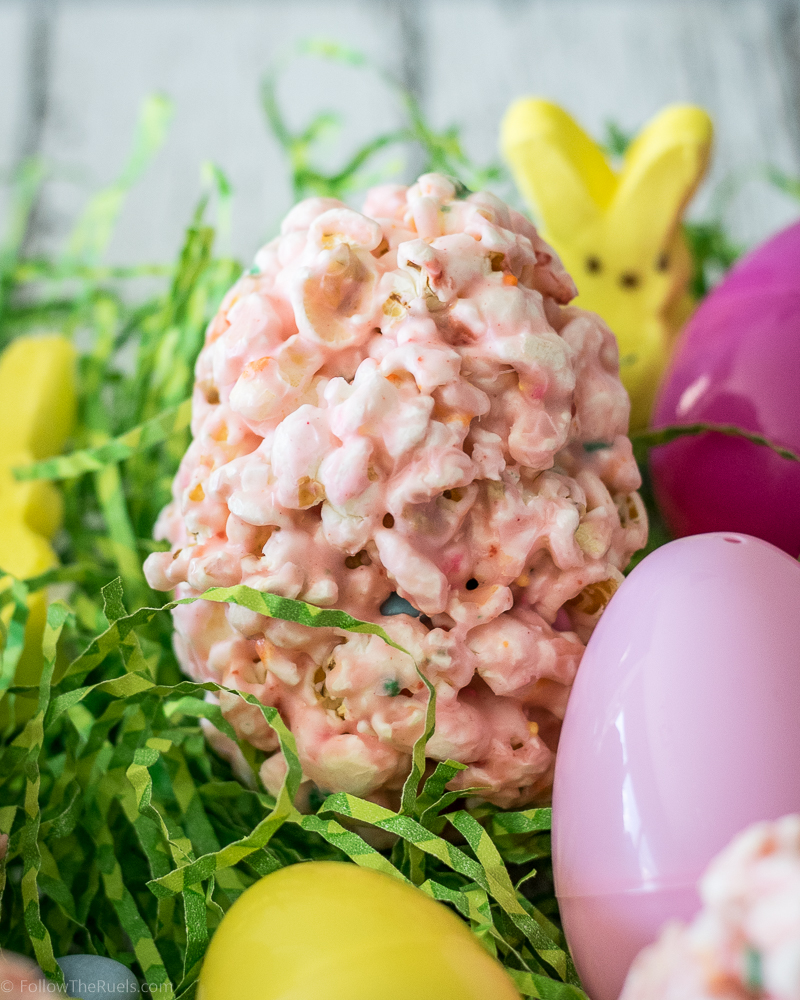
Did you make popcorn balls as a kid? Sadly my childhood was void of popcorn balls, which is a shame because they are so much fun to make! They are the perfect thing to make with kids, or for kids, because they require just a few basic ingredients  and absolutely no baking.

I didn’t even have a popcorn ball until I was an adult. I have a friend that makes them every year for the holidays to hand out for friends and family. I look forward to her popcorn ball delivery every year! But these puffy, sweet popcorn confections shouldn’t be reserved for Christmas. They seemed perfectly suited for Easter, too!


You may already have everything you need to make these popcorn balls in your pantry. All I needed to pick up from the store were the marshmallows.  We always seem to have a monster, Costco-sized bag of SkinnyPop in our pantry, so I used that instead of making popcorn from scratch. So much easier, plus I have something to snack on while I make the popcorn balls!

Just find the biggest bowl you have and pour in your popcorn. I like this one because it has the measurements on the side so I don’t have to individually measure out 8 cups of popcorn. 


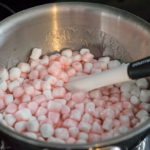
Set your popcorn aside and get to work on the sweet marshmallowy goodness to pour on top. Melt together the butter, corn syrup, and sugar. If you want to tint your marshmallow mixture, this would be the time to add your food coloring. Then add in the marshmallows and watch them dissolve into a creamy sauce. 

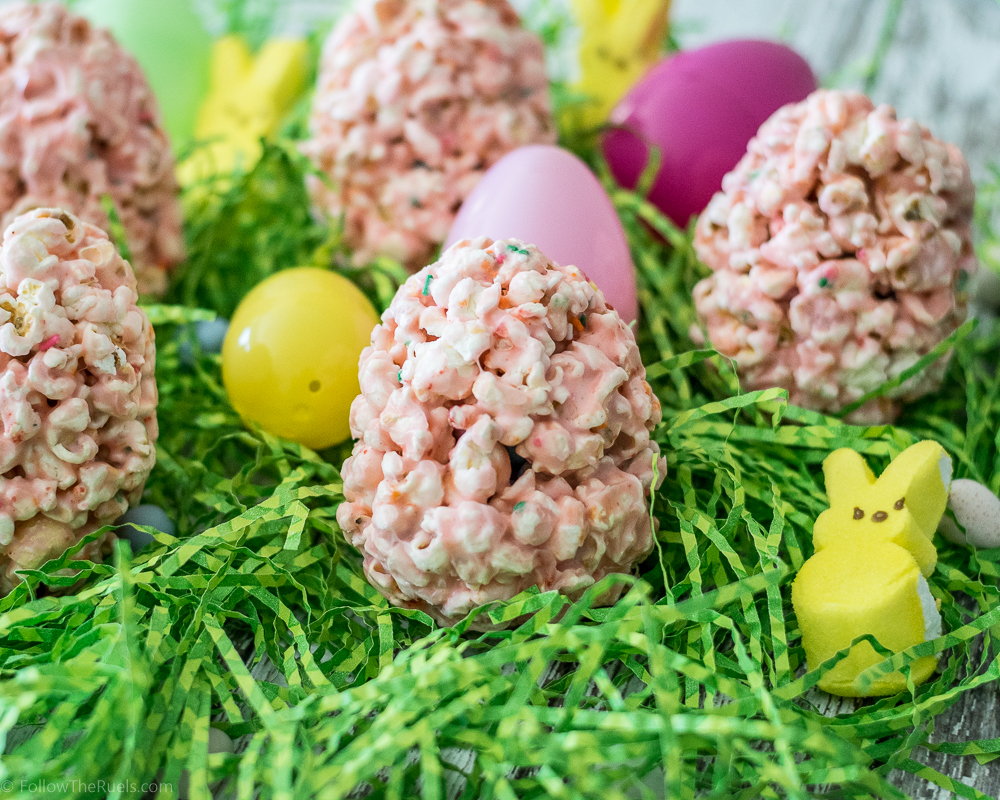
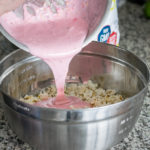
Once all the marshmallows are all melted, pour them right over the popcorn and use your biggest spatula to stir everything together until all the popcorn pieces are covered. If you feel like getting a little crazy, you can also add some sprinkles.


Now, to form them in to Easter eggs, you could just form them with your hands into a slightly uneven oval shape. Make sure you grease them up with a little cooking spray or else to you will have sticky popcorn all over your hands.

OR…

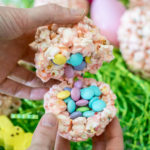
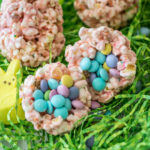
You could add a little something extra by stuffing some M&Ms into the center!


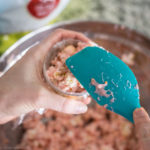
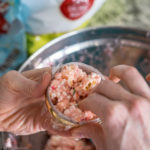
To make your surprise inside Easter Eggs, use the largest plastic egg you can find and press the popcorn mixture into one half. Then use your finger to form a little hole and fill it with the candies. Do the same thing with the other half then press the two sides of the Easter egg together. When you pull the plastic egg apart, you should have one while popcorn ball Easter egg. 

How adorable are these? Wouldn’t they be a fun addition to an Easter basket? I wrapped them up in plastic wrap once they had set a bit and you could barely tell they were wrapped. 


And of course they look like a plain Easter Egg Popcorn Ball, but you and I both know that there is a little somethin somethin inside. 

Because every Easter Egg should be filled with candy! Even the popcorn variety!


[amd-yrecipe-recipe:142]

/ Filed In: Desserts, Eat
Tagged: candy, Easter, Easter Egg, marshmallow, popcorn, Skinny Pop, Spring, Surprise Inside

Bunny Ears for your Coffee Cup

March 25, 2016

Bunny Ear Cookies-9

Happy Good Friday, everyone! Unless you don’t celebrate Easter, then just Happy Friday! 

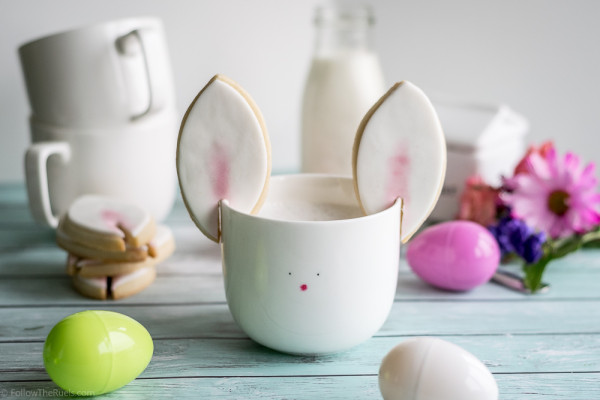
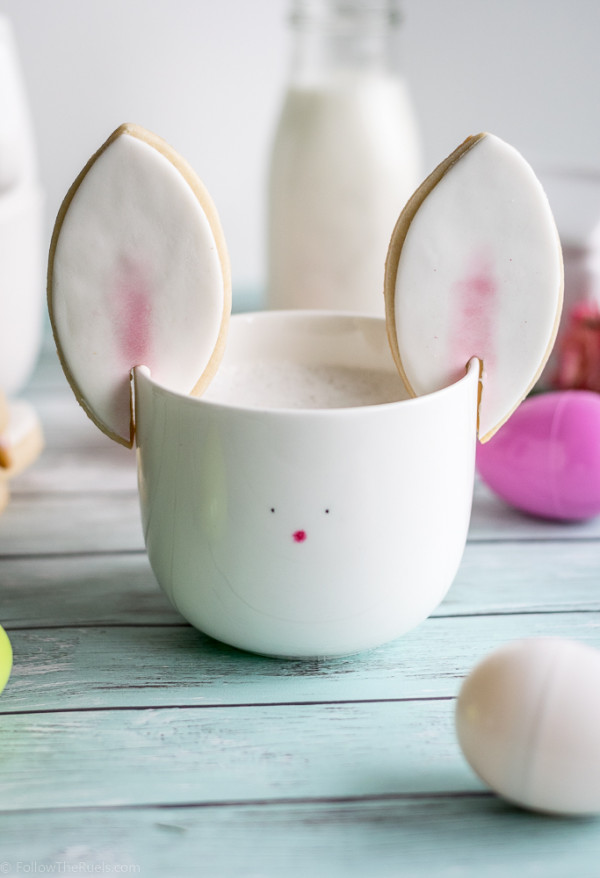
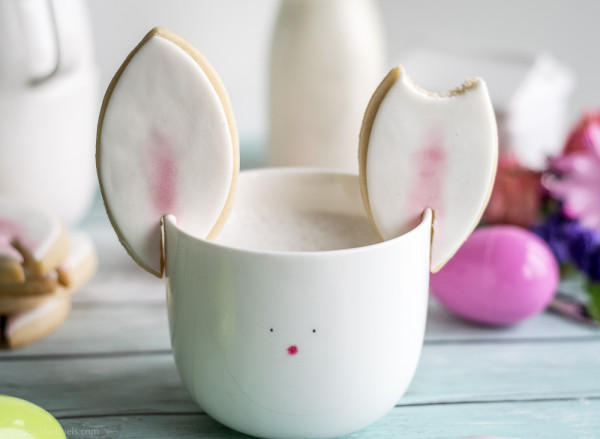
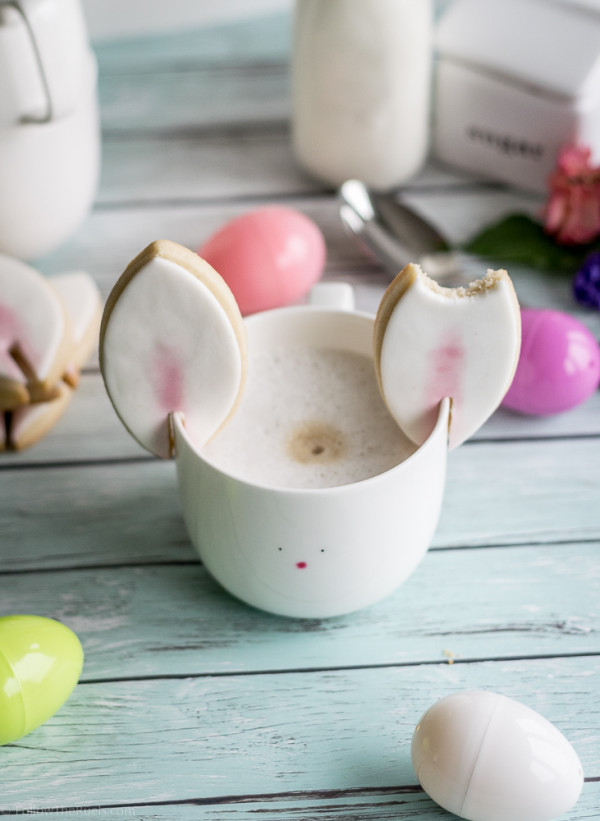
Since Easter is just around the corner, I wanted to squeeze final Easter post just in time for Sunday’s festivities. My last, but quite possibly my favorite Easter post of the year are these are bunny ear cookies. What makes these extra cute is that they are meant to sit right on top of your coffee mug to transform your average cup of joe into a festive Easter bunny! Aren’t they adorable? Once again, I can’t take full credit (y’all should know by now I have almost no original ideas). I saw Dominique Ansel (of cronut fame…this isn’t the first time I’ve copied him) post a picture on Instagram of his latest confection creation – a ice cream cup that had very similar cookie bunny ears. Since I won’t be attempting to recreate the cronut anytime soon, I thought I would give these bunny ears a shot!

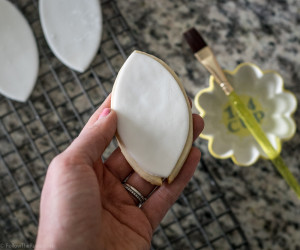
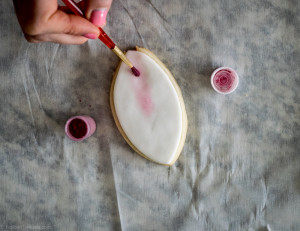
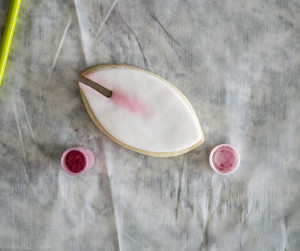
I used the same technique as I did with these Easter cookies – covering the cookie in fondant, then tinting the centers with pink luster dust.


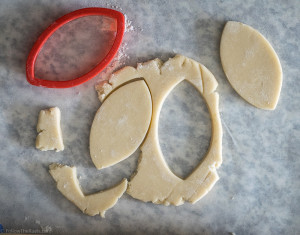
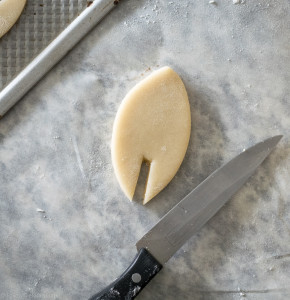
To get the cookies the right shape, I found a cookie cutter that claimed to be a football. But as you can see its a little flat and uneven. It may make a terrible football, but it was the perfect shape for bunny ears! Once the cookies were rolled out, I cut a small slit in the bottom of the cookie wide enough for to fit around the lip of my coffee mugs. I made the opening even wider because the cookies expand in in the oven, so I wanted to make sure there was enough space left after baking. 

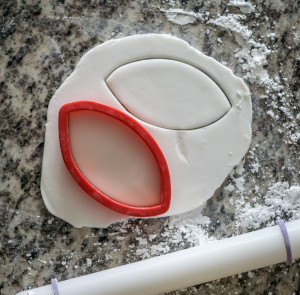
I then rolled out the fondant and cut it in the same shape. I “glued” the fondant onto the cookie with just a little bit of water, then brushed on some pink luster dust down the center of the cookie. From the back of the cookie (the cookie side, not the fondant side), I cut out the fondant, following the cut in the cookie. Once that fondant was removed, I smoothed all the edges and my ears were done!

All that was left to do was to find a cup of coffee to stick these on!

Bunny Ear Cookies-8

I’m kind of obsessed with these even though my husband thinks I am a little crazy. I guess he just doesn’t get it. Where is his sense of whimsy!?

I think these will be my new Easter tradition, especially if we have people over for brunch or there are kids around. Who wouldn’t want some cookie ears with their coffee? 

But these ears don’t just have to go on a cup of coffee, it can be a glass of milk or a mug of hot cocoa. I mean, how cute would these be with a generous swirl of whipped cream on top?

I do think that adding a little face to the mug or cup is necessary, though. I used food black food coloring and a toothpick for the eyes and pink food coloring and a paint brush for the nose. You could also use stickers or markers depending on how much you are about your dishes.  

Bunny Ear Cookies-12

Wouldn’t your kids love these cookies? They can even help you make them!

Also, high five to my friend Michelle who helped me come up with the name for this post. I was totally lost on what to call this one, but her idea was perfect!

Bunny Ear Cookies-11

[amd-yrecipe-recipe:11]

/ Filed In: Cookies New, Decorated Cookies, Desserts, Eat
Tagged: coffee, cookies, Easter

Surprise Inside Easter Bunny Cake

March 18, 2016

Bunny-Cake-20title

I mentioned on Monday how much I miss celebrating Easter like I did when I was a kid. I don’t know about you, but Easter at my house was so much fun! Easter Bunny paw prints would magically appear (our neighbor would stamp them on in flour) on my front steps. My parents would surprise me with a Easter basket filled with candy and toys. And I would wrap up my day with an Easter Egg hunt at best friend’s house. 

My other favorite part about Easter was making this Easter Bunny cake with my mom every year. We would buy a box of cake mix and a jar of frosting and make our Easter bunny cake. It was easy enough for me to help my mom with even when I was pretty young (she did all the hard work), but I felt like such an accomplished baker once our cake had morphed into a bunny!

Even though I have since outgrown the Easter basket and Easter egg hunt (I would argue that I can never outgrow those things), I still make this Easter Bunny cake as often as I can. But this year I decided to mix things up a bit and add a little surprise inside. 


It all starts with one big layer of cake. It can be any flavor you like, but I prefer simple white cake (and I add some lemon and vanilla to make it taste less “boxy”). Yes, I used box cake mix. It’s simple, easy, and cheap. And for a cake like this, I don’t think it’s worth it to make my own cake from scratch. You may feel differently, so do what you wish.  

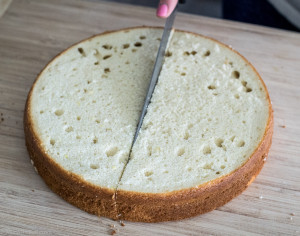
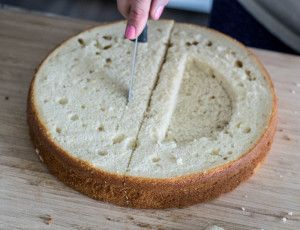
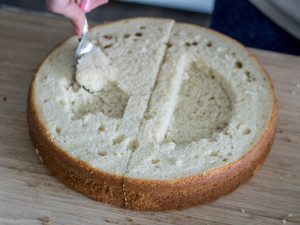
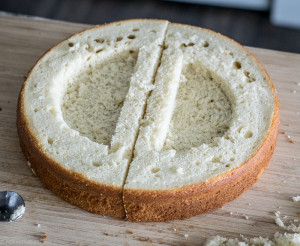
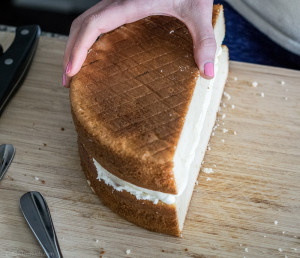
Anyways, where was I? The box instructs to make 2 layers of cake, but instead I made one thick one. Once it was baked, cooled, and leveled, I cut it in half right down the middle. I did a little measuring to make sure I was right in the center. I then used a small knife to cut around the inside of the cake, leaving about a 1.5″ margin, only cutting a quarter of the way into the cake. I then used a spoon to scoop out the cake from the center. I did this to both halves of cake. A quick tip, it is so much easier to cut the cake when it has chilled. I keep it in the freezer until I’m ready to go. 

I should also mention at this point that even though I didn’t make the cake from scratch, I did make the frosting (I know ,I don’t make any sense. Why would I make my own frosting, but not my own cake mix? Answer: because I don’t like the taste of the store-bought kind). But again, do what you like and what makes you happy. 

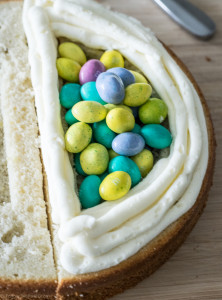
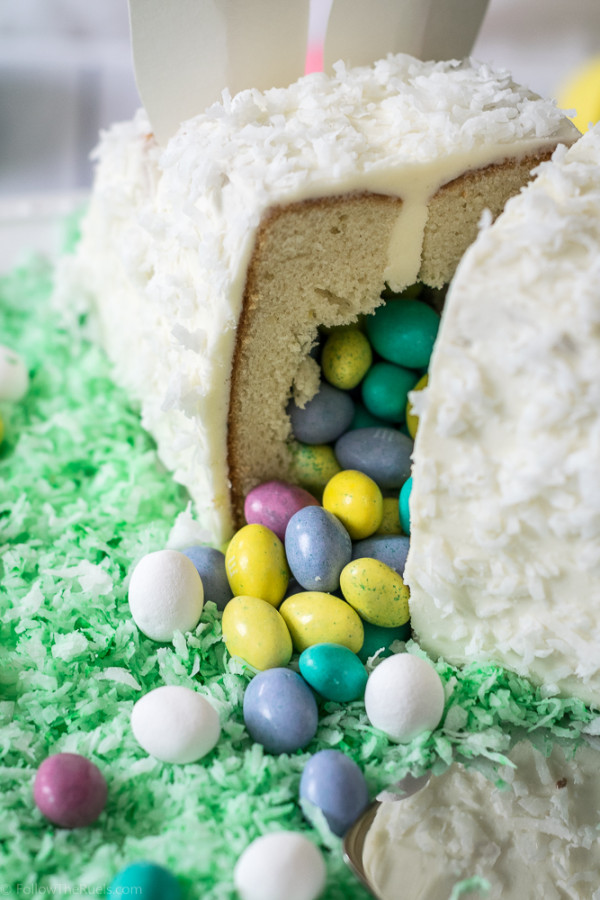
So I piped a bit of the frosting on 1 of the halves around the part of cake that I didn’t cut out and filled the center with Easter egg M&Ms. I then took the other half of cake and pressed it firmly on top, sandwiching the M&Ms inside. 


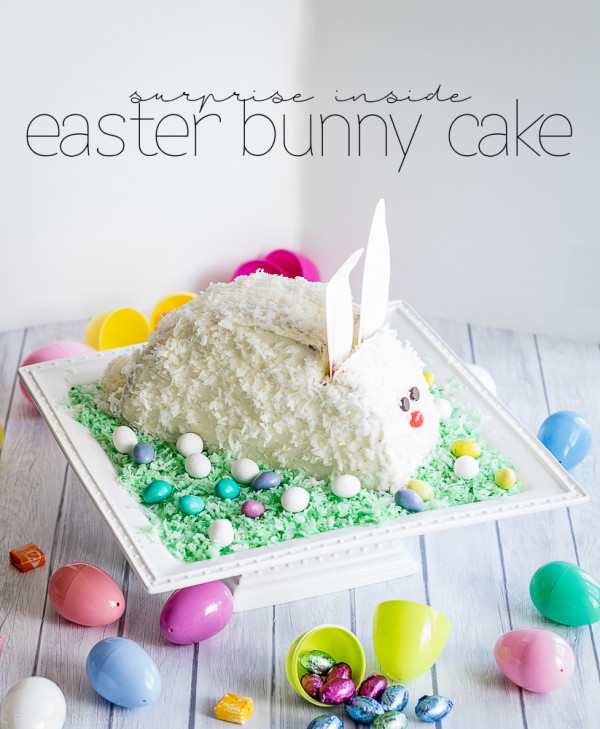
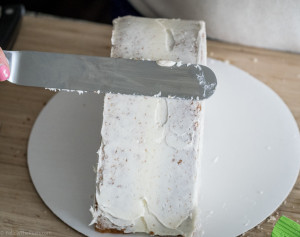
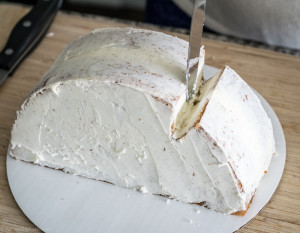
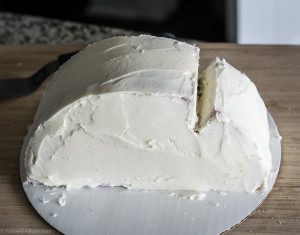
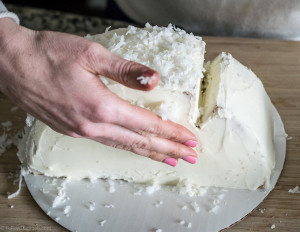
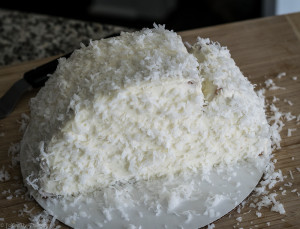
Now that the cake is in a half circle, I placed it on it’s flat side and cut a wedge about a third of the way up one side, taking care not to eat the wedge because I will need that later (this requires lots of self control!). I then lightly frosted the cake with a crumb coat and poped it in the fridge to set for about 10 minutes. Then I frosted it one more time and patted shredded coconut into the freshly applied frosting to make the bunny’s fur!

Surprise Inside Easter Bunny Cake

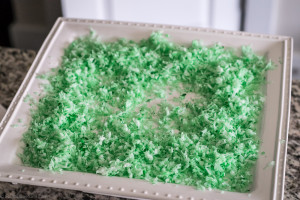
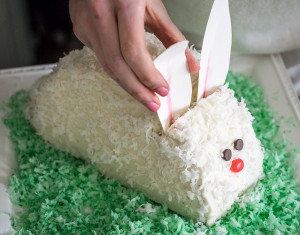
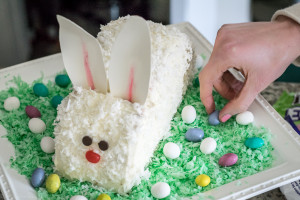
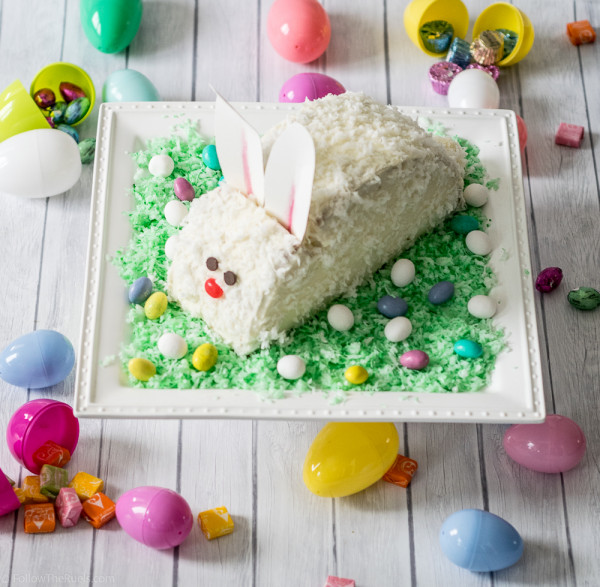
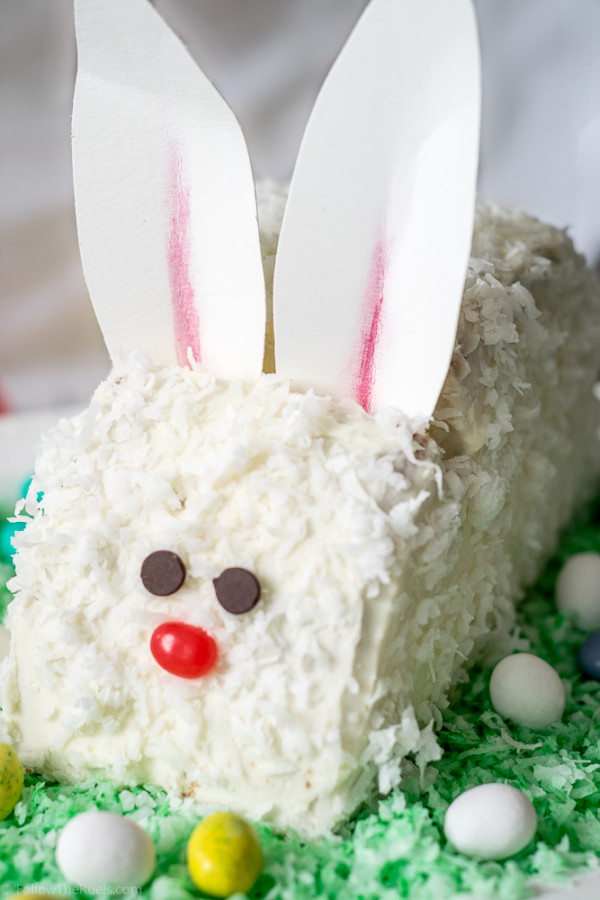
To decorate the cake and really make it look like a bunny, I first dyed some of the shredded coconut green and placed it on a cake stand. Next, I put two chocolate chips and a pink jelly bean on the face to make eyes and a nose. Then I cut out two floppy ears in white construction paper and stick them in the front of the wedge that we cut out. To make the tail, I use the scraps from that wedge, “folding” it in half so that one layer is stacked on top, frosted it with more icing and topped with some extra coconut. For extra flair, I used some mini Cadbury eggs and M&M eggs to dress up the “grass”. 

Bunny Cake-15

And there you have it! The classic Easter Bunny cake. How cute is this? It may not be the fanciest Easter cake, but it is so much fun and perfect for kids of all ages (even those of us who are <<cough>>30<<cough>>). 

Bunny Cake-17

This is definitely one of my favorite things about Easter. It is as much fun to make as it is to eat. And speaking of fun…

Bunny Cake-19

When you cut inside, out fall even more Easter eggs!! Who wouldn’t want a slice of this Easter Bunny? Does your family make an Easter Bunny cake every year, too?

Hope you all have a wonderful Easter!

[amd-yrecipe-recipe:8]

/ Filed In: Cakes and Cupcakes, Cakes New, Desserts, Eat
Tagged: cake, chocolate, Easter, holiday

Easy Easter Bunny Cookies

March 14, 2016

Easter-Bunny-Cookies-title-1b

Is it just me, or do you think Easter is a little underrated (commercially, not religiously). I mean, for kids, it’s great! Easter egg hunts, Easter baskets, and lots and lots of candy. There is none of that stuff for adults! Seriously, I would still love to do an Easter egg hunt every year. I keep telling my husband this, but he isn’t getting the hint. Can you tell I am in the Easter spirit? 

To kick off my Easter baking extravaganza, I made these adorable Easter Bunny cookies. Aren’t they cute? (I can’t really take credit for their cuteness. I got these idea from Sweet Bake Shop’s Instagram feed, which you must follow if you love looking at beautiful baked goods.) And the best thing about these cookies is how easy they are!

Can you use a cookie cutter? You can make these cookies!

Easter Bunny Cookies-1

You know I love to decorate cookies, but making the icing and then decorating them can be so time consuming. So to take a bit of a short cut, I used fondant! If you have never used fondant before, it’s basically the same consistency as Play-doh. It’s soft and pliable and can be rolled out and cut into any shape. 

Easter Bunny Cookies-2

To cover these bunny cookies, I rolled the fondant out to about 1/16th inch and cut it with the same cookie cutter as the cookie. The cookie will be slightly bigger since it expands in the oven, but it should fit perfectly. If not, the fondant does have some stretch, so you can pull it a little to fit the cookie, if necessary. 

Easter Bunny Cookies-3

To stick the fondant to the cookie, I brushed some water on to the back of the fondant. Since its basically made of sugar, when it’s wet it becomes really tacky and sticks easily to the cookie. Once the fondant is on the cookie, I run my finger around the edge to soften it a bit and make sure that its completely pressed down. 

Easter Bunny Cookies-4

The other great thing about fondant, it doesn’t require any drying time! You can pretty much immediately start decorating them. The next step with these cookies is to draw on the eye with an edible food marker. Like @sweetbakeshop, I drew the closed eye which makes them look so sweet and feminine. If you don’t like that you could just make a small dot or draw an open eye. 

Easter Bunny Cookies-5

To create the pink nose and cheeks, I used a little bit of pink luster dust that I picked up from Michaels. Luster dust is basically edible powdered pigment. You don’t need a lot of it to make an impact. What I do is tap a little bit into the lid, then dab my brush into the lid and tap off the excess. For the nose, I just brush a bit on. For the cheeks, I move my brush in circular motions right under the eye, first starting in a small circle, then working my way out. 

That’s it. That’s the whole process. I told you it was easy!

Easter Bunny Cookies-10

Come on! Don’t tell me you don’t want to make these cookies right this second! Anyone can make these cookies. Even if you don’t bake regularly or have never decorated cookies.

Easter Bunny Cookies-7

What would also be fun to do with these cookies is to create some water colors with watered down food coloring (gel food coloring + vanilla extract) and let the kids paint the bunnies with the water colors. The world is your oyster!

Enjoy!

[amd-yrecipe-recipe:6]


/ Filed In: Cookies New, Decorated Cookies, Desserts, Eat
Tagged: cookies, Easter, fondant

White Chocolate Brownies

April 18, 2014

BBC White Choc Brownies1


These sweet little cake-like bars posed a challenge for me. Not in making them. No, they were really easy to make. In what to name them. Can you call something a brownie if its not brown, but it is made with chocolate? Maybe calling it a white chocolate blondie would have been more appropriate. 

BBC White Choc Brownies4


Making these brownies was far less complicated. And honestly, they came to me on whim. I wanted to make something using the Easter candy I had picked up at CVS when I should have been buying allergy medicine. After scarfing down half a bag of M&Ms, I knew I had to use up the rest. 

BBC White Choc Brownies2


I adapted a brownie recipe using white chocolate chips instead of milk chocolate, which worked out surprisingly well. I used a bit less butter and sugar since white chocolate has more fat and is more sweet. But whipping them up was rather fool proof. If I were making them any other time of the year, I probably would have left them plain or added normal chocolate chips. But because Easter is around the corner, and like I said, I had the candy, I decided to throw those in for some color.

BBC White Choc Brownies6

I was pleasantly surprised how rich the white chocolate flavor actually was. I thought they may just taste like vanilla cake, but the chocolate flavor really stands out and makes these brownies fudgey-er than cake. Which is how a brownie should be, right?

BBC White Choc Brownies3

So, tell me. Should I have called these blondies instead?

[yumprint-recipe id=’12’]

/ Filed In: Eat
Tagged: bars, brownie, Easter, recipe, Spring, sweets, white chocolate

Follow

Hey There!

Hey there, I'm Lindsey. I'm a number cruncher by day and a home cook and baker by night. While I love to eat healthy and find fresh and healthy alternatives for my favorite foods, I will never turn down dessert! Life is all about moderation, right?

Recipes

  • All Recipes
  • Breakfast
  • Appetizers
  • Salads
  • Main Dishes
  • Side Dishes
  • Desserts
  • Drinks

Favorite Finds

[show_lookbook_widget id=”388783″]

Theme by 17th Avenue · Powered by WordPress & Genesis