• Home
  • Eat
    • Breakfast
    • Appetizers
    • Main Dishes
      • Chicken
      • Beef
      • Seafood
      • Healthy Dishes
      • Paleo Dishes
      • Salads
    • Desserts
      • Decorated Cookies
      • Cookies
      • Bars and Brownies
      • Cakes and Cupcakes
  • Shop
    • Cookie Decorating Supplies
    • Bakeware
    • Cookware
    • Kitchen Gadgets
    • House
  • About
    • Contact
    • Bucket List
  • Cookie Decorating 101

Follow the Ruels

Slow Cooker Barbacoa Tacos

March 27, 2017

This barbacoa recipe has quickly become one of our favorites! The first time I made it, I used the recipe straight out of the Fed and Fit cookbook (which is awesome, b.t.dubs). While the recipe was great, I am never one to settle with a recipe straight out of the cookbook. I have to tweak it until I love it!

I have probably tweaked this recipe 5 different times. Photographing it twice for the blog, ultimately deciding that it wasn’t right yet.  This last time, my husband basically told me to stop. Do not pass go. Do not collect $200 dollars. It was perfect!

Honestly, the difference in all the recipes in pretty minimal, in terms of the ratio of spices. The big difference in the last recipe that I used 100% Savory Spice Shop spices*. About 75% of my spice cabinet is already filled with Savory Spices, but earlier that day I picked up a few more and used them to round out the spice blend for this recipe. 

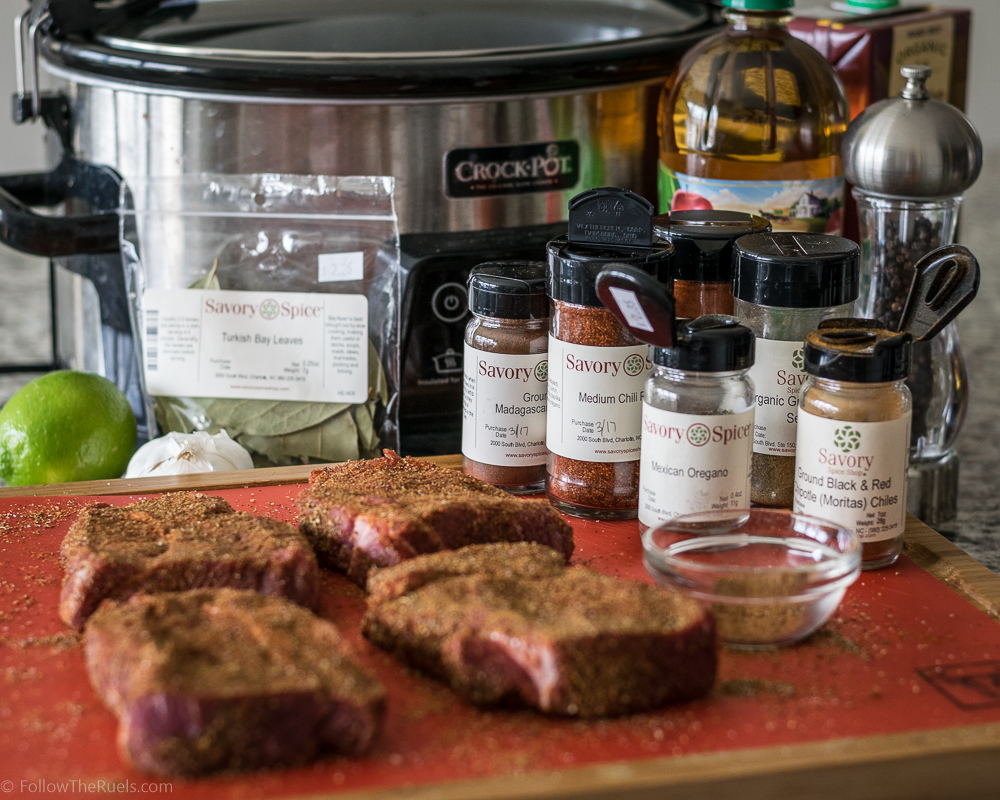
And boy is this spice blend packed with a ton of flavor: chili powder, chipotle chili powder, cayenne pepper, cumin, Mexican oregano, and cloves to be exact.

It just makes such a difference when you use fresh, good quality spices, like the ones at Savory Spice. I wanted to pick uSp a new jar of chili powder to replace my bulk sized jar that was probably two year old.  (Come on, what kind of food blogger am I using such poor quality spices? It’s embarrassing, really.) And now only do they have just dozens of different types of chilies, they have three different varieties of plain ol’ chili powder! I didn’t realize there could be more than one. 

We picked up the medium just to be on the safe side. 

So to get this bad boy cooking, start by covering the beef very generously in that delicious spice blend so that there is barely any meat showing through. If you have the time, I recommend letting it sit for a bit so the meat has a chance to absorb all those flavors. But if you are running short on time, you can immediately sear the beef on all sides so that they get a nice crust. 

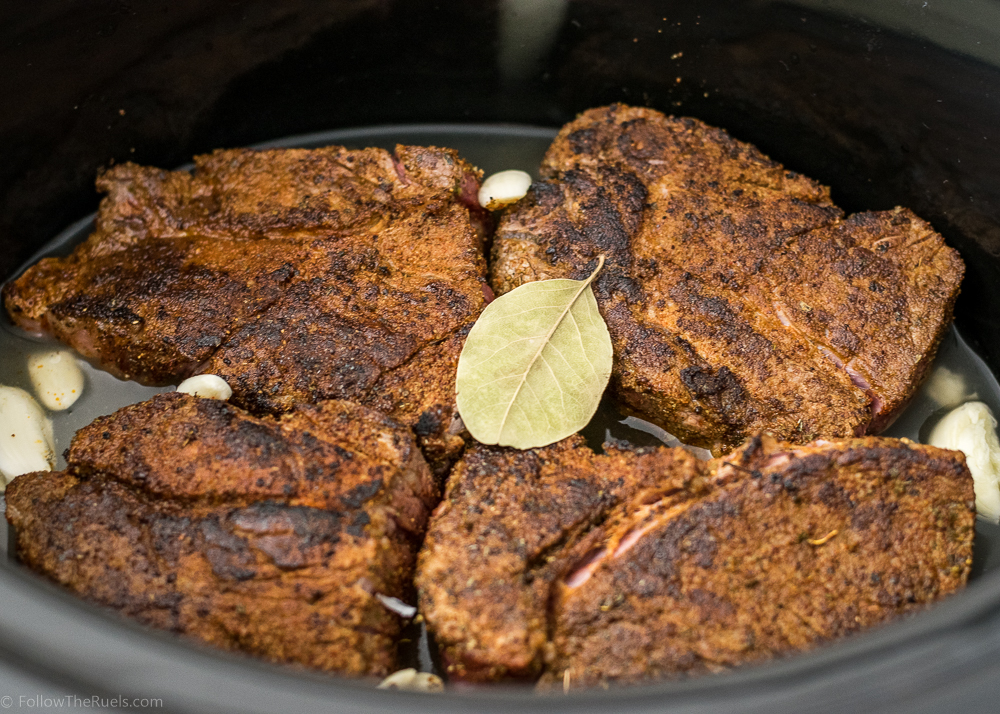
Then just transfer them over to your slow cooker and add in a couple cloves of garlic, a bay leaf, apple cider vinegar, and stock and let your slow cooker go to work.

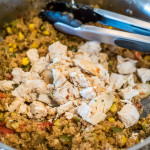
Just before you are ready to serve this, maybe 30 minutes before, squeeze over the juice of a lime, then shred it up into pieces.

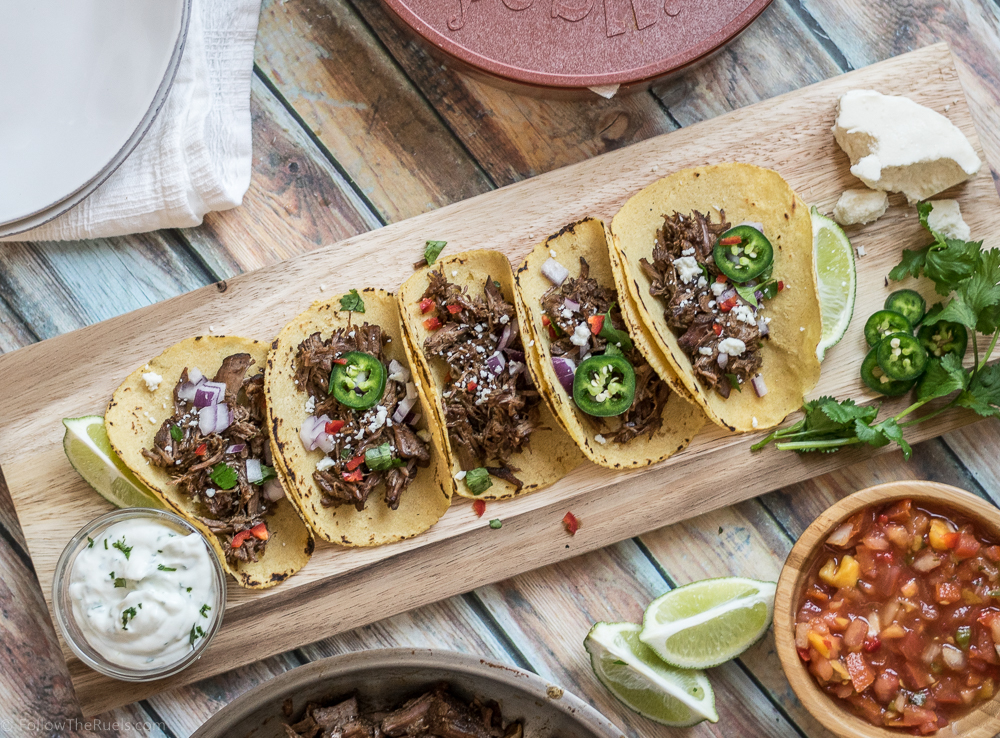
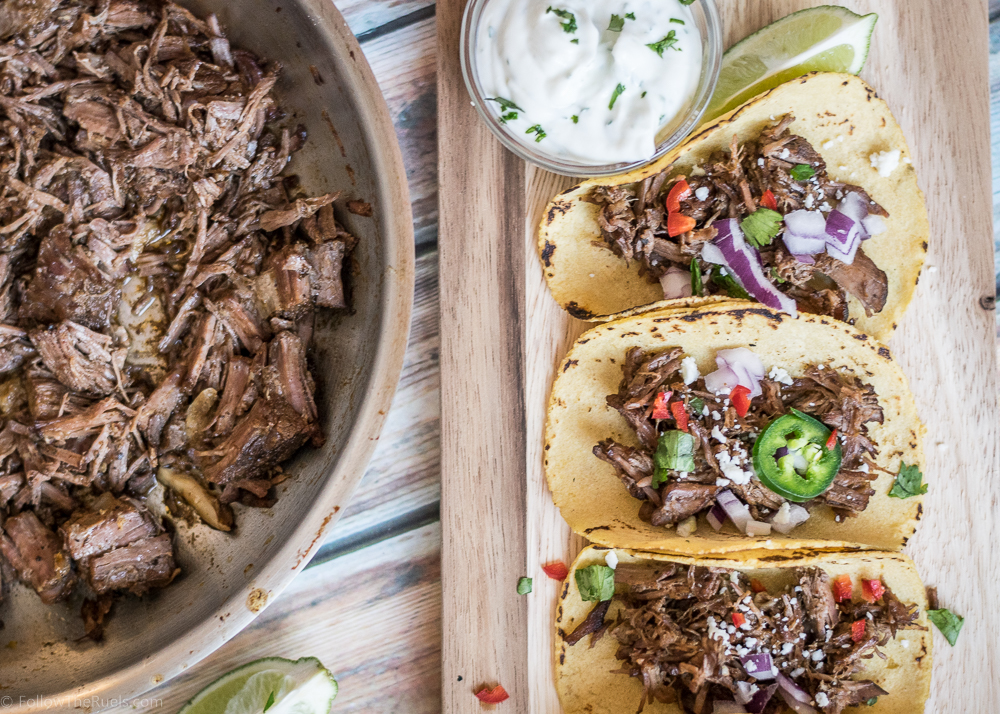
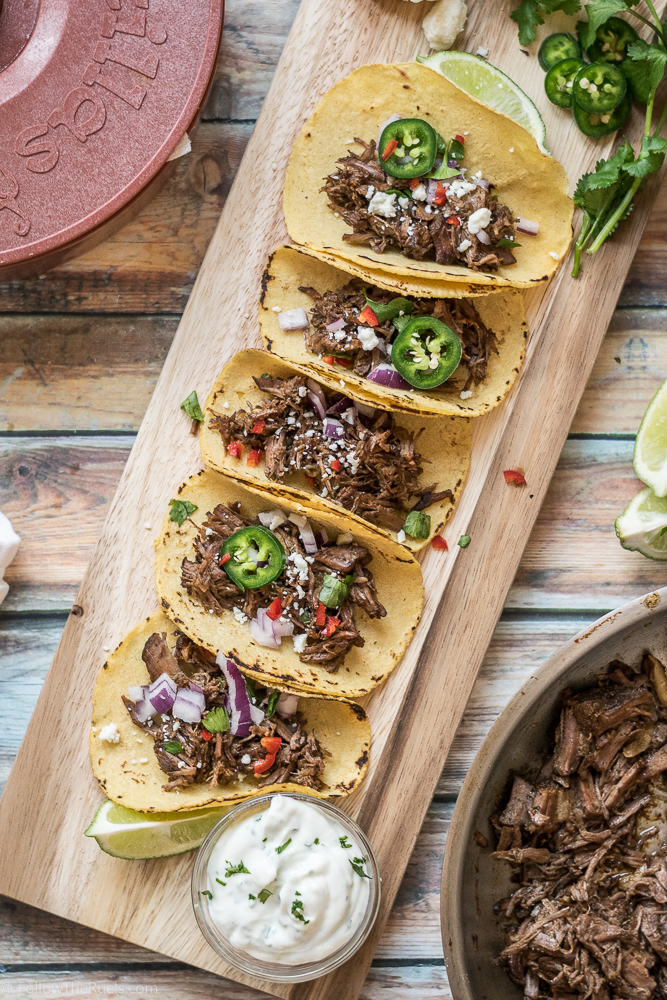
All that’s left is to plate it up in some tortillas and top it with your favorite taco toppings! I love to top my barbacoa with a bit of queso fresco or cotija cheese. Maybe a little onion and cilantro. My husband likes to sneak on some jalapeno. But truly, this barbacoa is good all on it’s own. Be prepared to eat the left overs straight out of the slow cooker. 

The best part (maybe?) is that this recipe can easily be made into a Paleo meal by serving it in lettuce wraps! The first two times I made this recipe, that’s exactly what I did. It’s fantastic!

*Full disclosure, my local Savory Spice shop did provide some of the spices used in the recipe. But to be fair, I already had (and purchased) 4 of the 6 spices used in the recipe. I highly recommend using good quality and fresh spices in all your recipes, which is why I love Savory Spice. Not to mention they are right up the road and have hundreds of different spices, so I have no excuse but to stop in and pick up a new spice to play with in the kitchen!

[amd-yrecipe-recipe:145]

/ Filed In: Eat, Main Dishes, Other Savories New
Tagged: barbacoa, beef, low-carb, Mexican, Paleo, slow cooker, tacos, whole 30

Healthy Beef and Broccoli Rollups

March 1, 2017

What is your favorite Chinese take-out dish? Mine? It’s got to be beef and broccoli. Yummy beef drowning in an even yummier sauce (I would like to remain blissfully ignorant about what’s actually in that sauce, thanks)? The best part about it is that I can pretend it’s healthy since it contains broccoli.

I love making beef and broccoli at home. And after making my chicken fajita rolls ups, I immediately knew that recipe would be a good candidate to be “roll-up-ified”….you know what I mean.

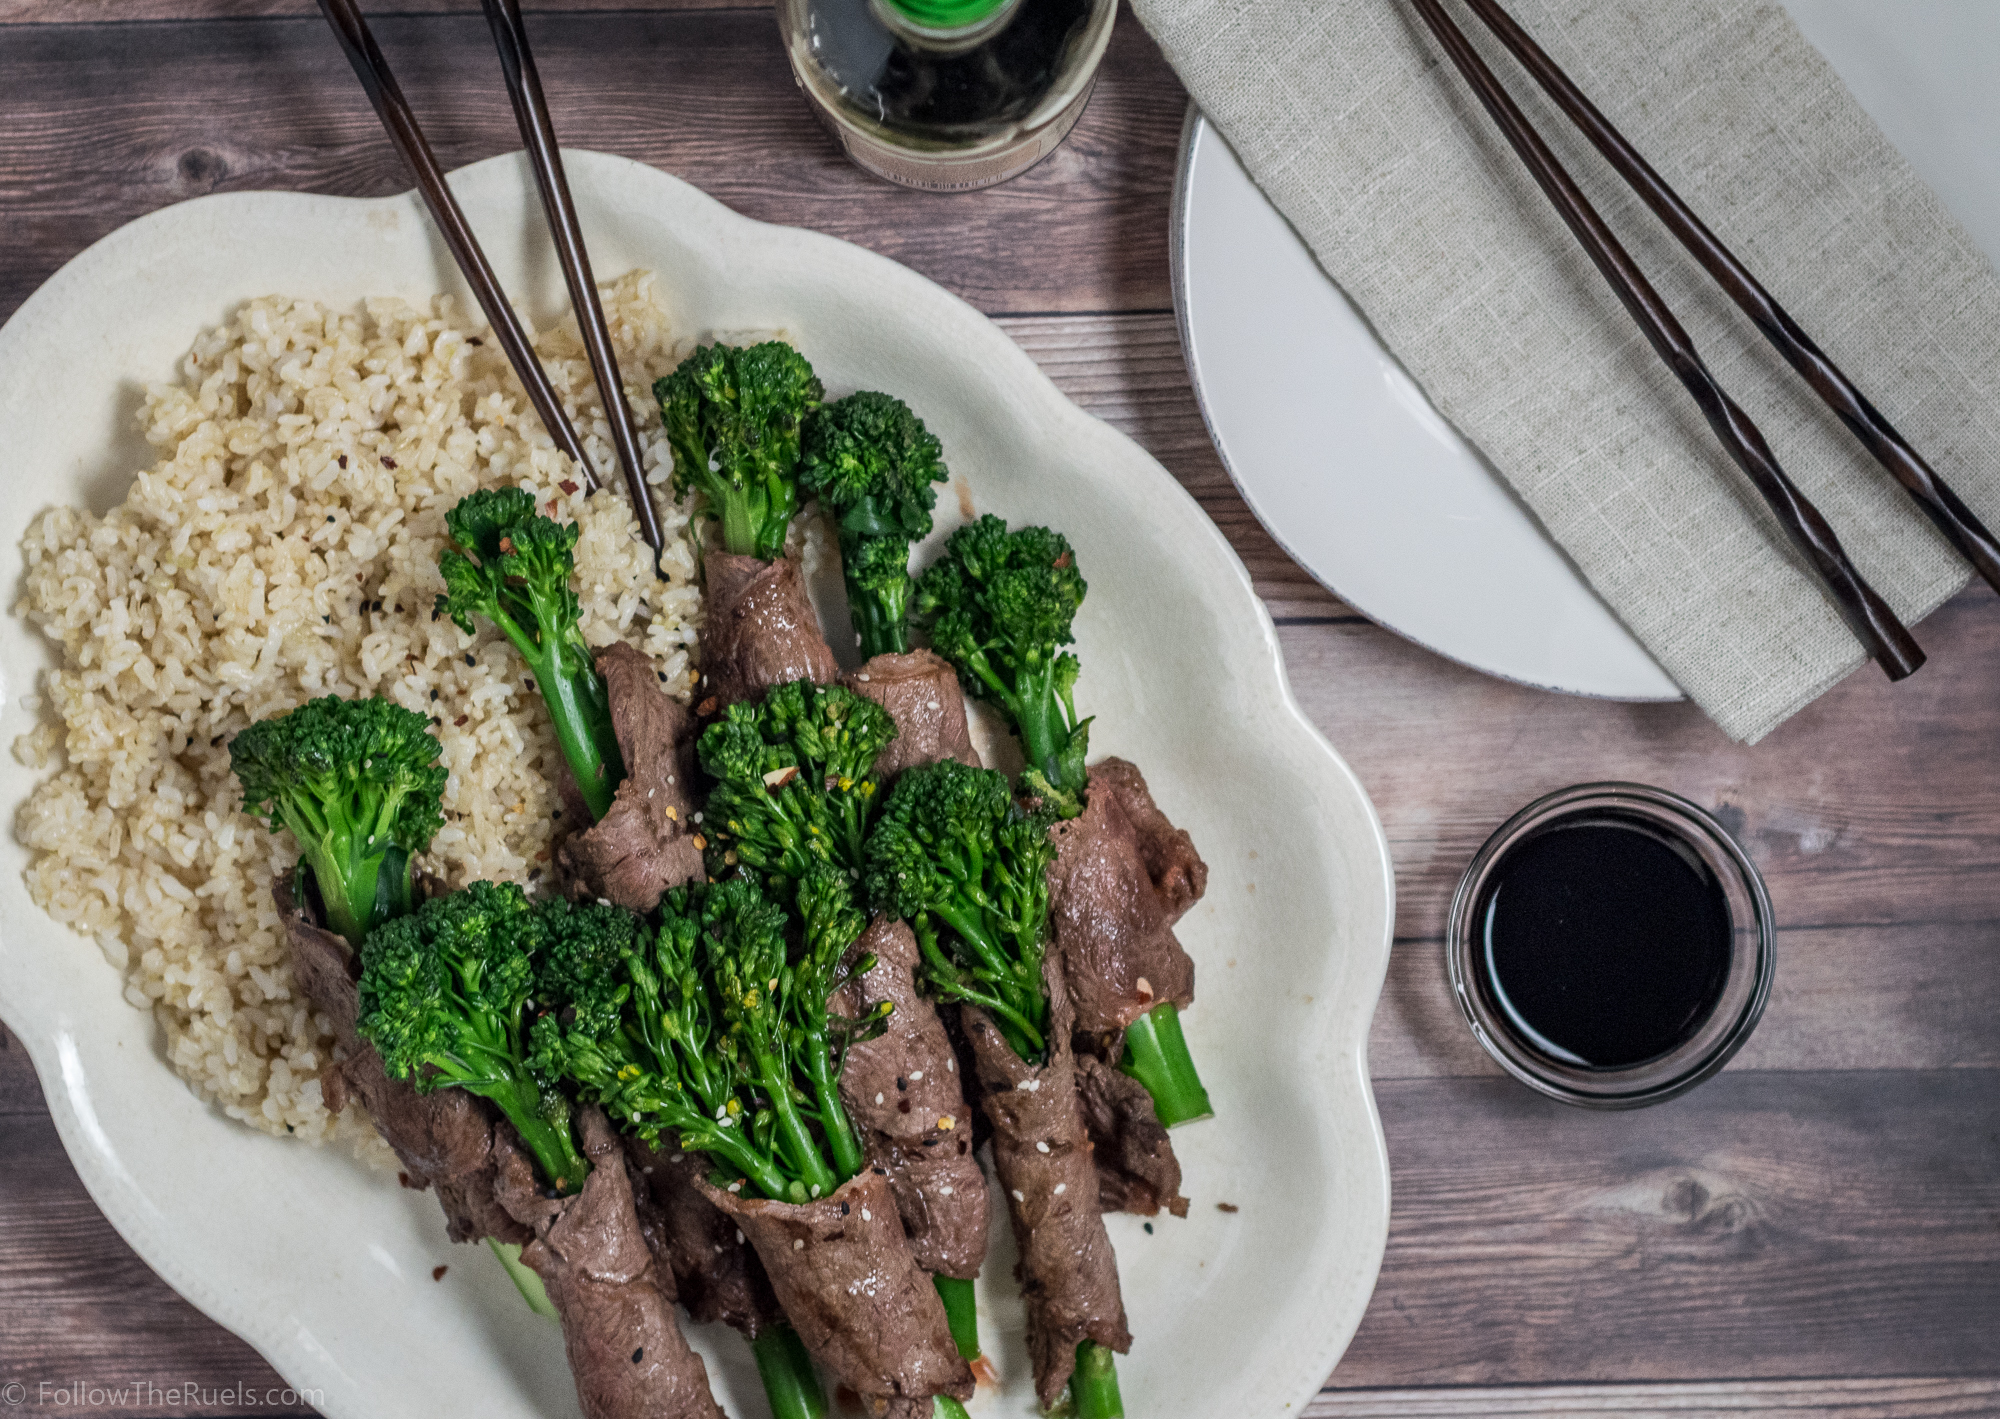
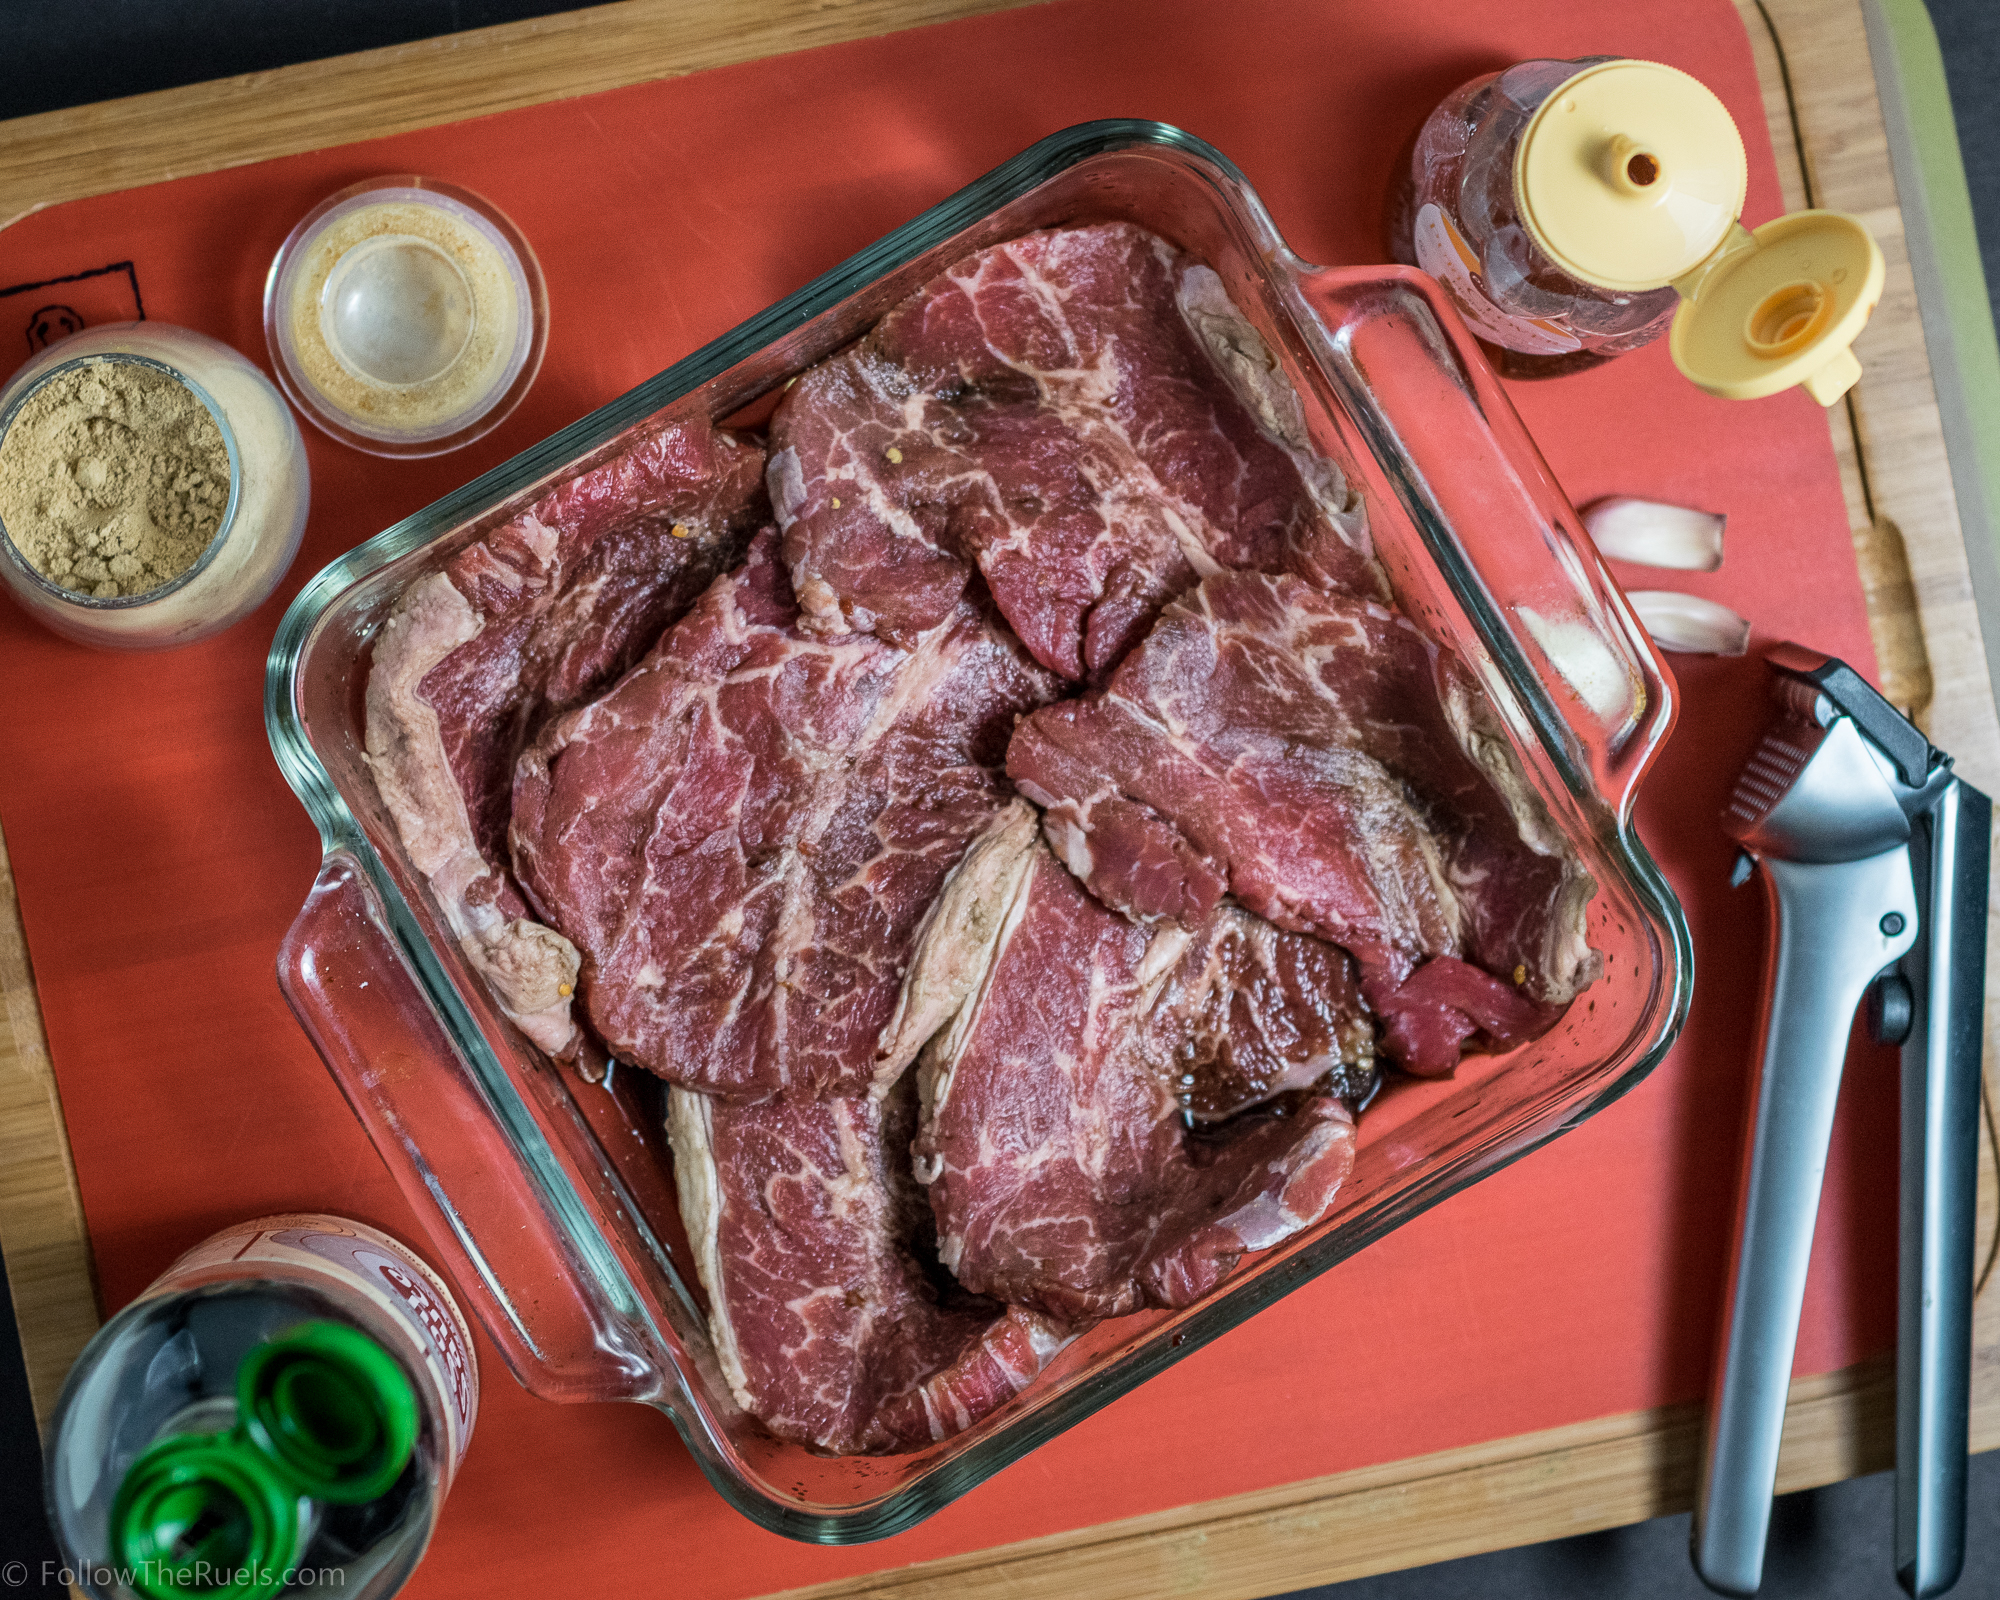
I started with some lovely marbled beef. I then pounded them into nice thin pieces and let them soak in a the marinade.

In hindsight, I should have trimmed off the fat before marinated them, but we all make mistakes.

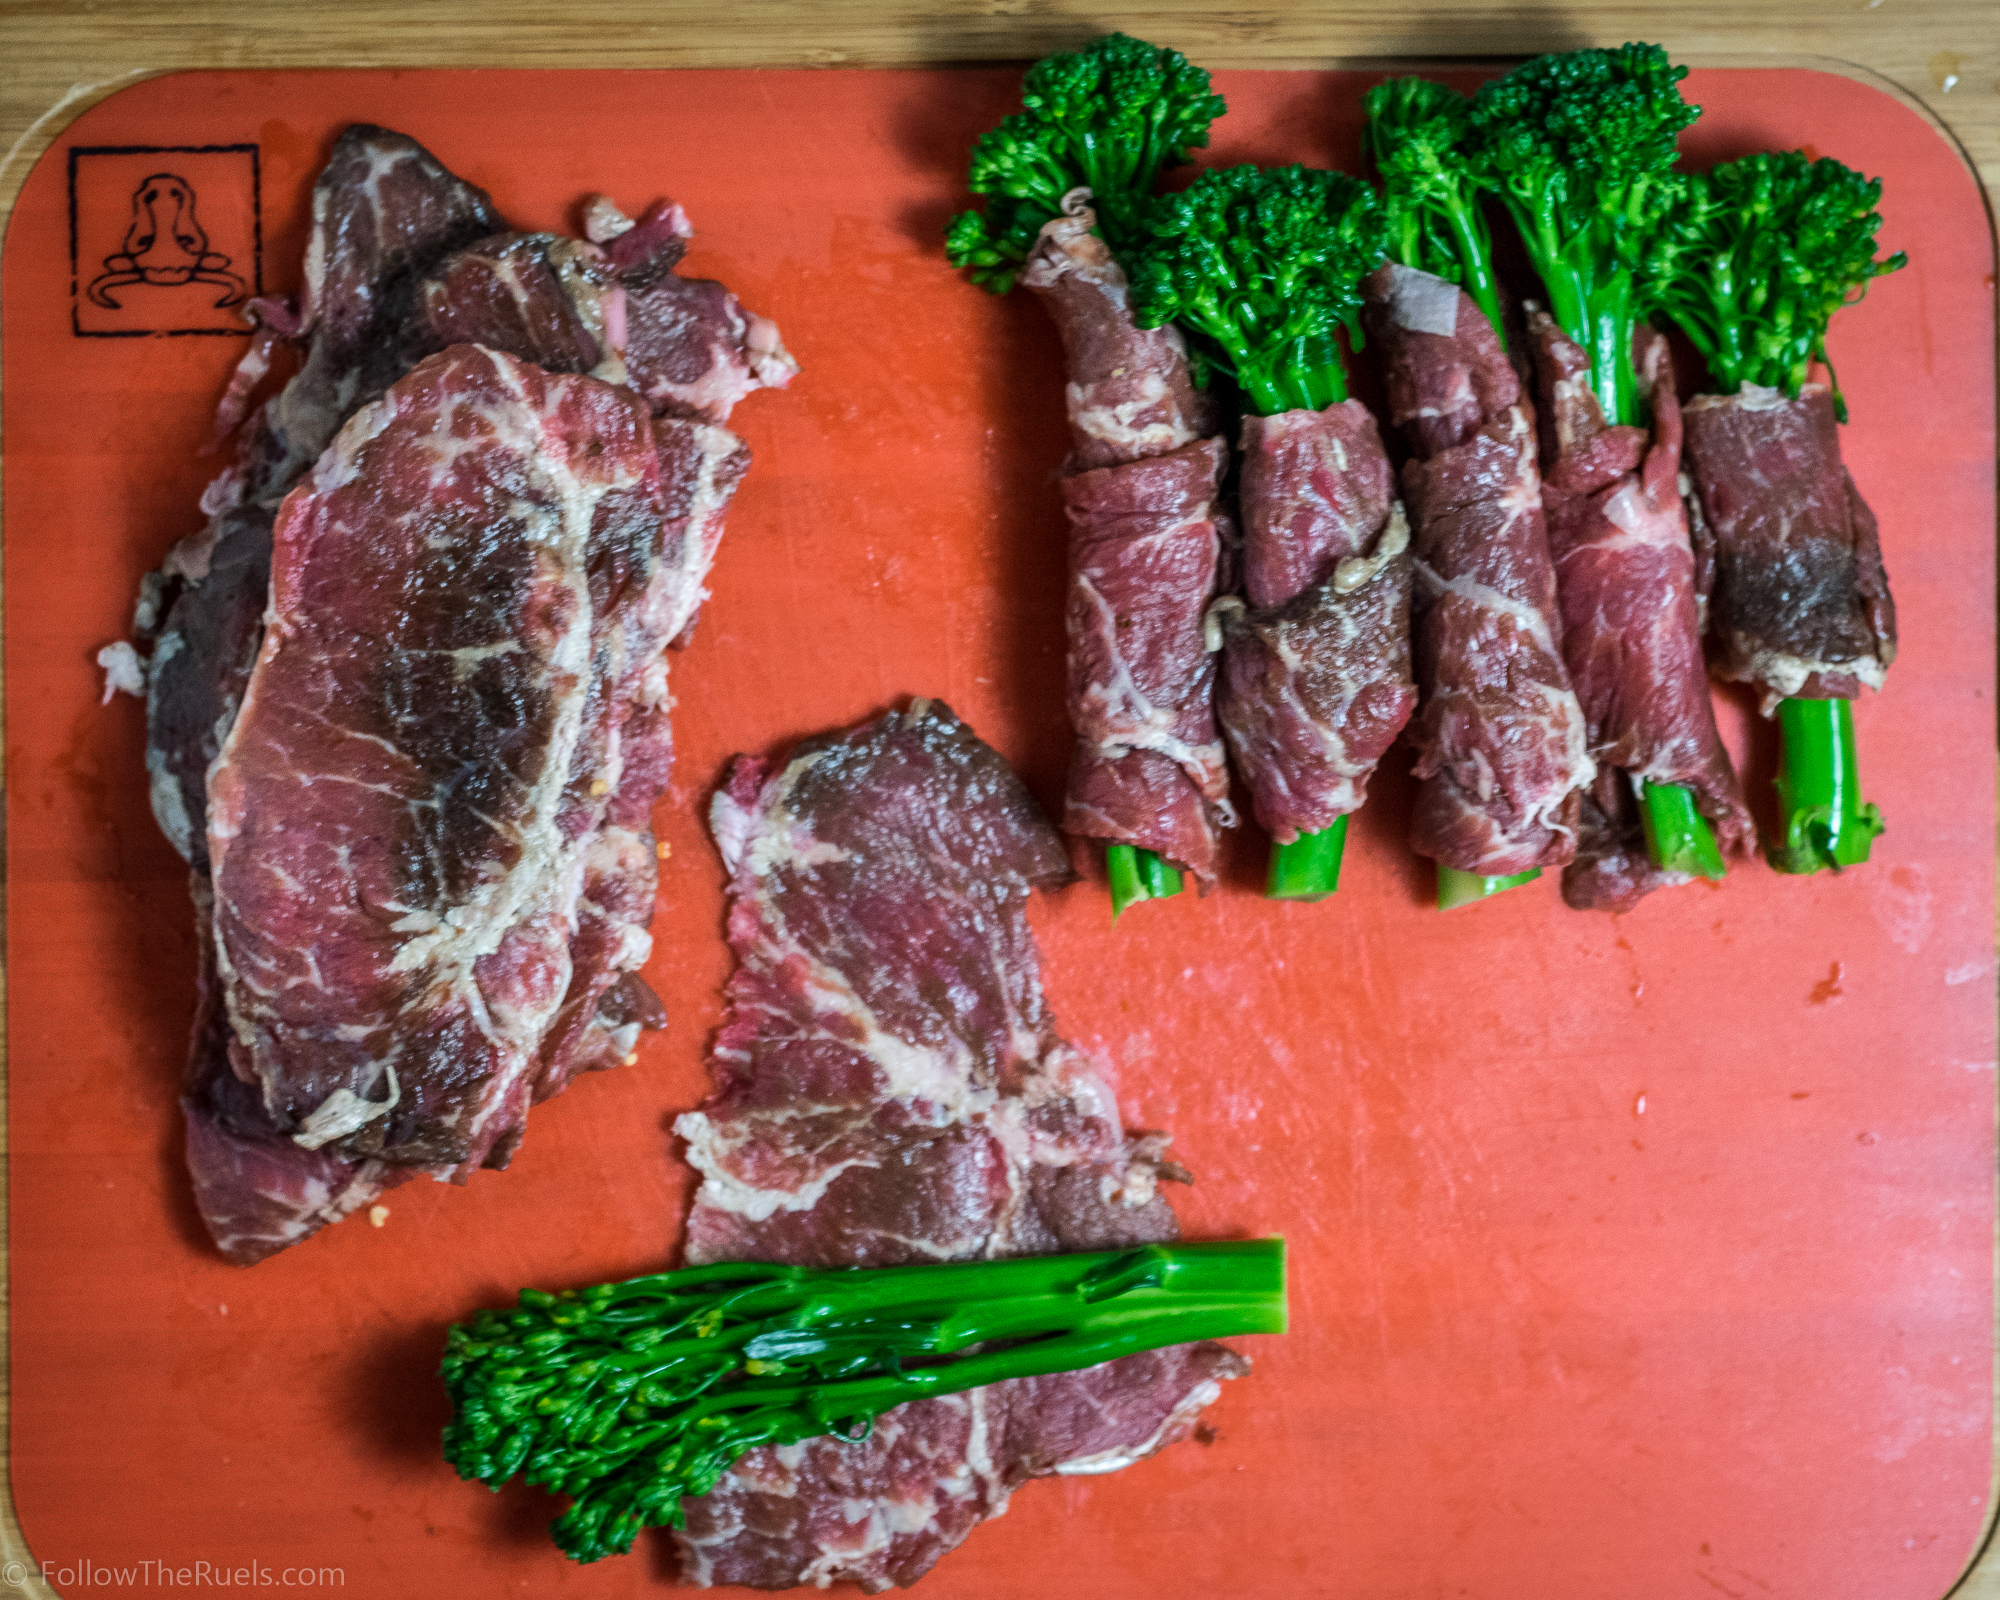
After the beef had soaked up all that flavor, I sliced them into strips just wide enough to fit one step of broccolini. Now broccolini is just a longer thinner version of broccoli (if you want to actually learn about broccolini, go to Wikipedia), but it works perfectly for these beef and broccoli roll ups.

I just rolled the thin slice of beef around the broccoli. Since the broccoli is so thin and sticky from the marinade, it just sticks to itself, so you don’t need a toothpick to hold it together. However, I you want to make sure that it stays together, by all means…use a toothpick.

To cook these bad boys, I just placed them all in one single layer in a hot skillet, turning every few minutes. Once all sides were browned and maybe a little charred, I covered the pan to make sure the beef cooked most of the way through. If you like your beef on the bloodier side, you can skip that step.

Then we just served it up with a side of brown rice instead of yummy fried rice. Have I mentioned this recipe is WAY healthier that the take out version? Have I also mentioned that it’s also just as good? No? Well, I thought both were implied, but incase you missed it, this recipe is both way healthier (like WAY healthier) and super tasty. So tasty I may never eat take out again.

Just kidding. A little MSG every once and a while never hurt anyone!

[amd-yrecipe-recipe:135]


/ Filed In: Eat, Healthy Dishes, Main Dishes, Other Savories New
Tagged: beef, beef and broccoli, broccoli, brown rice, Chineese food, dinner, healthy dinner, low-carb, take-out

Paleo Spaghetti Squash Lasagna

February 22, 2017

Spaghetti squash is one of my favorite ingredients to cook with. It’s incredibly healthy, low in carbs, delicious, and generally pretty easy to cook. It can also be swapped out in a lot of your favorite recipes, not just spaghetti! 

I have topped spaghetti squash with everything from chicken enchiladas to beef stroganoff. But one of my favorite recipes is this spaghetti squash lasagna! 

Now if you have never worked with spaghetti squash before you may be a little bit intimidated. I totally get it. I was right there with you once. Fortunately, my mom has been making spaghetti squash for years, way before it was cool, so I have learned a lot from her. 


The hardest part, by far, is cutting the darn thing! It’s seriously a pain in the butt, but I have a couple recommendations to make it a bit easier. 

  • Microwave the whole squash for 1 minute. This will soften the squash slightly, making it easier to cut.
  • Before cutting around the squash, cut off the stem. It will ensure you get to evenly sized halves. 
  • Use a serrated knife which will help cut through the outer shell.
  • Don’t cut using a saw like motion. Cut by sticking the tip of the knife all the way through and then pressing down with the base of the knife. It may take a couple cuts to get all the way through.

Once the squash is split in half, I scrape out the seeds then drizzle the flesh with a little bit of olive oil and sprinkle with salt and pepper. Then off to the oven it goes!

There are of course other ways to cook a spaghetti squash, but when time is not really an issue, oven roasting them is my favorite! The flesh gets very soft, but also a bit caramelized, which makes it taste so much better. 


After a few minutes in the oven, the squash is ready to become spaghetti. Its as easy as dragging a fork across the surface. The flesh should be soft so that this doesn’t not require a lot of effort. If it does, pop it back in the oven or microwave until it’s soft. 


Ok, while the spaghetti squash was roasting, I worked on all the other components of the lasagna. First up, the meat sauce. I seasoned some ground beef with salt, pepper, paprika, and garlic. Then I added in some whole tomatoes, which I smashed down into a sauce. 


The next component is the ricotta cheese. Or in this case, nut cheese. Did I mention this was Paleo? 

Don’t worry, you won’t miss the cheese. Nut cheese is surprisingly delicious and super flavorful. I love it because you still get that salty, savory, creaminess you would get from normal cheese. 

Nut cheese is also pretty easy to prepare. I basically blend up some soaked cashews with a bit of oil, lemon juice, garlic, salt, and pepper until its just short of cashew butter. It should still have a bit of texture, but not chunky. 


Finally, it’s time to assemble. I like to spread the nut cheese over the top of the spaghetti squash. You will probably pull up some of the noodles, but it’s okay – it doesn’t have to be pretty. I then top all of it with a generous helping of meat sauce. 

Now if you wanted to be a rebel and use real cheese, this would be where you swap in the ricotta and top this off with some mozzarella cheese. It won’t be Paleo, but it will still be a heck of a lot more healthy than your classic lasagna. 

After another quick bake in the oven so that all the components get nice friendly with one another, this Paleo spaghetti squash lasagna is ready to eat! Since everything was basically pre-portioned in the spaghetti squash itself, there is no messy cutting and serving of the lasagna. You know what I’m talking about. 

So the first few bites of this spaghetti squash lasagna are good and all, but when you get into the center where all that nut cheese is, it gets really good. The creamy savory-ness of that nut cheese just rounds out the whole thing, making you forget that there really is no cheese in this entire dish! 

Can you tell I love this recipe? That’s probably why I make it whenever I’m looking for something healthy, but comforting all at the same time!

[amd-yrecipe-recipe:132]

PIN NOW, MAKE LATER

PRODUCTS USED: 

[show_shopthepost_widget id=”2447992″]

/ Filed In: Eat, Healthy Dishes, Main Dishes, Other Savories New, Paleo Dishes
Tagged: dairy-free, healthy, lasagna, low-carb, meat sauce, nut cheese, Paleo, spaghetti squash, tomato sauce, whole 30

Delicious Cauliflower Pizza Crust

February 17, 2017

Ok folks, I know what you are thinking, “cauliflower pizza crust….real original!”. Oh yeah, I can hear your sarcasm from here. But here me out, guys! This one is actually really good! 

I have tried a lot of cauliflower crusts over the past couple years and they have always been a little lack-luster. Of course cauliflower crust will never be like pizza crust. It’s made of vegetables after all. But I knew it could taste better than bland old cauliflower. 

My solution: roasting the cauliflower. 

To me, roasting the cauliflower makes a HUGE difference. It not only gives the cauliflower a nice nutty flavor, but it helps to dry it out so it’s not so watery when it’s processed. 


My other secret to this anything-but-bland cauliflower pizza crust is roasted garlic. I just threw a couple of cloves in the with cauliflower while it roasted. Then everything got thrown into the food processor to transform the cauliflower and garlic to something that resembled mashed potatoes. 

Now at this point the cauliflower still has quite a bit of moisture in it. So to get rid of some of the excess moisture, I laid out two big paper towels and dumped the cauliflower mixture on top. Then I wrapped the towels around the cauliflower and pressed out any remaining moisture. 

Once my cauliflower was as dried out as it was going to get, I mixed in some spices, an egg, and cheese.


Then I dumped the mixture out onto a parchment lined baking sheet and pressed it into a rectangle (although, a circle will also work) that was about 1/4 inch thick. I wanted this crust to be pretty thin so that would get nice and crispy all the way through. Nothing is worse than a soggy crust that just falls apart. 

To make sure it was nice and crispy, I baked it first before adding the toppings. Then I added my favorite pizza toppings: sauce, cheese, and pepperoni. 

After another turn in the oven, the cheese got nice and melted and the crust crisped up even more around the edges. 

While this cauliflower pizza crust will never fully take classic pizza crust’s place in my heart, it has found it’s own cozy corner. It is healthy without really tasting like it. Sure, you will know you are eating cauliflower. But it’s flavorful, roasted garlic cauliflower. Basically the best kind of cauliflower there is. 

So if you want a healthier pizza option that still tastes delicious and that crispy crust that you love about pizza, you need to try out this crust. Especially if you have tried and been very disappointed by other cauliflower crusts. I think this one will win you over, and may even win your heart. 

That was cheesy….just like this pizza. 

Ok, I’m done. 

[amd-yrecipe-recipe:129]

PIN NOW, MAKE LATER

/ Filed In: aug 2018 savory new, Eat, Healthy Dishes, Other Savories New
Tagged: aug 2018 savory new, cauliflower, crust, dinner, healthy, low-carb, Paleo, pizza crust

Chicken Zoodle Soup

January 16, 2017

As soon as our feet hit the ground back in Charlotte after the holidays, both my husband and I immediately got a cold. It was like our bodies knew not to get sick during the holidays and waited until the very second we got home. So not only were we exhausted from the trip, now we were sick, and Charlotte was also about 30 degrees colder. As you might imagine, nothing sounded better to us than chicken soup! Scratch that; nothing sounded better than chicken ZOODLE soup. 

Zoodle (zood-l) n:  a noodle made from zucchini.

Chicken zoodle soup isn’t a whole lot different than chicken noodle soup. In fact, they are exactly the same recipe. The only difference being the zoodles which makes this classic comfort food that much healthier. It was exactly what the doctor ordered….if that doctor were me or WebMD. 

First I sauteed carrots, celery, and onion. Once they were a bit tender, I added in the chicken and chicken stock. I let the whole thing come up to a simmer, then I covered it and left it alone. I find that most soups are better when the have a chance to just sit and hang out for a while. All the ingredients warm up and get friendly with each other. It just seems to help the flavors develop.

At the very end, just when I was ready to serve, I added in the zoodles. Just like your classic noodle, the zoodles can get really mushy if they are cooked too long. And it doesn’t take very long for zoodles to get mushy. I prefer my zoodles to still have a little bit of a bite to it, like an al dente spaghetti noddle, which is why I liked to add them at the very end. 

All that was left was to assemble a couple big bowls to soup for the both of us! The broth was so soothing for our soar throats. And we didn’t miss the noodles a bit. I think it helped to eat something so healthy! We both bounced back pretty quickly and got over our colds relatively quickly. Well, some more than others. 

If you are on a no-carb or gluten-free diet, you need this recipe! Especially if you get sick! This will help you get through any cold…and who know, maybe it will actually help! Or at the very least, it will be a nice comforting, healthy meal to get you through the Winter. 

[amd-yrecipe-recipe:117]

PIN NOW, MAKE LATER


/ Filed In: Eat, Healthy Dishes
Tagged: chicken, gluten free, healthy, low-carb, soup, zoodles, zucchini noodles

How to Make the Perfect Zucchini Noodles

January 6, 2017

So I made the mistake of making my first grocery store trip on Monday, February 2nd at 4:00 pm. You know who else was doing their grocery shopping at that very moment? 

EVERYONE!

I should have known how crazy the store would be when 1) I couldn’t find a parking spot, and 2) couldn’t find a shopping cart. Once I got inside, I couldn’t find anything on my list! The store was cleaned out! Well, not completely. Just of all the healthy stuff. It’s almost like everyone had started a diet or something…

Once I realized they were out of zucchini, I just upped and left. Apparently everyone and there mother plans on cooking with zucchini this week. And I have a sneaking suspicion they will be making zucchini noodles!

Sounds like the perfect time to share my method for making the perfect zucchini noodles!

My method for making zucchini noodles starts out just like any other…by spiralizing the zucchini. I use my Kitchen-Aid attachment, but you can use counter-top or a handheld spiralizer if you want something a bit more budget friendly.

My advice, start with the handheld version, which you can get for under $10, just to make sure you like zucchini noodles. If you do, you can consider upgrading to another device.  


After all the zucchini has been spiralized, I lay them down on a couple layers of paper towels then sprinkle them with salt. The salt actually draws out some of the moisture which helps reduce the sliminess of the zucchini noodles. 

Then, to get rid of that moisture, I press some paper towels into the noodles to soak up all that zucchini juice. 


Now this next step, which I think is key, comes from the genius that is my husband. He always hears me complain about how my zucchini noodles are soggy, no matter what I do. So he came up with the bright idea of spinning them through a salad spinner!

I thought he was a little crazy at first, but I was amazed at how much extra water came out of those noodles! Soggy noodles no more!!

From this point, there are several ways I like to cook my zucchini noodles. 

  1. Saute them – The primary way I cook my zucchini noodles is by sauteing them in a teaspoon of oil (especially herb infused oil) for just a few minutes. 
  2. Blanch them – I only cook my noodles this way if I am adding them to soup or something else that’s already pretty soggy. 
  3. Don’t cook them – Zucchini noodles are also good raw! I like to add raw zucchini noodles to salads for some fun textures. 

So there you have it, my method for ensuring that I have perfect zucchini noodles every time! And if you need some inspiration for some zucchini noodles recipes, I have quite a few coming to the blog soon!

[amd-yrecipe-recipe:113]

PIN NOW, MAKE LATER

/ Filed In: aug 2018 savory new, Eat, Healthy Dishes, Other Savories New
Tagged: low-carb, noodles, Paleo, zoodles, zucchini

Zucchini Lasagna

July 11, 2016

Zucchini-Lasagna-


After a weekend of eating like crap, the first thing I cut out of my diet is processed carbs, like bread and pasta. That is, of course, until the next weekend when apparently all carbs are back on the table. Fortunately this little diet roller coaster has made me somewhat of an expert at making my favorite dishes without those pesky carbs, like this zucchini lasagna. 

This healthy zucchini lasagna has quickly become one of our favorite dinners. To me, is tastes exactly like a classic lasagna, but better because I know I am not eating all that pasta along with it. 


I will say, though, that cooking with zucchini can be a little tricky. If not prepared right, zucchini can get really soggy and mushy once it’s cooked. So for this particular dish, I sliced the zucchini really thinly on a mandolin. Then I laid all the slices out on paper towels and sprinkled then with salt to draw out all the moisture. 

While the zucchini was doing its thing, I prepared the rest of the ingredients for the lasagna, including the meat sauce. I made the meat sauce with ground turkey and my classic pasta sauce. 


To assemble, I could have layered everything in a casserole dish like you would normally make a lasagna. But for this zucchini lasagna I baked it in this mini loaf pan which makes it so much easier to portion out and serve. 

I started by spooning a little bit of the sauce down at the bottom of the pan, then topped it with strips of the zucchini. On top of the zucchini, I spread on a bit of ricotta and sprinkled on some mozzarella cheese. After that, I just repeated all those steps, starting with the sauce. I ended with a layer of sauce, mozzarella cheese, and Parmesan cheese. 

Zucchini Lasagna-8

Once everything has baked together, and the cheese has melted over the sauce, and the sauce has soaked into the zucchini, I can barely tell that I am eating a healthy version of lasagna. It’s packed with all the same flavors and textures of a classic lasagna. 

Zucchini Lasagna-9
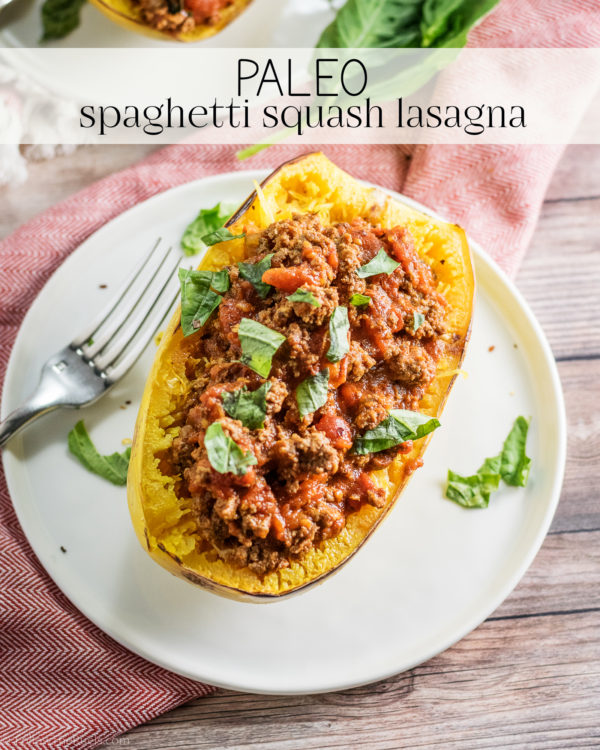
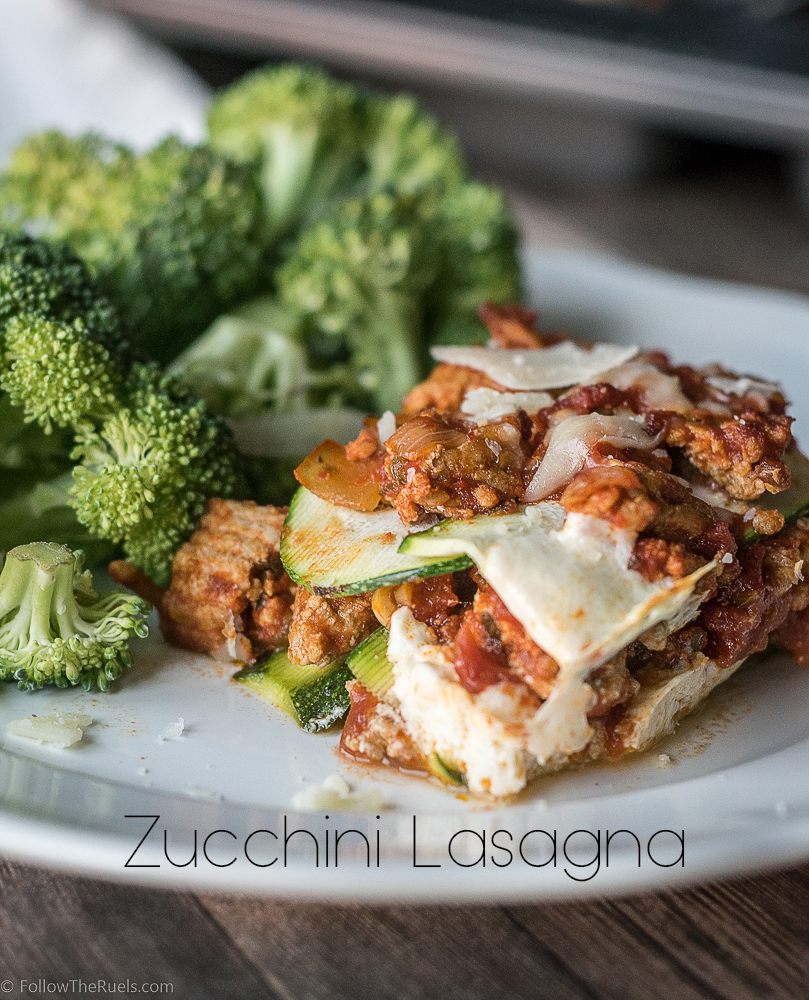
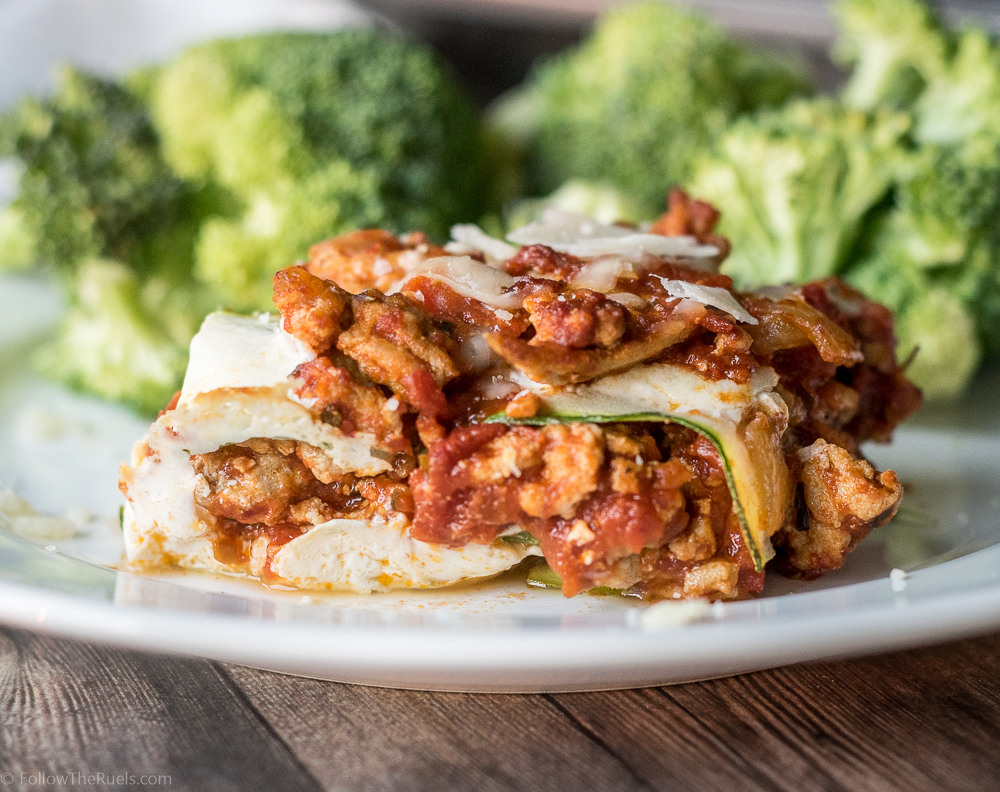
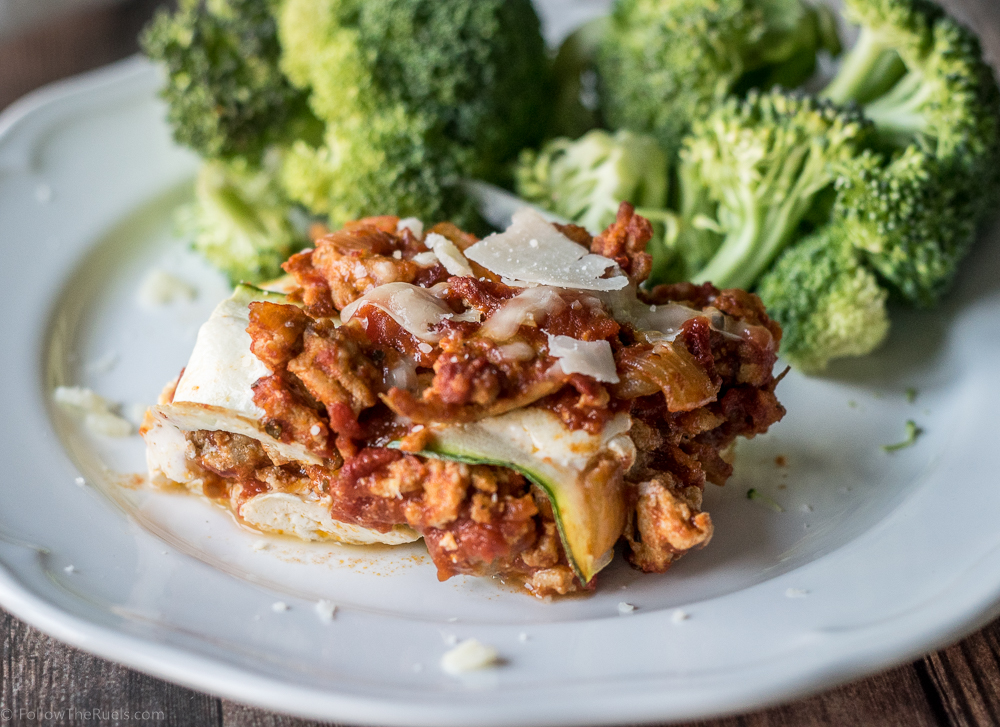
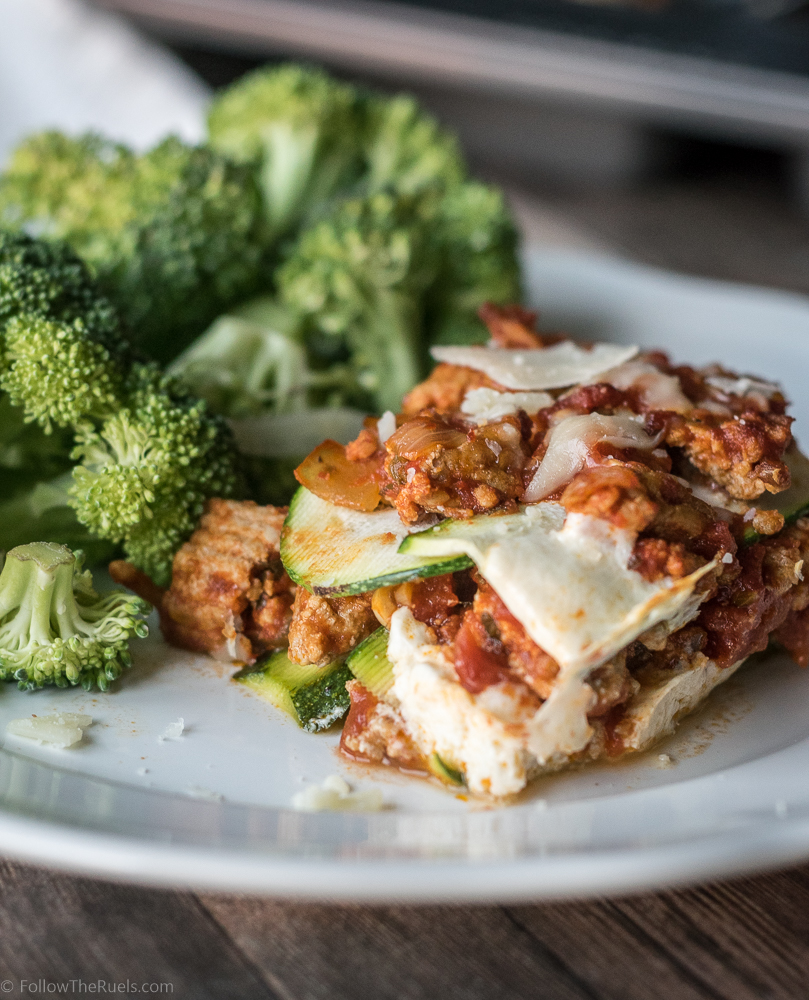
I can honestly say that I would prefer this lasagna over the pasta filled version. Not only does it taste just as good, but it doesn’t have all that guilt. This is one of my husband’s favorite meals that I make. Not just one of his favorite healthy meals. Favorite meals. That’s saying a lot.

Zucchini Lasagna-6

[amd-yrecipe-recipe:52]

/ Filed In: Eat, Healthy Dishes, Main Dishes, Other Savories New
Tagged: healthy, lasagna, low-carb, zucchini

Chicken and Quinoa Stuffed Avocados

April 13, 2016

Stuffed-Avocado-2title

If you live in Charlotte or happen to visit our fine city, one place you must stop in for a bite to eat is Viva Chicken. It’s a fast casual restaurant with some amazing Peruvian chicken dishes. One of their all time best sellers have to be their quinoa stuffed avocados: half an avocado stuffed with spiced red quinoa and topped with a chipotle mayo and balsamic sauce. Sounds so good, right?

Since I can’t eat at Viva Chicken every day (I wish I could), I decided to make my own version of their stuffed avocados at home. Except for my version I wanted to add some chicken and veggies so that I could feel less guilty about calling it ‘dinner’. 

Stuffed Avocado-5

While I love avocados, this dish would be nothing without quinoa. Without it, it might as well be deconstructed guacamole. For those of you who have never made quinoa, don’t worry. It’s exactly like making rice! But a little more full-proof, in my opinion. The only difference is that I toast the quinoa before I add in the liquid to boil.

To start, I poured in the dry quinoa into a hot sauce pan and let the little grains toast, stirring every so often, for about 5 minutes. Then I added in chicken stock (water could be used, too) and let it come to a boil before turning the heat down and covering the the dish. 

While the quinoa cooked, I sauteed up some bell peppers, onions, corn, garlic, and a chipotle pepper. Once the veggies were tender and the qunioa had absorbed all the liquid, I added the quinoa and some chicken (I used left over chicken breast. You can also use rotisserie chicken.), then mixed it all together. Now the only thing that was left to do was stuff the avocado!


This may be stating the obvious, but I waited until the very last minute to cut open my avocados. If you have ever worked with avocados before, you know how quickly they can brown. Once the filling was finished, I cut them down the middle, removed the seed, then piled on a generous amount of the quinoa and chicken mixture. 

Stuffed Avocado-7

For avocado lovers out there, this is the stuff dreams are made of. Those of you on a low carb diet will absolutely love this recipe as a healthy lunch or part dinner. Hey, add an egg and call it breakfast for all I care! There tons of healthy fat, protein, and just the right amount of carbs. And if you are not an avocado lover, well, I am sorry. You are truly missing out. 

[amd-yrecipe-recipe:19]

/ Filed In: Chicken, Eat, Healthy Dishes, Main Dishes, Other Savories New
Tagged: avocado, chicken, healthy, low-carb, quinoa

10 Products You Need to Survive Whole 30

February 22, 2016

Title

Now that I have completed my first Whole 30 I would love to tell you, “oh, it wasn’t that bad!”. I could tell you that, but I won’t. Because it wasn’t easy. It is definitely doable, but I’m sure I contemplated quitting and just eating a piece of bread about twice a day. It took some trial and error, but I was finally able to find some things to help me survive Whole 30. 

What makes it so difficult are those times when you need to grab food in a pinch, on the go, or just for a snack. Of course, snacking in general is discouraged on Whole 30, but try telling my stomach that at 4:00pm (hint: it won’t go well). It’s also difficult to try to maintain some normalcy in your life, like having a morning cup of coffee or socializing with friends. Both are difficult when you can’t have cream, sugar, or wine. 

It took me just about all 30 days, but I think I figured out how to get through just about all of those situations, like what to have for breakfast when you are running out the door, what snacks to keep in your purse when hunger hits, and how to feel like you are drinking without actually drinking (the most critical, right?). 

Here are the 10 products that helped survive Whole 30 through those situations (and then some!). Sure, you can survive Whole 30 without them, but I promise they will make your Whole 30 so much more bearable. 

Whole-30-Products-2numbered

1. Nut Milk Bags – As you know if you have even considered Whole 30, dairy of any kind is a big fat no-no. To add insult to injury, so is commercially processed nut milk (and non-canned coconut milk). The good news is it is SO EASY to make your own! I recommend buying commercial grade reusable nut milk bags if you plan on making your own, consistently. They don’t break and are easy to clean making them a much better value. You can also buy disposable bags at Whole Foods.

2. La Croix – If you are a big soda drinker, you will need to jump on the La Croix bandwagon ASAP. Even though I am not anymore, I needed something other than water and tea to drink to mix things up. Don’t expect a big flavor punch, these are flavored naturally and aren’t sweetened, but the sparkling water adds just enough to make your liven up your beverage choices. My favorite is the cherry limeade flavor!

3. A Paleo Cookbook (my favorite: Against the Grain) – Even though I had a copy of the Whole 30 book which had a whole meal plan and recipes inside, I needed some other recipe options to keep myself from getting bored. I had a copy of Against the Grain and turned to it frequently for inspiration (she inspired this Paleo Lasagna recipe). Since you basically have no other options other than to cook at home, having lots of options and variety will help ensure that you are successful.

4. Lara Bars – I had never had a Lara Bar before, but they were a life saver. I kept one in my purse, at my desk, in my pantry at all times. You never know when you will be stuck out running errands, not able to grab lunch, or running late to work when you need something quick and easy. Even though Whole 30 considers these “as close to a candy bar as you can get”, I say it’s still better than grabbing a bag of chips! Just be sure to read your labels, not all Lara Bars are Whole 30 compliant. My favorites are apple pie, cashew cookie, and cherry pie. (UPDATE: I have recently been turned onto RX Bars and they are my new favorite Paleo snack bar! My favorite flavors are the Salted Chocolate and Apple Cinnamon.) 

5. Kombucha – This one may be a bit controversial. Kombucha is a fermented drink that is actually made with sugar. But the sugar gets eaten up during the fermentation, so according to Whole 30, its fine. What’s great about the ‘booch, besides it being another water alternative and having probiotic benefits, is that it is naturally, mildly, alcoholic. And at least for me, it was a great substitute for wine or beer when we had friends over or I knew I was going out where people would be drinking. You won’t feel  the alcohol, but at least you can trick yourself into think your drinking. 

6. Epic Jerky Bites – Even though snacking is discouraged, you are probably going to do it anyways. My primary snack choices were nuts, apple and nut butter, and carrots. BORING. I probably ate my weight in almonds. Because I craved some variety in my snacks, I turned to jerky. Turns out about 99% of all jerky is made with sugar! UGH, sugar is EVERYWHERE! Fortunately, Whole Foods sells Epic brand jerky which is made with absolutely no sugar and is 100% Whole 30 compliant. By favorite is the bison jerky.

7. Justin’s Almond Butter packets – As I mentioned above, apples with almond butter was one of my go-to snack options. I probably had that combination at least once a day. But lugging around a jar of almond butter is cumbersome, so I turned to these almond butter packets which were must more convenient. If I’m being honest, Justin’s isn’t my favorite almond butter, but I haven’t found any other brands that have more portable packages. (UPDATE: Other brands are starting to sell nut butter packets like Barney’s and Artisana, which also does some other things besides peanut and almond butter! I haven’t tried either, but I plan to!)

8. Ghee – Ghee is essentially butter with the milk solids removed, making it the closest thing to butter you can get. It is great to cook with. You can slather steamed veggies in it. It is a must buy when you start your Whole 30. Fortunately, it was pretty easy for me to find. They carry it at Trader Joe’s near the olive oil and now I see it at just about every major grocery store near the oil or with the butter.

9. Chia Seeds – Yes, I am pretty sure these are the same seeds that you can make a Chia Pet with. Who knew they are actually pretty good for you. My favorite way to use chia seeds is making chia pudding (here’s my recipe for Cinnamon Roll Chia Seed pudding, which technically isn’t Whole 30 compliant). When the seeds are soaked in liquid overnight, they expand and form this gelatinous mixture. It might sound and look a bit unappetizing, but they have no taste and the texture is a lot like jello. When added to banana sweetened almond milk, they make a delicious dessert!

10. Acai Packs – Breakfasts were the hardest meal for me during the Whole 30. I can only eat so many eggs. So when I found these Acai packs at Whole Foods, I was thrilled! I started making acai bowls a couple times a week, which not only made breakfast more enjoyable again, but probably helped me see all 30 days through. I was this close to breaking down and having oatmeal a couple mornings. (Update: The Sambazon packs that I used now have soy lectin in them. I have re-linked another brand that is just acai and a bit of citric acid. If you want 100% pure acai, also try this freeze-dried powder and blend with some frozen berries, or try your local Trader Joe’s! They now sell frozen acai packets in their freezer section!

For those of you who are on or considering the Whole 30 challenge, I hope this helps you! Even if you aren’t or you are stick to a Paleo diet, I hope this has given you some great Paleo snack options to keep at home or work. Even though I am technically no longer doing the Whole 30, I will still continue to keep all of these things around to ensure I have healthy options when hunger strikes!

*This post contains affiliate links, which means if you click on a link and buy the product I receive a small commission. Everything I earn goes back into this blog!


/ Filed In: Eat
Tagged: healthy, healthy snacks, low-carb, Paleo, snacks, whole 30

Follow

Hey There!

Hey there, I'm Lindsey. I'm a number cruncher by day and a home cook and baker by night. While I love to eat healthy and find fresh and healthy alternatives for my favorite foods, I will never turn down dessert! Life is all about moderation, right?

Recipes

  • All Recipes
  • Breakfast
  • Appetizers
  • Salads
  • Main Dishes
  • Side Dishes
  • Desserts
  • Drinks

Favorite Finds

[show_lookbook_widget id=”388783″]

Theme by 17th Avenue · Powered by WordPress & Genesis