• Home
  • Eat
    • Breakfast
    • Appetizers
    • Main Dishes
      • Chicken
      • Beef
      • Seafood
      • Healthy Dishes
      • Paleo Dishes
      • Salads
    • Desserts
      • Decorated Cookies
      • Cookies
      • Bars and Brownies
      • Cakes and Cupcakes
  • Shop
    • Cookie Decorating Supplies
    • Bakeware
    • Cookware
    • Kitchen Gadgets
    • House
  • About
    • Contact
    • Bucket List
  • Cookie Decorating 101

Follow the Ruels

Homemade Marshmallows (Four Ways!)

August 16, 2017

Making marshmallows is a bit like a conducting science experiment. At least that’s what my husband said when we made a batch together over the weekend. He was a bit astonished that we took powdered gelatin, mixed it with some water to make a very thick gel. Then mixed that at high speed with some hot liquefied sugar and somehow we created marshmallows. Something that doesn’t resemble either of the two main ingredients at all. 

It is kind of astonishing, isn’t it?

While it may seem more like a science experiment than baking, making marshmallows at home is a ton of fun! It would be a really fun thing to make with kids (with adult supervision of course because it does involve boiling sugar). Just be prepared for the stickiness. I still have marshmallow finger prints in random places around my kitchen. 

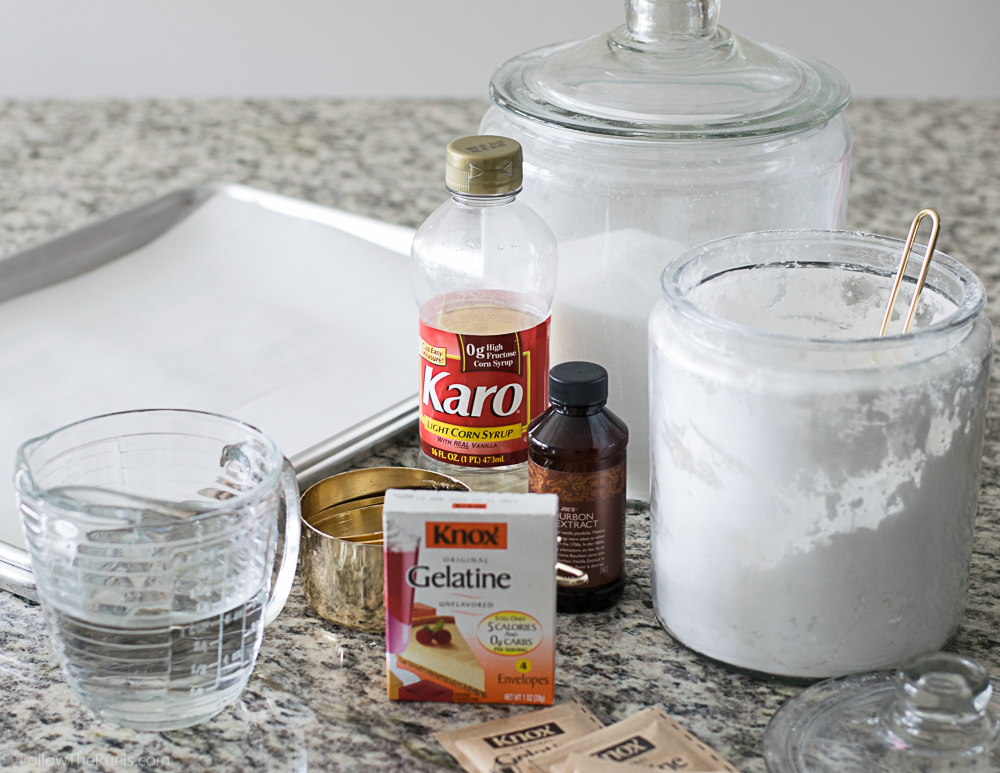
Marshmallows require only a few simple ingredients: gelatin (plain), corn syrup, and sugar. That’s it. Of course, you can add in flavorings like vanilla….or….

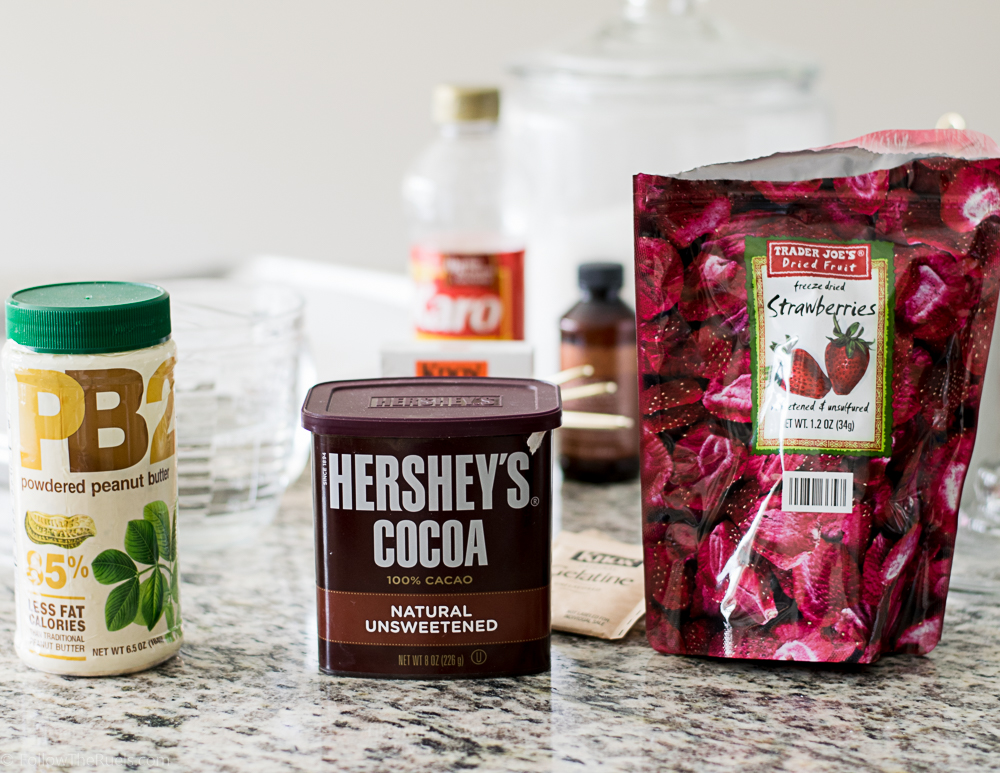
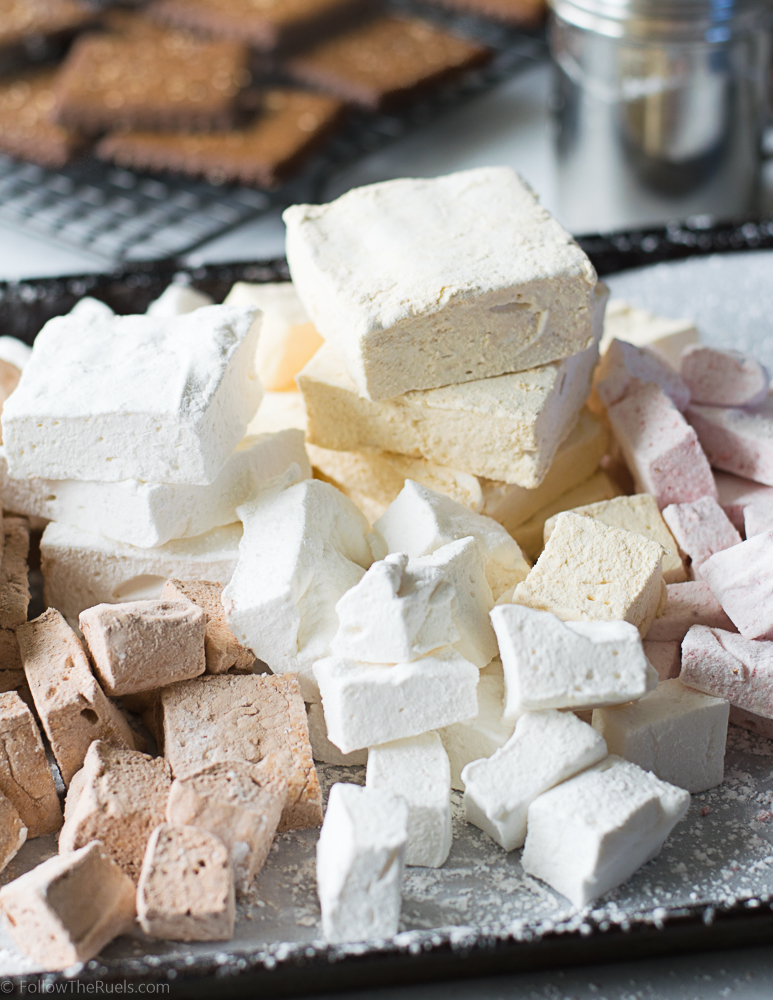
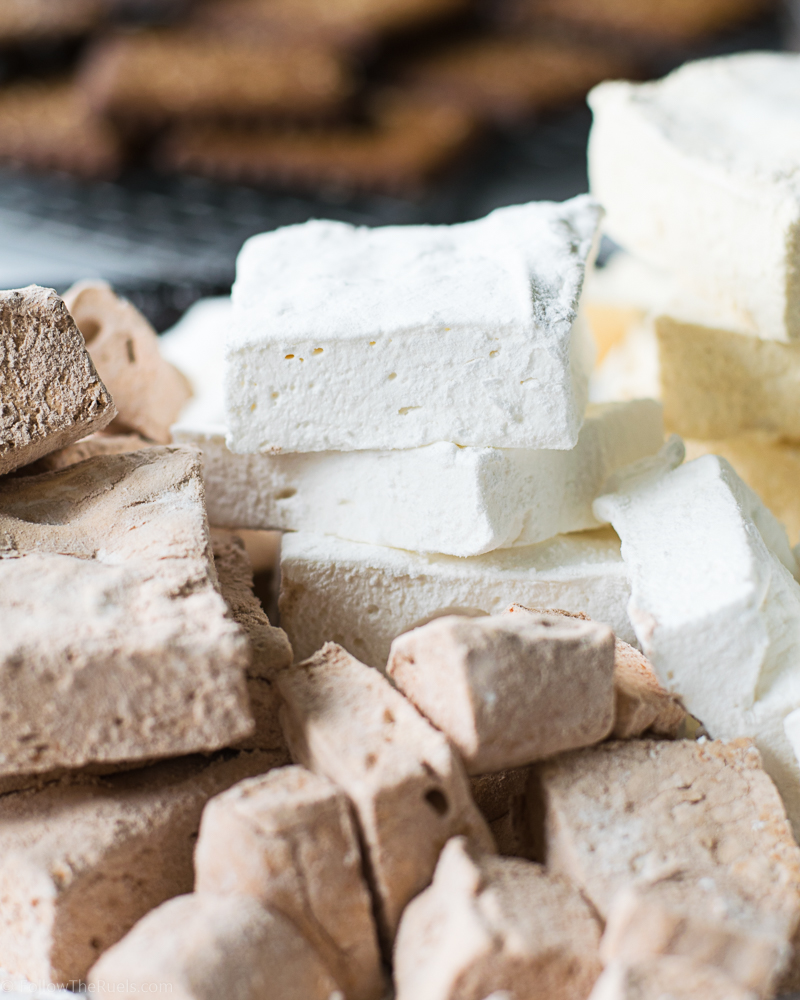
You can really step things up and make peanut butter, chocolate, and strawberry marshmallows like I did.

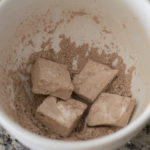
I knew that I wanted to make some different flavored marshmallows, not just plain old vanilla ones, and fortunately, I didn’t have to look far for my inspiration. I used peanut butter powder and cocoa powder to flavor the marshmallow mix peanut butter and chocolate flavored. Then I used freeze dried strawberries, that I ground up into a powder to mix it in the same way as the other powders. 

But I am getting a little ahead of myself…

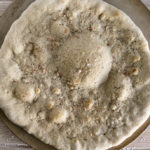
Start by blooming your gelatin with half of the water in a bowl or measuring cup. I recommend doing this in a separate bowl or cup (unlike what I did in my first batch), because some of the gelatin may stick to the bottom of the bowl and will never get fully incorporated into the rest of the marshmallow. 

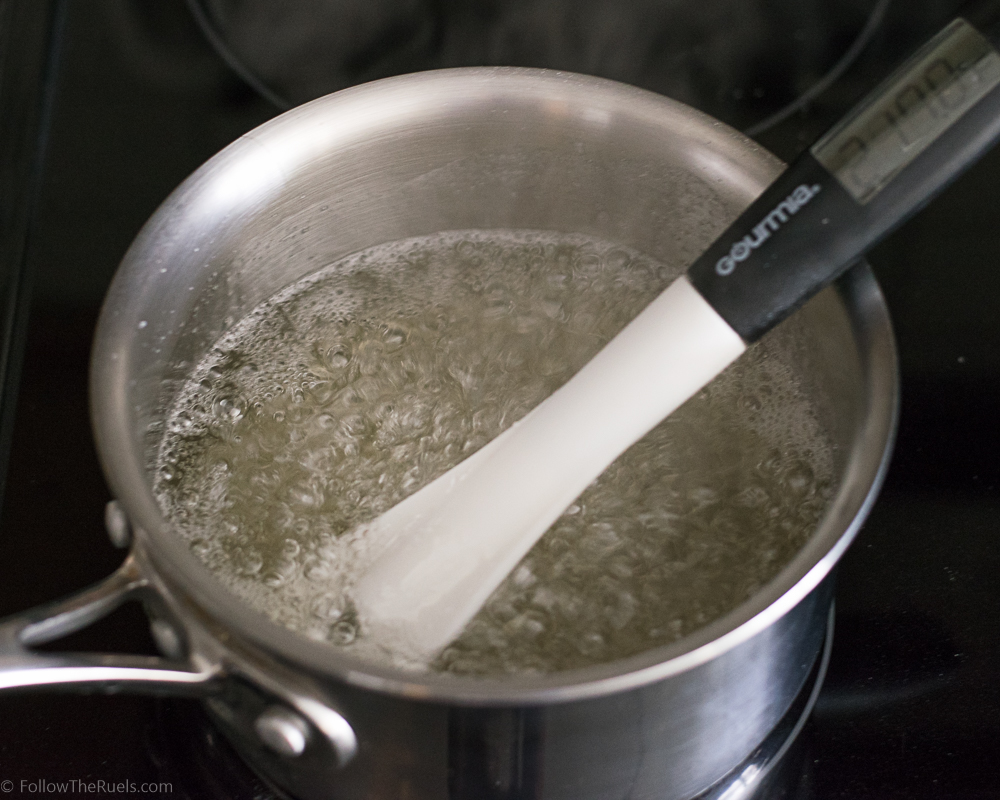
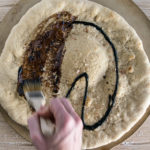
Meanwhile, what the gelatin is blooming away, bring the sugar, corn syrup, and water to a boil. A candy thermometer will come in really handy right about now because you want your mixture to come to 240 degrees.

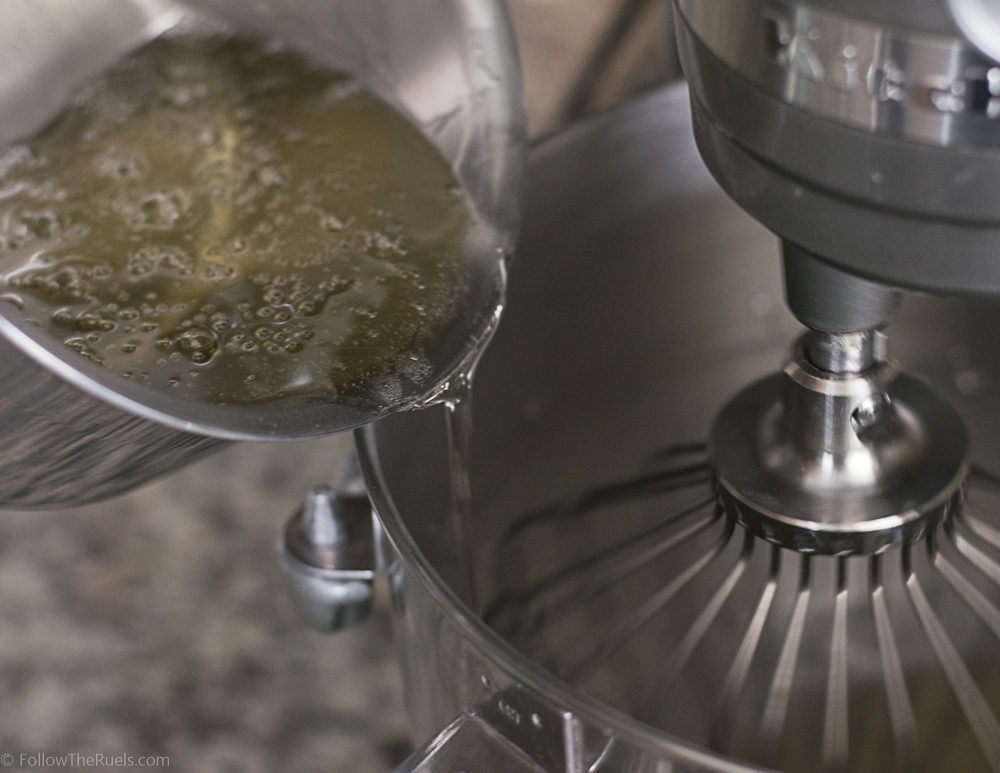
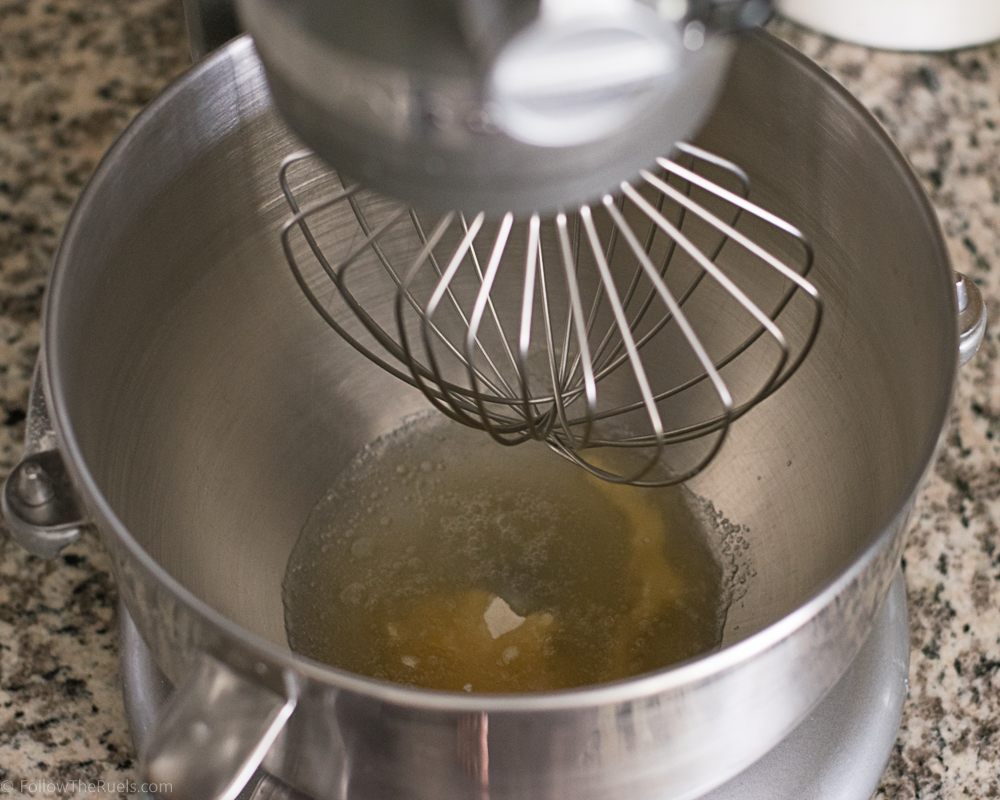
With your mixer on low speed, drizzle the sugar mixture into the bowl with the gelatin. After everything is poured in, turn the speed up to high and get the party started!

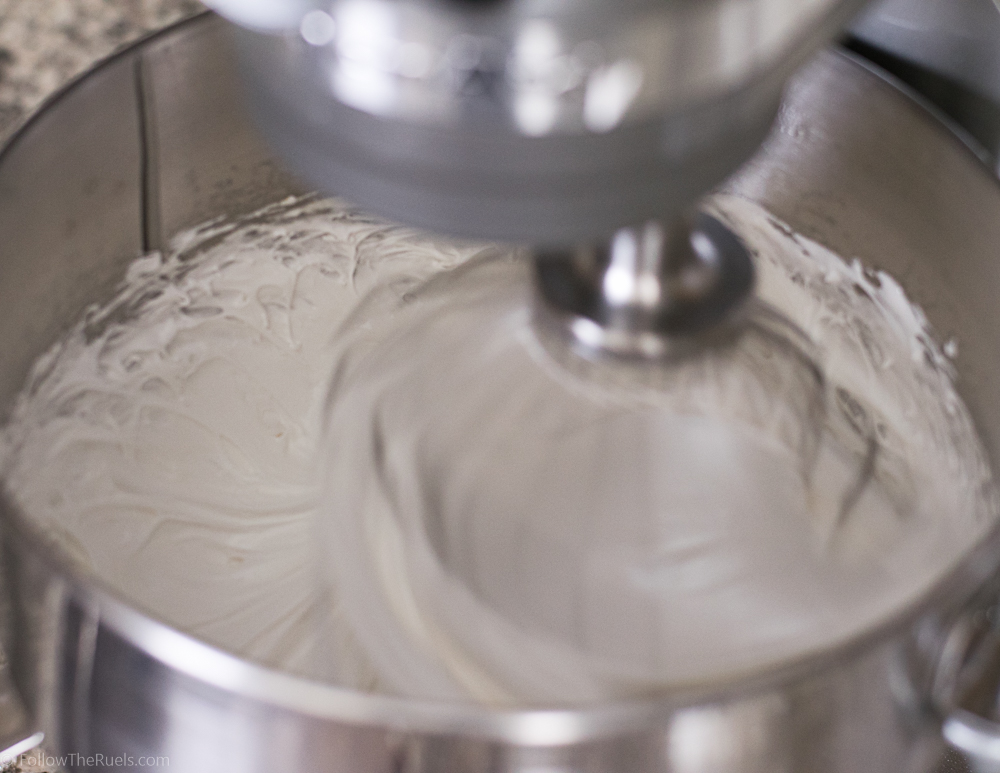
After about ten to fifteen minutes the mixture should look a lot like a stiff meringue, except a lot stickier! The mixture should be thick, but still very light and airy. 

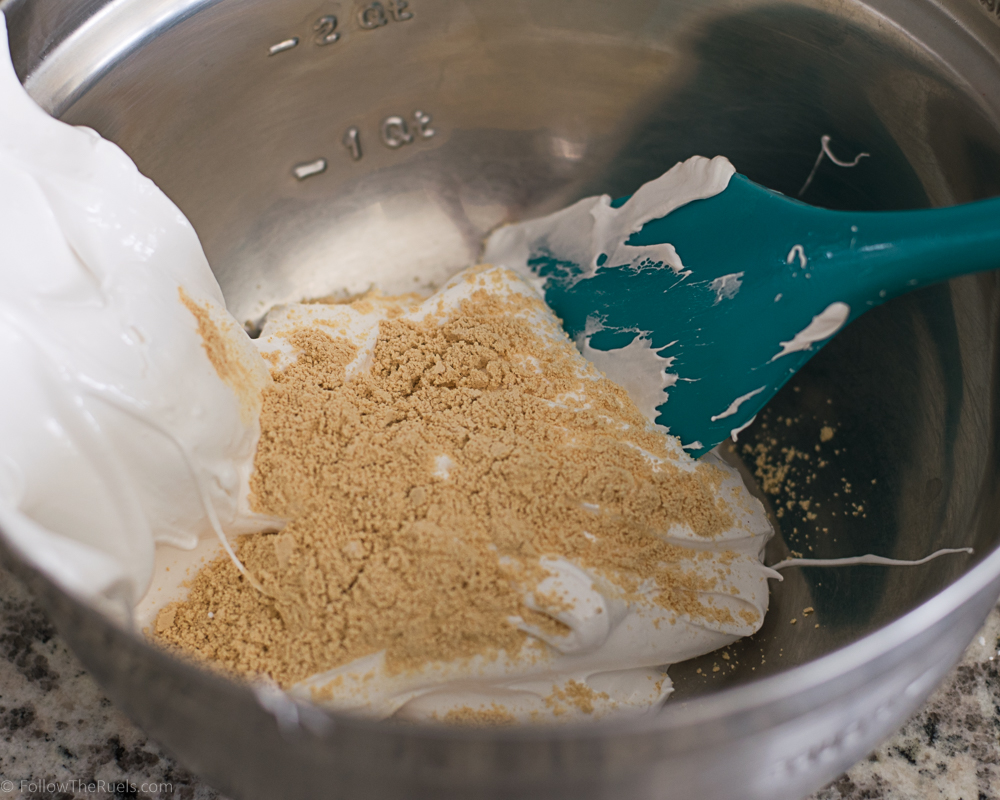
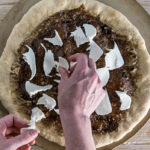
If you are flavoring your marshmallows with anything, now is the time to add that in. I added a couple tablespoons of peanut butter powder and mixed it into my marshmallow mix. I did the same with the cocoa powder and strawberry powder. 

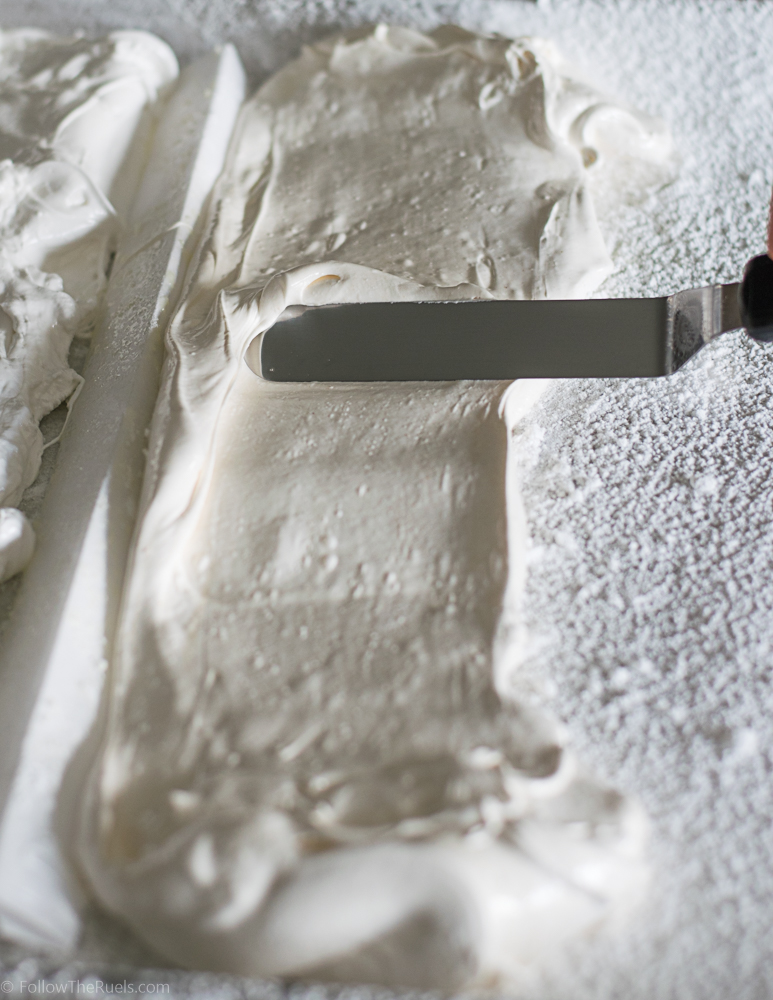
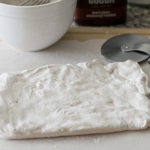
Forming the marshmallows may be the trickiest part of this whole process because the marshmallow is just so stubborn. It does not want to go where you want it to go, and it sticks to everything. I found that using a couple of well-oiled hands or an offset spatula works the best for spreading it out on to the pan.

Note that my pan is heavily dusted with powdered sugar. There is actually a layer of parchment under there, too, to make sure that nothing sticks!

Also, since I made several flavors, I sectioned off my pan with a piece of parchment so that the flavors wouldn’t stick together. If you plan on doing the same, I would recommend only try two flavors per batch.


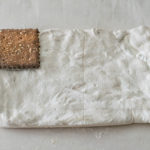
Let the marshmallows sit overnight so they can dry out. Then you can cut them to whatever size you wish! Since my marshmallows were going to be used for s’mores, I cut them to fit my graham cracker. 


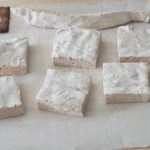
After your marshmallows are cut up however you like them, give them a toss in a bit more powdered sugar. If you flavored your marshmallows with any of the powders I used, add a teaspoon or two to your powdered sugar before tossing in your marshmallows. For instance, I added a teaspoon of cocoa powder to about a half a cup of powdered sugar then tossed in my chocolate marshmallows to make them extra chocolatey! And ensure that they marshmallows don’t stick to one another. But mostly the former. 

And voila! Homemade marshmallows! Nothin beat them! They are so soft and spongey. Even after a few days, they are still so soft and just melt in your mouth (I am currently eating left over marshmallows as I type. I work best on massive amounts of sugar.)

Even the plain vanilla ones are just better. But let me tell you, those peanut butter marshmallows are perfection! I brought some leftovers to a coworker who loves to drink hot cocoa (even in the Summers). He confirmed my suspicion that hot cocoa is 100% better with peanut butter marshmallows. I bet it would also be good with chocolate or strawberry marshmallows! Also, can imagine a s’more made with white chocolate and the strawberry marshmallows? Oh man, delish!

Now it’s time to go make some s’mores!

[show_shopthepost_widget id=”2785528″]

[yumprint-recipe id=’125′]

/ Filed In: Desserts, Eat, Other Sweets New
Tagged: cocoa powder, marshmallows, peanut butter, s'mores, strawberries

Strawberry Arugula Pizza

July 9, 2017

Two things you would probably never think to put together: strawberries and pizza. It sounds a bit strange, but trust me, it works!

Actually, there are a lot of fruit and pizza combinations that go well together. Fig and prosciutto, for instance. But this strawberry arugula pizza is my new favorite!


I start all my pizzas by pre-baking the pizza crust. Since I don’t own a pizza oven (if you do, can we be best friends and make pizza all the time?) I find that I get a crispier crust that way.

For this pizza, instead of sauce, I liberally coated the par-baked crust with a balsamic glaze. You can make your own balsamic glaze by simply bringing balsamic vinegar to a simmer and reducing by half or more until it’s nice and thick.

Or you can do what I did and buy it at the store. You don’t always have to be a hero and make everything from scratch.


Next comes the mozzarella. Most of the time I like to use the fresh balls of mozzarella versus the preshredded variety, but thats a personal preference. You do you, boo.

On top of the pieces of mozz, I scattered the sliced strawberries.


The last thing I added before putting this bad boy back in the oven was goat cheese. I felt like this pizza needed just a little something to balance out the acidity from the balsamic and the sweetness of the strawberries. This tangy and salty goat cheese did the trick!

Once the pizza came out of the oven I topped it with a generous helping of arugula that had been tossed in balsamic and olive oil. Which pretty much turns this pizza into a salad as far as I’m concerned. 

I can think of no better way to eat a salad than on a crispy and pizza crust.

But in all seriousness, this was one of my favorite pizzas we’ve made in a long time. The whole thing just worked. It was the perfect Summer pizza because it was just so light and fresh. It didn’t feel as heavy as some super cheesy meat-covered pizza. 

I guess that’s why the two of us devoured this whole thing. Like I said its pretty much a salad so we have nothing to feel guilty about. Right?

[yumprint-recipe id=’115′] 


/ Filed In: Main Dishes, Other Savories New, Uncategorized
Tagged: arugula, balsamic, cheese, goat cheese, Mozzarella, pizza, strawberries

Strawberry Caprese Salad

July 29, 2014

Strawberry-Caprese6I love salads, but I am actually a little intimidated to make them at home. Restaurant salads include a variety of ingredients that 1) I normally wouldn’t pair together, or, 2) don’t keep on hand. If you told me to go make a salad right now all I could throw together is lettuce, cherry tomatoes, and baby carrots.

Which is why whenever I make a salad at home I default to a classic: the caprese. A traditional caprese salad is usually just fresh mozzarella, tomato slices, and basil. For a little jazzed up version I added fresh strawberries and crispy pancetta.

Strawberry-Caprese2I started with a few strawberries I had left over from the farmers market, a plump tomato, and some freshly picked basil.

Strawberry-Caprese1I also cubed up some left over bread, tossed them in a bit of olive oil and toasted them in the oven until they were crunchy and golden brown.

Strawberry-Caprese3And I threw in the meat so that my husband would think of this as a meal and not just a side. I browned a small package of pancetta that I picked up in the deli section of my grocery store. If you want to make this recipe and can’t find pancetta, bacon would be the prefect substitute.

Strawberry-Caprese4For the dressing I stuck with a simple homemade balsamic. There is so much flavor from the strawberries, tomatoes, and basil, you don’t really need anything too extravagant. To make the balsamic dressing I mixed 2 parts oil with 1 part balsamic, then added salt, pepper, and minced garlic to taste.

Strawberry-Caprese5Then mix it all up and you got yourself a beautiful, and filling, salad!

[yumprint-recipe id=’27’]

/ Filed In: Eat
Tagged: healthy, pancetta, salad, strawberries, Summer

Follow

Hey There!

Hey there, I'm Lindsey. I'm a number cruncher by day and a home cook and baker by night. While I love to eat healthy and find fresh and healthy alternatives for my favorite foods, I will never turn down dessert! Life is all about moderation, right?

Recipes

  • All Recipes
  • Breakfast
  • Appetizers
  • Salads
  • Main Dishes
  • Side Dishes
  • Desserts
  • Drinks

Favorite Finds

[show_lookbook_widget id=”388783″]

Theme by 17th Avenue · Powered by WordPress & Genesis