Confession: I am not a very organized person. If you know me, have been to my house, or have worked with me you know I thrive with a little bit of clutter. But I LOVE the idea of organization. I was the kid that always organized all my school supplies for the first day of school. By the second week, my binders were all a mess and I had lost about half of my pens and highlighters.
Regardless of my history with organizational projects, one of the very first things I wanted to accomplish in our new house was to makeover our pantry! Okay, so pantry makeover may not be the best way to describe this project since what I was making over was our haphazard placement of spices, oil bottles, snacks, and random condiments just to get them out of our moving boxes.
But it was probably more of a makeover than I originally intended because I “made-over” this pantry several times before finally settling on the best layout and format for us. I also learned a few lessons along the way that I thought I would share with your guys in case you are planning your own pantry makeover.
Before we get into the fun part (all the things I bought), I wanted to give you a little peek inside my mind and how I strategized this little pantry makeover.
Pantry Makeover Strategy
Even though this is the largest pantry I have ever had, I knew that I would find a way to fill up the space making it feel small and cramped so I needed to be smart about how I laid everything out.
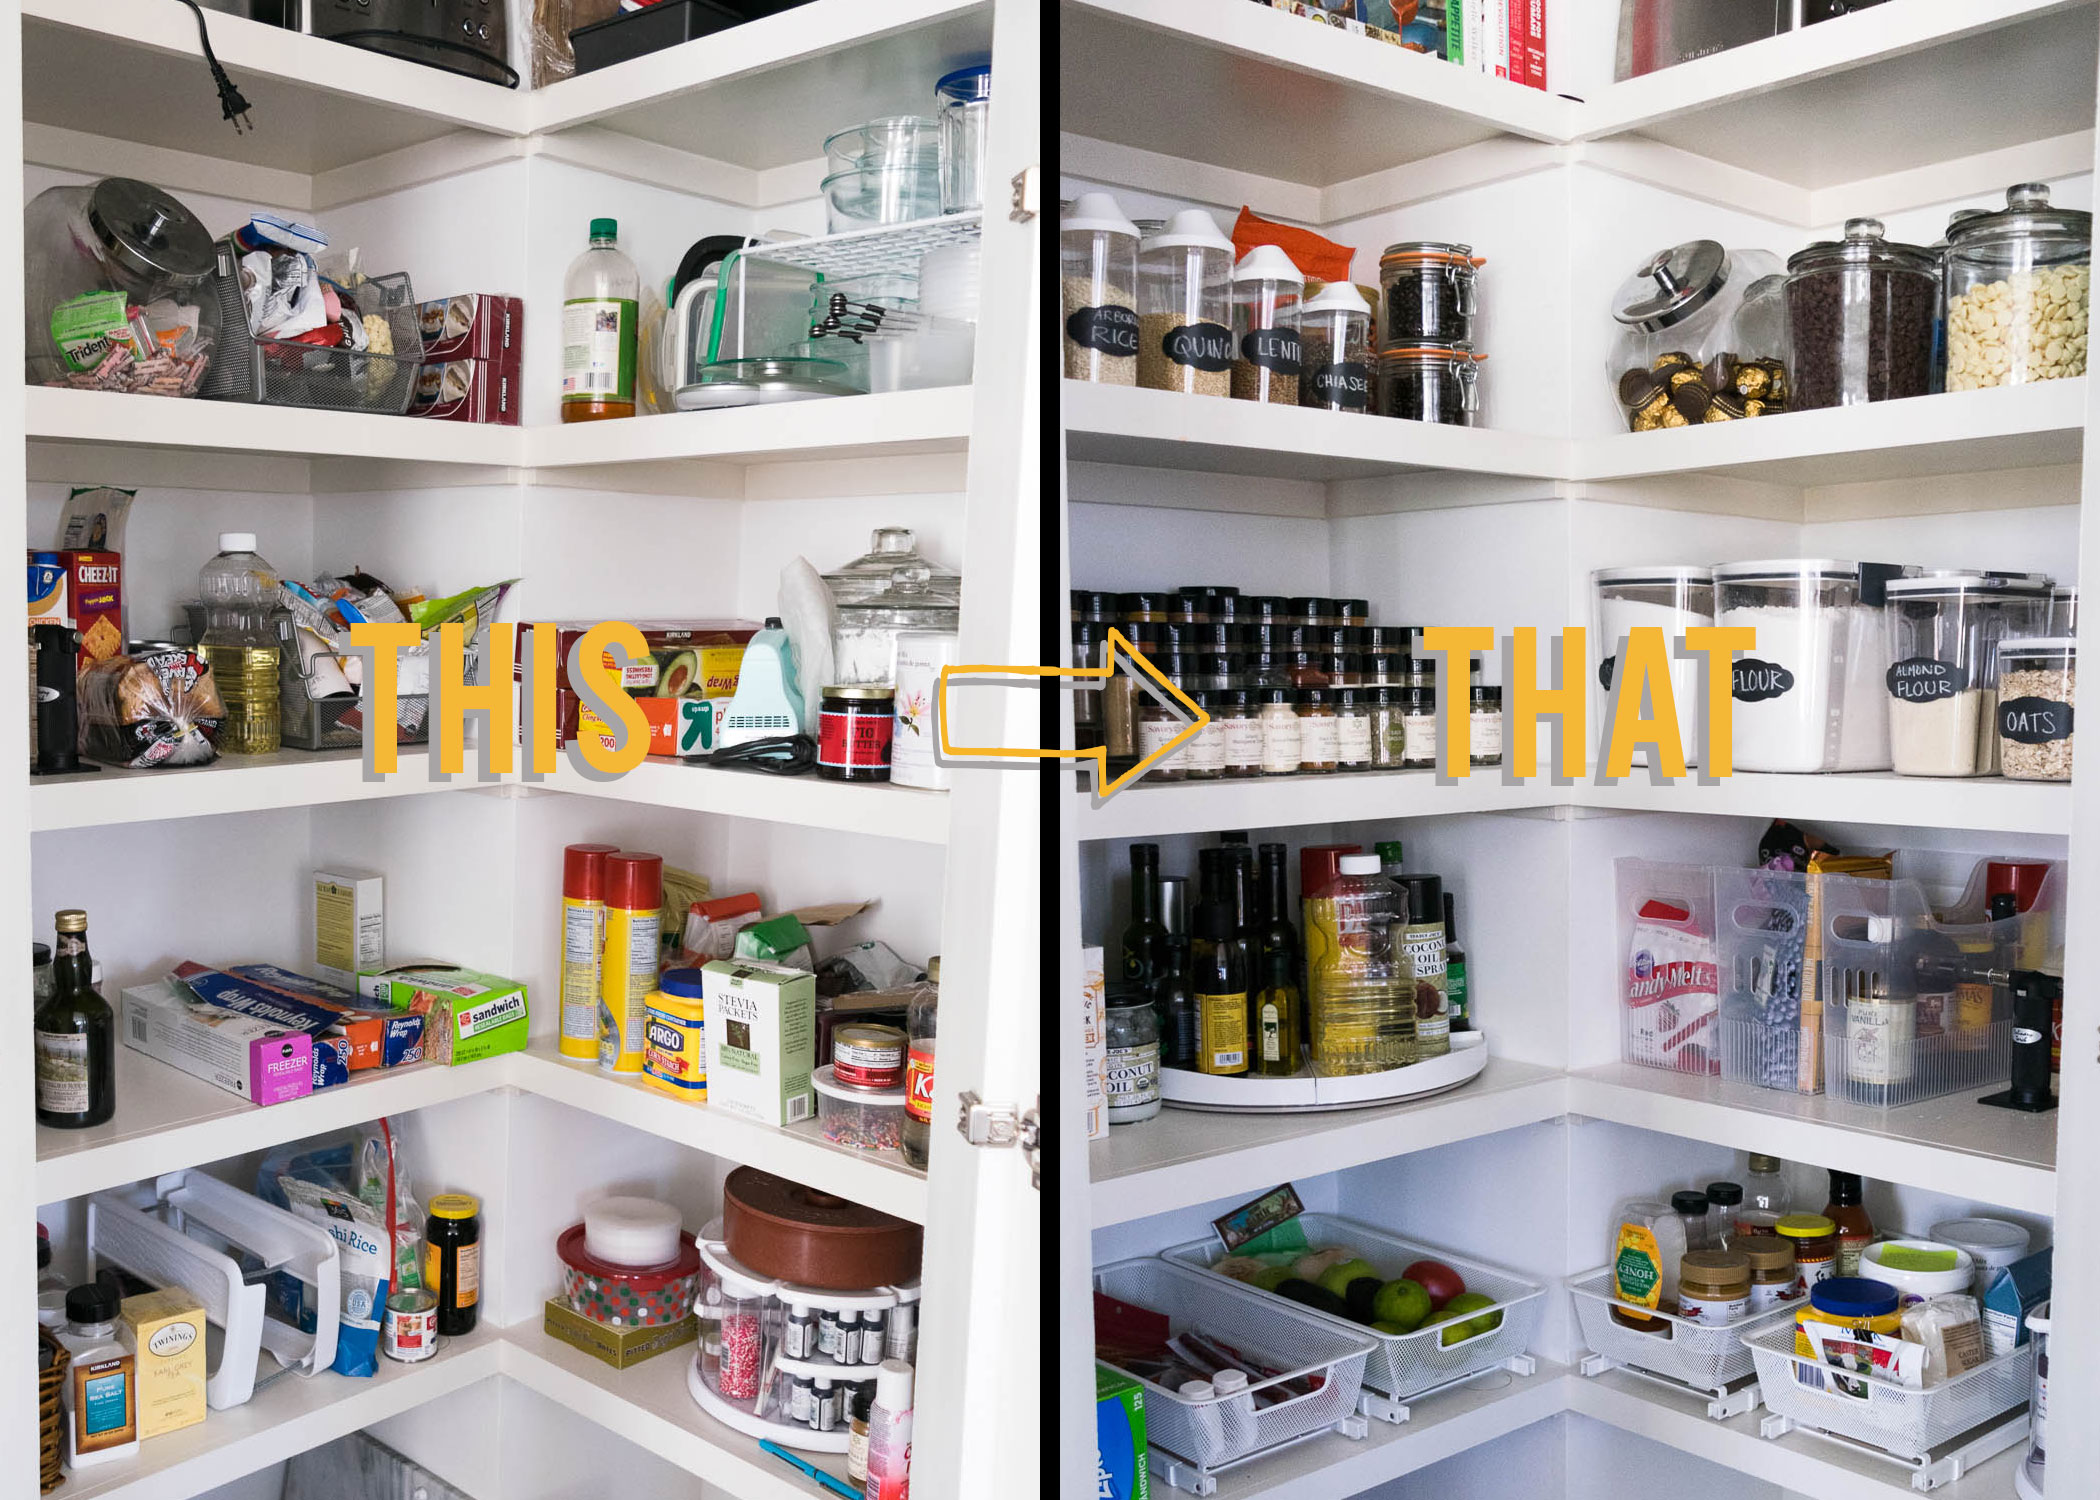
Just as a reminder, here is how the pantry looked before:
Obviously there is no rhyme or reason to anything. None of the items are grouped together for easy accessability. It is a mess!
The first thing I considered was what items I use most often: Oils, spices, flour, sugar, etc. Basically anything I use when I bake or when I cook dinner. So those were the items I wanted to put front and center at eye level.
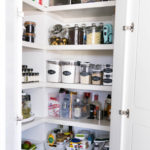
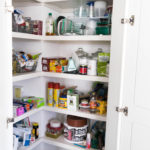
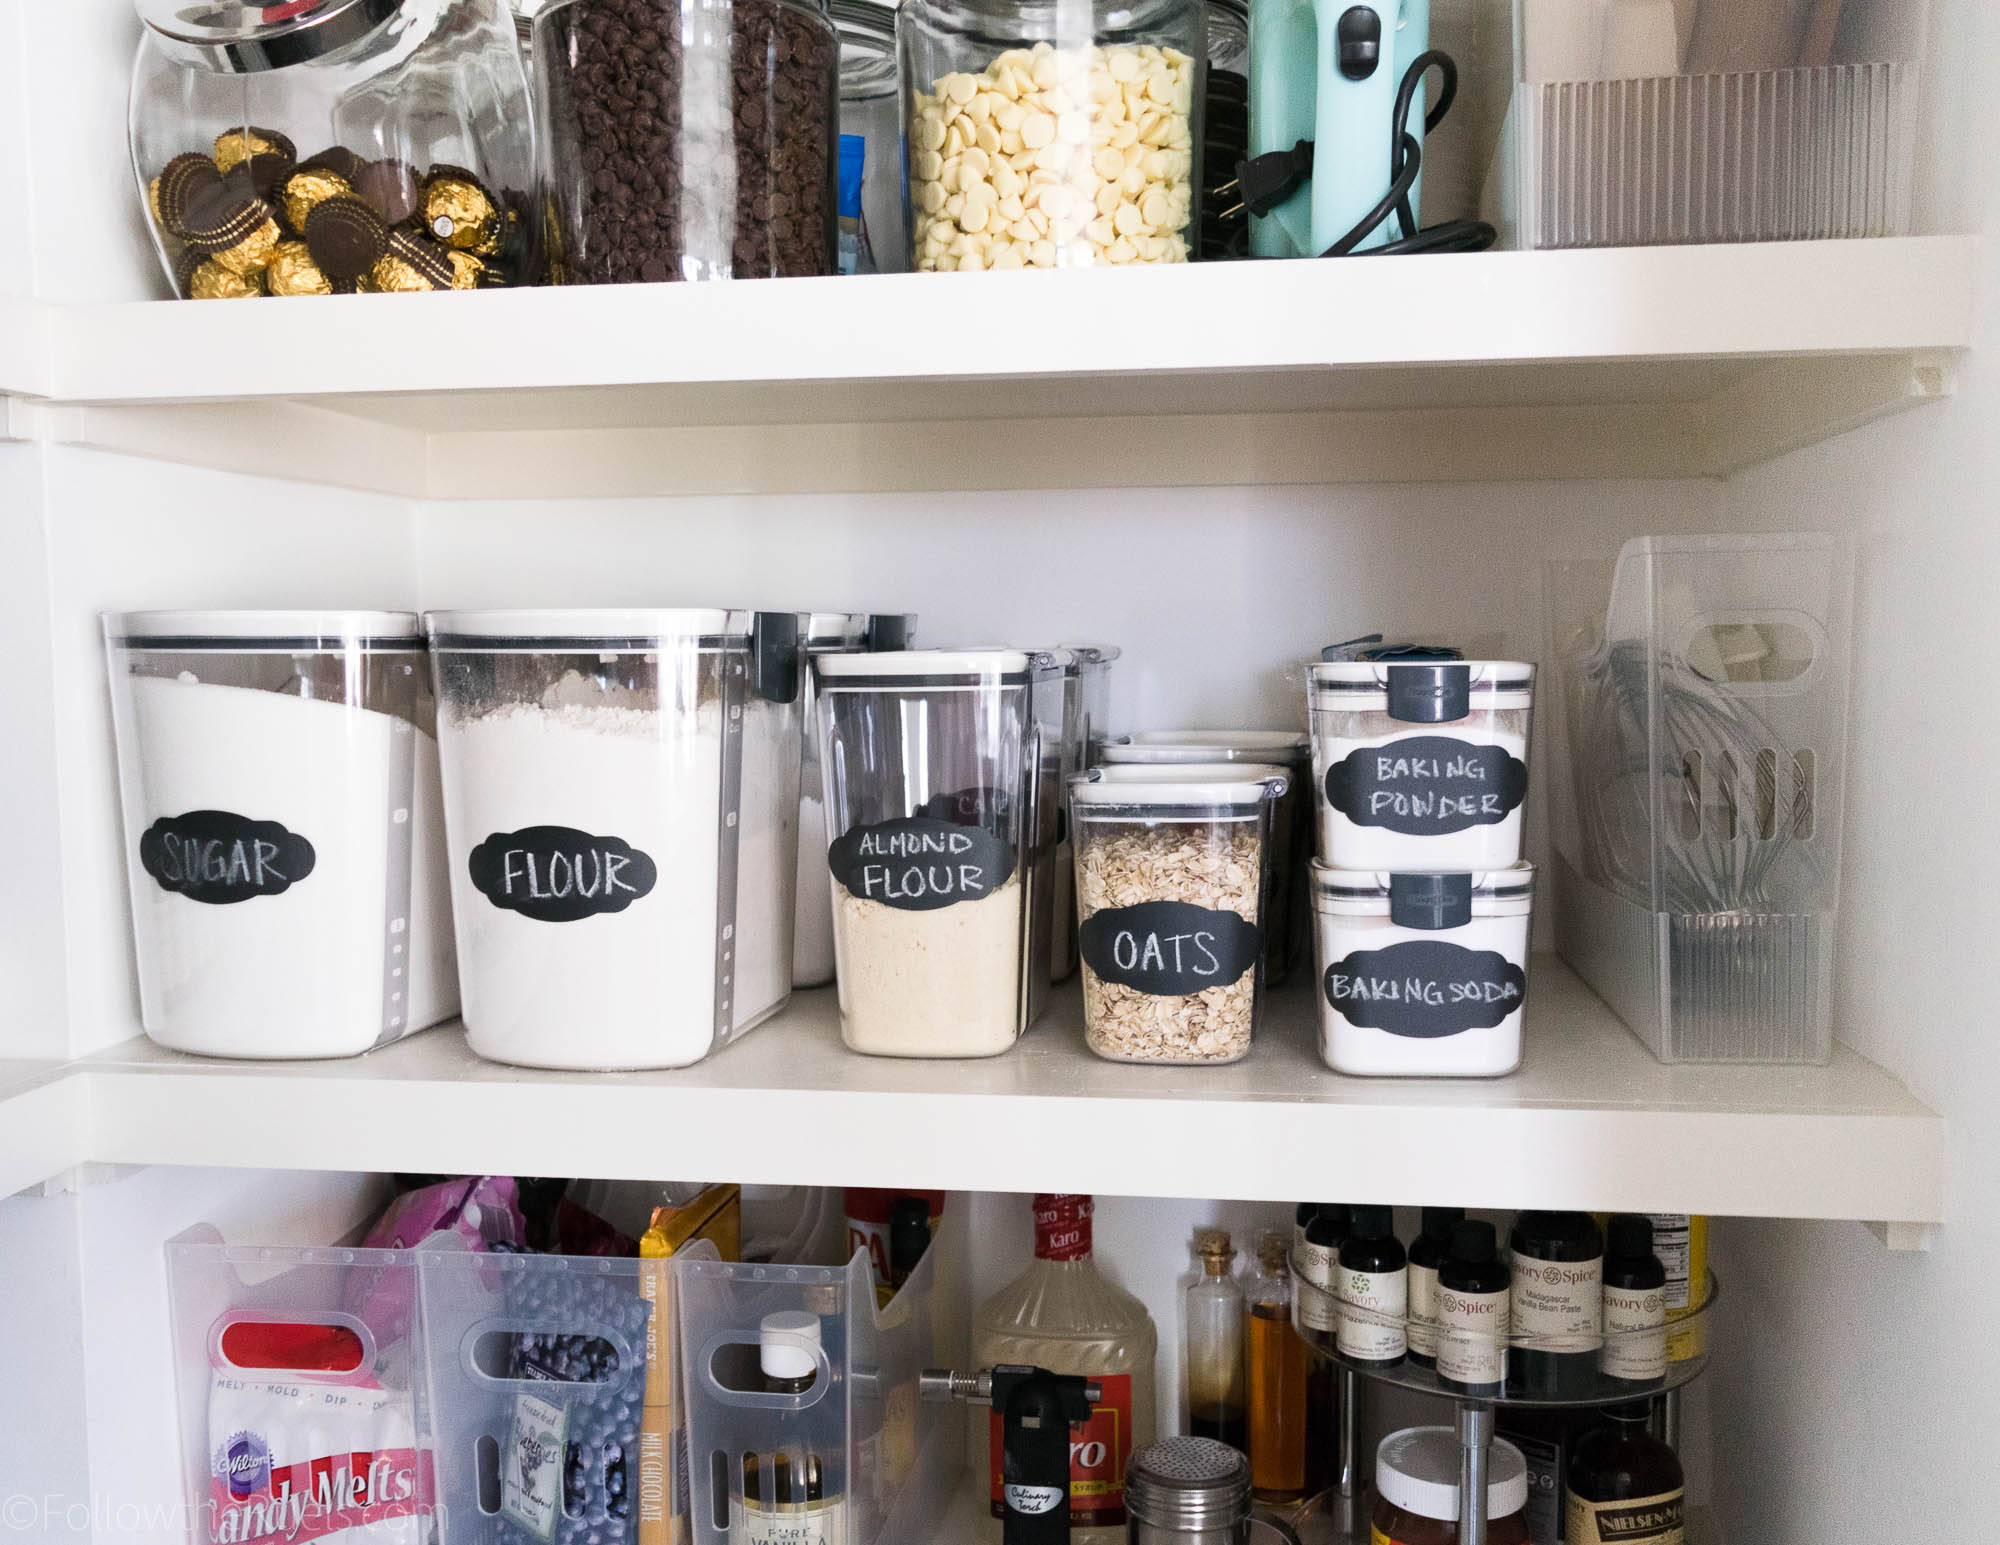
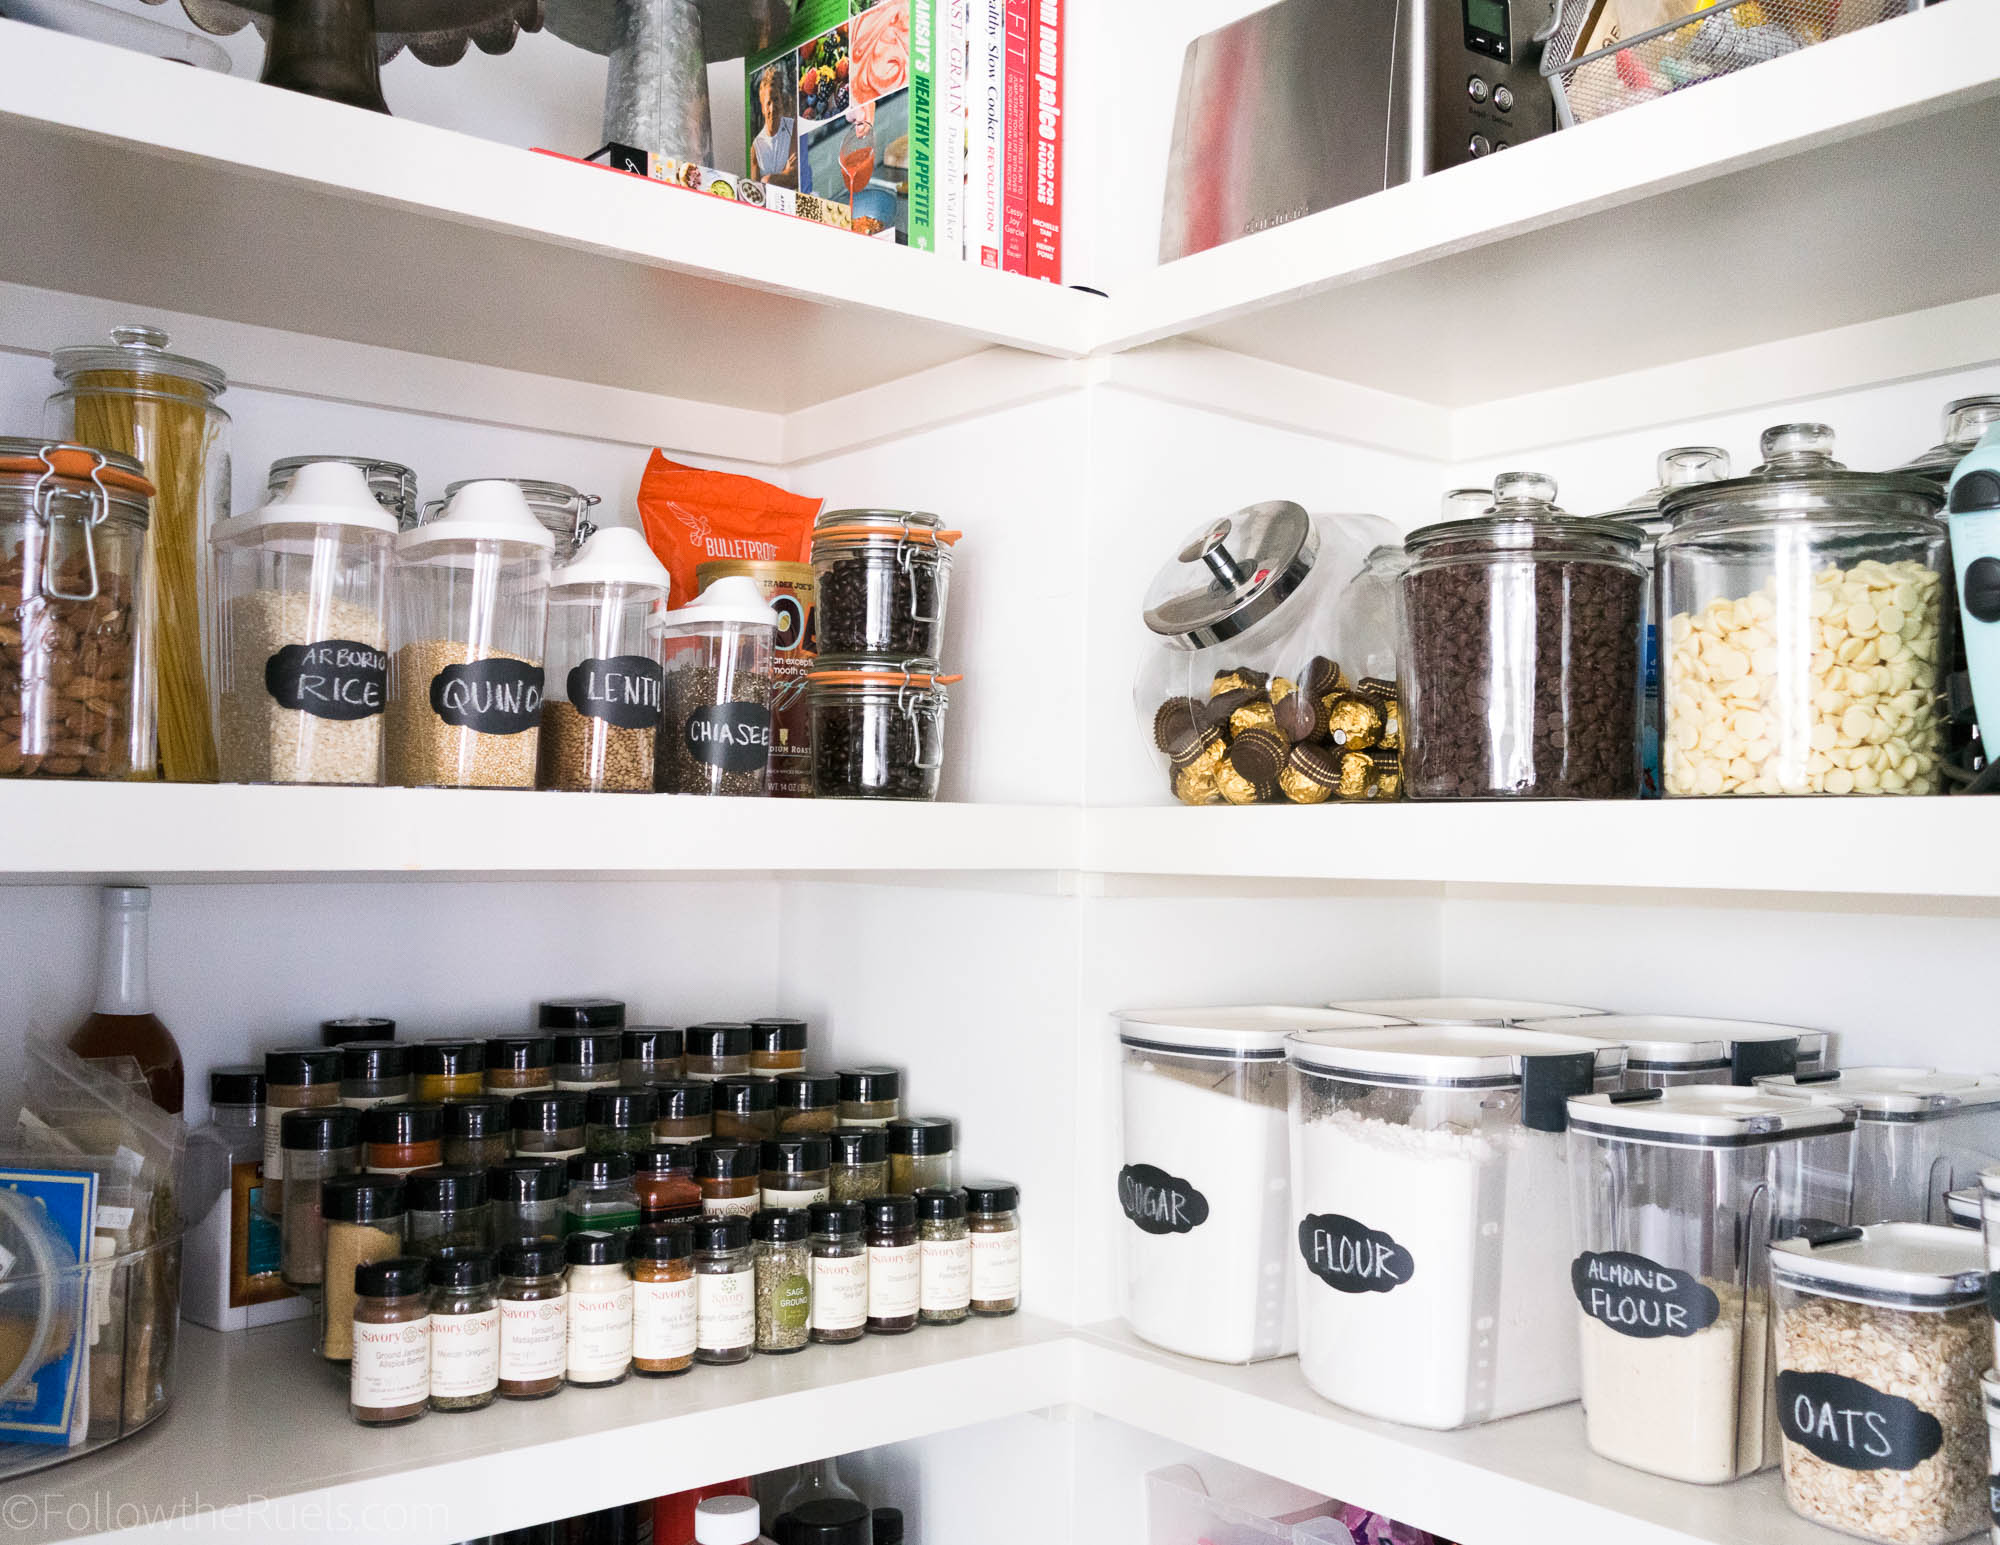
As you can see I have all of my spices on one shelf neatly organized so I can see all of them at once. My oils are right below on a cool lazy Susan that makes storing them and accessing them so much easier. And dry ingredients, like rice, pasta, and coffee are above on a higher shelf because I don’t reach for those very often (except the coffee).
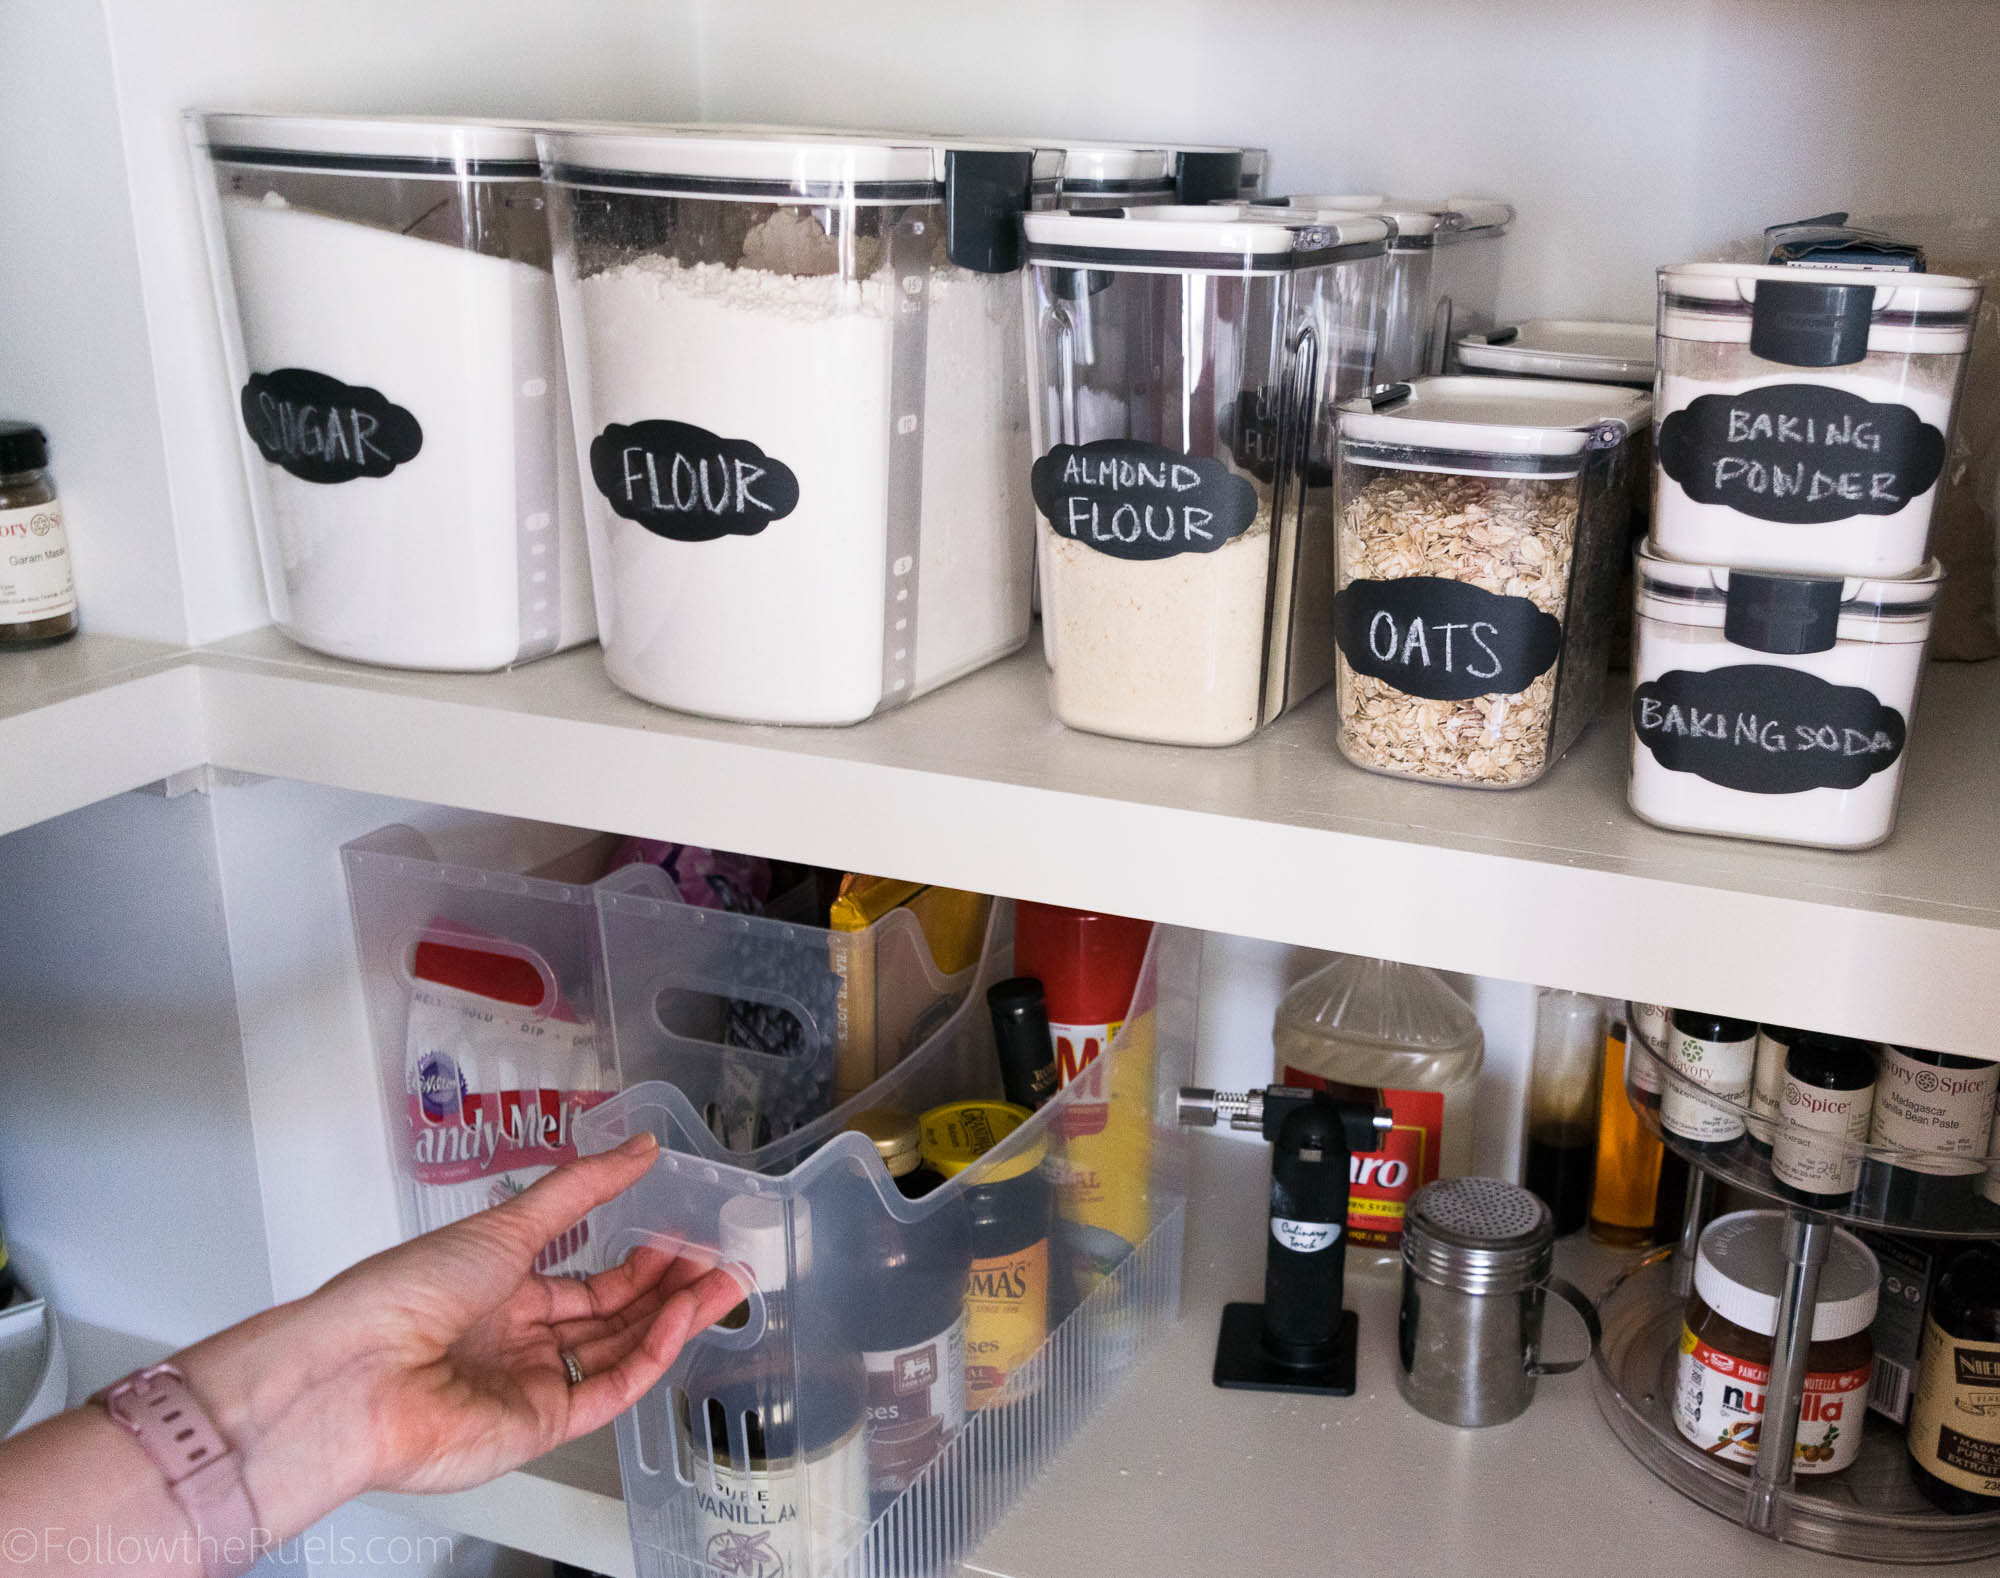
On the right side, I have all of my baking stuff. Dry ingredients are all on one level and the other flavorings, colors, etc. are right below. I also kept the large canisters of flour and sugar at that level because it is easier to take them down and put them back than if they were higher or lower.
On the bottom shelf, I have those items that I don’t necessarily access all the time or that I would like to be visible at eye level, like my parchment paper, plastic wrap, etc. and other condiments.
That is essentially how I planned out this space and what works for me. But now let’s talk about the fun stuff!
Pantry Makeover Products
For the first month of being a homeowner, I basically lived in the Container Store. I can’t tell you how many trips I made to that store, buying, returning, and buying some more. In the end, I am very happy with everything I bought (and happy I returned the things I did).
My absolute favorite purchase, and one that I was a little reluctant to buy, was these canisters.
[show_shopthepost_widget id=”3064816″]
In our old house, I had all my dry ingredients in nice glass jars on our counter which looked lovely. At first, I was committed to keeping everything in these jars, but as worked more in this kitchen the jars became a little cumbersome. Not only were they heavy and hard to move but they took up a lot of space.
I did a lot of research on canisters and ended up with these canisters made by ProKeeper. They have airtight lids and there are literally canisters for everything! Flour, sugar, brown sugar, coffee, powdered sugar. All of them have a different feature which makes them really functional. I didn’t really use them as they were intended because I have large quantities of ingredients. So my sugar is really in a flour canister and almond flour in a sugar canister. But it works for me!
And as you can see I repurposed the jars to hold other things like chocolate chips, snacks, and cookies.
[show_shopthepost_widget id=”3064825″]
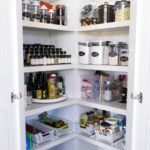
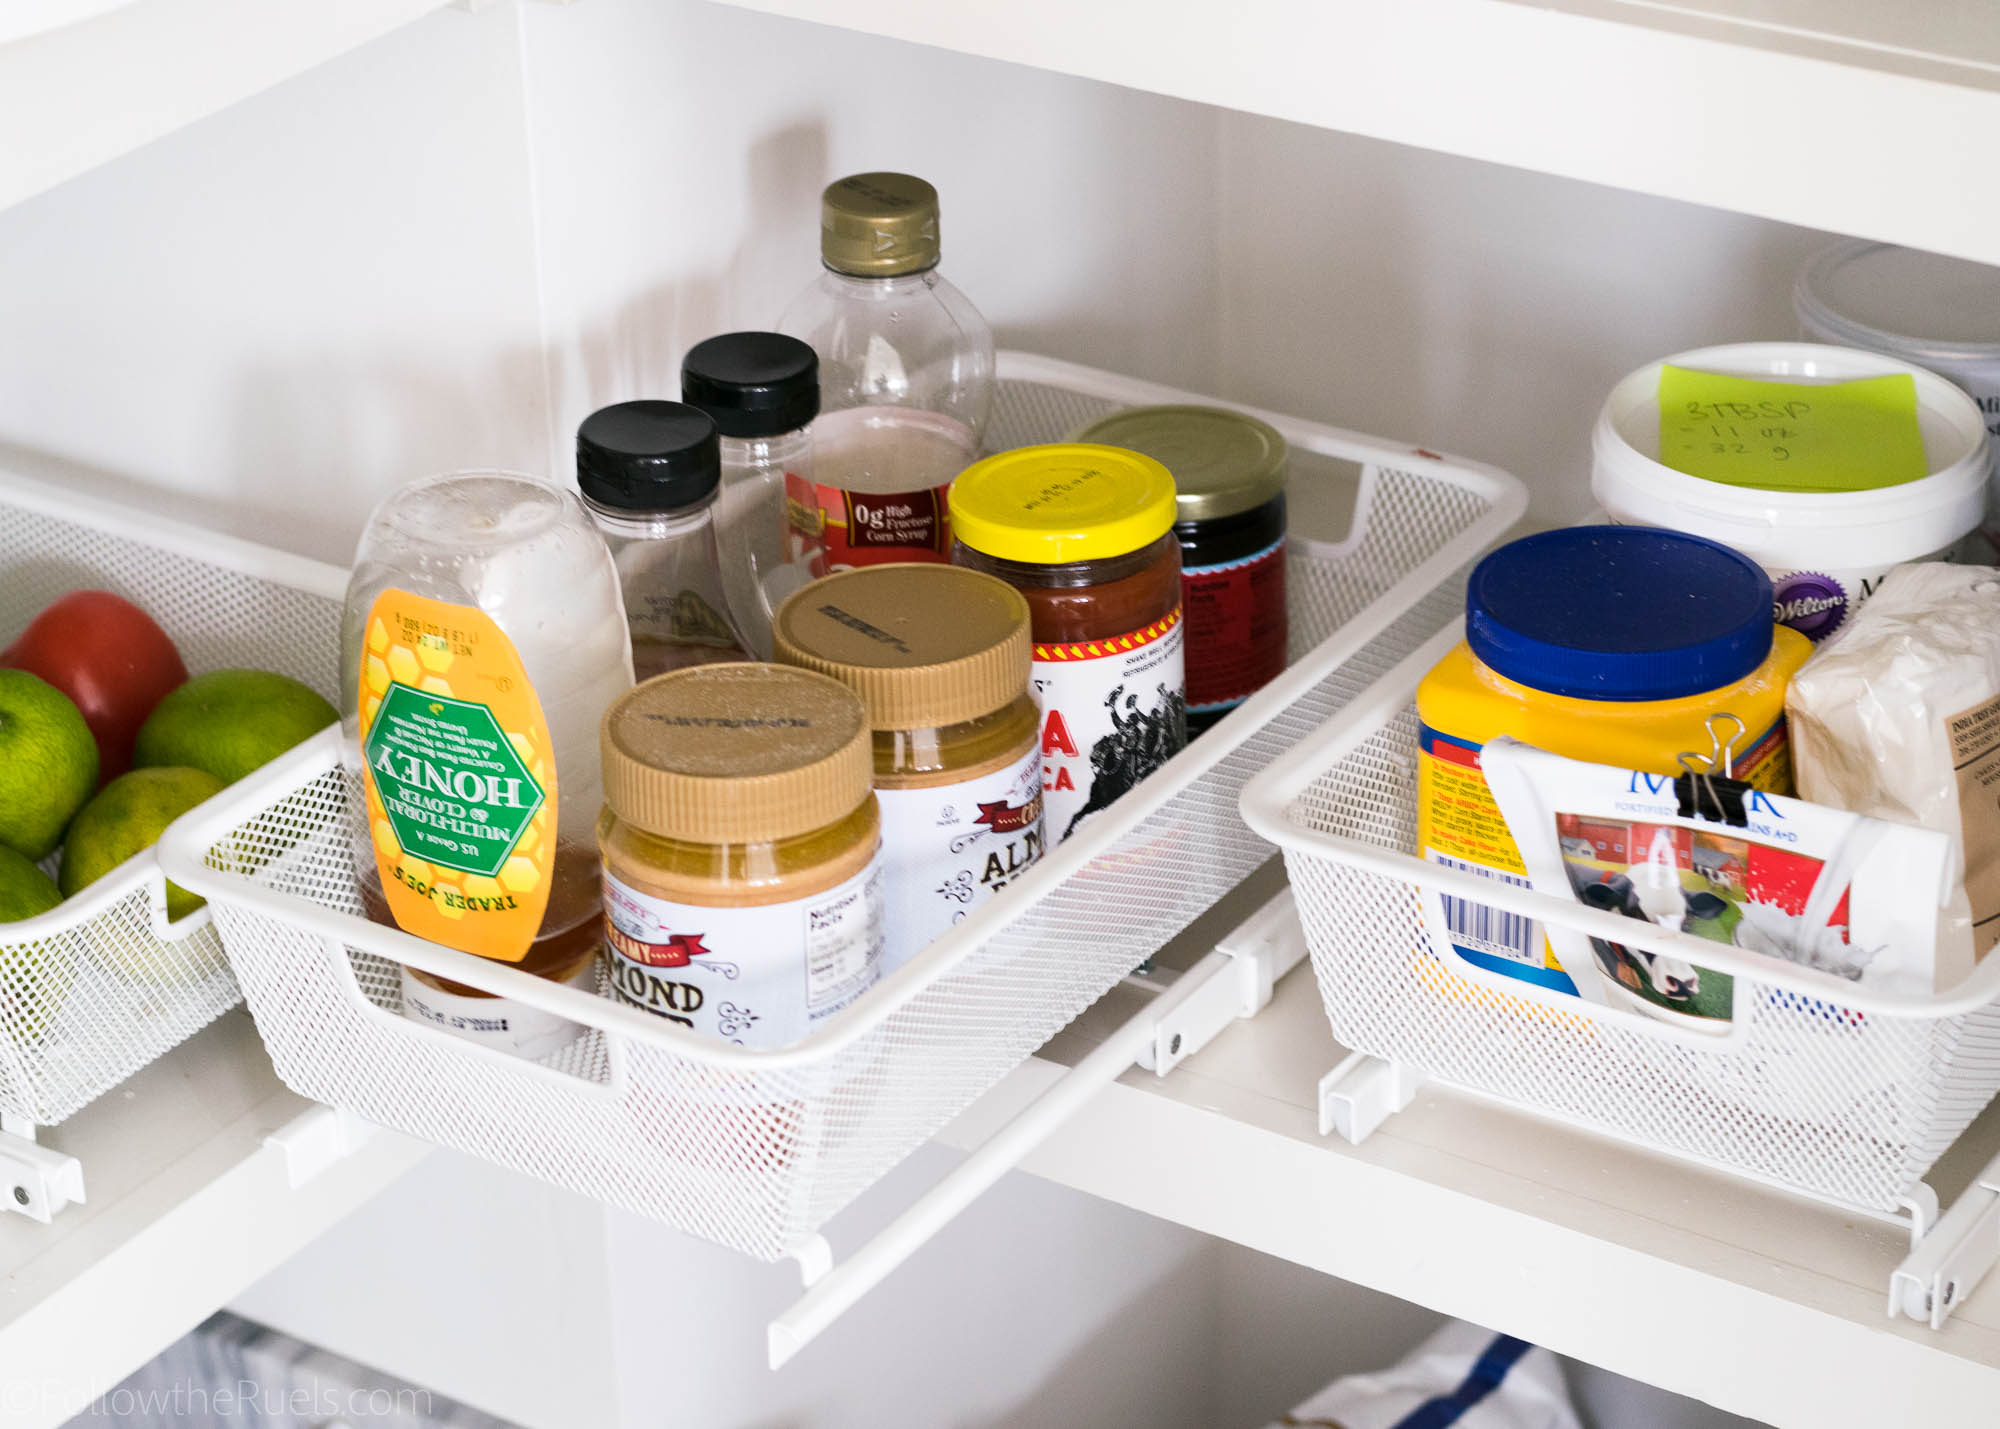
My next favorite product are these bins! I didn’t originally buy them for the pantry, but they actually came in really handy in this space. I had wider, low bins on this shelf before and I found they just wouldn’t stay organized. Bags of chocolate chips or nuts or whatever else would just pile up. Since these are tall and narrow I can easily line up bags, boxed, and bottles so they stay in place and I can see everything inside!
[show_shopthepost_widget id=”3064844″]
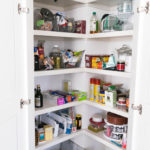
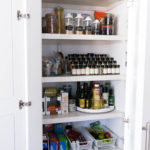
These are definitely my two favorite shelves! This is where all the good stuff is.
In my last apartment, I had all my spices in a cabinet stored in these pull-out spice racks and I absolutely loved them. When we moved in here, I was a little disappointed that I couldn’t use them in our new pantry. So I switched to this tiered spice rack which actually works out perfectly. I love seeing all my spices and being inspired to use something I haven’t pulled out in a while.
Since I also have random little jars and packs of spices, I keep them in a little lazy Susan to the side.
For my most used dry ingredients, I transferred them to these canisters with a pour spout. I also repurposed some old jars to store nuts, pasta, and other less used ingredients. I didn’t want waste perfectly good jars and canisters I already had.
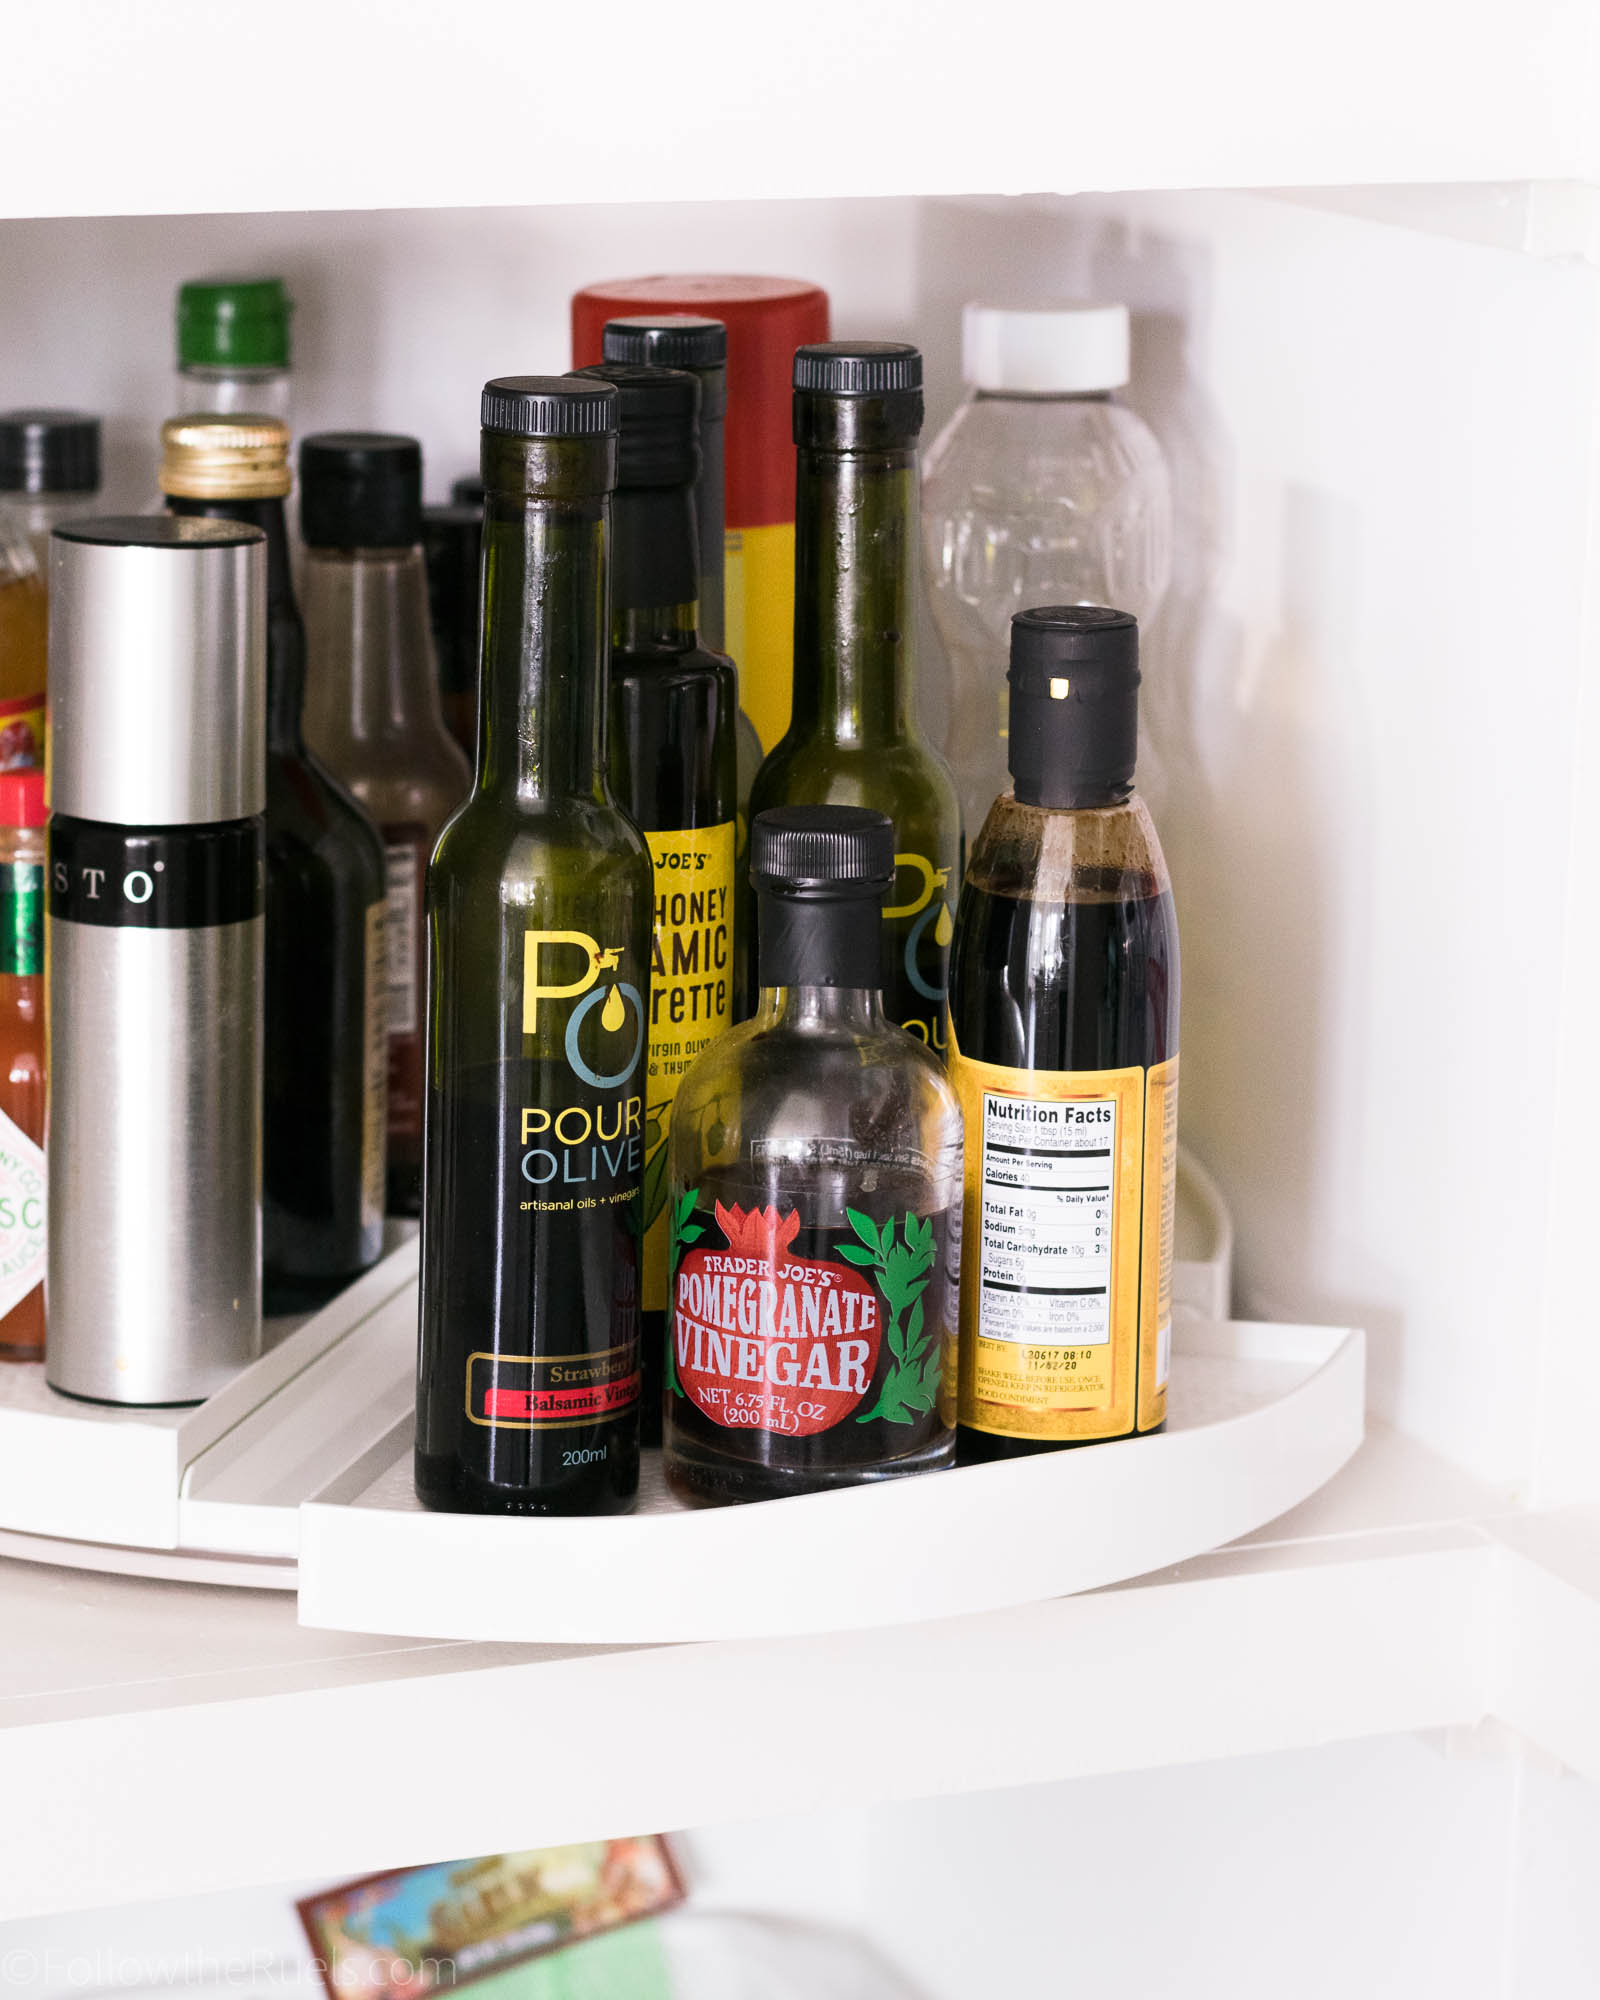
I have a lot of oils and bottles of vinegar and other items which were such a mess. In the first few weeks, I was constantly pulling items out and putting them back, making it harder to find the next time I needed to use it.
Enter the lazy Susan! This one has pull-out sections, which I love! If I am reaching for something toward the middle, I don’t necessarily have to remove the bottle in the front to reach it.
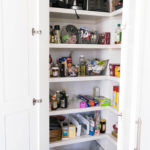
In the lower shelves, I installed these bins that are on tracks so that I can pull them out and reach things in the back. It makes finding things on these lower shelves where items can get lost in the back so much easier to access!
This pantry pretty much functions on lazy Susans and pull out drawers.
Lessons Learned
There are a few lessons I learned along the way. Oh, who am I kidding, there were lots (but I will only share a few)! As someone who isn’t naturally very organized, this was quite an exercise for me.
- Lesson One: Plan out how you want to pantry look and function before organizing or buying anything! I learned this the hard way and it cost me lots of trips to the Container Store and a few too many
- Lesson Two: Function over form. I was a little obsessed at first with making my pantry look nice, which is why I held on to the glass jars a little too long. In the end, function was more important, and oddly enough, now it looks even better because there is more space!
- Lesson Three: Try out products and return them if you just don’t need them or they don’t work. You can’t see them in the photos, but on the floor of our pantry, I have these large white plastic stackable bins for our snacks. That is about the 3rd product I have had down there. First, it was a large basket. Then it was small metal bins. I purchased each, tried them out for a couple days, and realized they didn’t work so back they went! Just remember to keep tags on them so you can return them.
Alright, that’s it friends! I hope I have maybe shared a little of the wisdom I gained through this process with you. Or maybe I have inspired your own pantry makeover!